(by William Mead, Lecturer - University of California @Davis)


This course introduces the programming language JavaScript and shows the websites that include the type of interactions students will eventually be able to develop. Learners will understand the importance of how JavaScript was developed and why such history impacts the way JavaScript is currently written and in future releases. Learners will write their first scripts, have their HTML and CSS skills assessed, create variables and arrays and assign values to them. If student’s skills are lacking, resources and recommendations are provided to improve these skills. There is ample opportunity for students to practice these first, core skills.
12 lessons, 2 readings
1.01 Intro to JavaScript - Part 1 (3:13)
1.02 Intro to JavaScript - Part 2 (6:41)
1.03 Intro to JavaScript - Part 3 (5:33)
1.04 Tools Needed for Success (3:40)
1.05 Skills Needed for Success (5:38)
1.06 JavaScript Variables (6:27)
1.07 JavaScript Variables Practice - Part 1 (7:12)
1.08 JavaScript Variables Practice - Part 2 (4:59)
1.09 JavaScript Variables Practice - Part 3 (5:21)
1.10 JavaScript Arrays - Part 1 (5:27)
1.11 JavaScript Arrays - Part 2 (3:17)
1.12 JavaScript Arrays Practice (6:16)
24 videos, 2 readings
2.01 Visual Studio - Part 1 (4:39)
2.02 Visual Studio - Part 2 (5:48)
2.03 Visual Studio - Part 3 (9:48)
2.04 Operators, Boolean & Selection in JavaScript (8:11)
2.05 Try This! (3:10)
2.06 Comparing Values (8:16)
2.07 Else If (5:56)
2.08 Switch Statements (5:06)
2.09 Using && (6:24)
2.10 Loops in JavaScript (6:23)
2.11 Working With Arrays (4:13)
2.12 The For…Of Loop (6:06)
2.13 While Loops (13:08)
2.14 Structured Programming, Sequence - Part 1 (4:43)
2.15 Sequence - Part 2 (5:42)
2.16 Sequence - Part 3, Loop (5:42)
2.17 Loop + Selection (8:20)
2.18 JavaScript Basic Challenges (5:02)
2.19 Functions in JavaScript (5:29)
2.20 Passing In and Returning Data (8:01)
2.21 Useful Example - Step 1 (6:21)
2.22 Useful Example - Steps 2-4 (6:05)
2.23 Useful Example - Step 5 (7:05)
2.24 More on Functions (10:00)
35 videos, 2 readings
3.01 JavaScript and the DOM (4:34)
3.02 Dot Syntax and Methods (5:21)
3.03 DOM; getElementsByTagName(); (7:56)
3.04 DOM; getElementsByClassName(); (5:09)
3.05 DOM; querySelector() (4:58)
3.06 DOM; querySelectorAll(); (6:10)
3.07 innerHTML (4:56)
3.08 className (6:13)
3.09 Creating Elements and Text Nodes (5:04)
3.10 Removing Elements (3:18)
3.11 Capturing Events with JavaScript (5:16)
3.12 Event Listeners (5:09)
3.13 The Event Object (5:27)
3.14 More On Events (7:54)
3.15 Mouseover, Mouseover Events: HTML (7:32)
3.16 Scroll Events: HTML (7:41)
3.17 deo: Window Resizing (4:23)
3.18 Key Down Event (6:43)
3.19 Scope in JavaScript (5:19)
3.20 Strategy 1: Never Use Global Scope (8:40)
3.21 Strategy 2: "use strict;" (3:15)
3.22 Strategy 3: const and let (8:31)
3.23 Scope in JavaScript Summary (7:21)
3.24 Simple JS SlideShow - Part 1 (4:52)
3.25 Simple JS SlideShow - Part 2 (5:49)
3.26 Simple JS SlideShow - Part 3 (5:12)
3.27 Simple JS SlideShow - Part 4 (5:54)
3.28 Simple JS SlideShow - Part 5 (5:53)
3.29 SlideShow with Cross Fade Effect - Part 1 (7:13)
3.30 SlideShow with Cross Fade Effect - Part 2 (4:41)
3.31 SlideShow with Cross Fade Effect - Part 3 (4:09)
3.32 SlideShow with Cross Fade Effect - Part 4 (6:29)
3.33 SlideShow with Cross Fade Effect - Part 5 (5:56)
3.34 SlideShow with Cross Fade Effect - Part 6 (4:40)
3.35 SlideShow with Cross Fade Effect - Part 7 (8:21)
In this module, you will be able to apply and practice the skills and techniques you have learned in the course by building a basic and a more advanced distance converter. You will be able to further apply and practice to extend your skills and techniques by building a simple vacation destination list application.
26 videos, 4 readings
4.01 Basic Distance Converter Project - Part 1 (6:28)
4.02 Basic Distance Converter Project - Part 2 (5:33)
4.03 Basic Distance Converter Project - Part 3 (6:32)
4.04 Basic Distance Converter Project - Part 4 (6:15)
4.05 Basic Distance Converter Project - Part 5 (4:27)
4.06 Advanced Distance Converter Project - Part 1 (5:13)
4.07 Advanced Distance Converter Project - Part 2 (5:44)
4.08 Advanced Distance Converter Project - Part 3 (5:48)
4.09 Advanced Distance Converter Project - Part 4 (4:52)
4.10 Advanced Distance Converter Project - Part 5 (4:52)
4.11 Vacation Destination Project: HTML & CSS - Part 1 (6:06)
4.12 Vacation Destination Project: HTML & CSS - Part 2 (7:33)
4.13 Vacation Destination Project: HTML & CSS - Part 3 (7:03)
4.14 Vacation Destination Project: HTML & CSS - Part 4 (6:56)
4.15 Vacation Destination Project: HTML & CSS - Part 5 (4:32)
4.16 Vacation Destination Project: HTML & CSS - Part 6 (4:13)
4.17 Vacation Destination Project: JavaScript - Part 1 (5:37)
4.18 Vacation Destination Project: JavaScript - Part 2 (4:33)
4.19 Vacation Destination Project: JavaScript - Part 3 (6:37)
4.20 Vacation Destination Project: JavaScript - Part 4 (9:07)
4.21 Vacation Destination Project: JavaScript - Part 5 (7:37)
4.22 Vacation Destination Project: JavaScript - Part 6 (7:00)
4.23 Vacation Destination Project: JavaScript - Part 7 (9:39)
4.24 Vacation Destination Project: JavaScript - Part 8 (6:06)
We are delighted to be a part of your continuing education. This course will provide you with a variety of tools and learning opportunities, to include video lectures, readings, assessments, peer reviews, and an opportunity to contribute to the Coursera learning community in the discussion forums.
In each of the lesson sections, you’ll find learning objectives, lecture videos, readings, activities, and an opportunity to test your knowledge in quiz format. In some of the module sections you’ll also work on assignments and grade the work of your peers. A peer-review assignment, is one where you and your fellow learners have an opportunity to review and grade each other’s work. We’ll dive more into peer reviews later on in this course.
When navigating the course, you can find available course resources under each of the lecture videos in a section labeled “[Downloads]” – here you can download the lecture video, view transcripts, PDFs of the lecture slides, and find additional readings or files.
If you run into any issues during this course, learner support is available to all Coursera students. The link for Coursera’s Learner support is included below. The Help Center/Learner Support includes topics such as account setup, payments, enrollment questions, and troubleshooting common problems.
If you find any content issues, be sure to let the course staff know by flagging the lecture, assignment, reading, or quiz and this will inform us of where these issues occur. Here is the link for more information on how to Flag an Issue − it is also listed below.
One of the great things about Coursera courses is that they are self-paced. The course dates are based on the average time it takes to complete a course. However, if you need additional time to complete a course you can reset your deadlines with no penalties. More information on resetting deadlines can be found here: Assignment Deadlines.
Need additional help during your course session? Be sure to utilize the discussion forums and interact with your fellow peers. In this area, you can ask questions or search for similar issues that have already been posted in the forums. Learner support is also a great place to find answers, but specific course content questions can typically be found and answered in the discussion forums. This is also a great place to post your assignment if additional peer reviews are needed. Here is a link with more information on the discussion forums: Discussion Forums (URL shortcut).
Because of the self-paced nature of Coursera courses, this is an excellent opportunity to show your commitment to your work and the work of your peers through academic integrity. Be sure to read the Coursera guidelines and the Coursera Honor Code here: Coursera Honor Code (URL shortcut).
We look forward to having you in this course. Happy learning!
UC Davis Coursera Team

Hello, and welcome to our course on JavaScript. My name is Bill Mead, and I've been teaching and learning about JavaScript for many years. Here I am in California, outside on this beautiful day not that many miles away from where JavaScript was invented over 25 years ago. It's a fun programming language, I think you'll enjoy learning it. It can be frustrating and maddening at times when you can't get it to work, but when you do get things to work the way you want them to work, it's super satisfying. It's become one of the most popular programming languages in the planet.
As we go through this course and through this specialization, I think you'll start to understand why it's satisfying and easy to get started with and if you're new to programming, don't worry, we're going to start at the very beginning and get you going all on the right track. Buckle in and let's get started learning JavaScript.
Welcome to the first module on JavaScript. In this module we'll get into the basics of the language. We'll talk about variables and arrays and these kinds of things that you see in a lot of programming languages. But we'll also talk about the history of JavaScript and do a real introduction to the language. And the history of JavaScript is super interesting because it has an impact on how we write JavaScript. And that's really interesting to see how a language has evolved and developed and how that affects the way you write modern, up to date JavaScript. And I think you'll learn a lot from this and you'll be able to do some interesting things with JavaScript as you go along. So stick with me and we will have a lot of fun in this first module learning about JavaScript in the basics of the language.
Unlike a pillbox which really can't hold much more than just pills, you can put anything into an array in JavaScript.
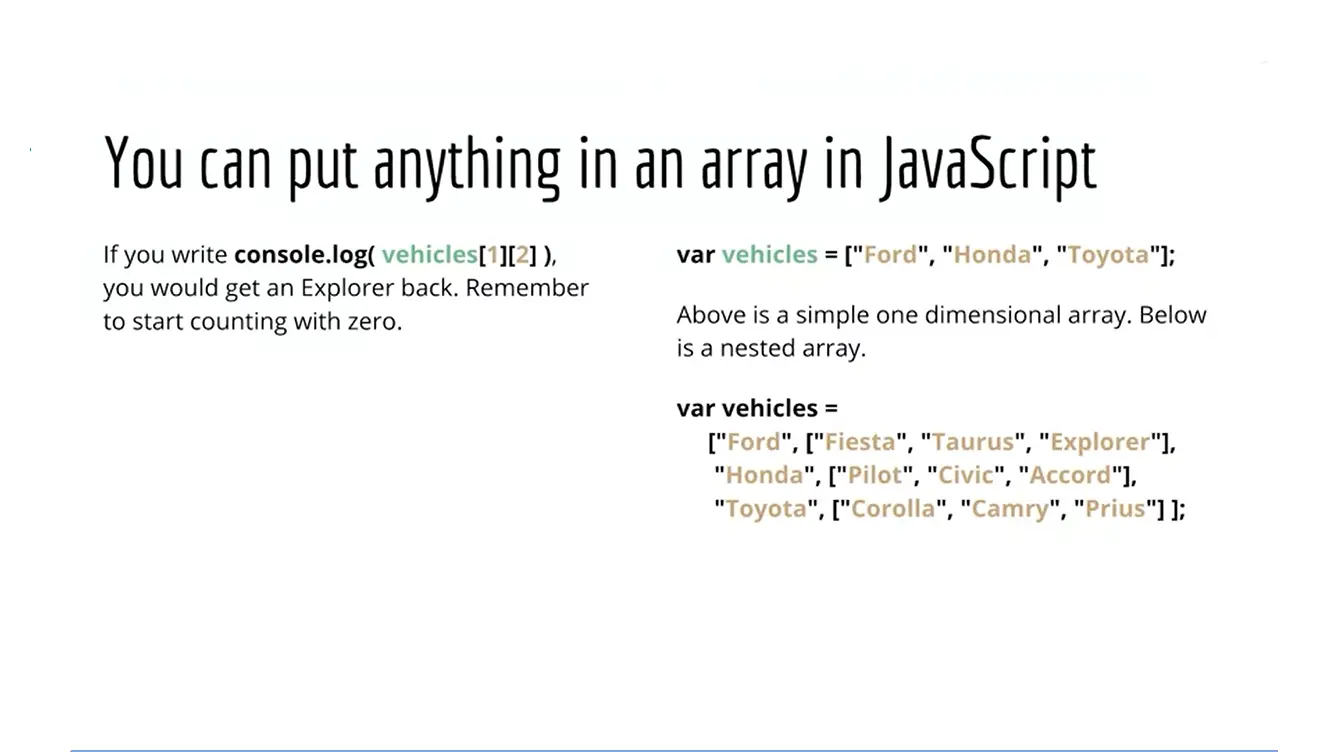
You can even put in an array and an array. You think about a pillbox with a sub- container with even smaller divisions in it.
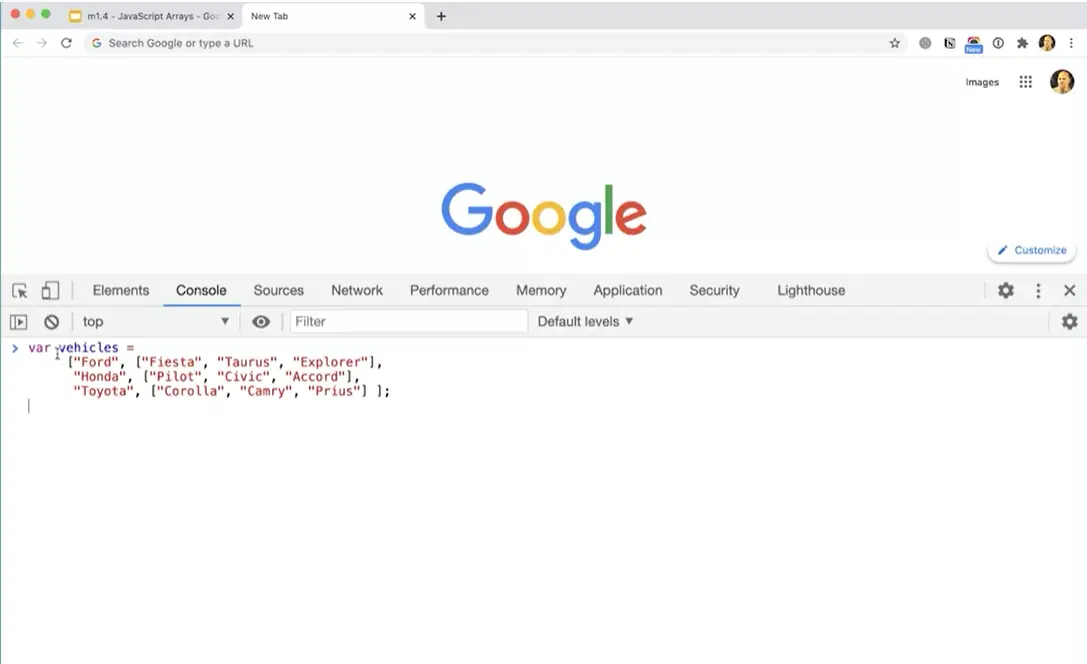
Let's take a look at what that looks like. Let me switch back over to my tab here. I'm just going to paste this in, but you might want to type it. It's a little bit hard to type and get right, but it's worth trying if you can. I'm going to paste this vehicle's array in here.
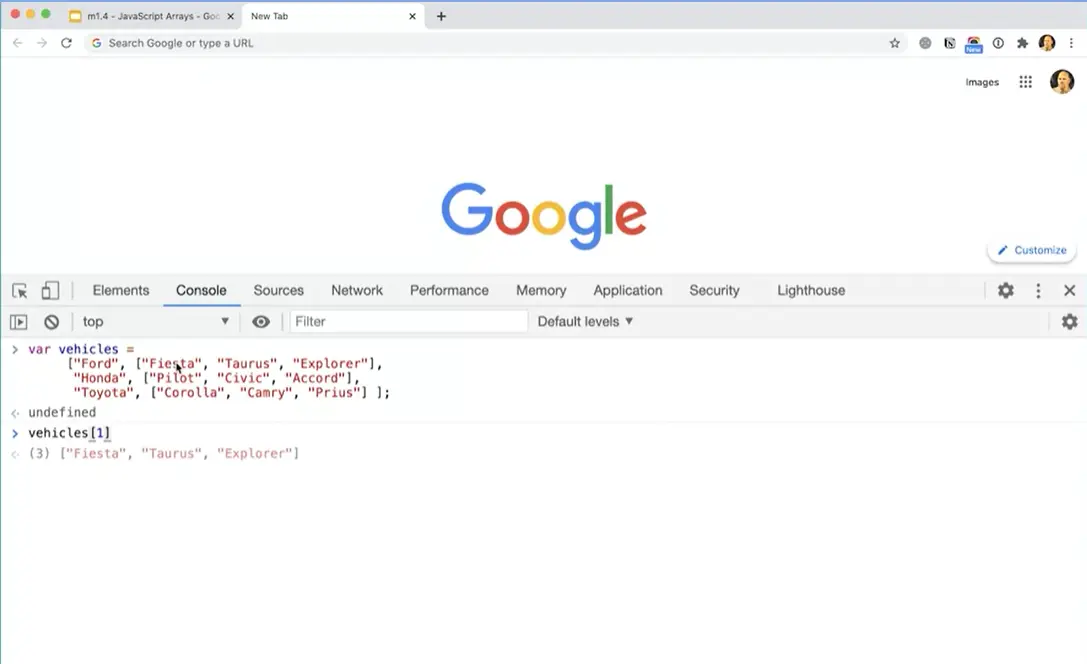
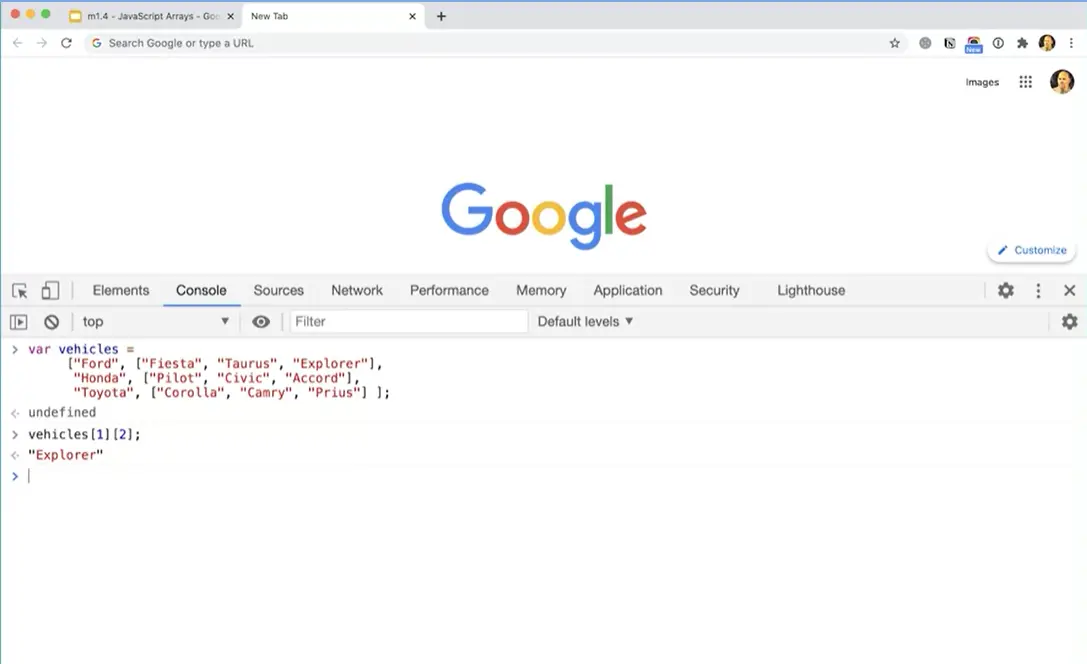
Now if I want to access an element from this array, I could do vehicles, square bracket one. That's going to go and get the line that starts with which element. There we go. Then, it's going to give me this because this is zero, and now this is one. Right? It's going to get me that into that sub-array. You can see it's sort of showing up down there. Then if I do square bracket two, that's going to get me the explorer elements in that sub-array. You can do things like that with arrays.
That's kind of complicated and you're probably not going to be doing arrays inside of arrays to start off with. But it's an important thing to understand about arrays is that they're very flexible tools that you can use to hold groups of data, and that's very useful.
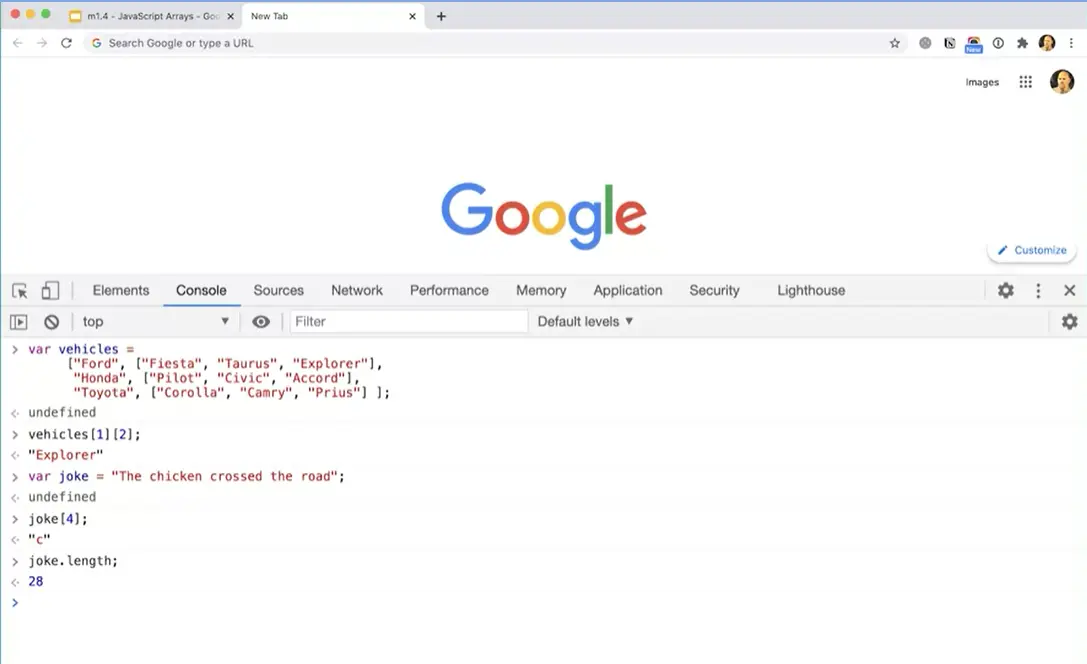
Another thing that's interesting is that a regular variable holding a string can be treated as an array in JavaScript. If I make a variable var joke equals the chicken crossed the road, now I've got a variable called joke, but I can actually treat it as an array. I could do. Joke square bracket four, and that's going to get me the C in chicken. Because zero, one, two, three, four is going to get me that C in chicken. Or I could do, joke dot length, and it will tell me that there are 28 characters in that string. That's kind of an interesting thing to understand about arrays as well.
A great place to go to find some websites that will show you the way JavaScript can interact with the website is this Awwwards website with the extra w's in here.
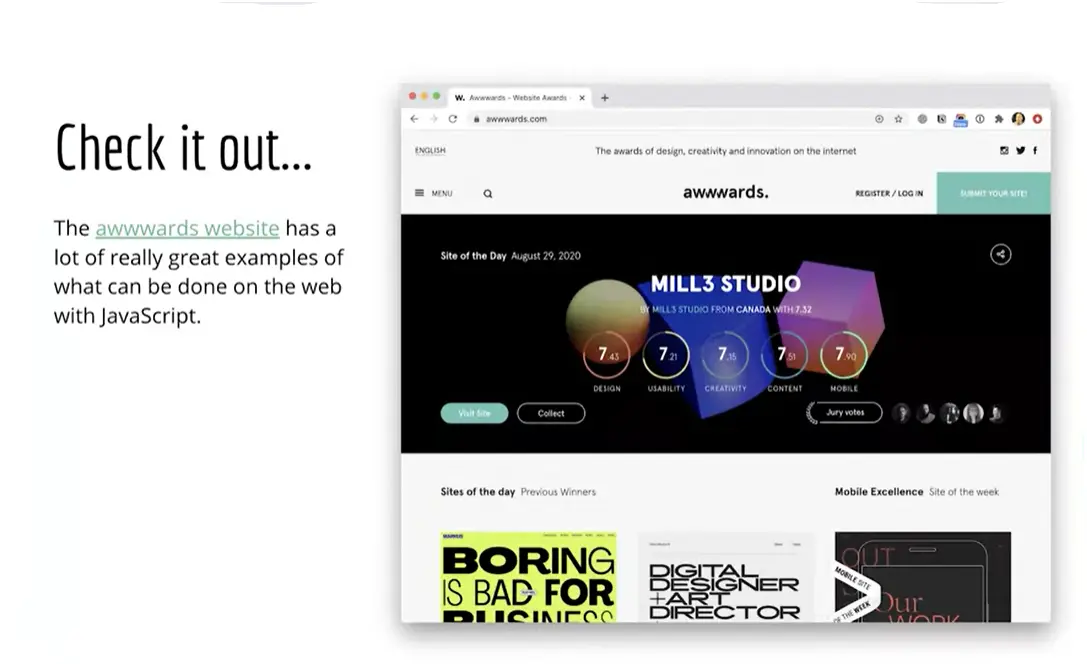
I have that website pulled up over here. You can come here and look through some of the different sites that have won awards on Awwwards. They tend to be pretty innovative and interesting sites.
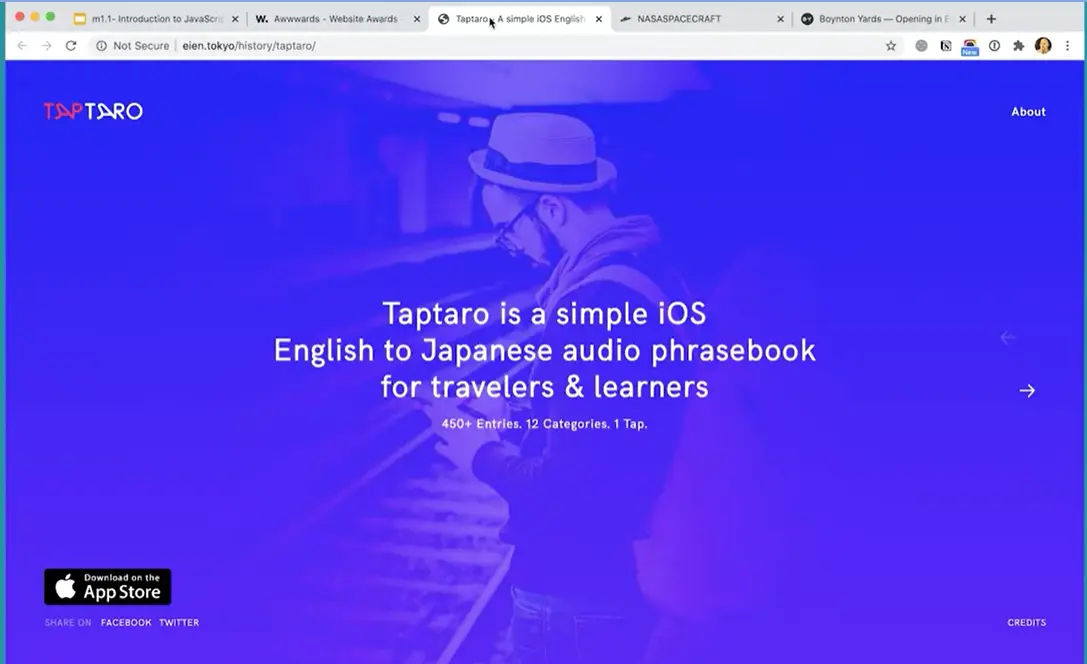
I have Awwwards taptaro. Whether you're talking about following the mouse, or coming over here and the animation around the circle, or the way these images pop in, this is all being done with JavaScript, this kind of thing.
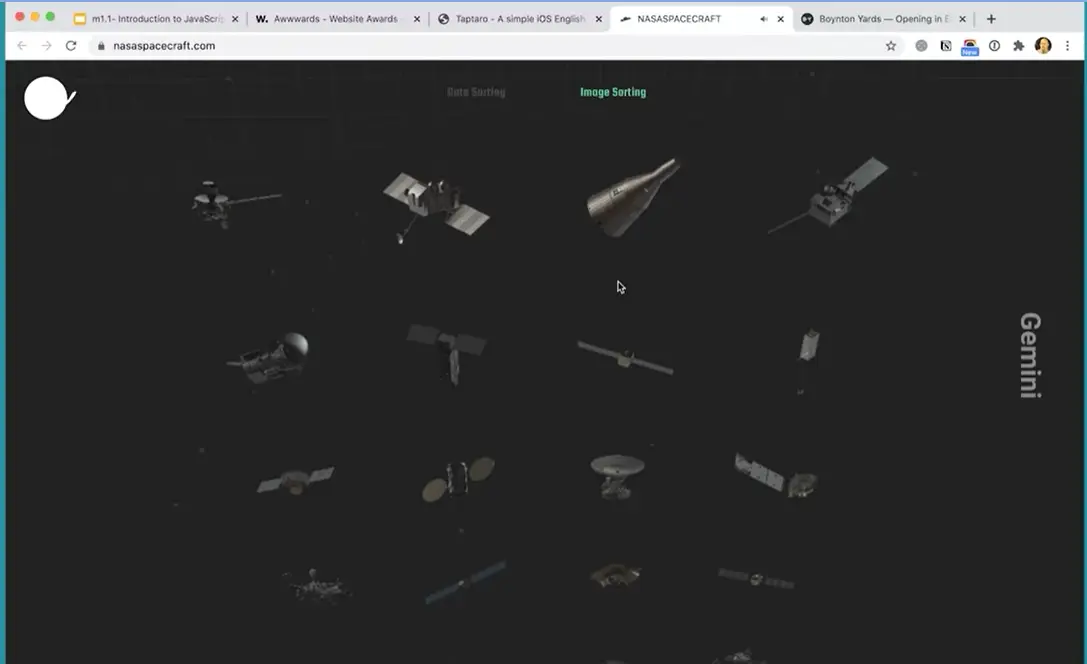
Then here we are in one of the NASA spacecraft website here (no longer active). Click on one of these things it will come up and show you the different pictures and give you some other interactions including some sounds as you work around it.
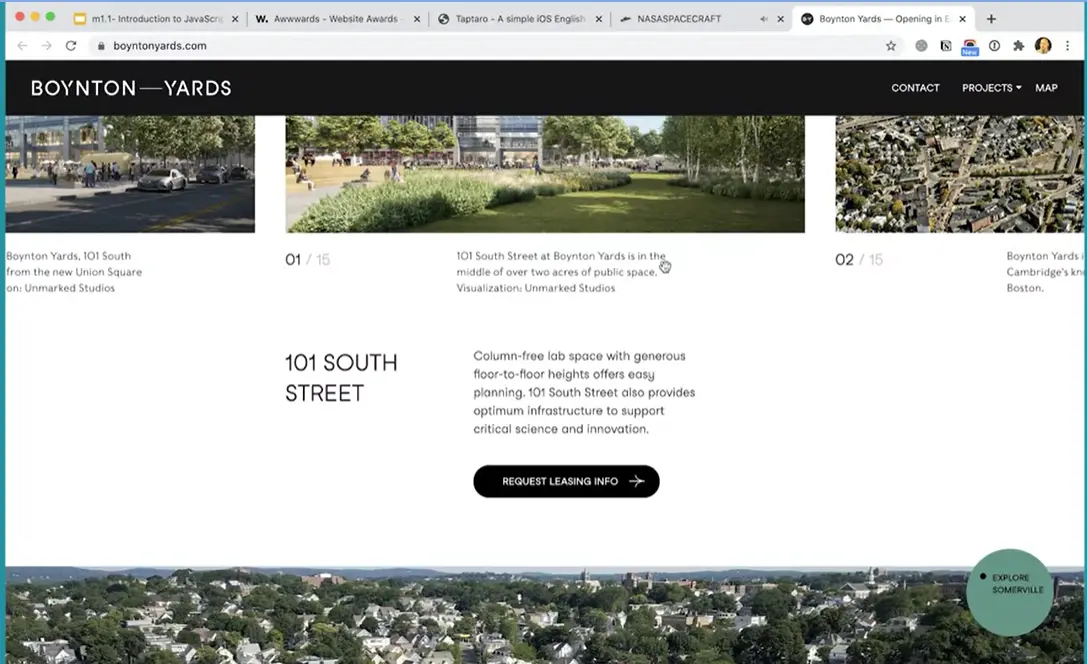
Or this website which has some interesting interactions as you're scrolling through the website.
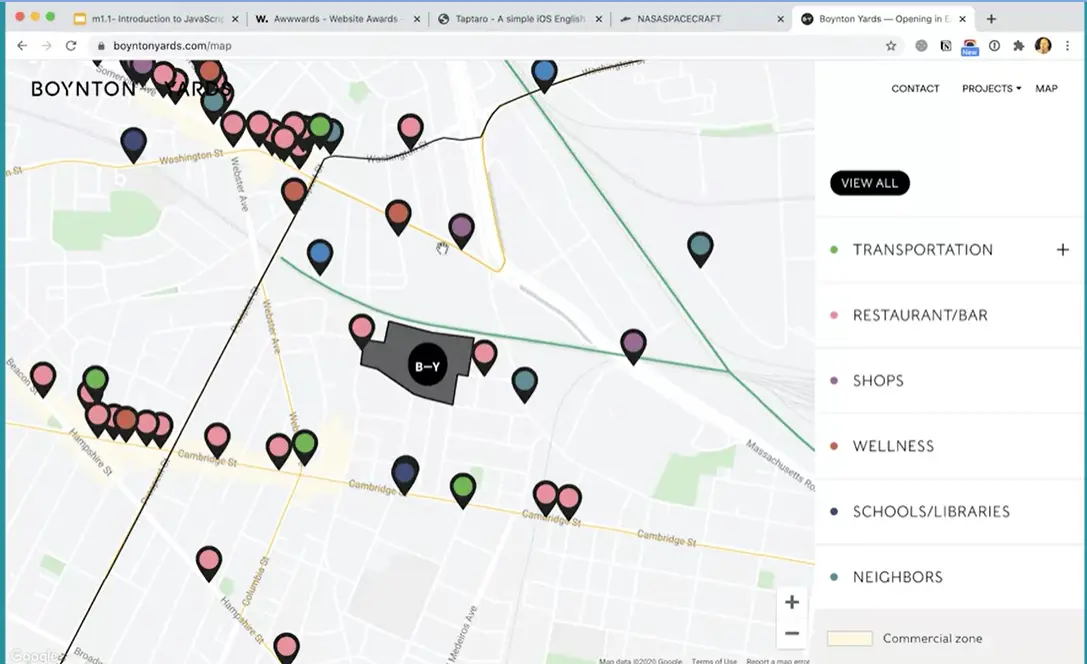
Yeah, look around on the web and wherever you see interactions happening, whether it's a map like this or all kinds of interactions are being created by JavaScript. You've seen some interactions and websites and you've probably seen plenty of others in other websites or you've gone off and found your own.
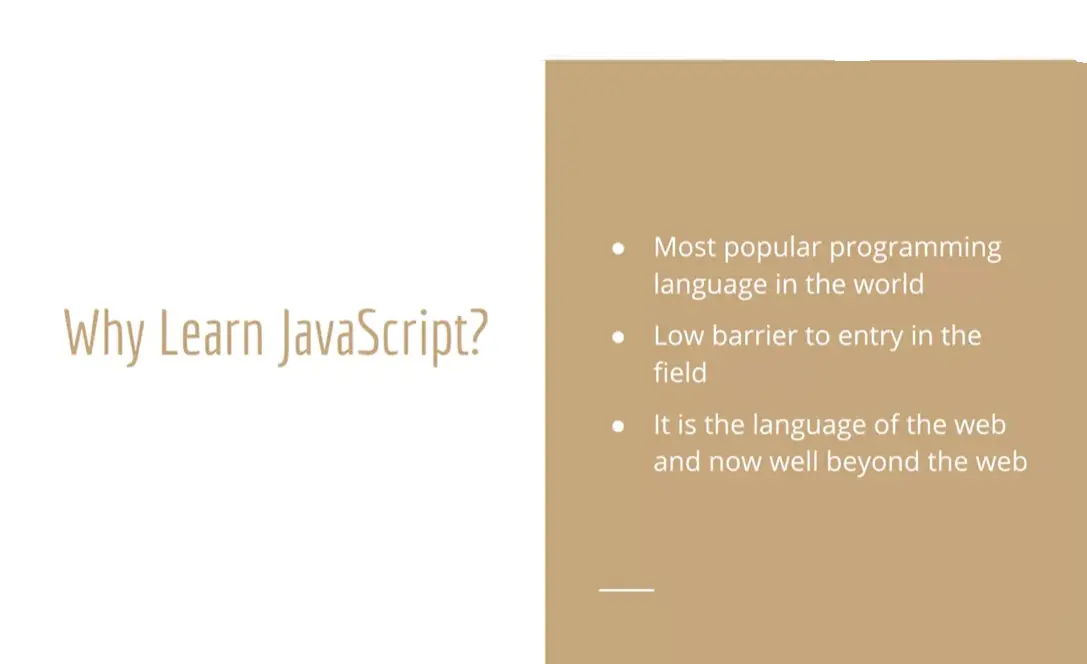
But let's talk about some other reasons why we should learn JavaScript. First of all, it's the most popular programming language in the world. There's also a low barrier of entry to the field. Whereas if you're learning Java, or C, or C++, you're going to need a lot of experience before you can get to a really good paying job. But JavaScript in the web is the gateway to programming into the tech industry in this way. It's really good to learn JavaScript for that reason.
Then finally, it is the language of the web. Now it goes well beyond the web. We have Raspberry Pi and other devices that can all be programmed with JavaScript robots and all kinds of things where JavaScript exists. The Unity gaming engine uses JavaScript as well as C#. There are lots of places where you can use JavaScript, but it is ultimately the language of the web. It is the programming, the scripting language for the web browser, and it's native to the web browser. That's a really great place to start with programming.
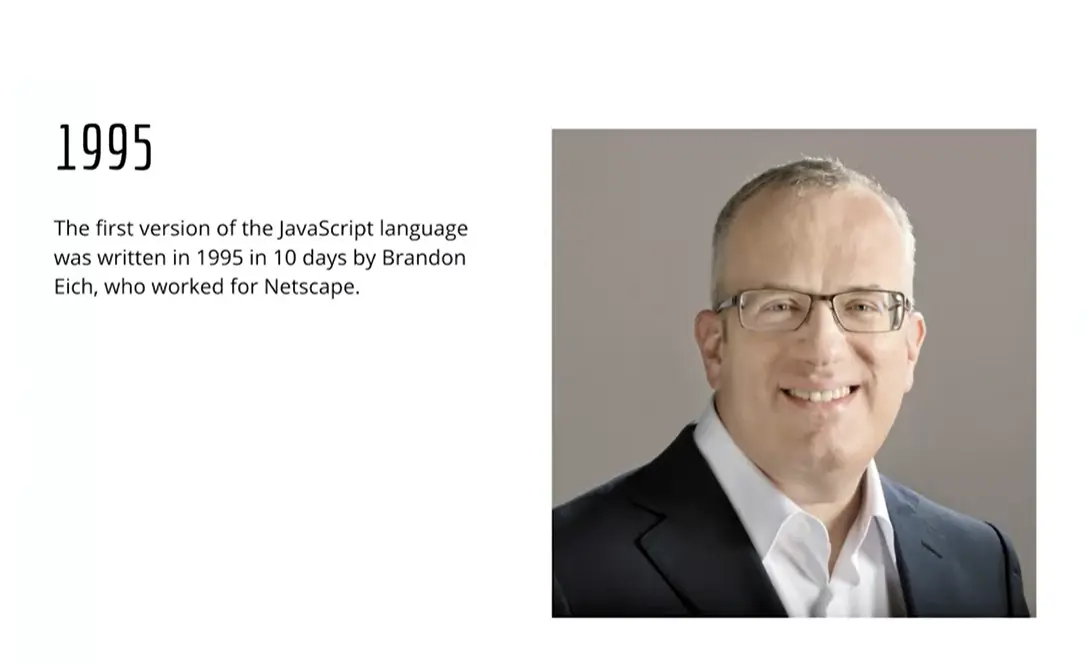
The story of JavaScript is really interesting. It really is the story of an underdog who became king. JavaScript didn't start off as the most popular programming language. It's really important to understand this path that JavaScript has taken through history because it has a big impact on how we write JavaScript. JavaScript was written by this gentleman here, Brendan Eich, in 1995 over the course of 10 days while he was working at Netscape. I'm not going to go into great detail on the history here, but it's a really good thing to look up. It's a very interesting story in and of itself. But he wrote the language in a very short amount of time and that's an important thing to understand about this language.
Another important thing to understand about the JavaScript programming language is it's not the same language as Java. It was originally a language called Mocha and they changed the name to JavaScript, really as a marketing ploy. But it's not actually the same language as Java, they're two completely different languages. It's easy as a beginner to get confused between Java and JavaScript.
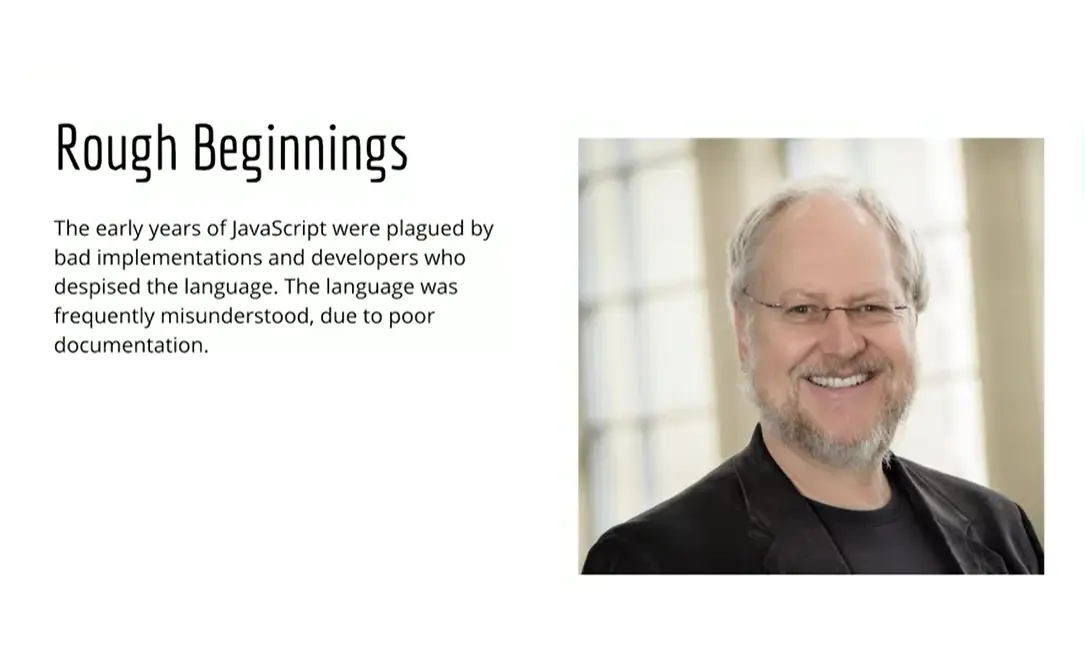
As I said before, JavaScript had some rough beginnings. The early years of JavaScript were plagued by bad implementations, developers who just despised the language mostly due to poor documentation and it was greatly misunderstood as a language. This gentleman, Douglas Crockford, did a lot to help people understand the incredible value of JavaScript as a language and its strengths as well as its weaknesses.
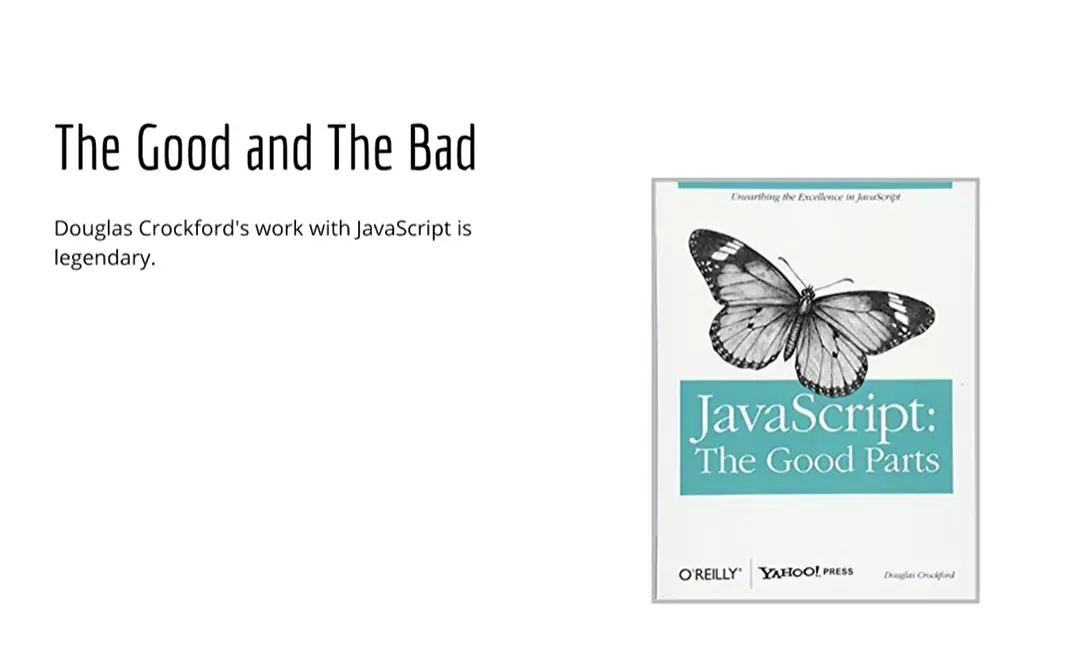
He wrote a book called JavaScript: The Good Parts. It's a legendary book because in this book he really talks about how JavaScript has some of the best features any programming language has ever had right alongside some of the worst features. Becoming a good JavaScript developer is about understanding how to leverage the best parts of the language while minimizing the worst parts of the language. We'll be seeing some examples of some parts of the language that are good and not-so-good right off the bat, and I'll be pointing those out.
You'll see that as we go along, we write JavaScript in ways to minimize the bad features of the language. When I say bad features, what I mean are features that can lead to more errors, lead to confusion in the programming, and so on and so forth. But it's also a very expressive language, it's a very powerful language. Some of the ideas behind it are very interesting and very powerful, even though they're different from other languages, which was behind some of the frustration that people had with it initially is they just didn't understand it because it was different.
It's really important to understand the development of JavaScript over the years, and this is because the way JavaScript is developed has really impacted the way that we write JavaScript.
So having a little bit of understanding of this history is really important as you learn the language. Again, I'm just going to cover just the very basics, but there's a lot of this history. It's a fascinating history and worth looking into if you're interested in that kind of thing and you can find out about it by looking it up on the web where there's plenty of books about it and that kind of stuff.
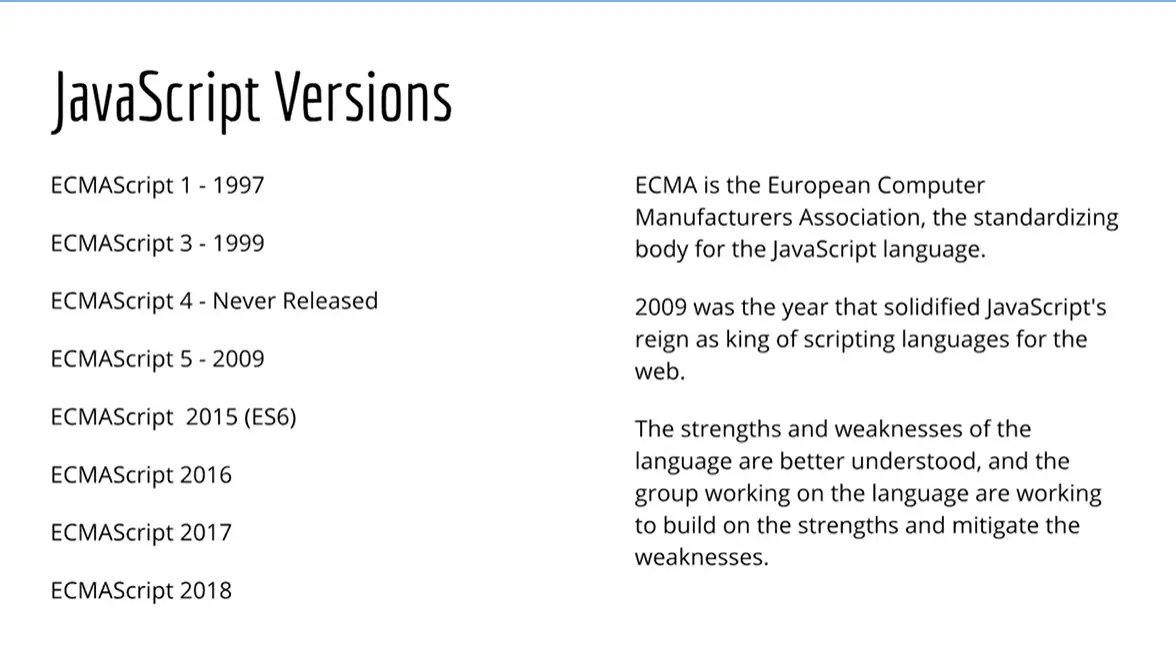
We know that JavaScript was originally written in 1995 in 10 days by Brendan Eich and his team at Netscape. Then in 1997, the first version of the standard was released, and the standard is created by the European Computer Manufacturers Association. Essentially the people in California went to Europe to this association to get this language rubber- stamped. It didn't turn out to be quite that easy, but that's a longer story. But in 1997, the first version, ECMAScript 1, was standardized and released, and then a third version.
The second version never really quite happened, but the third version came out in 1999 with some minor changes and fixes. The fourth version is an interesting story and one that I won't go into great depth on, but again, you can look it up for yourself. But essentially, if you'll recall, I had said earlier that there was a lot of arguing about the direction of JavaScript and there were a lot of developers that didn't really understand it. There was some push to make JavaScript more like other programming languages that we're already familiar with and comfortable with. Douglas Crockford really stepped in and said," Wait, look, JavaScript is its own language and it has its own powerful features in its own right and if you understand it and make use of that power then it really is valuable to keep it the way it is". It took a while for him to convince people of that.
But in 2009, they released ECMAScript 5, and ECMAScript 4 was scrapped. They started to go a different direction entirely and then they scrapped that direction entirely. They released ECMAScript 5 in 2009. This is the version that when it was released, everybody had kind of come together around the table and said, "JavaScript is going to be the scripting language for the web". Because everybody had agreed with that, this is when JavaScript really took off and made it past its troubled beginnings and its difficult beginnings was here in 2009. In 2009 is when JavaScript became King of the web because all of the major players agreed that this is going to be the scripting language, the programming language of the web. They built in a lot of features. There's a lot that's built into ECMAScript 5 that we'll be using throughout this course.
Over the next 10 years, there was a lot of work on JavaScript. They really wanted to move it from being a scripting language to a general all-purpose language, something that was very powerful. In 2015, ES6, what is commonly referred to as ES6, was released, sometimes it's called ECMAScript 2015. These two terms are interchangeable, but ES6 was released and it's a big release, a lot changed and a lot was added, and a lot of JavaScript has been made more powerful and turned into a more general all purpose programming language. A lot of what you'll be learning in this course are pieces from the 2009 ECMAScript 5 standard and pieces from the ECMAScript 2015 ES6 standard together, which really make up the major part of JavaScript.
Since 2015, the standardizing body has been in a nice cadence of releasing new versions each year. From then on, instead of calling it ES7 and ES8 and that kind of stuff, they stuck with the year. They came out with ECMAScript 2016, ECMAScript 2017, and so on and so forth. In each year there are smaller new additions added, but on the whole, these additions are fairly small and they are being more advanced pieces that we won't see nearly as much of in this course because this is a beginner's course, but we will be doing a lot with ECMAScript 5 and ES6 or ECMAScript 2015. Dive in and I hope you enjoy learning about JavaScript as we go along here.

Tools and skills needed for success for learning JavaScript.
First, we'll talk about software and then we'll talk a little bit about hardware.
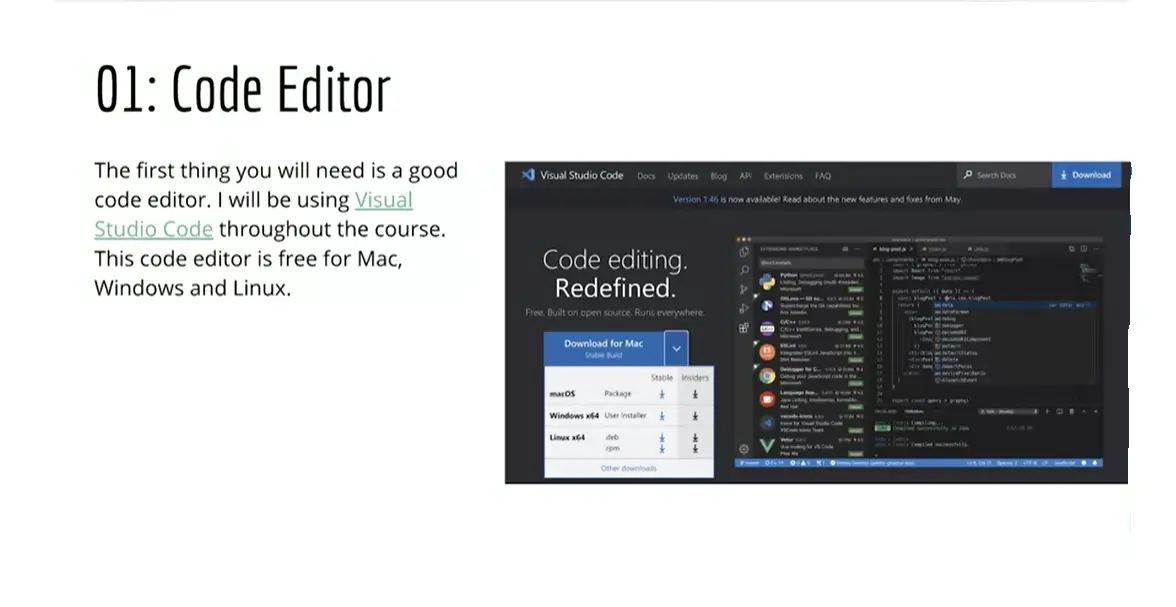
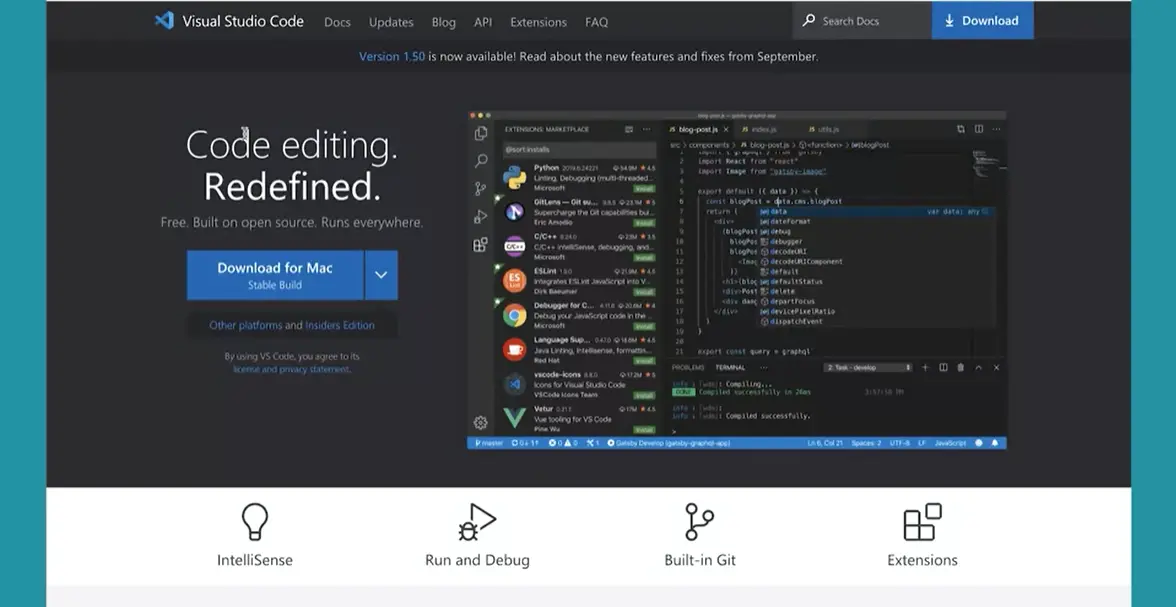
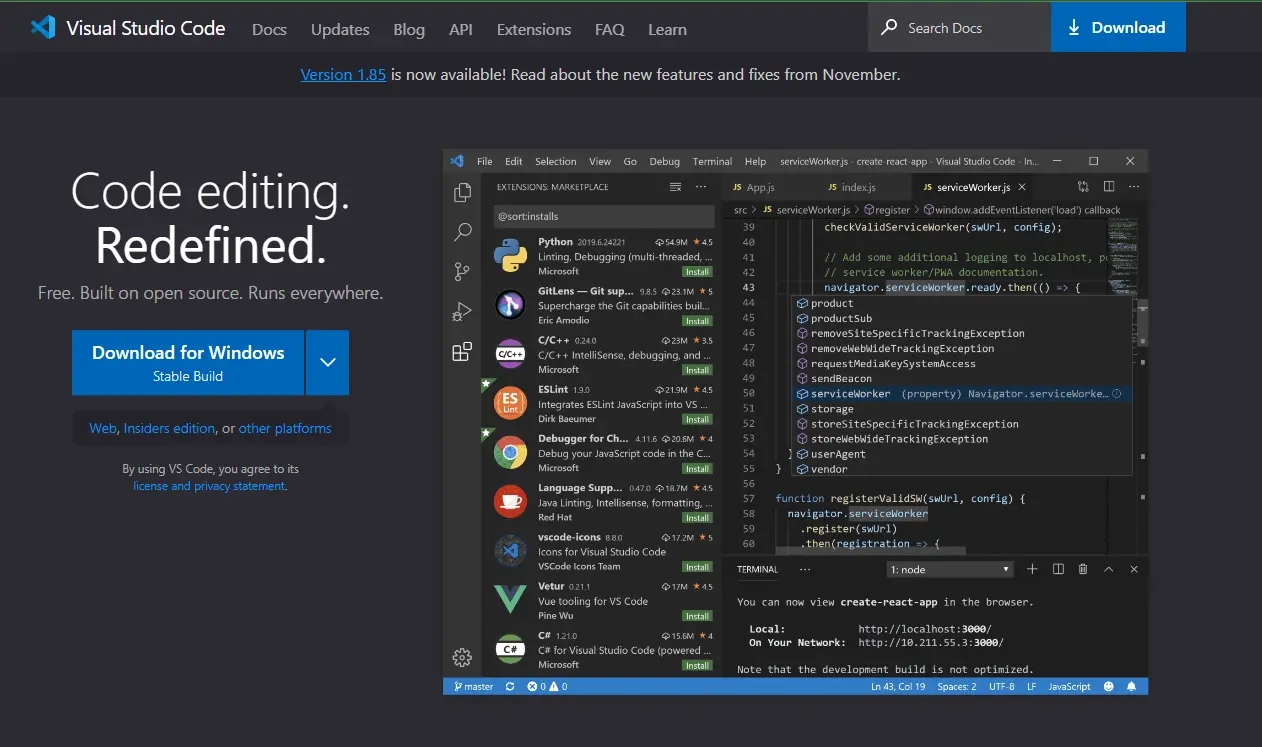
The first thing you're going to need in order to work with JavaScript and write JavaScript is a good code editor, and I recommend using Visual Studio Code. Not to be confused with Visual Studio product, but Visual Studio Code, and I have that in this browser tab here. You can download that for Mac or for Windows, or I believe also for Linux you can get Visual Studio Code. It's a really good code editor. It's very popular these days. There are plenty of other code editors out there.
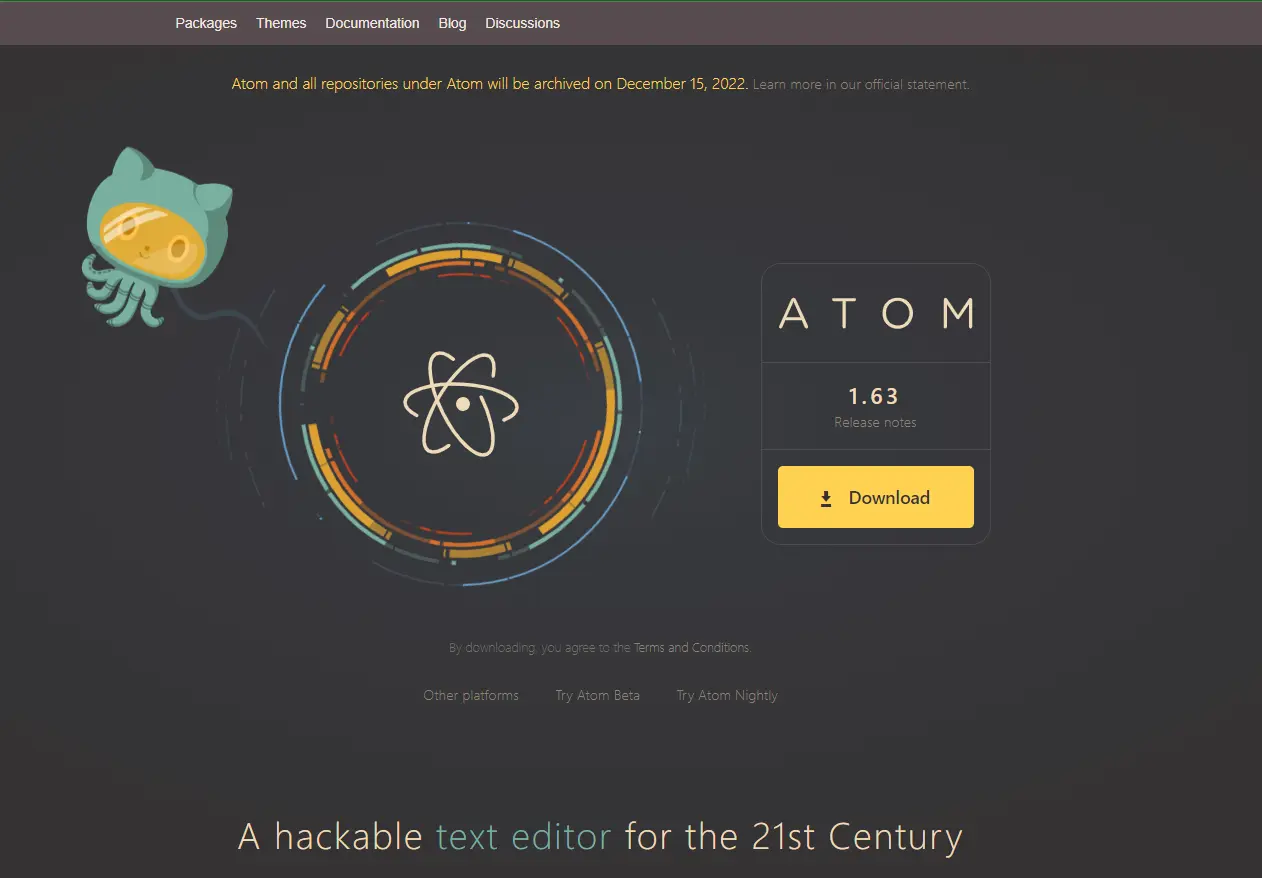
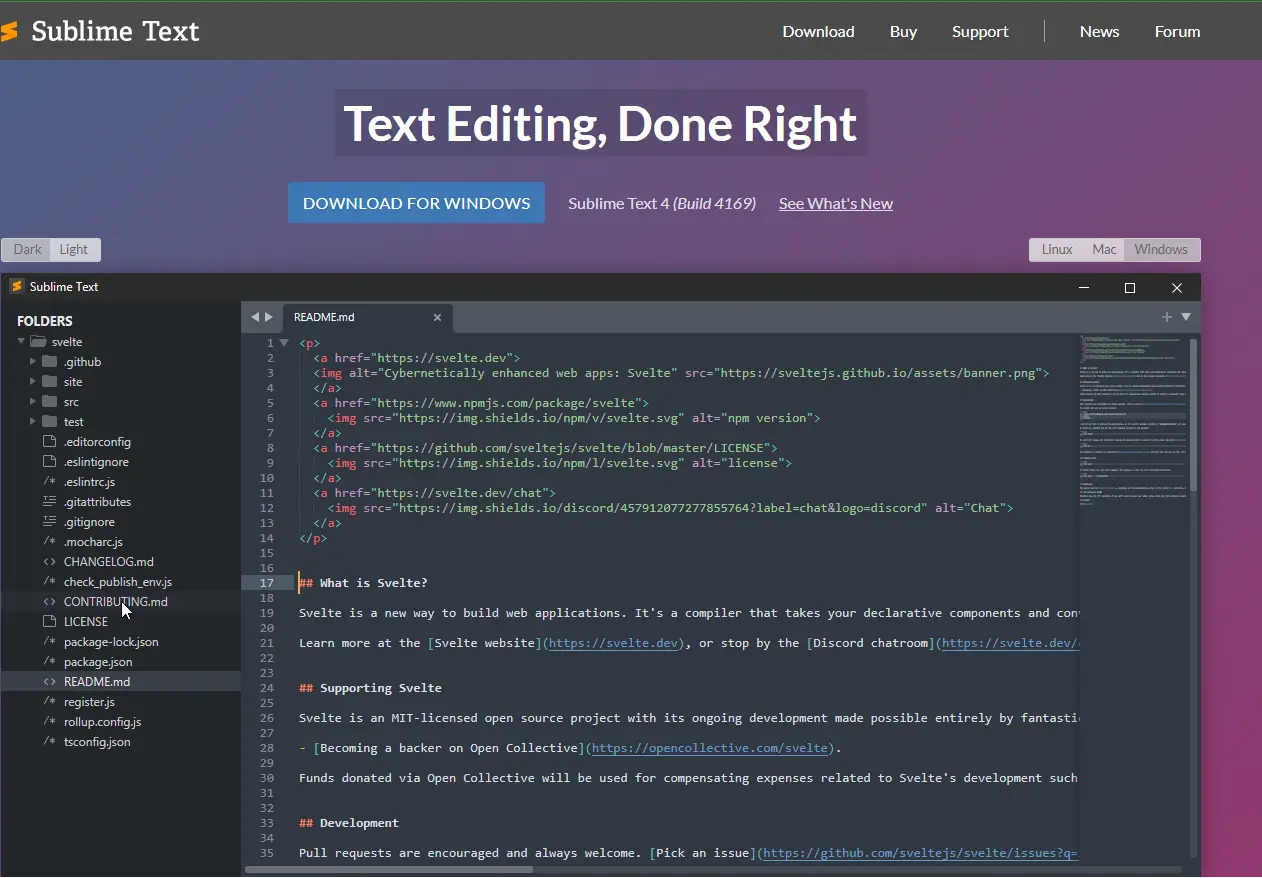
You could use Atom, you could use Sublime Text, even if you have Dreamweaver, you could use that as a code editor.
Dreamweaver has a lot of other stuff built into it that you don't need, but it works perfectly fine as code editor if you want to use that as well.
The second thing you're going to need is a web browser, and I'm going to recommend that you use Chrome. Chrome has a lot of the developer tools that developers use. They're built right into Chrome and they're easy to access. You can also use Safari or Firefox or Microsoft Edge or Brave. There are other browsers out there as well and many of them also have developer tools, but most developers use Chrome and get comfortable with the Chrome developer tools. So I recommend that you download Chrome and use that browser. Do NOT use IE or Edge developed by Microsoft. Unless you LOVE advertisements and poor coding techniques.
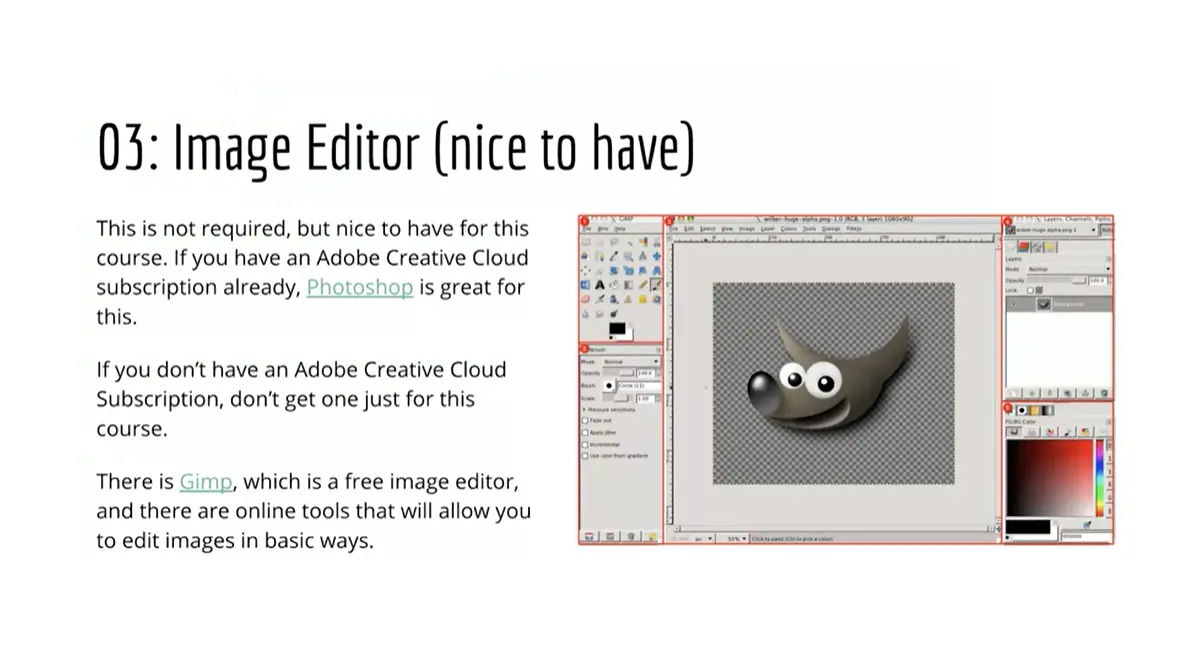
You're also going to need an image editor. If you have access to Photoshop, that's great. Photoshop is fantastic for this kind of thing, but if you don't have access to Photoshop, there's another one called GIMP, which is free.
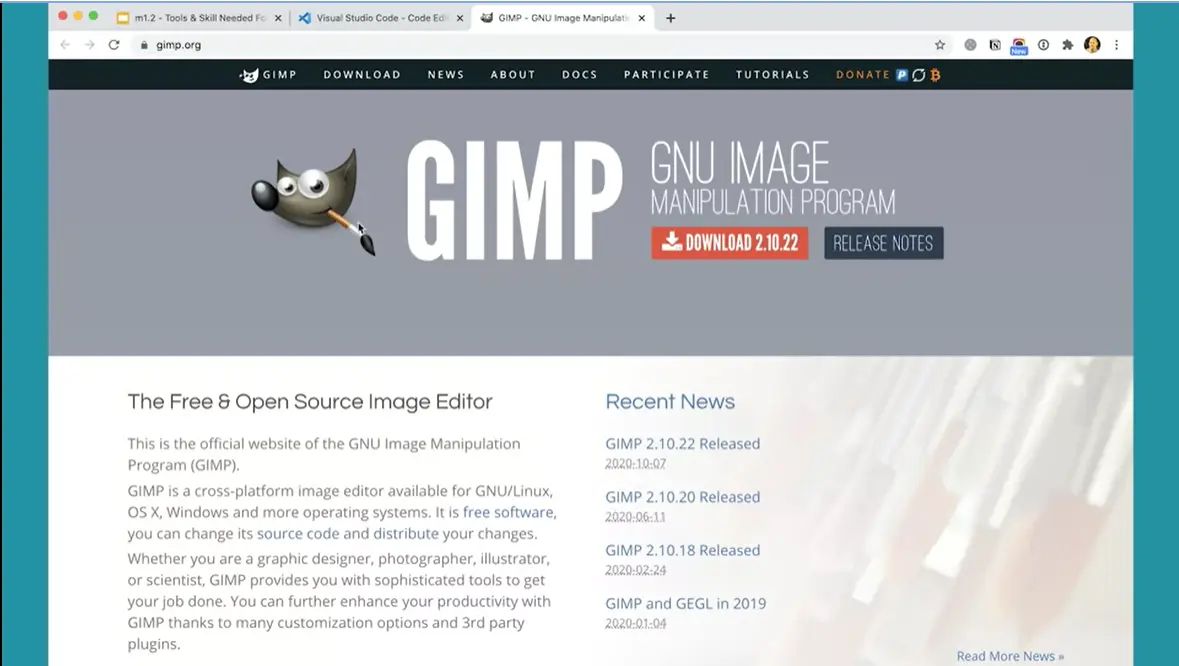
You can go download GIMP and I have that pulled up here. You can actually download GIMP for Mac or for Windows and that kind of stuff. IrfanView is even better & easier. There are also online tools, webpages that will allow you to upload your image and optimize it for the web and do some different kinds of image editing right through your browser. You might find some of those types of tools as well, but you will need some image editor to help you working with images. That's a nice to have. It's not absolutely necessary, but it's really nice to have.
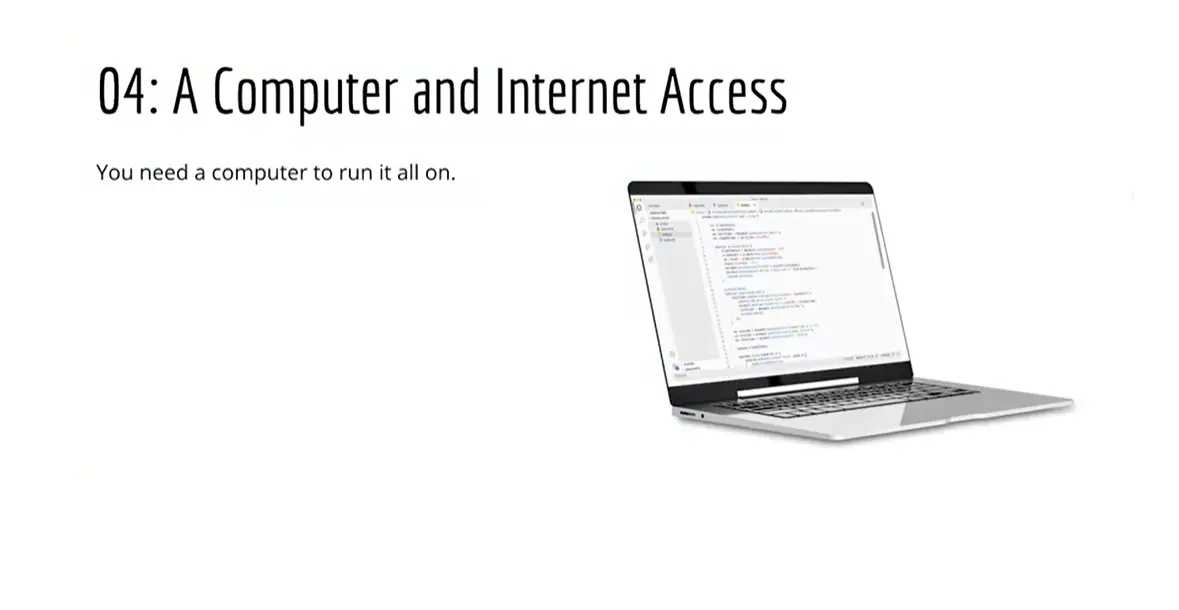
Next, you're going to need a computer and internet access. It may sound obvious that you're going to need internet access to do an internet class, but you are going to need that and you will need a computer, whether it's a laptop or desktop.
What's not going to work very well is either a Chromebook or a tablet or a phone. You're really going to need something that you can write code on and save files to. iOS you can make it work, but it's not really up to the task. You'll be fighting it every step along the way. You want to be working with Mac OS X or Windows 10 on a computer in order to really make this work.

Let's talk about some of the skills you need in order to be successful learning JavaScript.
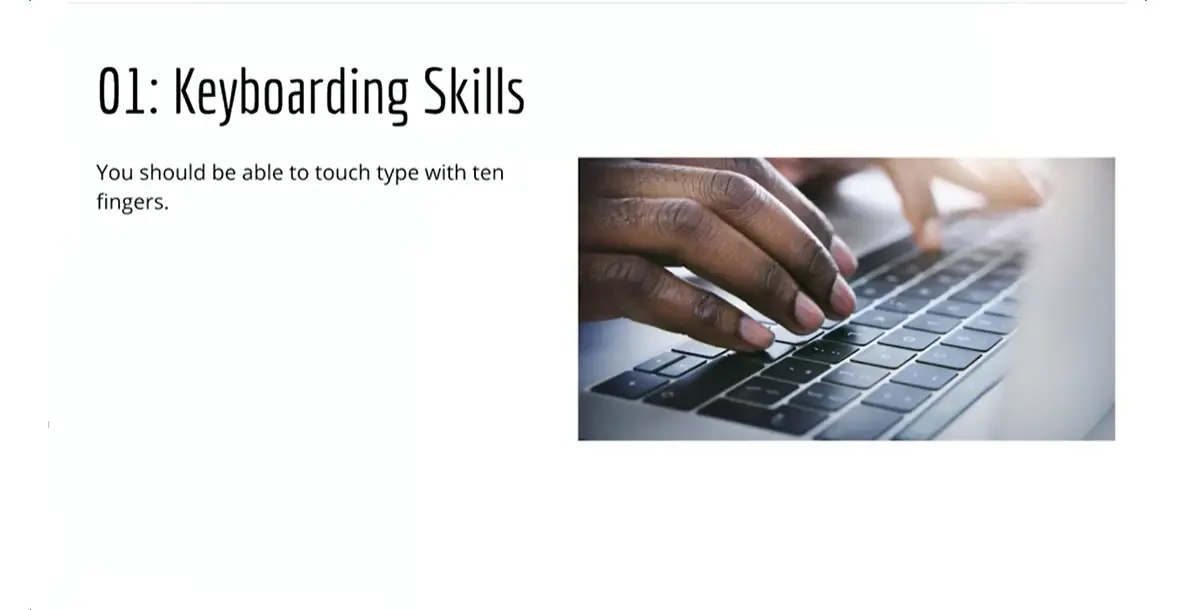
First and foremost, you need to be able to type. I mean typing with 10 fingers without looking at your fingers, touch typing. And it will really help you to be able to do this. If you're somebody who hunts in packs with one finger or two fingers, you may be pretty fast at it. But it really will slow you down for programming. And so I recommend that you do some online typing programs.
There are plenty of places online where you can learn how to type. You don't have to be terribly fast at typing. But you do need to be accurate. Or if you're not accurate with typing, you have to at least stop and go back and fix every single error. And I have known a lot of students over the years that struggle a lot with typing. And it really impedes their ability to learn something like JavaScript. So I recommend that you get those keyboarding skills if you don't have them already.
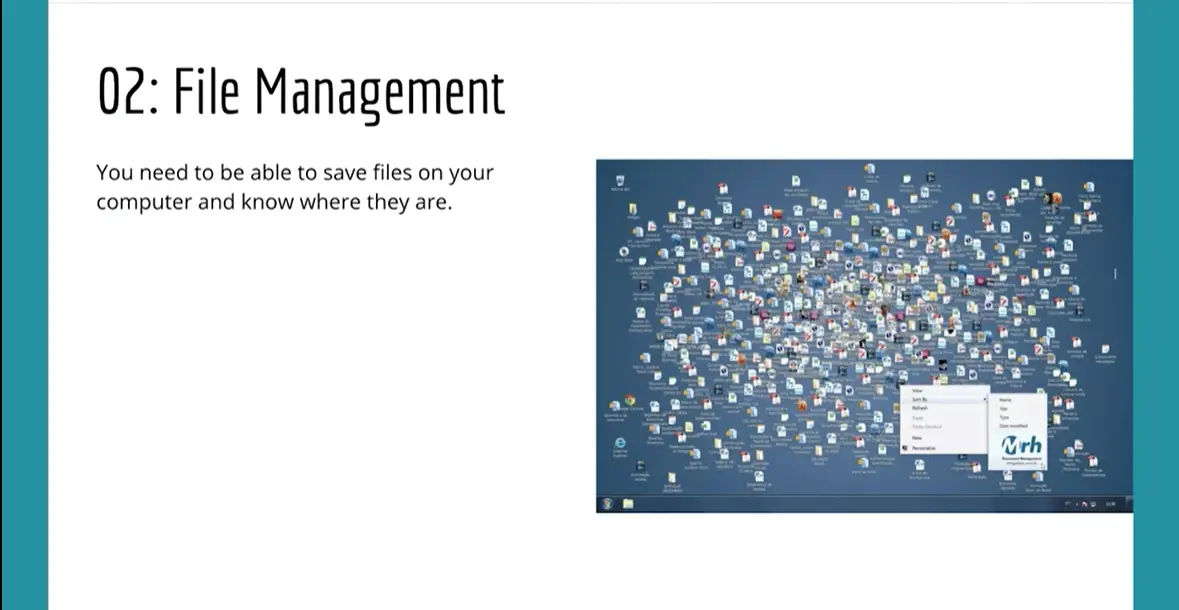
The second thing that you need is you need to be able to manage your files. That means when you save a file on your computer, you know where it is. Not just going into the file menu and choosing the most recent files thing. If that's what you do to find your files, then you need to get good at file management. And if your desktop looks like the picture here, then you're going to be in trouble.
Make sure you're comfortable with saving files into folders. And you know how to do that and where those folders are on the web, everything is linked. So if a file cannot be found, if a file is not in the right place, then your project will break. And we don't want that to happen. So make sure you clean up all of your files. And work with a clean desktop. And for every project, you should have a folder and all the files you need for that project should be in that folder.
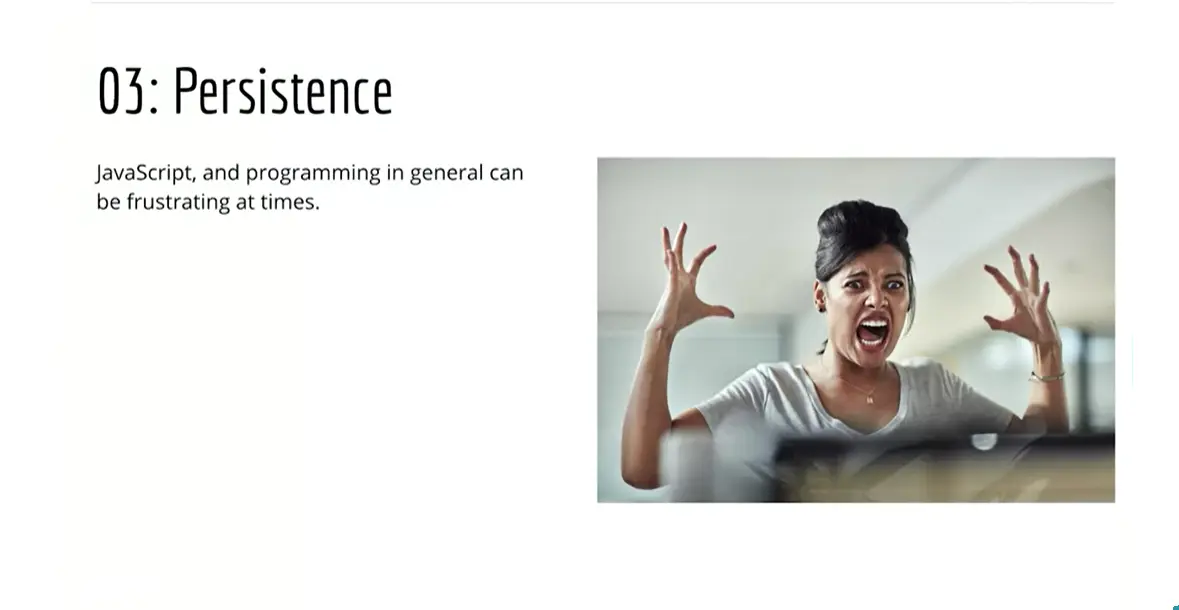
The third thing that you need is persistence. Learning JavaScript is not easy. It's challenging and maybe that's true for every programming language. But JavaScript in particular it's got some quirks to it and it takes some getting used to. And there will be times when you're frustrated when things aren't working the way you think they should. And you just need to take a break, step away from it and then come back to it. But come back to it, because it's worth learning. And even though it's hard, it's definitely worth putting in the effort and being persistent to get there.
I've told many students over the years if you're not banging your head against the wall, you're not learning JavaScript. All my students will tell you that I say that over and over and over again. And it's frustrating especially in that moment when you realize you just left that one character or semicolon or something like that, and that broke the entire script. But stick with it, keep working at it, stay calm, keep pushing forward. And you'll make a lot of progress with it, I promise.
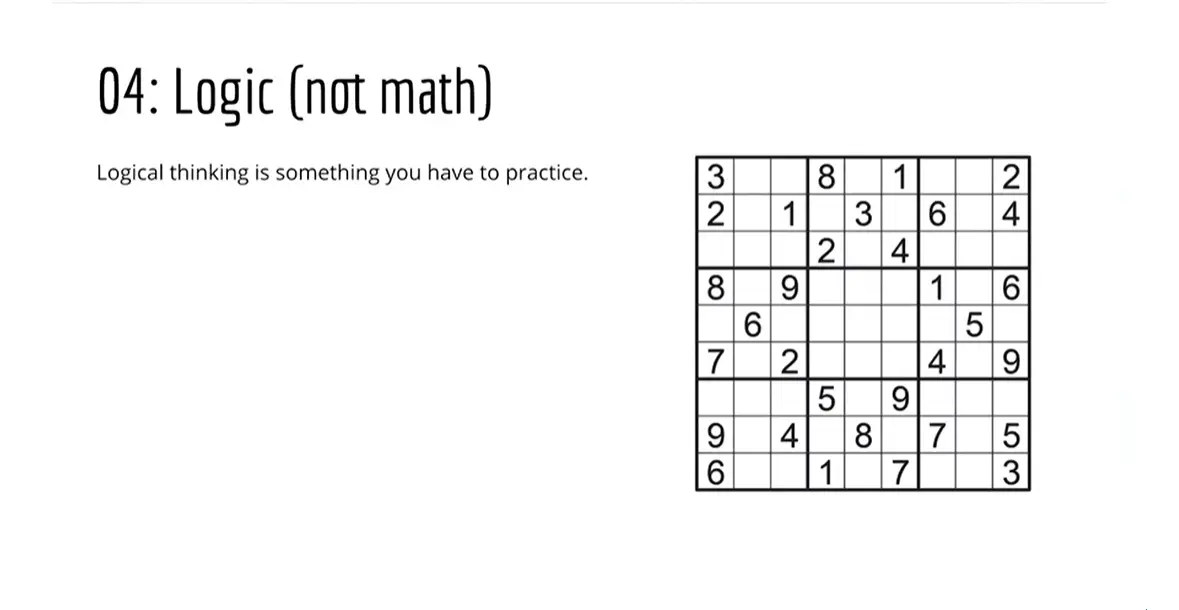
The fourth skill that you need is to be good with logic. And logic is a learned skill. Some people are naturally very logical but it's something that you can practice and develop. And there are lots of tools and games out there that will help you build your logic skills. Sudoku is a great place to go for puzzles that will help you build your ability to use logic. Programmers often use math as well. But math is not that important to begin with. It's really the logic skills that you need. You might need some basic arithmetic. But I don't do a lot of programming that involves very sophisticated math and a lot of programmers don't. There are programmers that do. But we don't need that in order to get good at JavaScript. But you do need to be good with logic.
The next thing is, you really should know HTML and CSS as well as you can. JavaScript manipulates the HTML and CSS that makes up the page. That's how it works, that's what it does. And if you don't know HTML and CSS, you don't really know what you're manipulating. So I recommend building some skills with HTML and CSS if you don't already have them.

And a good place to go is this Interneting Is Hard website. This is a really great tutorial. They've got a lot of really great, it's very simple the way they've explained things. And they've got a lot of great examples and tutorials here that will help you with learning HTML and CSS, and it's free. So I recommend going and looking through the Interneting Is Hard website if you need to get caught up I need you to know in CSS. Well, if you've never done any HTML and CSS at all, then maybe take a course in HTML and CSS before diving into JavaScript.
In summary, there's a low barrier for entry to this class. The software is free. You don't need a super fast, or super fancy computer. And getting good at JavaScript can be a ticket to a high paying job, and a good life. But it's not easy. You're going to have to work hard to get there. But it really is worth it if you keep working at it. And I hope that you continue with us and see all the cool things that you can do with JavaScript.

JavaScript variables.
It's good practice when programming to write code that is as generalizable as possible. It allows the code to be reused and helps limit the effort of writing and maintaining redundant code. Imagine somebody gave you a robot as a gift to do chores around your house. You have to teach it how to do your chores.
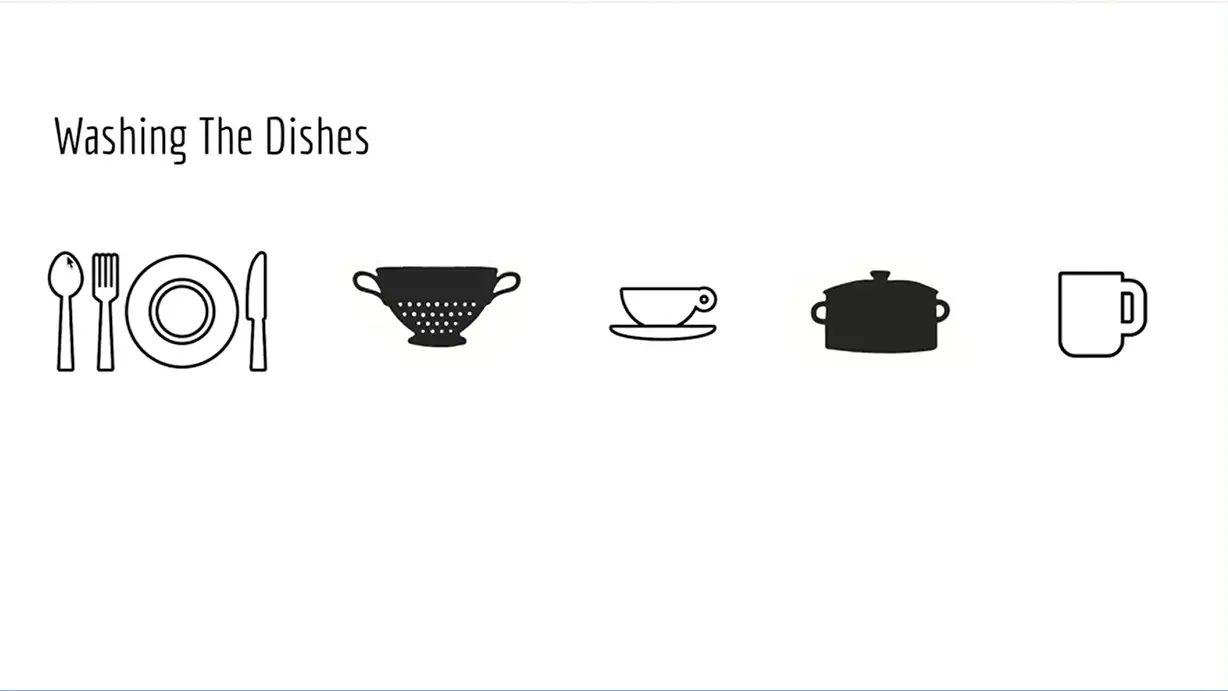
What if you wanted to teach it to wash the dishes? That would be great. It will be really helpful to have a robot wash the dishes for you. But what if you had to write different instructions for each dish in your house? That would be a lot of dishes and perhaps a lot of instructions. That wouldn't be so great.
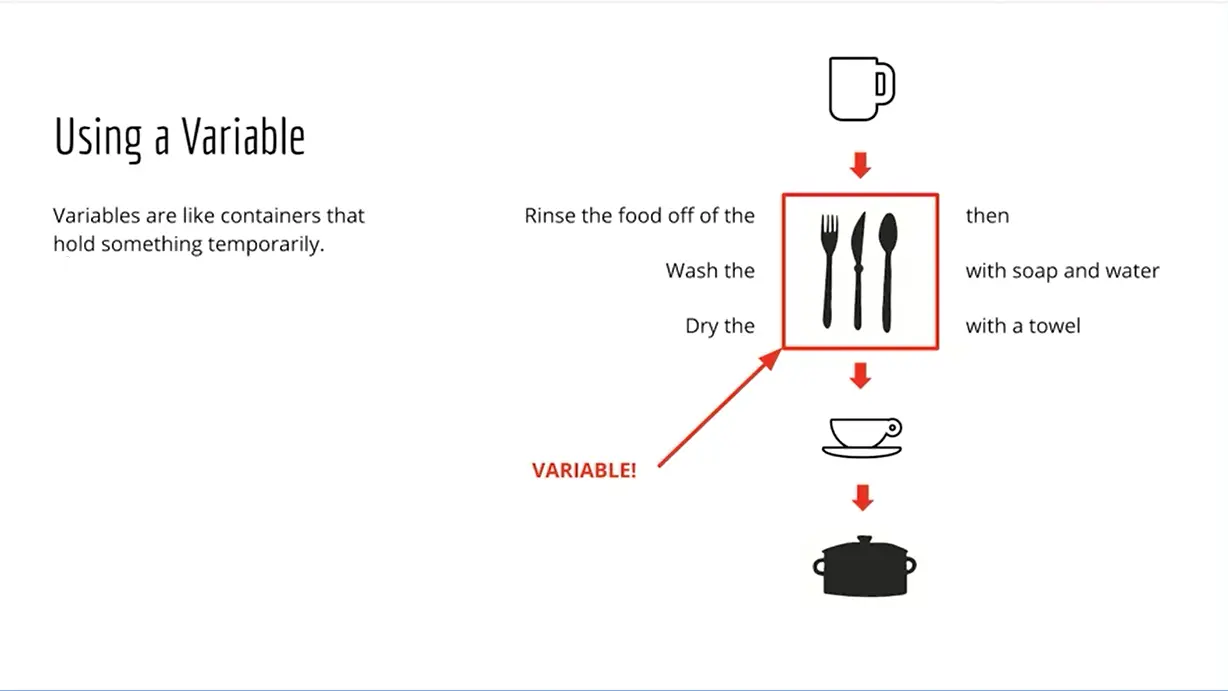
What we can do with a variable is that we can treat it as like a container, and then we can write a set of directions and pass each item through that set of directions. Here in this diagram, currently, we're going to rinse the food off the silverware and then wash the silverware with soap and water, and then dry the silverware with towel and then move on to the next thing which perhaps might be a cup. The red box that you see here is really the variable. It's a temporary container that we can pass these items through, and we can teach our robot to wash all of the items one at a time using this container. That will make your instructions more modular and more reusable and that's really helpful.
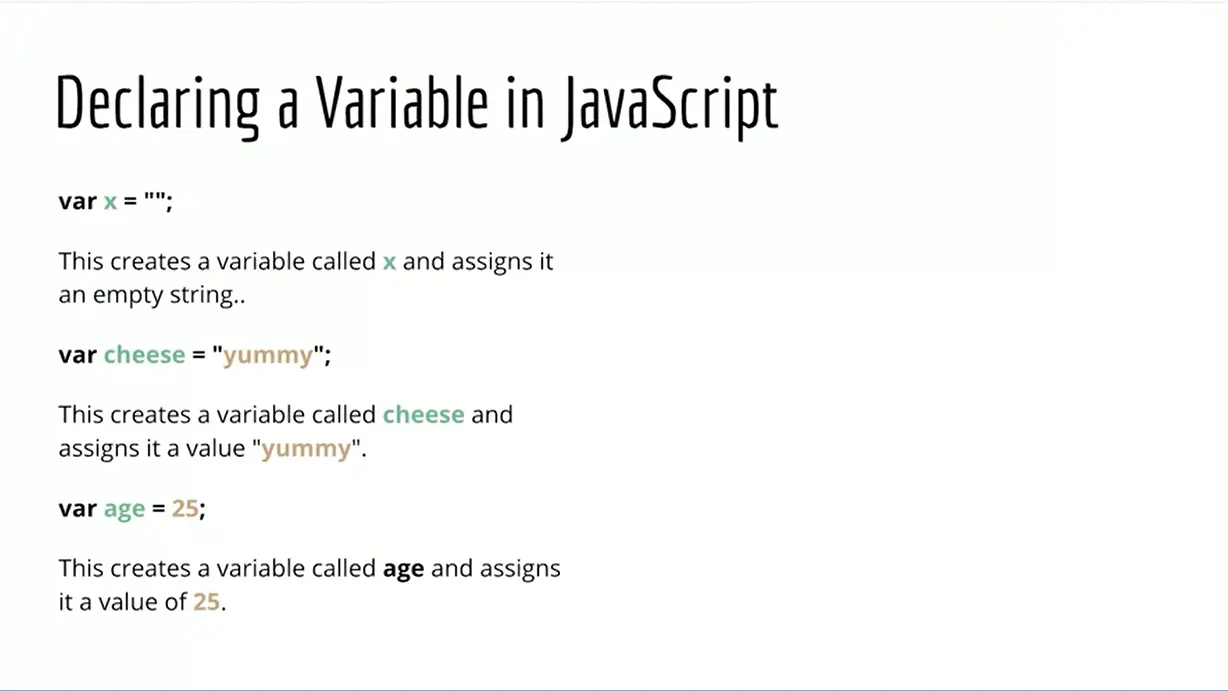
There are many ways of declaring a variable in JavaScript. We'll start with one of the most basic ways which is using the var keyword V-A-R. Here I have a variable called x, I'm creating and JavaScript will then recognize x as a variable and I'm assigning it an empty string, two sets of quote marks there followed by a semicolon. That means that variable x holds an empty string.
On the next example, I have a variable called cheese that I've created, and it's holding a string called yummy. The equal sign here is an assignment operator, it means assigned. So yummy is assigned to cheese. It's easy to use the word equals because we're used to seeing the symbol in association with math, where we see 2 plus 2 equals 4 and we say equals but in programming, we want to say assigned. Yummy is assigned to cheese.
Then the next example we have a variable called age and it's assigned a value of 25. Twenty-five is a number. It doesn't need to go inside quotes because JavaScript knows what a 25 is.
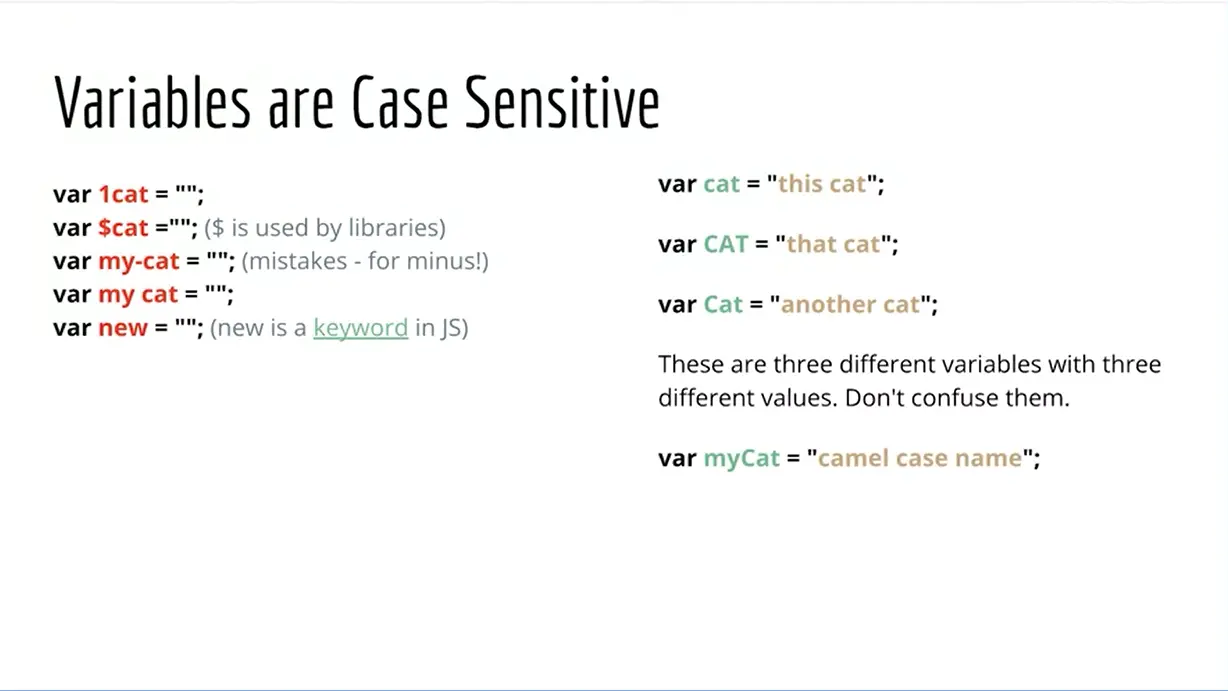
In JavaScript, variables are case-sensitive. They have to follow certain rules. For example, a variable has to start with a letter, you can't start with a number.
This variable over here that says 1cat is not going to work because it starts with a number. Also, you should not start variables with something like a dollar sign. They're used a lot by libraries, so you should not do that as well. The third example, my-cat is not going to work because JavaScript sees the dash as a minus sign. It thinks your just trying to subtract cat from my which is not going to work it all either.
Also, you can't have a space in a variable name because var my might be a variable, but then it doesn't know what to do with cat because it sees that as a separate thing because there's a space in there.
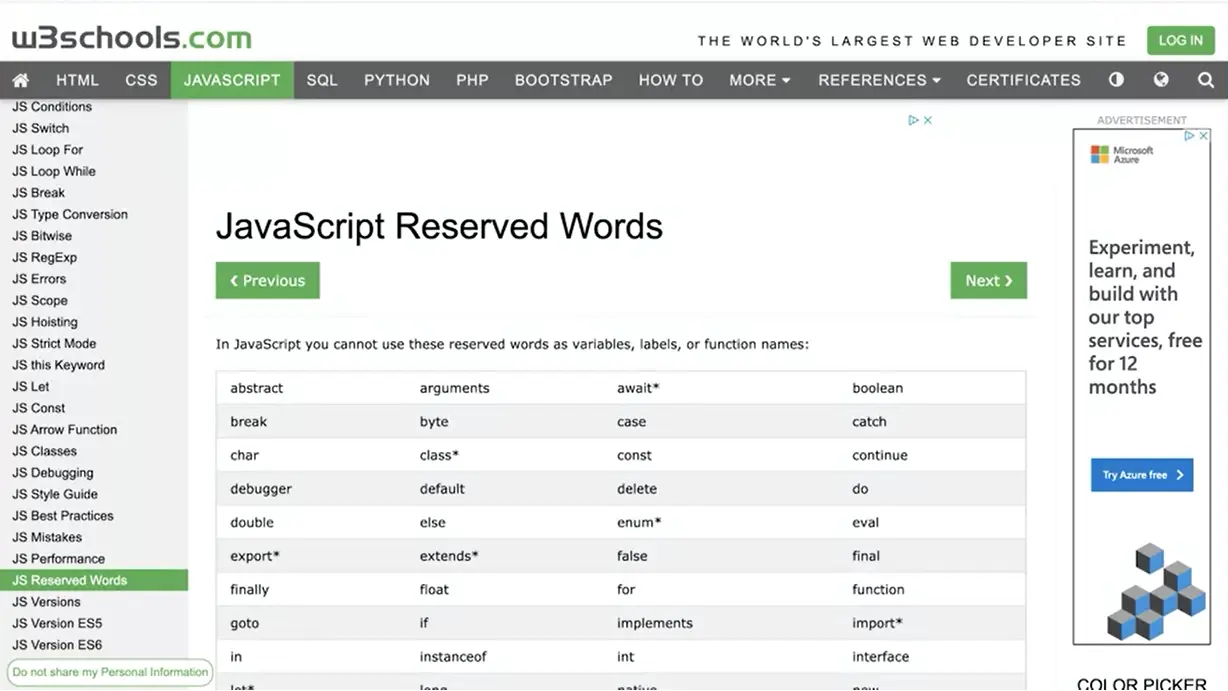
Finally, there are certain keywords in JavaScript that you can use as names of variables like new is a keyword. Up here I have some of the keywords pulled up on the W3Schools website. W3Schools is one of the places you can go to get a lot of information about JavaScript, basic information. We'll also look a lot at the MDN, the Mozilla Developer Network, which is really the most authoritative place to get information about JavaScript, but it can be a little bit overwhelming at first as well. The W3Schools is a little bit easier to understand.
You can see here that there are a bunch of keywords. You'll notice that some of them have an asterisk in here. Words marked with an asterisk are new in ECMAScript 5 and 6. Remember, we talked about the versions of JavaScript, so now when you see ECMAScript 5 and 6, you know that we're talking about ECMAScript 5 which was released in 2009, that was the big release then, and ECMAScript 6 or ES6 was the version that was released in 2015. These are all keywords that you can use as names for variables in JavaScript.
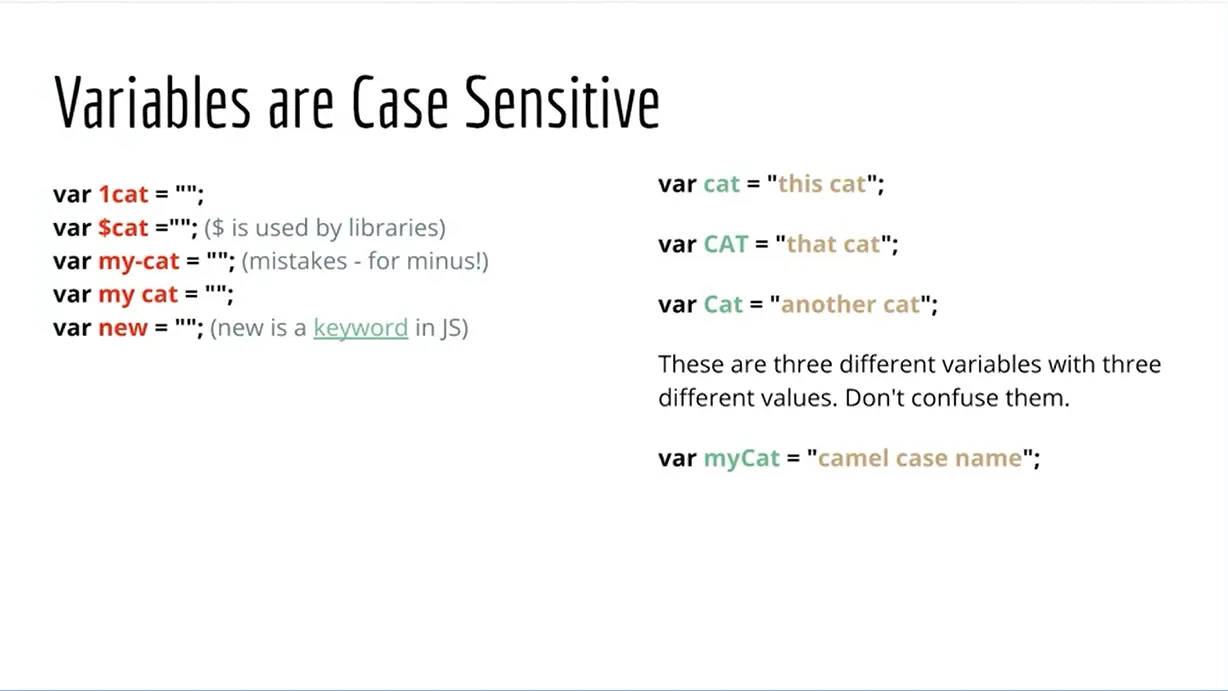
Over on the right in this image here you'll see we have variable cat with lowercase c, variable cat all in uppercase letters, and variable Cat with a capital C. These are three different variables that hold three different values. It's generally better practice to use lowercase letters when creating variables or to do what's called camel casing like we have done at the bottom here; myCat with a capital C in the middle, so it's like a hump in the middle. We like camels in JavaScript. That's called camel casing. That's not specific to JavaScript but it's something that is in a lot of programming languages. But we use that frequently in JavaScript. You'll frequently see variables that are using camel casing.
We've been talking long enough about JavaScript. So now it's time to actually get down and write some. And I hope you're ready to do that because it's pretty exciting to start seeing you come alive on web pages. And it'll be a little while before we start making really interesting things, but we'll be working with the basics now. So let's get started with that.
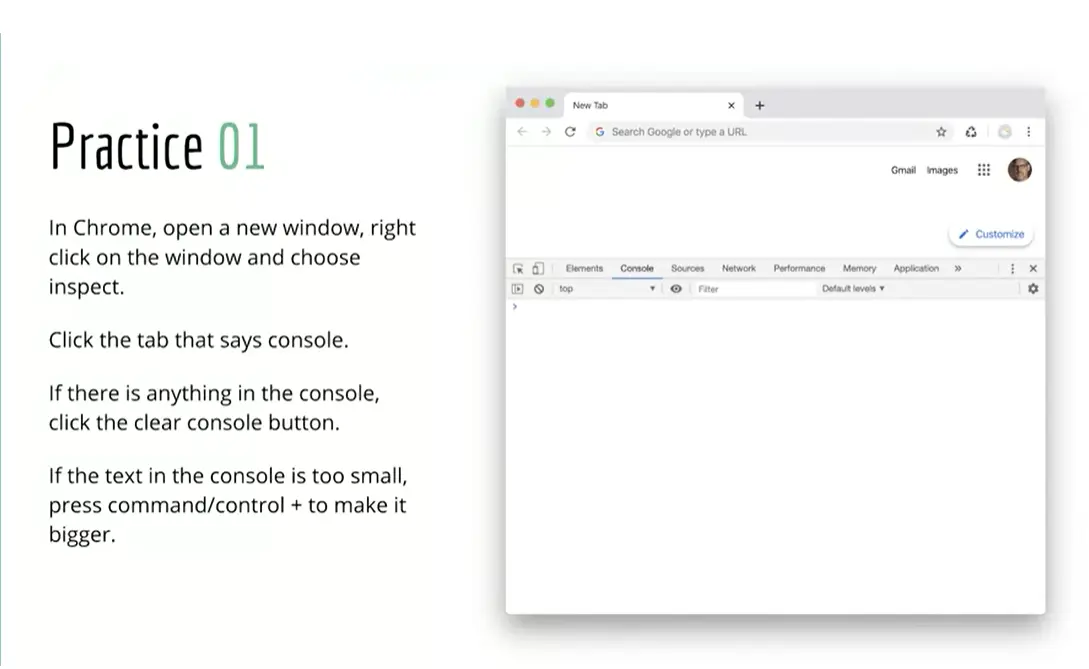
And what we can do with our browser is we can actually open just a new browser tab and use the console to write some JavaScript. Because JavaScript is native to the browser, we can write it right into the browser and it'll actually do stuff in the browser. I have a new tab over here and you can create a new tab for yourself. And I'm just going to right click and choose inspect.
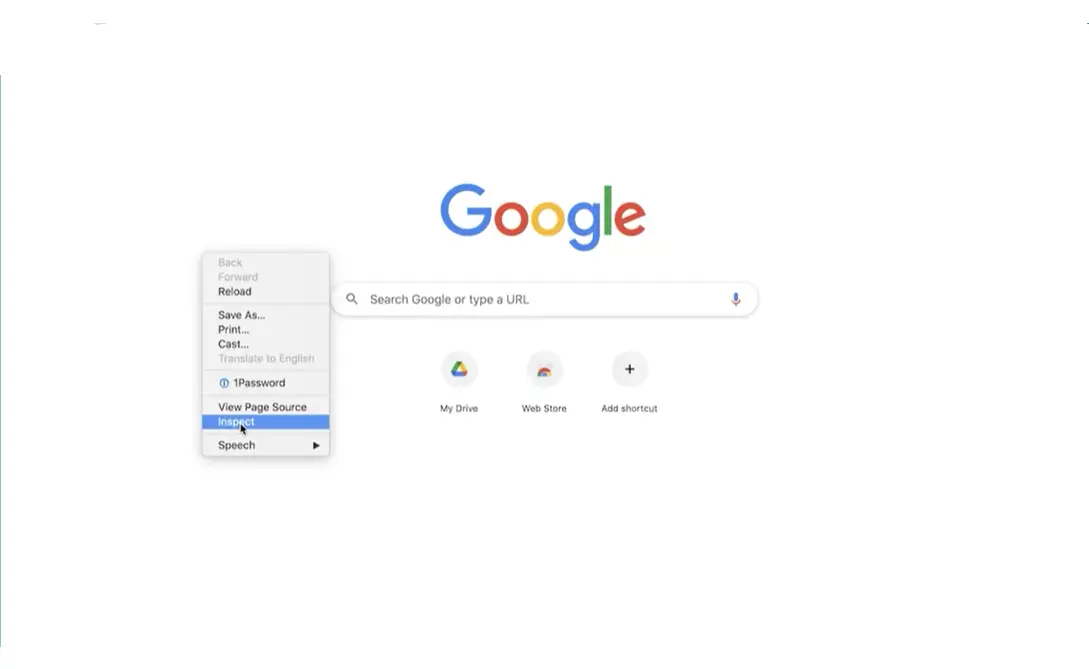
And you have to right click on the white area, you can't right click on an element.
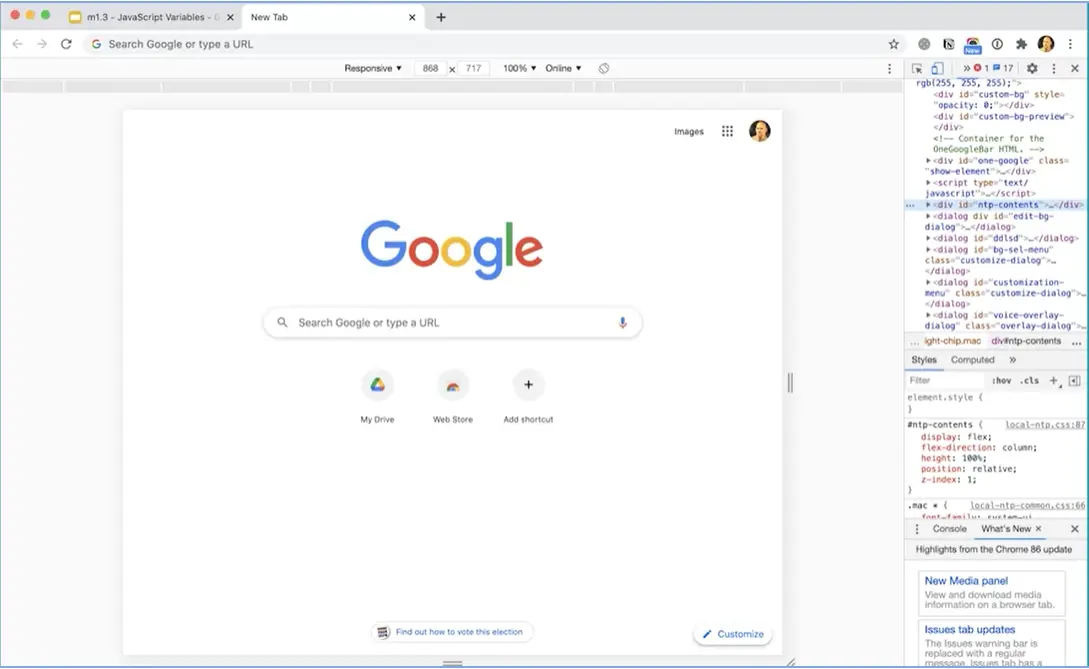
Right click on the white area and choose inspect. And that'll bring up the inspector in Chrome. And again, I'm in Chrome. And when I do that, it might put the inspector over here it might do some different kinds of things. Some different buttons might be selected. But what you can do is you can use these buttons here. You can arrange this thing, make it bigger or smaller. You can use these buttons to move this inspector around. So this button here will allow me to choose where I want it to display.
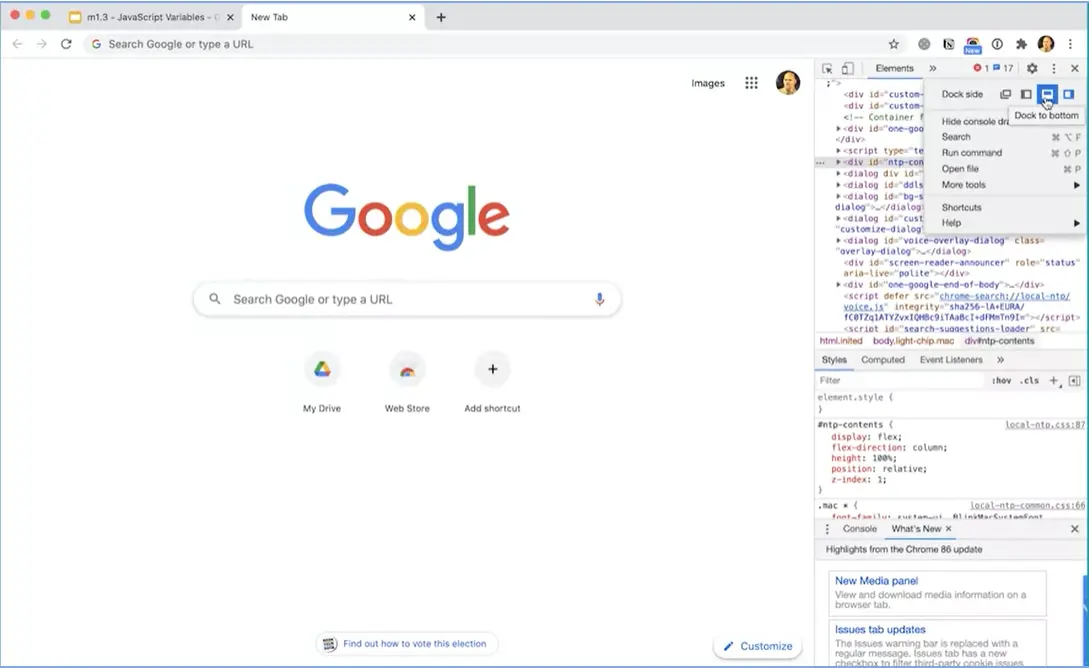
Right now, it's on the right but I could put it on the left or I could put it on the bottom. I want it on the bottom in this case.
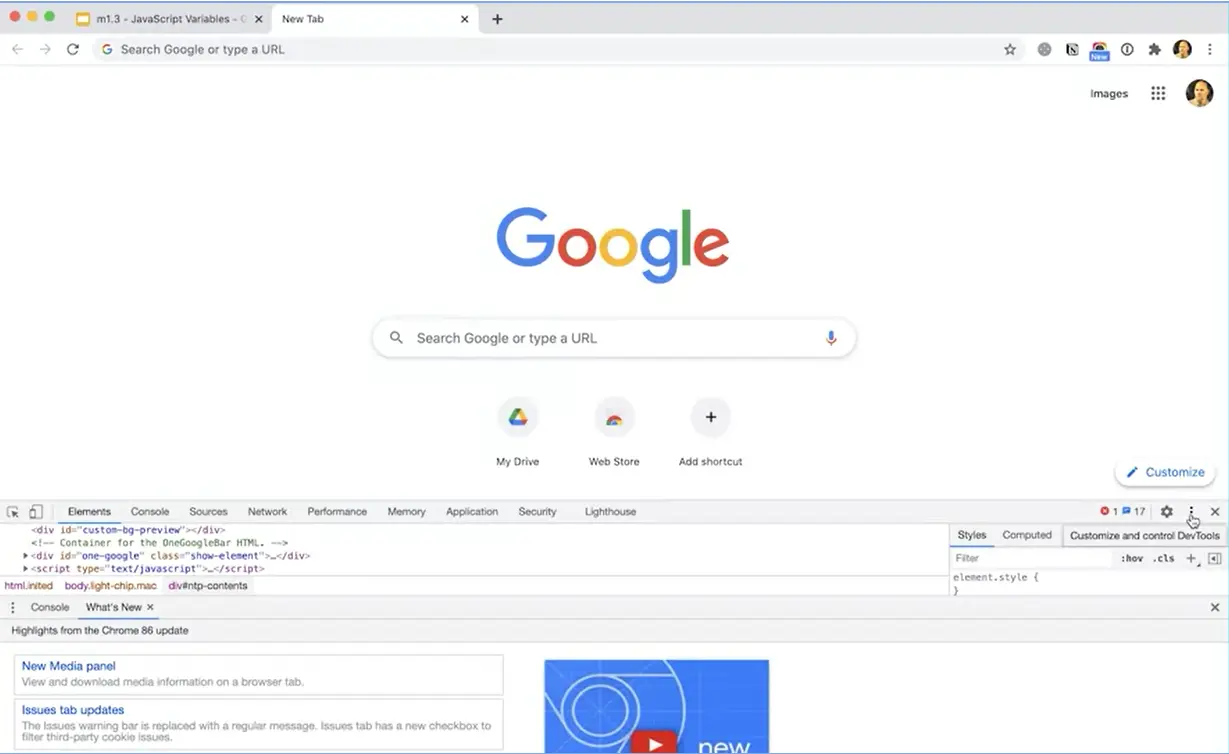
Sometimes, it's helpful to tear it off entirely into a different window, which is this icon, but I'm going to leave it down here on the bottom. And then I want to close this thing down here because that's just giving me some information. And I'm going to make this come up here.
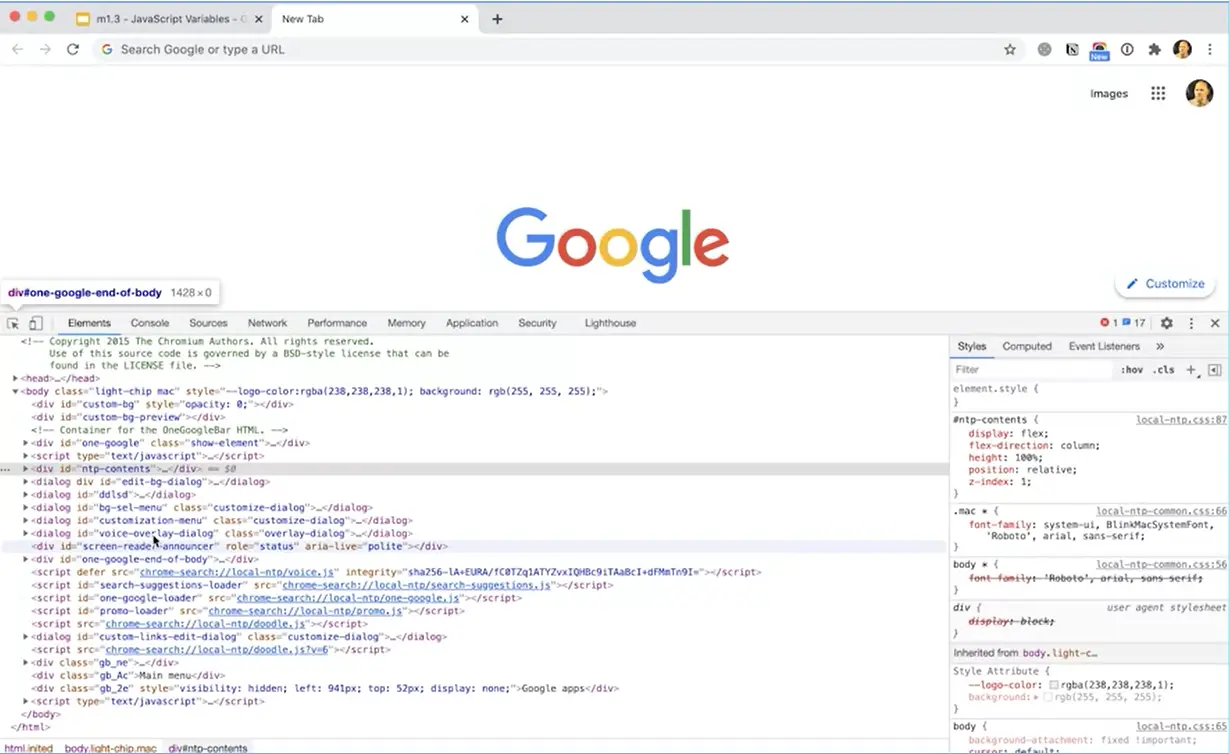
And right now and on the elements tab, and I can see the HTML that is making up this page. And you can actually drag around on here and you'll see different elements of the page will get highlighted.
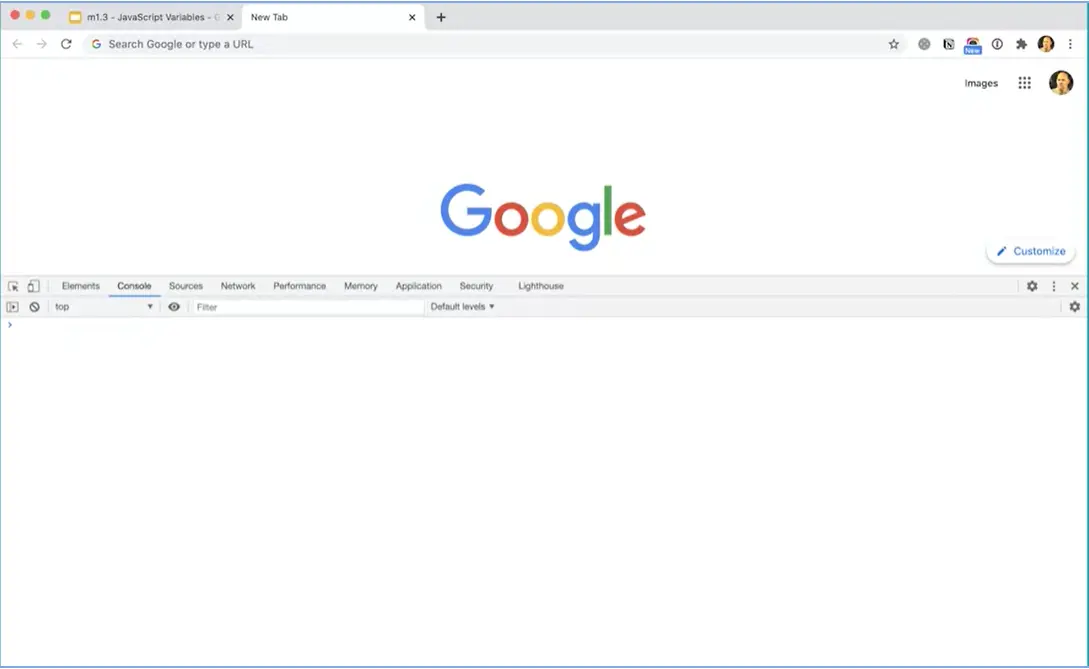
But what I really want to do to write some JavaScript is the console. So click on the console. And click the garbage can to clear console screen. And now I can do things like create a variable, var cheese = "yummy". And again, yummy is assigned to cheese, the variable cheese here, put a semi colon and press Enter.
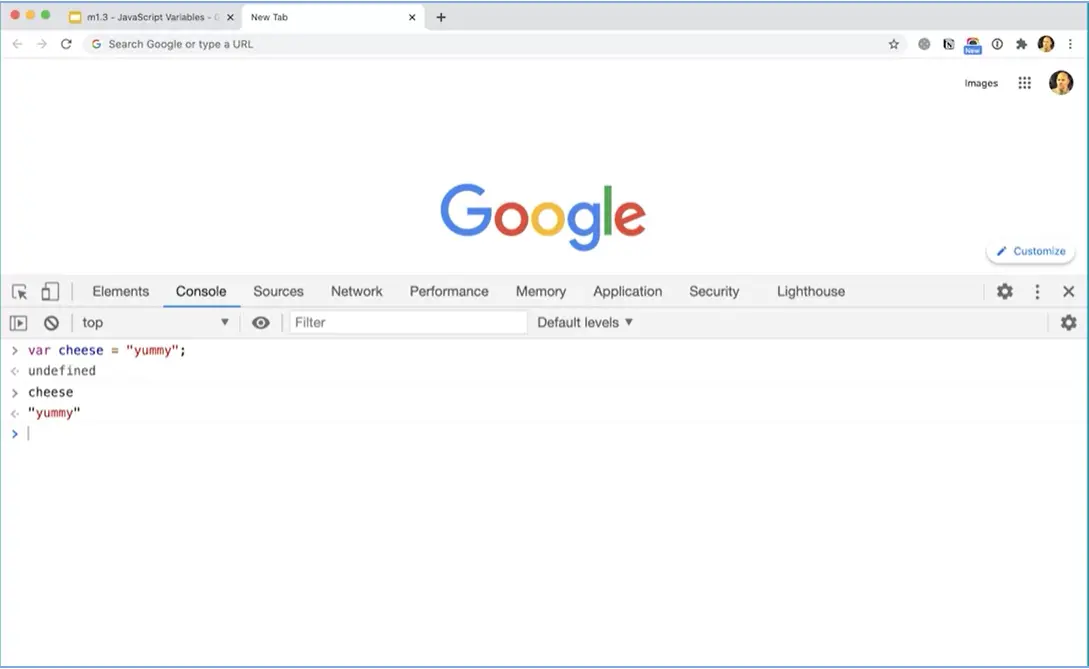
Now before I do this, another thing that's useful is if this is seeming very small in your screen, you can use Ctrl on Windows or Cmd at Mac and the plus key to make the text larger or the minus key to make it smaller. Plus and minus or you can do command zero to put it back to the default size. So, a lot of times when I'm working with students, they have trouble seeing the syntax and I recommend making the actual code larger so that you can see it better. So I'm going to make it larger like that. So var cheese = "yummy". Great, undefined is sort of the return value. This doesn't have a return value. I'm just assigning a variable here so don't worry factor that says undefined here. Now that I've defined this variable, if I type cheese, you'll see that I get yummy. That comes back. That's the return value for that variable, for that variable name.
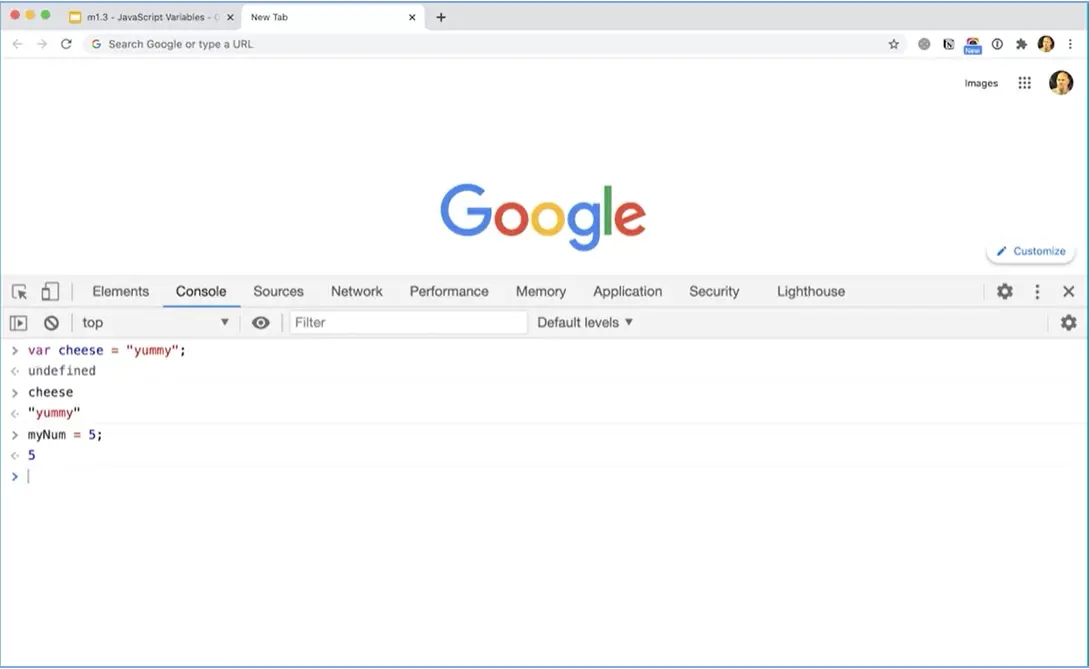
I'm going to make a new variable. Line and assign it a value of 5. And I get a 5 back. That returns the value of 5. So I could make another variable. When I created my num, you'll notice I forgot to use the var keyword. And that's fine. JavaScript will adjust for that in this case and we'll talk later about what happens when you don't use the var keyword. But in this case, it's fine. It actually created a variable called myNum and assigned it 5.
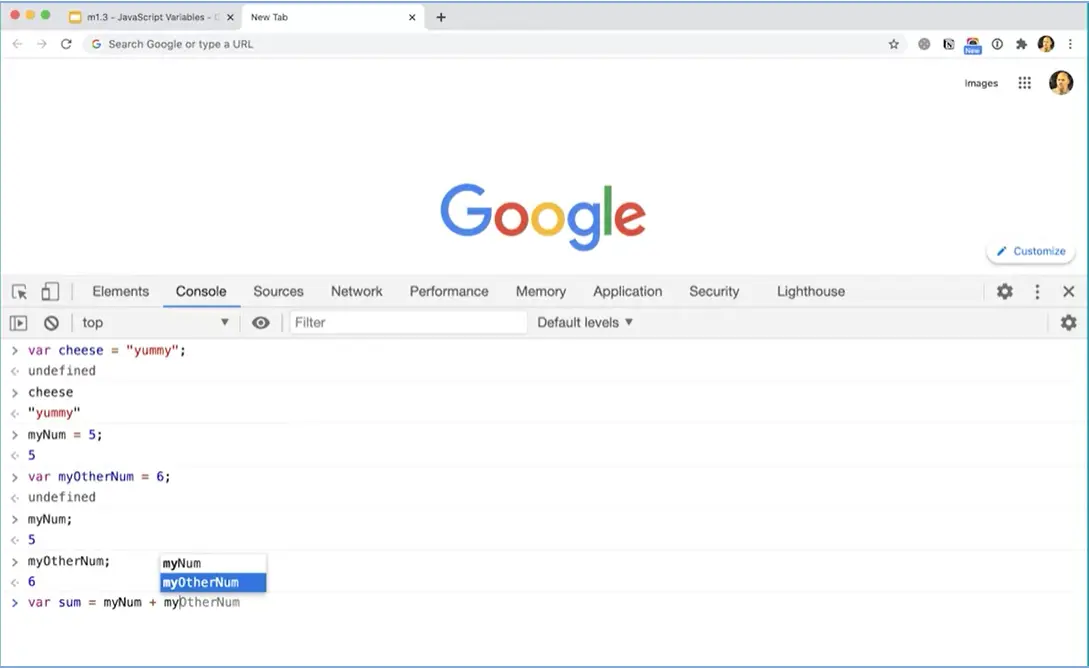
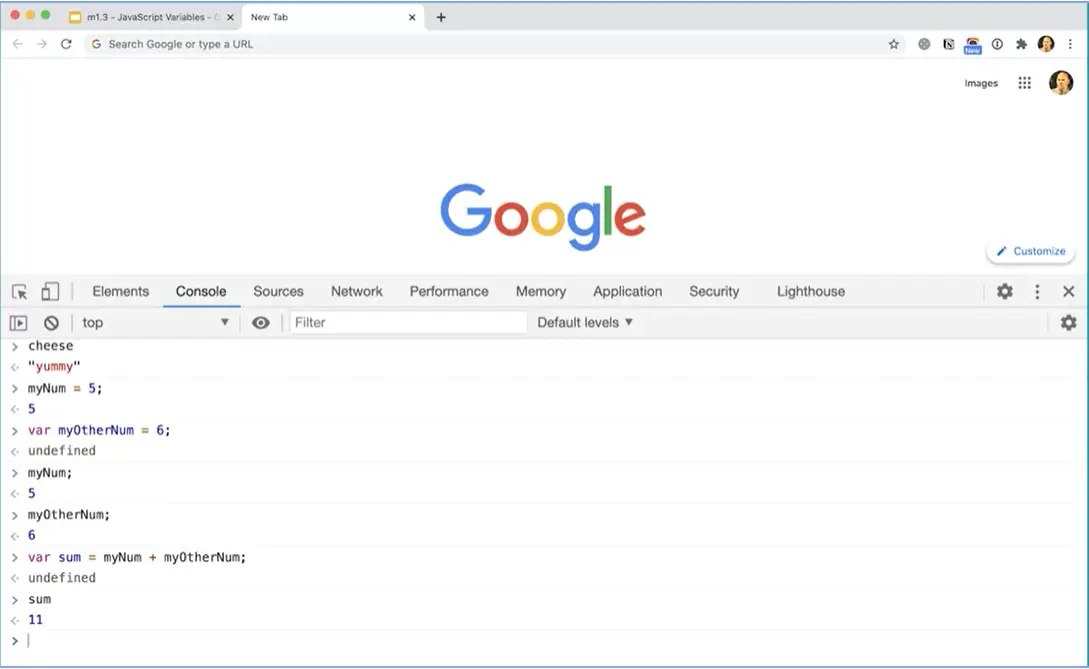
But it would be better to use the var keyword for myOtherNum = 6, that comes back undefined. And this came back with 5 because of the fact that I didn't use the var keyword. But if I do myNum, you'll see I'll still get 5. If I do myOtherNum, and you'll notice that in Chrome, it's predicting what I'm going to type. And if I press tab on the keyboard, I don't even have to type that whole thing. I can do something like, Var sum = myNum Plus myOtherNum, I can even pick it from the list using my keyboard here. I don't even have to type it. Now if I do sum, you'll notice I get an 11 because it's doing basic arithmetic.
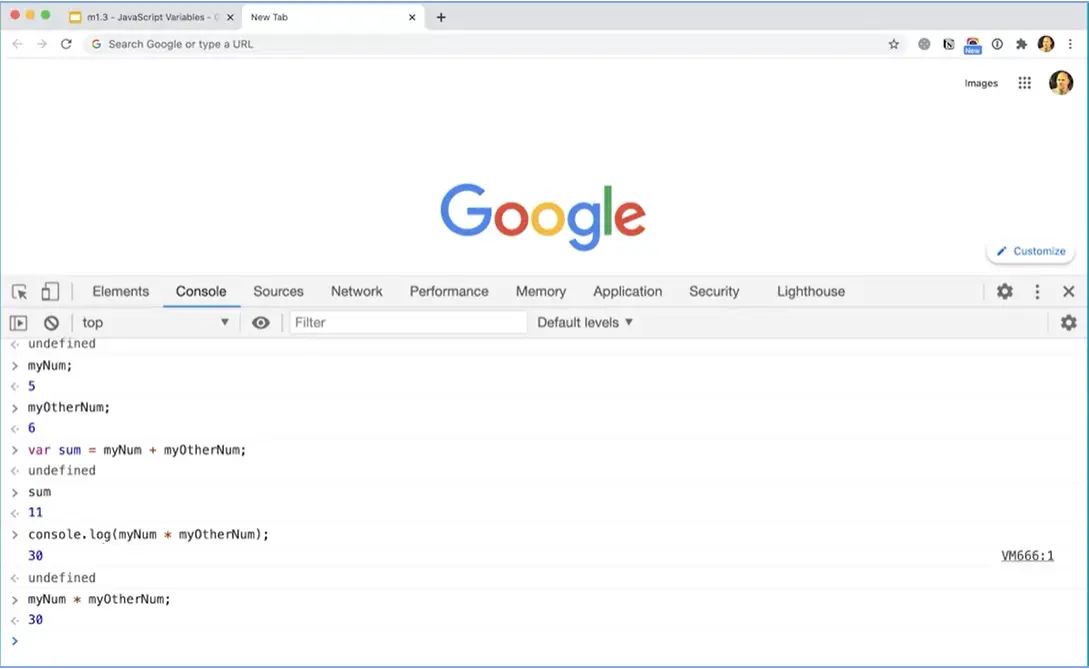
I can also use a method called console.log. Console.log, and I could do myNum, Times, MyOtherNum. Semi colon, and you'll notice that I get 30 because it's taken 5 and multiplied it by 6. Now we're in the console, so we don't have to use the console.log statement here. The console.log method, but because I can just do myNum times myOtherNum. And you'll see I still get 30. But I'm showing you the console.log method because when we start working with files, we'll use this method a lot to send things to this console. While I'm in the console, I don't actually need to use it.
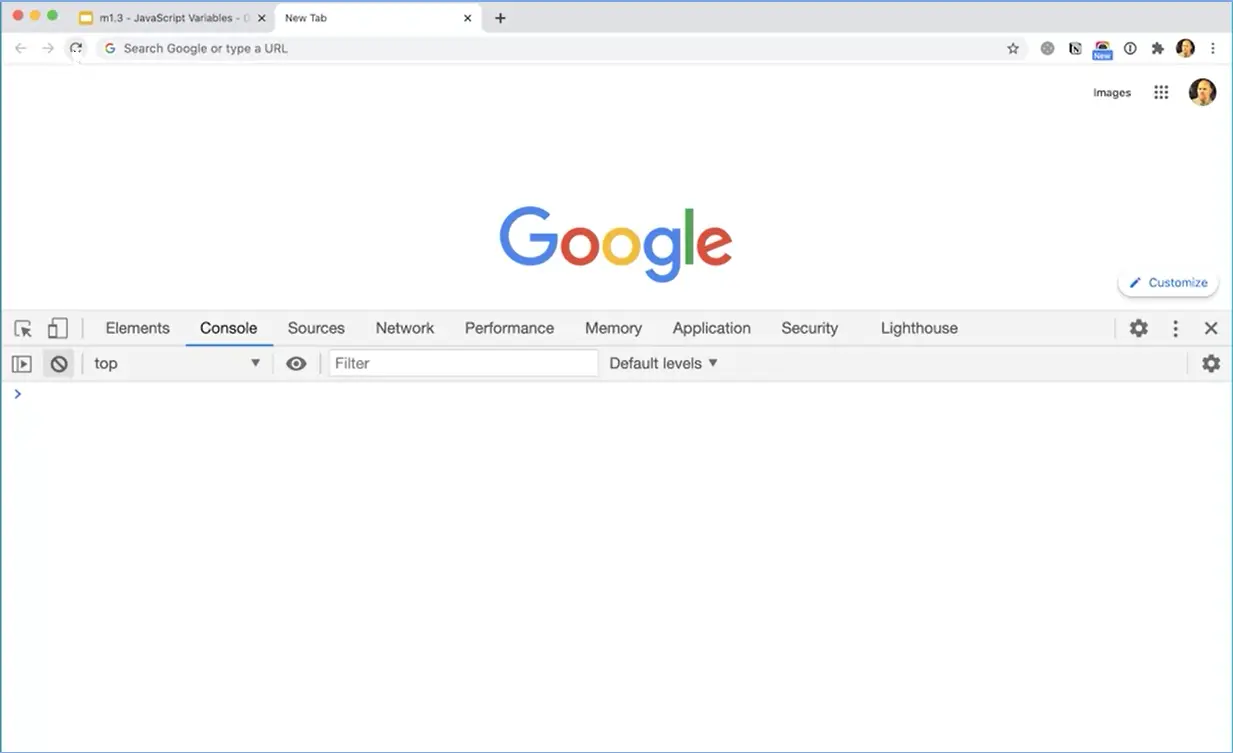
Here you can see a cleared out the console by clicking this clear thing here. That won't actually forget any of the code that you've put.
If you do want to actually forget the variables, you can click the Refresh button up here that will actually forget everything.
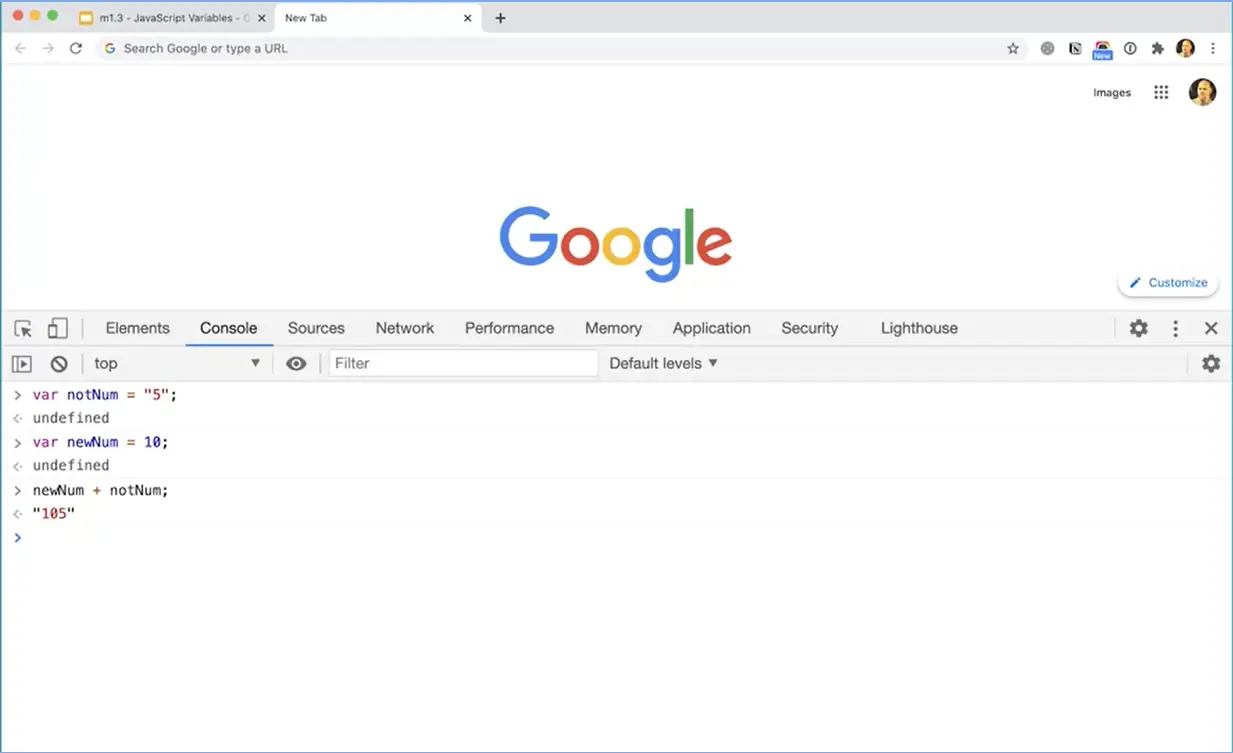
Now I'm getting the error that came back just with the Google page, but I can clear that here. I can actually create variables fresh that way. But let's do this, I'm going to make a variable var notNum, I'm going to assign it a value of five. But I'm putting it in quotes because it's not really a number. It's a string with a number in it. I can make another var newNum, I'm going to assign it a value of ten. That's actually a number. Now watch this. If I do newNum plus notNum, it gives me 105 inside quotes.
Now, JavaScript is loosely typed. You do not have to specify what type of data a variable's going to hold when you create the variable. A lot of people don't like that about JavaScript. Way back in the day when they were working on ECMAScript 4, you'll remember that version was never released. They were thinking seriously about switching JavaScript to being a more strongly typed language. Like other languages, where you have to declare what type of data a particular variable will hold when you create the variable. But in JavaScript, you don't have to do that.
Douglas Crockford, who we mentioned earlier, made a strong argument that the loosely-typed nature of JavaScript is actually very expressive and very powerful in its own way if you know how to use it properly. But it can lead to confusion. Here's a good example of that, where we might get something that we don't expect. Perhaps we expected to add 10 to 5 and get 15, but instead, we got 105 in a string. So that's an important distinction and something important to understand about the way JavaScript works.
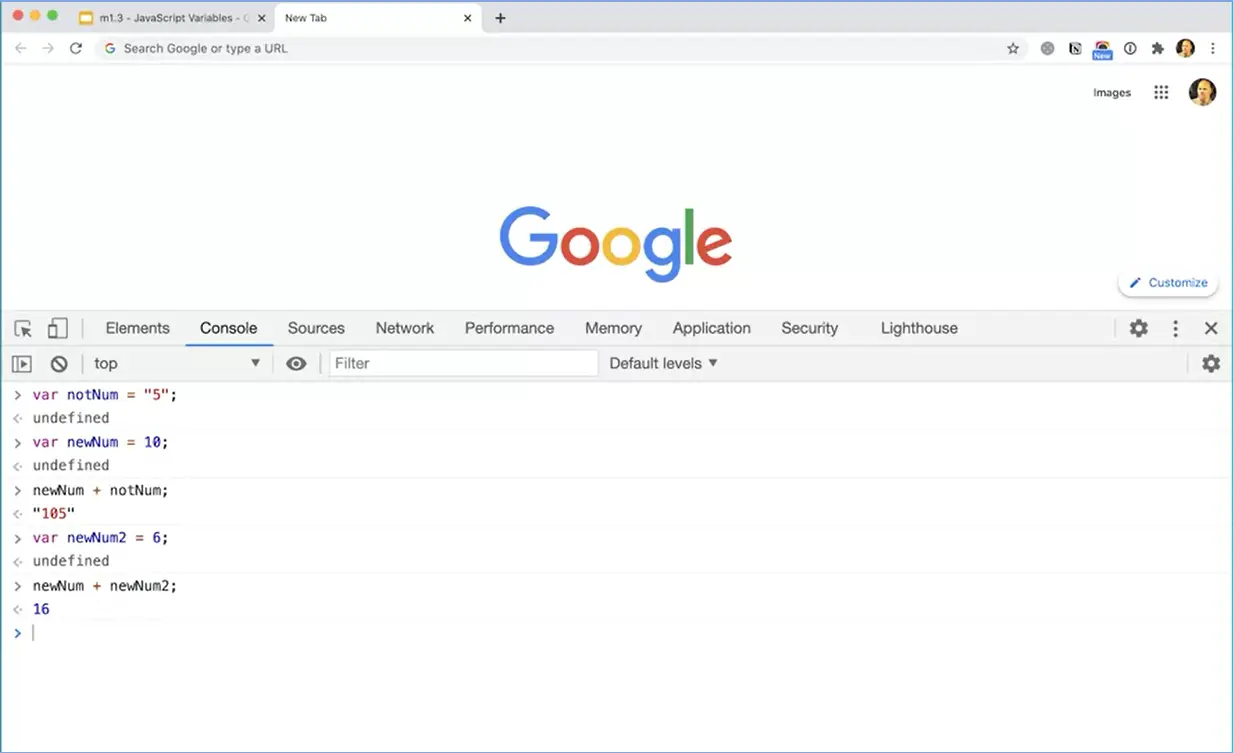
Another thing to know is that the plus operator in JavaScript does double duty. It will add numbers together, so we can make another variable, var newNum 2, and assign it a value of six. Then I could do newNum plus newnum2 and it'll give me 16. So it'll add numbers together, but it will also concatenate strings. Here we were seeing the plus sign actually doing some concatenating because one of those elements was a string. So it can concatenate it together and I got 105. Then here, when we use the plus sign, it's actually adding.
This is a problem in JavaScript and they've done some things in the language to help mitigate the fact that the plus sign does both things. We'll look at what we can do to deal with that. We'll look at some better ways of putting strings together other than using the plus sign. But these features of JavaScript that were built in from the beginning, persists to this day.
The plus signs still does two things, it concatenates and it adds. Here we're seeing already, very much at the beginning of the course, things about JavaScript that are a little bit different. We're seeing that it is a loosely typed language and that's unusual. We're also seeing that the plus sign does double duty. That's not only unusual but a little bit problematic. Already you're learning a little bit about why we use JavaScript in certain ways or why we type in certain ways. We'll get into more detail about that as we go along.
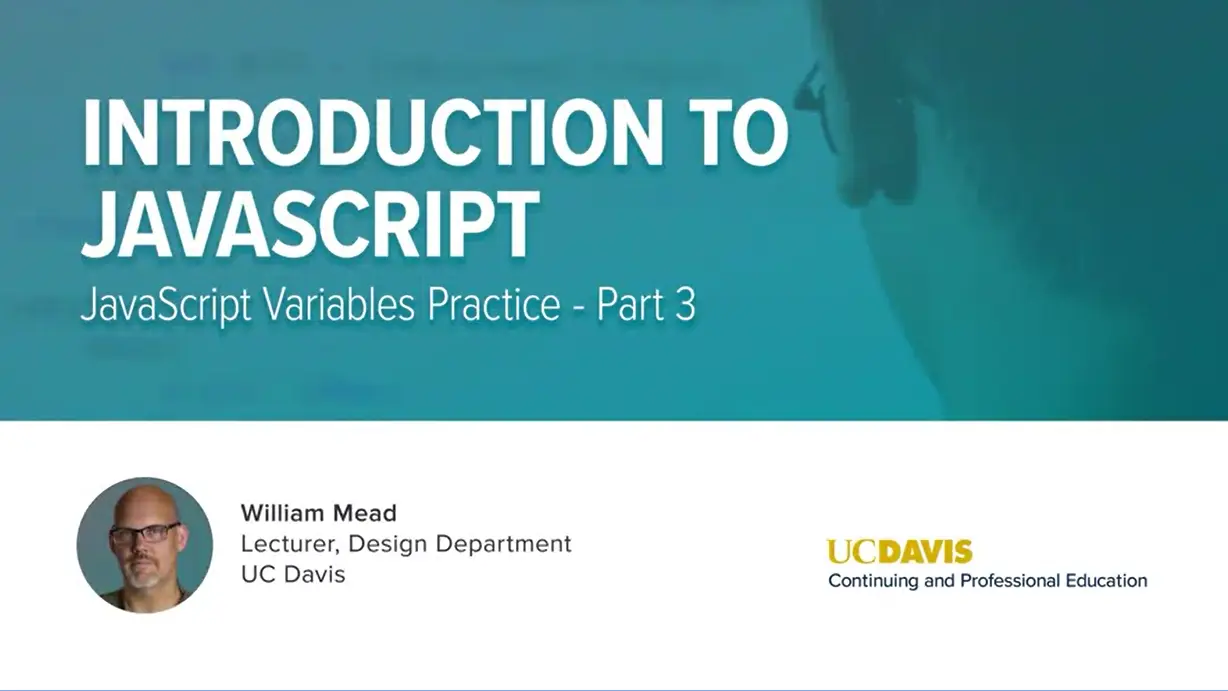
I'm going to clear out my console here, press the clear button there, and then I'm going to create a new variable, var myNum equals 10, We'll put that in there.
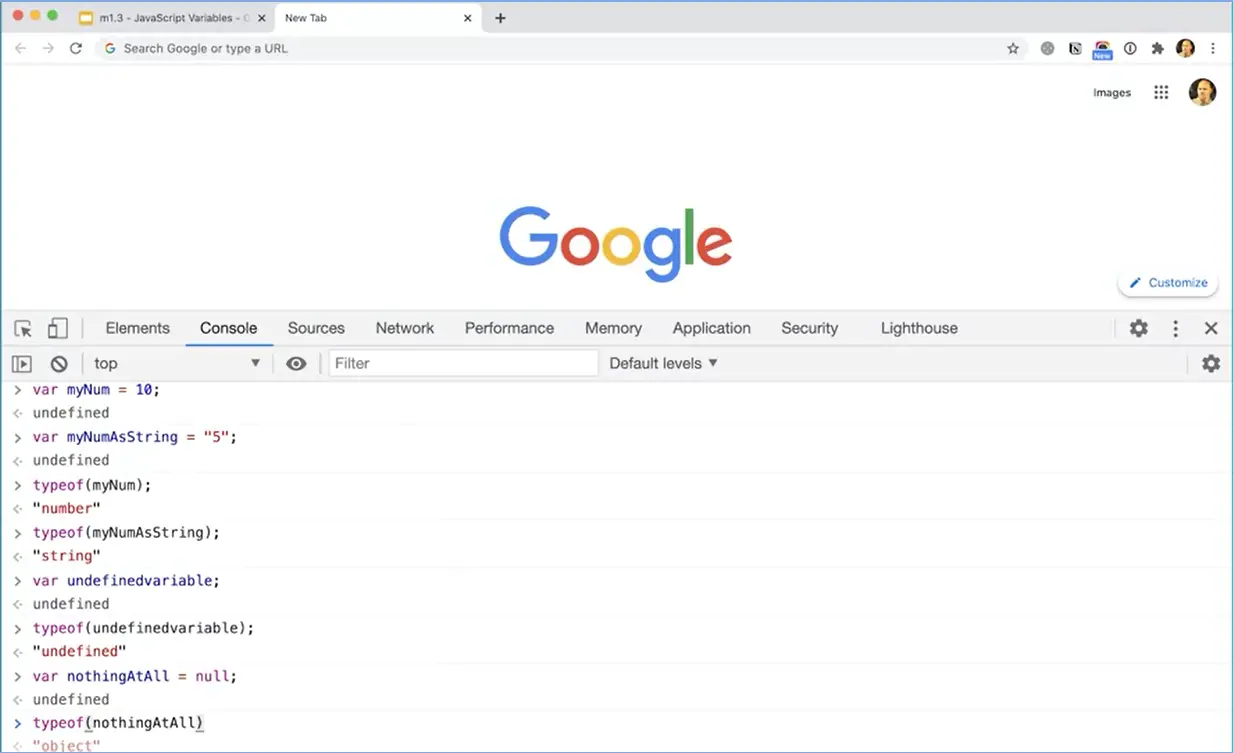
Then I'm going to make another variable, var, myNumAsString. I'm going to make a variable there and we'll call it five. But that variable again is a string. Now it's important to note that even though JavaScript is loosely typed, it doesn't mean that variables don't have a type. If I do typed, which is a method that allows me to pass in a variable like myNum. It'll tell me that it is in fact a number. Whereas if I do typeof myNumAsString, I can actually pick it from the list here so I don't have to type the whole thing. It'll tell me that's a string.
If I make a variable, var undefinedvariable, and leave it empty, so there's nothing in here. I could do typeof undefinedvariable to get my variable here. You'll see that I get undefined. Or I could do var nothingAtAll and assign it null, and I could do typeof nothingAtAll, and I get object, so that's kind of interesting. These are all very different variables with different values. That's an important thing to understand about JavaScript, but they do have type associated with them.
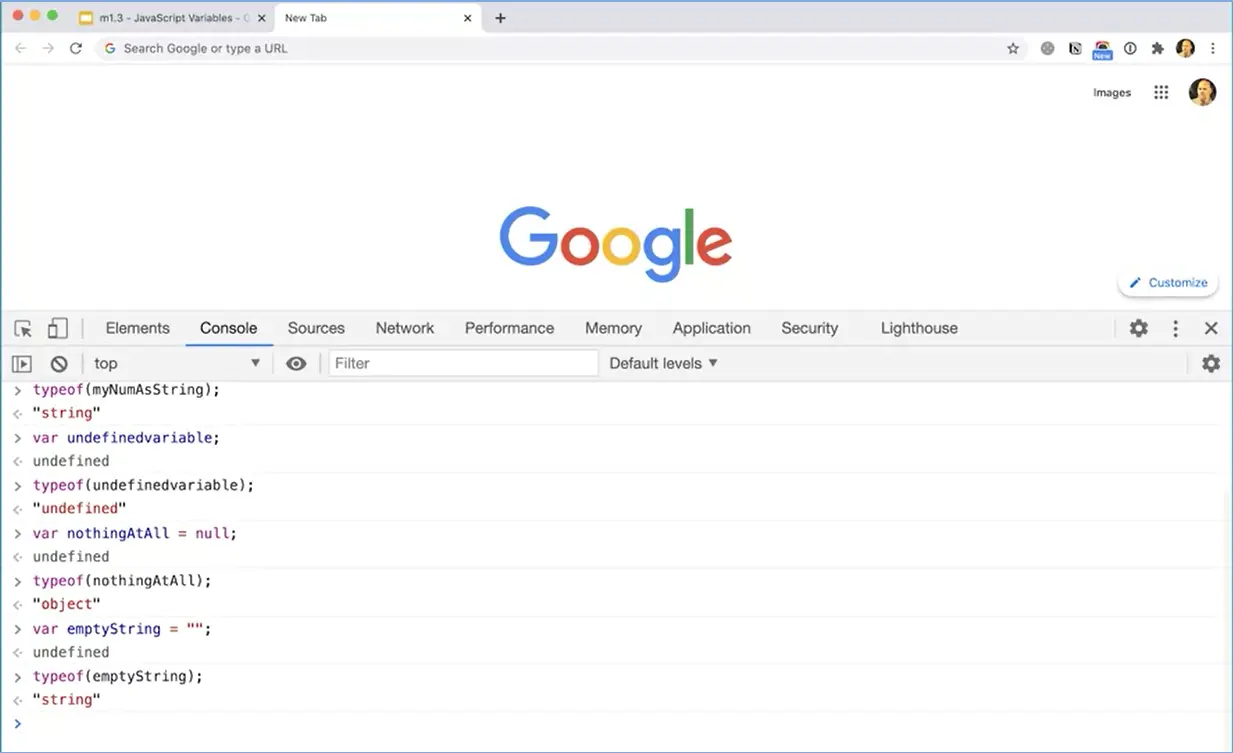
Let's try one more. I'm going to make another variable var emptyString. I'm going to assign it a couple of quotes, and if I do typeof emptyString, you'll see even though there's nothing in there, there's nothing really assigned to this variable. The fact that I put a pair of quotes there means that it is in fact a string. It's also kind of important to note that I could use single quotes or double quotes in JavaScript.
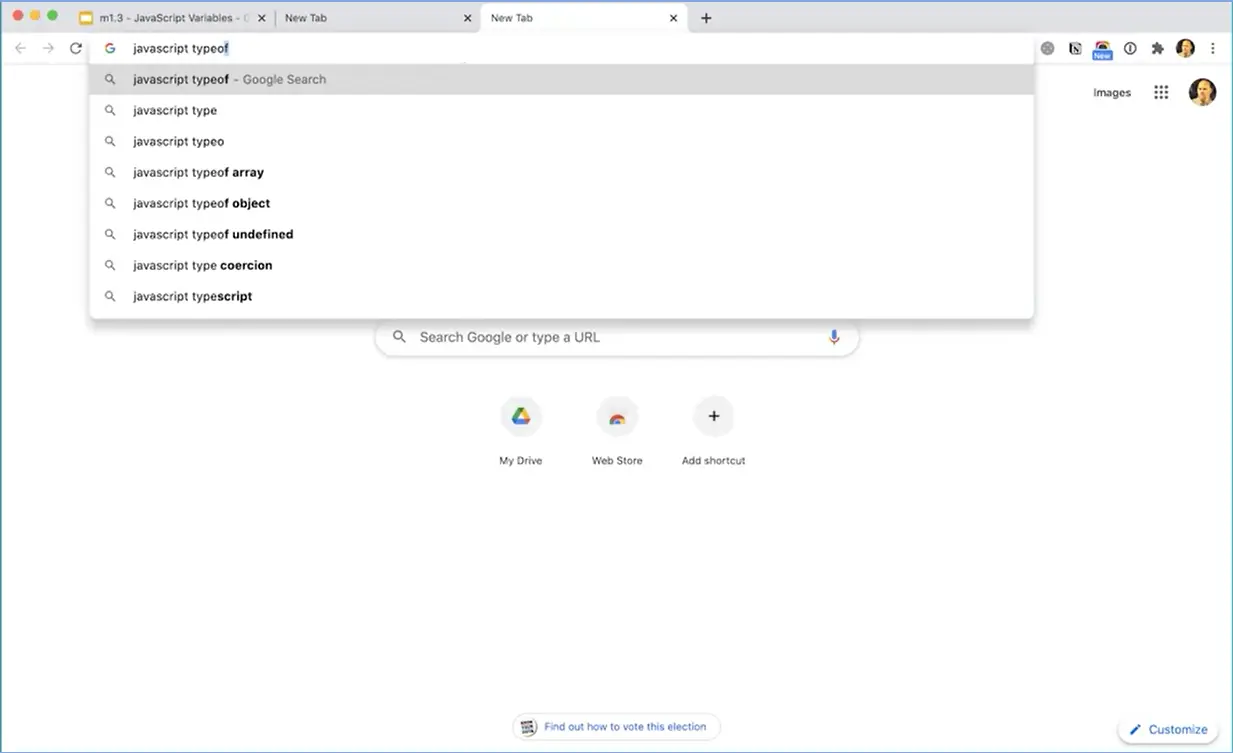
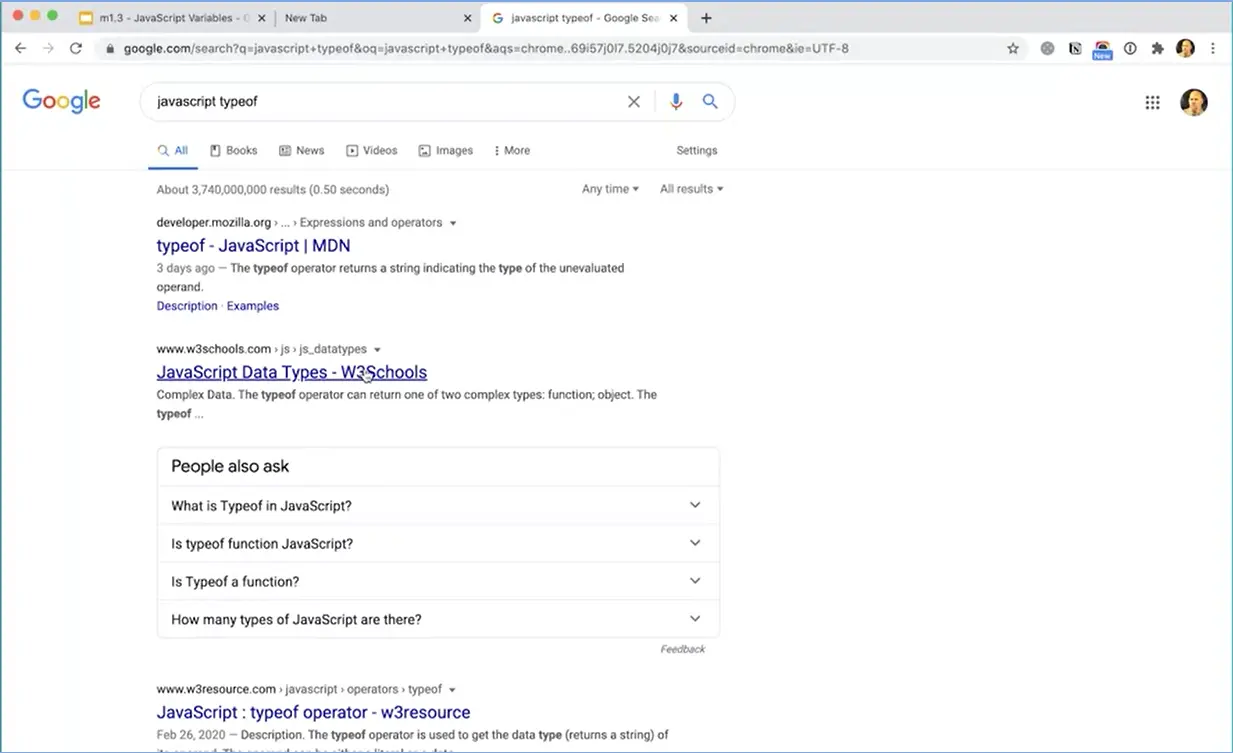
Now if you want to find out more about the type of method, you could come over here and just Google JavaScript typeof. The MDN will come up very quickly, if not the first, sometimes you'll get W3Schools. The MDN, which is the Mozilla Developer Network, is the definitive resource for web technologies such as HTML and CSS and will give you a lot of information about different methods and different things you can use.
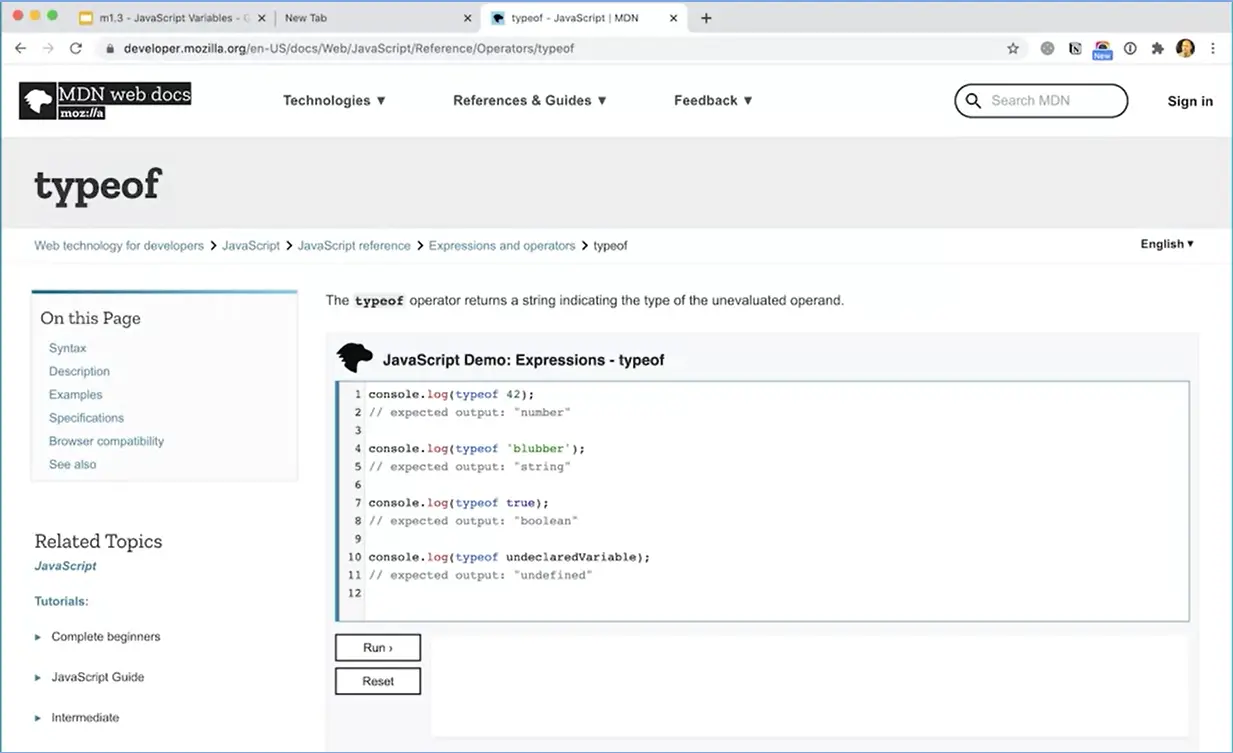
We'll be referring a lot to the MDN throughout this course, sometimes the W3Schools website as well, but the MDN really is sort of the definitive resource, but it can be a little bit confusing at first. Sometimes the W3Schools website is a little bit easier to understand, but the MDN is very thorough. That gives us a very basic start at creating some variables that can hold different pieces of data. At this point, you're probably wondering yeah, so what? But remember that as we're learning a language, right now we're just learning the alphabet and the letters by themselves don't really do all that much. It's not until you start putting them together to form words they can start to have meaning.
We'll be working on some more of these very basic elements of JavaScript, but then pretty quickly we're going to be getting into more interesting aspects of the language, and you'll be creating more interesting little programs that will actually do things on web pages and on websites.
JavaScript arrays.
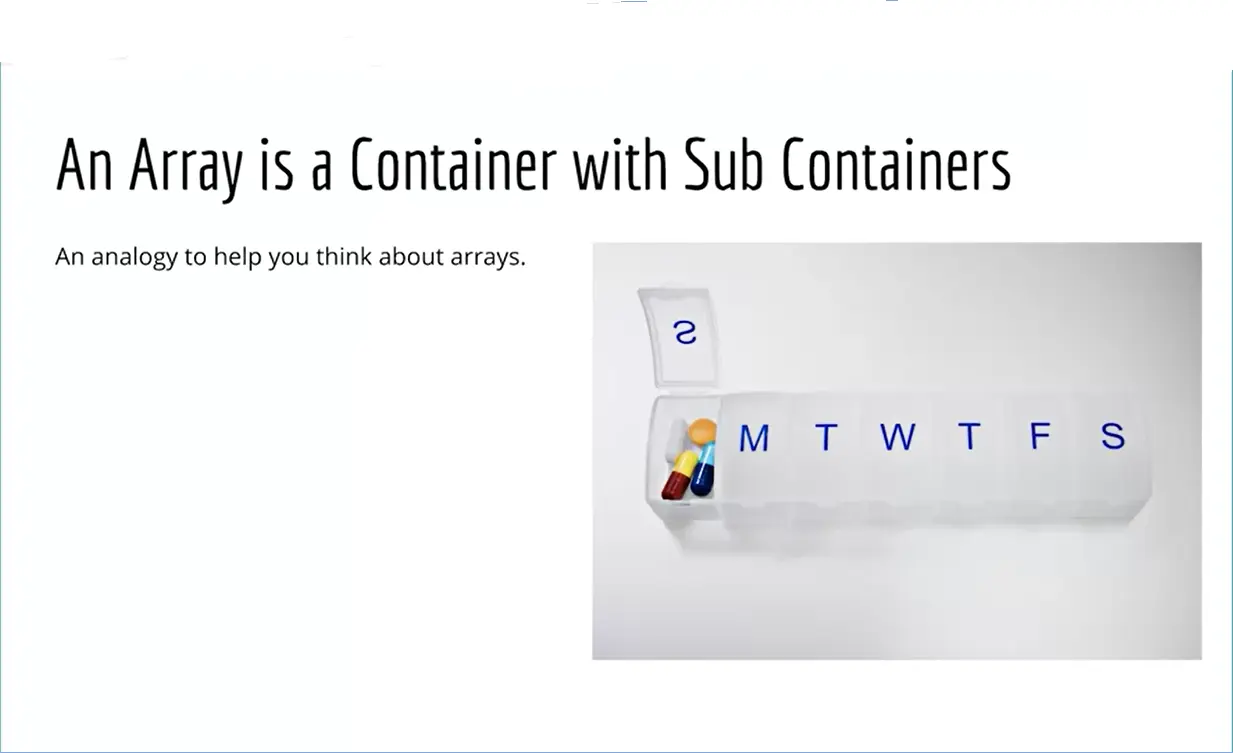
An array is really just a container with sub-containers and it's the next piece of the puzzle that we need to talk about in terms of JavaScript. We talked about variables, and an array is just another type of variable. But instead of holding one piece of data, it can hold multiple pieces of data. Think of it like a pillbox. Perhaps you or a friend or relative has to take medications each day and perhaps they have a box that looks like the image here on your screen where you have different containers that are going to hold different pills for the week. Frequently in JavaScript, we have to deal with groups of things.
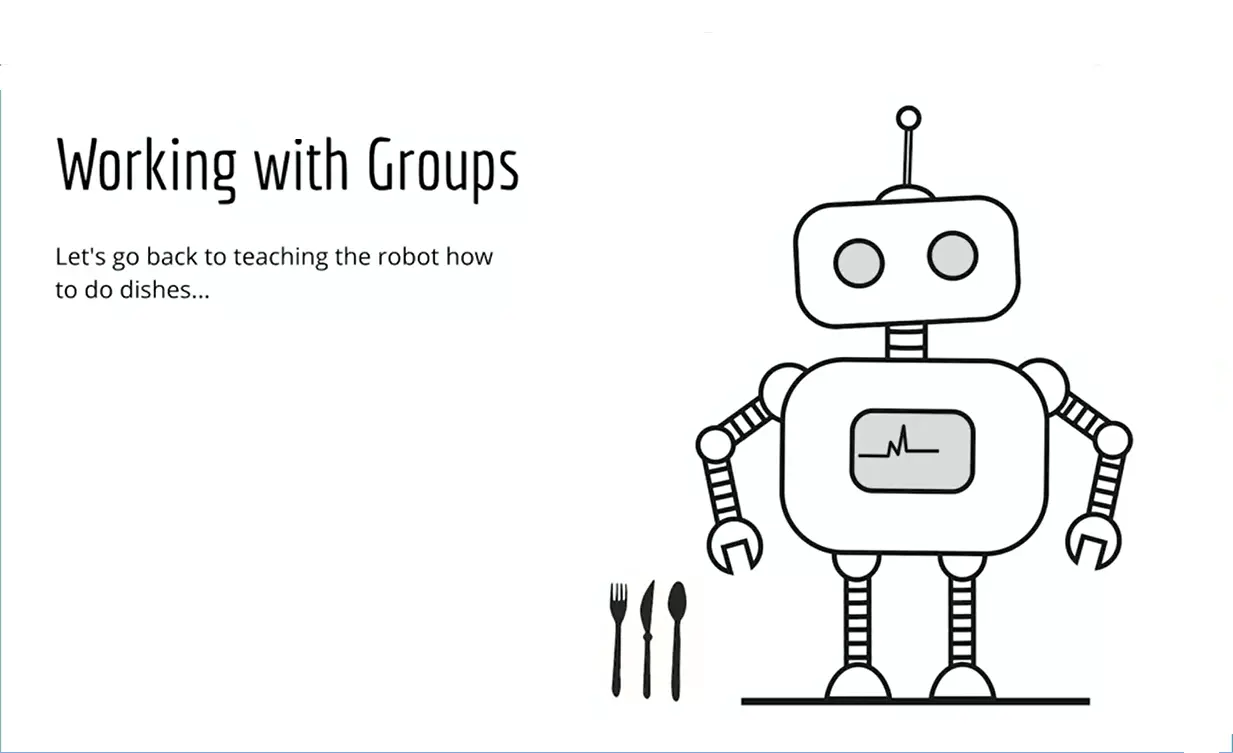
If we go back to our robot analogy, if we're teaching our robot how to wash the dishes, perhaps glasses need to be handled in a certain way or perhaps plates need to be handled in a certain way. Then when it comes to working with the silverware, the silverware needs to be handled in a certain way, but then we've got a subgroup of spoons, and knives, and forks, and maybe other pieces of silverware. That's a group within a group. The analogy that works best for that is thinking about groups of things with arrays.
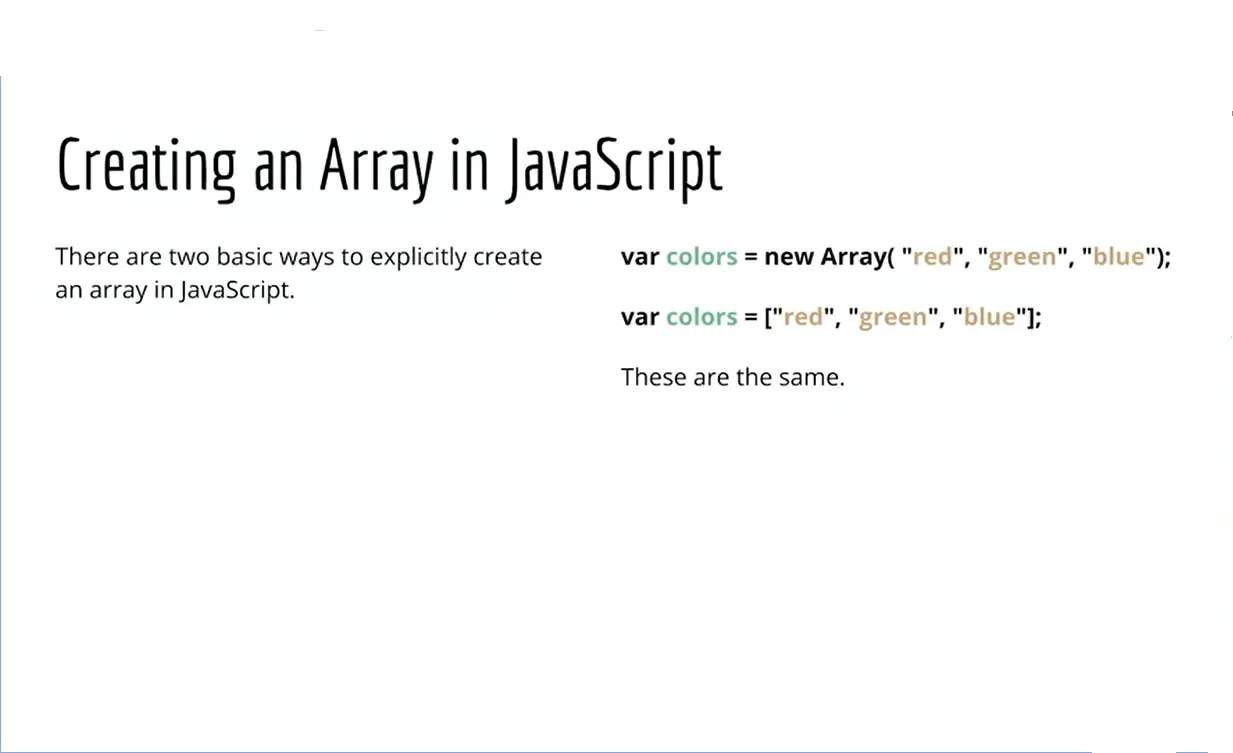
Let's take a look at what that looks like. In JavaScript, we can create a new array in a couple of different ways. We can use the new keyword with array and parentheses as shown here or we can create it more explicitly using the square brackets as shown below on the right here. Let's actually do this over the console. I think it's helpful to actually see us create these elements.
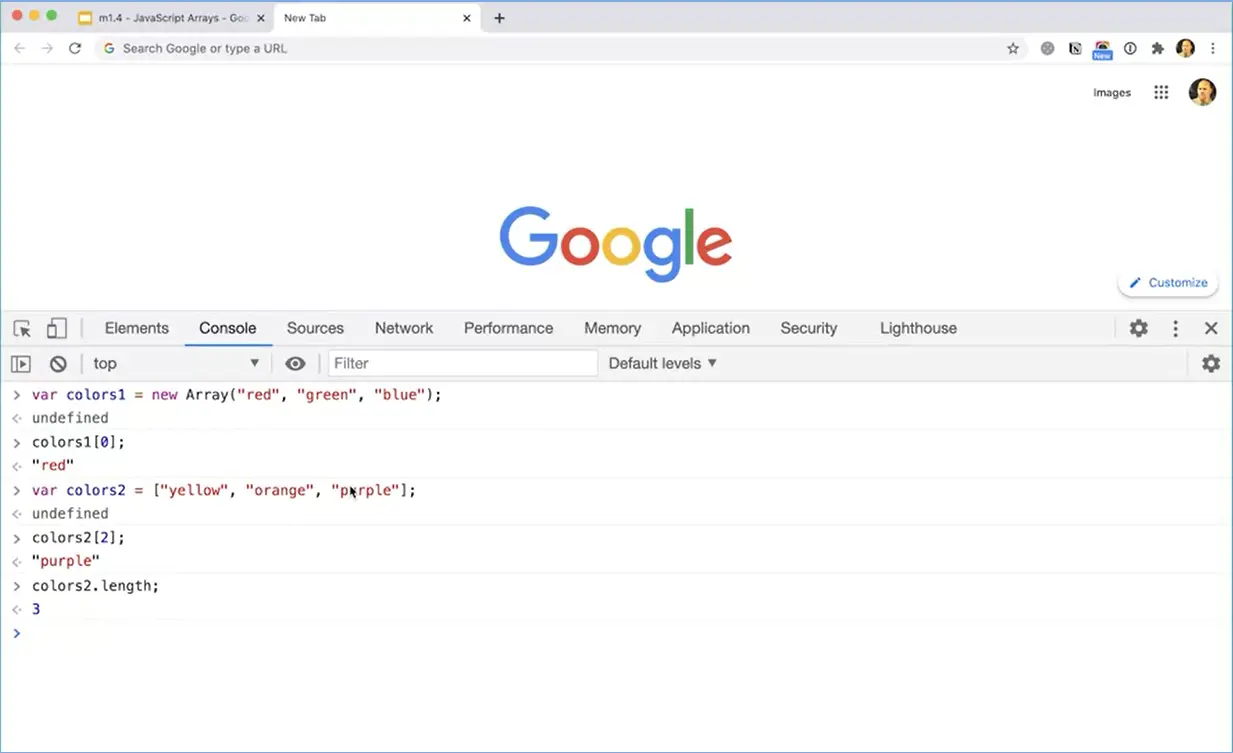
I'm going to come over here and make a new tab, and choose Inspect, right-click and choose Inspect. Then I'm going to run the console here, clear out this area. Then I'm going to make an array, var. I'm going to call it colors one equals new array. Then in here, in quotes, I'm going to put some colors, "red," "green," "blue." Now I've created that array. I can access those colors by typing colors1[0]. That will get me the first color in that array. That'll give me the red or I could make an array more explicitly. This is the more common way that you'll see it done is var colors 2 equals square bracket and then "yellow," "orange," "purple," square bracket, semicolon. Now I've created a second array and I could do colors 2 square bracket 2. That will get me the third element in the array.
Now, square bracket two gets me the third element. Arrays are zero-indexed. The length of the array is 3, colors2.length. Because there are three elements in the array. It's just they're numbered 0, 1, and 2. Normally, we start counting with 1 first, 1, 2, 3. But in programming, frequently we start counting with 0 first, 0, 1, 2, but the length of the array is 3. That's an important distinction and something to be aware of.
Unlike a pill box, which really can't hold much more than just pills, you can put anything into an array in JavaScript.
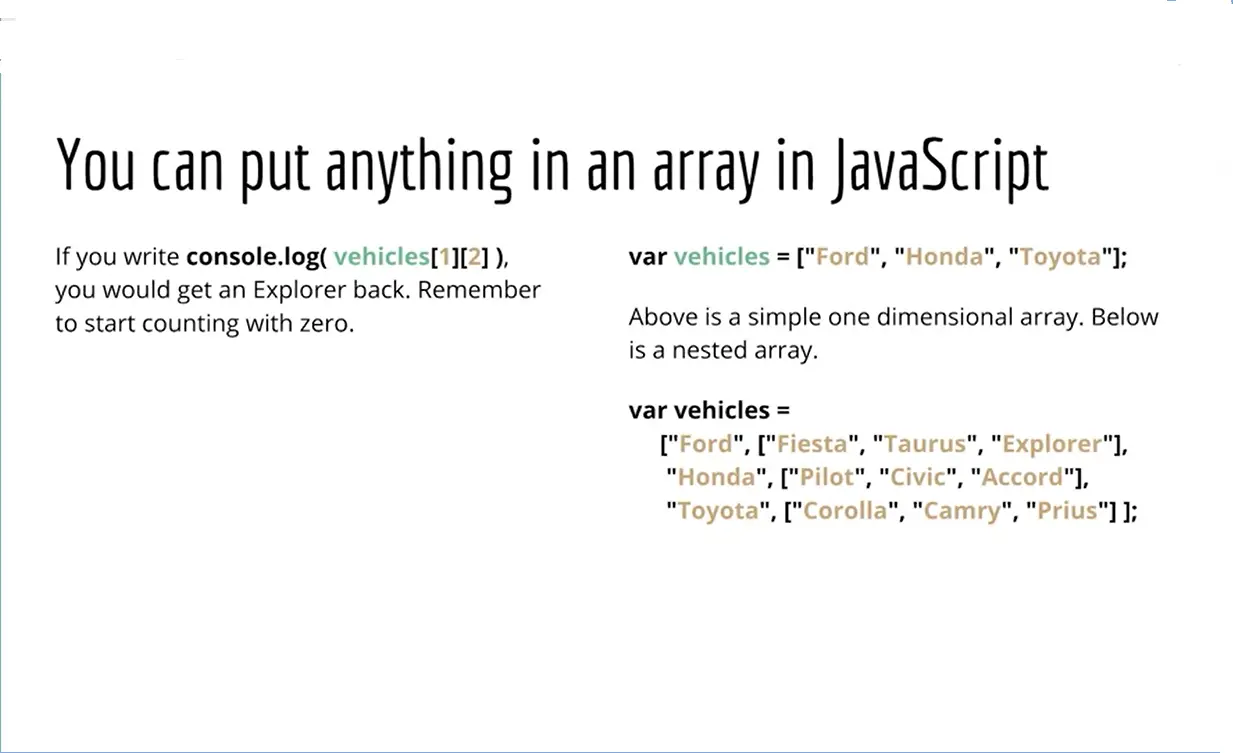
You can even put in an array in array. So you think about a pillbox with a sub container with even smaller divisions in it. So let's take a look at what that looks like.
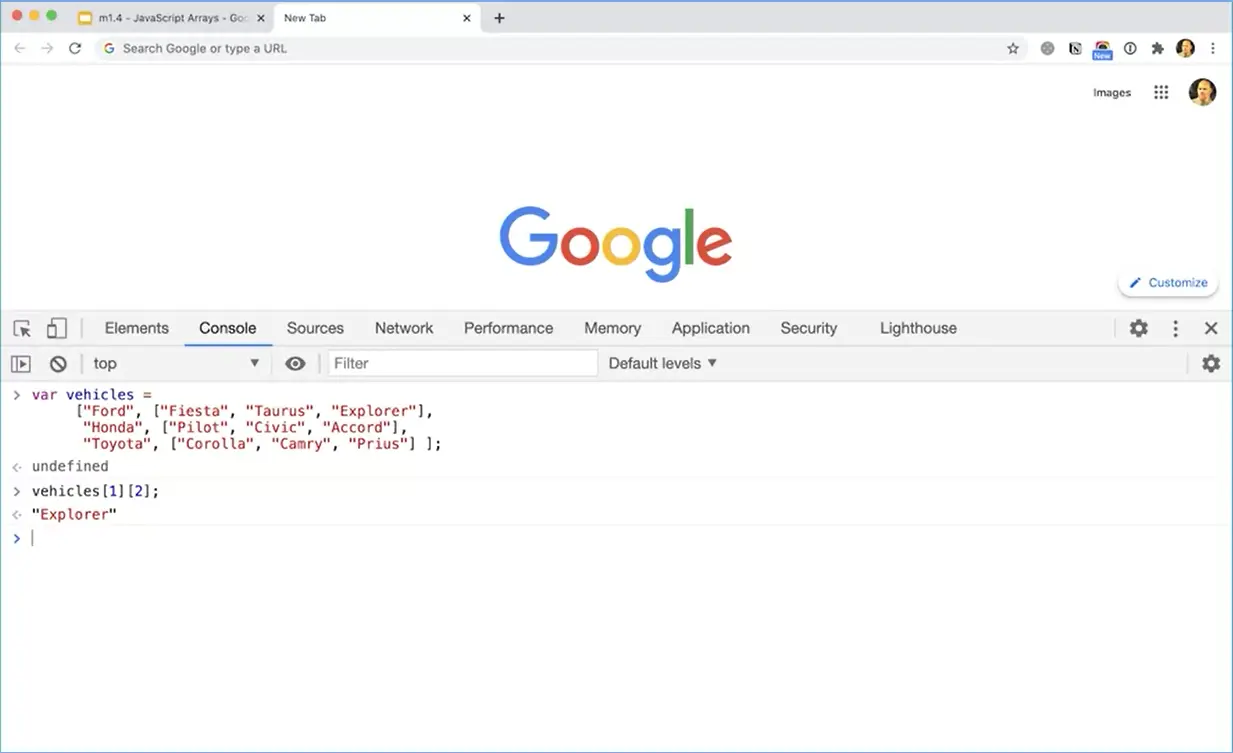
Let me switch back over to my tab here. And I'm going to clear out this tab by clicking the clear button there. And I'm just going to paste this in but you might want to type it, it's a little bit hard to type and get right but it's worth trying if you can, but I'm going to paste this vehicles array in here. And now if I do, if I want to access an element from this array I could do vehicles [1]. That's going to go and get the line that starts with which element, there we go. And then so it's going to give me this because this is zero, and then this is one, right? So that's going to get me that into that sub array. You can see it sort of showing up down there.
And then if I do [2], that's going to get me the Explorer element in that sub array. So you can do things like that with arrays. That's kind of complicated. And you're not probably going to be doing arrays inside of arrays to start off with. But it's an important thing to understand about arrays is they're very flexible tools for you can use to hold groups of data, and that's very useful.
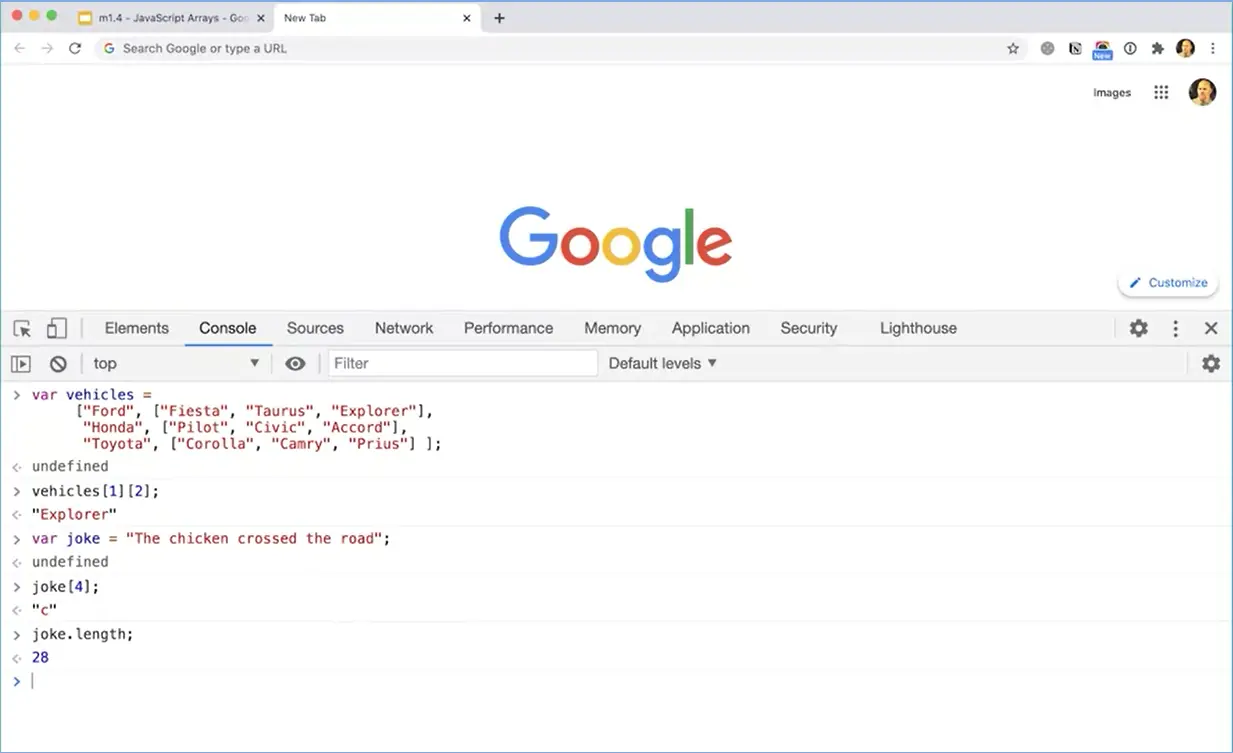
Another thing that's interesting is that a regular variable holding a string can be treated like an array in JavaScript. So if I make a variable, var joke = "The chicken crossed the road". Now I've got a variable called joke, but I can actually treat it like an array. I can do joke [4], and that's going to get me the c in chicken because zero, one, two, three, four is going to give me that c in chicken. Or I could do joke.length and it'll tell me that there are 28 characters in that string. So that's kind of an interesting thing to understand about arrays as well.
Let's do a little bit of practice with arrays, so I can make a new variable bar Animals and assign an array.
![Define array; var animals = ['cat', 'dog', 'chicken']; Define array; var animals = ['cat', 'dog', 'chicken'];.](./images/webp/image083.webp?raw=true)
Cat, dog, chicken and all of those animals will be in the array. So if I just do animals. You'll see that I get back an array with three elements, cat, dog and chicken. Now, arrays come with certain array methods that you can do to arrays specifically, so if I do animals.
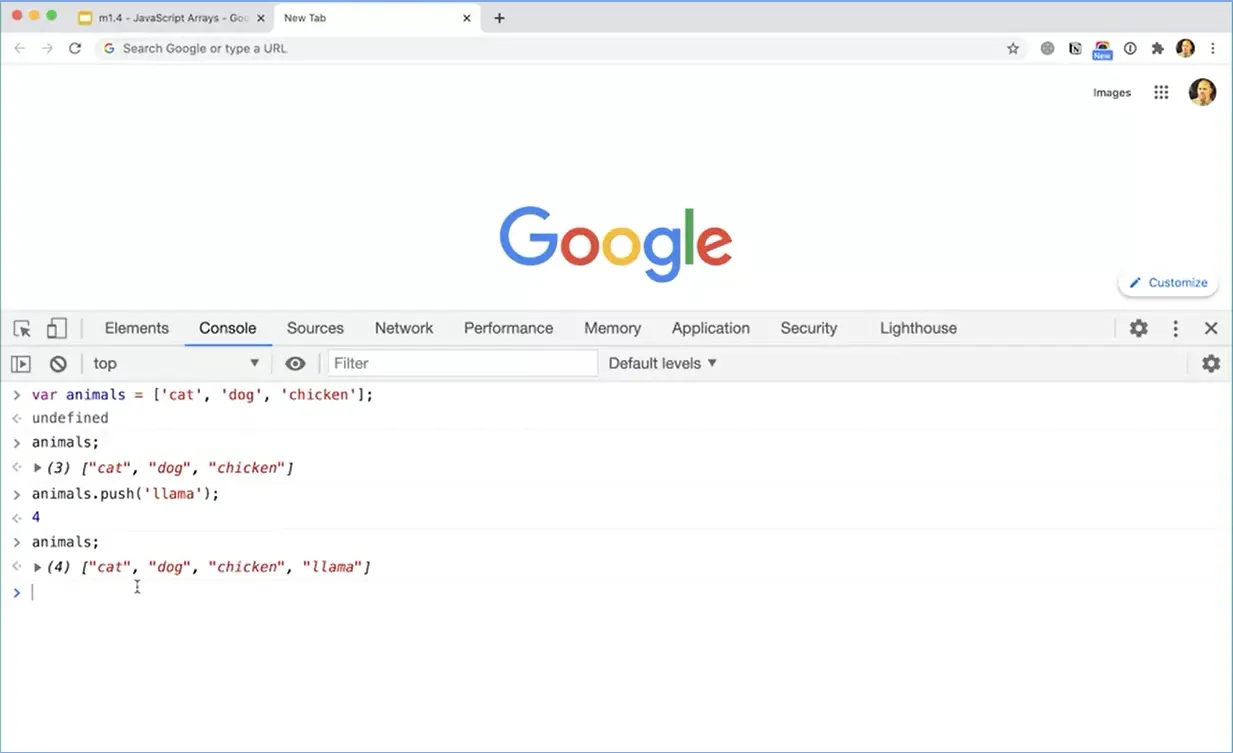
That push llama, now there are four elements in the animals array. The cat, dog, chicken and the llama are all in the array.
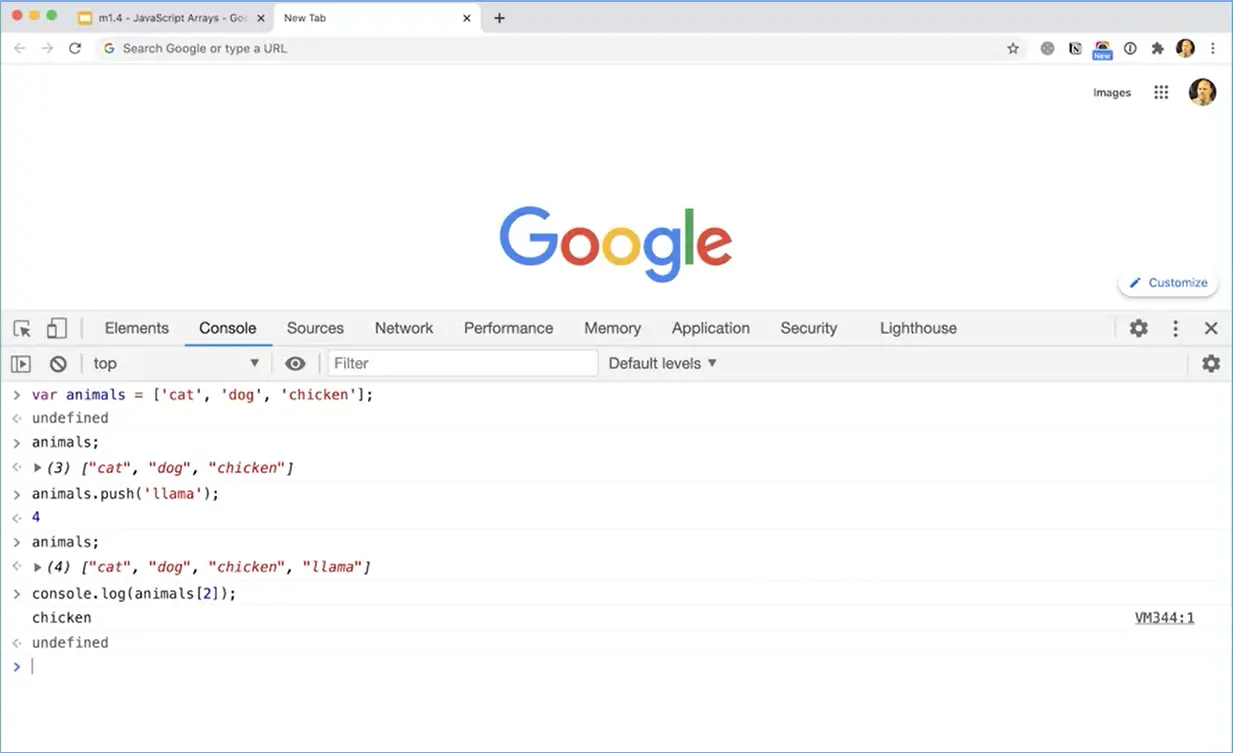
Remember, we can use the console log method we don't really need to hear in the console, but we will when we go to using file shortly. So it's worth remembering that we can do console dot log. Parentheses, that's a parentheses, animals. Square bracket, one or two. Let's do two since I put a two in their square bracket, and then the parentheses, console log animals square bracket two. And then if I press return there, it'll give me the chicken. I don't really need to use the console log method here in the console. But you can, and it's worth remembering that you can do that.
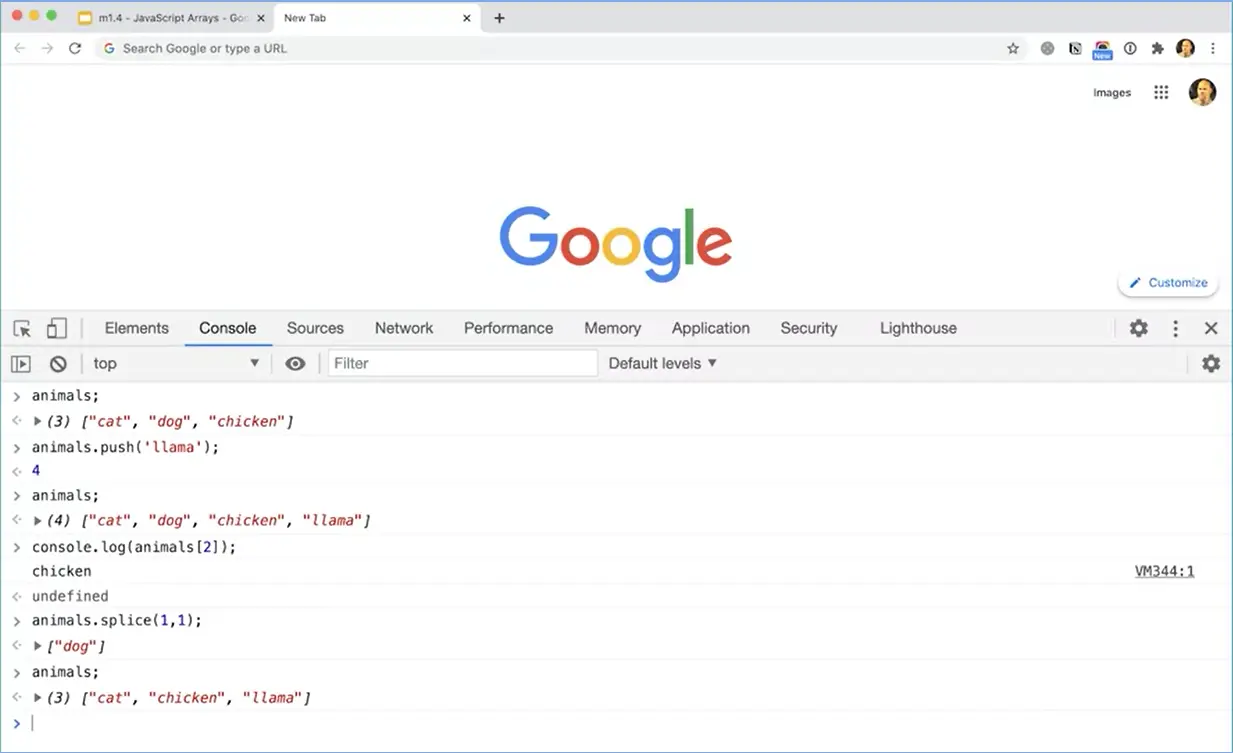
Now, what if I wanted to remove an element from the array or we could do animals that splice (1, 1) and that will take the dog out of the array. So now, if I do animals, you can see it's got the cat, chicken, and the lama,but not the dog.
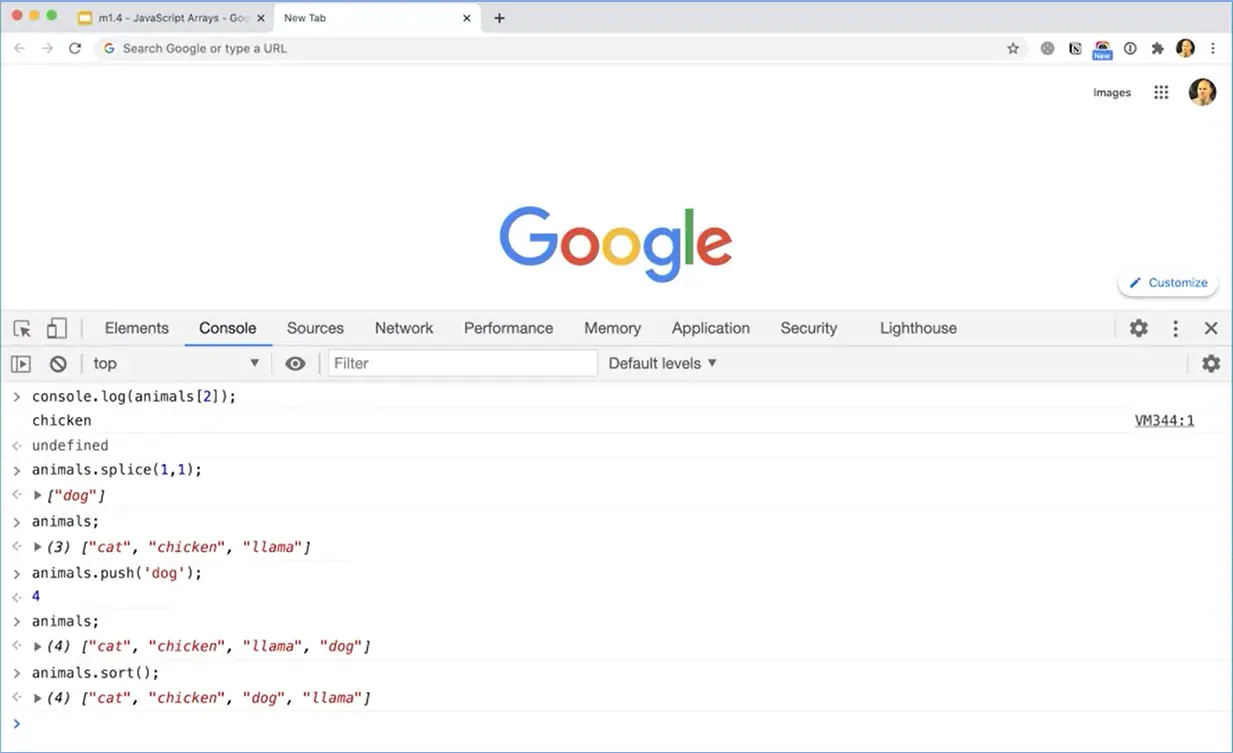
And I could do push and push the dog back into the array. Let's do that, animals don't push, dog and now the dog is back in the array. Another array method is sort, animals. dot sort. And notice now that the order of the animals in the array has changed slightly, so that the dog is in the third position based on alphabetical order. So there are a lot of array methods that you can use.
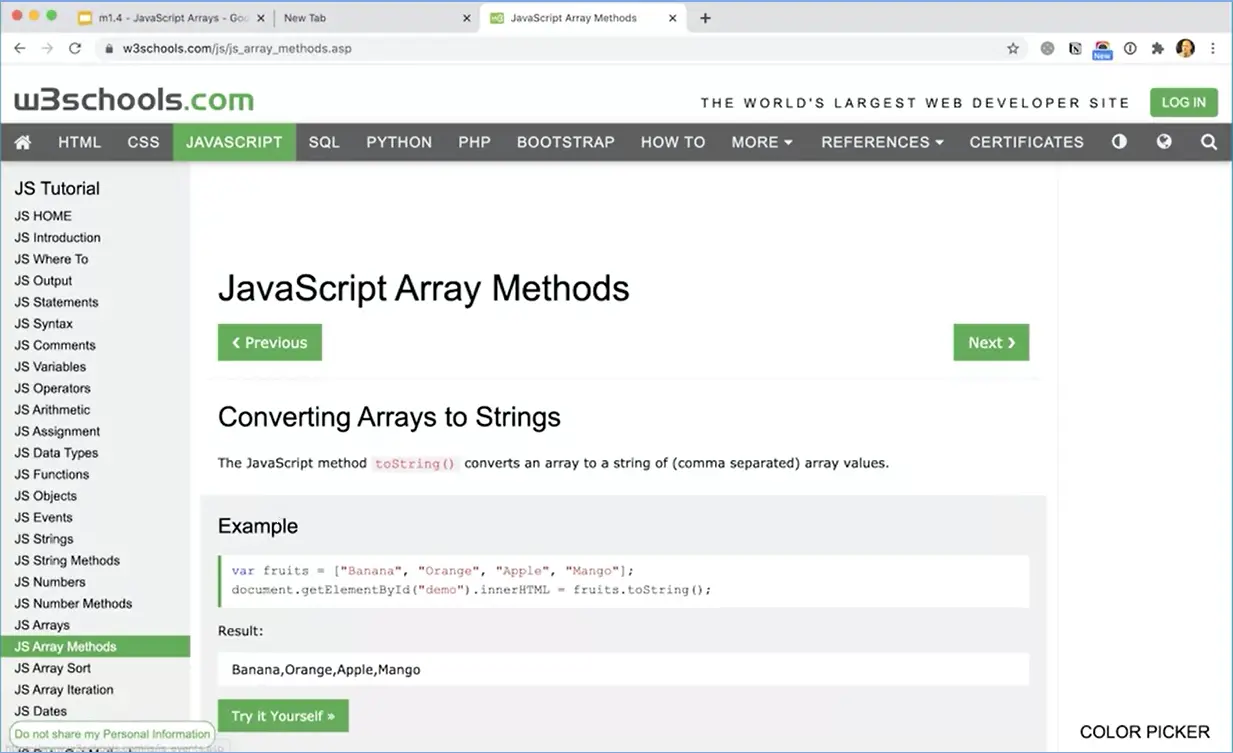
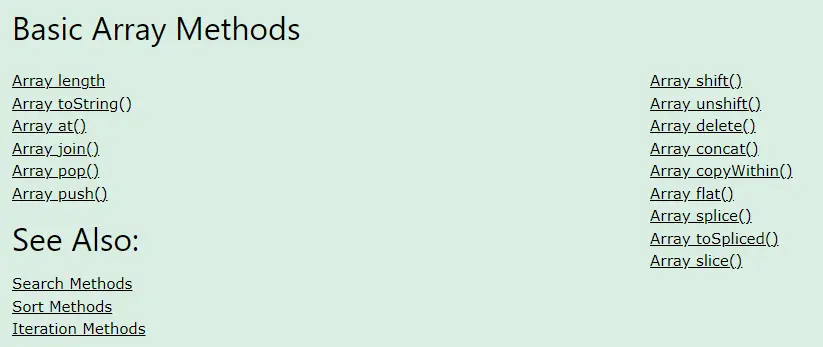
And a really good place to go look at them would be the W3schools.com website or the MDN JavaScript arrays. And here it is here and then they'll have array methods here. There are all kinds of examples of array methods that you can use. You can join, we can do all kinds of things. And it's worth exploring some of the different methods and trying them out on your own with just messing around with arrays. And just working in the console and getting used to how this works, because that's a really great way of learning sort of the basics of JavaScript.
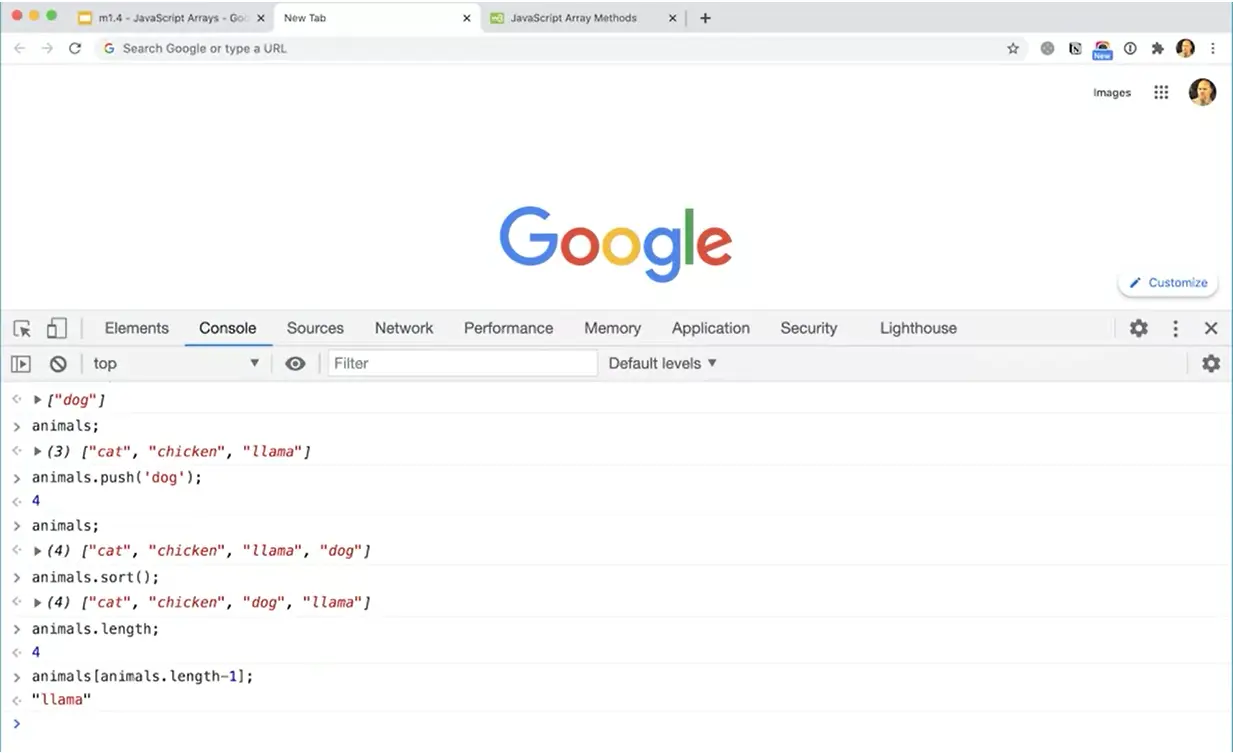
Here's a challenge for you, we have an array for animals here, and we can see that the length of the array is four but you could also find out by doing animals dot length and you'll get four. Now, what if you didn't know how long the array was? How could you always get the last element in the array? What would be the code that I could type in here that would always give me the final element in the array no matter how long it is. animals[animals.length-1]; Here's what I would do. I would do animals, then square bracket, then I want to get the length, animals dot length but I need to subtract one because the length of the array is four. Actually the last element is element number three and you'll see that that will in fact get me the Llama at the very end.
So I'm going into my animals array and what I'm passing in is animals[animals.length-1]; animals dot length, which will be a 4-1 which gets me this element here. Zero, one, two three and that may seem a little counterintuitive to begin with, but you'll get used to working with arrays and with the lengths of arrays and with different ways of getting elements out of arrays.
Here are resources related to these lessons:
Welcome to the second module. In this module, we’ll get further into the basics of the JavaScript language. There are certain things that you’ll find in many modern programming languages, such as control structures, such as being able to figure out if something is true or how to handle something in a loop and these kinds of things. We’ll be doing that sort of work in this second module. There’s a lot of practice and there’s a lot of opportunities along the way to get used to the JavaScript syntax. I encourage you to do as much of that as you possibly can.

In this lesson, we’re going to be talking about working with the code editor and I’m going to be specifically looking at Visual Studio Code, which I have pictured here on this slide (see below). But I also have it open over here in this tab and you can go down the download Visual Studio Code for Mac or Windows for free and it’s a great code editor if you prefer to use a different code editor such as Atom or Sublime Text or something else. That’s fine too. As long as it’s got great features for editing code and it’s not a word processor like Microsoft Word. But I’ll be using Visual Studio Code throughout this course, so it might be helpful for you to use that as well.
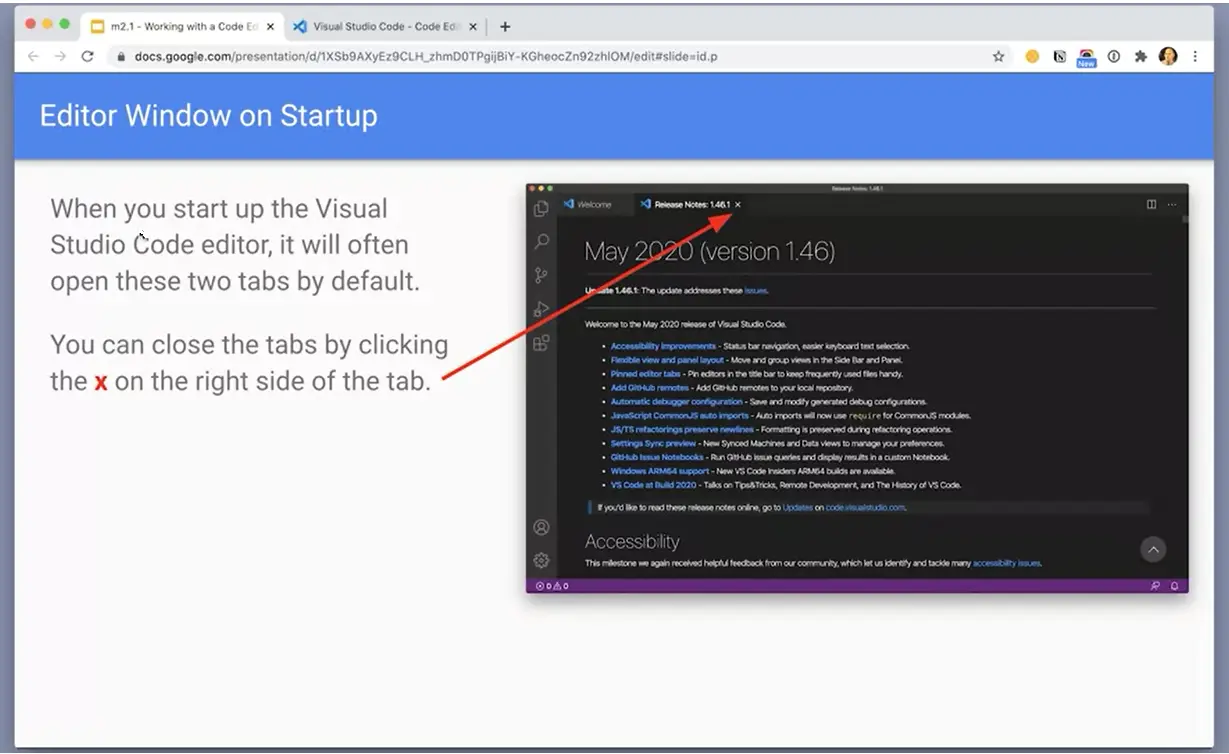
Sometimes when you open Visual Studio Code, you’ll get these tabs open with the Welcome or with new release notes if they’ve come out with a new version and you can just close those tabs by clicking on the “X”. You’ll notice I have Visual Studio Code open in running here, but I don’t have any of those editors open and I can make a new file by just going and choosing a new file, and that creates a new file here.
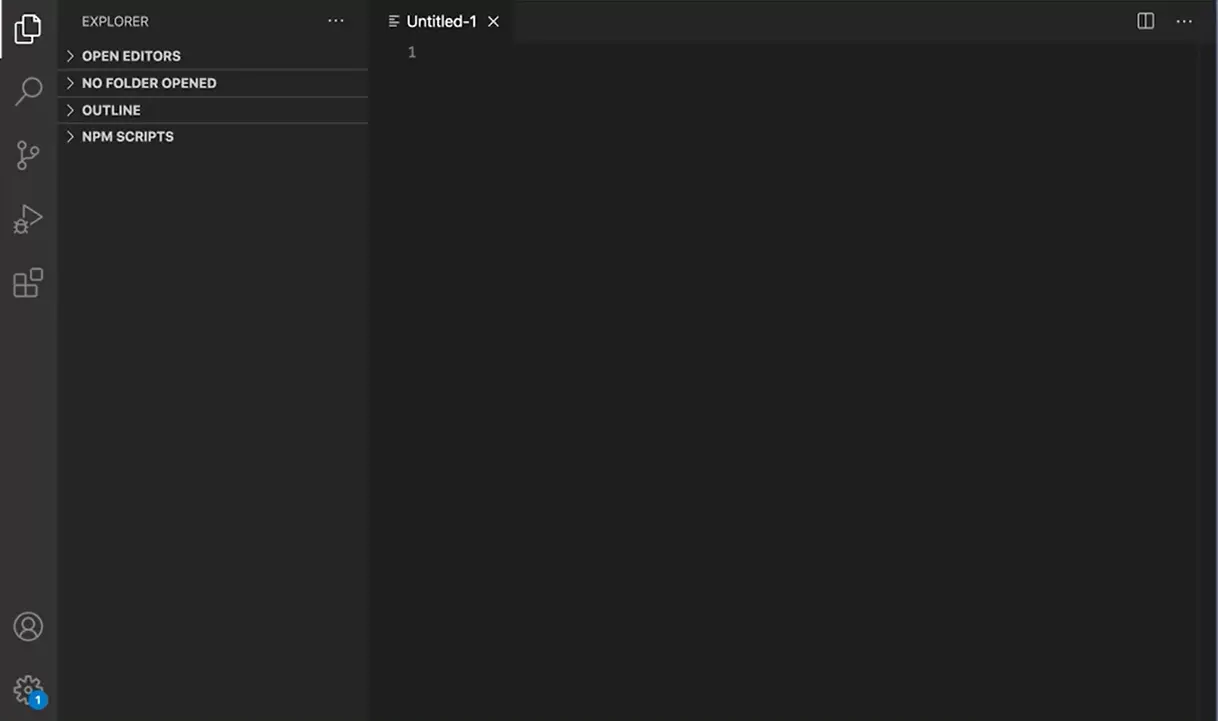
It’s important with Visual Studio Code that before you do anything else, you save your file. That way it knows what type of file you’re working with. I’m going to choose file save as, and I’m going to just save this as “myfile.hml”. I’m going to save an HTML file, to begin with on my desktop. Once I have an HTML file, then I can get the basic HTML structure by holding down “Shift”, pressing an exclamation point, and then pressing “Tab” and that will give me the basic structure for my page.
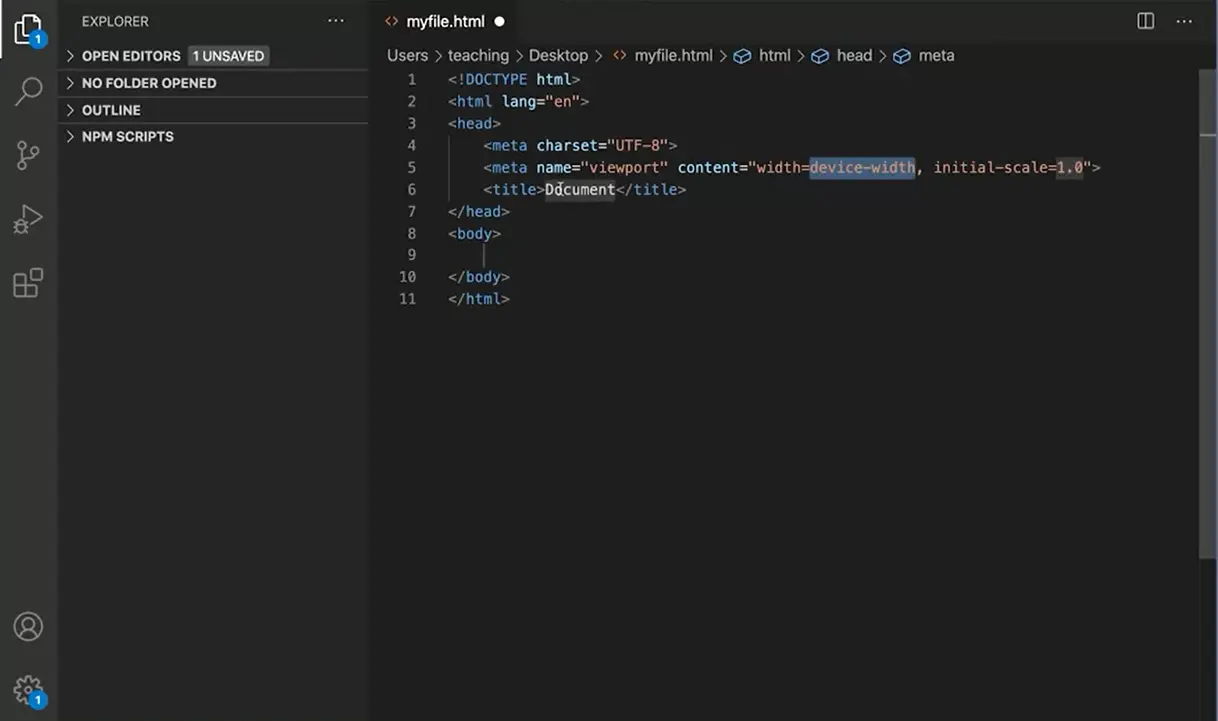
If you take an HTML class, you’ll learn to type the doctype and to type all these tags, we can use the shortcut. Again, what you did to get it, I’ll just type exclamation point and then press “Tab” and then you can come in here and give your document a name, “My File”. The title shows up in the tab in the browser. That’s important. Great. I can save that.
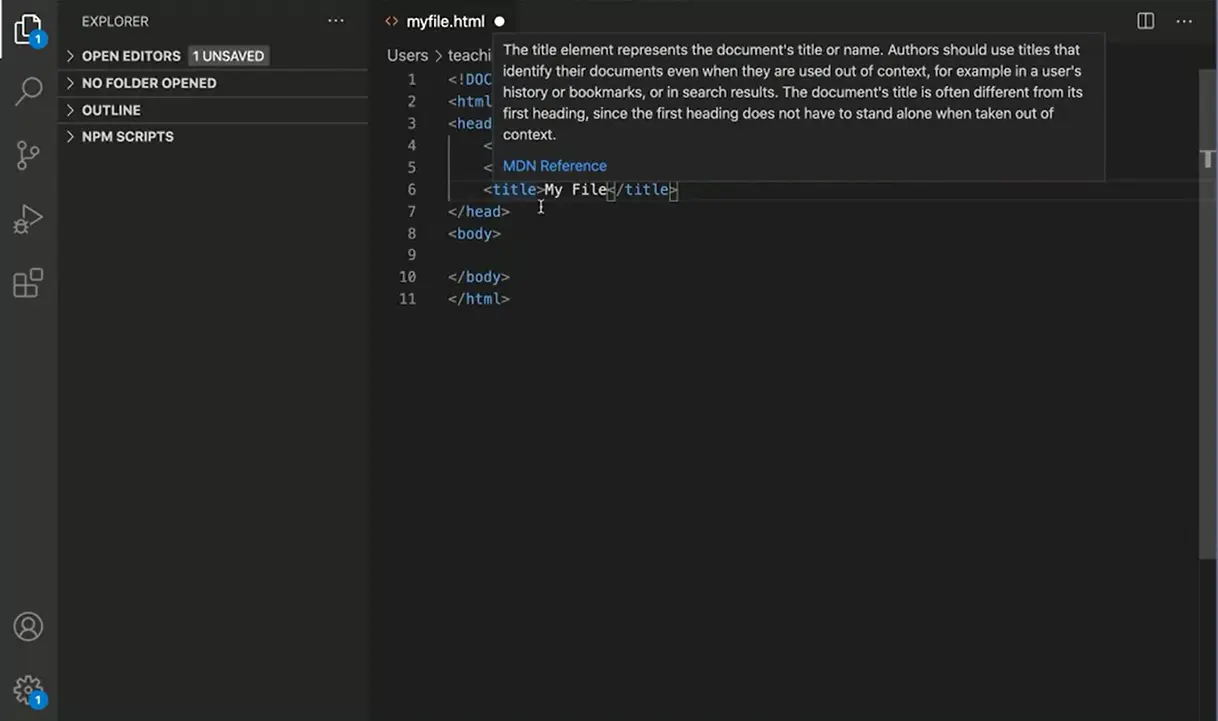
Now, one thing to notice really quickly while we’re here, see this dot up here, that means this file has changed and it has not yet been saved. One of the frequent mistakes I see at the beginning with users getting started with, working with HTML and CSS and JavaScript is they’ll add things to the file and then they’ll forget to save them, and then they’re going to run the file and they realize their changes aren’t showing up, so watch out for that little dot. You can get that to go away by doing “File”, “Save” over here or “Command S”, “Control S” in windows, and then it’ll go back to just the X, which you would use to close that tab and close that window app, and then I can open this back up again by dropping it here and that will open that file back up again. That gets me some basics of getting files opened and working here in Visual Studio Code.
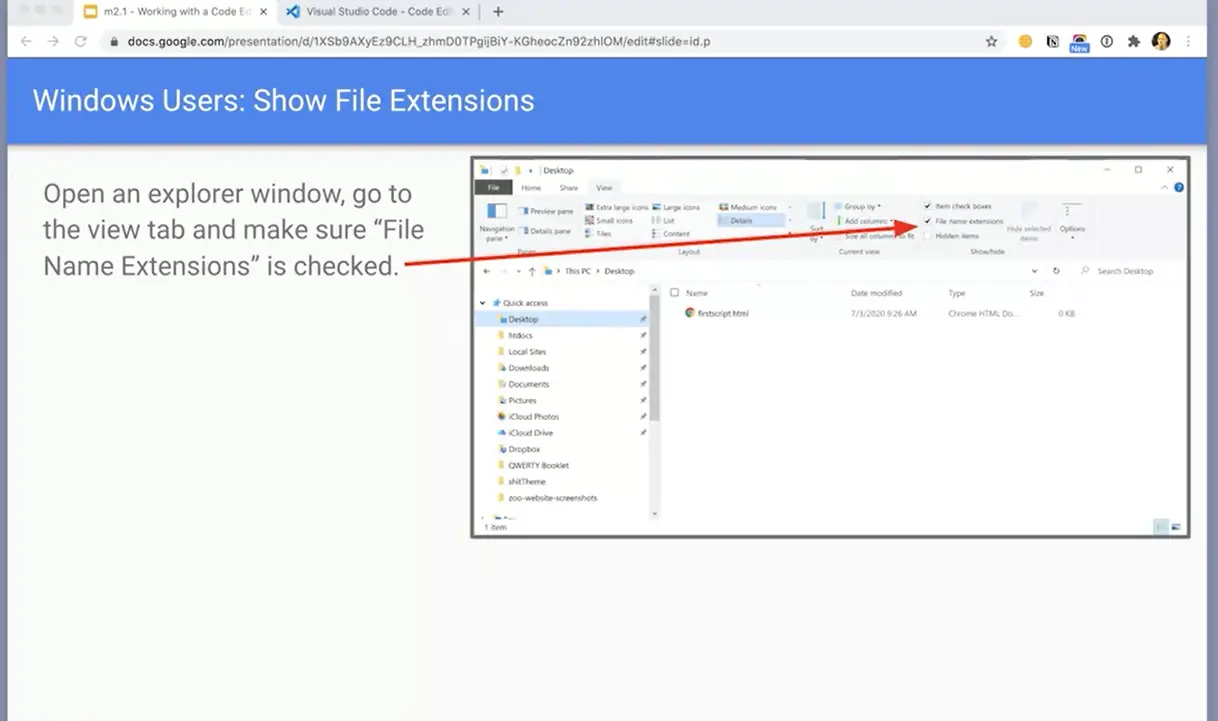
A important note, if you’re on Windows is, open up any Explorer Window. Click on the “View” tab and then go over and verify box is checked in “File name extensions”. That way when you save your files, you’ll see the “.html” file extension, and that’s important. But here I have a screenshot of it so please make sure you do that. Also. Make sure that when you save files, make sure that the filename is always lowercase and never has a space in it so I have “myfile” all as one word here. Do not put spaces in filenames, they cannot be more explicit about that.

I’m back in my code editor. And now, I’m ready to add a script. So let’s add a script to this file. And we can see some JavaScript actually happened here.
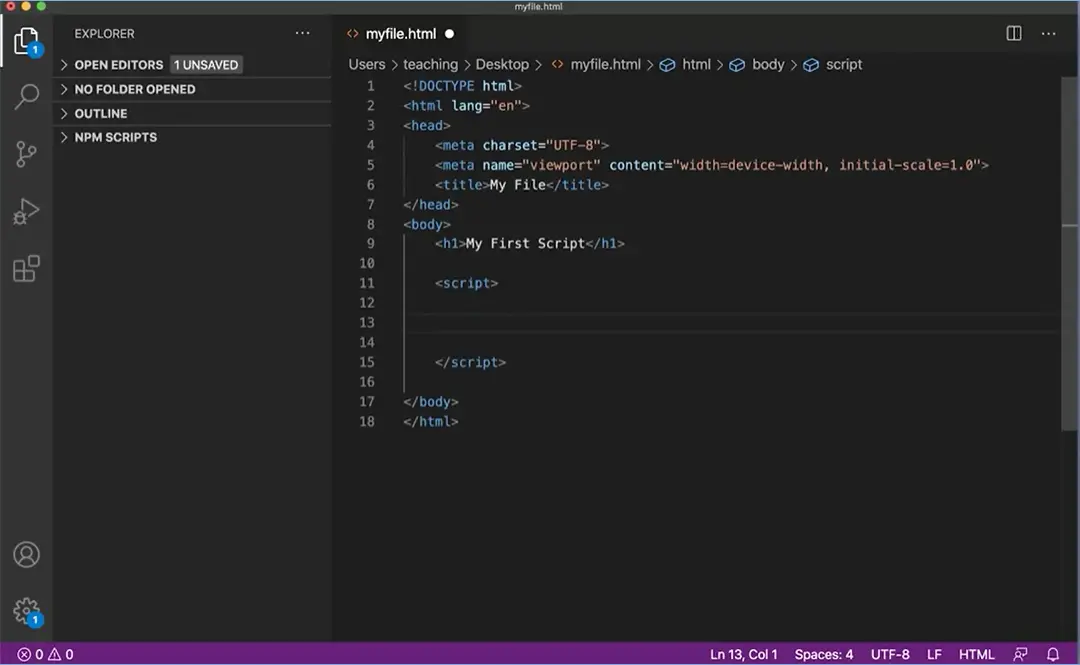
First, I’m going to put some HTML on the page, My First Script. And then you can actually put scripts really anywhere inside this file. Sometimes they go in the head of the page here inside the head tag. Frequently, you’ll see them down here just before the closing body tag. So I’m going to make a script tag. And then it puts the cursor between the two, and I can move that down.
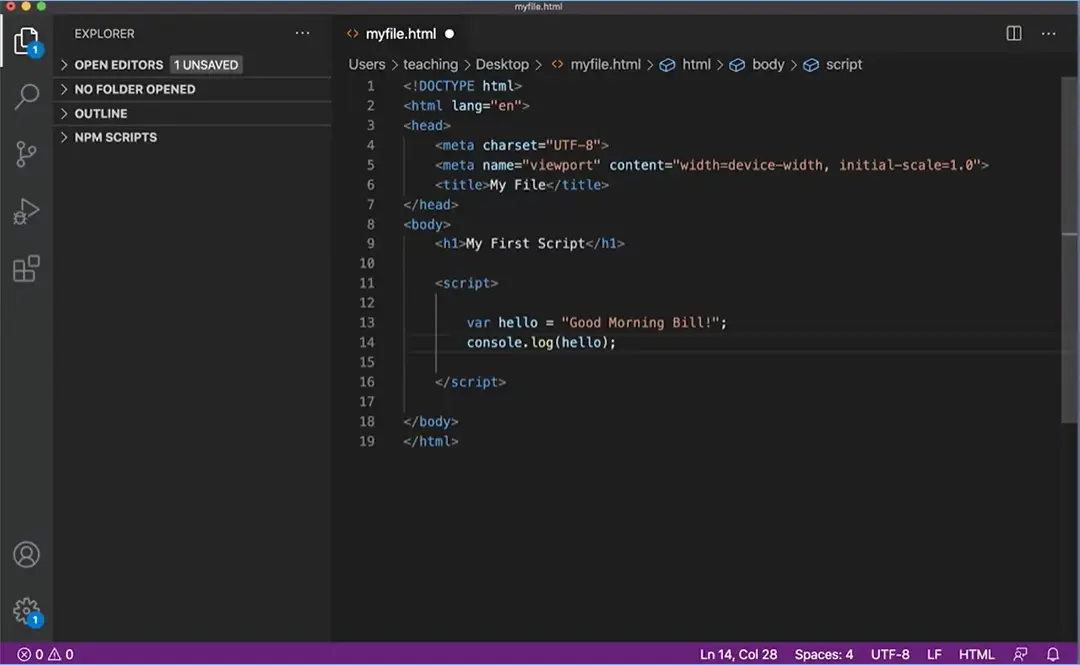
And here I can make a variable, var hello = “Good Morning Bill!”;. And then in order to get it to do something currently what we have to work with is the console. because that’s what I’ve shown you so far in the other videos, we’ll get to other things later. And really pretty soon, but for right now we just have the console. So I can use console.log, remember, we talked about this method before. (hello) to put that variable or really the string associated with that variable into the console. So I can save this file and there’s the data up here, I have to save it. I can save the file and then I can go over to Chrome over here.
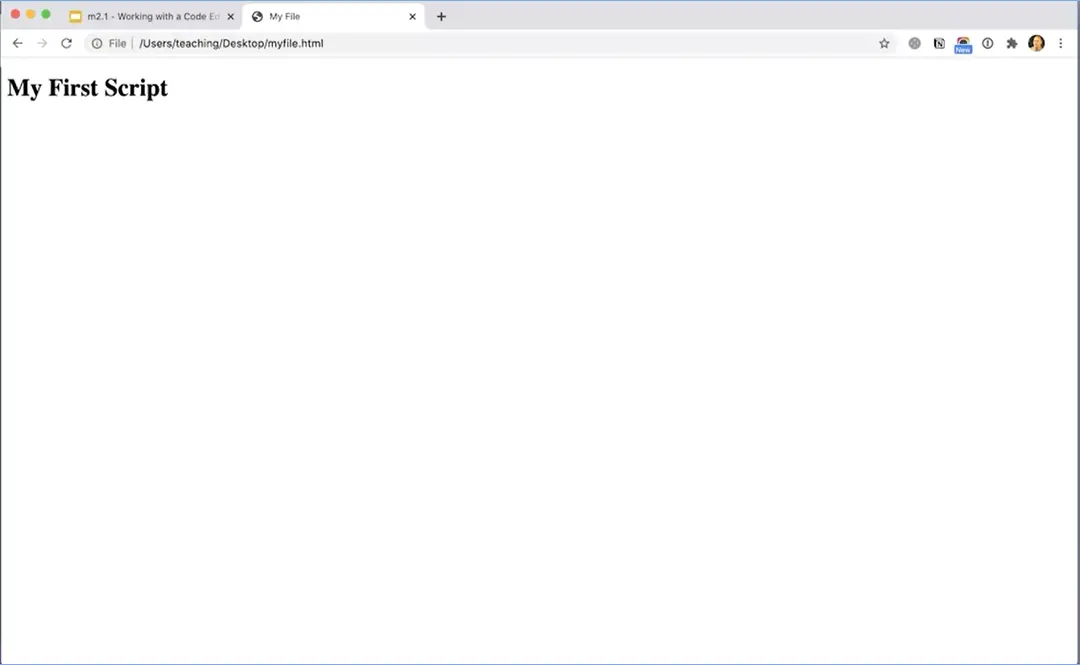
And I can go to File and open, or on Windows, you can do Cmd+O. And then here I am on my desktop and I can open this file. And it comes up and it doesn’t really look like much, it’s just a webpage and we’re not even seeing the script run.
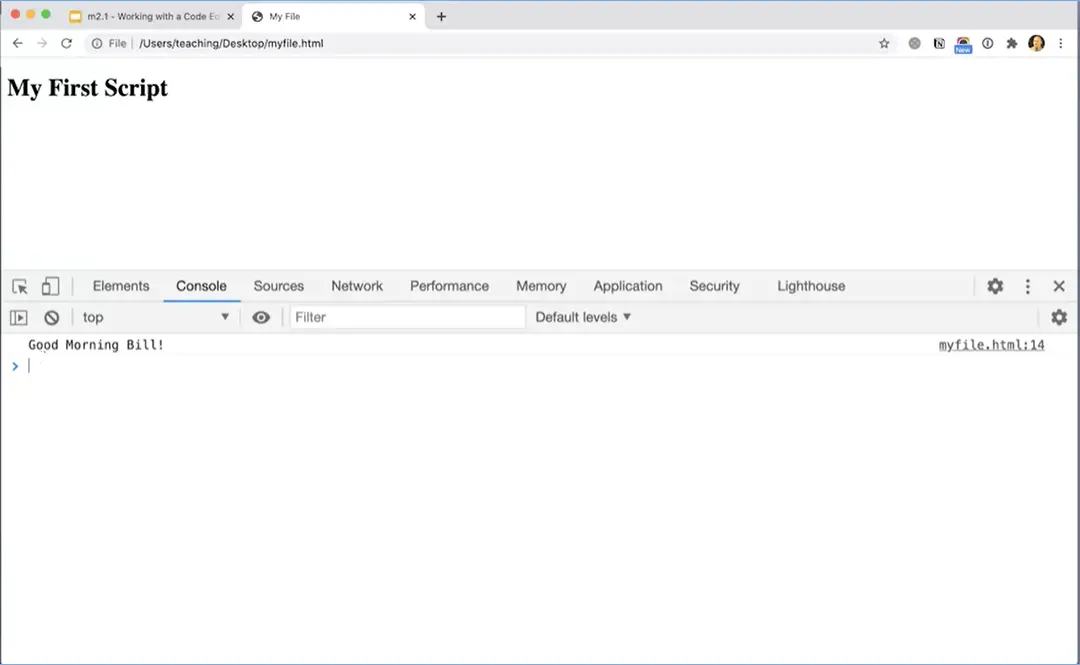
But if we go and choose Inspect and then click on the Console, you’ll see that it comes up here. And my JavaScript is actually running. We’ve gotten our first script to run. The next thing to talk about is how we can make some comments in JavaScript in case we want to remind ourselves exactly what we’re doing. It’s always good practice to add comments to your scripts so that when you come back to them later, you know what’s going on.
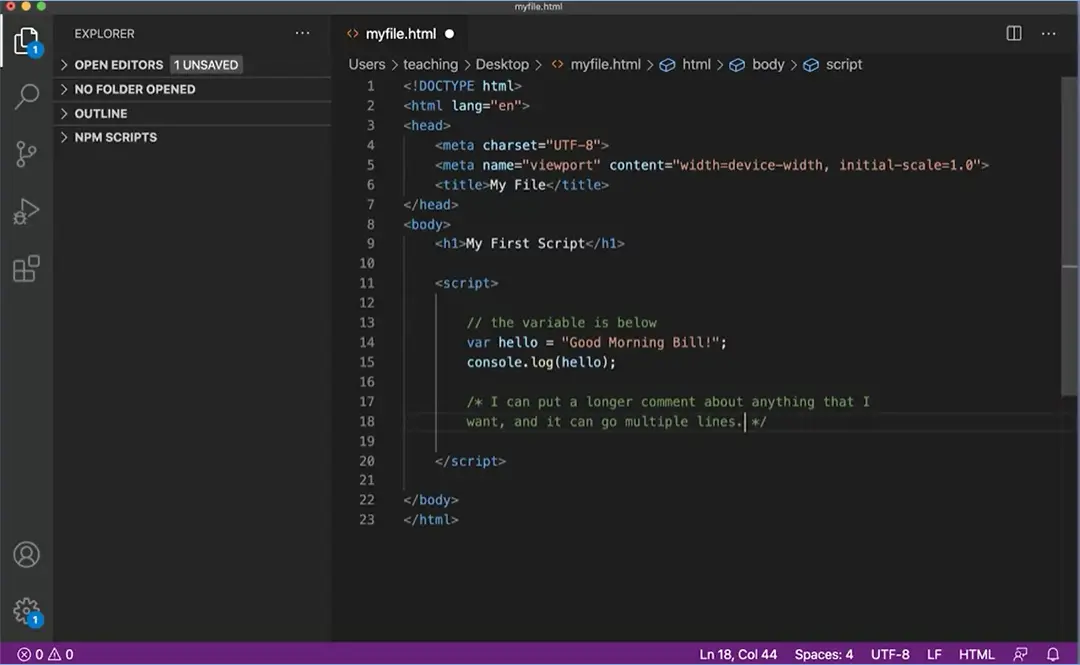
There are two ways of making comments in JavaScript. I can use the slash twice, two slashes, and I can type the variable is below, something like that, or the variable below, I don’t know we could say something else about it. But putting two slashes //, two forward slashes here, will keep JavaScript from trying to do anything with this line here. If you want to have a longer comment, you can use the slash and a star /* and then end comment with a star and a slash */. And then I can put a longer comment about anything that I want and it can go multiple lines. See example in image.
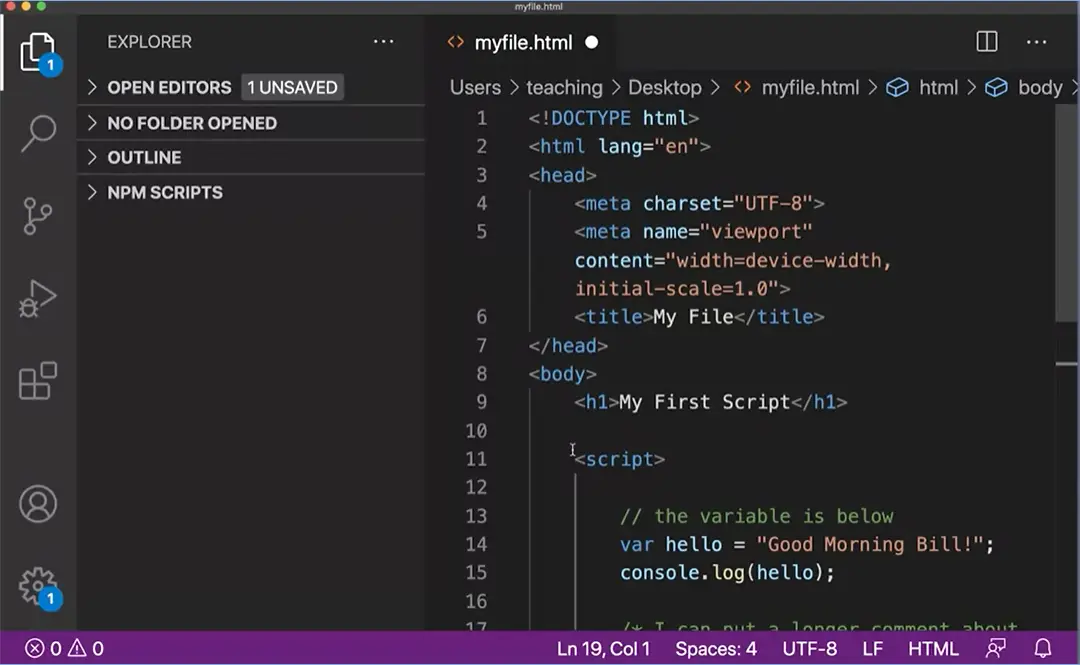
While we’re here, another thing that’s important is I can actually make the code in the browser larger or smaller by pressing the Cmd plus or Ctrl plus in Windows on my keyboard here, let’s click on that. And that will make the code larger or smaller. And I can make this window over here smaller too if the code is getting squished in there, you can close it all together. This thing opens and closes that Explorer. But I can make the code larger or smaller. And depending on how good your eyes are, you might want the code to be larger or smaller, Cmd+0 will put it at its default size, but command minus will make it smaller. So make sure you’re setting your code to a size that’s comfortable for you to read.

The next thing to talk about is folders and working with folders for projects.
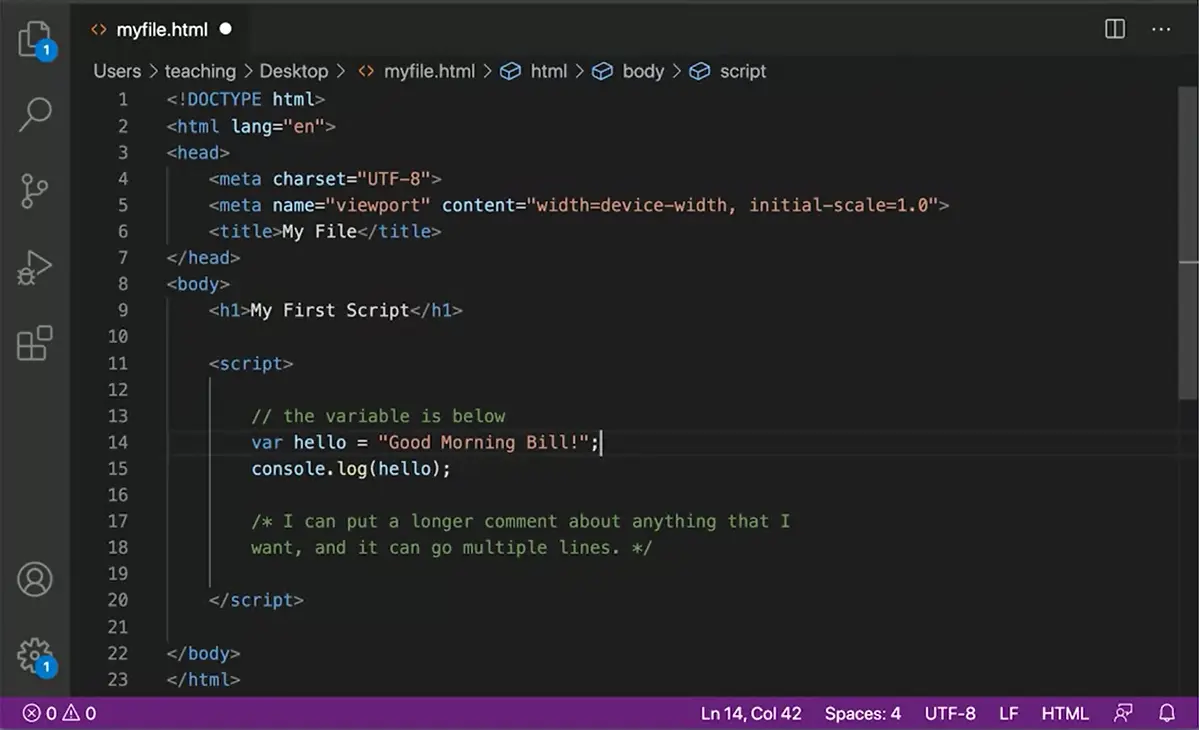
This file, myfile.html, this file here is just sitting on my desktop. That’s fine for a single file, but usually, if I’m working on a project, I’m going to have a folder with a bunch of related files. I might have an HTML file. I might have a CSS file, I might have multiple JavaScript files as we get going here. But for right now this is just a single file. That’s not really very useful by itself.
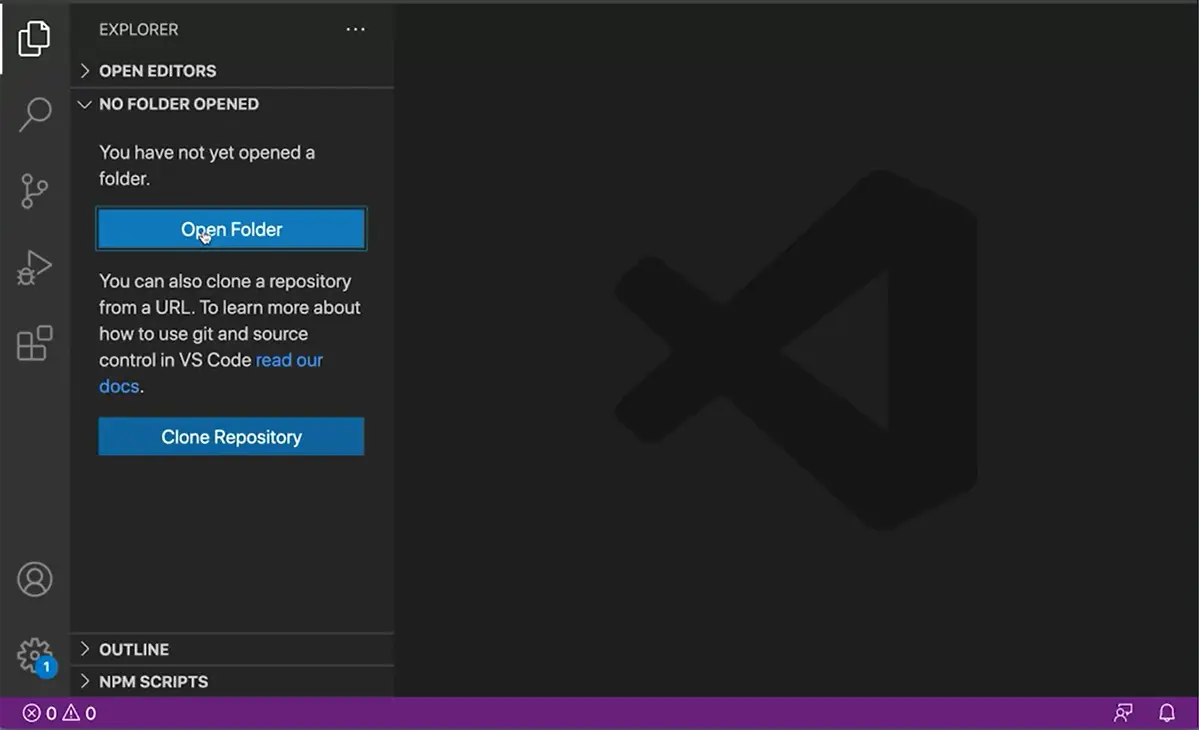
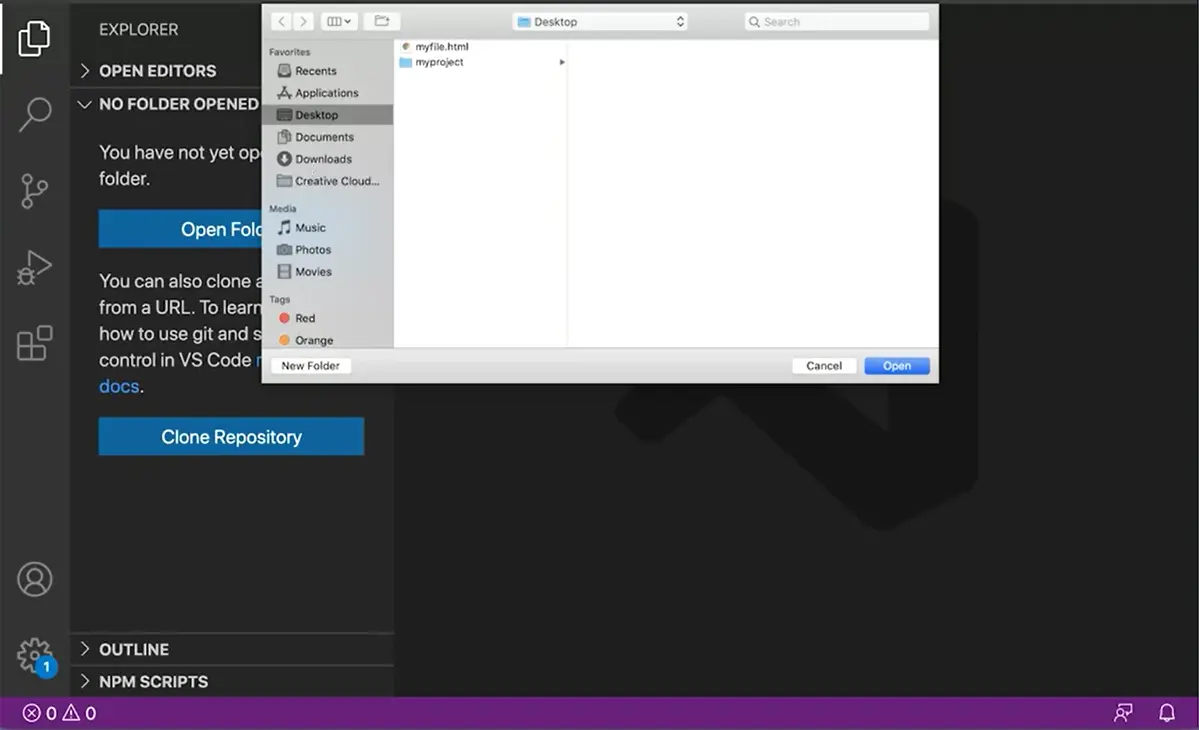
Over here I’m going to make a folder, and I’m going to give the folder a name, myProject. Notice there are no spaces in that folder name. Also all the letters or lowercase. It doesn’t have to be, so myProject. Then over here, close this file, and open up the sidebar here, and no folder opened. I can actually open that folder, myProject.
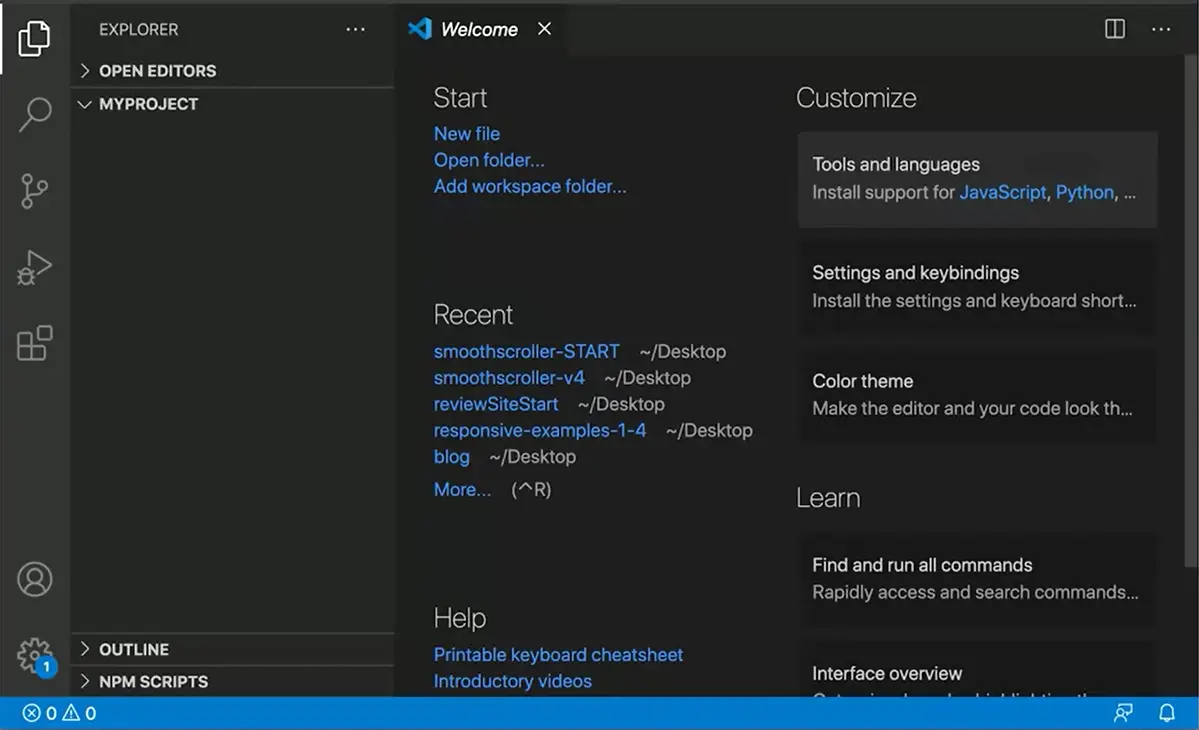
Now you can see I’ve got my welcome screen again and I’ve got MYPROJECT here. There’s no files in this folder currently. I just made a folder and it’s empty, but I can put a file in that folder and close that welcome screen.
If I make a new file, suppose I make a file and call it index.html. That’s going to be an HTML file. I can put that in my folder.
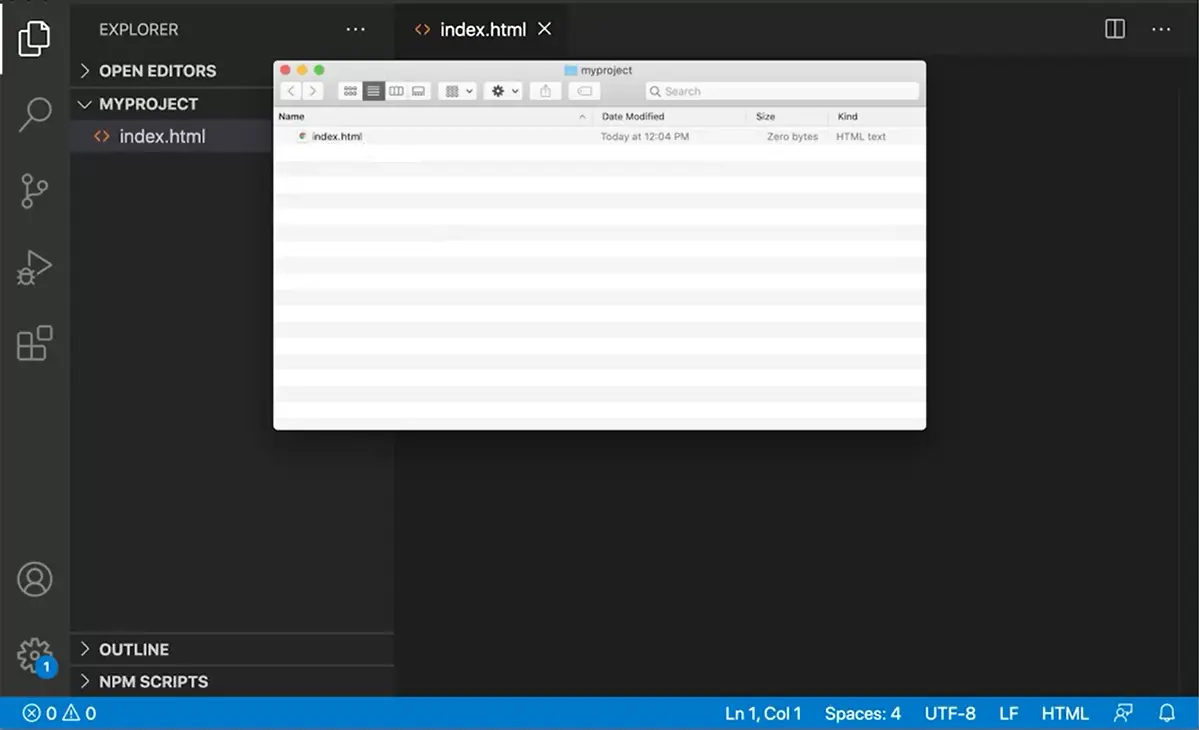
Now you’ll notice it’s created the index file. Not only that, but if I look in myProject folder over here, you can see that index.html has been created in that folder. I can manage my whole project from here.
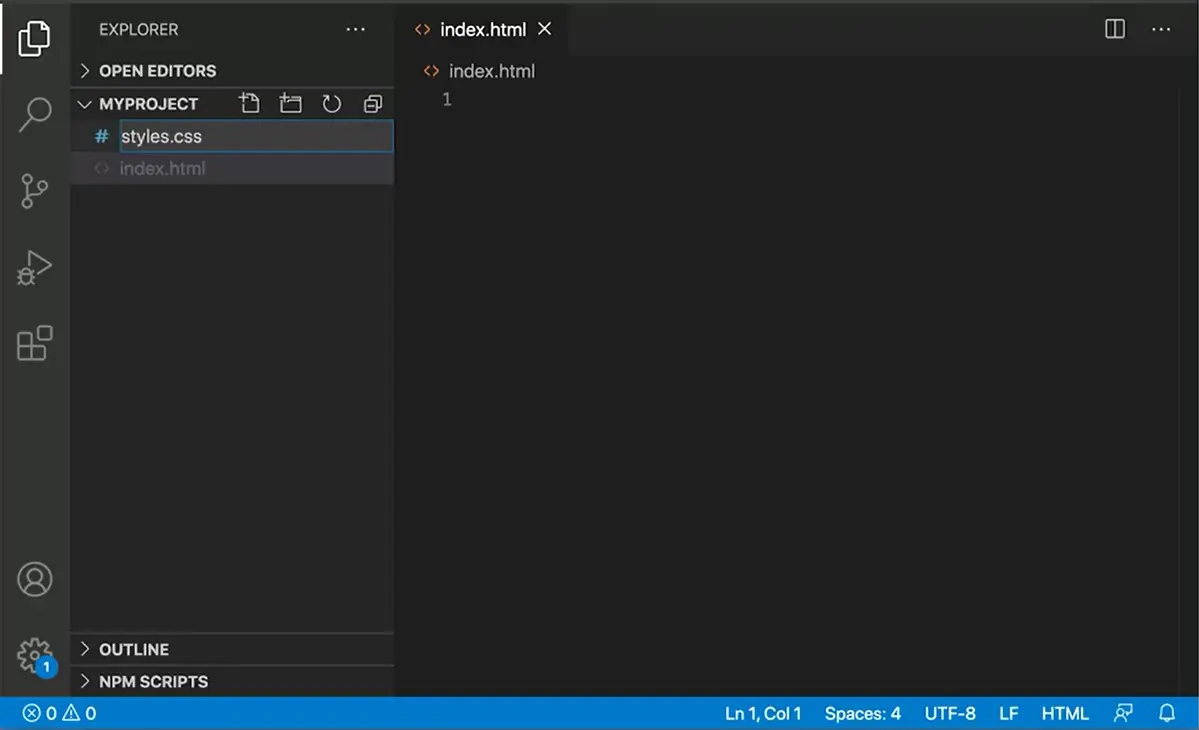
Perhaps I have another file in here. I’m going to have styles.css. Maybe that’s going to have some styles for my webpage, and it’s going to go into that file.
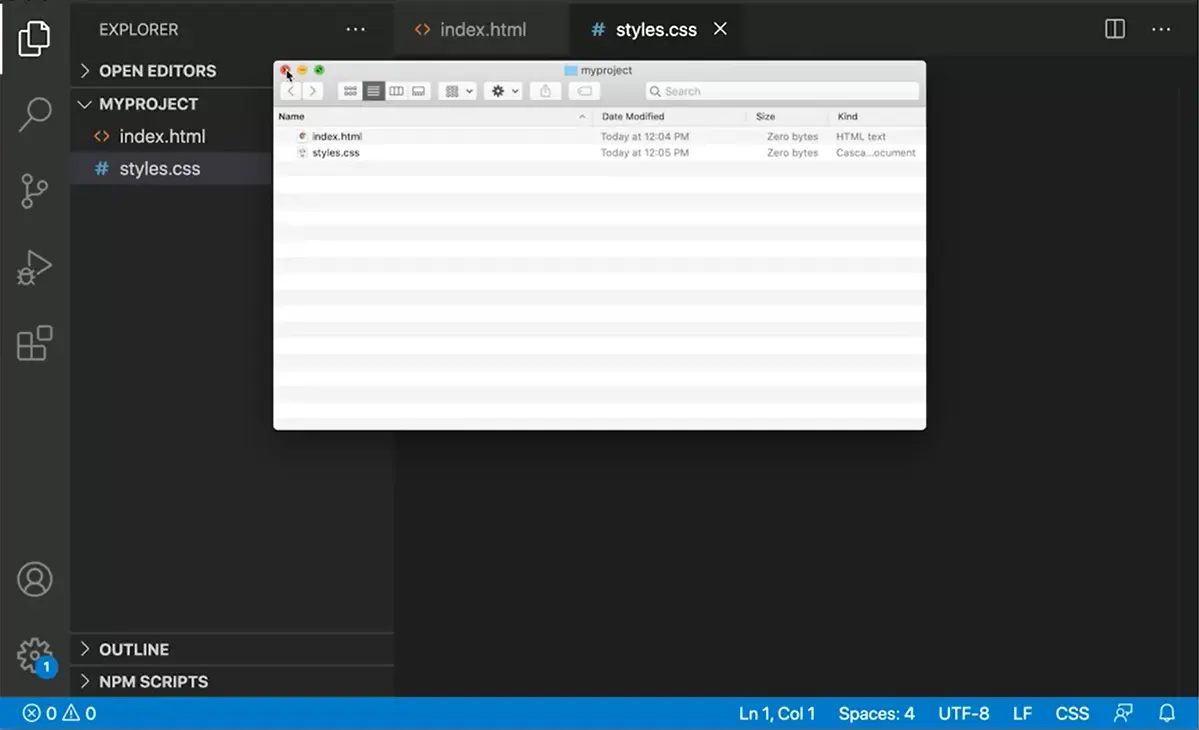
Now that file is in the folder over here. In this way, I can control and keep track of all the files for myProject and they’re all in one place. Remember I said earlier, you have to get really good at file management and you have to make sure that all the files for a project stay in the folder. You might have other folders in the folder.
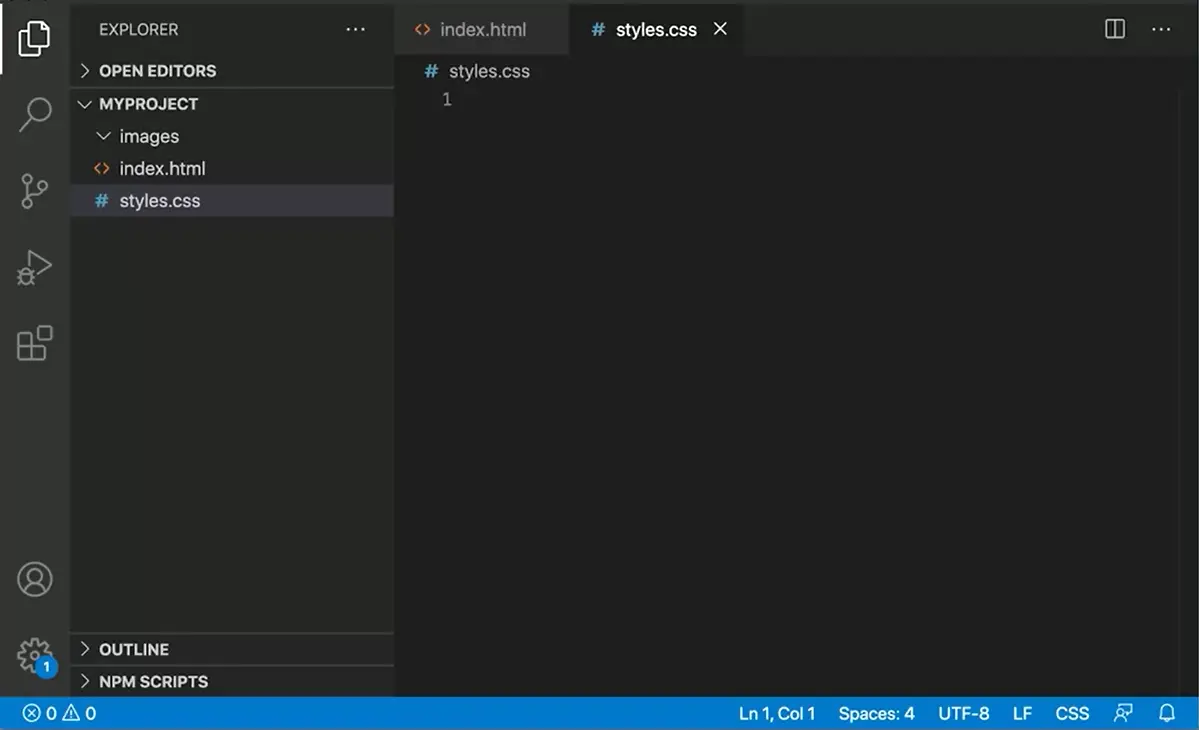
If I come back here, I might make a folder for images. Now this is a folder, and currently there’s nothing in the folder, but if I look in this folder over here, you can see that the folder images is here, and I can put images in there. Be careful when you’re creating files, not to accidentally put the file inside the folder if you don’t mean to. If I click “New File” here, it’s going to create this file inside of Images.html.
This file is actually inside the Images folder here, and I can see it over here as well. If I decide I don’t want that file, I can right-click here and choose “Delete”. It will ask me, do I really want to move it to the trash? and sure enough, from over here, that file is now not inside that folder and folder is empty again. By working with this Explorer, we can create files and manage files for our projects and make sure that the files are in the correct places at all times.
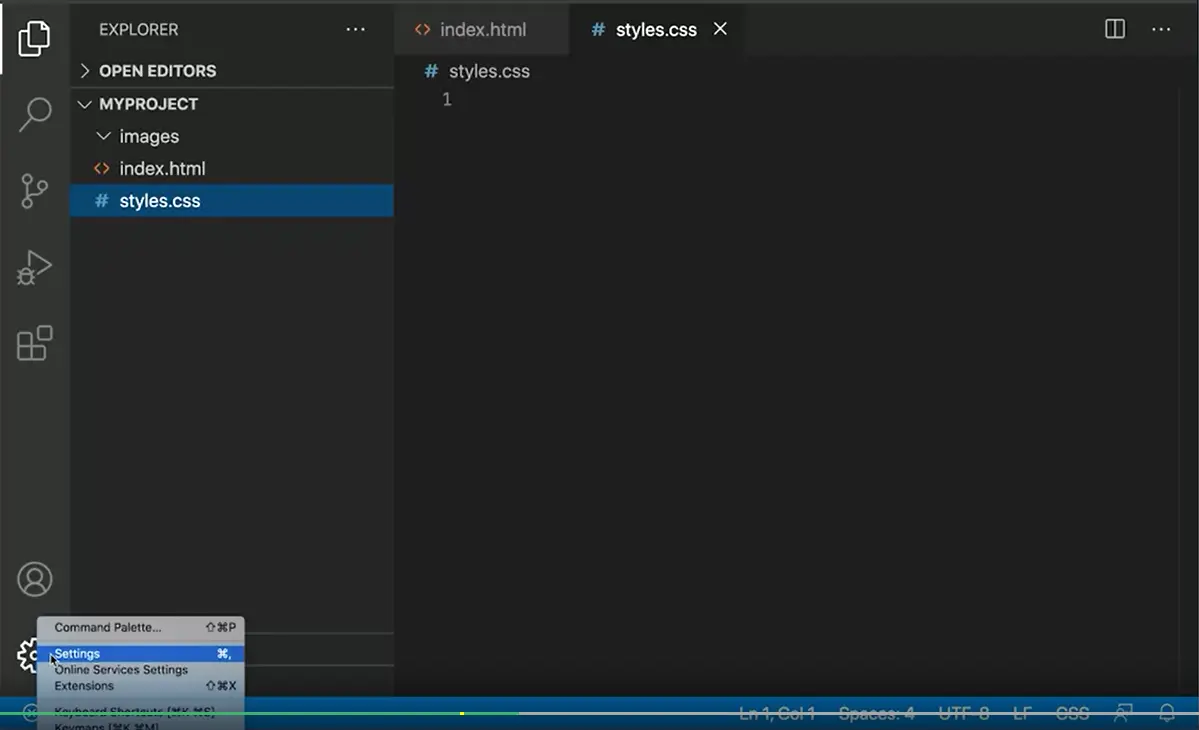
The last new thing that I have for this lesson is I just want to show you that Visual Studio Code is very customizable. You can add all extensions to it. If I click on this Gear icon down here, I can get into the Settings. I can do all things in here with extensions and other things.
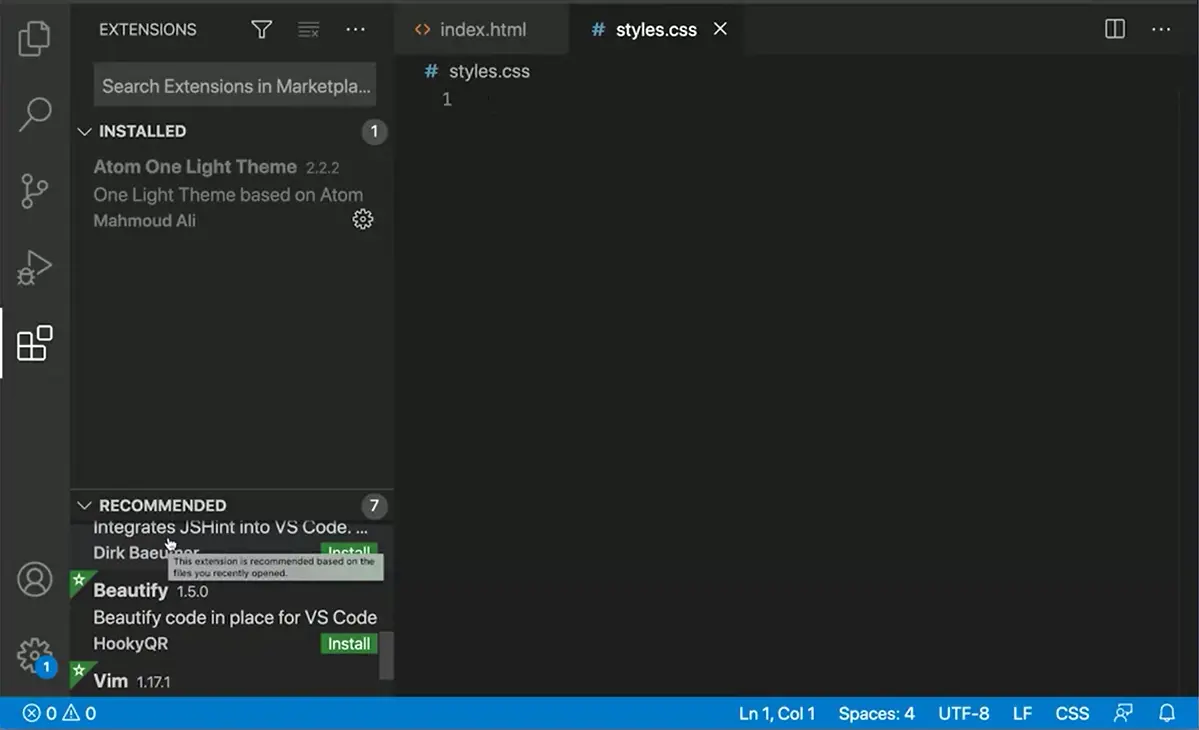
For example, you can search for Settings or Extensions. You can do all fun things to make Visual Studio Code more personalized. Maybe you like this black look for your code editor, or perhaps you prefer a lighter theme.
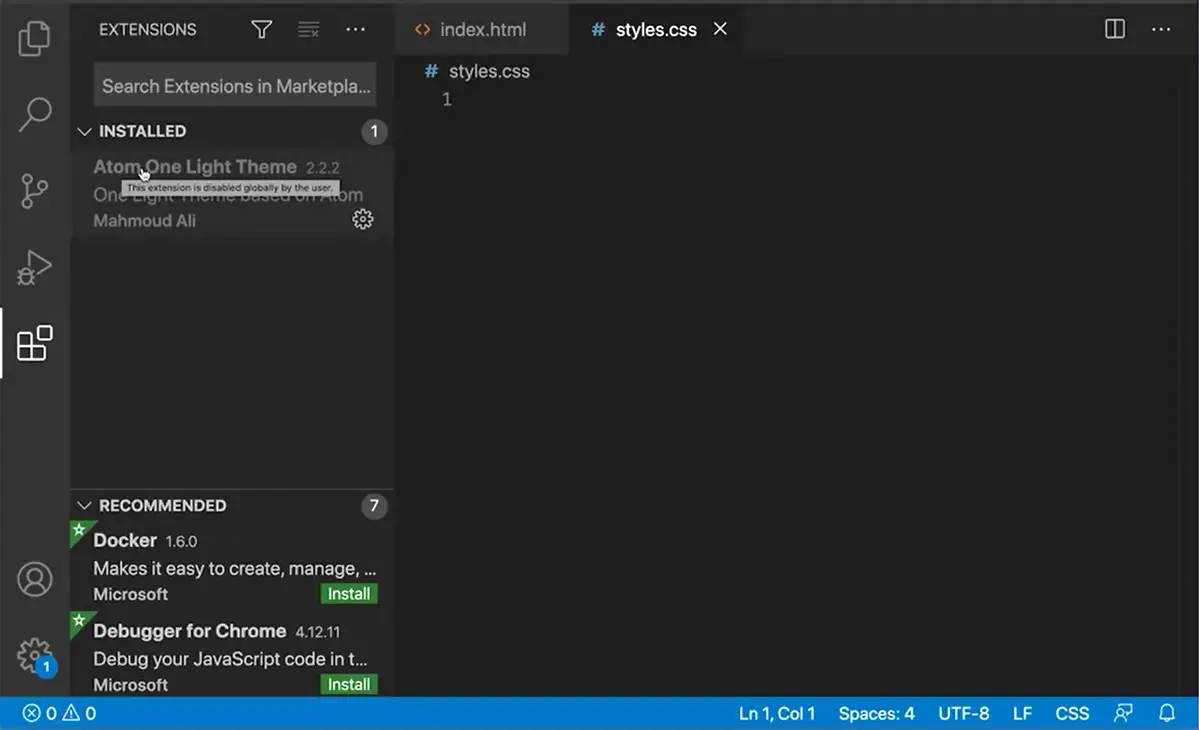
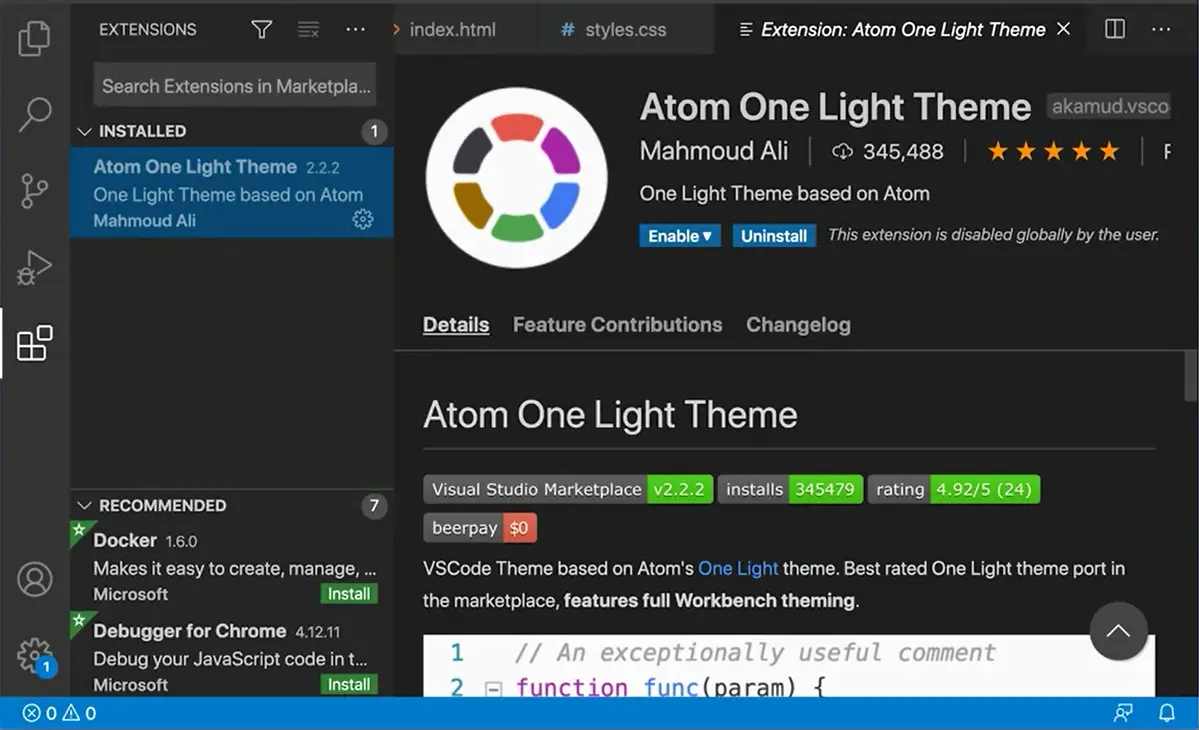
I installed this Extension here called Atom One Light Theme. You can click on that, and currently it’s disabled, but I can enable this theme.
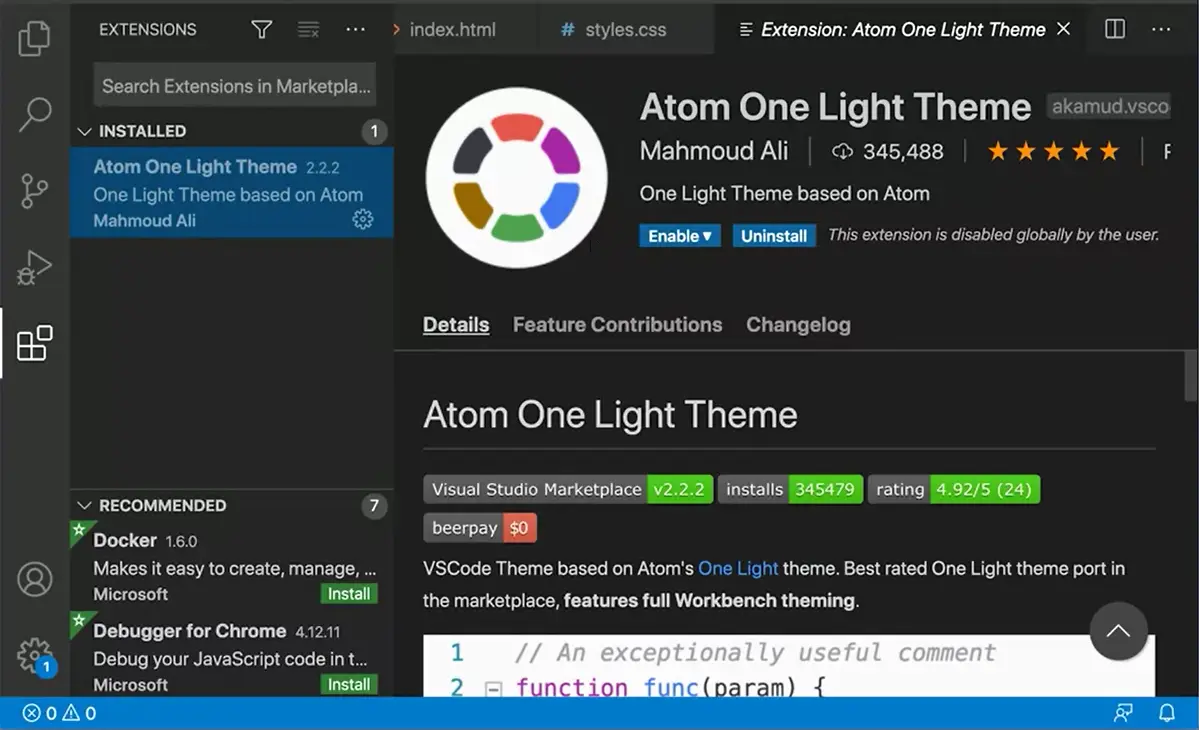
Select Color Theme. There we go. Here I’ve got the Color Themes and I can select that. Sometimes you have to mess around with Extensions in the Theme Editor, in the Settings to really figure it out. There’s all themes that you can get for Visual Studio Code to customize it and make it look the way you want it to look. I go back to my files and here I am.
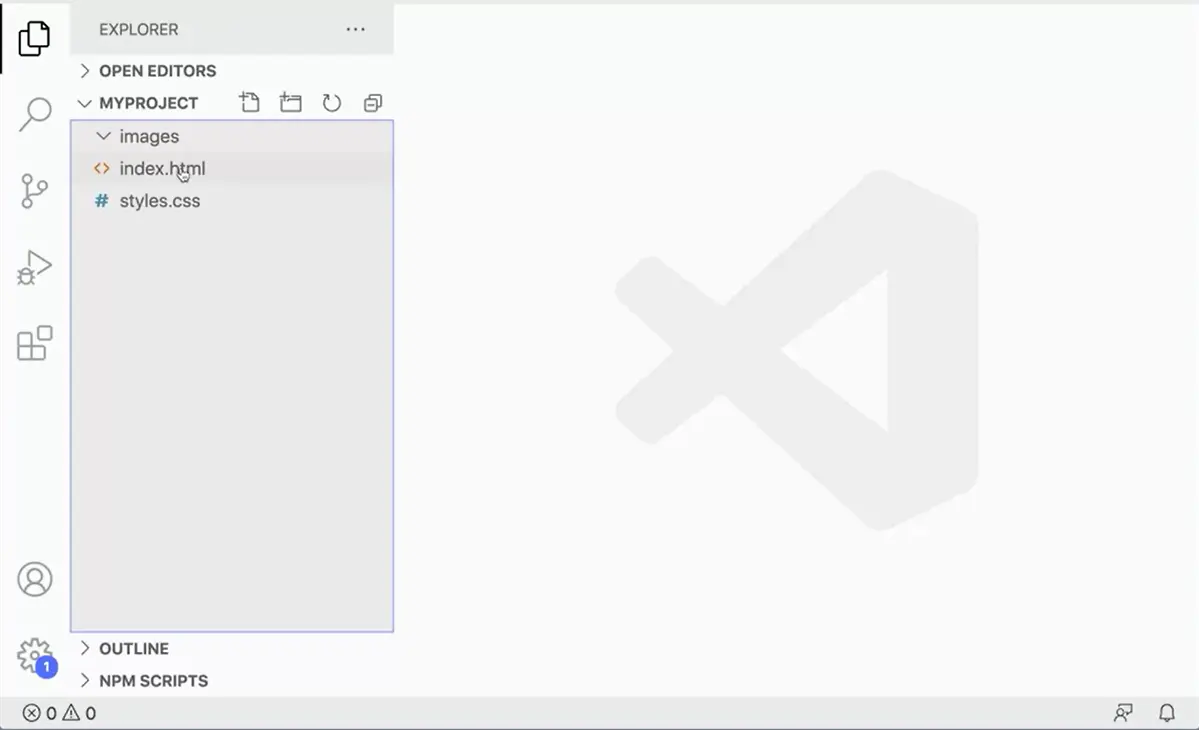
Now you’ll notice that my files will look a little bit different because I’m using the Atom one light theme. Just to remember here, we’ve done quite a lot to make this page. You can see here I am in myProject again for my Index file. I come over here and click.
![For html template, type exclamation followed by [tab] For html template, type exclamation followed by [tab].](./images/webp/image120.webp?raw=true)
Just to review what we did in this lesson, I can type an exclamation point press tab ([tab]) to get the basic structure of a page. I can add a title for my document that will show up on my page. I can add some HTML. I’m just going to add an h1. Here is a heading. Then I can add some script tags, and I can add a script to my page. I could do something like var myVariable and set it to “hello”. Then I could cancel logout console.log myVariable. Notice it pops up here. I can even just press carriage return, don’t even have to type the whole thing. I can just press return to get it to pop that in place so I make sure I don’t spell it wrong. Then a semicolon. Semicolons are used in JavaScript at the ends of statements. I can save that file, and then I can come back to the browser and test it.
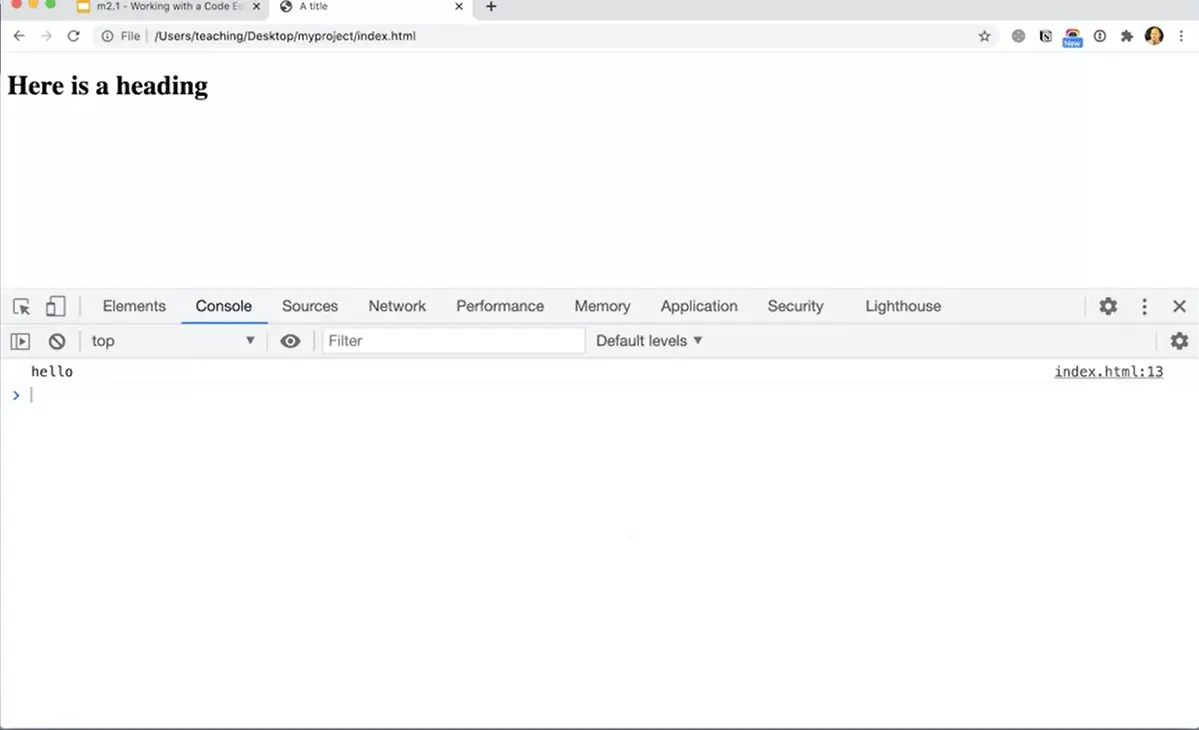
Let’s do that real quick. Comeback here to Chrome. This is the other file. I’m going to open this file. I could do Command All, there we go myProject index, and there it is. It’s doing Hello there. The Hello came up in the Console lock there. That’s a review of everything we learned in this lesson. Your now able to work with files and get those files to output content into the console that you can then test in your browser. That’s a great way of working.
Another way of opening your file is to right-click on the file and choose “Open With” and I want to open with the browser, you could even try a different browser. Brave is a great browser to try. Brave is using the same rendering engine as Chrome. It actually works the same way as Chrome generally. What’s interesting about Brave is that the CEO of Brave is actually that Brendan Eich guy who invented JavaScript. It’s interesting to note that the guy invented Java Script is now in the business of creating a browser. That’s interesting. Great. This will get you started and I look forward to seeing you in the next lesson where we can start writing some interesting scripts.
Operators, Booleans and Selection in JavaScript.
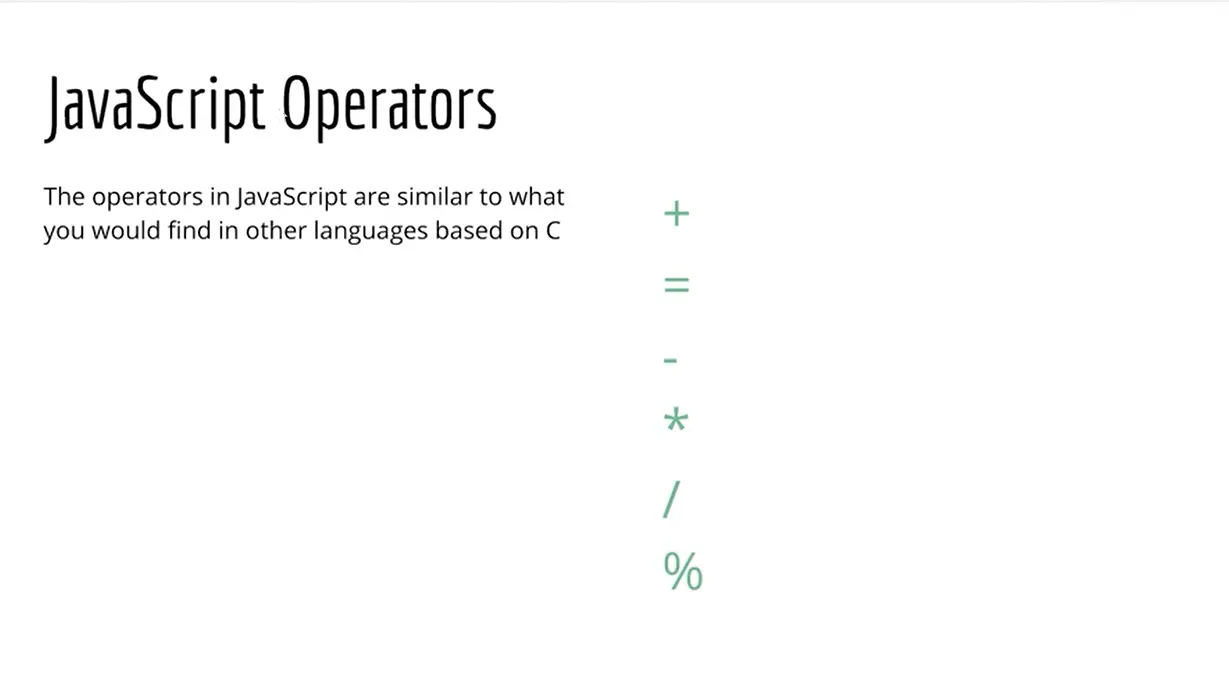
Operators in JavaScript are the symbols that will allow us to create different expressions in JavaScript. And here are just a few of them. We’ve already seen the plus sign and the equal sign, which remember, equals is an assignment operator. There’s also minus and the asterisk is used to multiply and forward slashes used to divide and the percent is a modules operator.
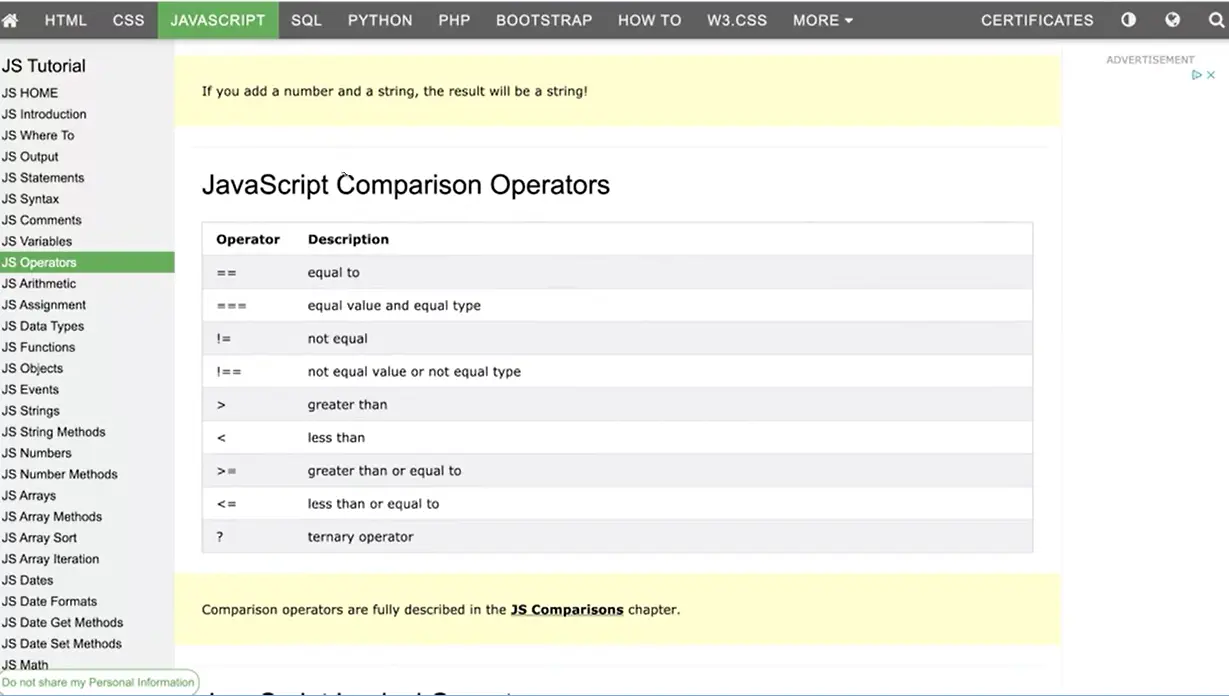
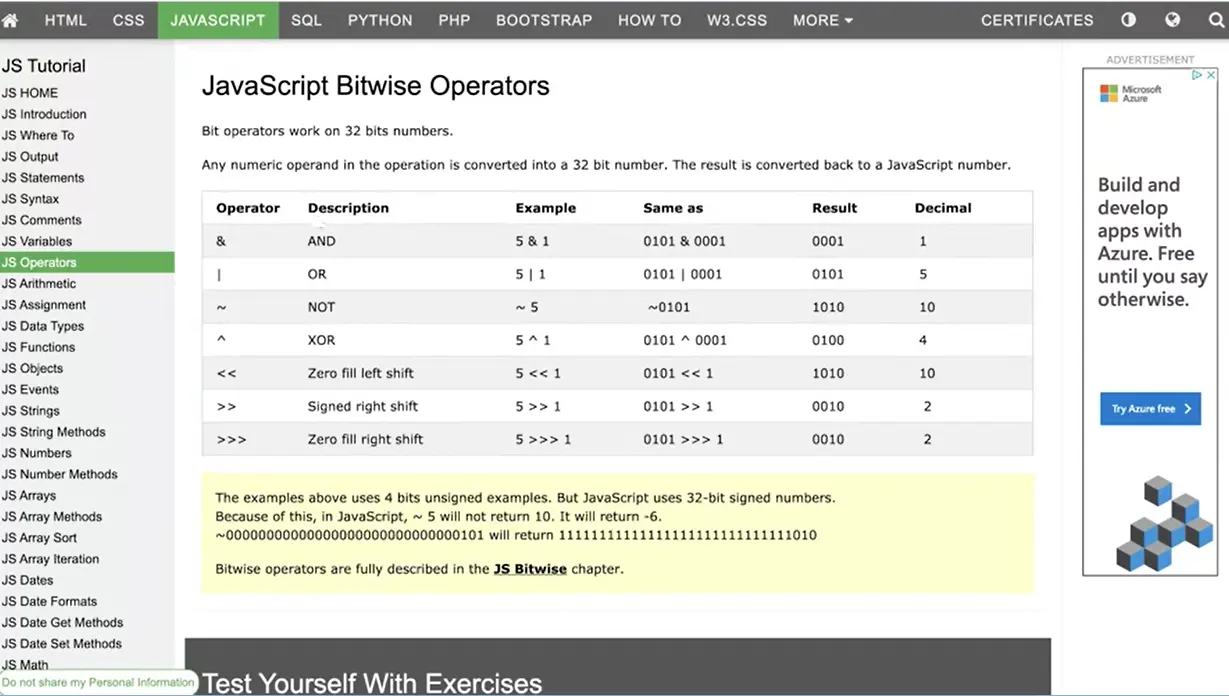
If you want to find out more about operators you can come over to the W3schools.com website and look at the different operators though. Get all listed here comparison operators, logical operators, all kinds of stuff here. So you can come through and find all the details about all of the different operators if you want to there. But we’re just going to start with a few of them so it’s not too overwhelming and most of the operators are very similar to what you would find in other C-based programming languages. C, C++, C sharp, Objective C, and so forth.

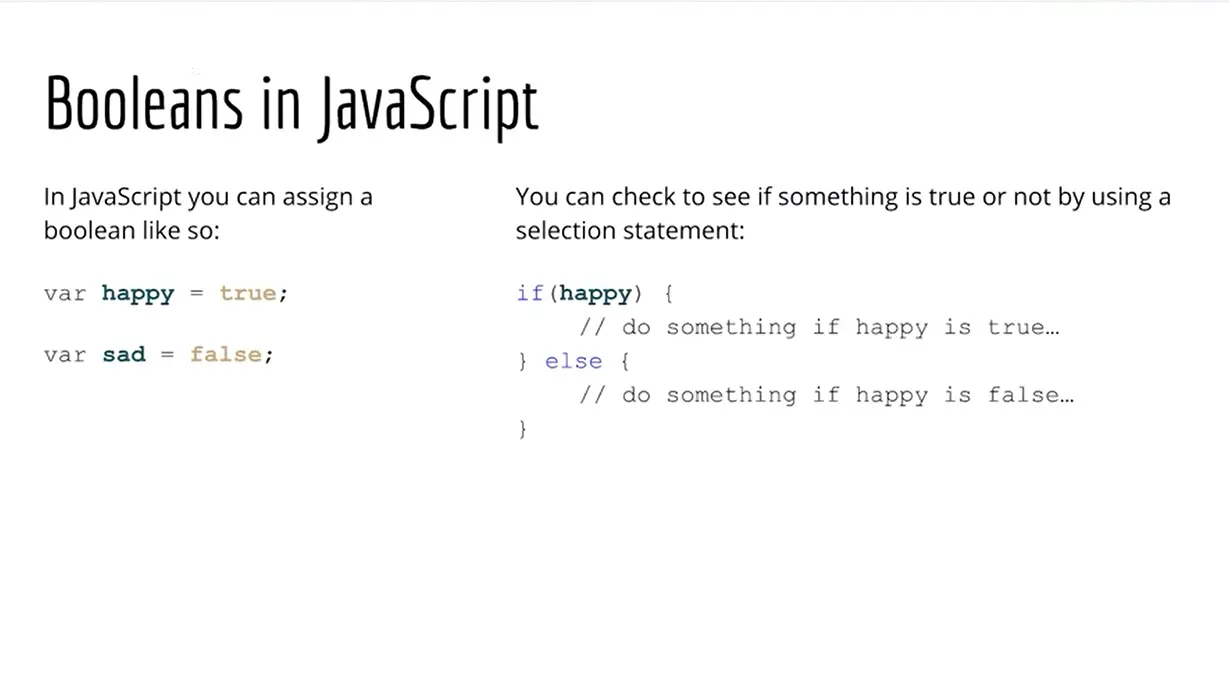
Okay, so there’s also Booleans in JavaScript. And it’s very nice to know that a Boolean can have two values true or false. And that’s it. So here I’m making a variable called happy. And I’ve set I’ve assigned it the value of true. Notice that true is not inside quotes. JavaScript knows what true means true is a key word that means that something is true. And false is a key word that means that something is false.
So I have a variable here sad, that’s false. I can use an if statement to check to see if something is true. So if happy, now happy has assigned true to it, so it’s going to do something here. If I were to replace happy with sad. Then the else would fire it instead of they have and we would do something down here if happy was false. Or if I change the value here from true to false, then happy would be false. And it would do this down here. So that gets us started with a little bit of that.
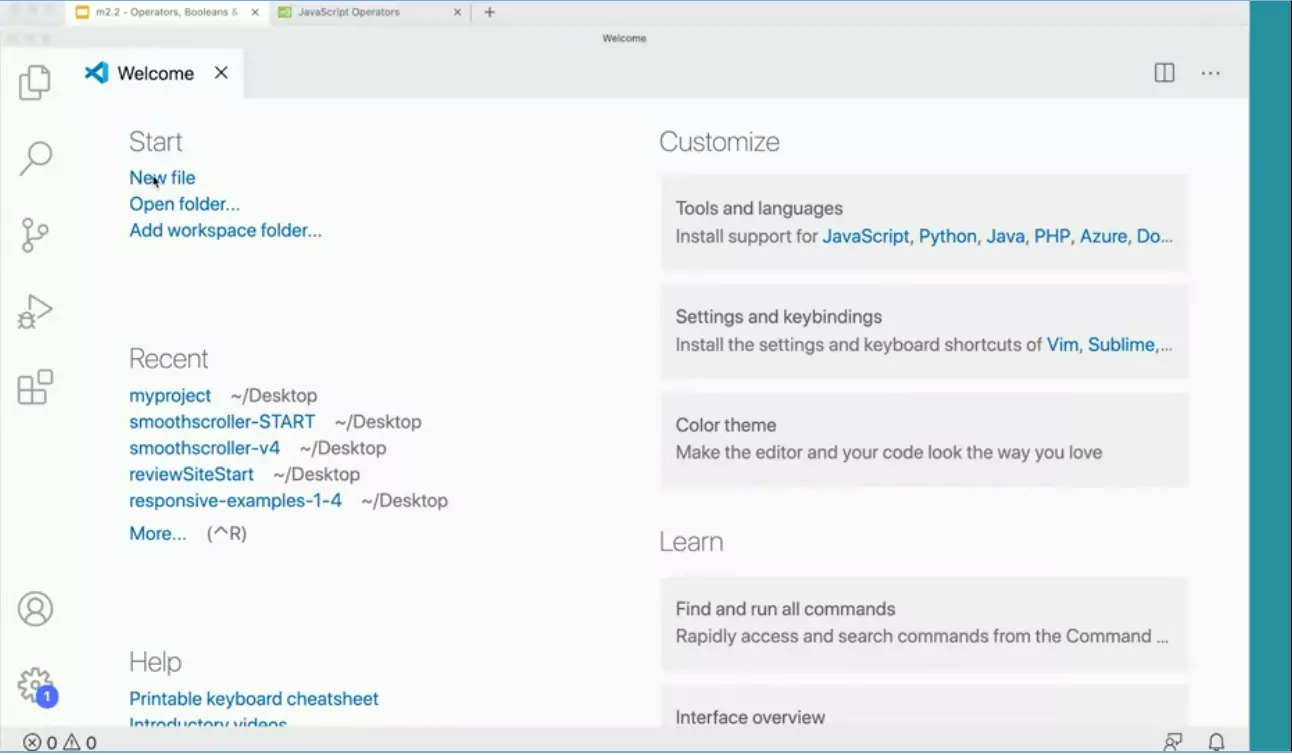
So next we’re going to move to our code editor and make a file and try working with some selections and Booleans and that kind of fun stuff.
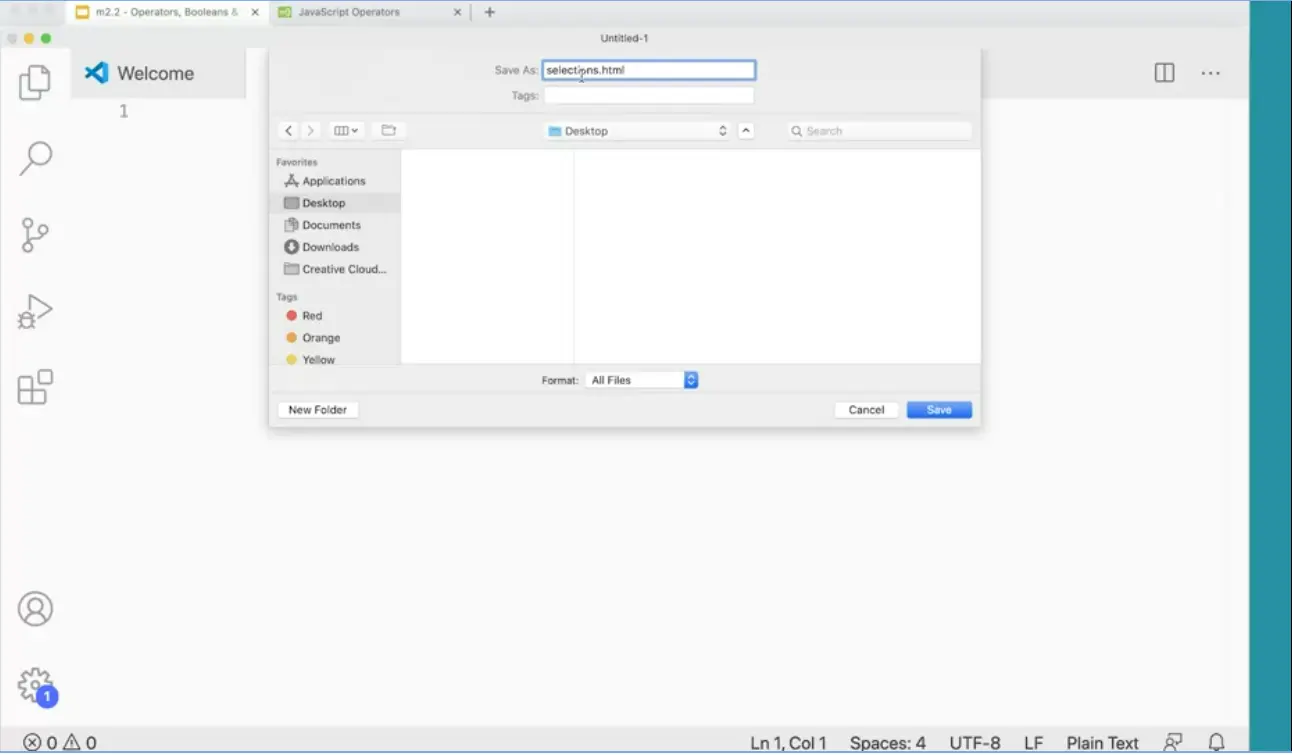
Here I am in my code editor, and I’m going to make a new file. And I’m going to make a file and before I do anything, I’m going to save the file. Save an image, just save it on the desktop, and I’m going to call it selections.html. Notice all lowercase no spaces in the dot html extension. I’m going to save that on the desktop.
![Type exclamation [tab] for basic html structure Type exclamation [tab] for basic html structure.](./images/webp/image129.webp?raw=true)
Exclamation point will allow me to press tab, which gives me kind of my basic structure for an HTML page. And then I’m going to type in here. Testing selections and there we go. And then in here I’m just going to add an h1 testing selections.
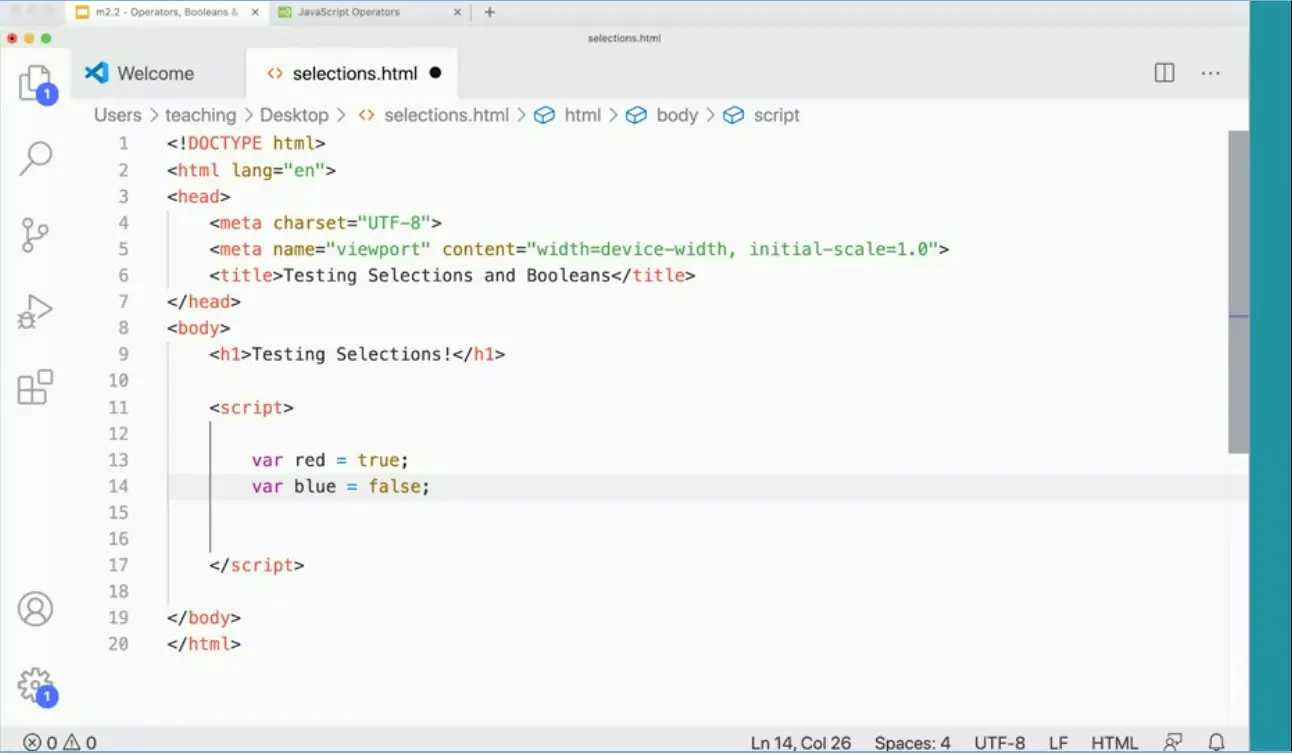
Now, I’m going to add a script tag. So we’ll go ahead and add a script in here. And then what are we going to put in the script? Well, let’s make some bullets I’m going to have Var red and I’m going to set that to value true. Then we have var blue and I’m going to set that to value of false. There we go. So I’ve got two values here. One is set to true and the other one is set to false.
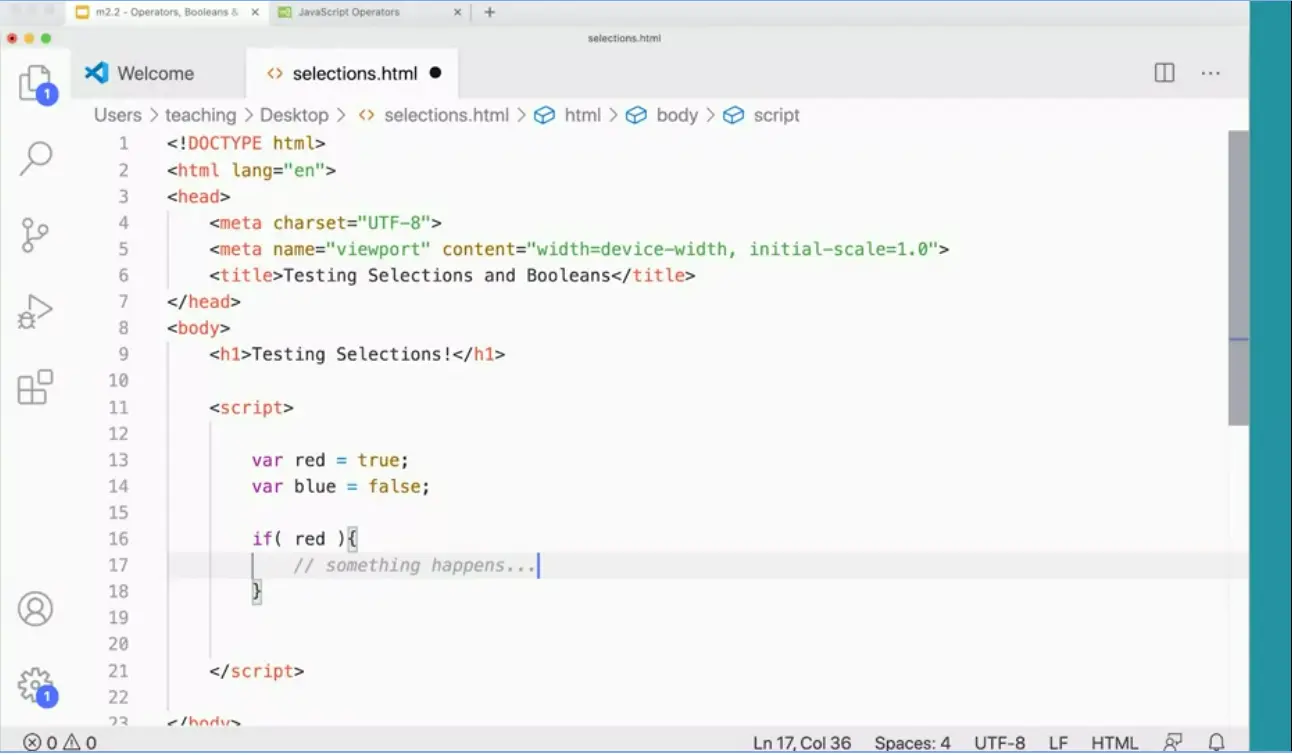
Now if I were to make an if statement if parentheses, and I were to check the value of those red. I’m going to check the value of red. If red is true, which is it is, then something’s going to happen here. Red is going to evaluate to true because I have true assigned to the red variable here. If I were to put blue in here, then this would not be true, in which case something else would happen.
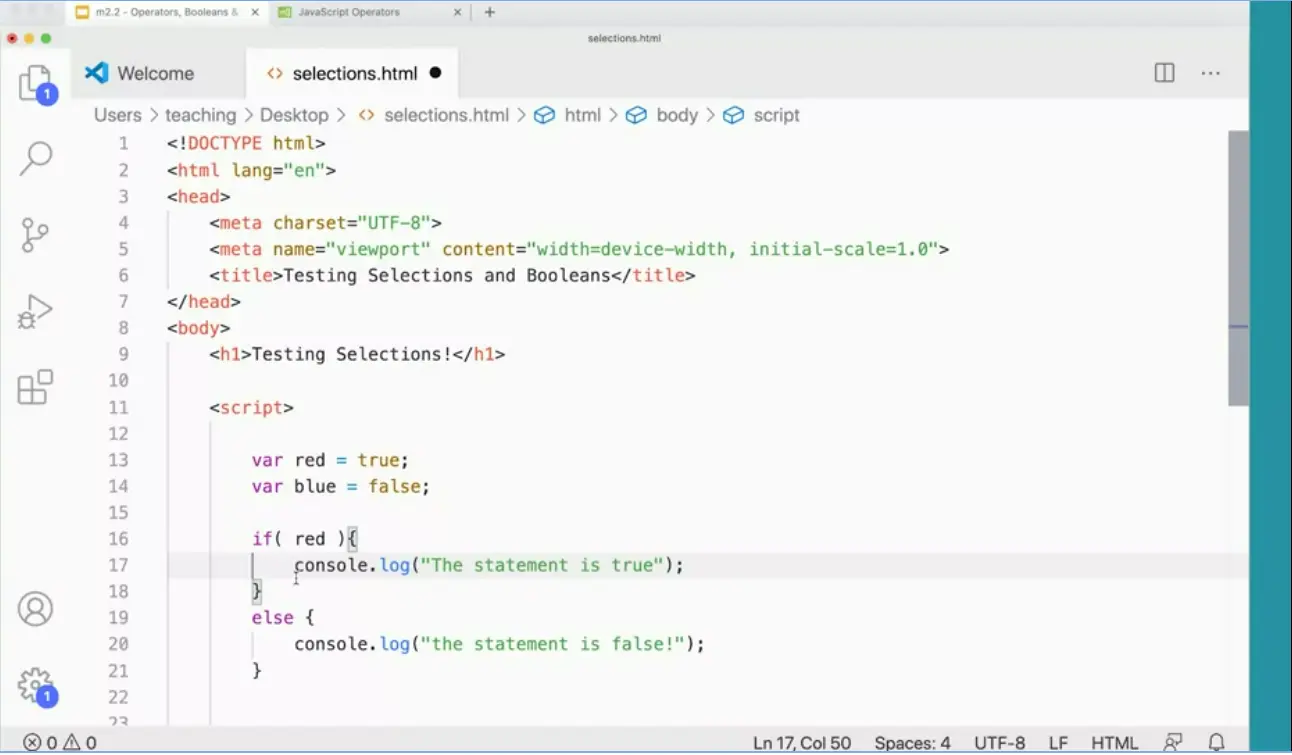
I’m going to come down here and add else, which is exectued when false. Therefore, console.log states false.
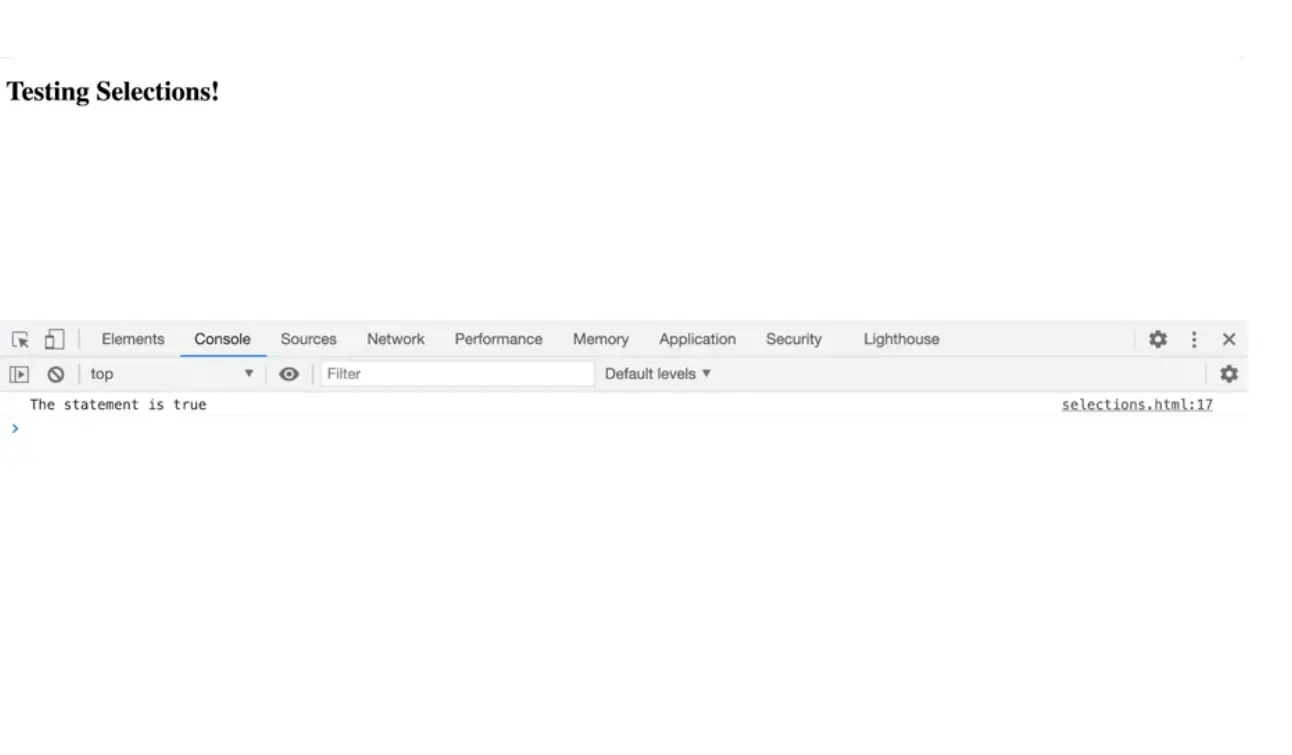
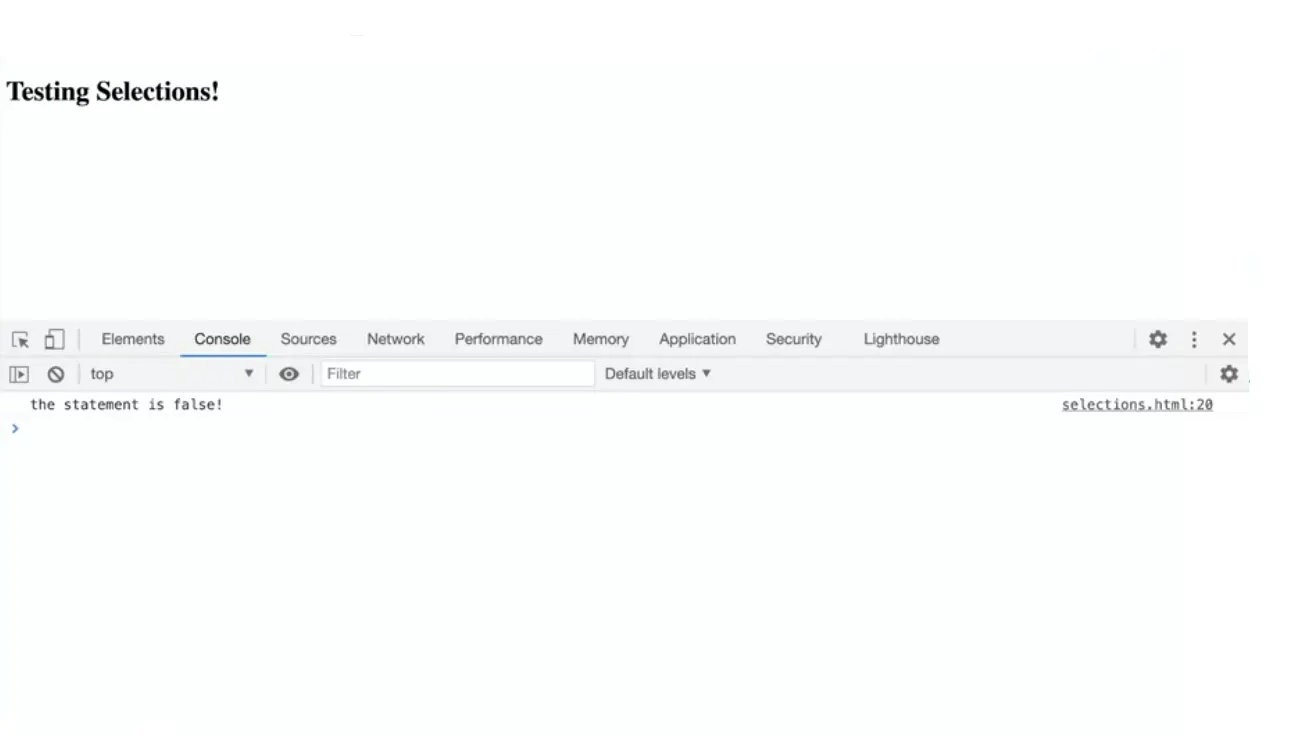
Now we can try this out and come over here to our browser. I’m going to make a new tab here and open this file selections. Open, and I’ve got my testing selections. If I right click and choose inspect, I can go to the console and sure enough, the statement is true.
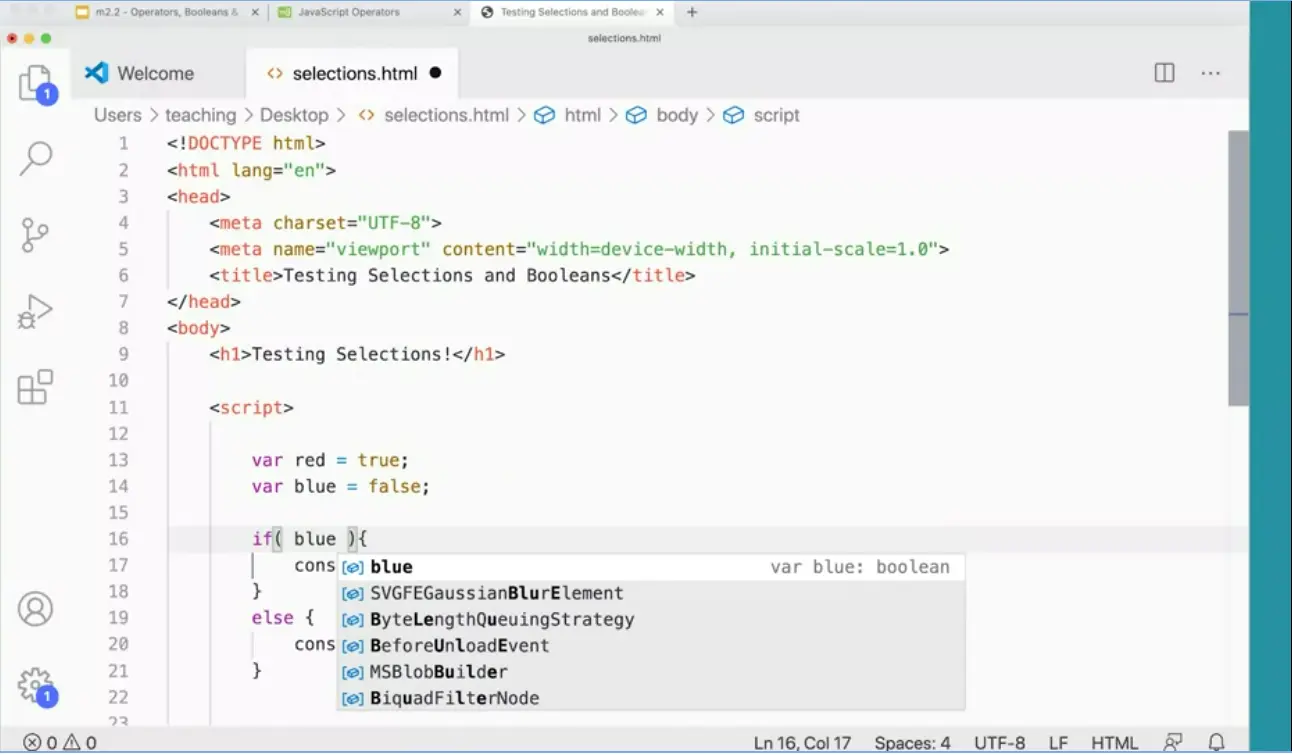
I’m going to come down here and add else is executed when false. Therefore, console.log states false.
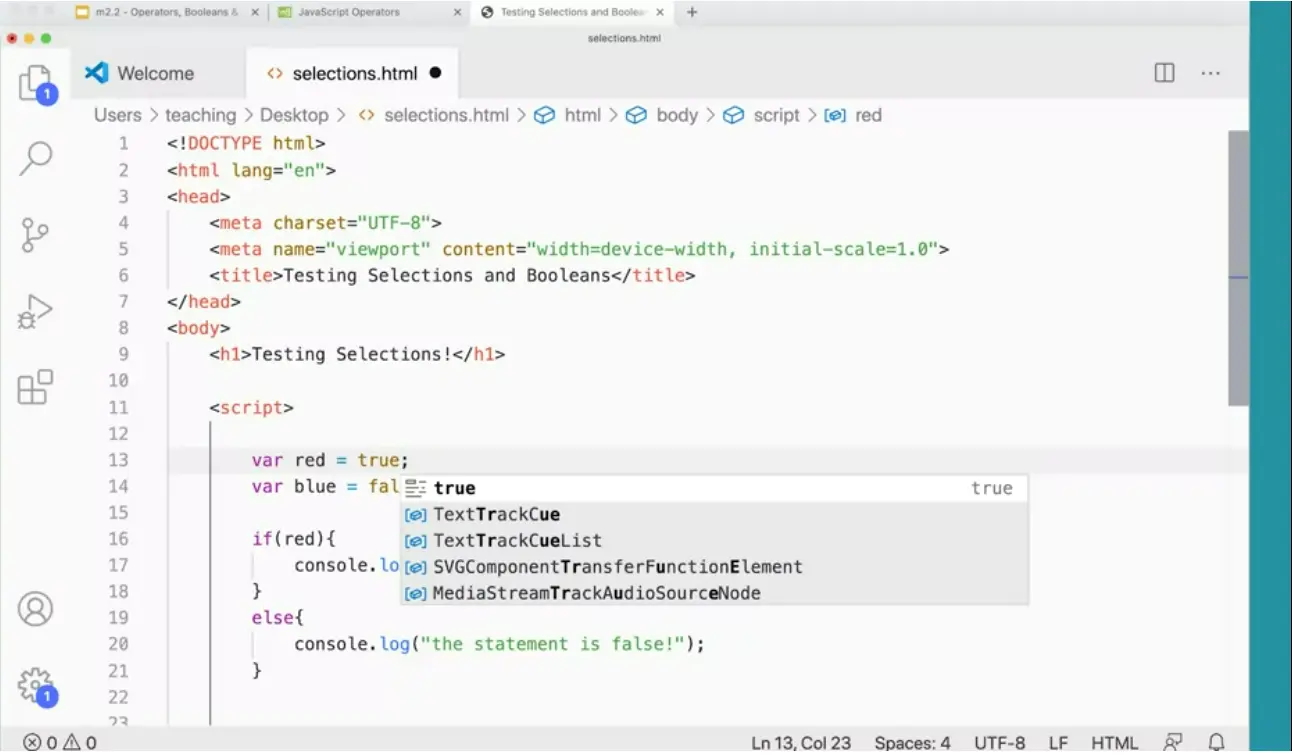
Usually you’ll see more like this, I just add the extra space in there just to make it a little bit easier to read and a little bit easier to evaluate. So red is either blue false or true. And blue is either false or true because I’ve used these Boolean ’s here.
Usually you'll see more like this, I just add the extra space in there just to make it a little bit easier to read and a little bit easier to evaluate. So red is either blue false or true. And blue is either false or true because I've used these Boolean 's here.

This is interesting. Let's try this.
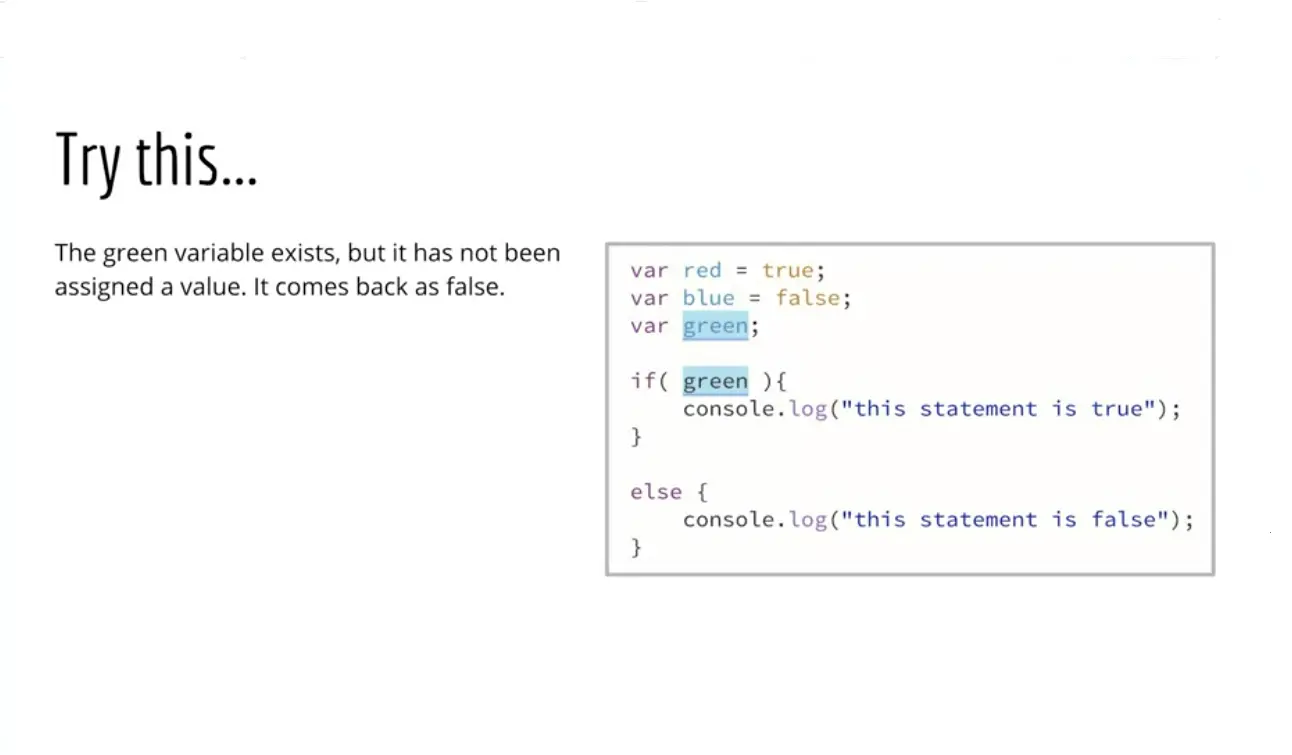
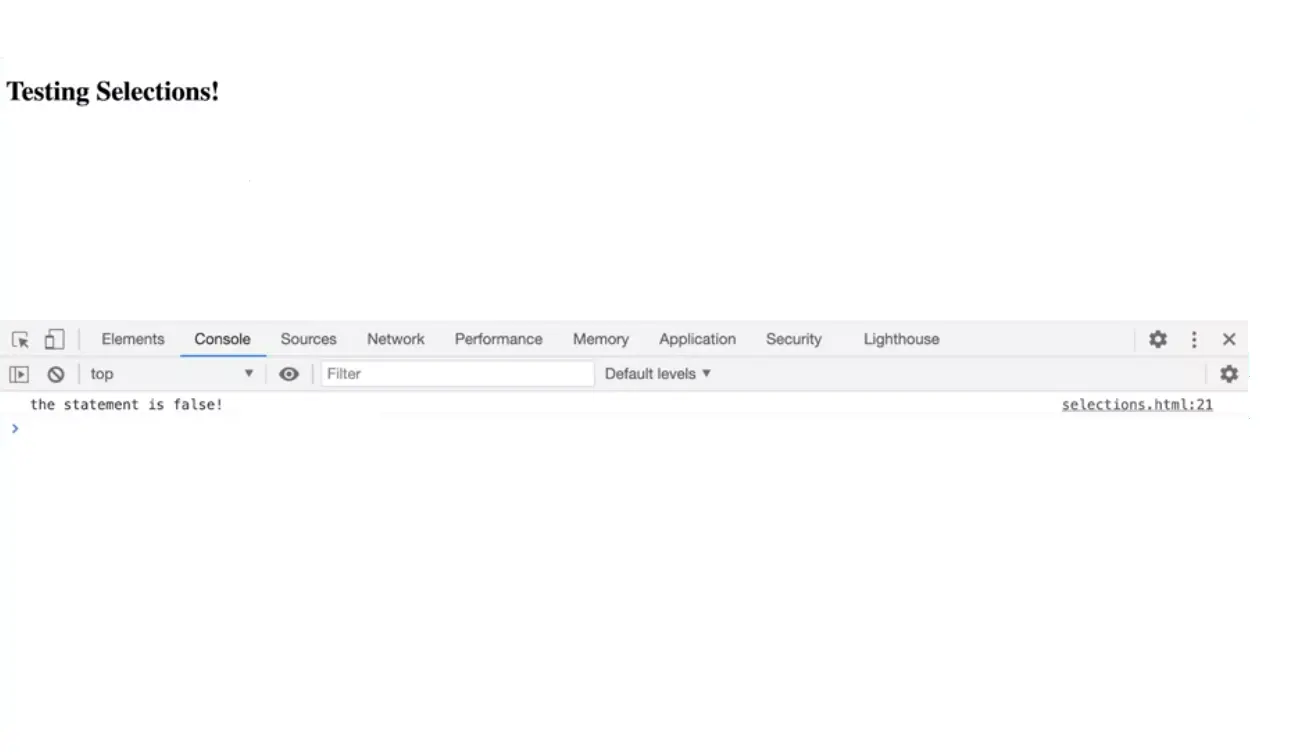
I'm going to make a variable called green and then see what happens if I pass green in here. Notice green doesn't have a value here. So let's take a look at that. I'm going to make a variable green, and just put a semicolon. And then down here, I'm going to test green. Is green true or false? What do you think? This can happen here.
Let's test that. The statement is false. This is an important thing to understand about JavaScript. Green is essentially undefined. It's an undefined variable. Undefined resolves to false in JavaScript. JavaScript has a concept of truthy and falsy. So things are either true ish or false ish. And they could be explicitly true or false like red and blue out here, but they could false ish. And JavaScript treats variables that are undefined as false.
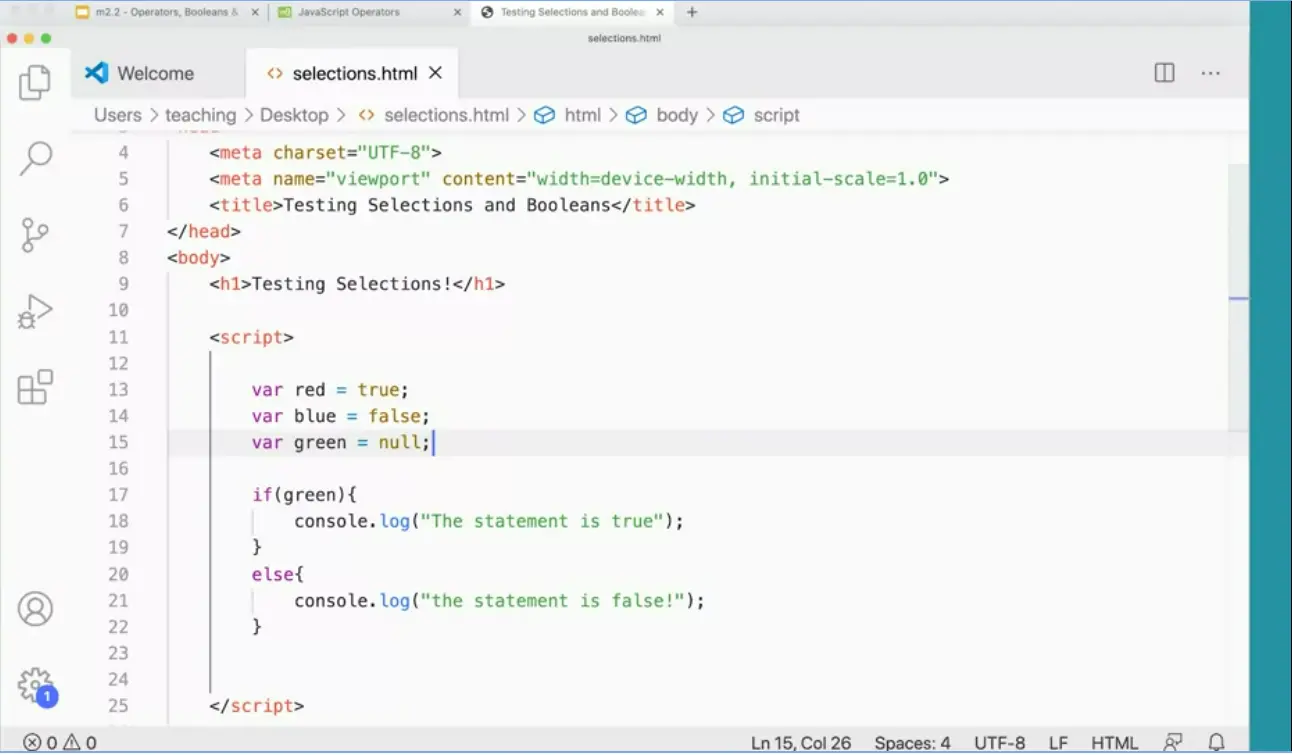
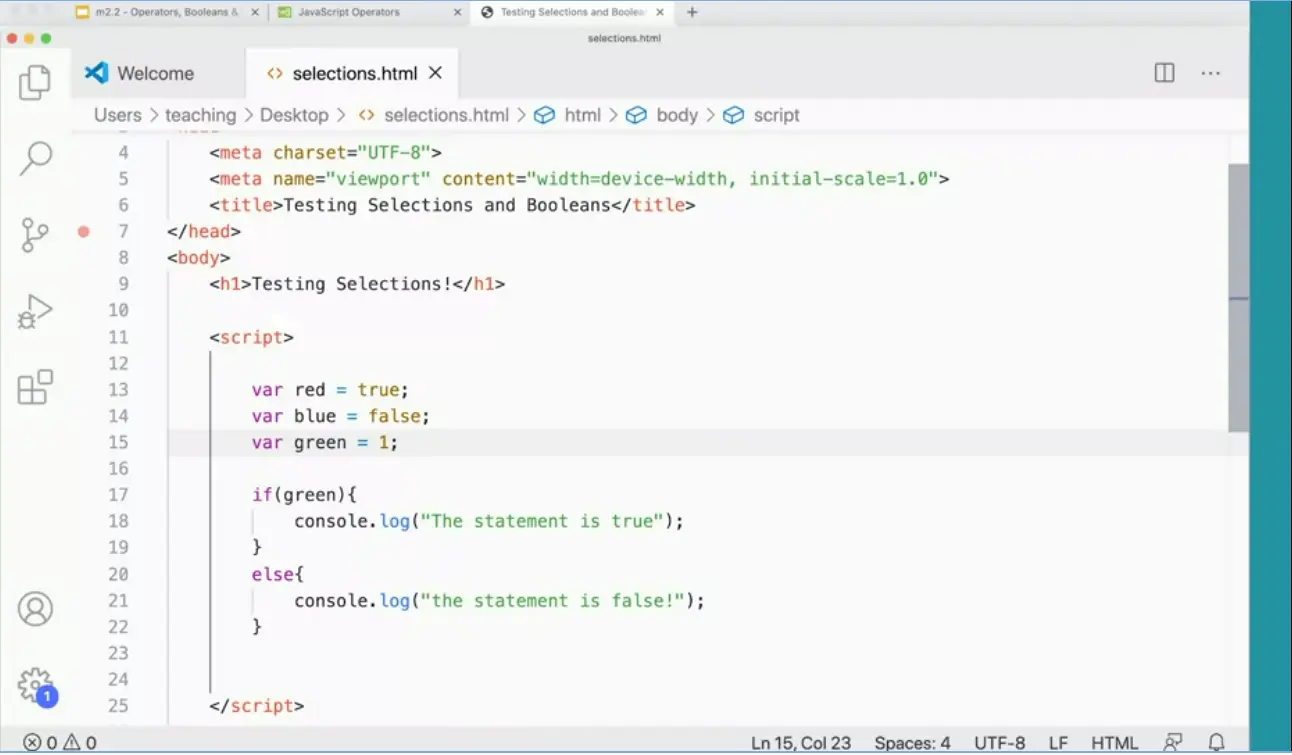
Also, green equals null, that would be false. So that comes up false. Green equals 0, 0 is false. But if I put any other number in there except 0, any other real number like a 1. 1 is true. What about 100? That'll be true too. What about minus 100? That's true as well.
So, numbers are true except for zero, zero is falsy. It's false ish. So, zero comes up as false, which is kind of an interesting thing. So things that we know are false or undefined is false, null is false, zero is false. False is false. Other things are true.
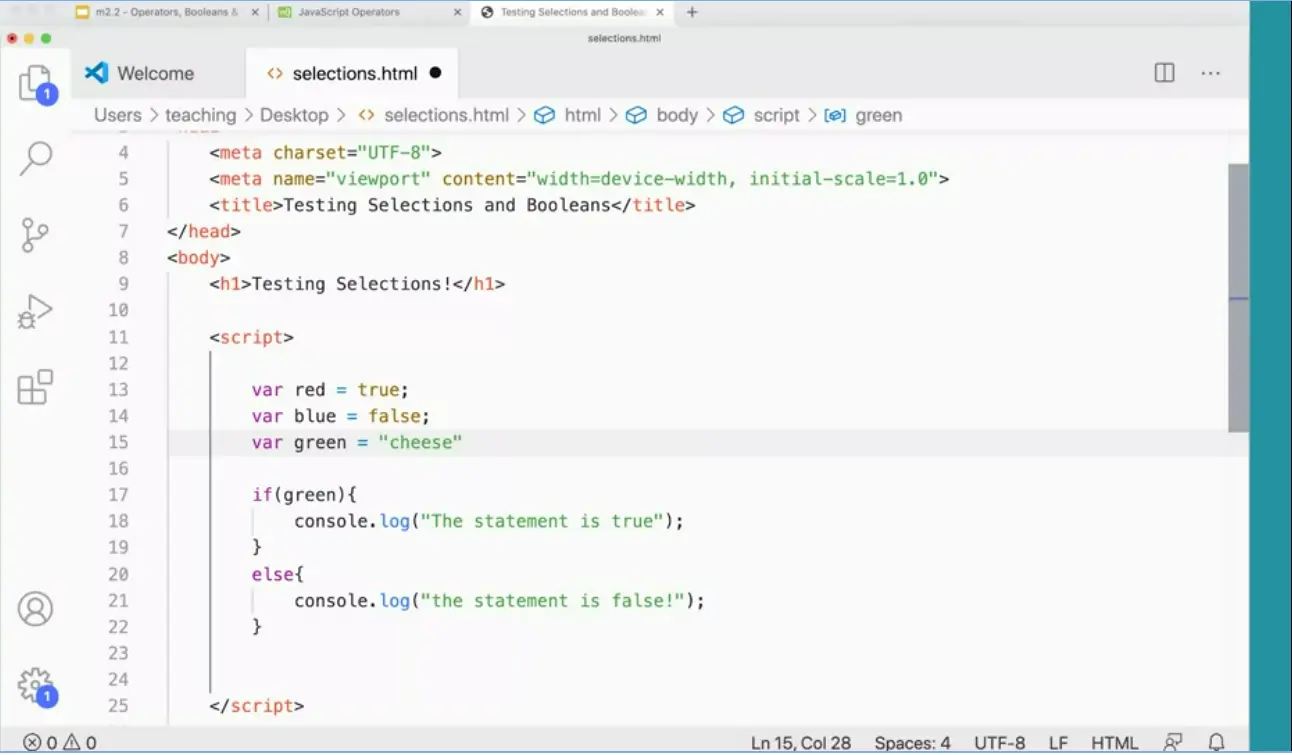
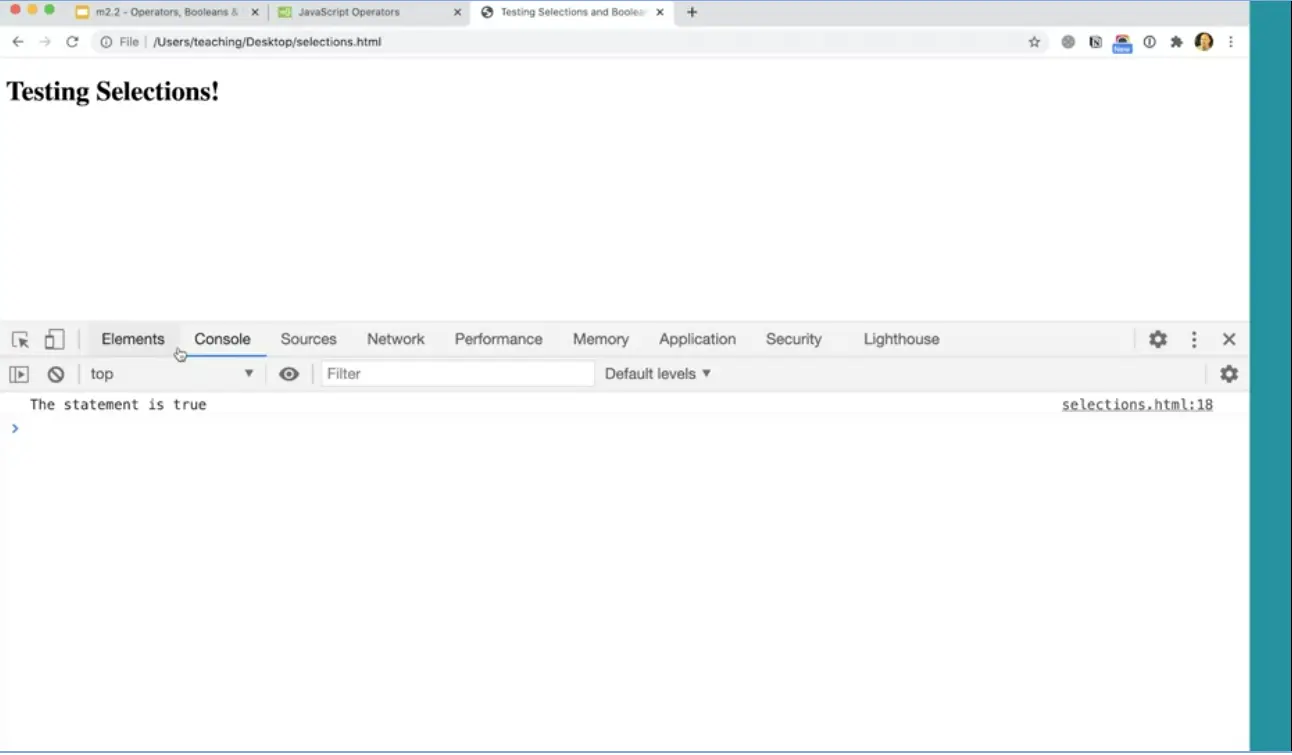
But if I put Cheese Cheese is true. So that's an interesting thing about JavaScript.

Let's look at comparing values.
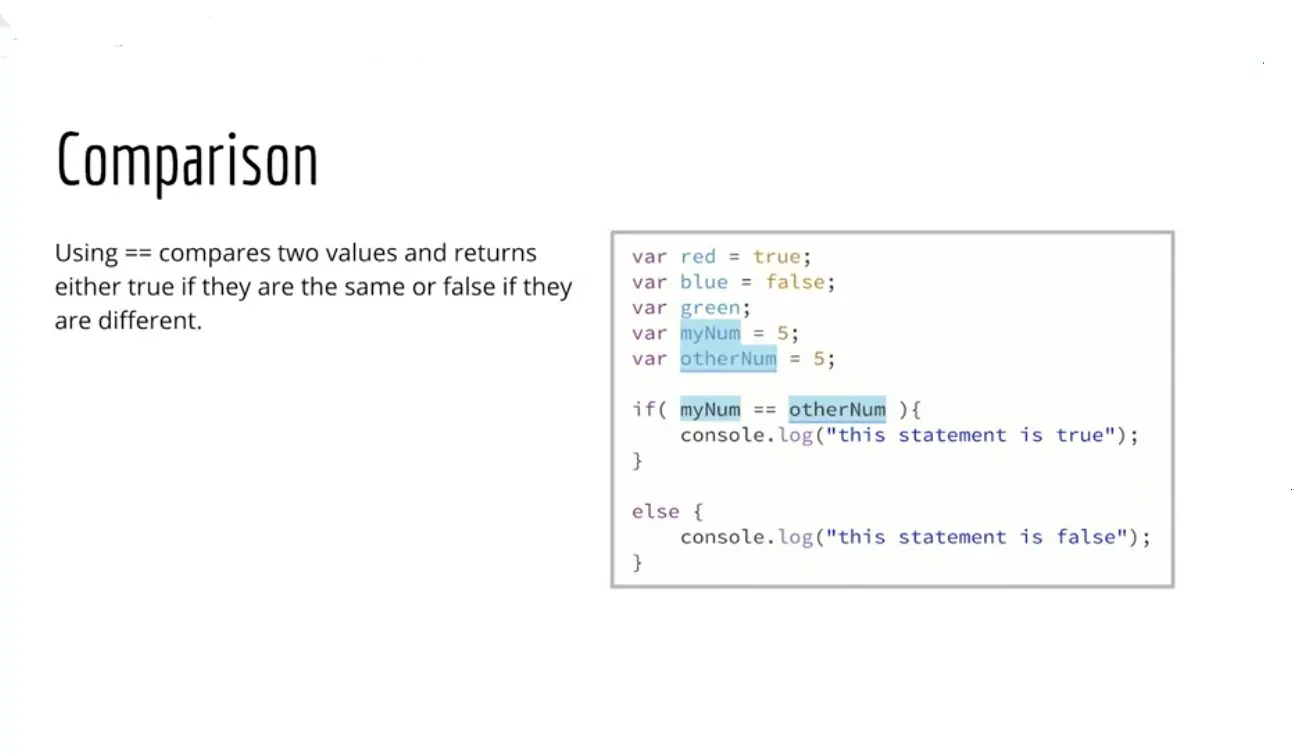
This is something we'll do a lot in JavaScript. We often want to find out if the value here is the same as the value somewhere else.
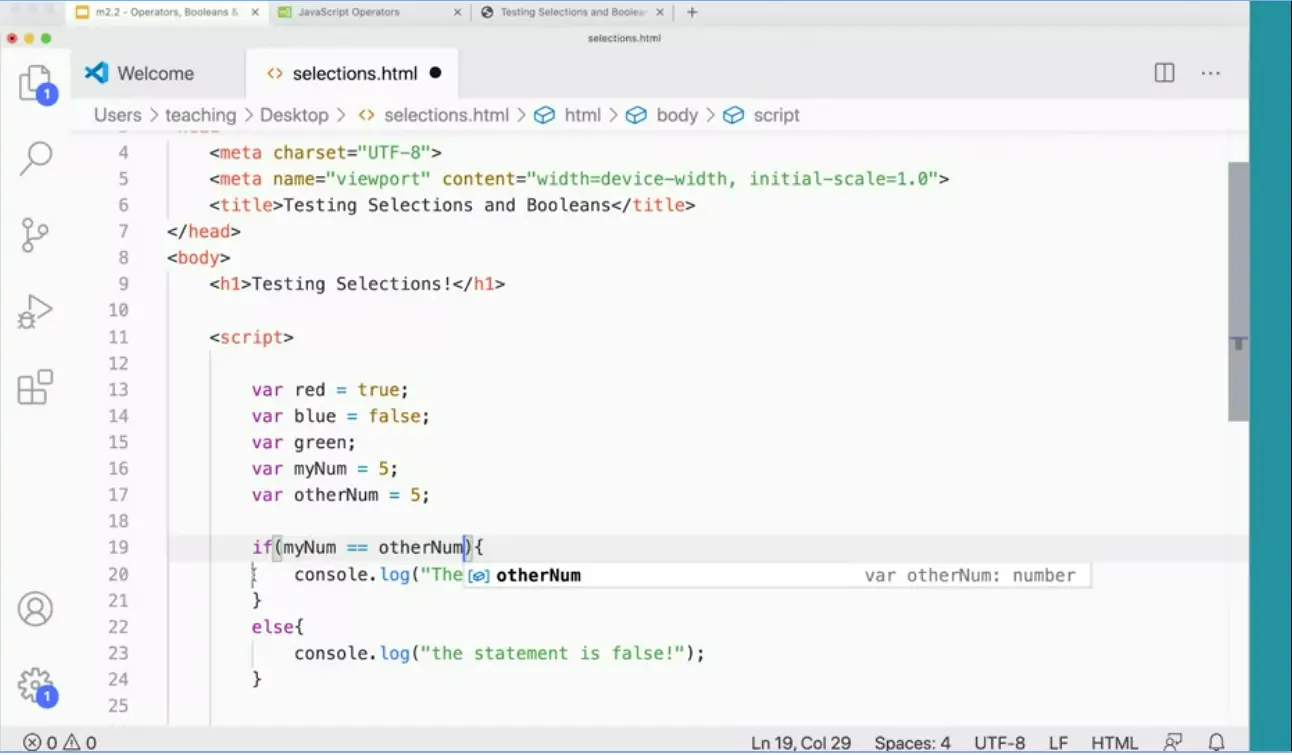
I'm going to go back and leave green here is undefined, like so. Then I'm going to make a new variable, var myNum and assign it the value five and var otherNum and assign it value of five. Then down here I can check to see if myNum is the same as equals otherNum. It's really important to read this as the same as. This is assigns, five is assigned to otherNum and five is assigned to myNum. But here what I'm checking to see is myNum the same as the otherNum. In this case it is.
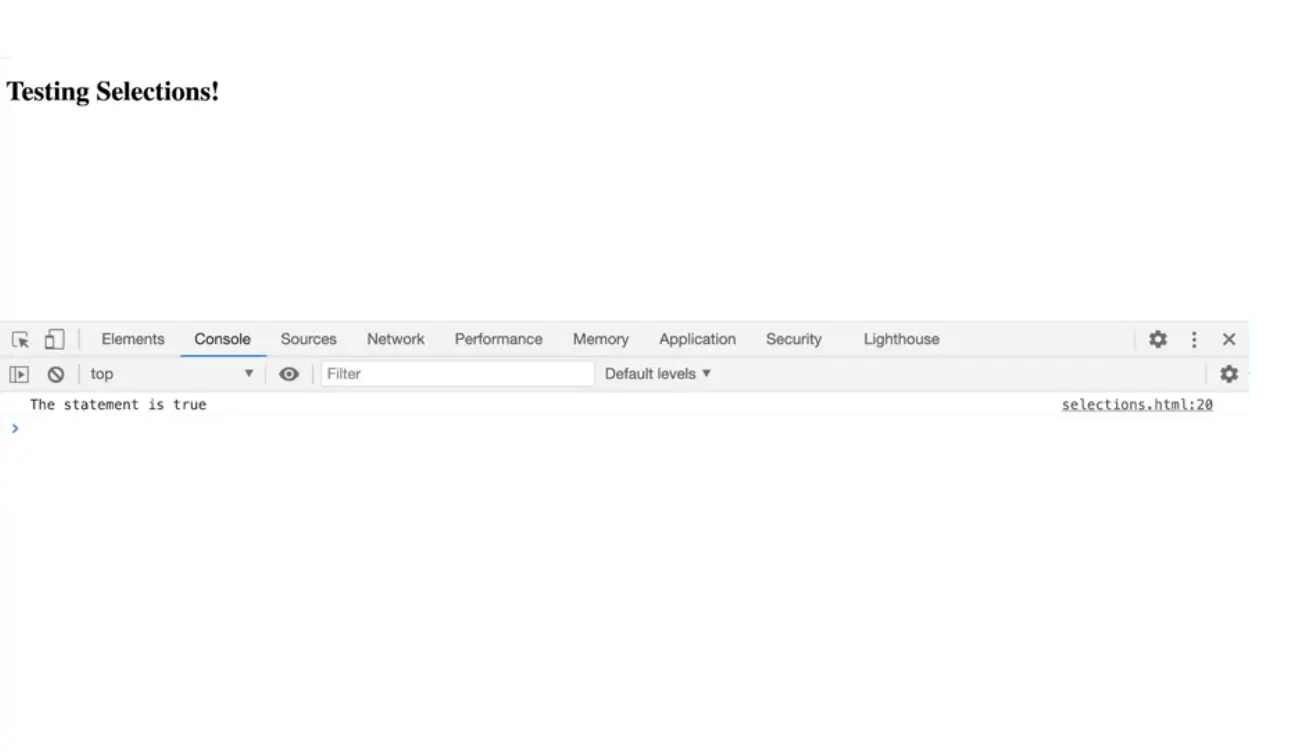
So if I save this and test this, you'll see the statement is true because myNum is the same as the otherNum.
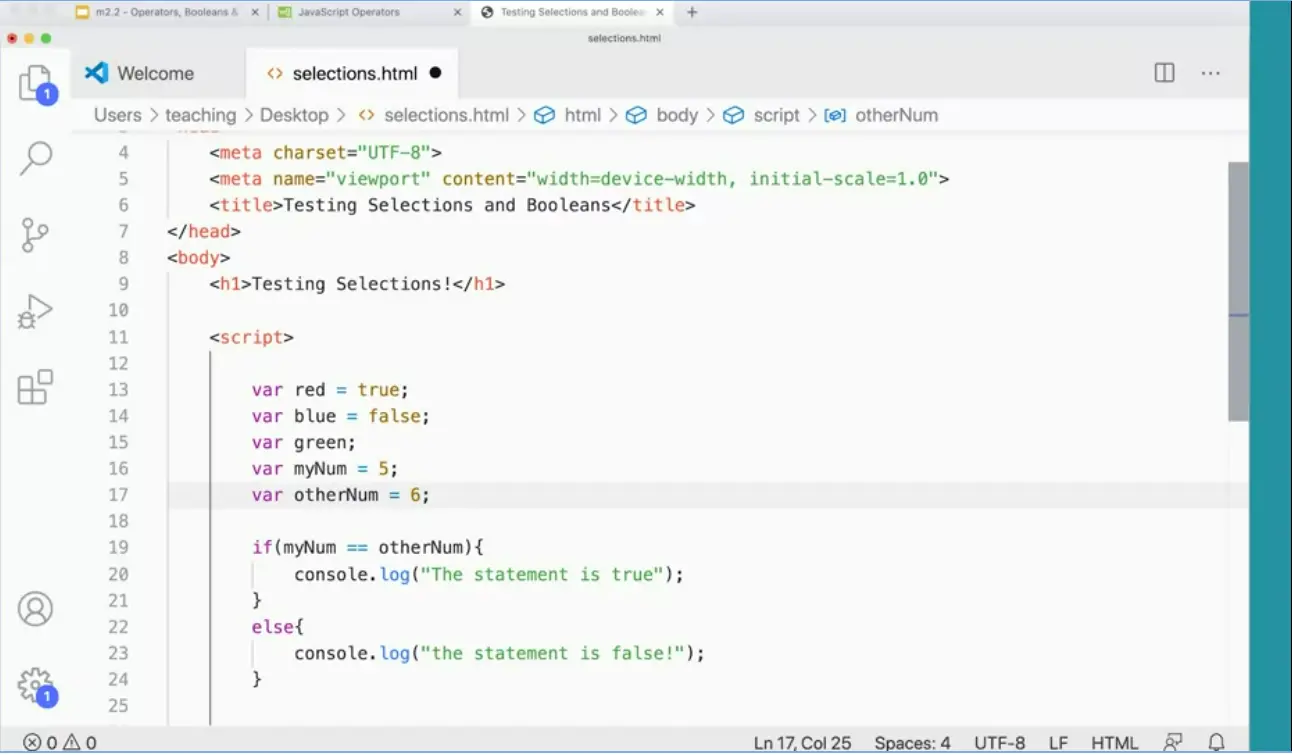
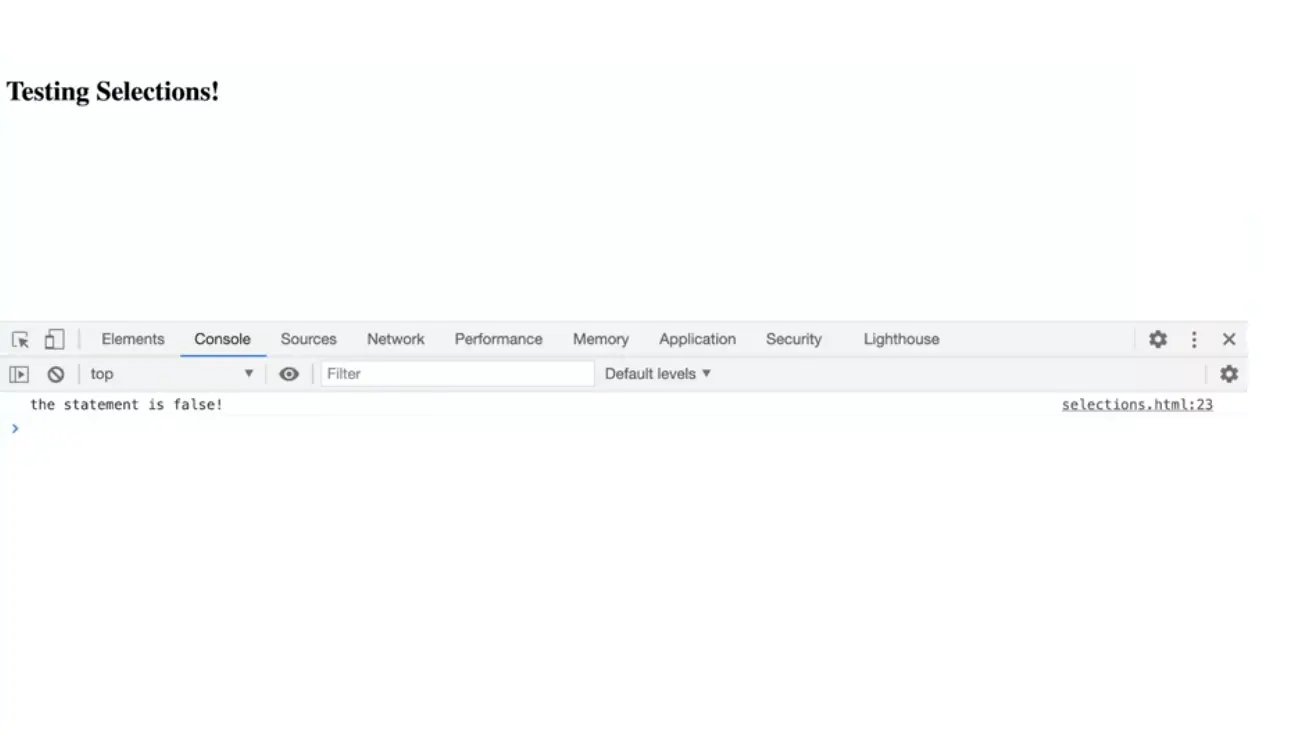
If I change this to a different number, then I'm obviously going to get false. That's not true. So the statement is false, they're not the same as.
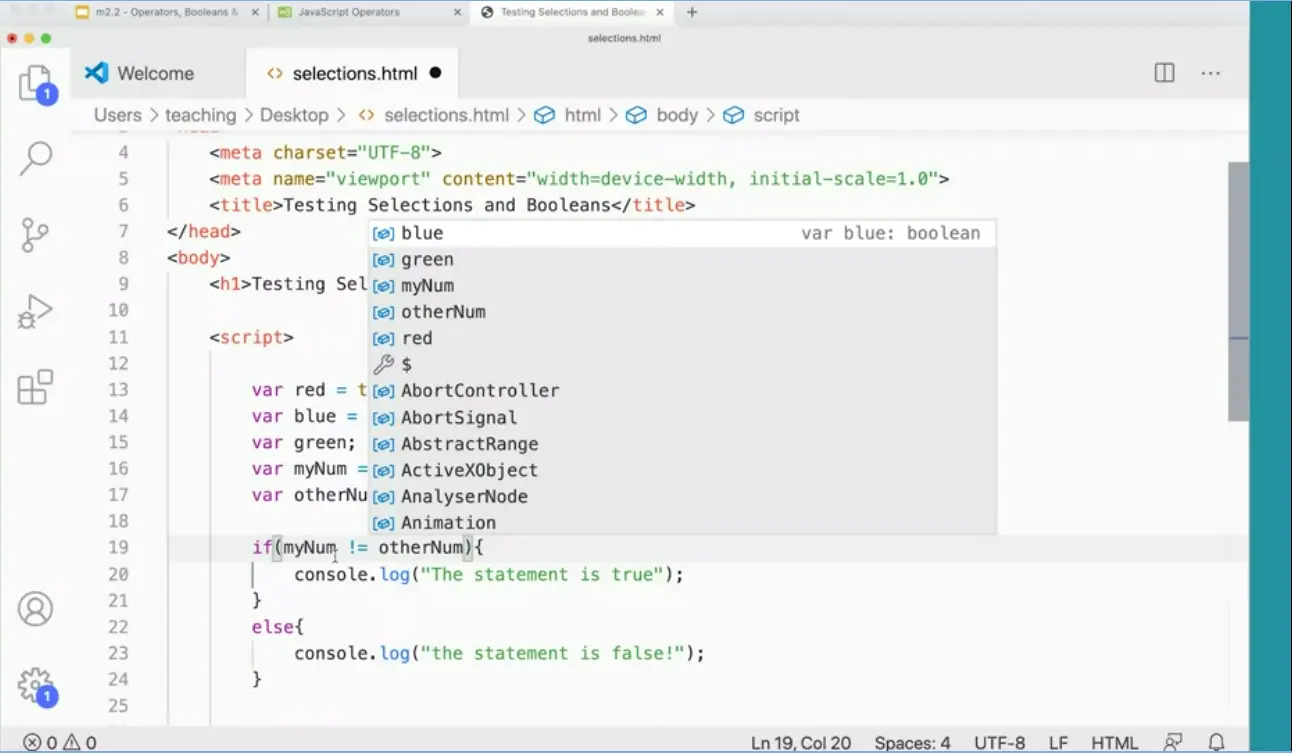
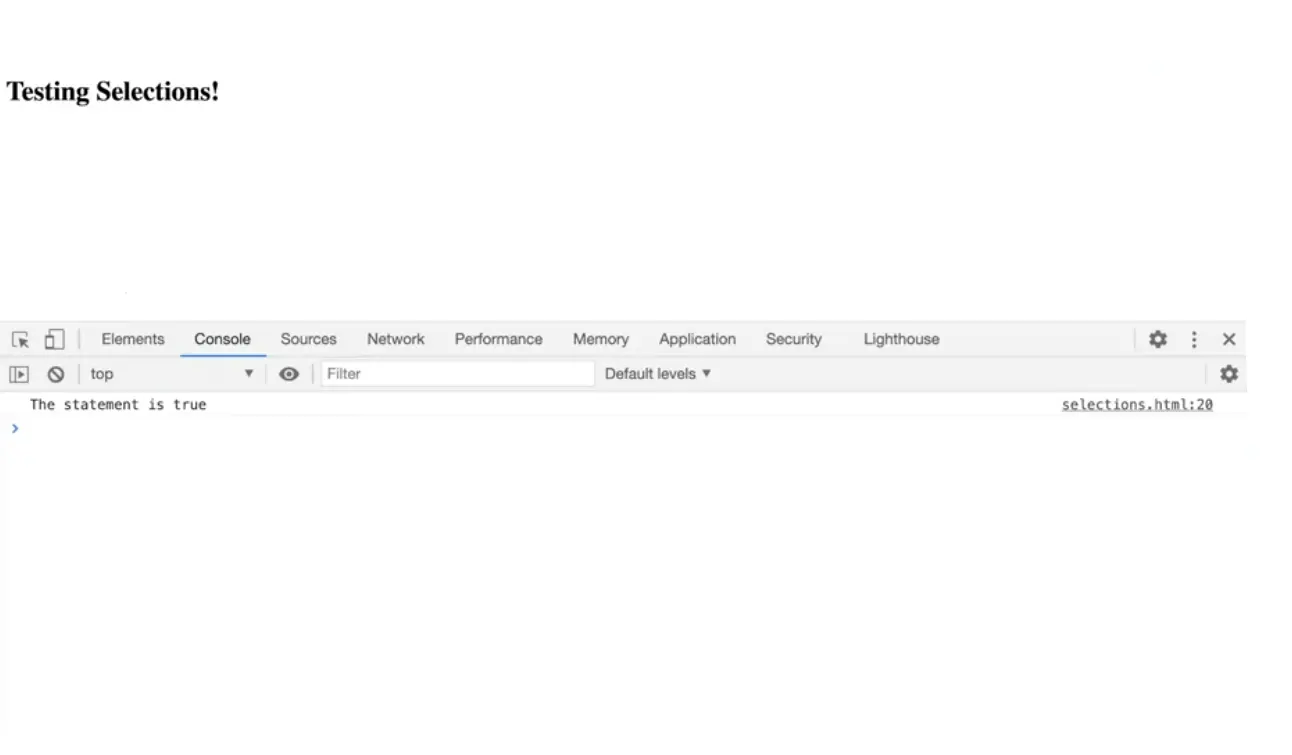
Instead of equals equals, I could use exclamation point equals. That will be not the same answer. Is that true? Is myNum not the same as otherNum? Yes, that's true. We can also check for greater than or less than so we could say, is myNum less than my otherNum? That should be true because myNum is less than the otherNum, let's see, and that statement is true. I could try is it greater than? Is myNum greater than the otherNum. Is that true? That's not going to be true because five is not greater than six. But we can test for these different kinds of scenarios, myNum and otherNum. We can use less than and greater than and check to see if that's true.
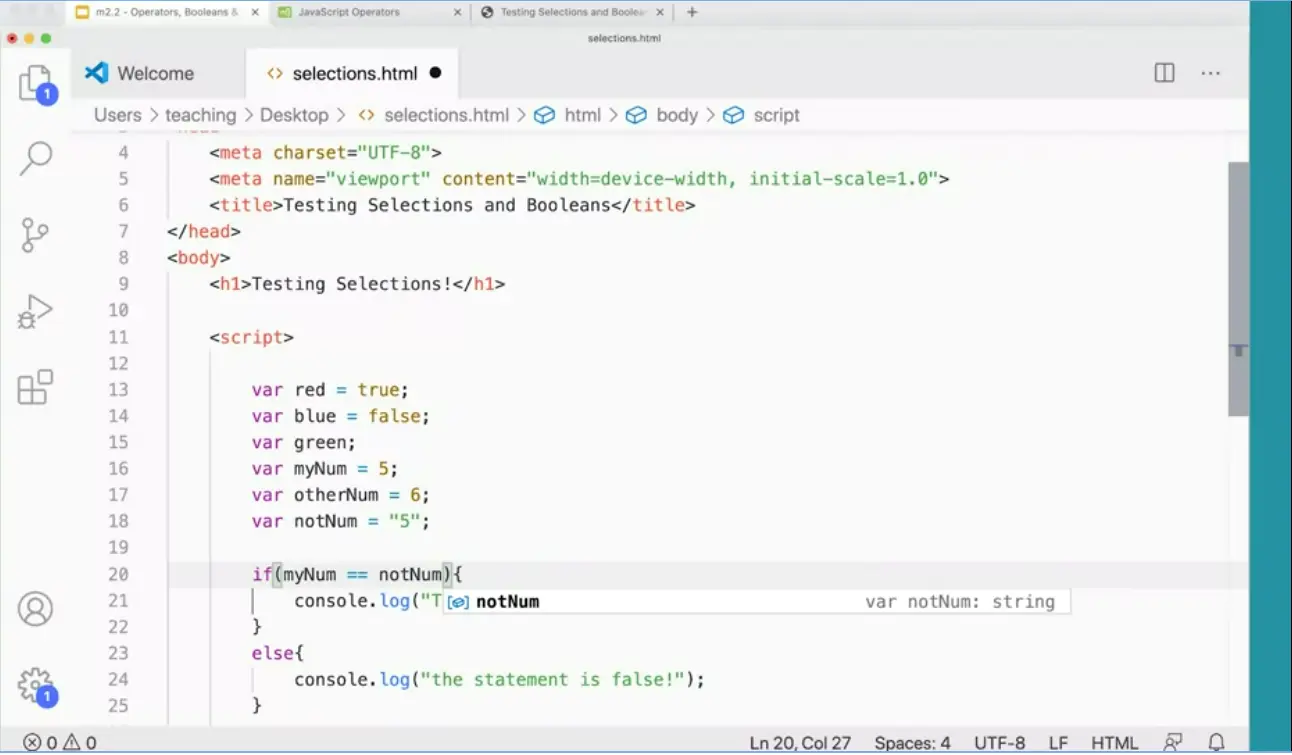
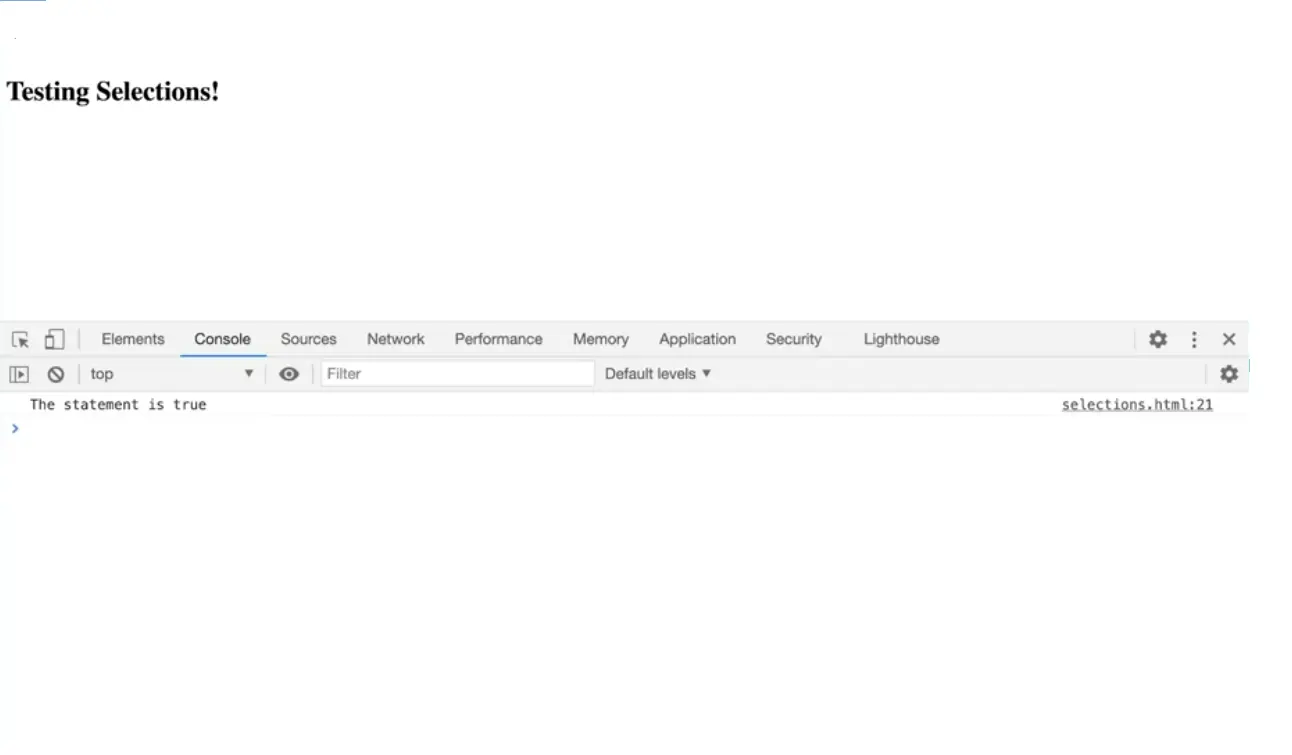
We're going to try a little mix. var notNum equals five. So this five is a string with the number five in it. Now can I check to see if myNum is the same as notNum? Do you think I'm going to get there if I save that and try that? The statement is true. Well, that's interesting. How can a five be the same as five inside quotes?
Remember, JavaScript is loosely typed and it allows for something called type coercion. What's going on here is that JavaScript is saying we've got a five here and we've got a five in a string and they're basically the same, so I'm going to call that true. So that's truthy. It's truish. You can think of it that way, which is very interesting. Now, again, this is the kind of thing that can drive programmers crazy because you could end up making a mistake in your programming or having something unexpected happening. You don't want unexpected things to happen in your programs, that's never a good thing.
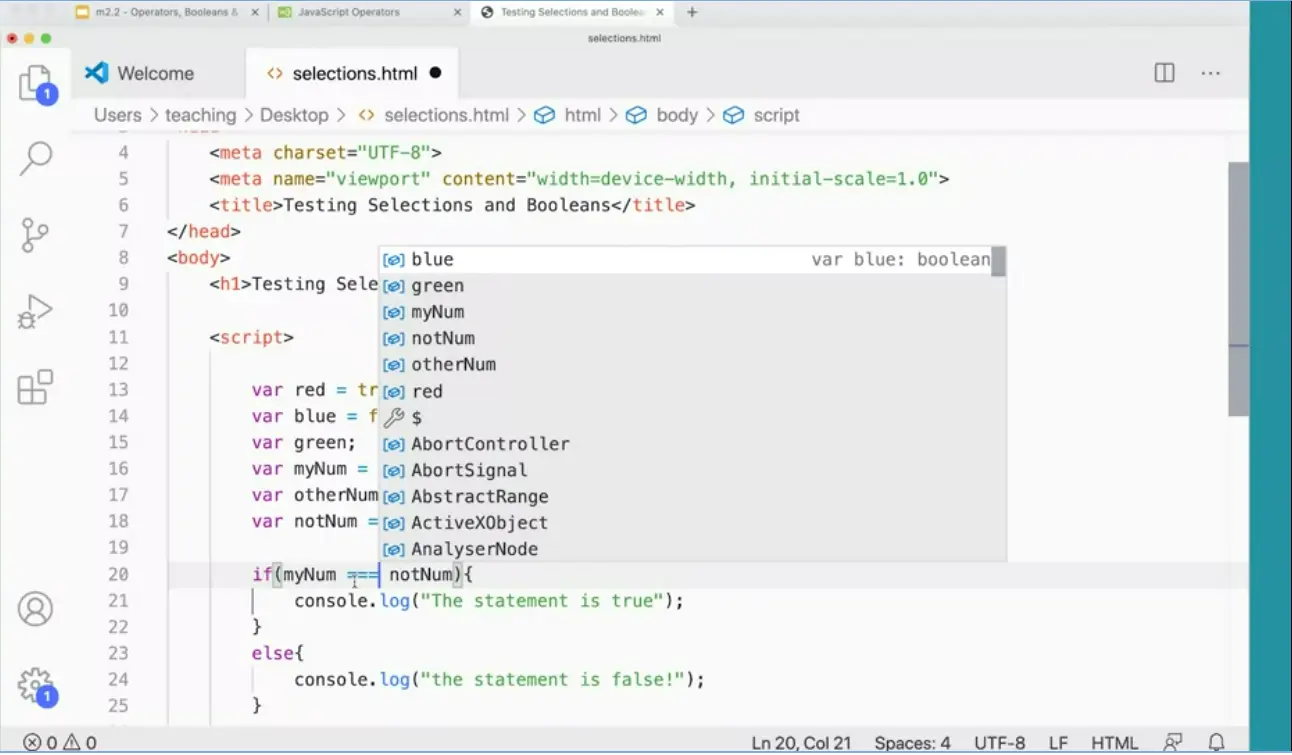
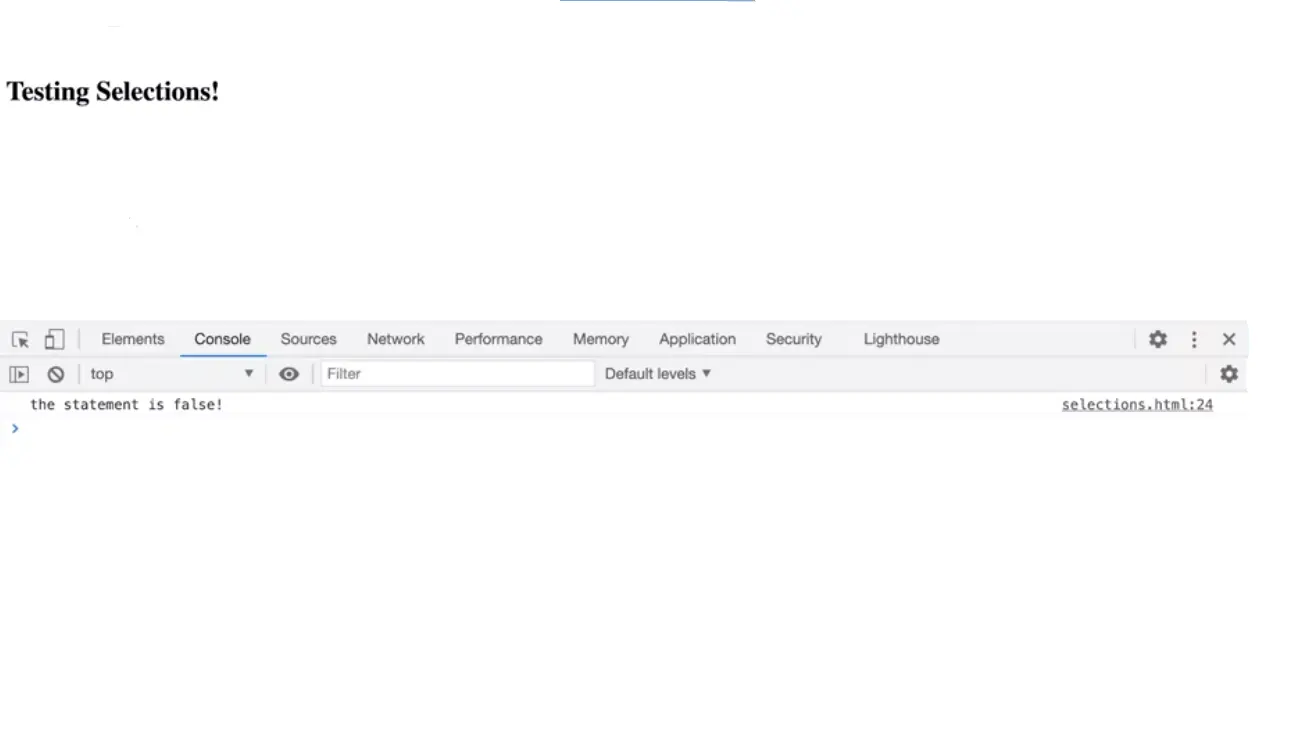
I believe it was ES5 in 2009, they introduced the triple equals operator, which is exactly the same as and that won't do type coercion. Remember, this is the kind of thing that we're working with in JavaScript. They don't want to just get rid of the double-equals or change what it does because that would break other programs. That will break programs that have been happening in the past. But they can add another operator which is the triple equals and that one will not do type coercion. So you'll notice this one will come up false. That statement is false because it won't do the type coercion.
There is also the same thing with the exclamation point so you can say that's not exactly the same as. You can read this as is myNum exactly the same as notNum and the answer is no. Generally, it's considered better programming to use the triple equals sign everywhere. Often in our shorter scripts, it doesn't really matter and you'll see me equals equals over time. But really if you want to get into really good habits, always use the triple equals sign so that you don't ever have any type coercion unless you really want it for some reason. Again, this is an odd thing about JavaScript that you can do this.
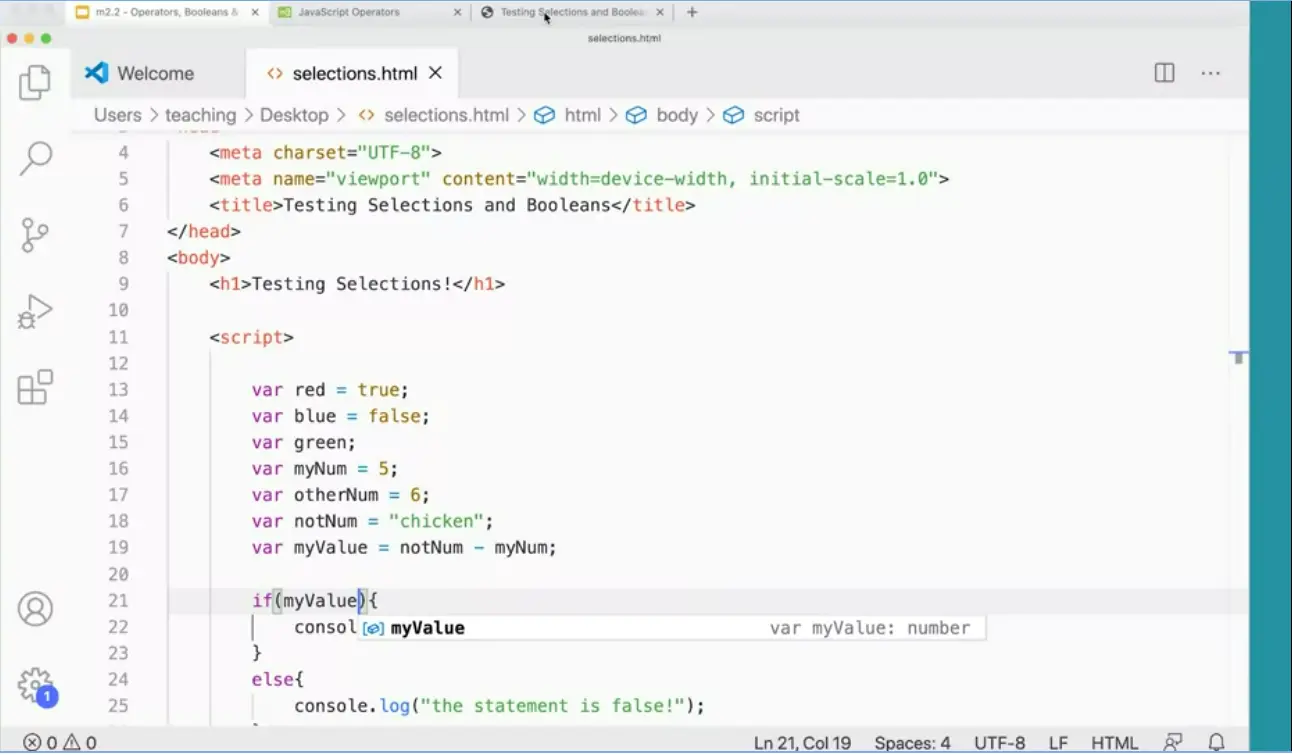
One more thing I want to check out here really quickly while we're here, I'm going to change this five to something like chicken and then I'm going to make a new variable, var myValue equals notNum minus myNum. I'm going to take chicken and subtract five. That doesn't make any sense. What happens if I put my value in here? You probably won't be surprised to see that that comes up false. That's false.
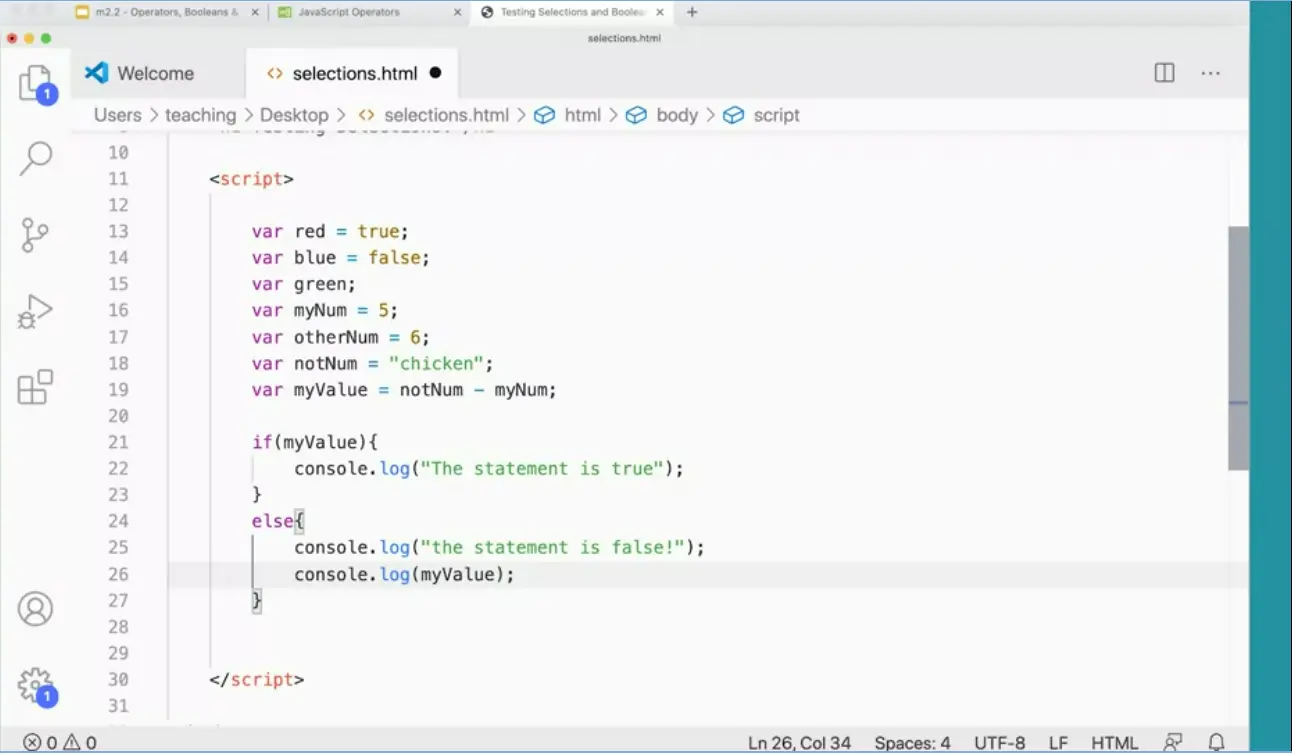
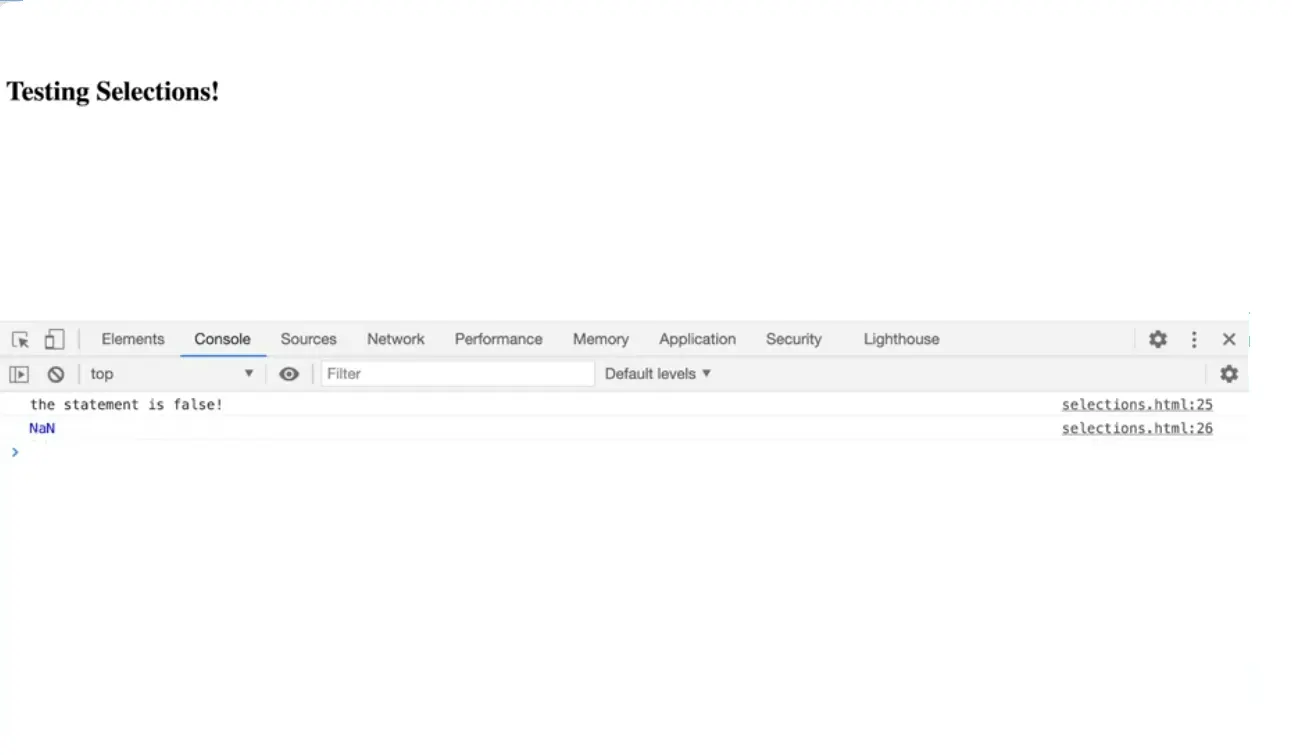
More than, if I come down here and just console.log my value, just to see what's actually in that my value when I try to take a chicken and subtract five from it, what do I get over here? Num not a number, NaN. Num is another thing in JavaScript that is falsy. So in our list of things that are false are zero, false, undefined, null and not a number (NaN). Those things all come up false in JavaScript and that's an important thing to keep in mind as we move forward with working with JavaScript and working with Booleans, and when we're testing values.

JavaScript has an Else If.
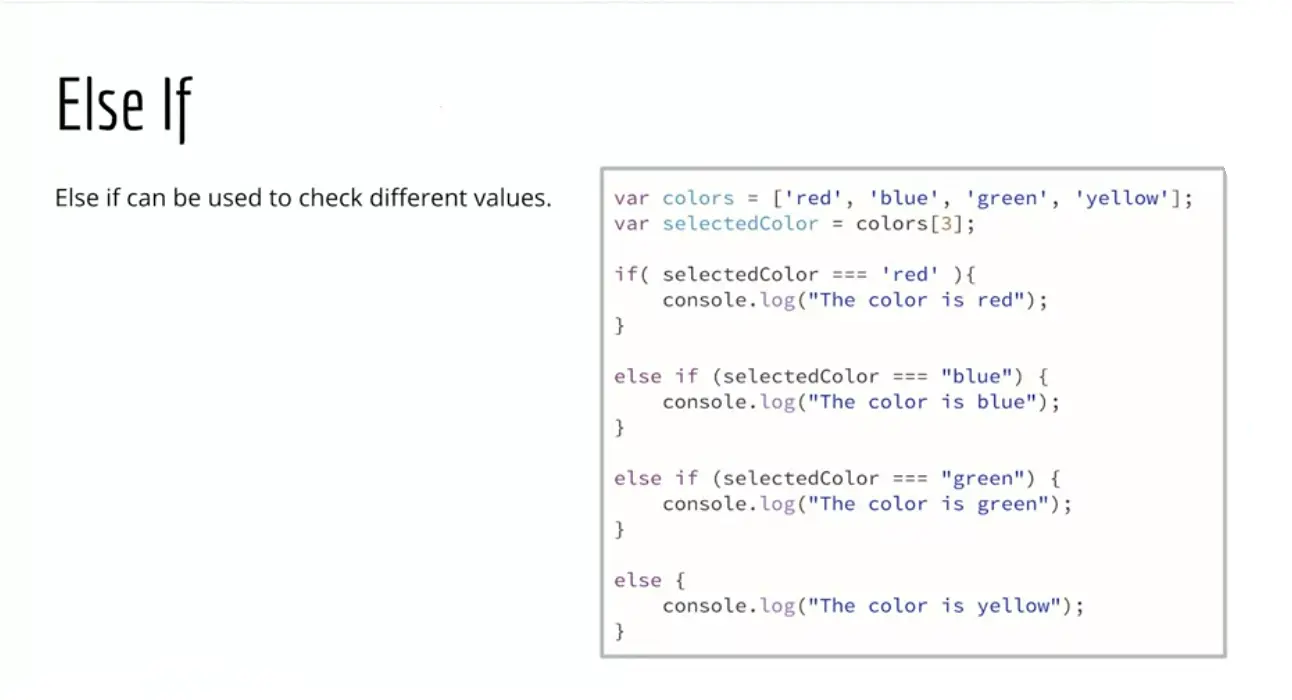
We can run through a series of selection checkers to see which one is true. Practice this stuff as much as you can and get used to the syntax. By just writing the stuff and making mistakes and forgetting to put in the semicolon and the curly braces or the square brackets and seeing what happens when you get in here. Let's type this in.
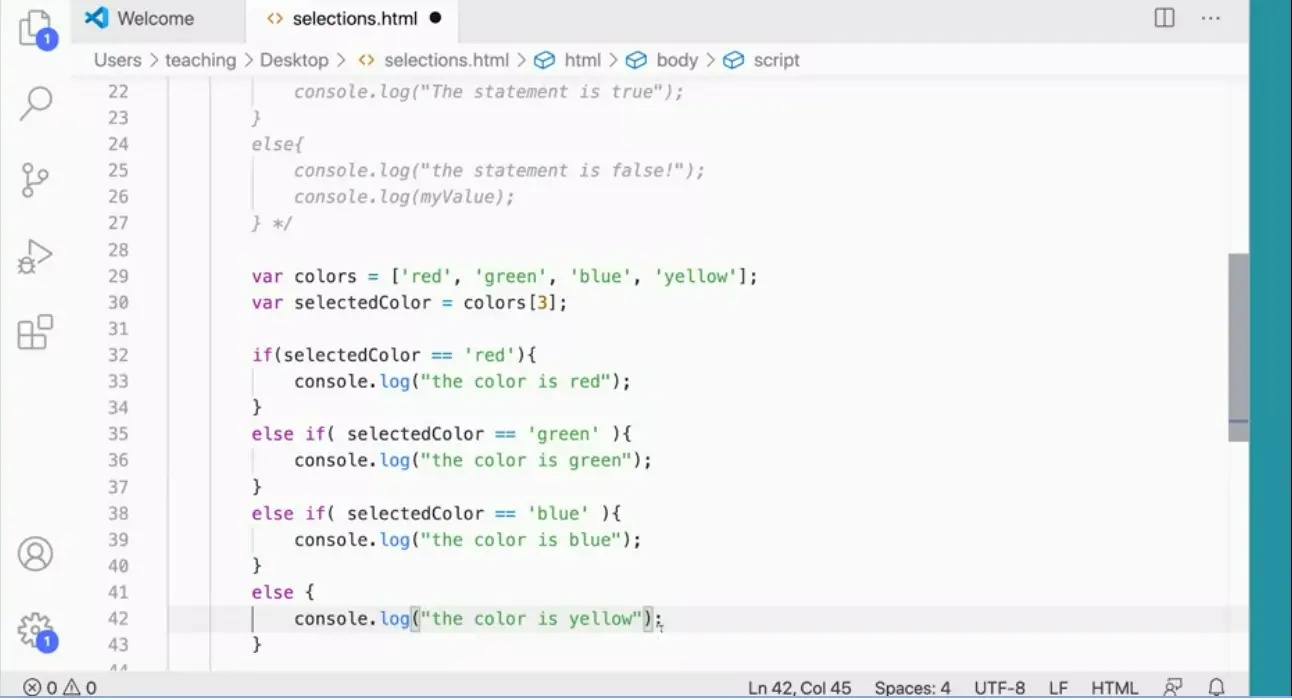
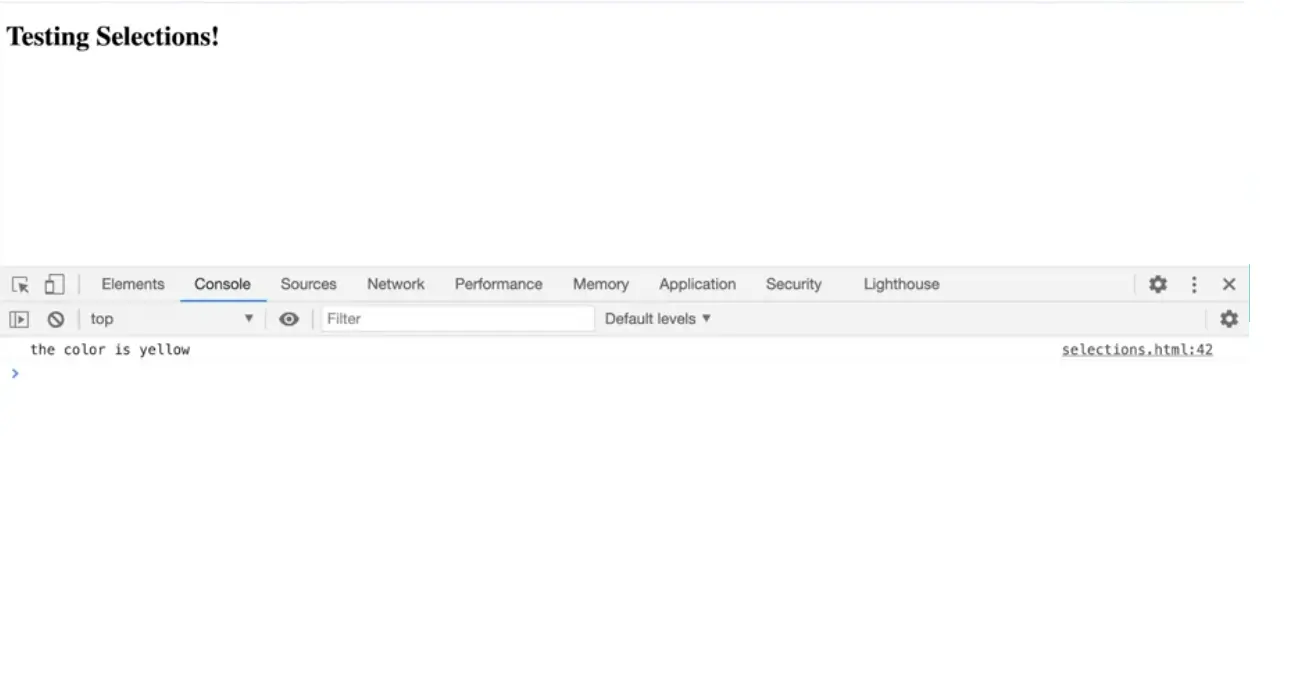
I'm going to come back here and I'm going to add, Windows Alt Shift A. And that will comment that. It'll put a comment around something that I've selected. Down here I'm going to make a variable for colors equals square bracket, quote, red. Green Blue Yellow I'm going to make a variable var selected color Equals colors, square bracket and we'll do three. Red is zero, one, two, three. Now, over here, so I've got that, and that's great. Now I can do an if else statement. So I could do if, selected color is the same as equals red or yeah, let's do red. Red in quotes, red. If it's the same as red, then I can console log something out console dot log. The color is red.
Now I can do an else if. And again I can put else if on this line here like so. I think it's a little bit easier to read if you move it down like this else if selected colour in here I'm going to cheat by copying and pasting. Else if selected colour is blue. And again, I'm just adding these extra spaces because I think it's a little bit easier to read. But it's not really common practice but that's okay. If the selected colour is blue, then I'm going to console log out. Blue actually should do green, green snacks, it doesn't matter. I can go whichever order I want. In this I'm just going to go to read because that sort of makes sense and then I can copy and paste the else if. Select the colour is change this one to blue, and if it's not red, green or blue, then it must be yellow. Okay, great. So with this script in place, we can test this.
We come over here and refresh this and you can see the color is yellow it went through that list of items and chose the correct color. Whereas, if I come up here and change this to a one to zero one and this. You can see I get the color is green. Now, what happens if I make a mistake? Suppose I put four, zero, one, two, three, oops, there's no four. Let's see what I get over here. You're going to get mistakes. You're going to have errors and this said, the color is yellow because the else ran. Which is not really what I wanted. But it is sort of doing that kind of thing or let's see what happens if we do what happens if I make a mistake and I forget to put commas in here.
This is a common mistake that I see from students is they'll forget to put the commas in the array, what happens if I do that? Uncaught Syntax Error: Unexpected string on line 29. So that gives you a notion that you should come back and take a look at line 29 and see what's going on in there. And hopefully, with this stuff in here this little red underline stuff going on here. You'll see that something's wrong there, and you'll put the comments back in very common mistake. When we're starting with this thing, okay, so you can try these different, try these different scripts and see how they work and what they do. It's really helpful to do that.
JavaScript also has a switch statement which will take a value like selected color and run it through a bunch of cases.
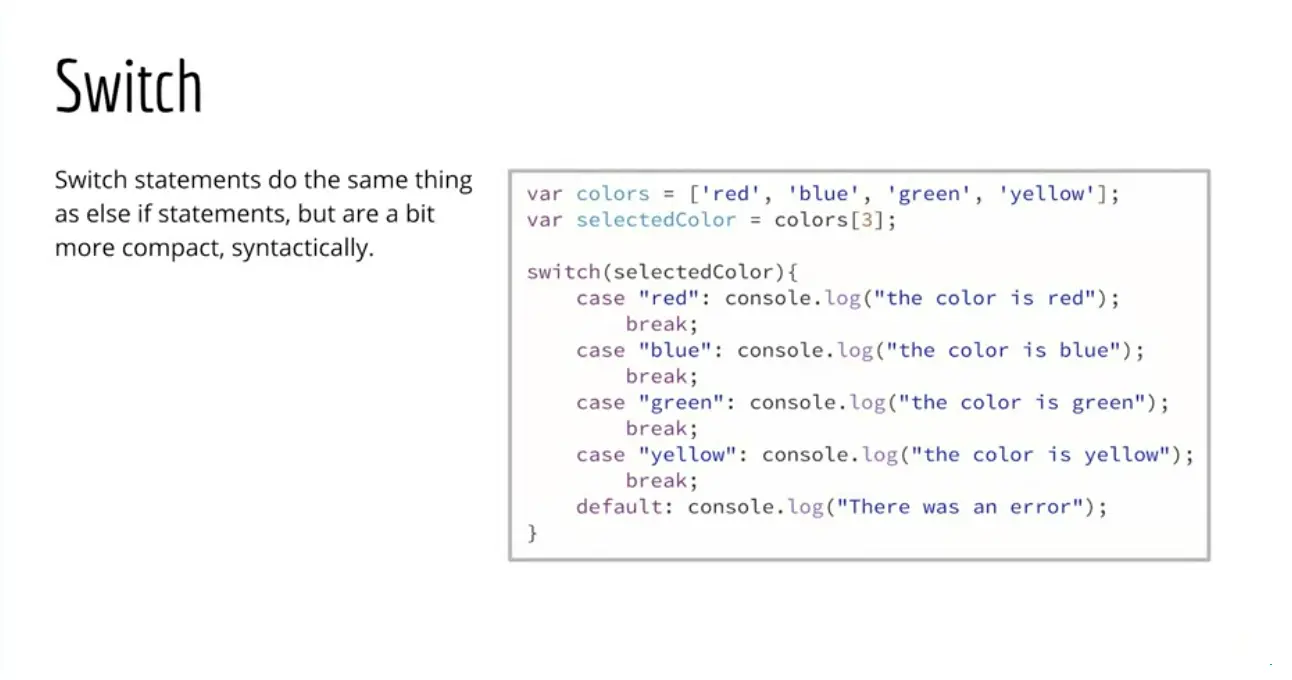
In case it's red, it'll do this, in case it's blue, it'll do that, in case it's green, it'll do that, and then at the bottom there's a default, you can add a default and it'll do this if none of these other ones are true. It's important with selection that you add this break in here as well. The break will bump out of this switch when one of these true statements comes up.
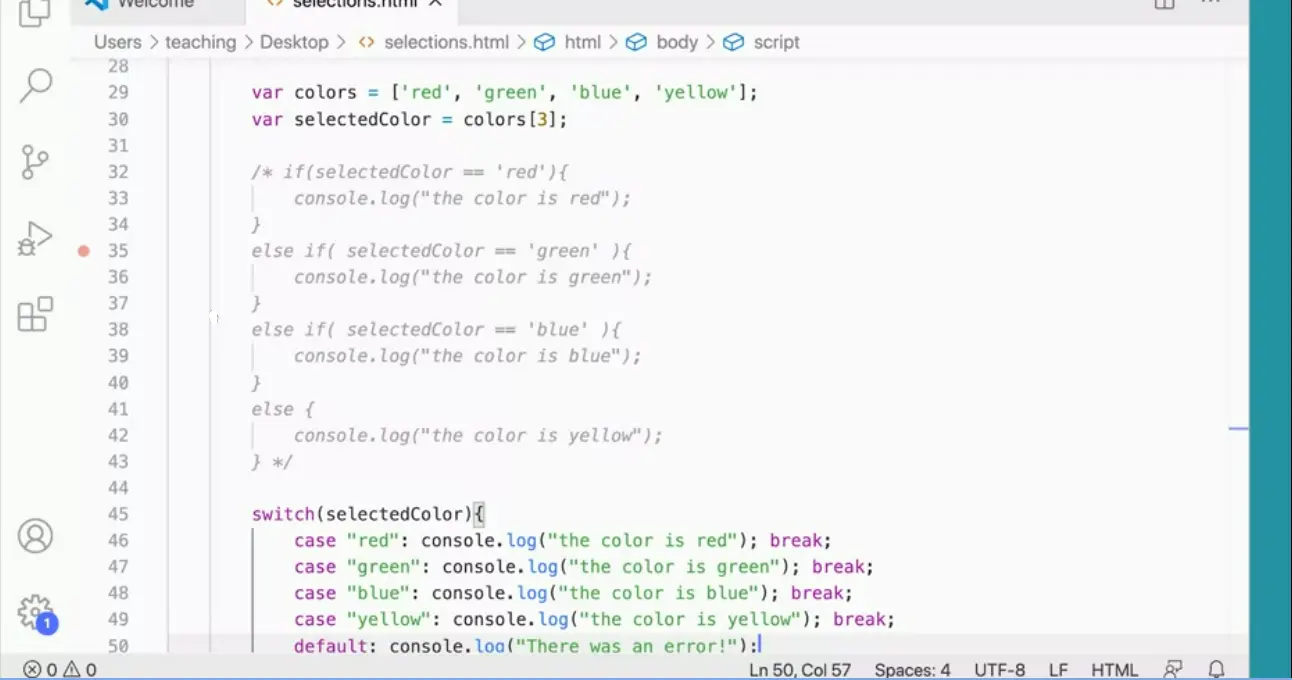
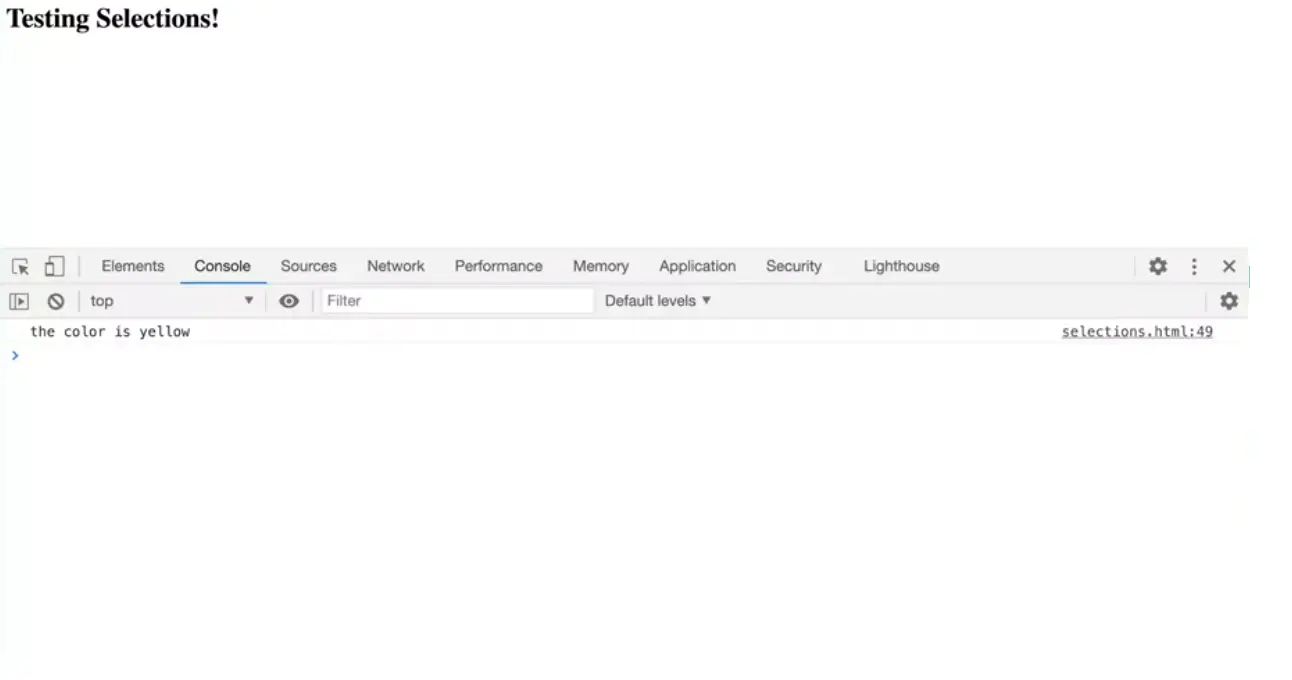
Let's take a look at this really quickly and see what we get over here. I'm going to go in here, I'm going to comment out these if-else statements. Again, I'm going to "Select" them and then do "Option" or "Alt Shift" A in Visual Studio Code to quickly just comment this out, so I'm not running that anymore. Then down here, we can run a switch statement, switch parentheses and I'm going to put in here the value in checking its selected color. Then the switch statement, I'm just going to paste it in here because it's a little bit tedious to watch me type it all. But I'm going to paste it in here, but I recommend that you type it.
Type out, case, red:console.log. The color is red and then a semicolon, so that's the statement that is going to run and then break and it can be on the same line on the slide I have it on the next line, but you can put it on the same line here, rather than watch me type all of these, I'm going to just paste them in here. But you should type it in because learning the syntax, you'll learn it by typing it, not by watching me do it. Go ahead and make these files and type these in here so we can test it out. Then notice I've got red, green, blue, and yellow, and up here, if I set select the color to three, I should get 0,1, 2, 3, I should get yellow. Let's see if I get that if I come over here and test this. Ensure enough the color is yellow, that's coming up great.
I could change the selectedColor[0] to zero, which will get me the first one. Now I've got red and that break is bumping me out of there.
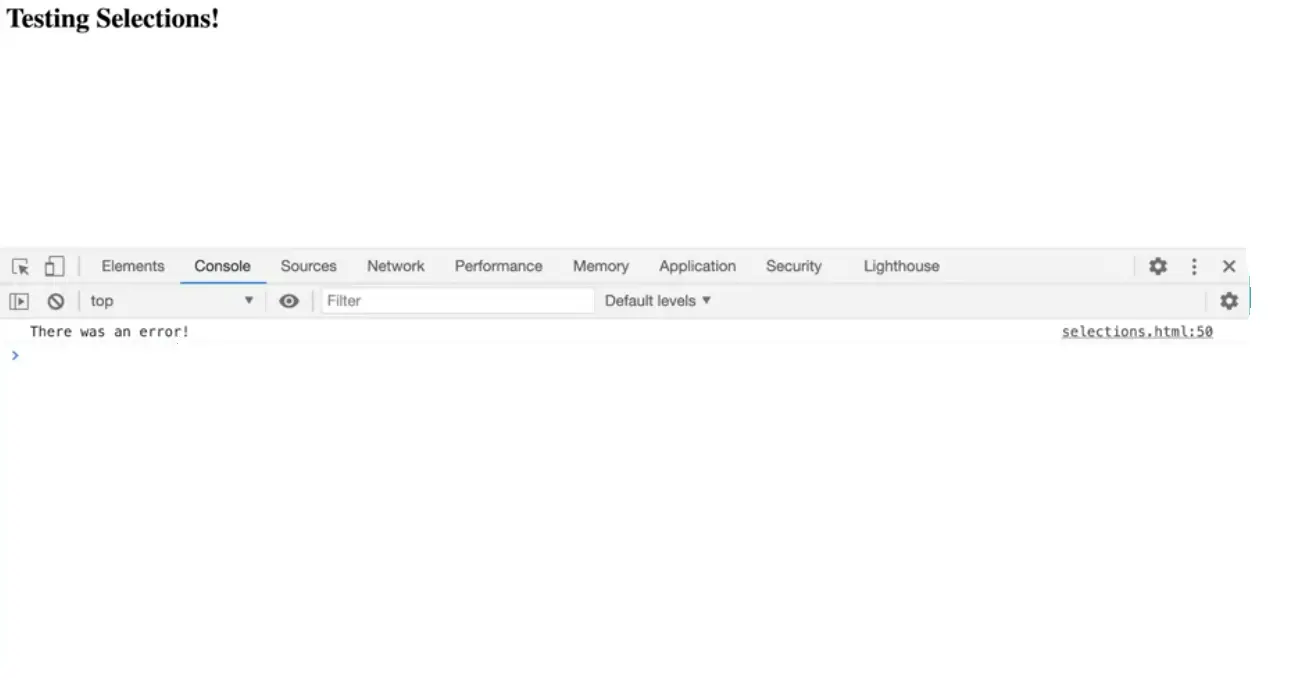
But if I were to set it to something past the end of my array, so 0, 1, 2, 3, if I set it to have four, the default will run and I get there was an error because I'm outside of my array, so the default option ran down here.
Sometimes say "I'm forgetting a semi-colon, " will really set it off as well. Unexpected token break and line 47. These syntax error, unexpected token, what does that mean? It's really expecting a semicolon token here and it seemed break instead, so it's confused by that. But these syntax errors, these error messages are sometimes a little bit cryptic and they take a little time to get used to them. But the switch statement is a great alternative for the else, if and it takes up less space and it can help you be very concise and specific with your code in a way that's helpful and useful.

In JavaScript, we can check to see if multiple things are true by using the ampersand operator, or the pipe operator.
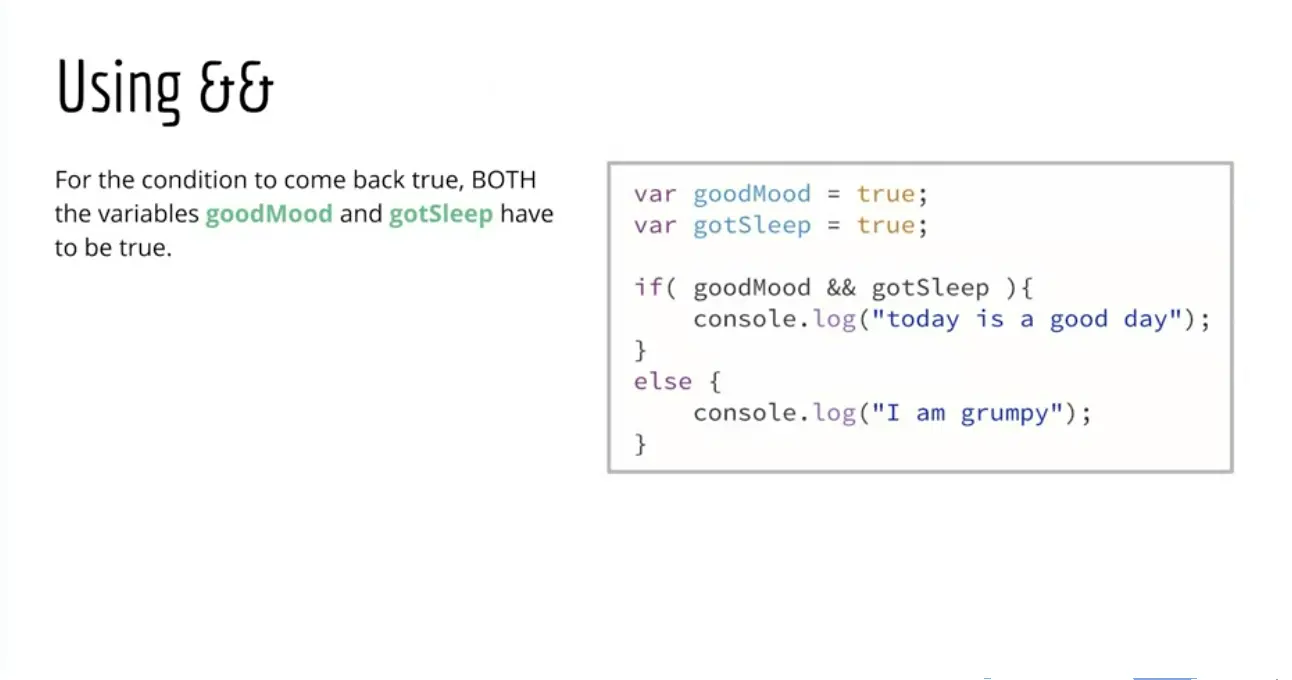
We'll look at the pipe operator next, but here we're using the ampersand operator, and we use two of them together here.
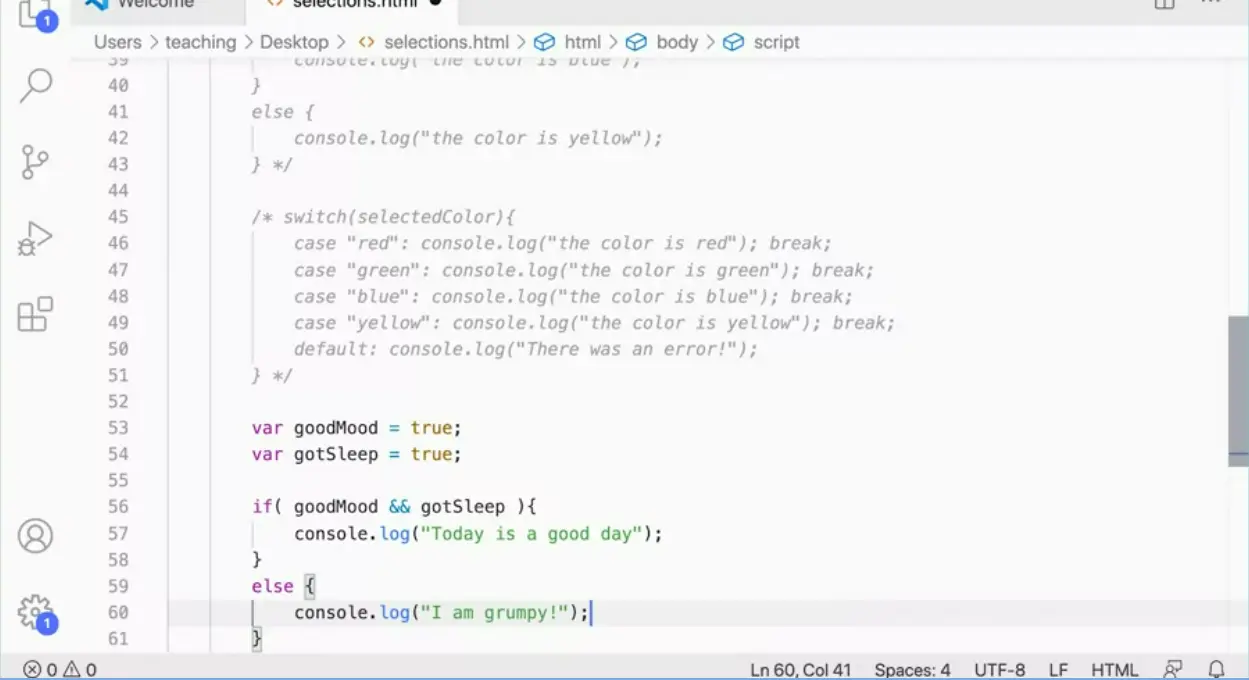
And what we do is, we check to see if this statement is true, and if this statement is true. And for this whole thing to be true, when you use the AND operator, both of these must be true in order for this to run. So I have to be in a good mood and have gotten sleep, in order for today to be a good day. If either one of these is false, then I'm going to be grumpy.
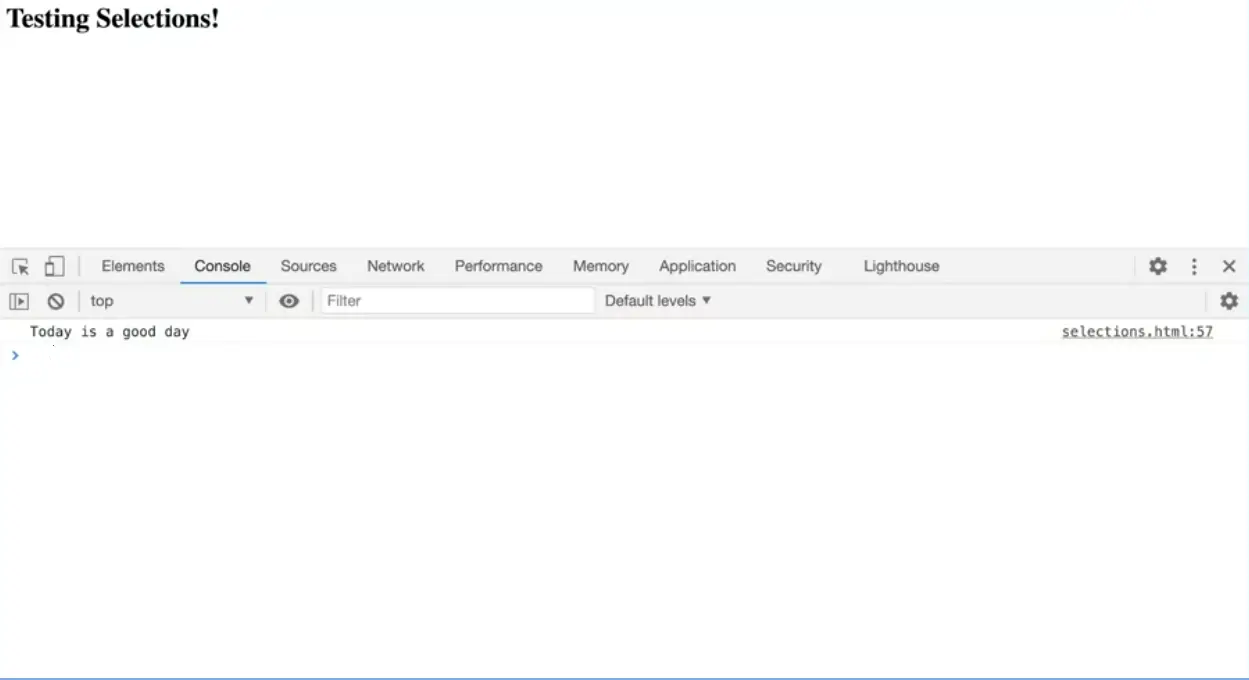
Let's just test this one really quickly, because I think it's just a good idea to practice typing these.
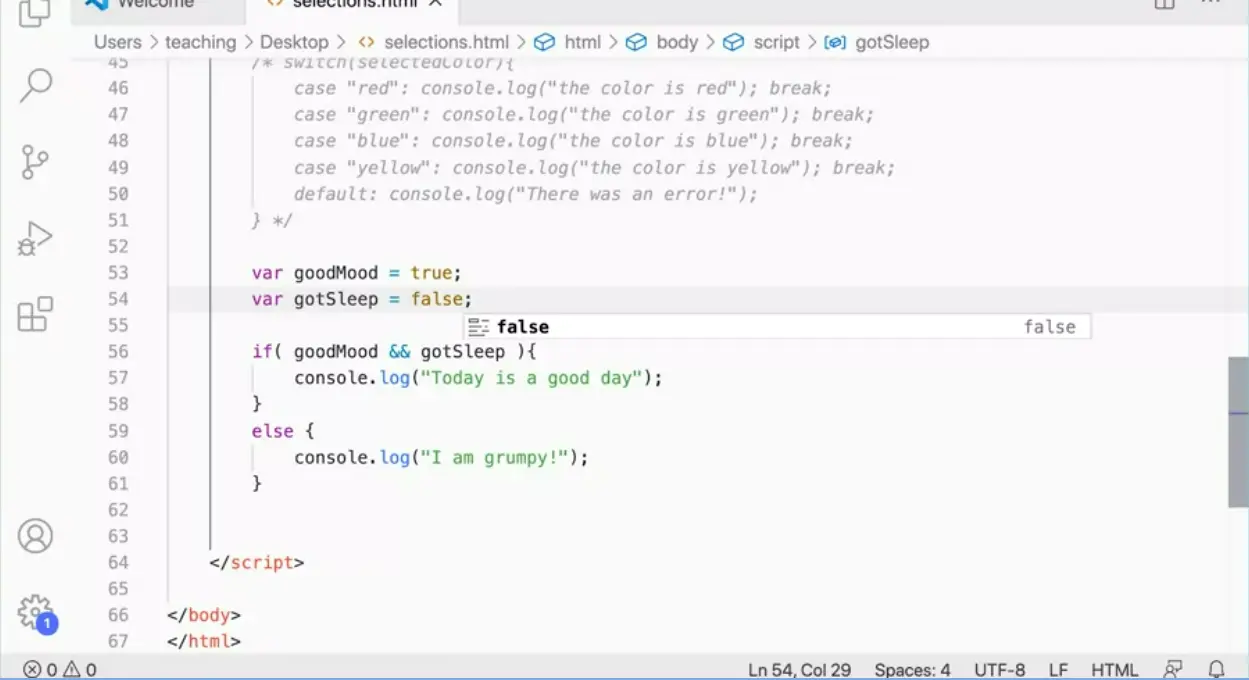
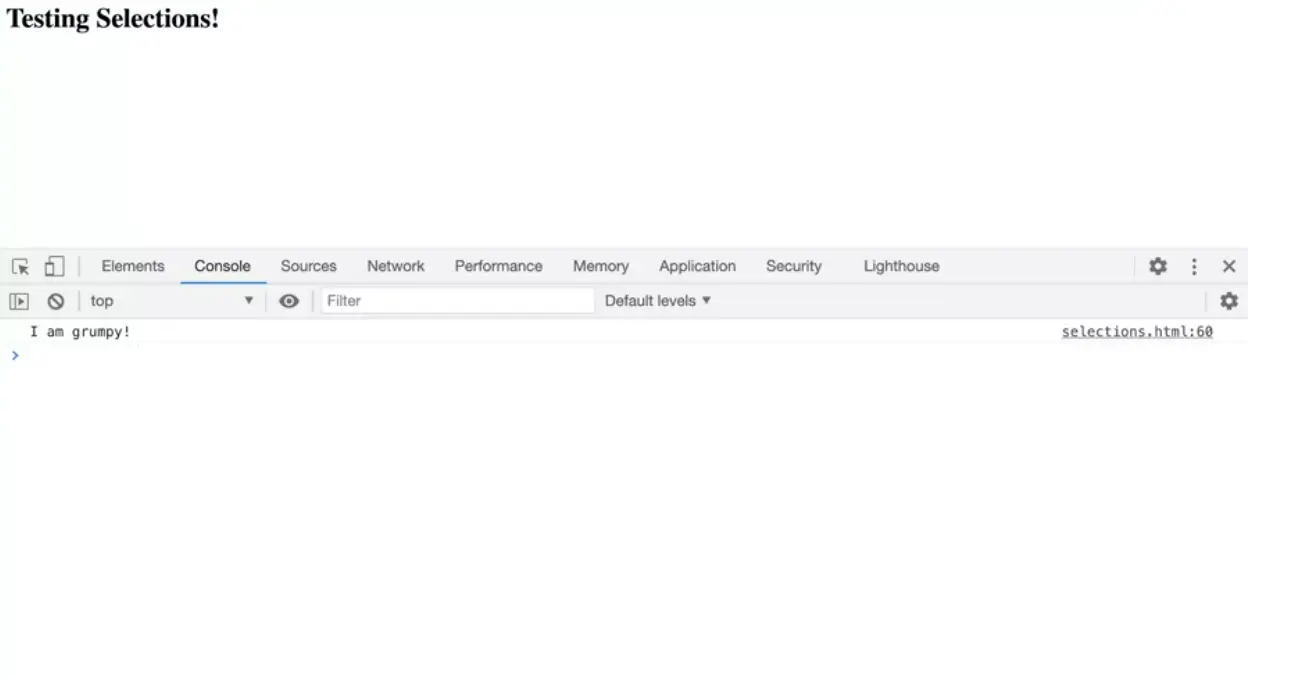
Next, I'm going to come in here, I'm going to turn this one off. Again, Option or Alt+Shift+A comments it out. And then I'm going to do var goodMood, and set that to true, var gotSleep, and set that to true. And then I'm going to say if, whoops, if(goodMood && gotSleep), if both of those are true, then I can console.log, Today is a good day, else, console.log("I am grumpy!").
Now, we can test this, and we can see that because both of these are set to true, the if statement is going to run. Today is a good day. However, if I were to go in and change it so that one of these was false, it doesn't matter which one, then this whole statement will come back false. And I'm grumpy, so that's kind of an important tool in our tool kit, is we can check to see if two things are true. If two things are true, then we can do something. If either one of them is false, then something else is going to have to happen.
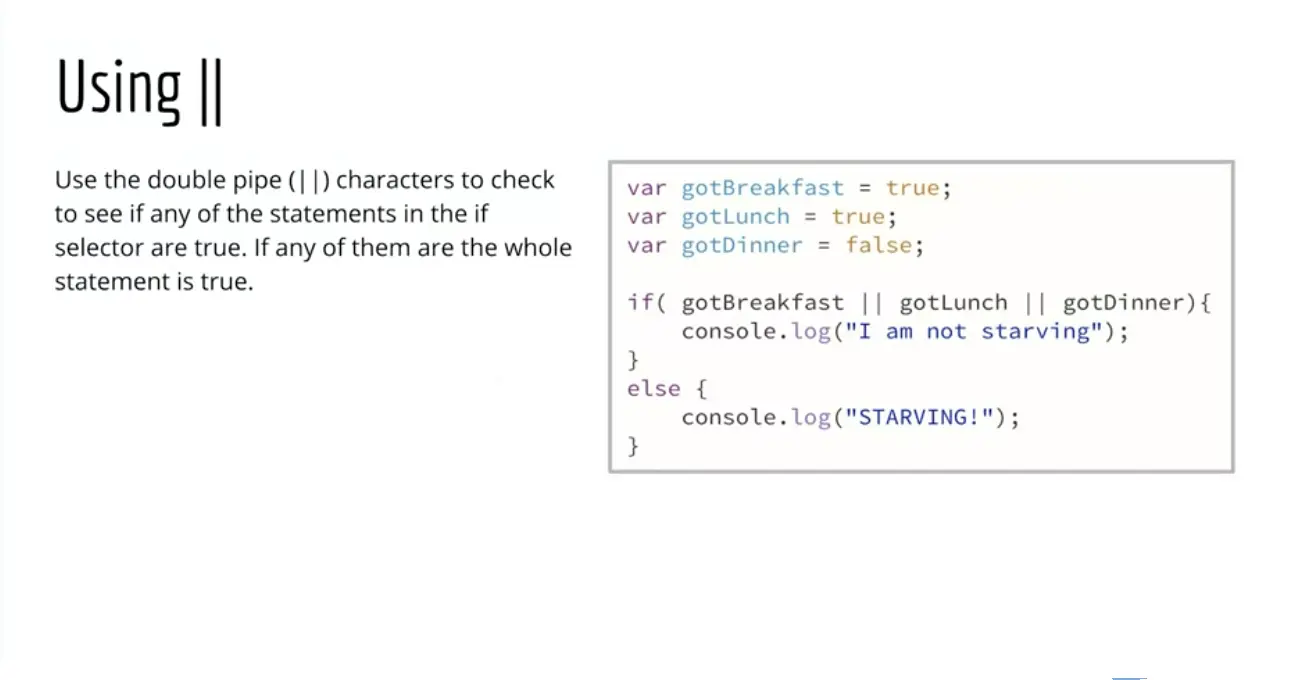
Now, we can also use the double pipe. The pipe is the key on the American keyboard above the Return key, Shift, and that key up there. It's also got the backslash on it. The pipe is an OR statement. So here, gotBreakfast is true, gotLunch is true, but gotDinner is false. But if any one of these is true, then the if statement rings as true. So they would all have to be false for me to be starving.
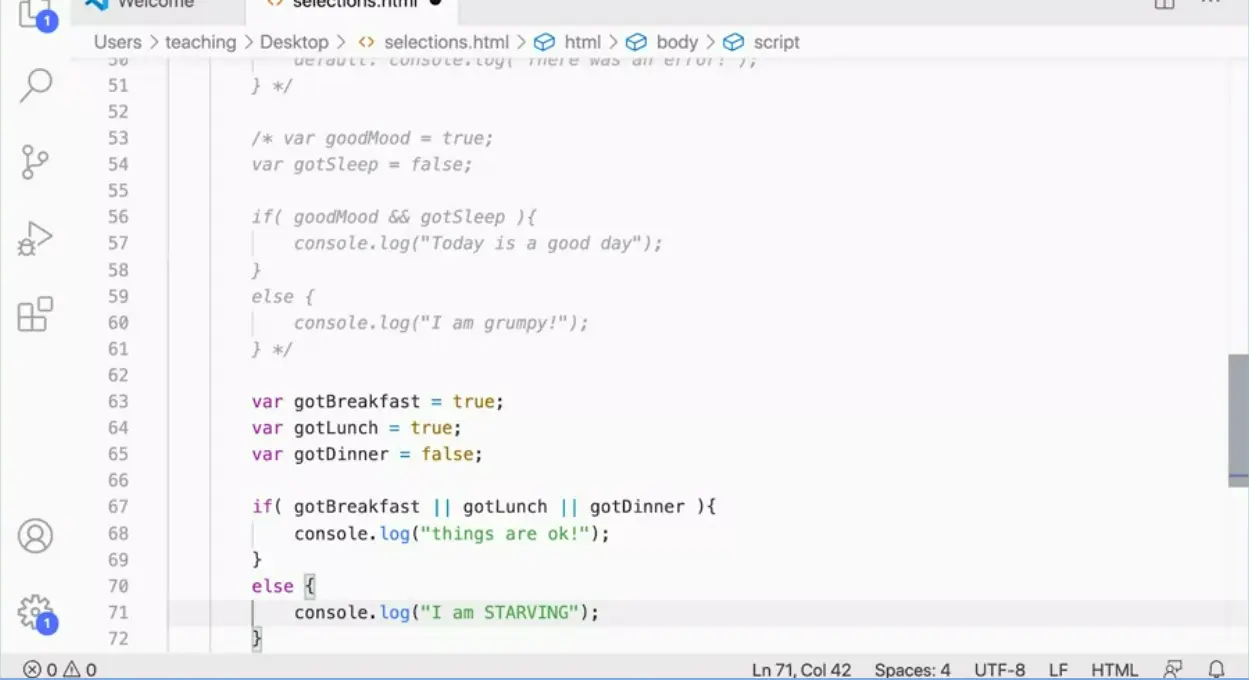
var gotBreakfast = true, var gotLunch = true, var gotDinner = false. If(gotBreakfast || gotLunch || gotDinner), if any of those is true, then console.log("things are ok!"). Then down here, else console.log("I am STARVING").
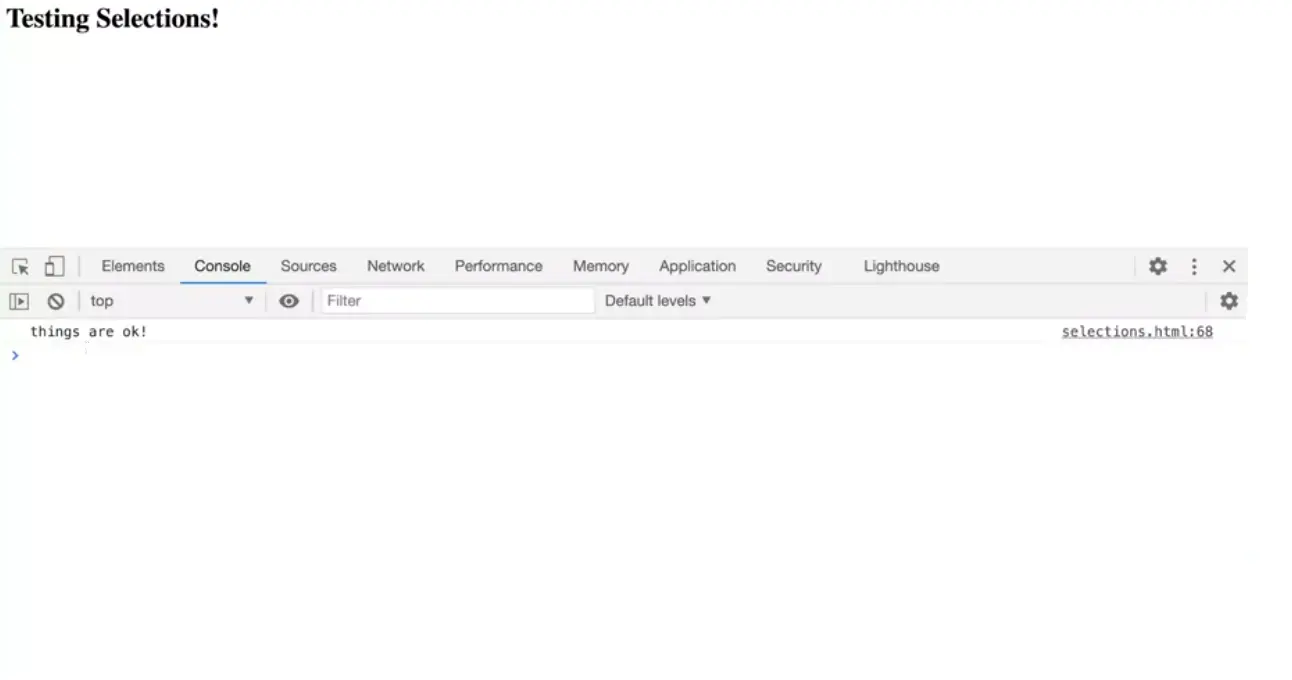
And there we go, so I can test this over here. And you could see, things are ok, even though one of those would be false. I would have to make all of these false, to be starving, and there we go.
You've learned about Booleans in this lesson, what's true and what's false. And that some things are true-ish, and some things are false-ish, or falsy and truthy. 0 is considered false in JavaScript, or undefined, or null, or not a number (NaN) is false. These are all considered false in JavaScript. And you've already learned a lot of the basics of JavaScript, and we're going to keep going with these basics.
And I know that these scripts don't seem particularly interesting yet. But I promise, if you hang in there and keep working on this, then we will start making some interesting things pretty quickly. And we'll start manipulating content on web pages, doing all kinds of interesting stuff, so hang in there, keep going. And if you haven't had breakfast, lunch, or dinner, you're probably starving, so you should go eat something.

Loops in JavaScript.
We've already done quite a bit of JavaScript already. We've looked at variables and we've looked at arrays, and we've looked at how to use selections to choose if something is true or not, Booleans. The next piece of the puzzle is loops. Frequently, you need to iterate through a number of values and do something with them when you're programming. And JavaScript, like many programming languages, will allow you to do loops.
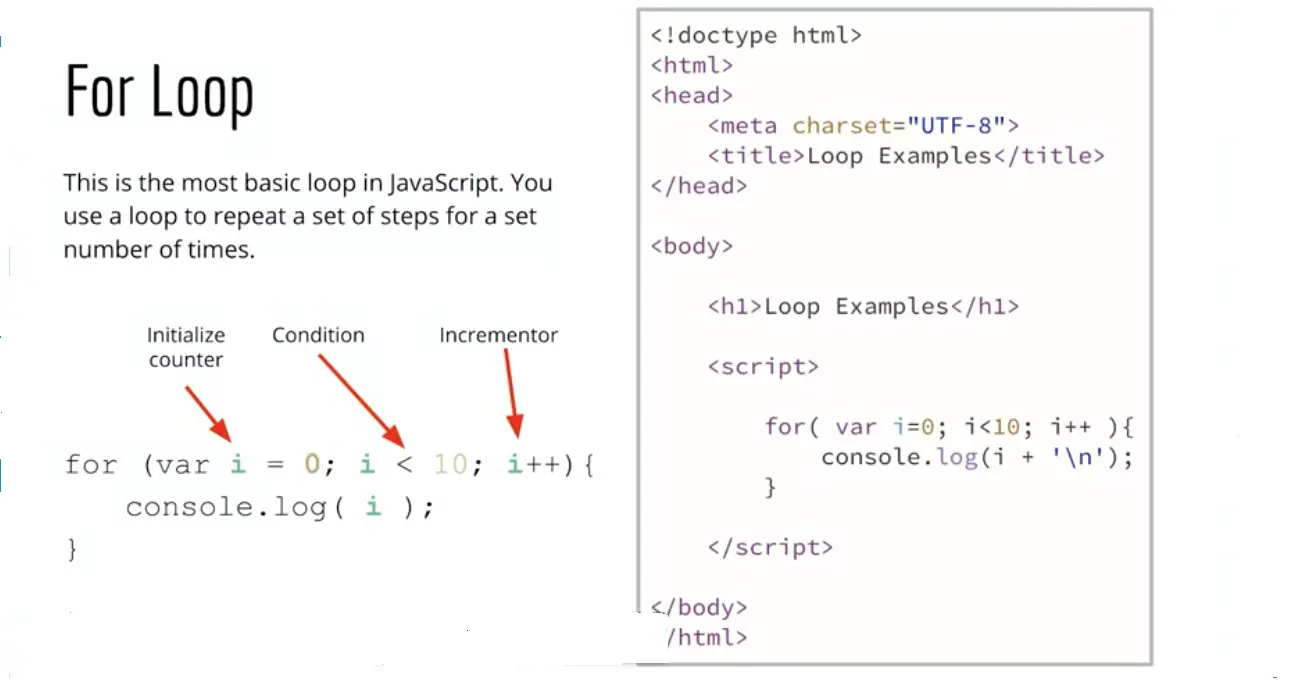
The most basic loop is a for loop. And you'll see here that in the for loop, we start out with an initialized value. And then we check if the value is less than some number. And then each time through the loop, we increment that value. The best way to explore this is to actually try it out. So I recommend opening up your code editor and following along with me.
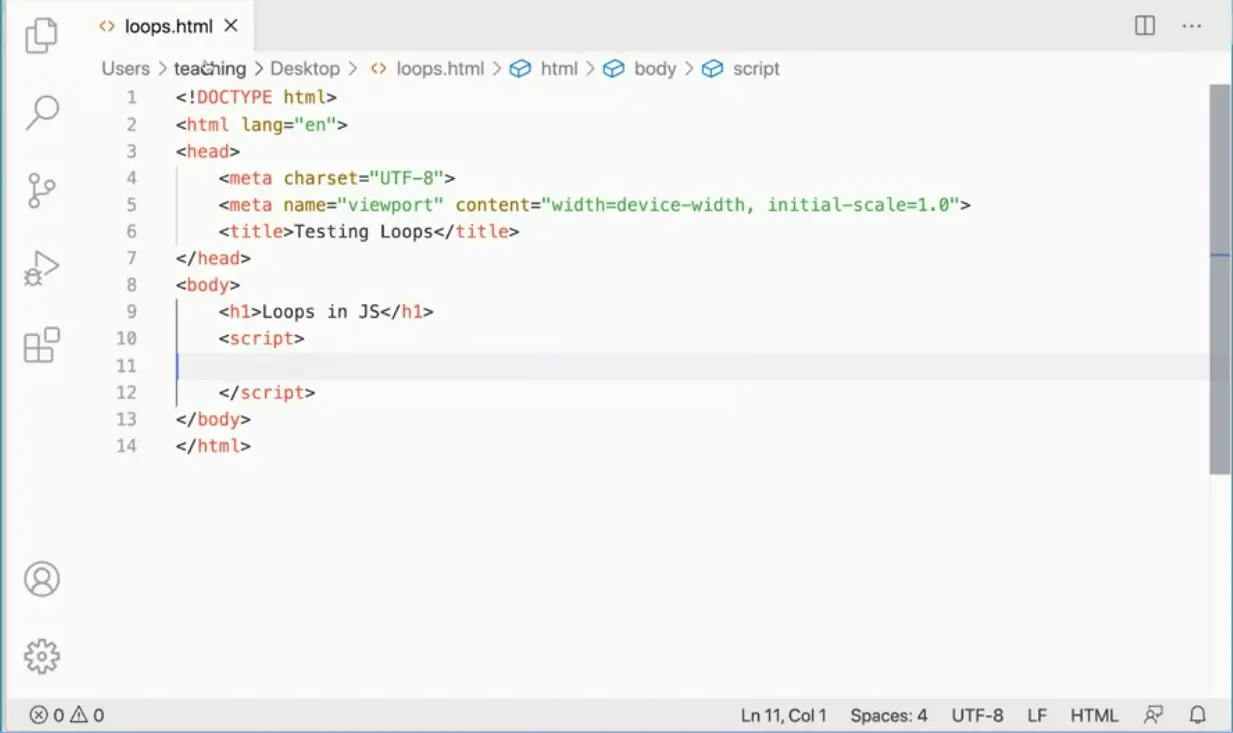
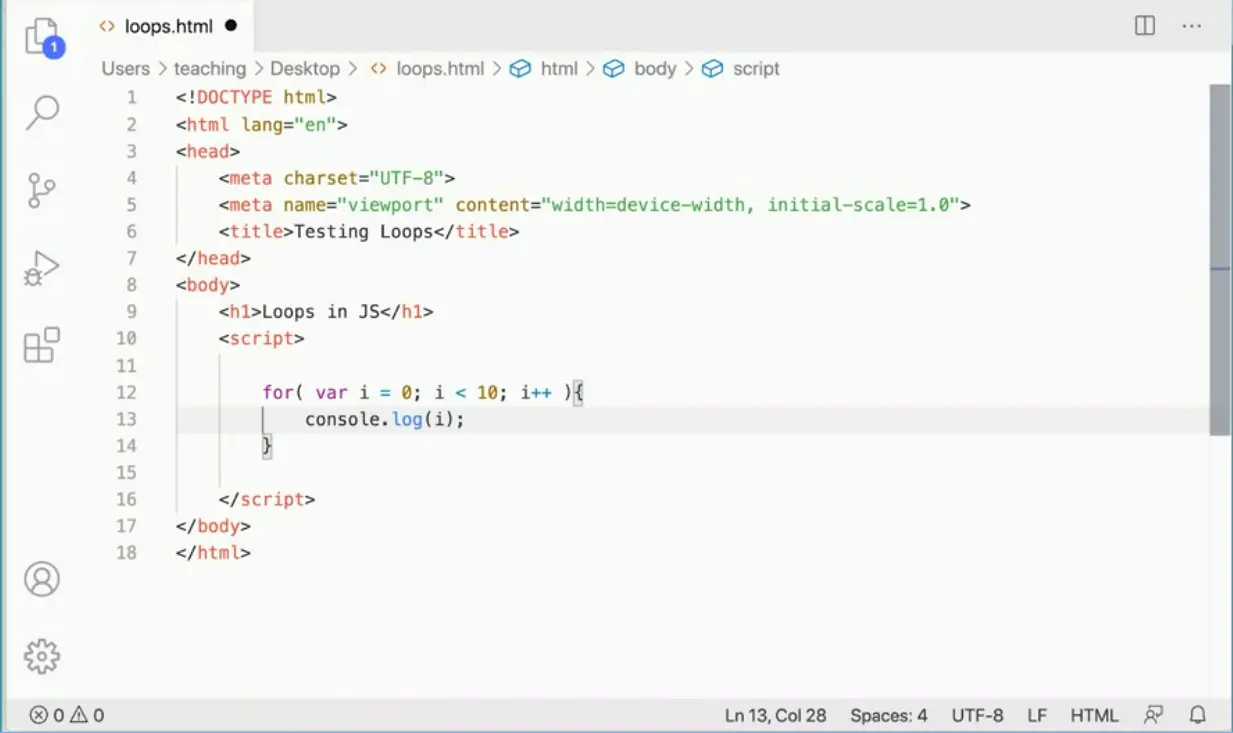
Here, I have just a file called loop study HTML saved on my desktop, and I'm going to add a loop in this script down here. There we go, and I'm going to add a for loop. I'm going to make a variable var i. And i can be anything. It could be X, it could be Y, it could be J, it could be the word counter. It's just a variable. i is fairly common to use because it can stand for incrementer. I don't know, it's a fairly common one to use but it doesn't have to be that it could be something else if you want. But I'm going to start i at 0. And then I'm going to check while i is less than, say 10. And then each time through the loop, I'm going to increment i, i++. i++ is a shortcut for i = i+1 one, like so. So we could take i, add 1 to it and then assign it back to i. So if i starts at 0, the next time to the loop will take 0, add one to it, which gives us 1 and assign it back to i. So now i is 1 and then the next into the loop will take 1, add 1 to it, assign it back to i so now it's 2, so on and so forth. But a shortcut for that is i++. That's called an incrementer. And then here we have, let's just do console.log(i).
And so what this is going to do is we're going to set i to 0. The console log will run. And it will say, it'll give us a 0. And then we come back and we increment i. So that we take 0 and we add 1 to it. So now it's 1. Is 1 less than 10? Yes, it is. Since 1 is less than 10, it will console.log(i) again, which is now 1, and then it'll increment 1 again. So i will go from 1 to 2 and then is 2 less than 10? Yes it is. So we'll console log out a 2. And then we'll increment i again, we'll take 2 and we'll increment it to 3. Is 3 less than 10? Yes it is. We'll console log out a 3, and so on and so forth until we get to 9. We get to 9, we'll console log out the 9 and then i gets incremented to 10. Is 10 less than 10? No, it's not. So then the loop will stop and we'll bust out of the loop at that point. But let's give this a try. I'm going to save this. And then I'm going to go to the browser, okay, I have over here.
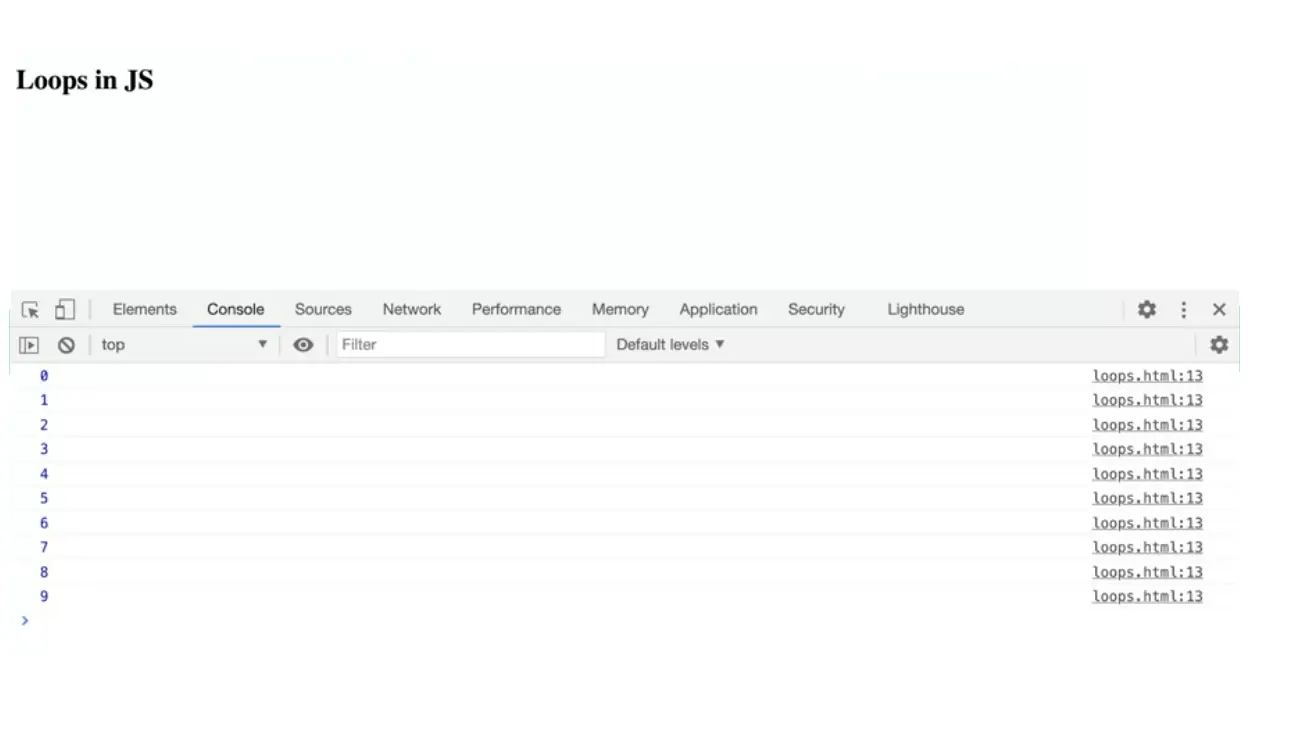
And I have this file loaded here. And I can just run it and you'll see that my loop ran. Line 13 ran ten times starting with 0, 0 through 9.
Now, I don't have to start with 0. If I wanted to go from if I wanted to count from 1 to 10, I could start with 1. I could even say, well, I want it to be less than or equal to 10. So then that'll actually work as well.
You also don't have to start i at 1 or 0, you can start out anywhere. If I wanted to, I could start at 37 and go till I'm at 63. I want to i++. And then if I go back and do that, you'll see that the loop we'll do those numbers. So, there are a lot of different ways of creating loops in JavaScript and we'll be looking at a few different methods throughout this course. But the for loop with these three expressions is really your most basic loop. And as we go through the loop, we evaluate these expressions and that determines whether the loop runs or not.

One of the places you're very likely to come across using loops is if you have an array of items, you have a group of items and you need to iterate over that group of items to do something to them.
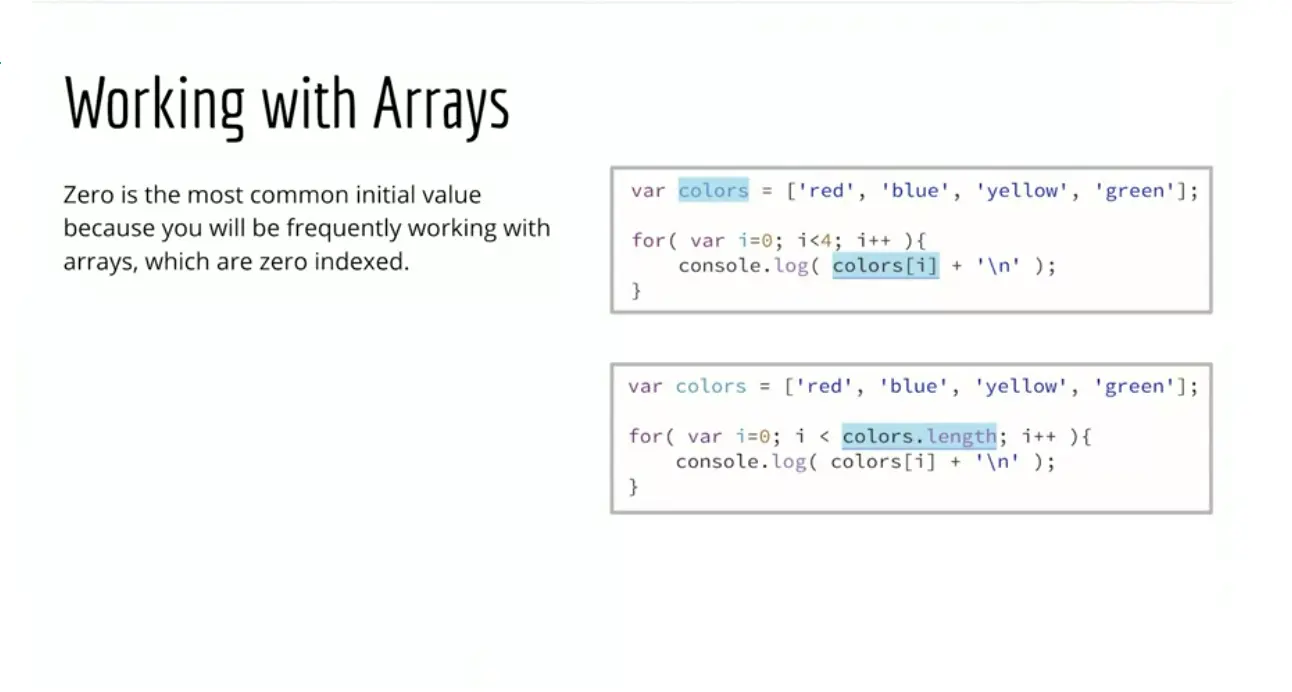
Let's take a look at what that looks like. Here I have a variable called colors, which is an array. It's got red, blue, yellow, and green in it. I'm going to loop through each of the colors in the array. If you're wondering with this + '/n' is that's to create a new line in the console. Actually I don't really need to do that because in fact the console creates new line for each call anyway. I shouldn't have put this on my slide here, but I forgot to take it off but you can just ignore it. We can just do it without that, and it'll work just fine. Remember, arrays are zero-indexed.
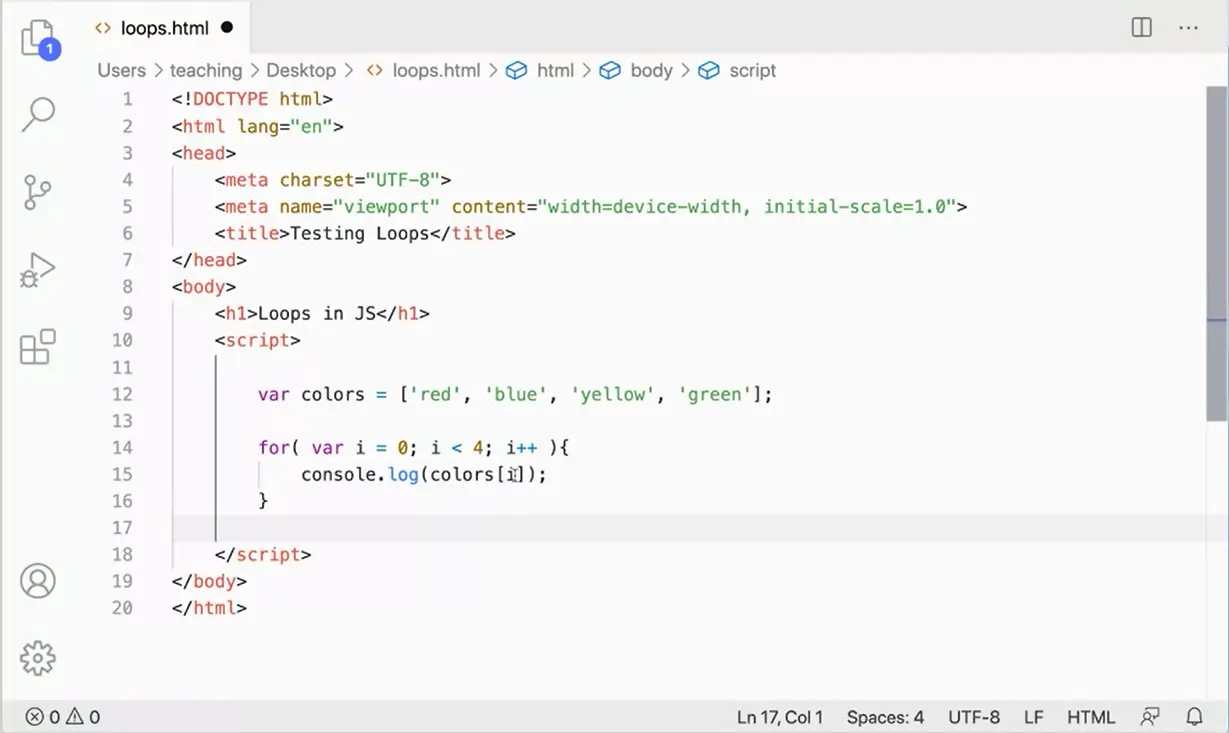
Here I am in the same file I had before. I didn't update my loop, but I added the array with the colors in here. What we would do down here is we would set i to 0 first, so we get red. While i is less than four, we're going to increment i cause we're going to do it for red, blue, yellow, and green. Down here, I'm just going to console log out, colors, square bracket i. The first time through the loop i is 0. Colors square bracket 0 gives me a red and then i gets incremented to one. The second time through the loop, i is a one. I go to my colors array here. Colors square bracket one gives me a blue, i gets incremented to two. I go up to colors here and I go 0,1, 2. Now colors, square brackets two is going to give me yellow. I get incremented to three. Colors three is 0, 1, 2, 3, it's going to be a green. I get incremented to four. Four is no longer less than four and my loop breaks out.
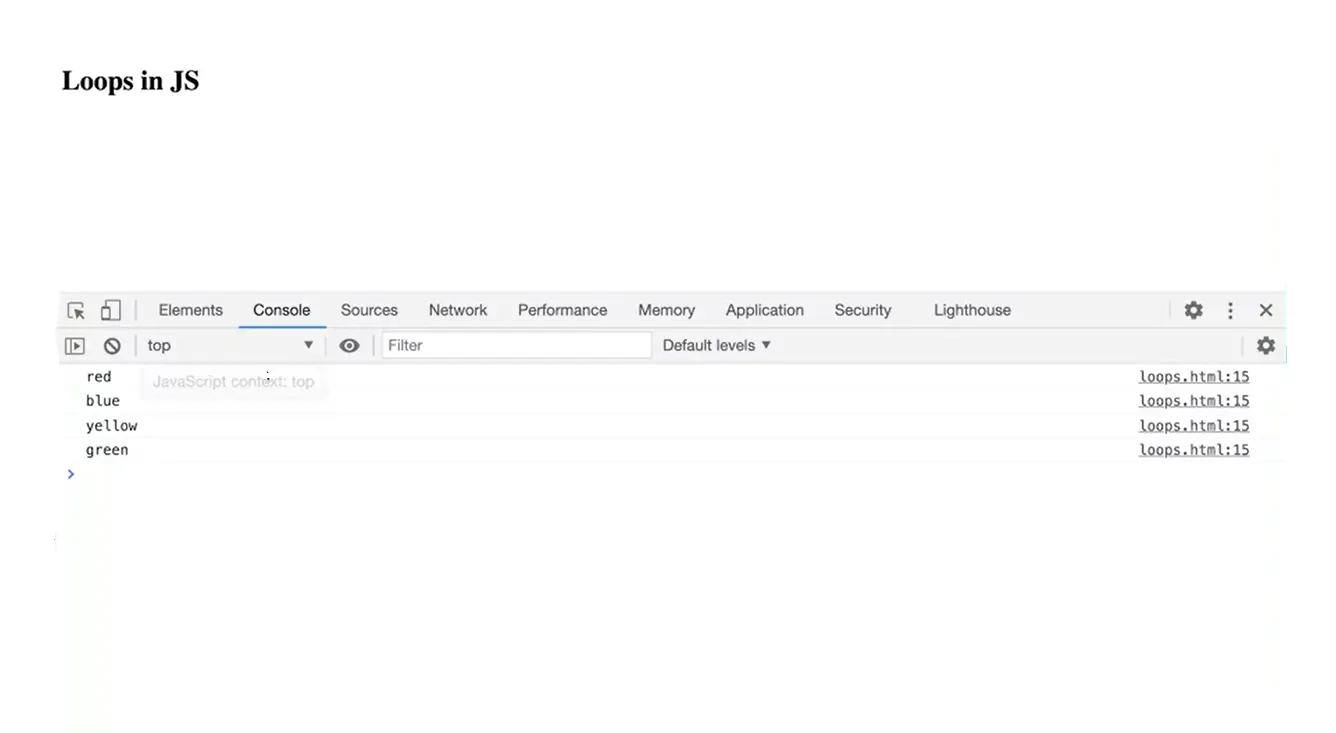
Let's give this a try and see if it works. Sure enough, I get my four colors out in the array. It's looping through and doing line 15 four times there. That's really useful. Now, generally, this is fine, this works.
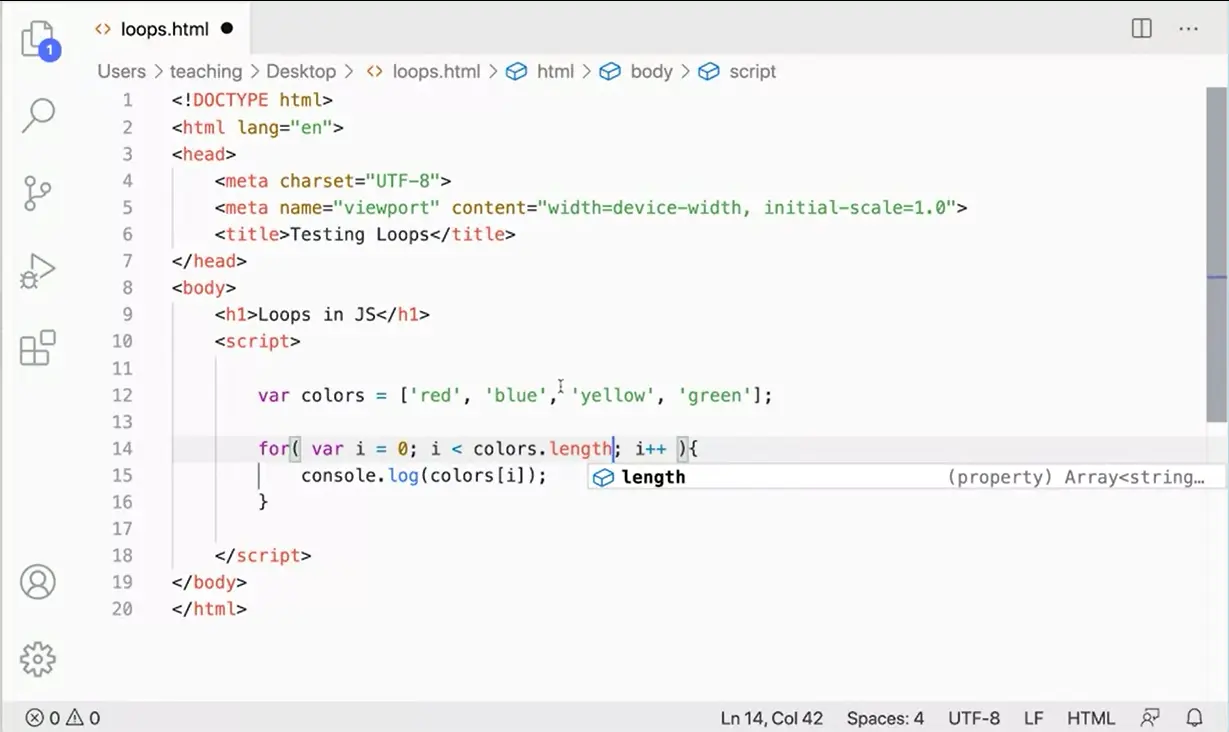
But generally we don't want to have to put in a number here. What's better is to keep this more general. If I do colors.length, that's also a four, colors.length is four. Now I could add more colors into my array, and this code will still run. No matter how many colors I have in my array. I could add in here orange and purple into the array. This will continue to work because now the length of my array is six. I don't have to update this number every time. Colors.length will help me make my code more general and allow me to do that thing more easily. Okay, so we can do that really nicely and loop through all the colors in the array that way.
const fruits = ['apple', 'banana', 'orange'];
for (const fruit of fruits) {
  console.log(fruit);
}

It's important to note that the for…of loop cannot be used with objects directly, as objects are not iterable by default. However, you can iterate over the keys or values of an object using Object.keys(), Object.values(), or Object.entries() in combination with the for…of loop.
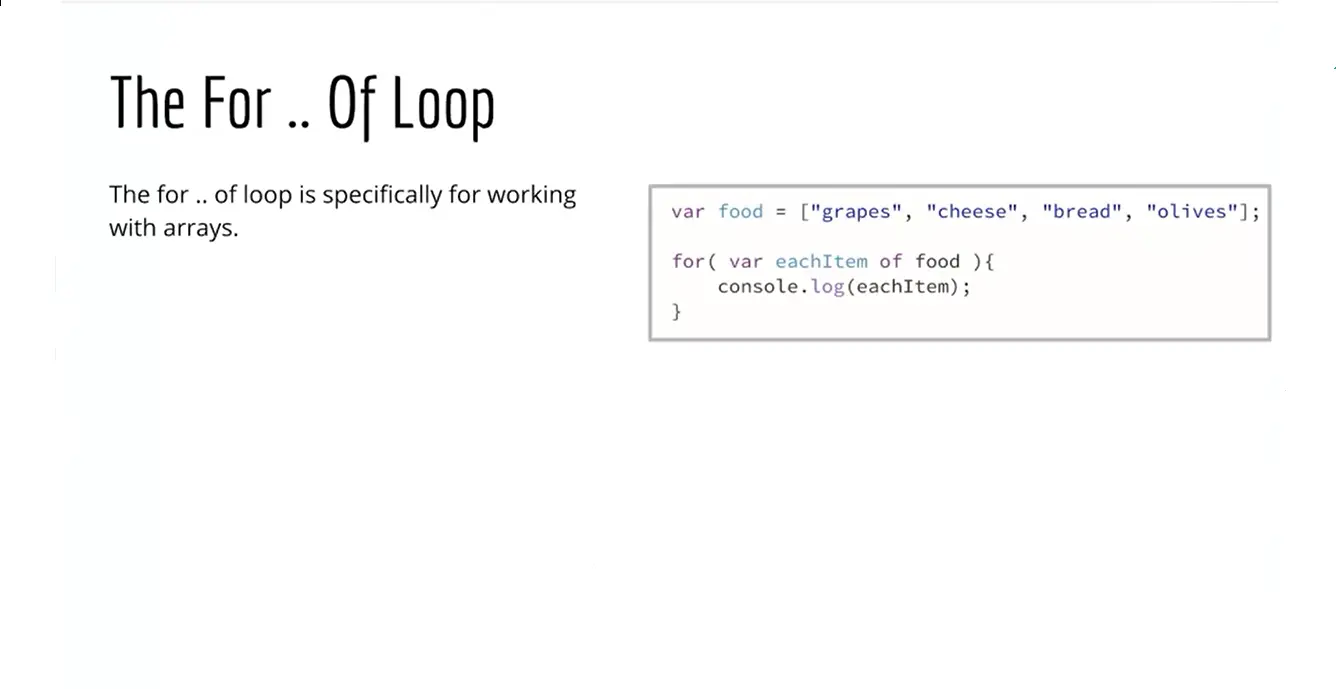
The basic for loop is a good place to start with loops. There's also a loop that is specifically for working with arrays and it's called the for of loop. Here I have an array of food. You can see there are four items in here, four foods. I can use for, and I can create a temporary variable, and I'm calling it each item, but you could call it X, you could call it Y you call it I, you call it whatever you want. Each item of food. Each item with this loop is going to do is it's going to go through this array until the end of the array. Each item the first time to the loop is going to be grapes. I'll cancel out the grapes, and then since the array is not reached the end yet, it'll run again and each item will become cheese, and then it'll become bread, and then it'll become olives. Let's give this a try really quickly in our code over here.
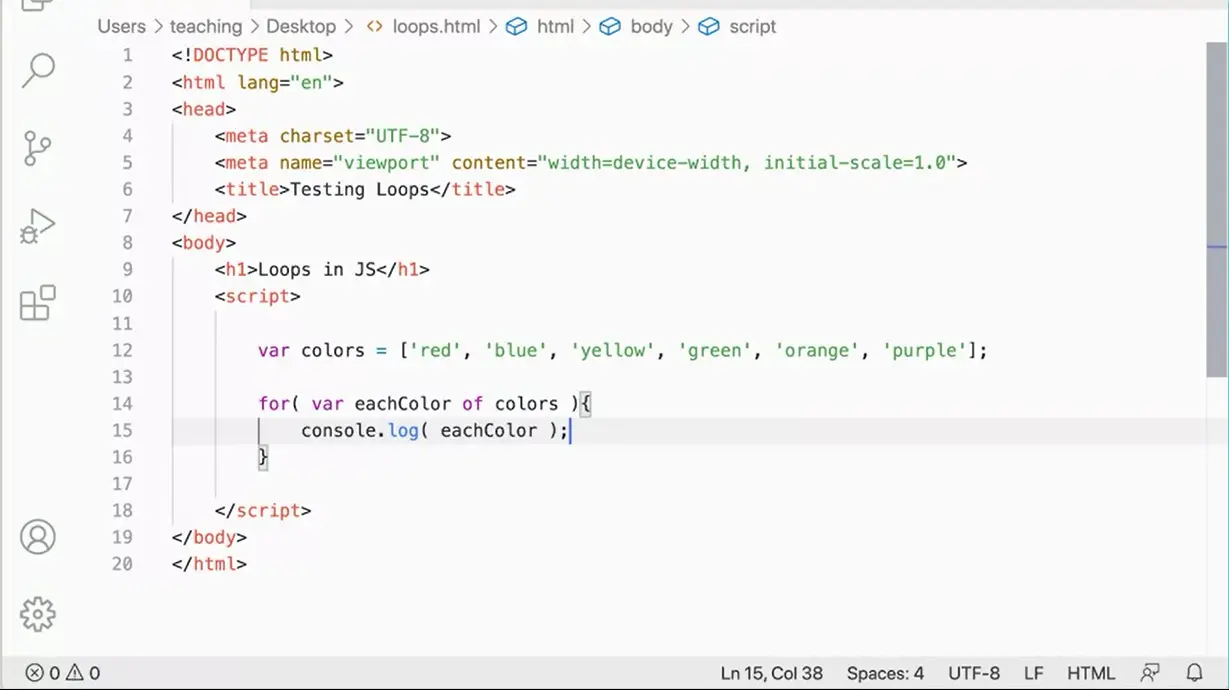
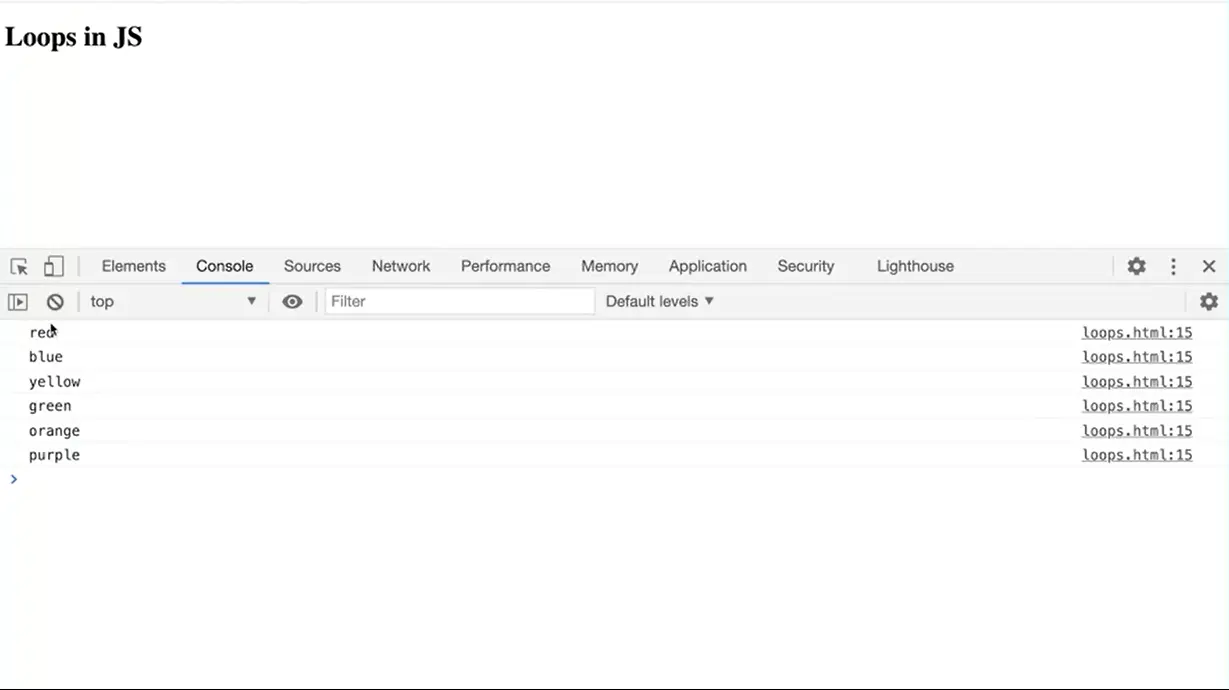
I'm going to just leave the array with colors, but instead of this for loop, I'm going to do for var each color of colors. It knows what colors is because that's been defined here. Each color is putting var here because I'm creating a new variable there. Then down here I can do console.log each color. You'll see that when this runs over here, I get each color. There are other methods used for looping that we'll talk about later. Basically, there is; for of, for in, and for Each methods of looping in JavaScript.
Right now, I just want to get you started with the basics so you can see how to do this. The basic for-loop is a good place to start for working with arrays.
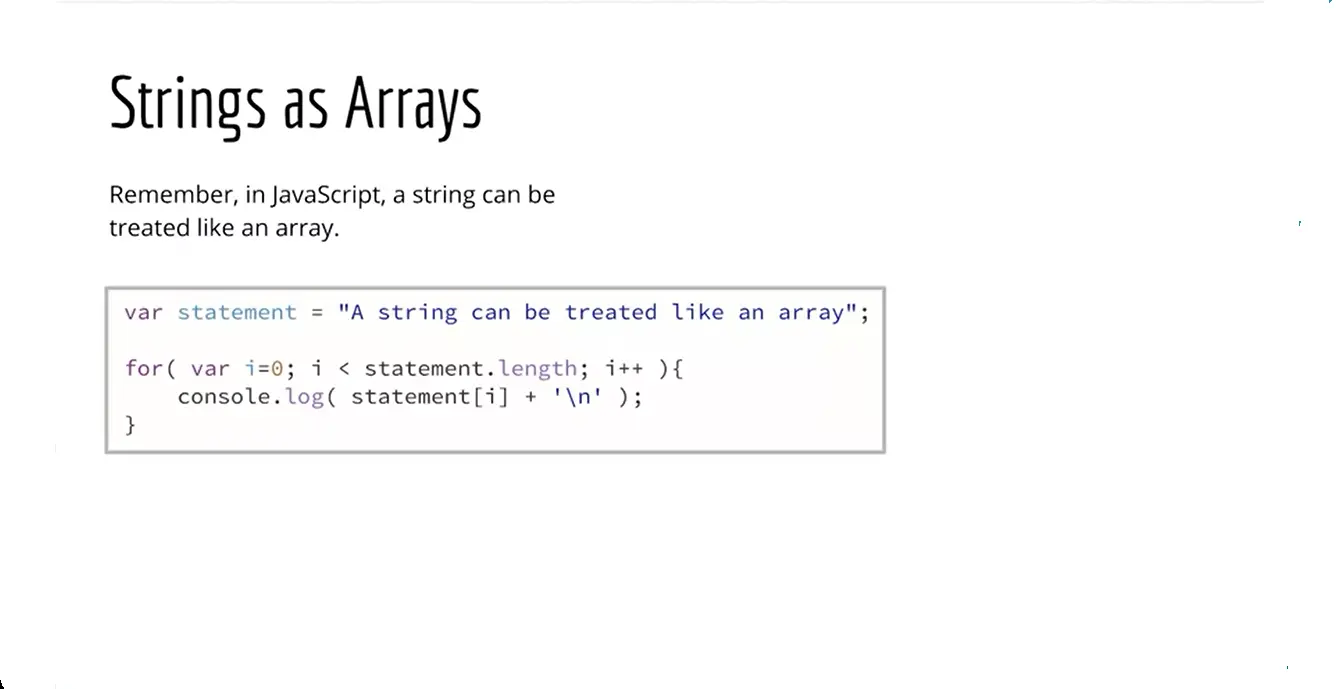
We can also do something with strings. Remember strings can be treated like an array. I can actually make a string and then loop through the length of this thing and actually alert out each letter one at a time in my console.log there. I can do that thing.
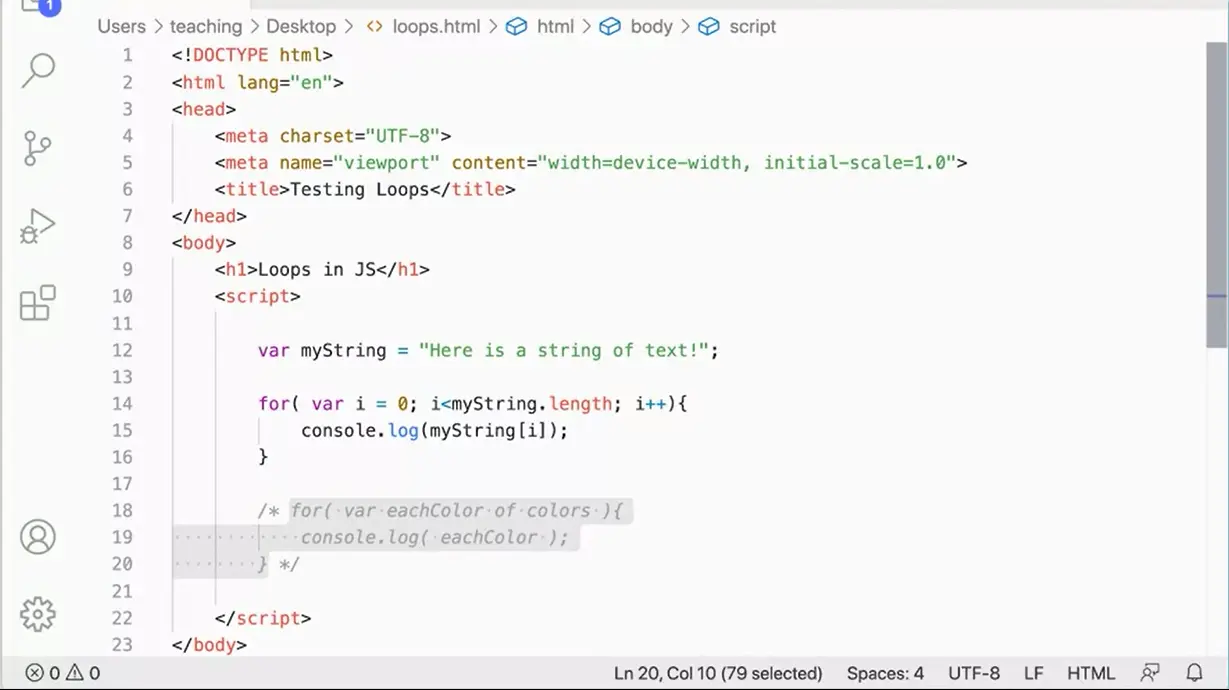
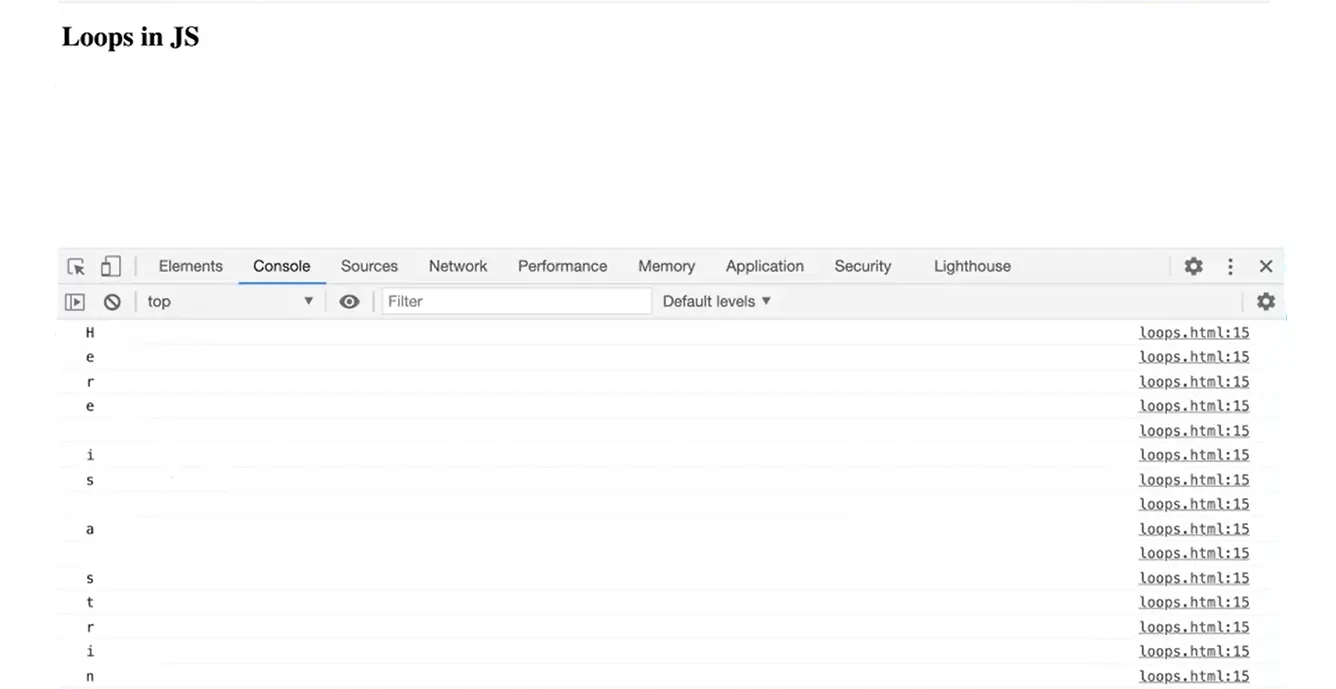
In fact, let's give this a try really quickly here and change this to myString equals here is a text. There we go. I could do it. I can do it this way, for var i equals 0, log i is less than myString.length i plus, plus console.log myString square bracket i. I can do it this way. Let's see if I did it right. Sure enough, each line has a letter. I could do it that way, or I could even use the for of loop.
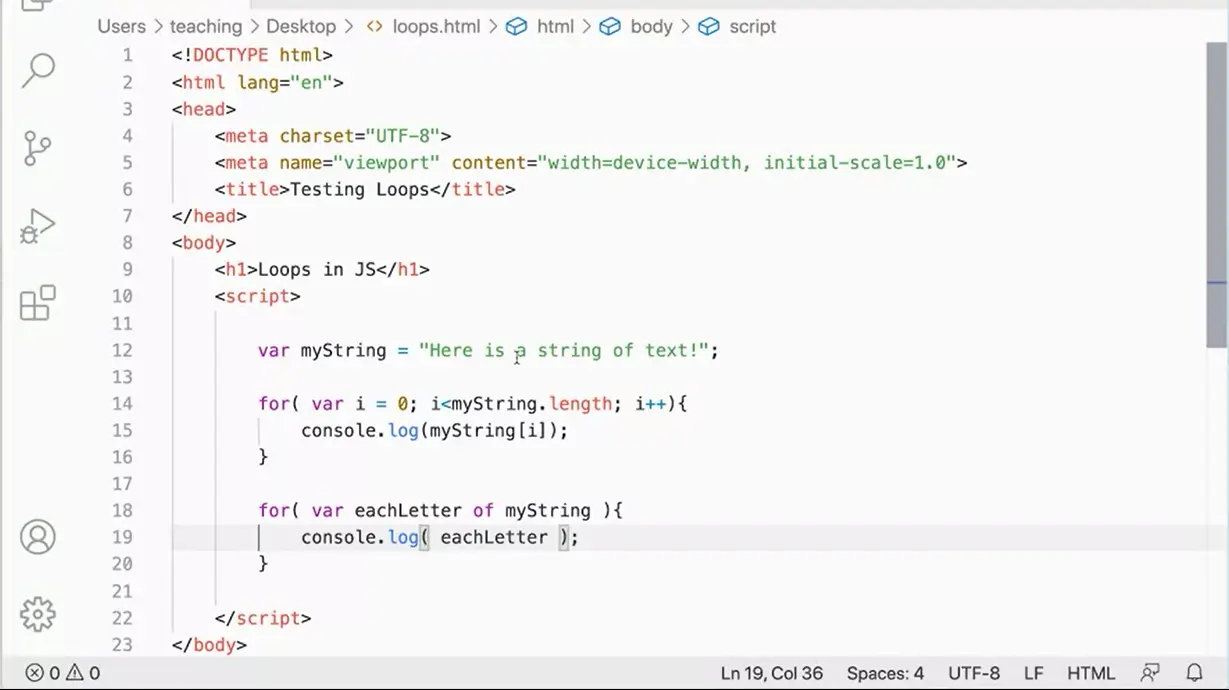
Here's an example, like above, but using the "for of" loop as well. This will give the myString twice.

JavaScript also has a while loop and we don't see them as often while we're programming with JavaScript, but they are worth knowing about.
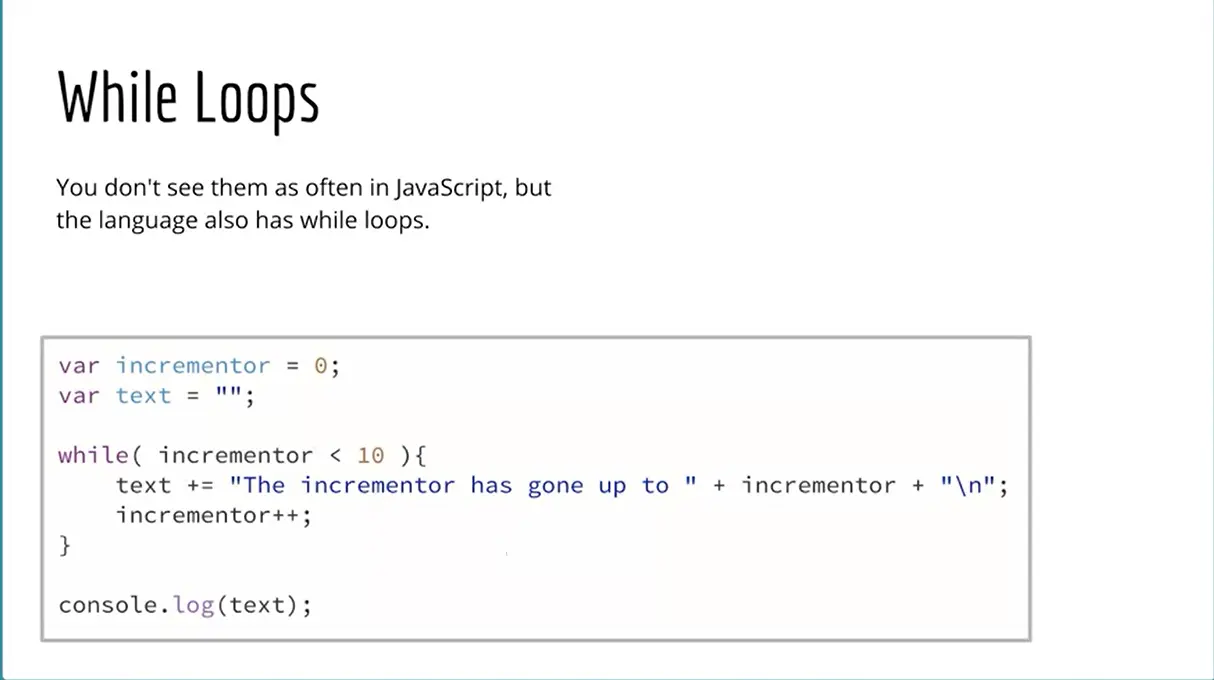
Let's take a look at them really quickly. Here we can see the way the while loop works is we start off, we have an incrementor, and then I'm making a variable that starts as an empty string. That's maybe not quite as necessary but you have to have the incrementor outside of the while loop when you're using a while loop. Then while the while loop is less than 10, I'm going to do this stuff and then increment the incrementor at the bottom of the while loop. This is going to run, incrementor gets set to one, one is less than 10, so this runs again. Incrementor gets set to two, two is less than 10, so this runs again, so on and so forth. Then notice when the loop is done, once this increments up to 10, 10 is no longer less than 10, so I'll bump out of the while loop. This console log is going to run text.
What I'd like you to notice here is this plus equals, this text is starting out as empty and plus equals is saying each time this thing runs, add to what was there before. The first time through the loop, there's nothing in there. It's going to add the incrementor has gone up to plus incrementor, so that's going to be a zero, and then a new line, and then the incrementor gets incremented to one, and then the next time through the loop, we're going to add to that. It's going to add a new line that says the incrementor has gone up to one. Then it's getting increment again then we'll say the incrementor has gone up to two, so on and so forth.
Let's do this one in the code editor because I think it's really worth seeing this. I've got my for loop so I'm just going to comment that stuff out. I don't really need that now.
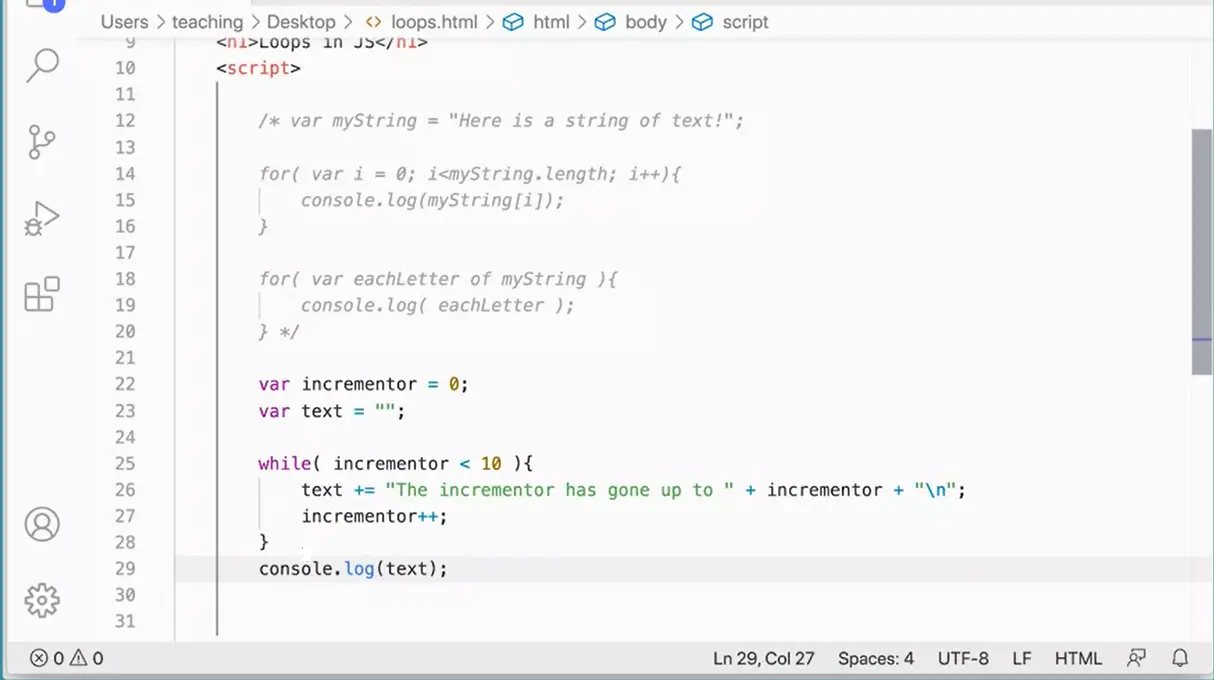
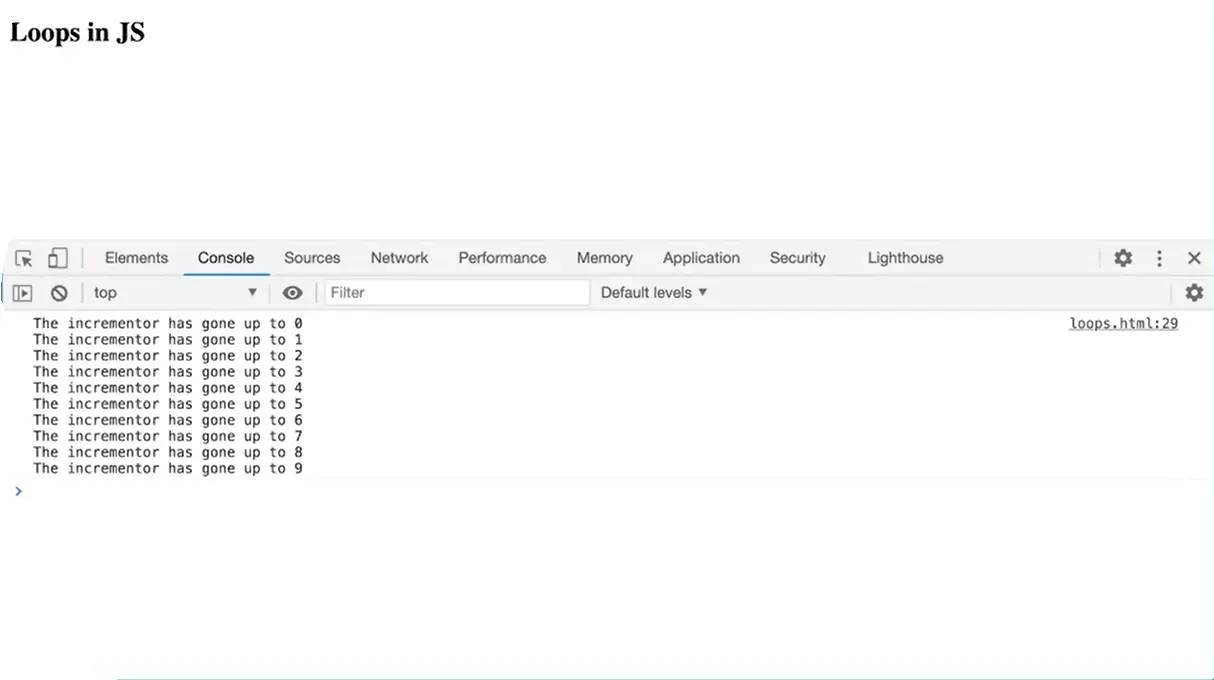
Come down here. I'm going to make a variable var incrementor equals zero. Again, it doesn't have to be incrementor. You could leave it out if you wanted to, that would be fine. Then I'm going to make var text equals quote, quote. That's an empty string. Notice I'm using just the single quotes here, but you could do the double-quotes if you want on my image there. But you could use single quotes or double quotes. I'll put it in double-quotes right now. There we go. It's just an empty string there.
Then while incrementor is less than 10, I'm going to do something. What I'm going to do is I'm going to say text plus equals, add to what was already there, quote, the incrementor. What did I put over here? I forget now, has gone up to, that's right. Then I need to have a space there. I'm going to use a plus to concatenate in the incrementor variable. It's gone up to whatever that number is and then I'm going to add a plus and another set of quotes. Now I need to add the new line. In this case, I actually need the new line because this is not going to get printed out. It's only going to get printed out once after the loop is done. Incrementor plus. Then down here I'm going to print the console log once with all the text in it.
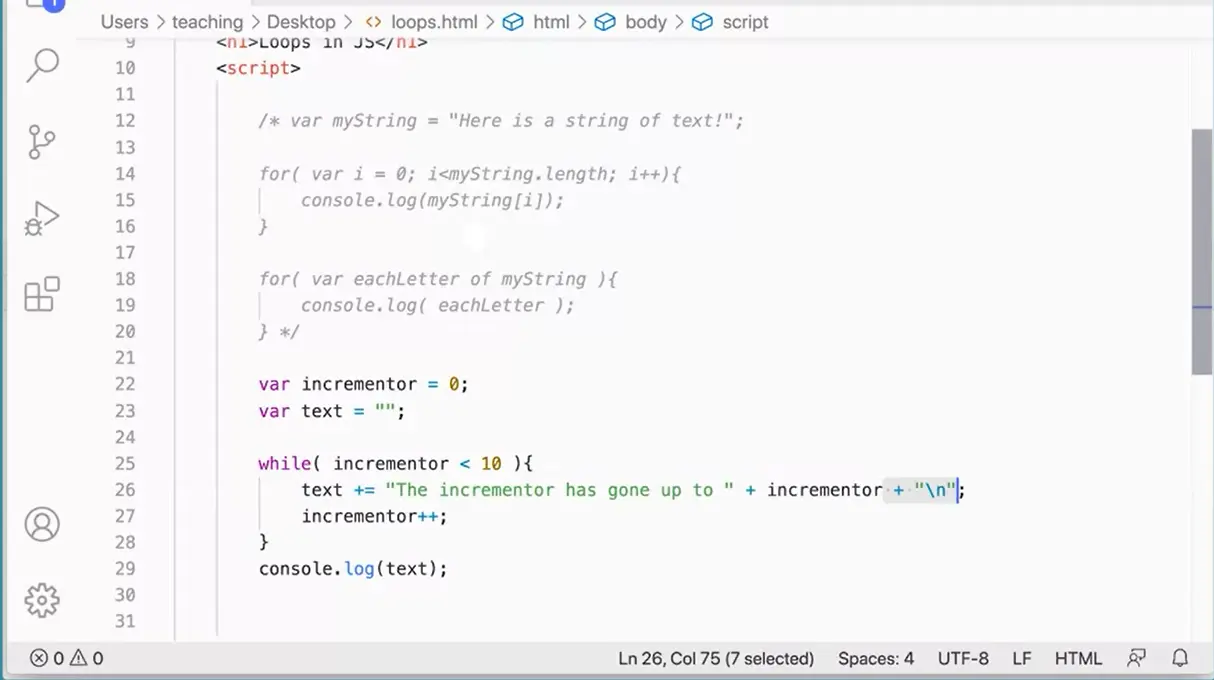
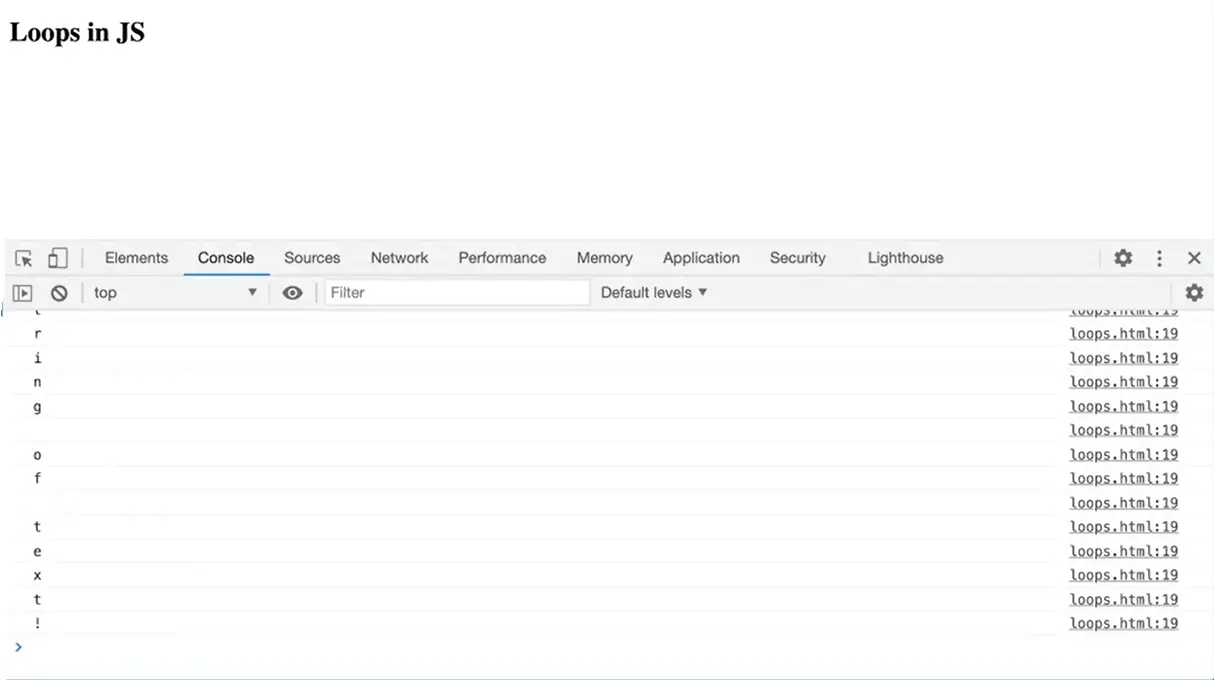
There's one print to the console log. Let's give that a try. If I didn't mess anything up here, let's see. There we go; 0, 1, 2, 3, 4, 5, 6, 7, 8, 9. If I didn't put the slash n on the end here, let's see if this does, but I think it'll do. There we go. I don't get the new lines. The slash n is adding new lines over here after each one of these, because this is just getting printed out once. That's really important to understand about the way this incremented and the way the while loop works here.
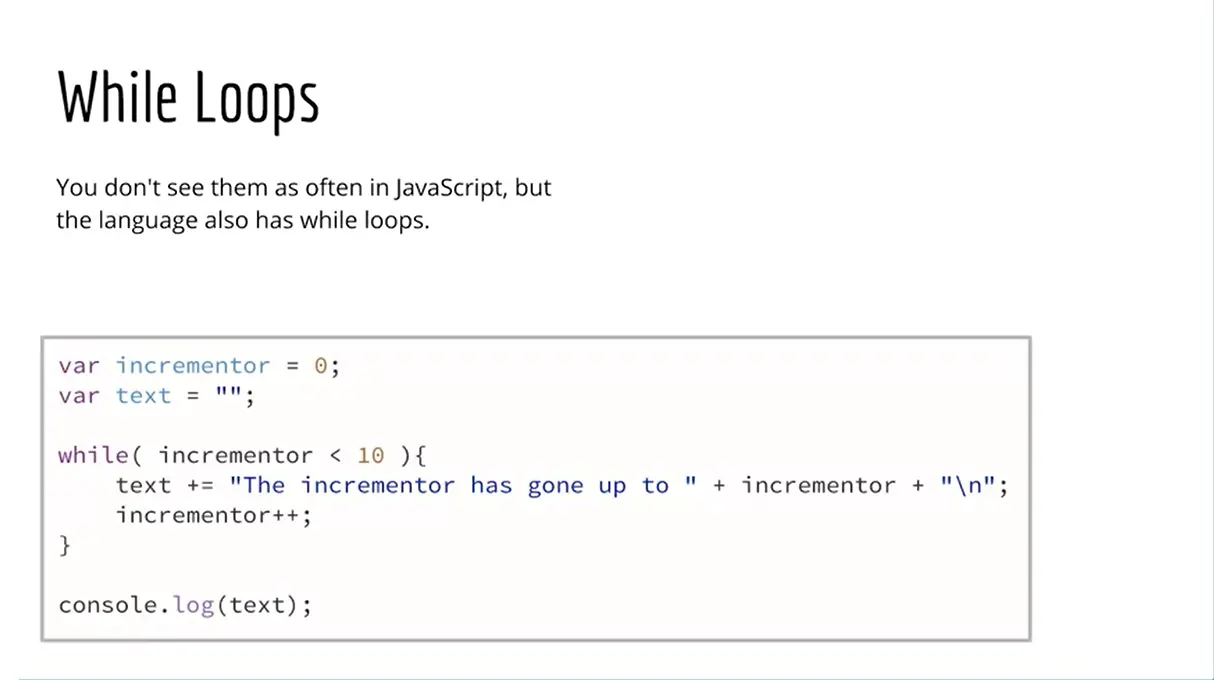
When we look at this image here, we're using the plus sign to concatenate the string together with the variable. We talked about this before. The plus sign in JavaScript does double duty. It's used to add numbers together the way you would normally expect the plus sign to work, but it's also used to concatenate strings and things together. Here we've got a string of text and then we're concatenating in the variable and then another string of text concatenated onto the end of that. It gets complicated to work this way. It's not very intuitive. We can't just leave incrementor inside the quotes because then the string would just say the incrementor is gone up to incrementor. JavaScript would know that this is a variable if we just put this inside the quotes.
With ES6, which you'll remember is the version of JavaScript that was released in 2015. They introduced something called template literals that will allow us to work with variables inside strings a little bit more easily.
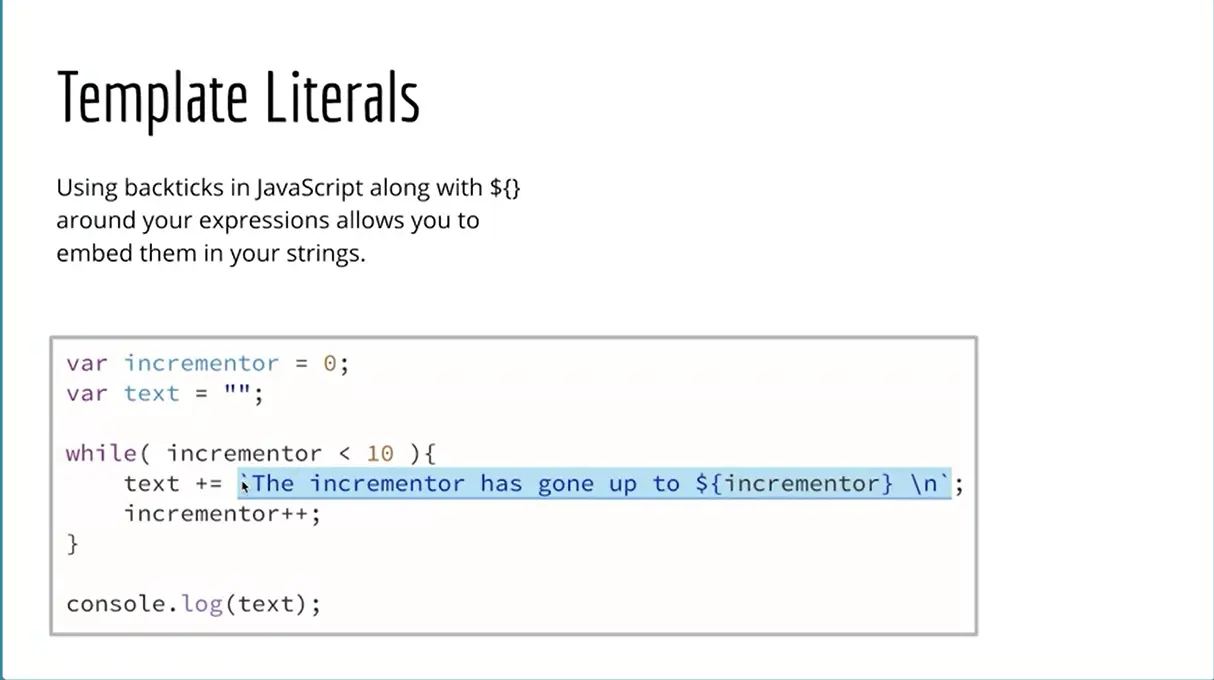
Let's take a look at how to do that. Here we have the template literal, and what the template literal the way it works is we put a tick mark on either end. The tick mark is not a quote. The tick mark is a separate character on your keyboard. On the American keyboard, it is the character with the tilde just above the Tab key. That's a tick mark there and a tick mark there. Then we can just put the variable inside curly braces with a dollar sign and JavaScript will know to treat that as a variable. This is a much more readable way of working with strings, with variables in them.
This particular string is not terribly complicated or complex in any way. But sometimes if you're constructing a piece of HTML and you've got tags and tags have their attributes in them, which have quotes and equals signs, it can get confusing quite quickly. This will help you out and we'll be using the template literals throughout the rest of this course.
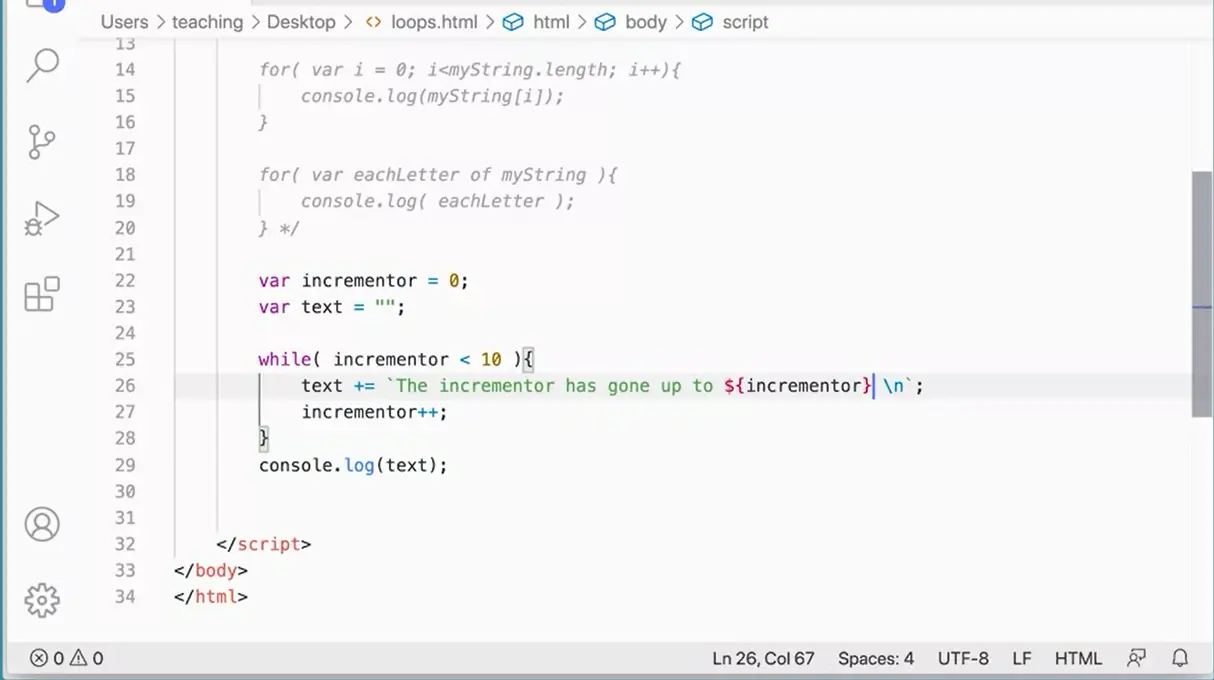
Let's switch our codes that we're using this over here. The way we do this is, I'm going to put in a tick mark there and at the end I'm going to put in a tick mark and then I can get rid of these quotes and pluses. Then because this is a variable, I'm going to put a dollar sign, a curly brace, and another curly brace.
By the way, if you're constructing a string that has variables, this is how I recommend that you do it, rather than just typing from left to right, type it like this. The incrementor has gone up to incrementor and then go in and add the dollar sign and the curly braces. You'll find it easier to understand what you're doing and to not make mistakes and do all that stuff if you do it this way.
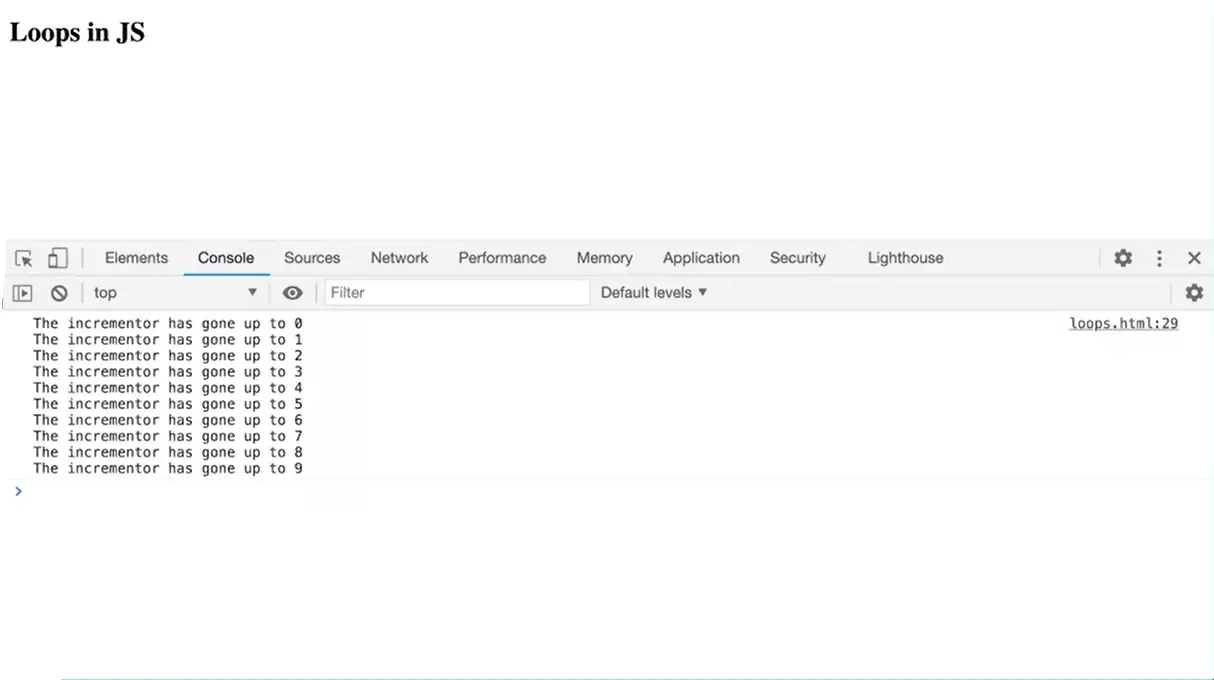
But you'll notice if I do this and save it and then go back and run the page over here. I mean, I just ran it, but it looks exactly the same and I am getting my variables over here. That is actually working.
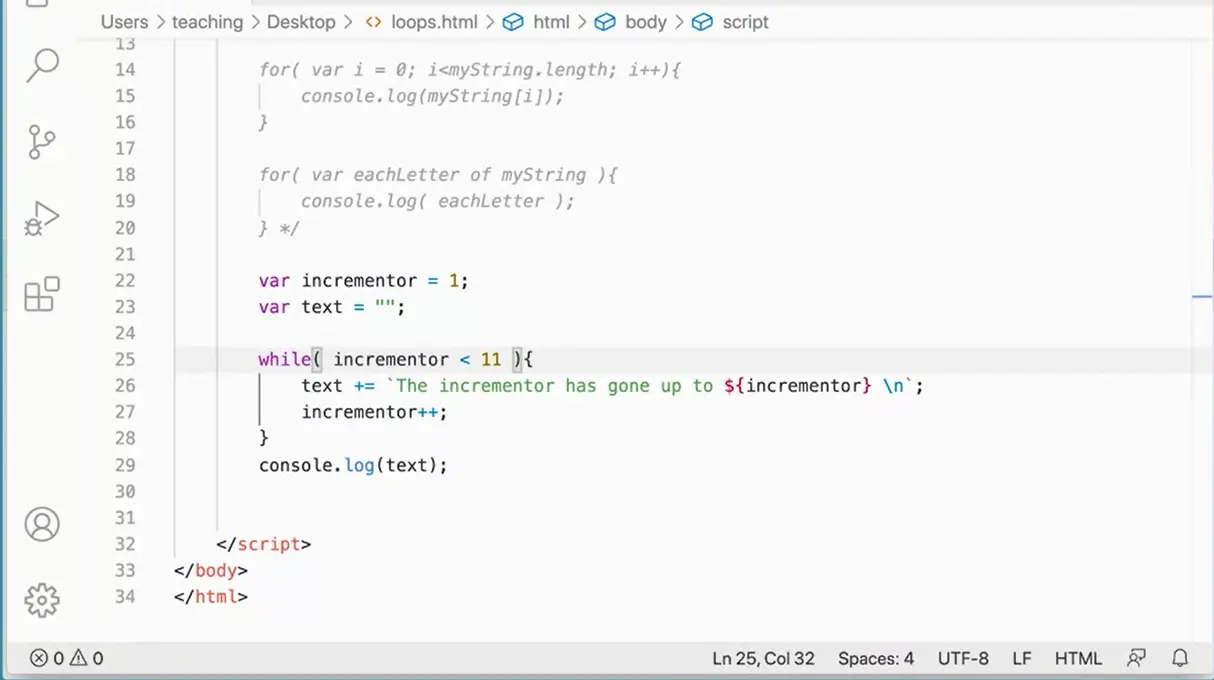
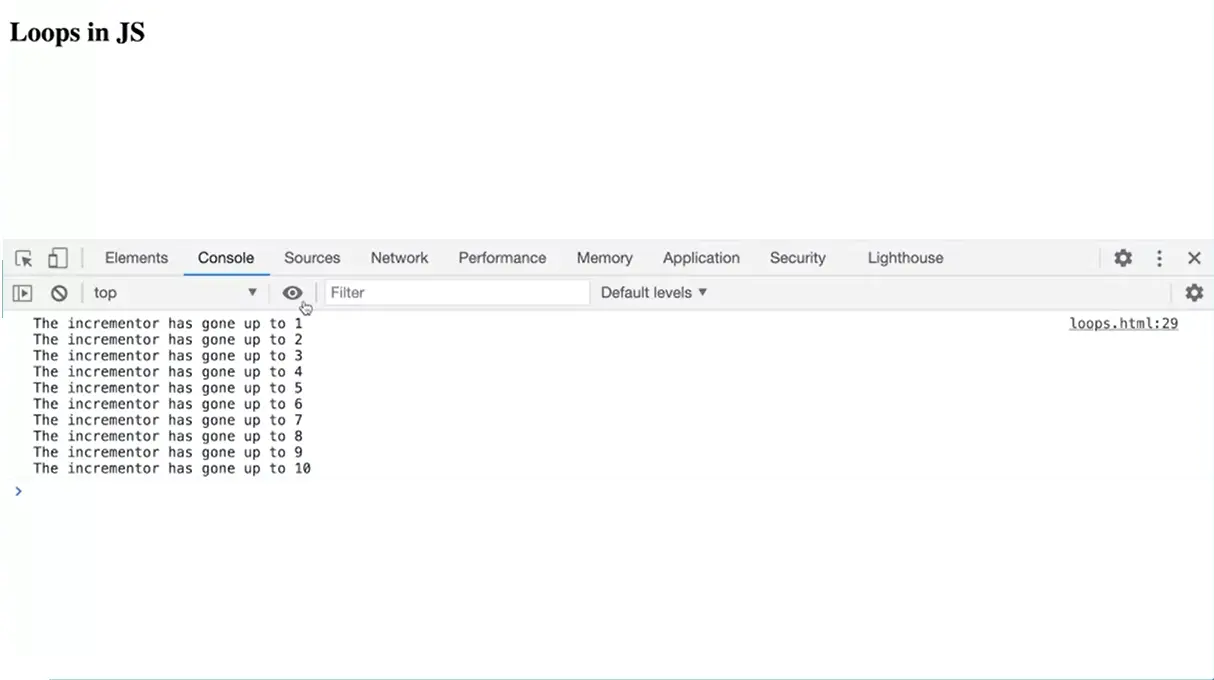
If you wanted to see if it was actually doing something different, we could start here with 1 and go to 11. See what that looks like. There we go, 1-10, very nice. We've got the template literals.
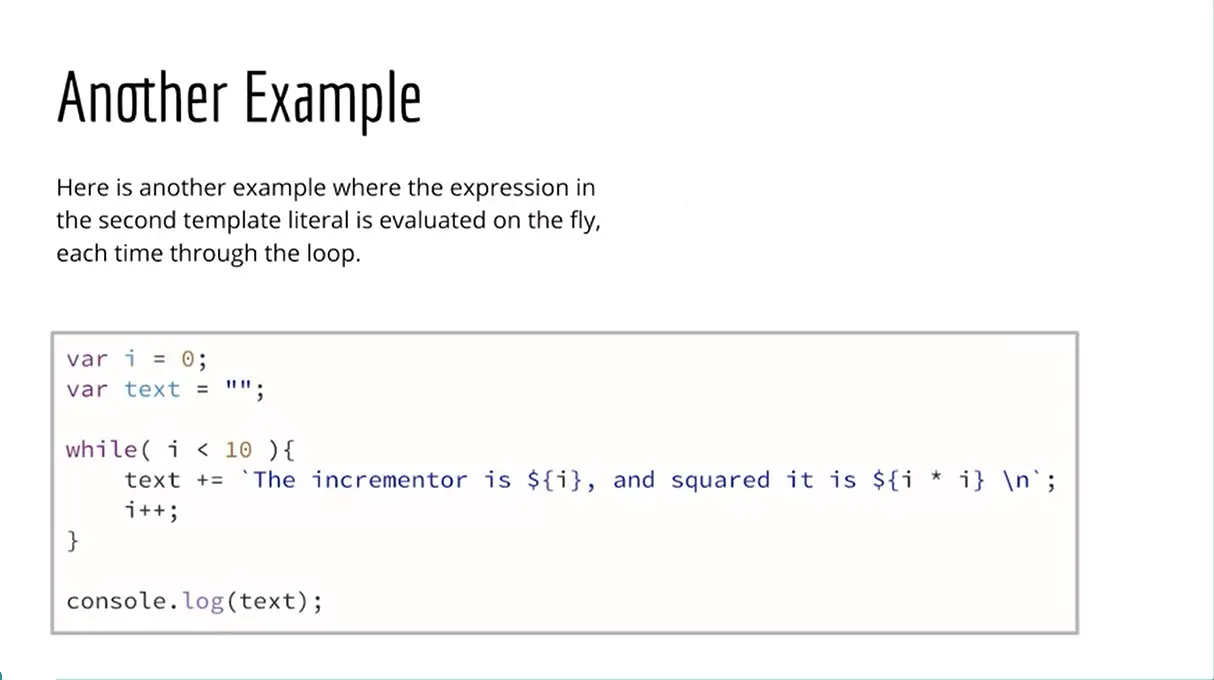
We're going to take a look at one more example. What's interesting here is we can actually do expressions inside our curly braces here. Rather than just sticking a variable in there, we can actually perform JavaScript operations right in line with our string.
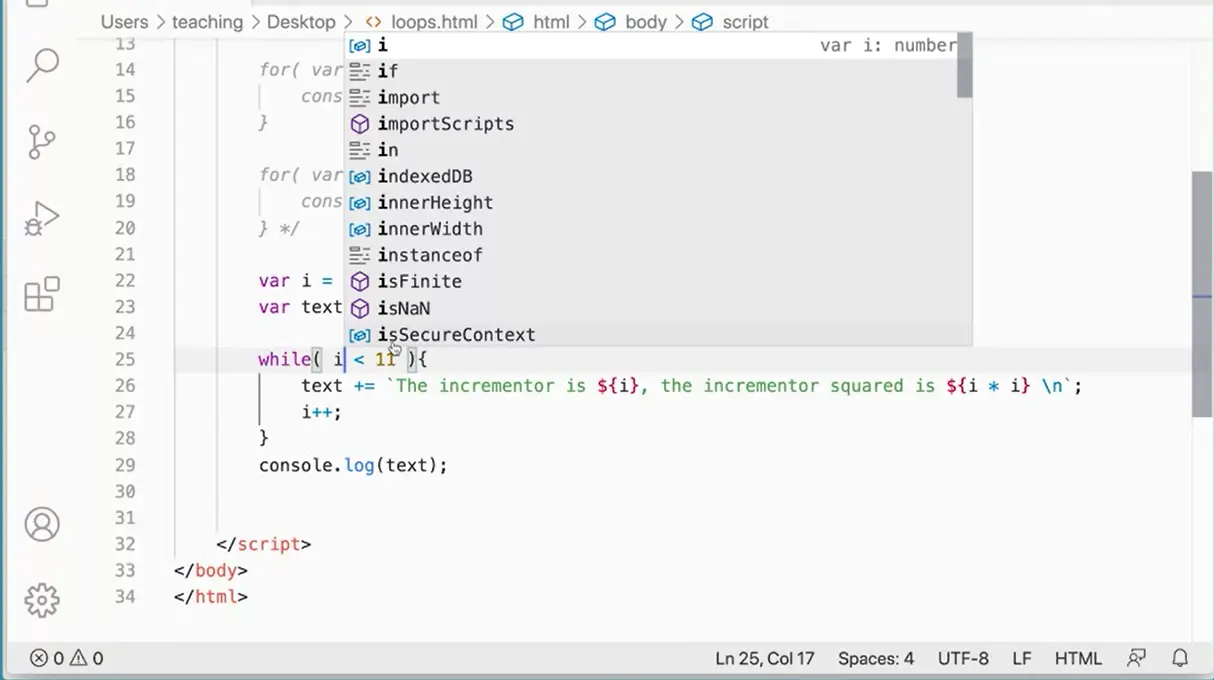
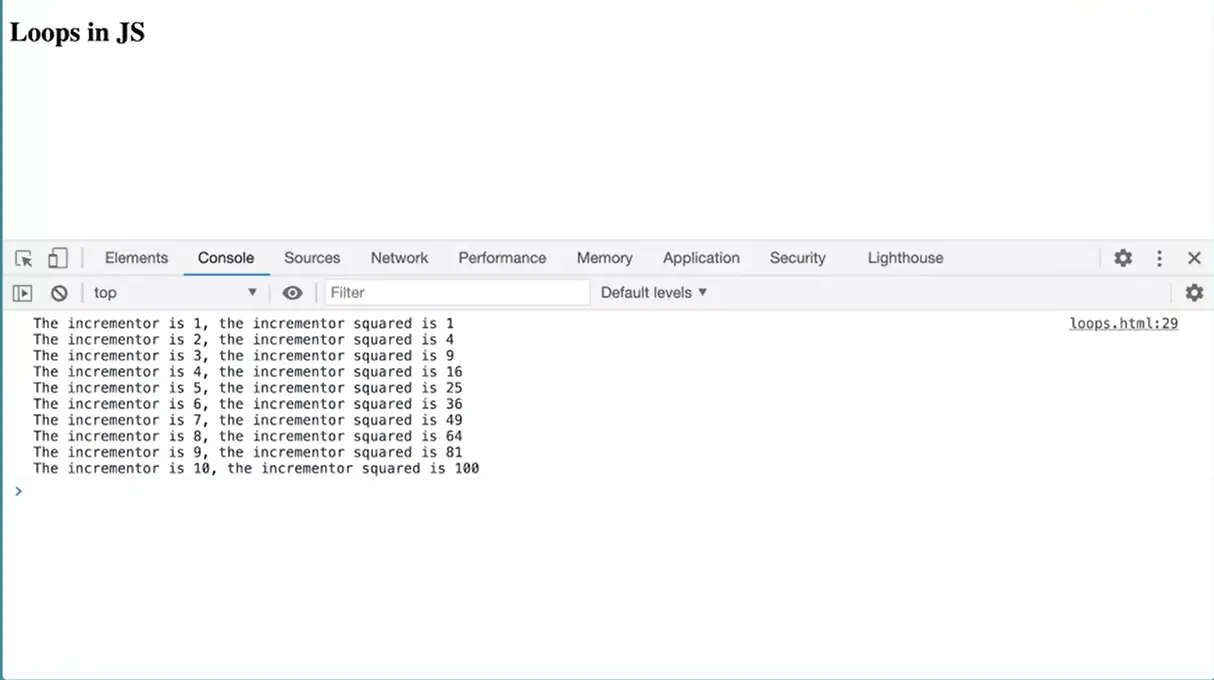
Let's give this a try. I set the incrementor to i to keep it shorter here. Let's do that. Over here I'm going to set this to just i, i is one word, we'll start it at 0. I'm sure we'll leave it at one. Do it like this. The incrementor is i and the incrementor squared is i times i. But this is going to be a variable and so is this. This is going to be an expression. Maybe I want some spaces in there make that a little bit more readable. Let's go see what that does. I'm getting my squares over here as well.
Loops are one of the fundamental building blocks in JavaScript. It's important to get comfortable with the syntax needed to create them. I recommend just sitting down and getting to the point where you can type out a for loop. I know that it looks a little weird at first, but you have to just keep working at it so you can get to the point where you could sit down and say, I'm just going to write out a for loop and when you get there, then you'll know that you have the loops really down pat. Great, we're going to a move on to the next thing.
Here is a resource related to these lessons:
Coursera Learn JavaScript Basics Additional Resources
w3 schools JavaScript loop (URL shortcut).

Sequence selection and loop.
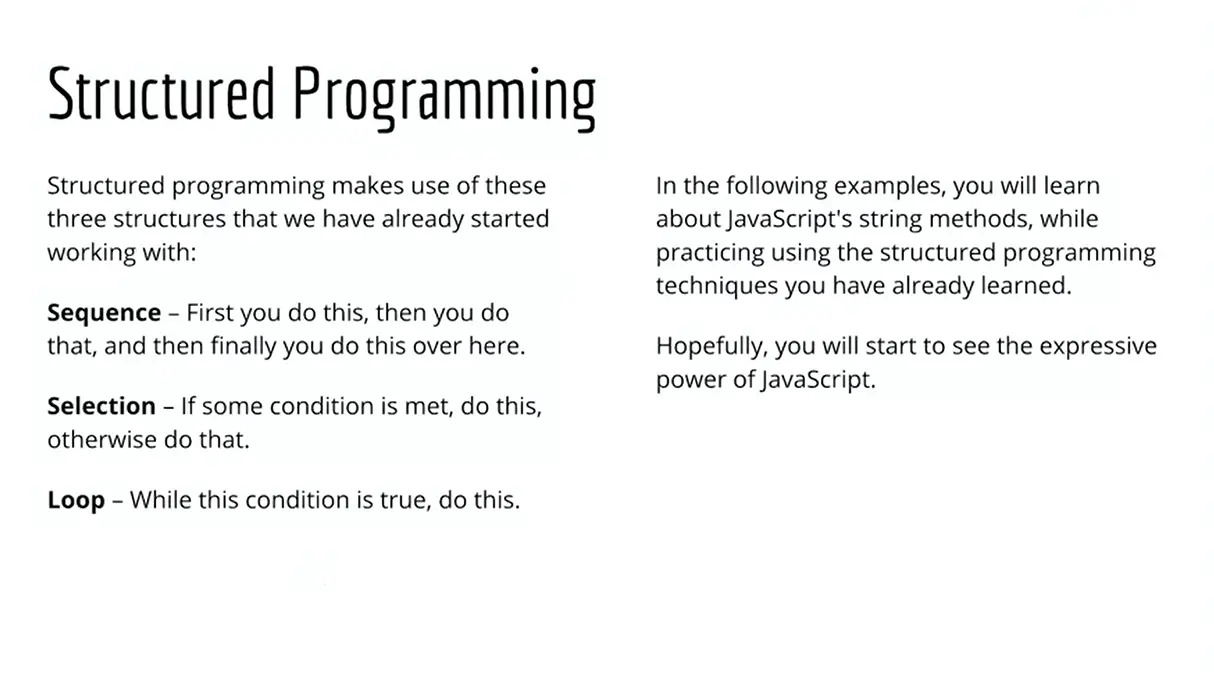
In this lesson, we're going to put together some of what you've already learned and what you've already been doing and see if we can make some sense out of it. In Structured Programming, we make use of these three structures we've already started working with. Sequence, 1st, you do this, then you do that, finally, you do this over here. With JavaScript, you start at the top of the script and you work your way down the script and JavaScript does everything in the script one thing at a time in a sequence.
With selections, we're checking to see if some condition is met. If this is true, do this, otherwise, do that. Then with loops, while a condition is true, we're going to continue to do something. With the scripts that we have next, we're going to learn a little bit about JavaScript string methods, while also practicing some of these techniques you've already learned a little bit about with loops and selections and these kinds of things. Hopefully, you'll start to see the expressive power of JavaScript.
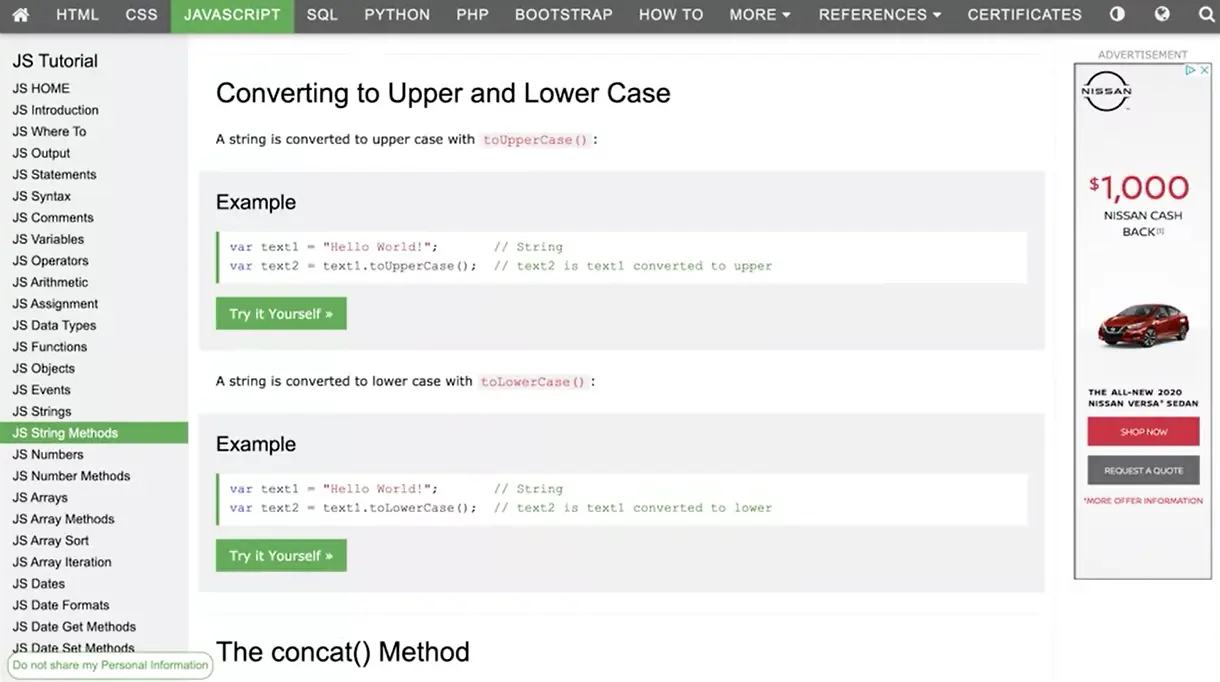
Over here I have some of the different string methods you can do. To start with, we're going to work with the toUpperCase() method here. We can actually take a string of text, assign it to a variable, and then take that variable and do.toUpperCase, and that's a method that will take that string and convert it into an uppercase string. Or you can convert it to lowercase.
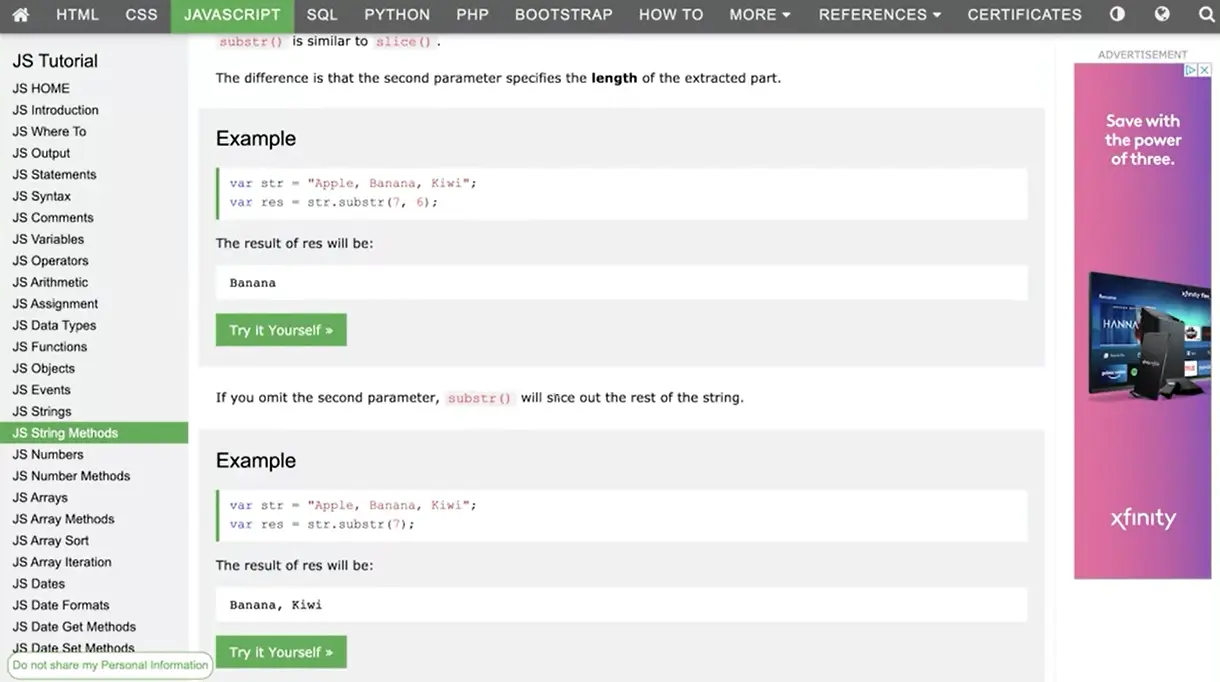
If you come to this page, you'll notice and further down the page here, but there's all different things we can do with strings; to replace content, to find content, to do all kinds of things with strings. We can take pieces of strings out of strings, we can perform string surgery. This page is very useful to explain some of the different things that we can do with strings of text. You might be wondering, well, why would I want to do anything with a string of text? Why would I want to do this stuff?
But if you think about it, a web page from the very first character of the web page to the very last character of a web page is nothing but a string of text. If I were to right- click on this page and do the page source, you can see it starts with a character, and down at the bottom, way, way down at the bottom, it ends with a character. This is one long string of text. From that perspective, every web page is really just a string. If we can do things with strings, we can affect web pages. Not that we're going to do it that way very often, but you actually can do it that way, which is pretty cool.
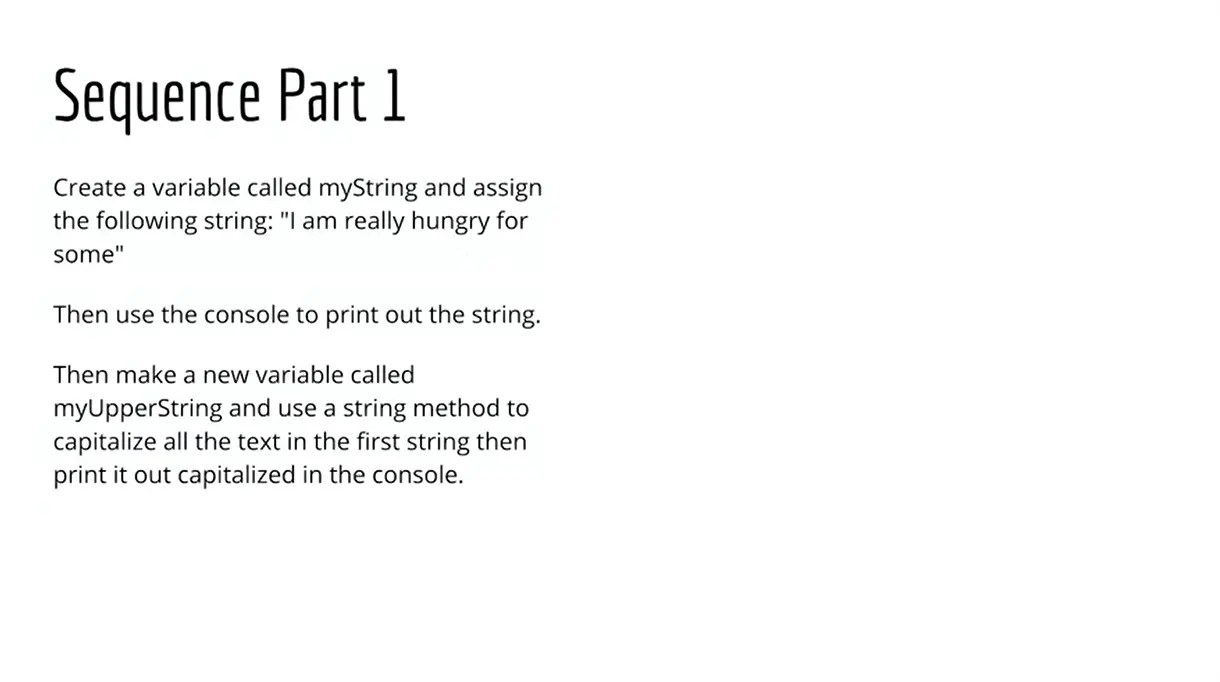
Let's go forward with this and see what we're doing here. The first thing we're going to do is create a variable called myString and assign it the following string, "I'm really hungry for some" and then use the console.log to print out that string. Then make a new variable called myUpperString and use the string method to capitalize all the text in the first string and then print out the capitalized version in the console. Can you do that on your own? Try to do it using this toUpperCase string method here. You can pause the video and come back and see how I did it. When you're ready, unpause the video, and let's see if you got the same thing I got.

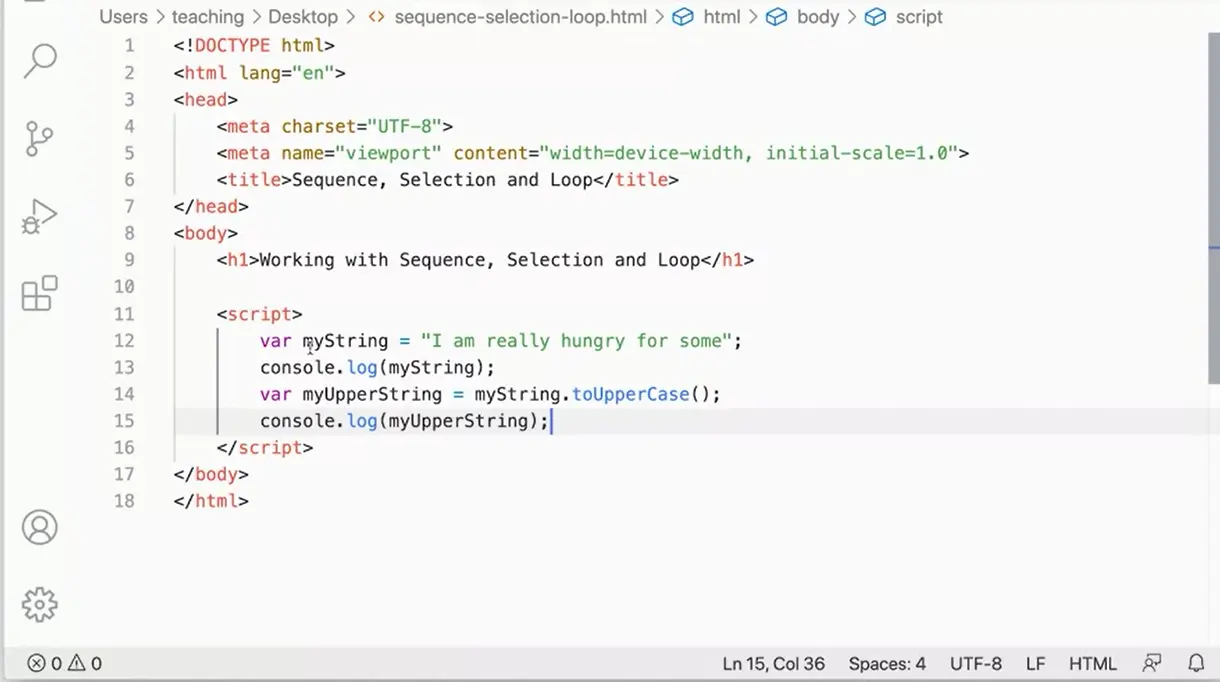
Did you get something like this? I have the same thing over here in my Visual Studio Code. I left out the spaces, but this is the same thing here. Created a variable myString, assigned some text to it, I'm console logging that out, then make a new variable called myUpperString, which is my string toUpperCase with the parenthesis. This is a string method. We're going to talk about methods and functions and all that in a little bit, but for right now, understand that method has these parenthesis at the end. It'll take myString and convert it into uppercase, and then I can console.log that out and assign it to this and console.log that out.
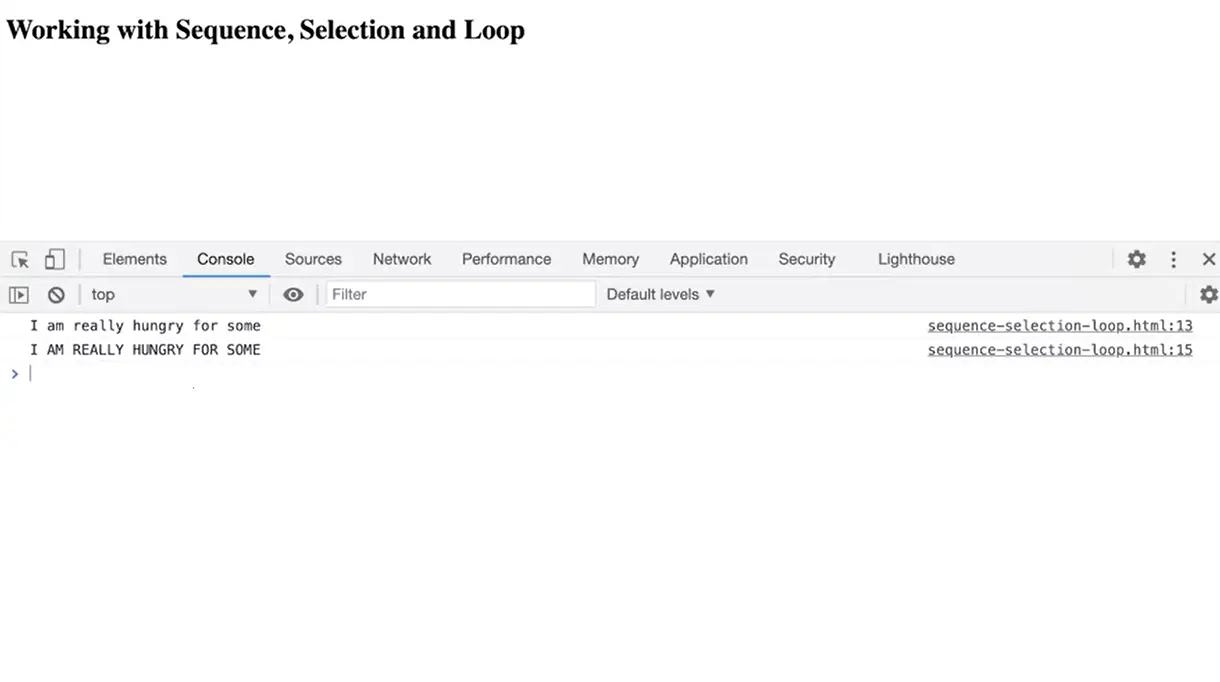
I can come over here and see that that actually runs, and I've got both of my strings. One of them is lowercase, and one of them is uppercase. That works great. Let's see, what should we do next.
Next, we'll do some more surgery on our strengths.
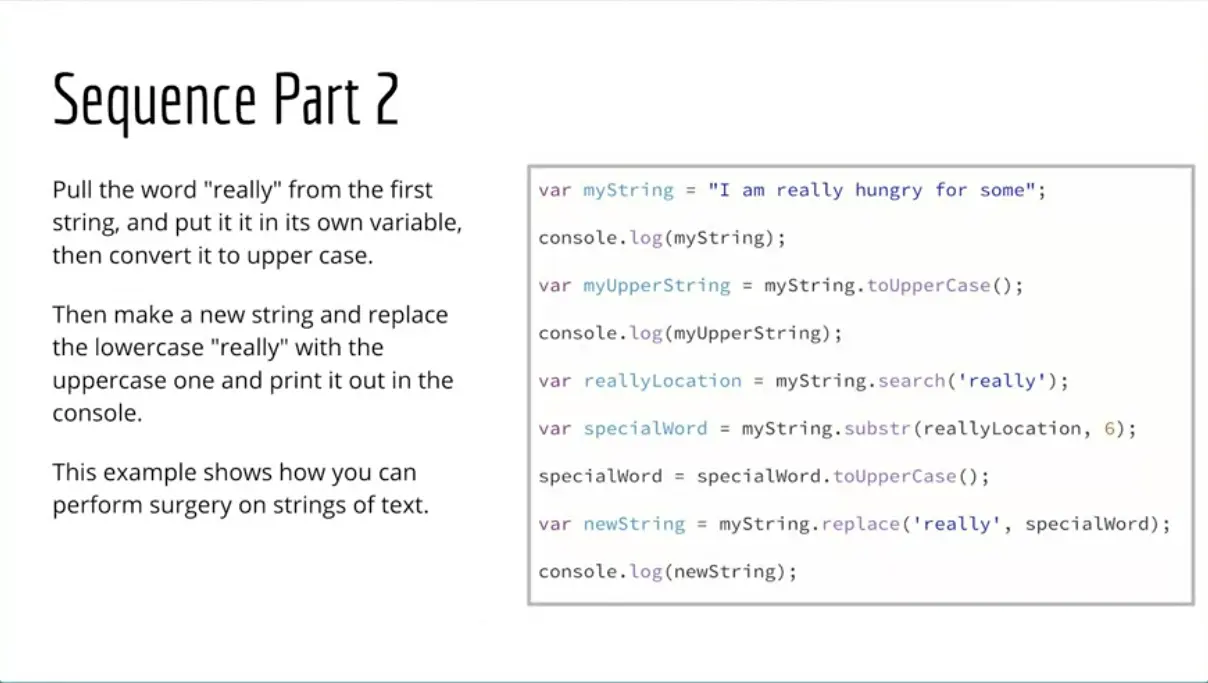
What, we're going to do first here is we're going to pull out the word ''really''. So I'm going to make a variable called reallyLocation, and I'm going to use the search method to find out where this word ''really'' in my string starts.
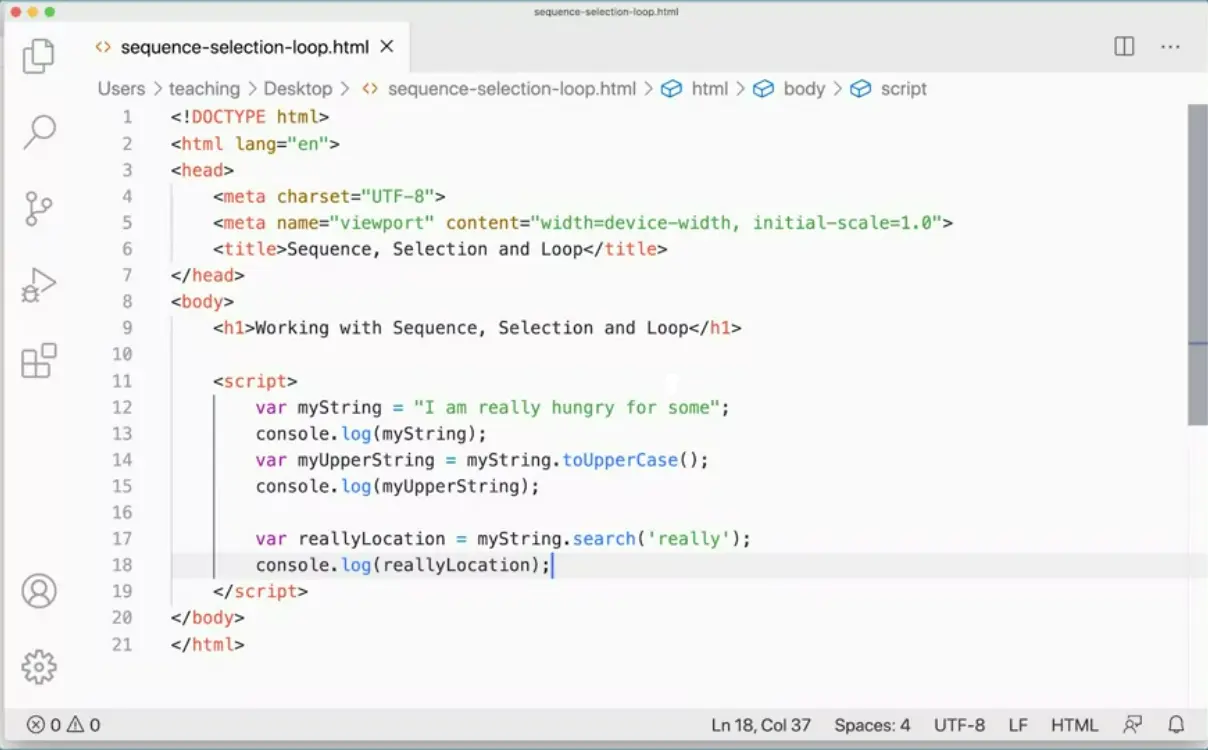
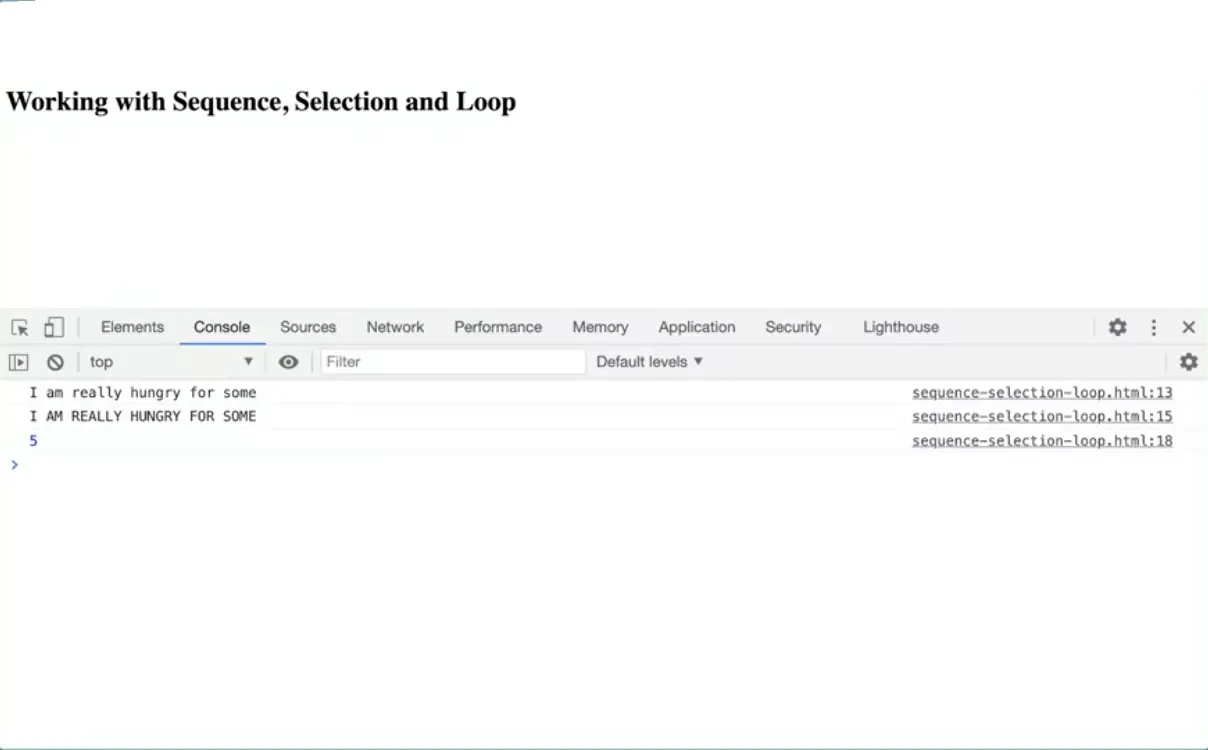
What this is going to return is a number of that location. So let's do that first. Var reallyLocation equals myString.search really. Then I'm just going to console log out reallyLocation just so you see you can see exactly what that's getting. Assuming I did that right and I did. That's getting a five. What that means is that if I count from here 0, 1, 2, 3, 4, 5, this is character Number 5. It starting at a five. How many characters do I want to get? I'm going to get six characters.
So I'm going to use the substring function or method here, and I'm going to pass in reallyLocation which is location five, and I'm going to get six characters. What that's going to do is it's going to pull out into this variable, special word, the word ''really''. It's going to start at five from myString and get six characters.
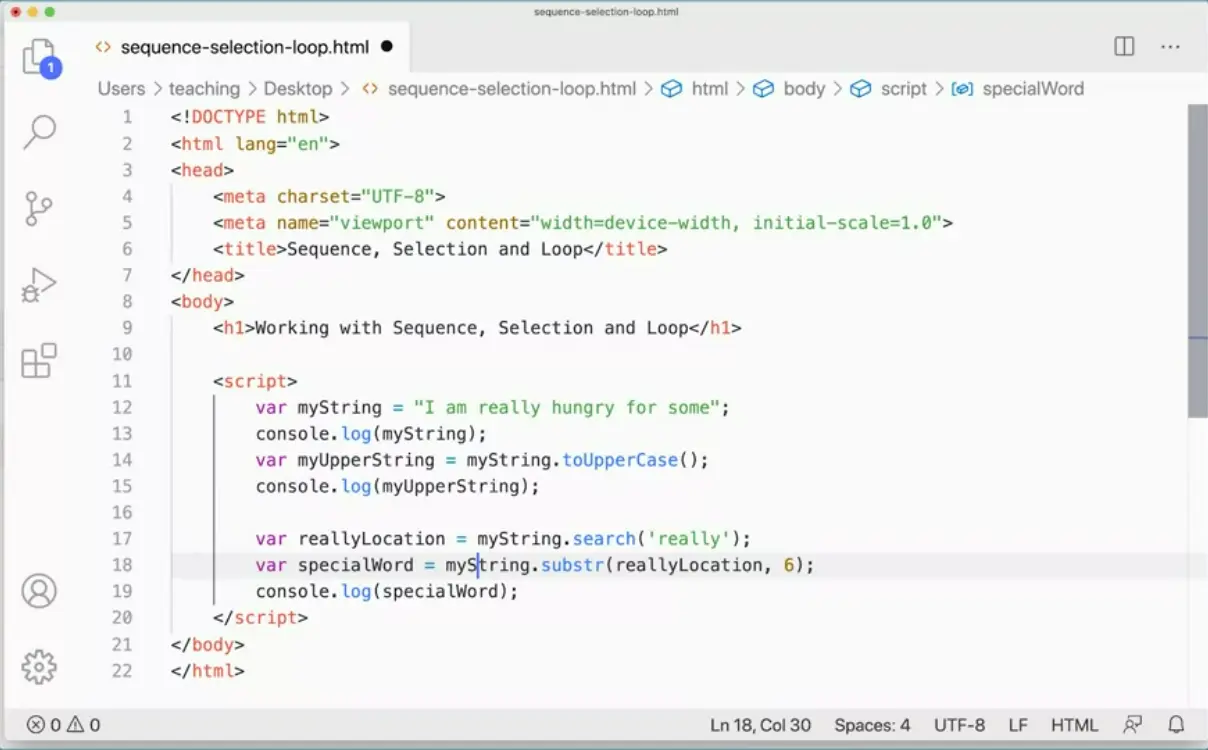
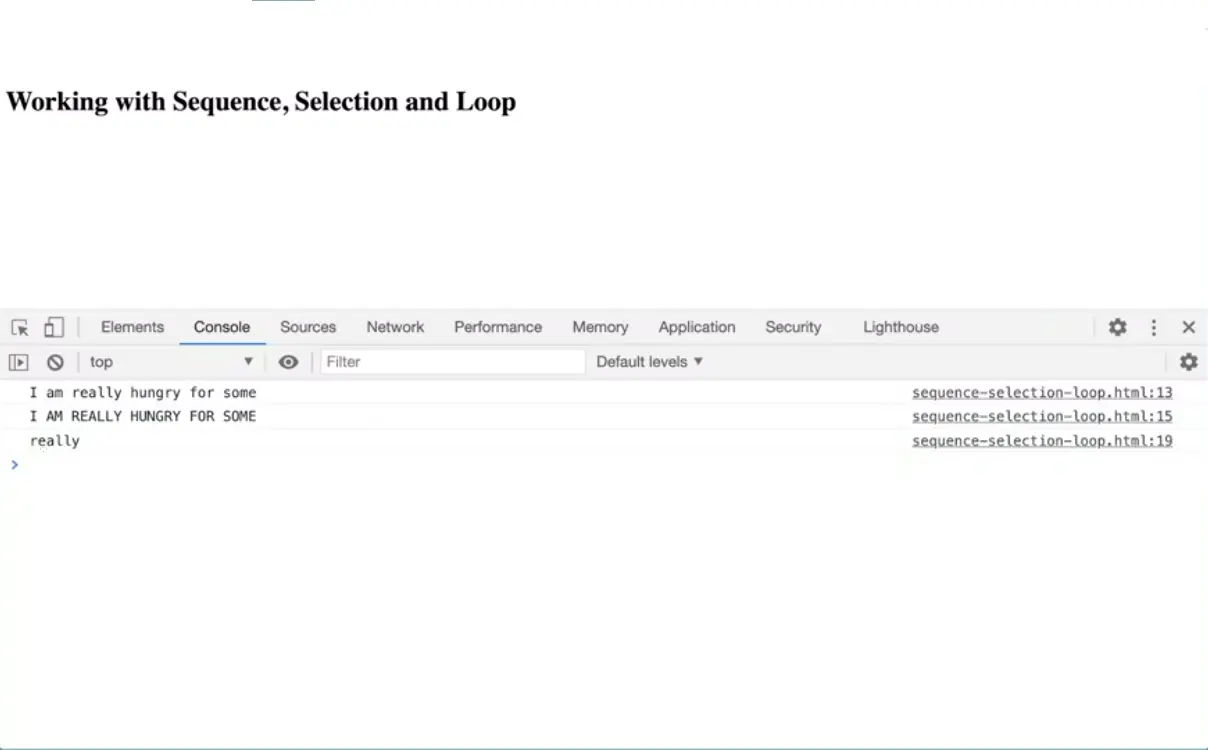
So let's do that. Var specialWord equals string.substring, and I'm going to start with reallyLocation and get six characters. If I console log special word, you'll see that what that's getting for me. It's myString.
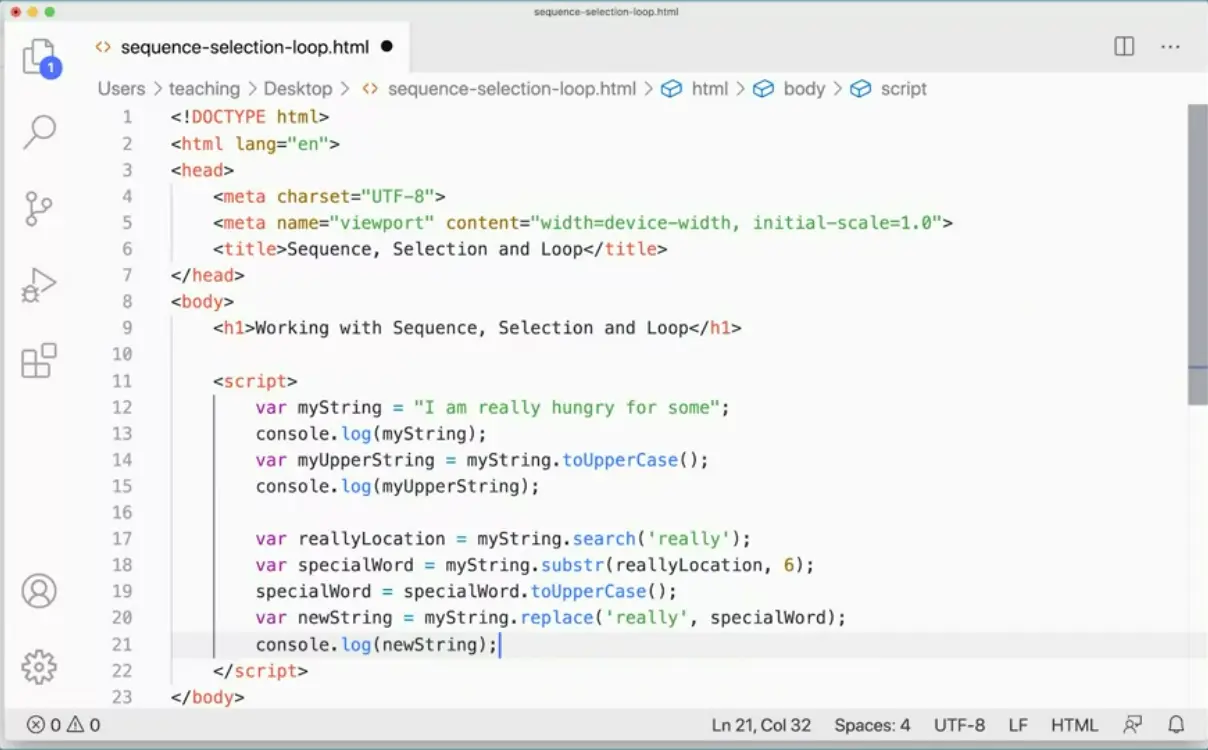
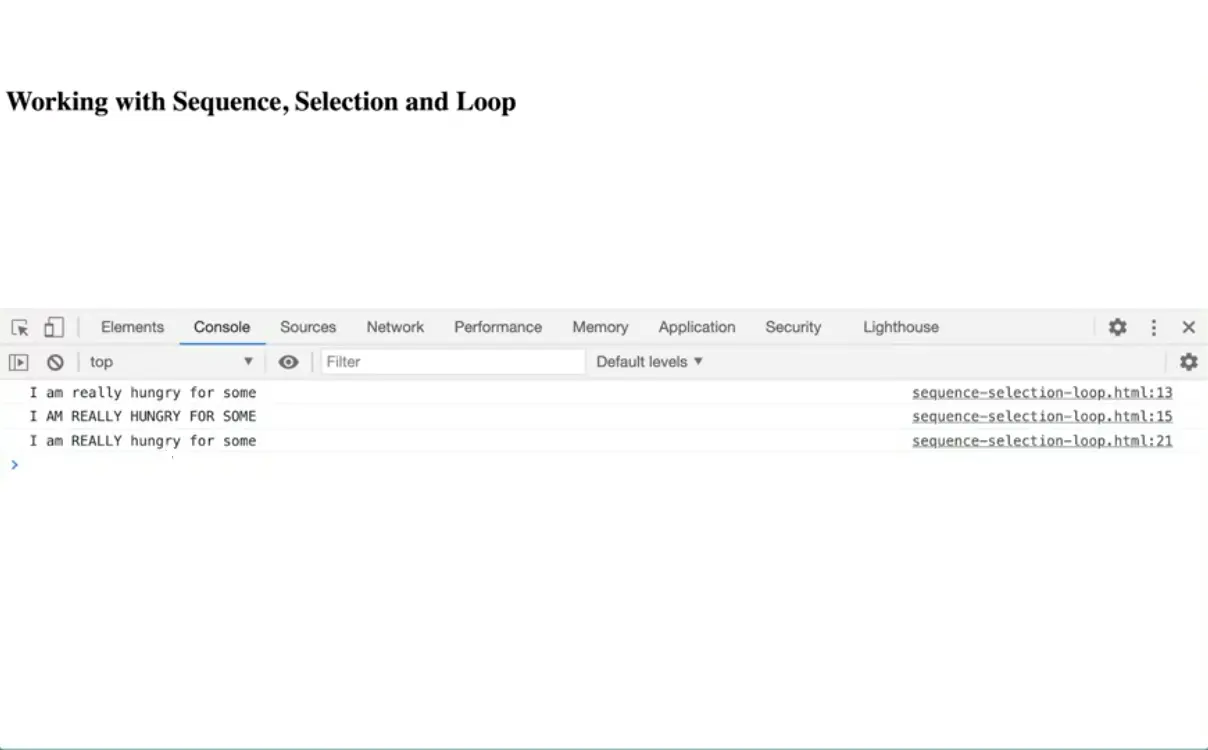
So I've got that, now I'm going to take specialWord and assign it back to itself, but uppercased. I'm going to say specialWord, I'm going to assign it specialWord.toUpperCase. So now it's going to be uppercase, and then what I'm going to do is I'm going to make a newString and I'm going to replace ''really'' with specialWord into the original myString here, and then I'll console log out newString. So let's do that. Var newString equals myString.replace. Which order does it go in? I'm going to replace ''really'' with specialWord. SpecialWord like so and then I'll console. console.log newString. What I should get is I am really hungry for some, so I'm getting the capital word ''really'' there.
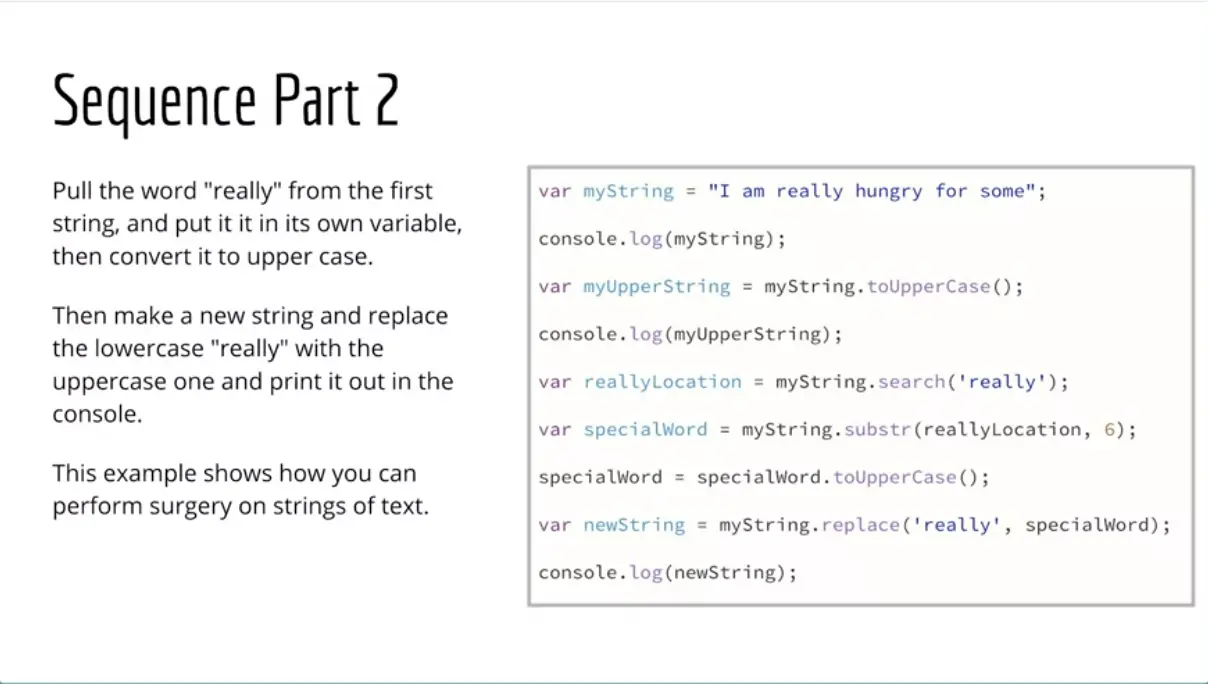
But this is a sequence, JavaScript is doing a sequence of things, one thing after another, we're just doing a sequence of things here. JavaScript goes through the script one step at a time, and we're just learning about some string methods along the way. We've learned about a few of them already, uppercase and replace and search and substring, and there's a lot more here that you can go through and learn. But that'll get you started to begin with the various string methods that are available in JavaScript for doing string surgery.

For the next step in our sequence, make an array called foods and put four foods in the array. Then use the string literal syntax.
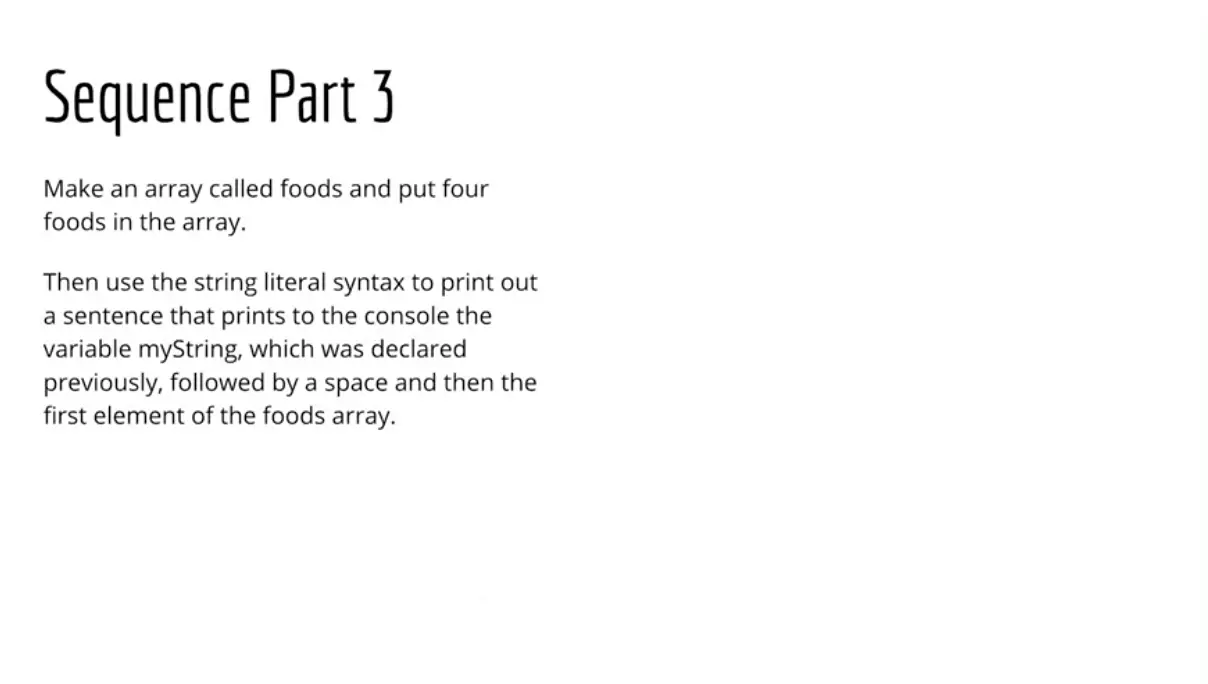
So we can practice that to print out a sentence that prints to the console the variable myString, which we declared earlier, and follow that with a space and then the first element in the foods array. See if you can do that.
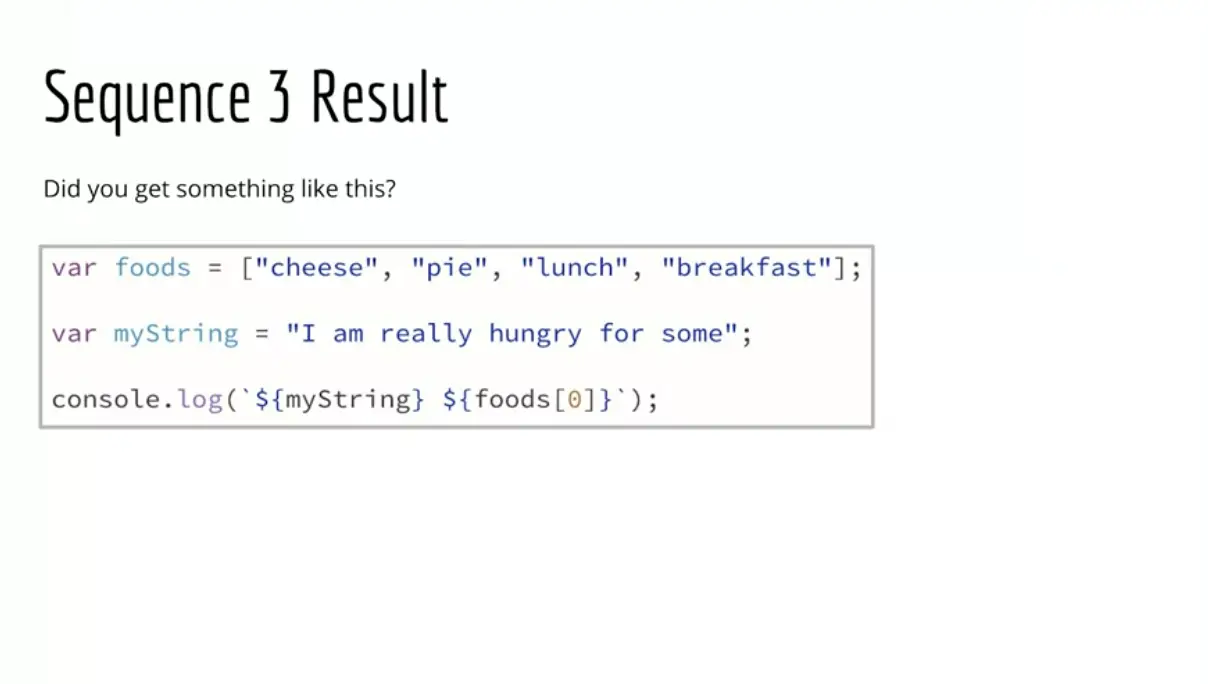
Pause the video and see if you can do that without looking at the answer that I have next and when you're done, unpause the video and come back and we'll see how I did it. Did you get something like this? I have myString in here again, but you shouldn't need that because we already have that on our file but you should have an array and then the console.log with the template literal, takes a little getting used to the template literal thing. Let's do that part together.
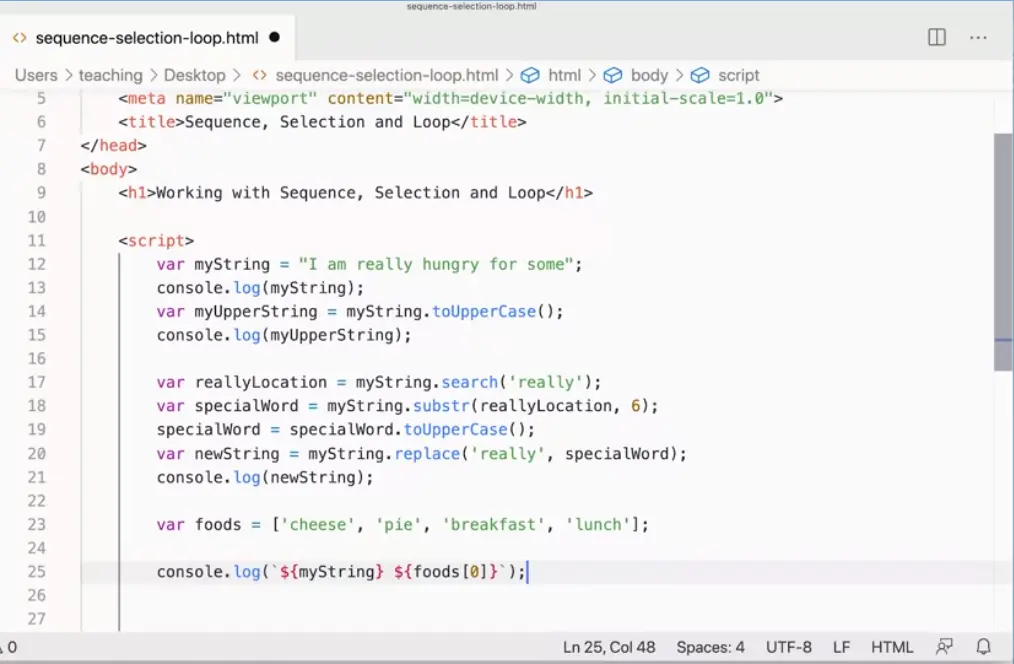
So over here you can see I've added the array and then here I need to add the template literal. And the best way to do this is to just type the variables myString. Then I want a space and I want foods square bracket 0. But these are variables. So I'm going to come in here and add a dollar sign and a curly brace, and a curly brace. Then a dollar sign and a curly brace and the curly brace around it. If you do it that way, you'll understand it better if you always work from the inside out or the outside in, in this case, we're working from the inside out. But if you work that way, it'll make it easier for you to understand.
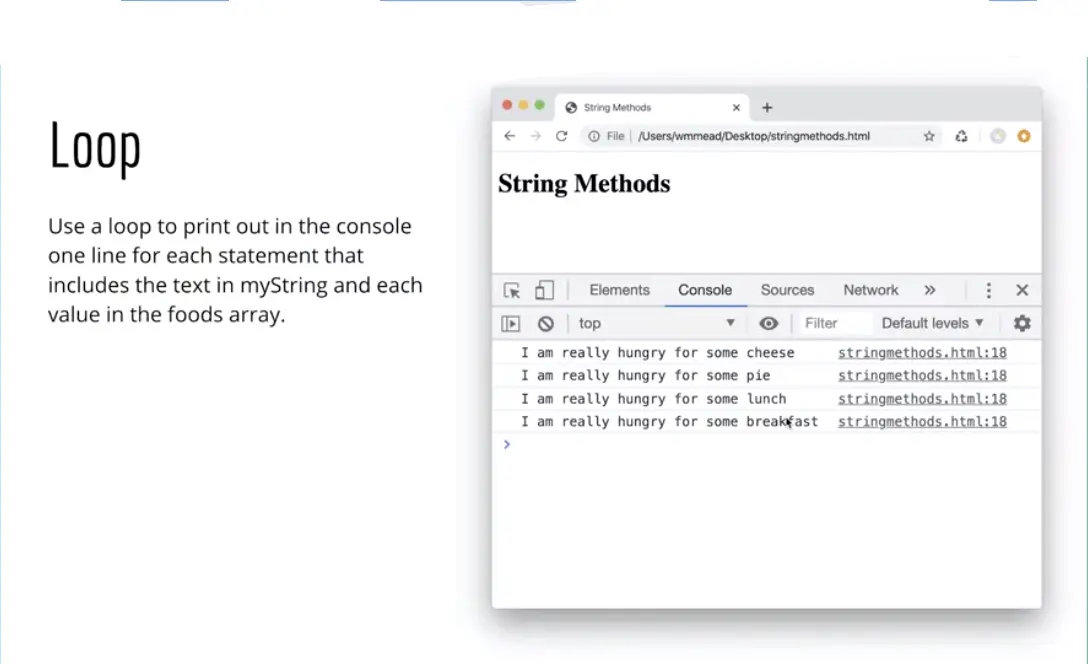
Then over here I can actually run that and I should be getting, "I am really hungry for some cheese". So that works perfectly well. The next thing to do is to see if you can use a loop and loop through all of the elements in the array. I'm really hungry for some cheese, for some pie, for some lunch, for some breakfast. All of these elements.
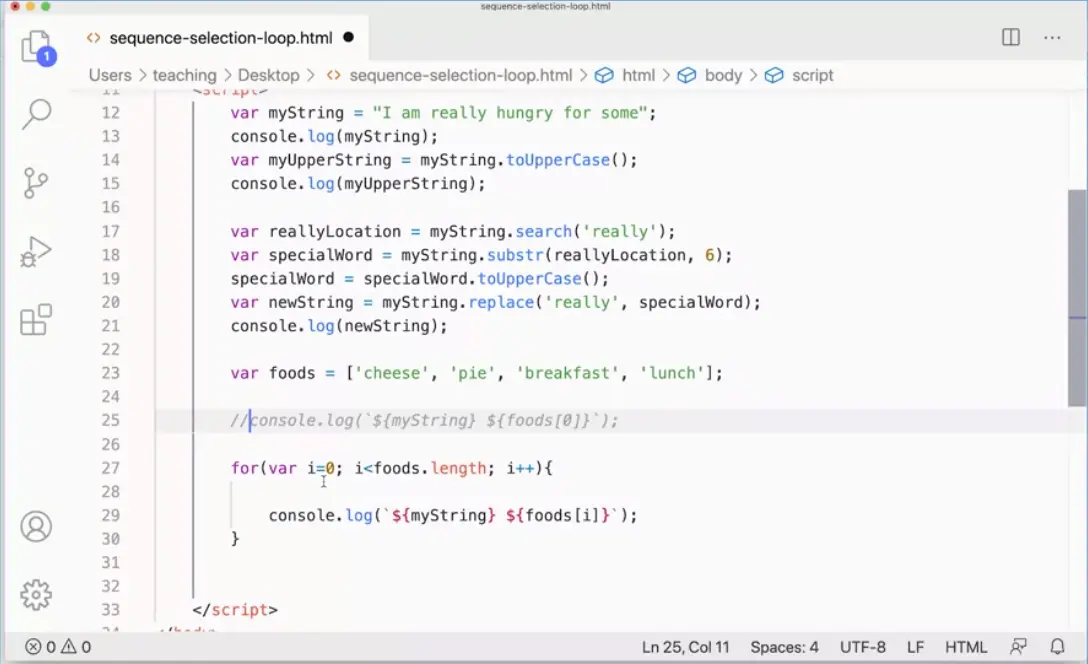
I'm going to say var i equals 0. So I'm going to start at 0. For i is less than foods.length. Now I could stick in here a four instead of foods.length, but this is better practice. Foods.length i plus, plus. Then I'm going to console.log out this line here. We're just going to stick that in there. But instead of food 0, I'm going put an i in there because i is going to get each one of these. In fact, just so you don't get confused, I'm going to comment that line out there just so I can see that this is really working.
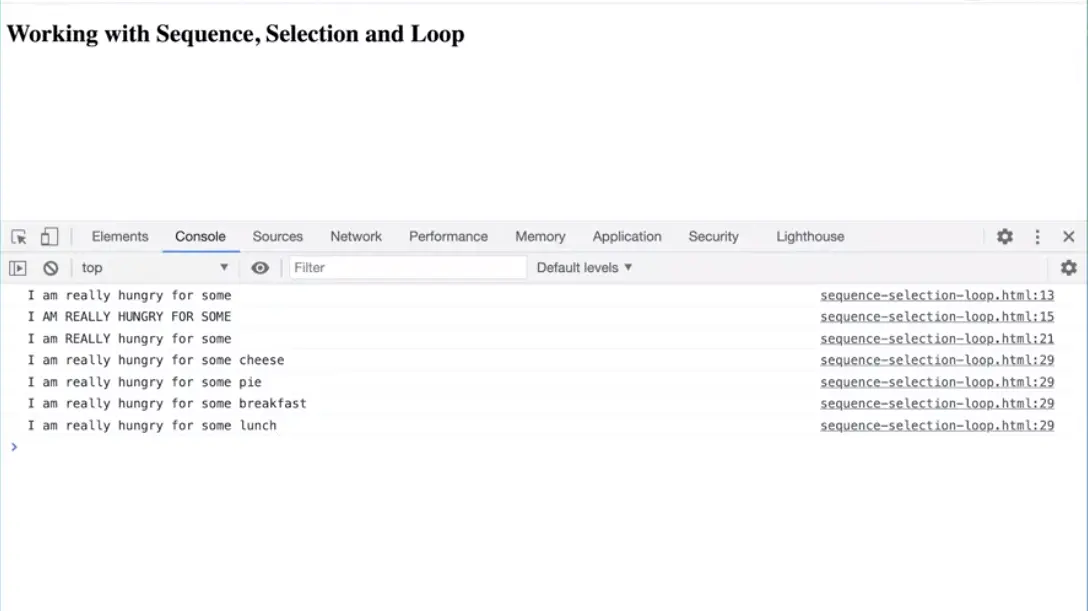
First time through the loop, i is 0, so it's going to print out, I'm really hungry for some space food square bracket 0 because i is 0, i gets incremented to one. So the second time through the loop, one is less than four because remember this is going to be a four. So it'll go through again and you'll get pie. Then the third time through the loop it's going to get breakfast, and the fourth time through the loop it's going to get lunch. Then i gets incremented to four because it's 0, 1, 2, 3. So i is going to get incremented to four, four is not less than four. So the loop will bust out. Let's see if that works. There we go. We're getting all of it there. That's great.
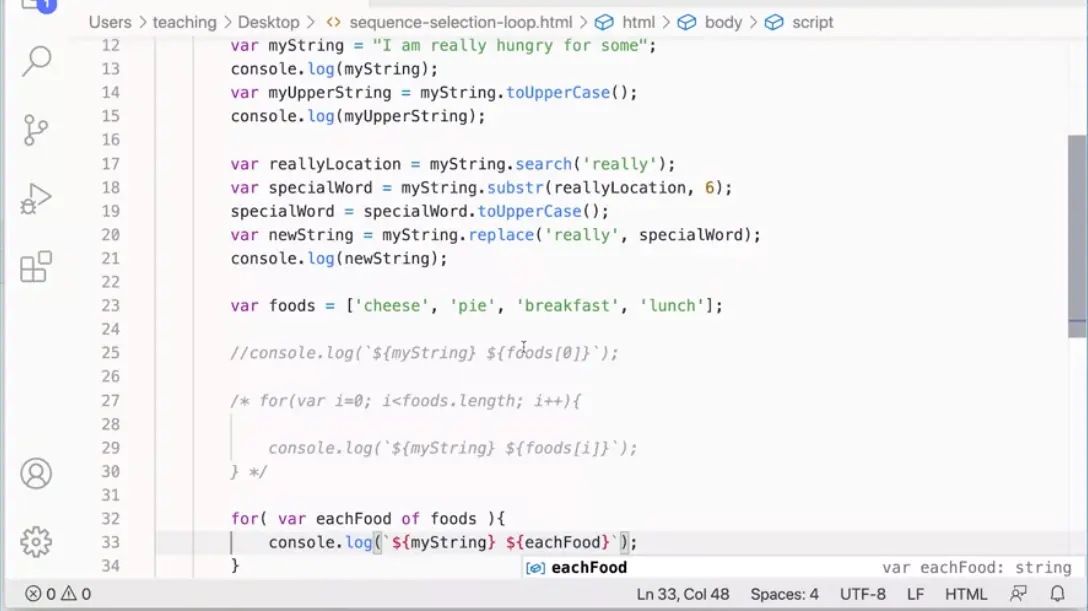
Now, what if you wanted to use the for-of loop? I'm going to just comment that out. For var, eachFood of foods, something like that will work. It doesn't have to be eachFood, you could do i if you wanted to. Then in here, we're going to do the same thing. We're just going to basically take this and stick it here, but now instead of foods, this foods i, this is going to be eachFood. I'm still going to print out myString, but now this is going to be eachFood.
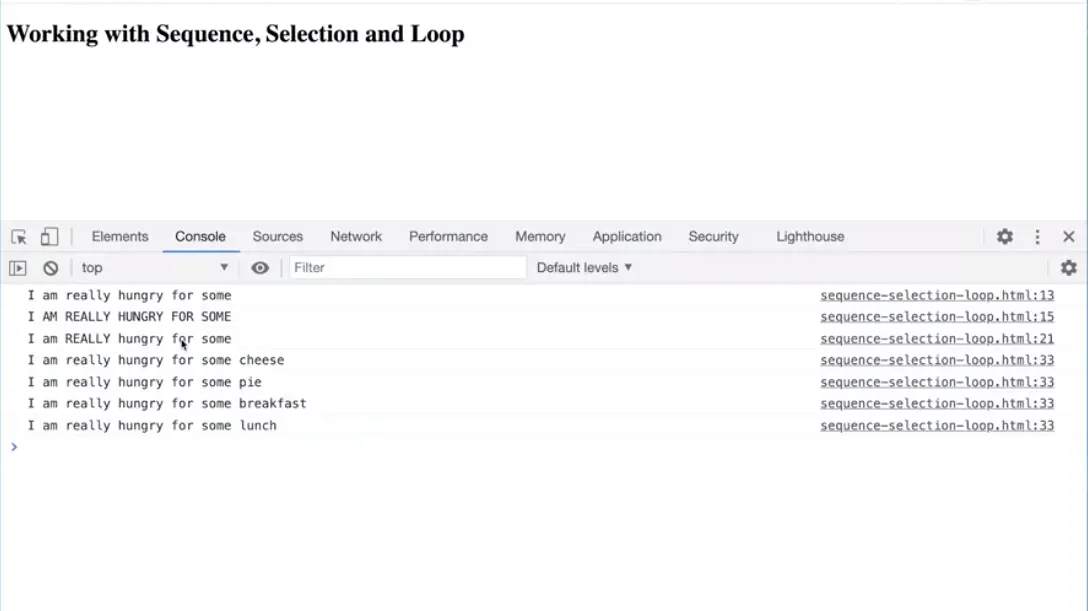
The first time through the loop, eachFood is going to be cheese. Then the second time through the loop it's going to be pie and then it's going to be breakfast, and then it's going to be lunch. We should get exactly the same results so let's go test it out to be sure. Sure enough, I get the same results.

Next we'll bring selection into the mix.
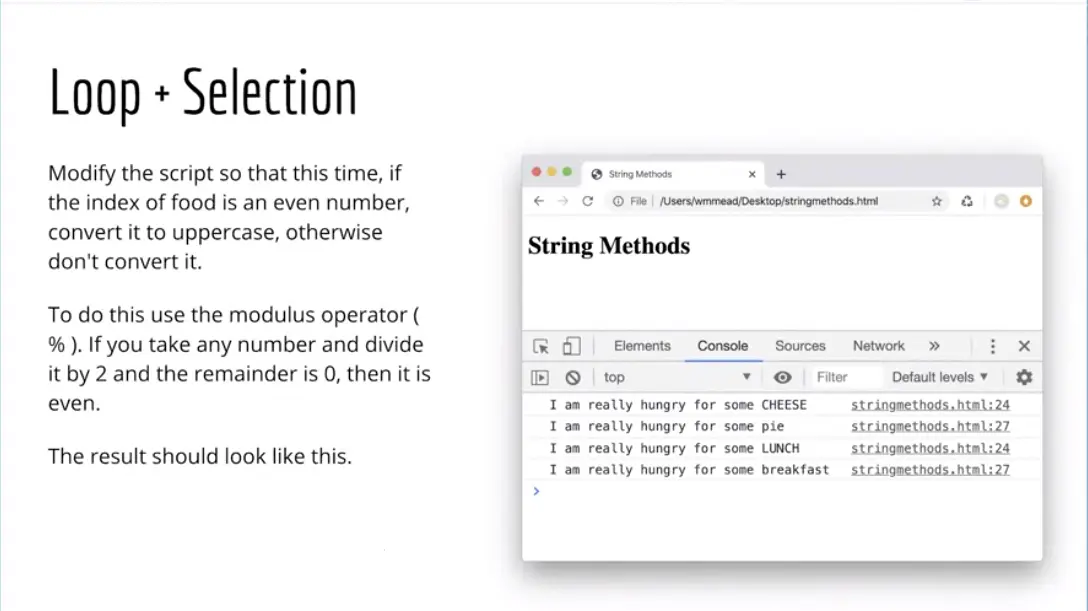
Now, inside our loop, we're going to check to see if the element in the loop is even or odd. If it's even, we're going to make the word for the food that we're getting out of the array all uppercase like this over here. This should be your results. I am hungry for some CHEESE, all capital letters there, and I am hungry for some pie and that one's normal, and then LUNCH is going to be uppercase. Now you might be wondering, well, wait a minute, that's not even. But remember we're starting with zero so this is zero, this is one, this is two, this is three. These two really are the even ones.
In JavaScript, you can determine if something is even or odd by using the modulus operator, which is the percent sign. We can figure out when we divide something and use the percent sign if the remainder is zero, then it's even if you divide something by two.
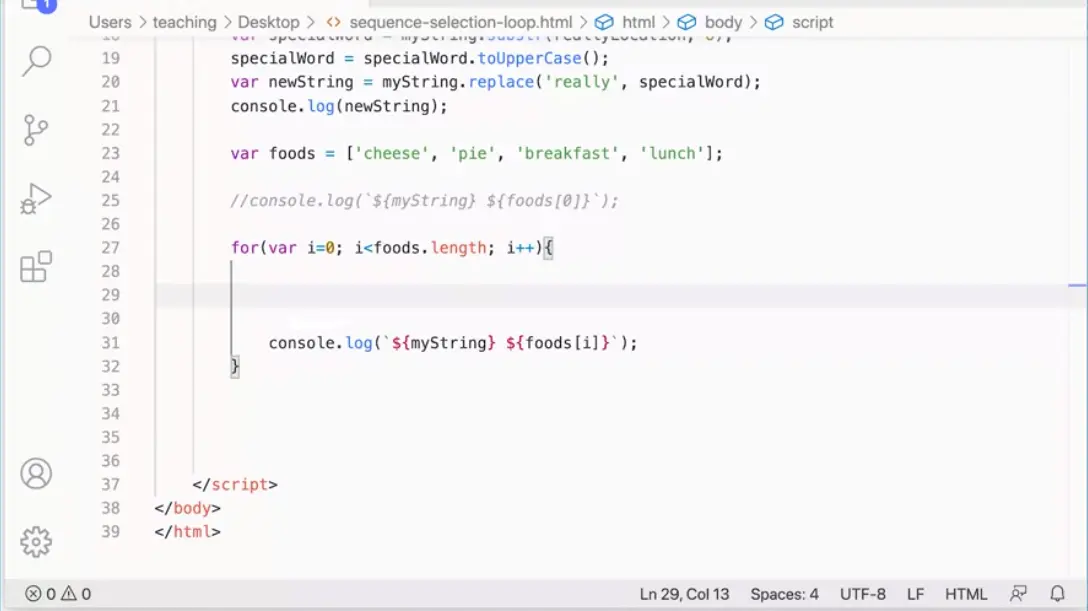
Let's do this together. Here I am with my loop and I got rid of the for of loop. This one's really going to work better because we already have i working as an incrementor with numbers. So we can just work with i to do this.
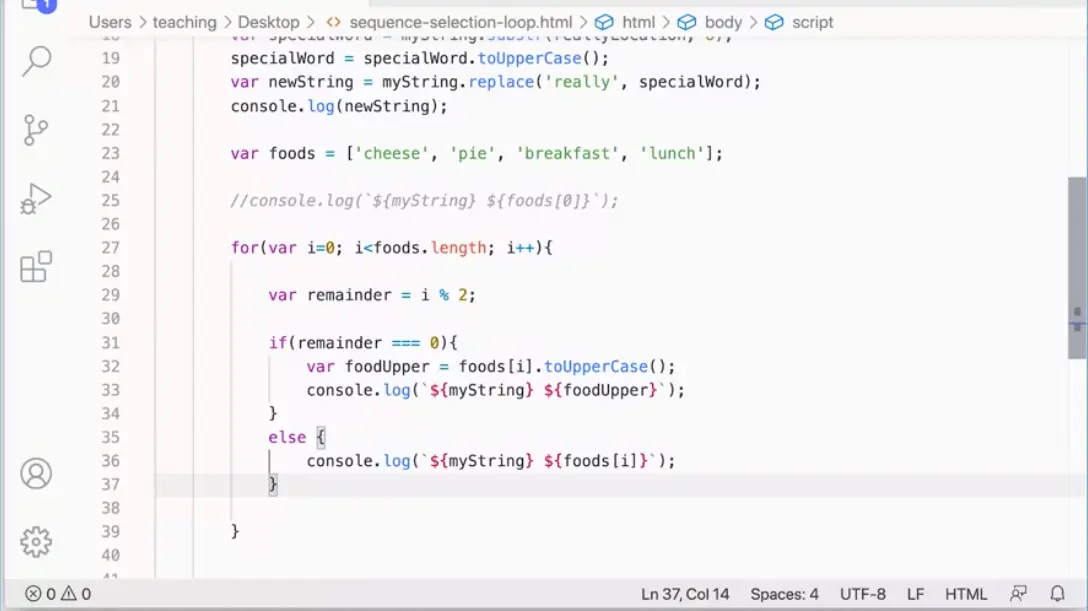
Initially, I'm going to add this var remainder i percent two. Now, what that's going to do is each time through the loop, it's going to take i and divide it by two and see what the remainder is. The first time through the loop, I take zero. Zero divided by two is zero. That's going to be a zero, that's even. One divided by two is not zero. Two divided by two is zero, so on and so forth. If remainder is exactly the same as zero, we could do same as, but just to be absolutely sure, exactly the same as zero. If it's exactly the same as zero, then what we're going to do is we're going to make a variable var foodUpper and assign it foods [ i ]. That's going to get that first food, whatever is there and due toUpperCase. Then I'm going to print out basically this. But instead of foods i down there, I can print out this one here. I think that'll work. Else we'll just do this. Save that.
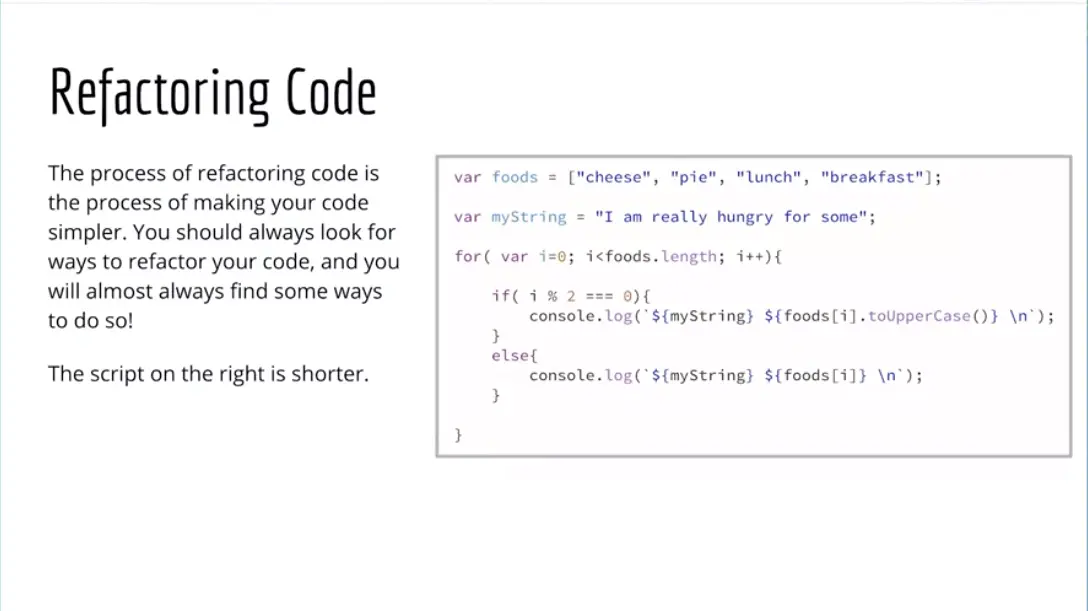
Did I do it right? Let's see. Refresh my page here and look at that it's working. That's great. Did you get something like that? That's great.
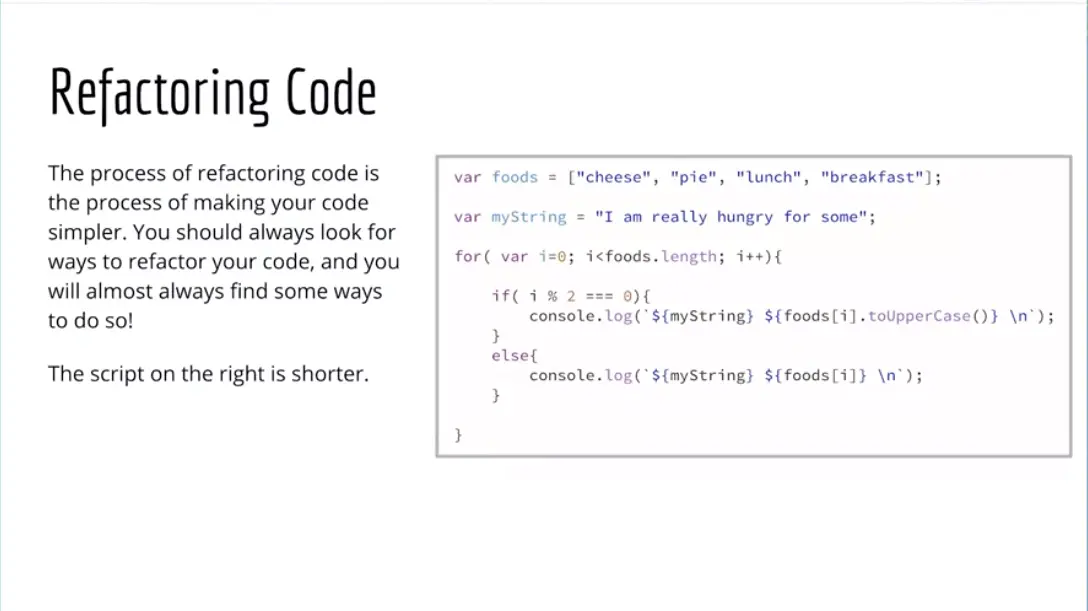
The next thing I want to talk about is refactoring code. Often we will write code the first time and then look at it later and realize that could be a little bit simpler. I could simplify that a little bit. Refactoring code is the process of taking your code and not changing its functionality at all, but making it simpler, finding ways of making it shorter and making it more concise, making it more readable. Sometimes those things don't all go together. Sometimes making it more concise, makes it less readable. But really you're looking for the right balance of conciseness and readability when you're refactoring your code. We could take that same piece that we wrote and refactor it a little bit so that we could get rid of that extra variable here.
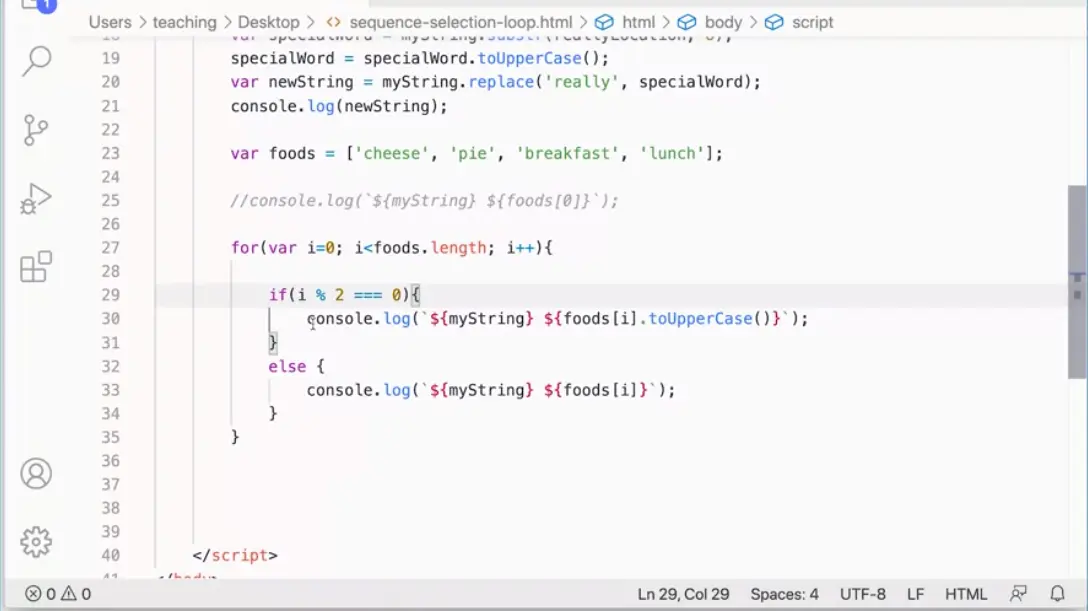
Let's do that really quickly over here. Frequently, students will tell me when they're working through my examples they'll say, "Oh, wow, I tried it and I ended up with way more code than you did. Yours is much more concise." Well, that's because I've refactored mine down quite a bit. Nobody writes it perfectly the first time so don't feel bad about that. Always just keep working at it, look for ways of taking your code and saying, you know what, this could be a little bit simpler. I'm going to take that, I'm going to save it and I'm going to just make sure that it still runs exactly the same way.
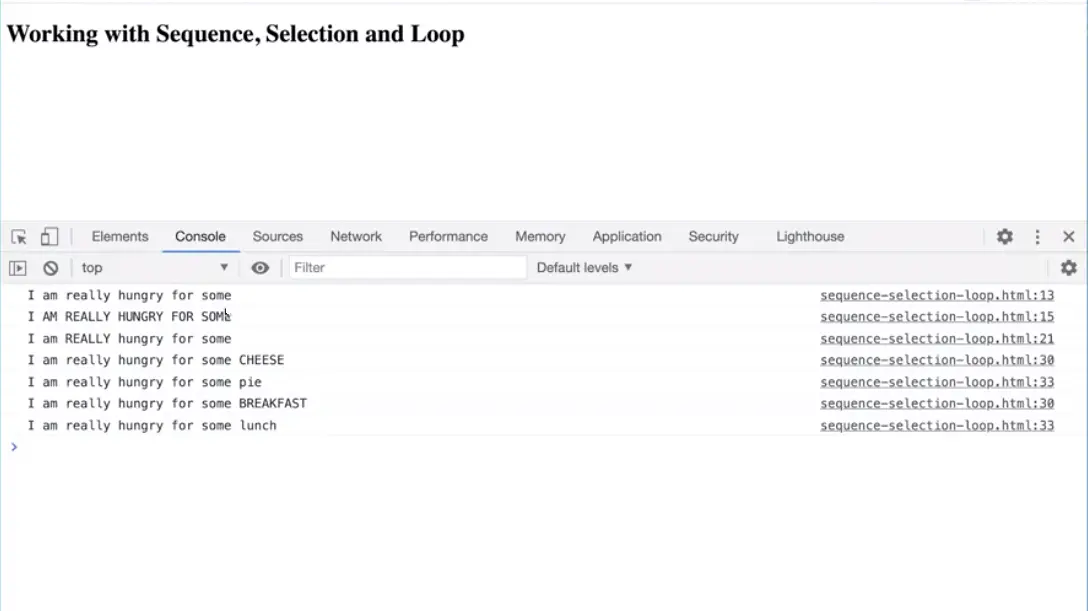
Make sure I did that right, and I did, so that's fine.
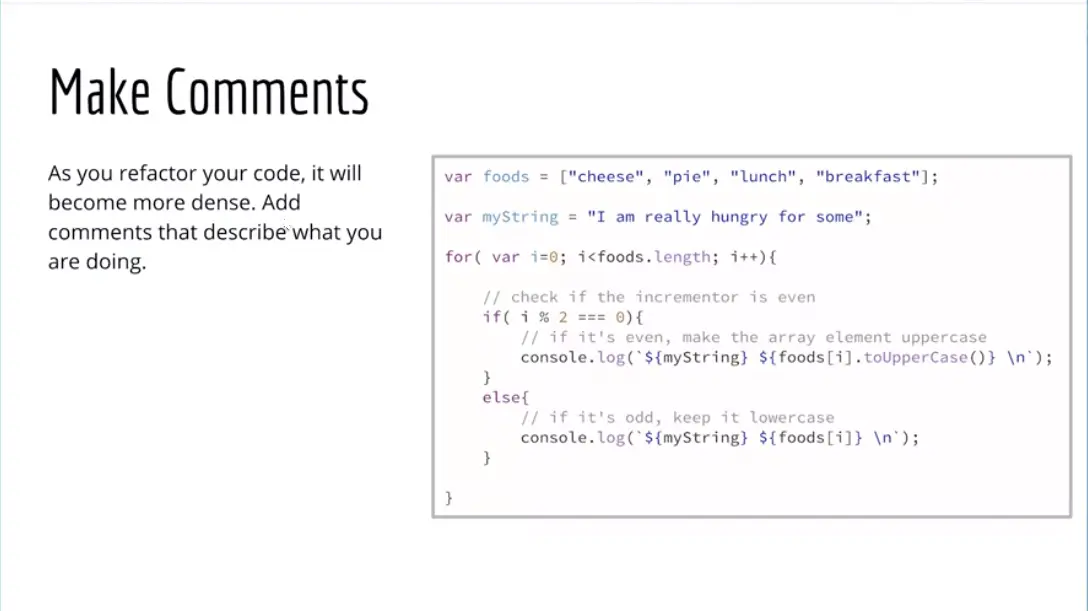
Another thing you can do that's really helpful is make comments. If you're not really sure that you can refactor something down, but then it can become less readable and it can be helpful to put comments in there to help you make sure when you come back to it later that you know what you did and that it will make sense to your future self. You can go ahead and come in here and add comments. I'll put it up here. Checking to see if the incrementor is even. Something like that will be helpful later perhaps and you could add more comments in here. As you refactoring, be sure to do that as well. Once you've added your comments and refactored your code, you've done a great job at working with sequence selection and loops. We're going to get more practice with those as pretty much every script that we write will have some combination of them as we go along. Great, see you in the next lesson.
JavaScript basic challenges. This course includes a number of challenges, and these challenges will help you become better at writing JavaScript and becoming a JavaScript programmer. I encourage you to take the time you need to, to get good at working through these challenges and to be able to do the challenges and get the correct results.
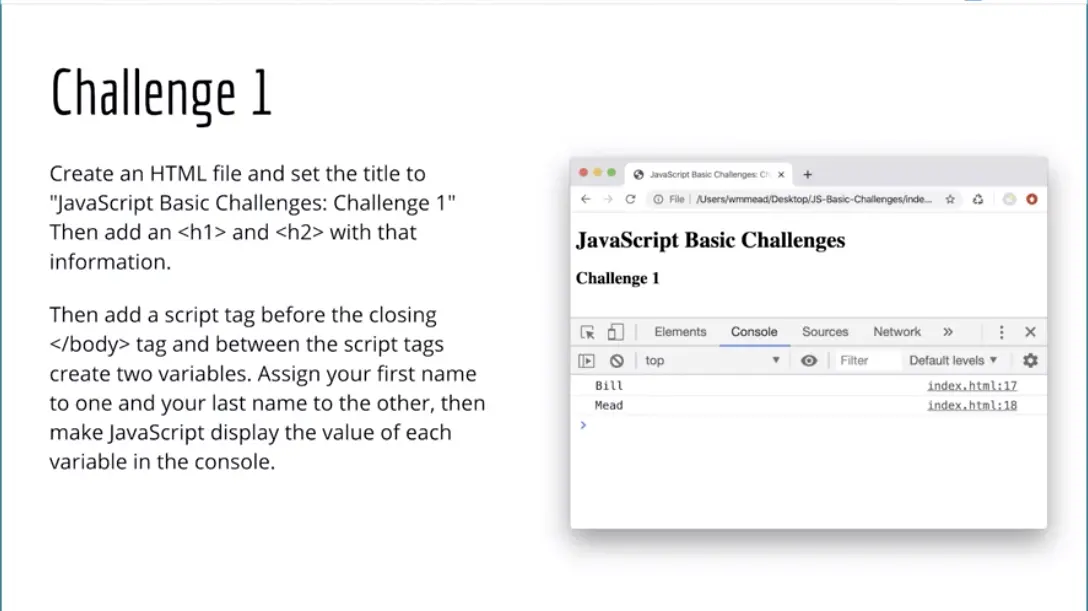
The way the challenges work is, I'll give you a challenge. This first one is fairly simple. Write a script that prints out your first name on one line, your last name on the next line. Very basic challenge.
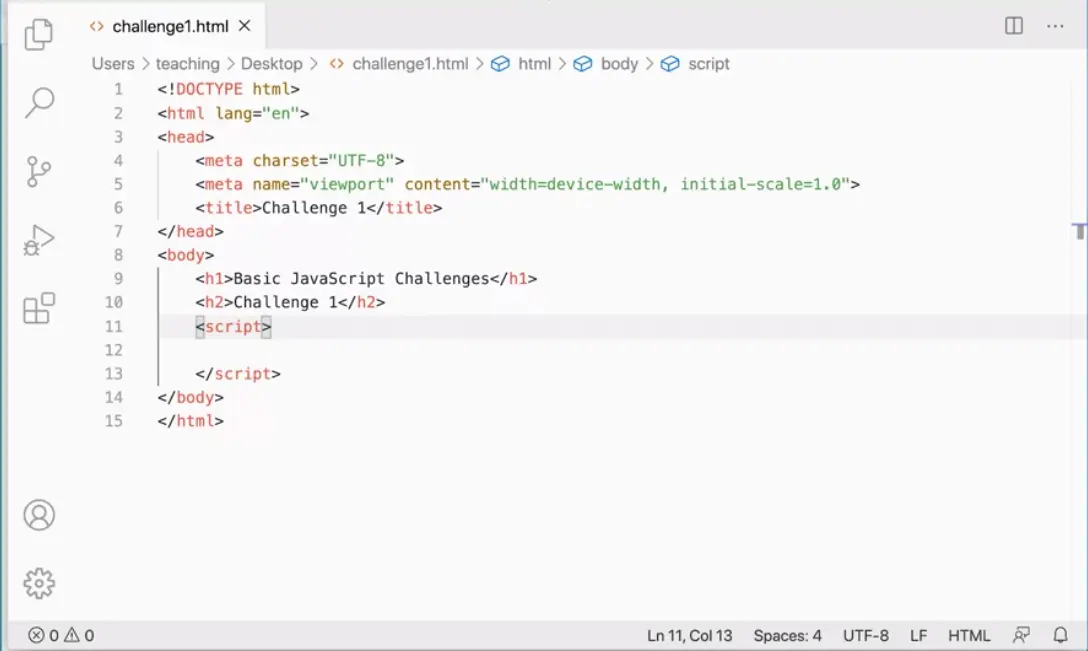
But what you should do is set up your file. I have a file set up here, and then you'll come in here, and it's very normal to be, "Okay, what do I do first?" I don't even know what the first thing is to do, and that's fine.
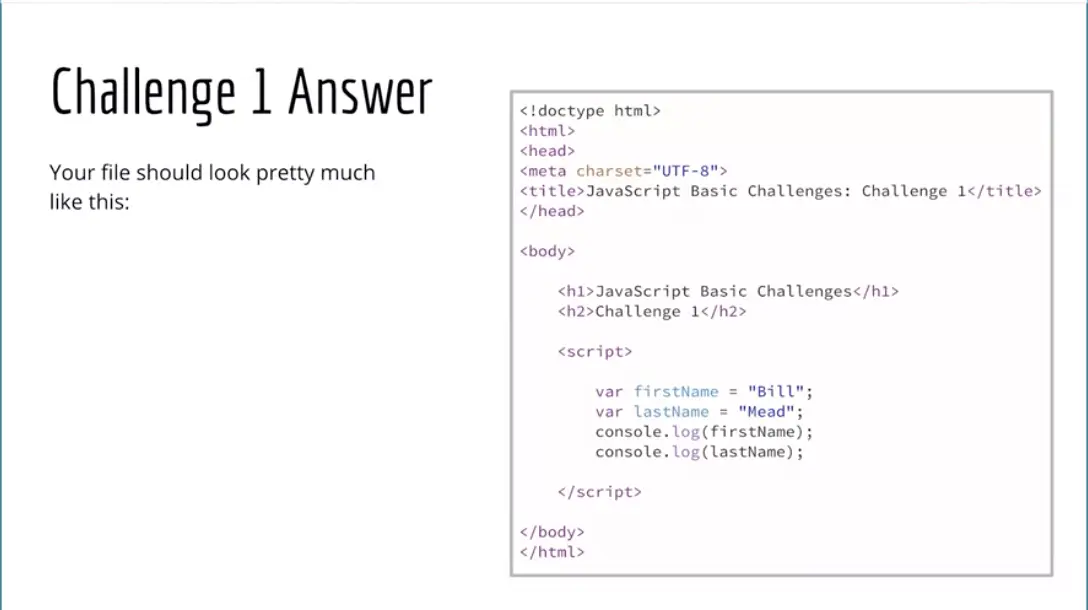
You can always come over and look at the answer for the challenge will be on the next slide, and you can look at that and go, "Okay, yeah, that makes sense. We did that in the other lesson, I know how to do that." Then, come back and actually write that, var firstName equals, "Bill", and I've forgotten what to do next, and that's normal. Go and look again, if you have to. Look again and see what you need to do next, and then go back and actually type it without looking at the slide. What this will do, this will do a few things to really help you get good at JavaScript.
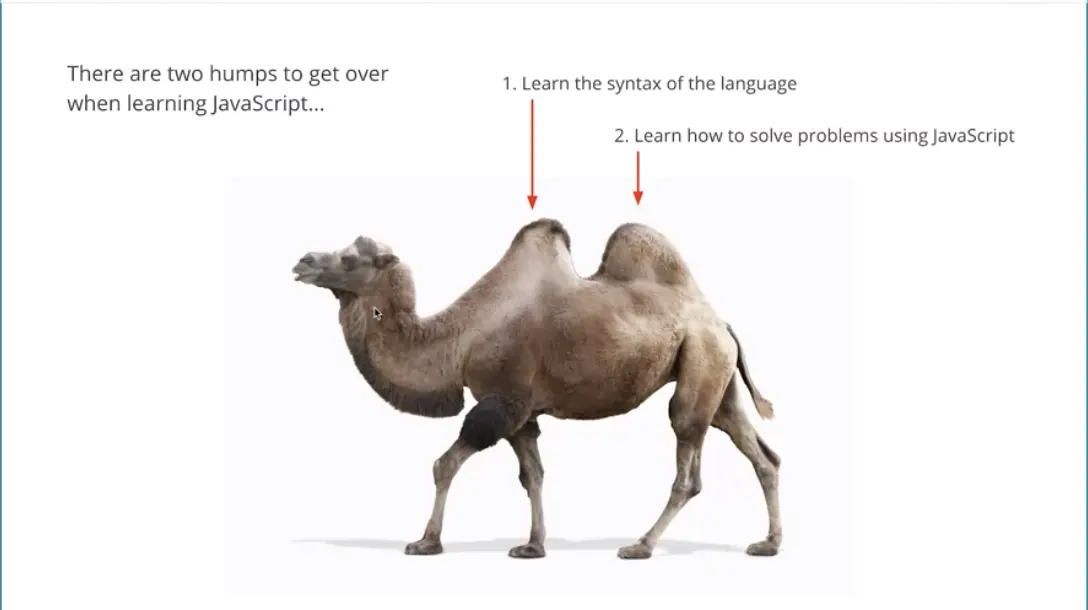
First, what it'll do is it'll help you with the syntax of the language. Remember we need to get over this first hump of the camel. We need to get over that first hump, which is learning the syntax of the language. The way to learn the syntax of the language is to type it. When you're working on this, even if you're looking at the answer and then having to come in here and just remember it for a few seconds, that will help you learn the syntax and get better at it over time, and I promise it will help. Over time, you'll really start to be able to do these without having to look at the slides if you keep working at it. Look at the answers if you have to, they're here, and then type it without looking at the answer.
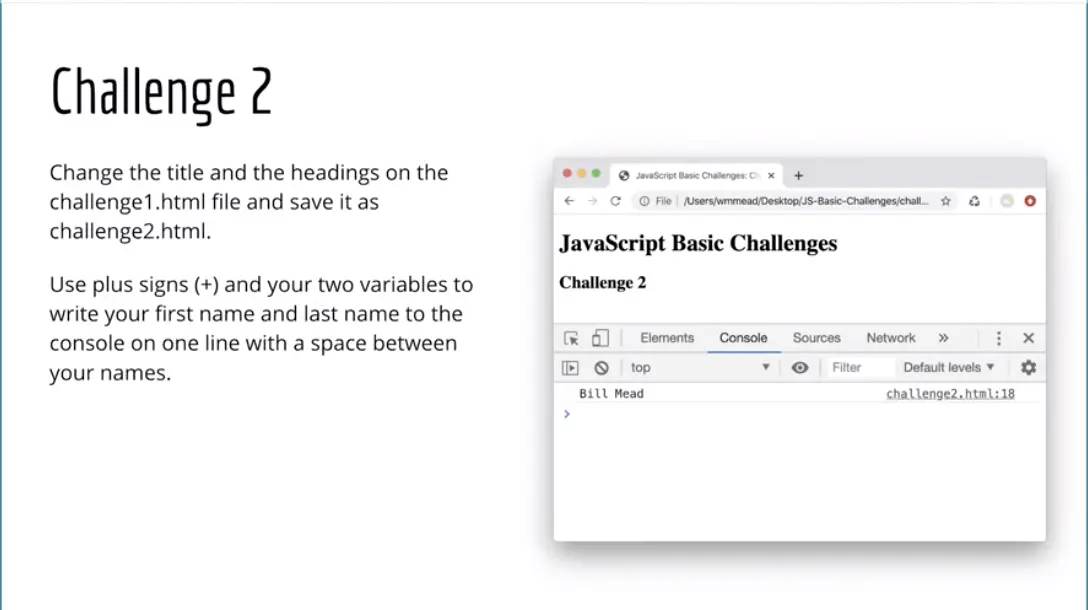
The second thing that I'll do for you is these challenges build on each other. The second challenge is a little bit of a baby step beyond the first challenge. I've designed these challenges such that they build up in small baby steps like this so that over time, you're taking an idea and expanding it into a larger, more complex script as you go along, and that will help you with this second hump on the camel. Learning how to solve problems with JavaScript. You get good at learning how to solve problems first by solving very small problems in making baby steps, and these challenges, we'll help you do that.
I recommend you do these challenges to the point where you can do them without looking at the answers because that will really help you with the syntax and meanwhile, you're building up some skill for how to take a small thing and then build on it. Now, there's nothing magical about these challenges. I also recommend you come up with your own challenges. Try things out. See if you can make a small thing work. If you can make that small thing work, then build on it and see what other ideas you have and see if you can build on those. That is a great way to learn JavaScript, and it's fun. It's fun to see if you can do that kind of thing. By doing these challenges, by working through these examples and by getting really good at them, you will build your skills with JavaScript.
If you don't, you don't have to. You can continue to watch the videos and do the quizzes in the videos, and you'll learn about JavaScript. But in order to actually become a JavaScript programmer, you have to write JavaScript. You have to take the time to really sit down and write it. Even if you're coming to JavaScript from another language like C plus plus or Java, or Python or some other language and you might be thinking, oh yeah, I know what loops are, and I know what if statements are, and those kinds of things. I recommend you sit down and write JavaScript because it's a little bit different and it takes practice. Great. Keep working on these and get really good at the challenges and I promise, you'll be on the road to becoming a good JavaScript developer.

Functions in JavaScript. Functions are reusable sets of instructions.
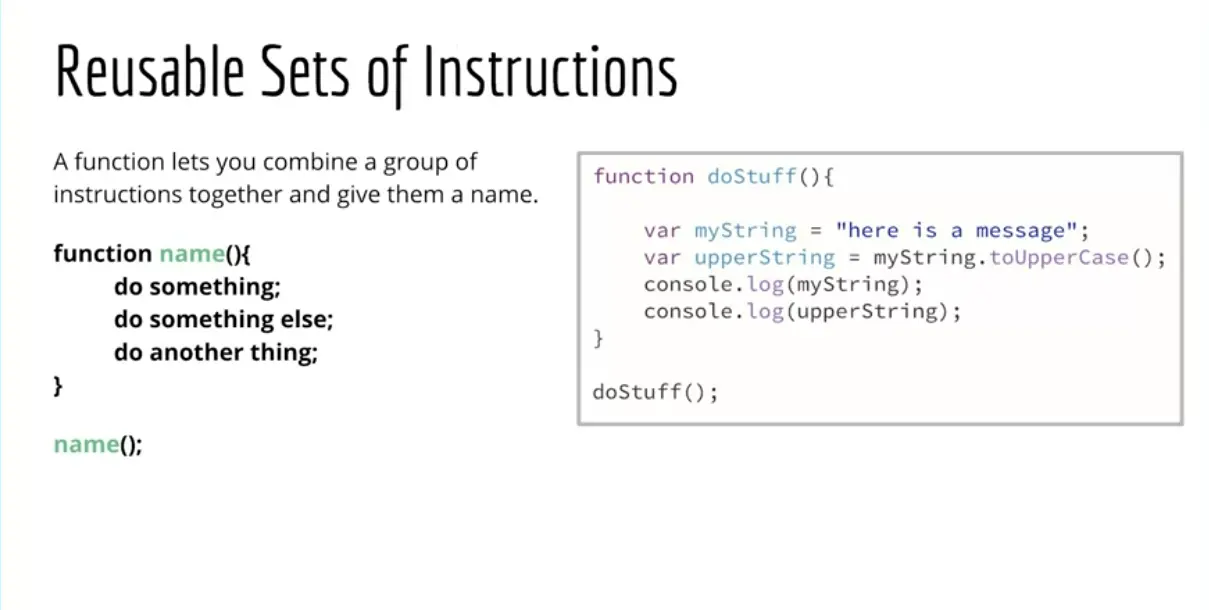
For example, in the sequence selection and loop exercise, you're adding a bunch of script to the page and it was getting messy. There's a lot of single lines of code all piling up without a lot of order, organization to them. What we can do with functions is we can take that stuff, stick it inside of something that has a name, and then run that function when we want to run that set of instructions. We can make functions so that they're reusable, so that you can use them in multiple places within your programs, and that's where functions can become very powerful.
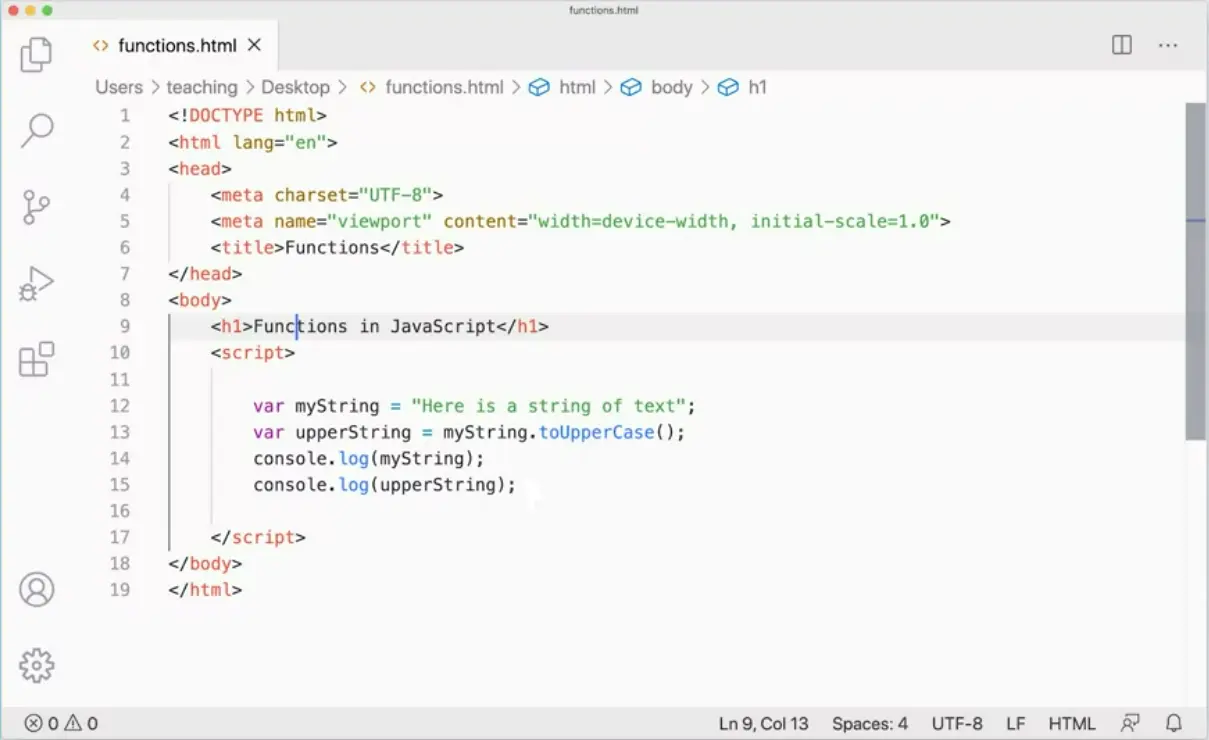
Here (see below), I have a function called doStuff, which is going to run something similar to what we did in the sequence selection and loop exercise. Let's give this a try real quick. I'm going to switch over to my code editor over here. You can see, I've already set up a file and I recommend you do the same. It just needs to notify within each one, and I've got a script here, and I've got some of the script from our sequence selection and loop exercise.
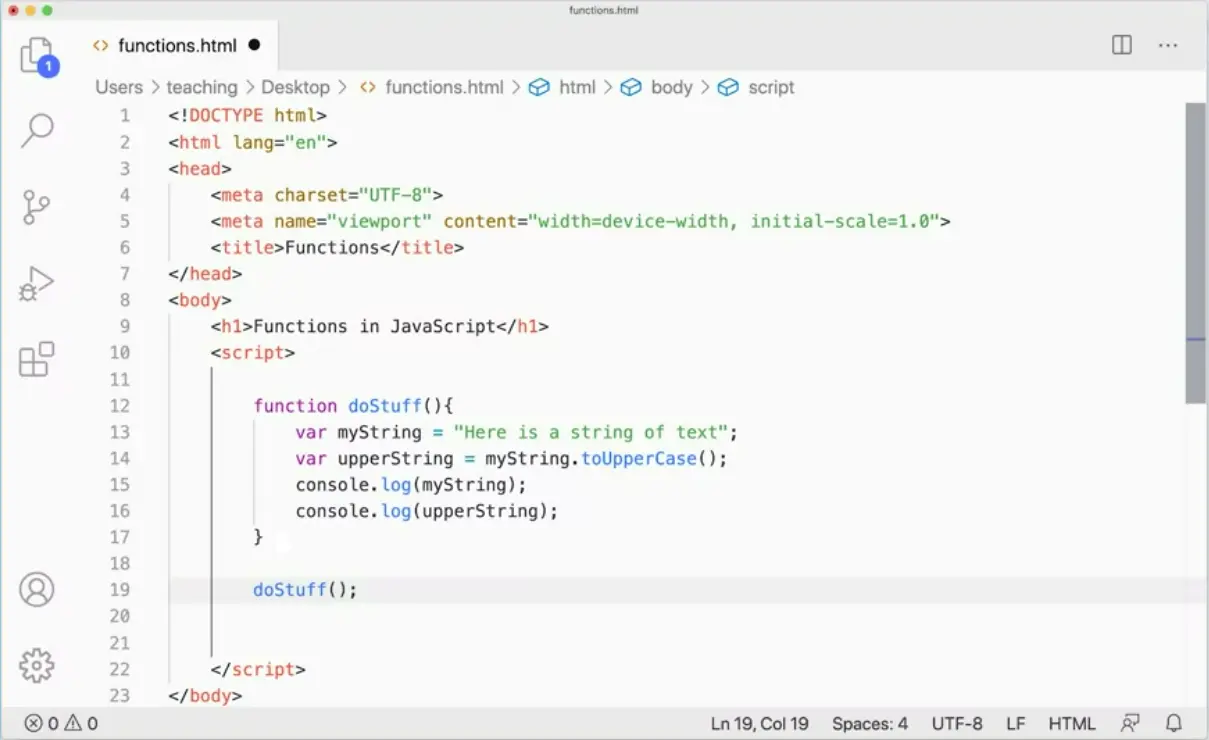
Now, I'm going to add a function. To do that, I would just define a function here. Function is the function keyword doStuff, parentheses and curly braces. Now, this stuff can just go inside the curly braces, like that. Then you have to run the function doStuff. We define the function which tells it what it does, then we invoke or call or run the function.
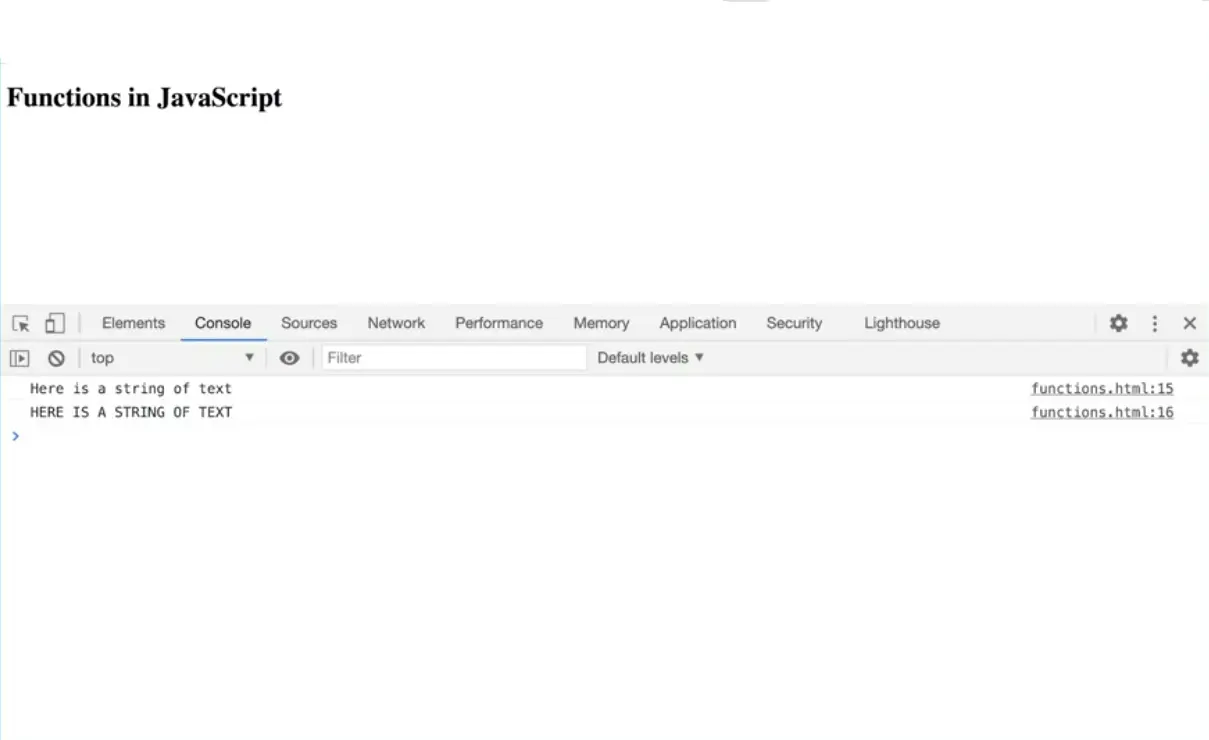
Any of those verbs will do: invoke, call or run. I can save that and I can come over to my pagers, and this is that same page, and I can run this, and you can see that the function runs and it does its thing. It's very normal when you start doing this, and sometimes I still do it to forget to call the function, which will mean that you'll get nothing, because it'll be defined but it won't actually run. I have to run doStuff.
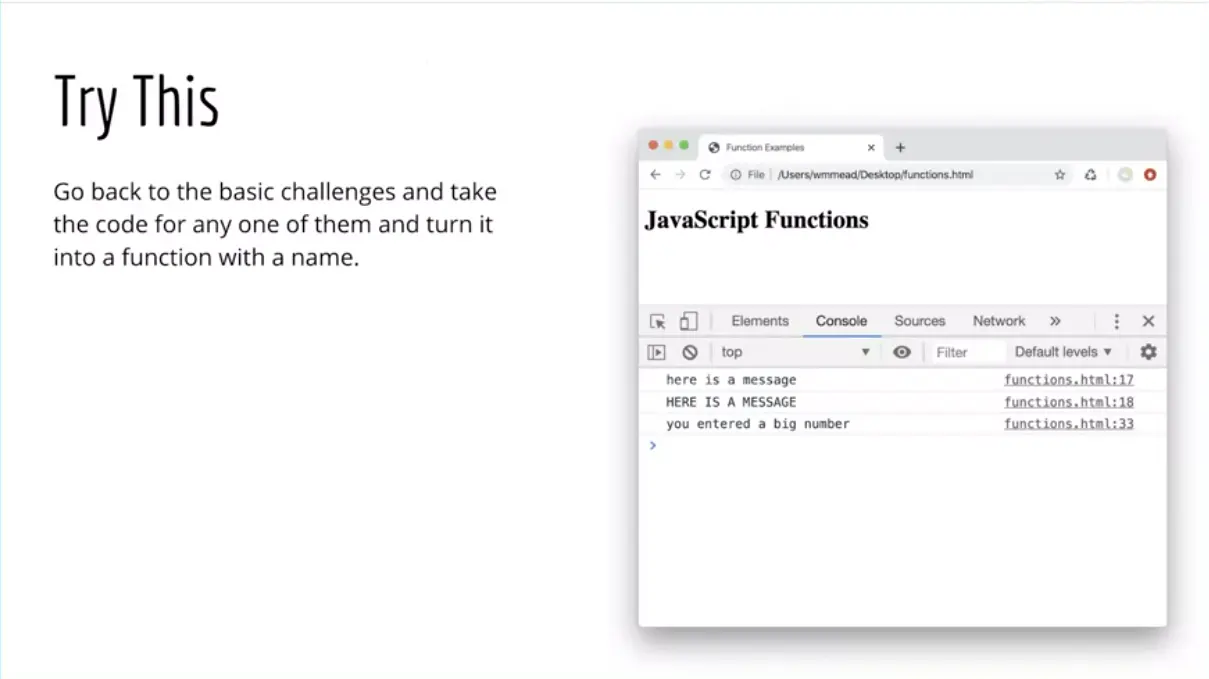
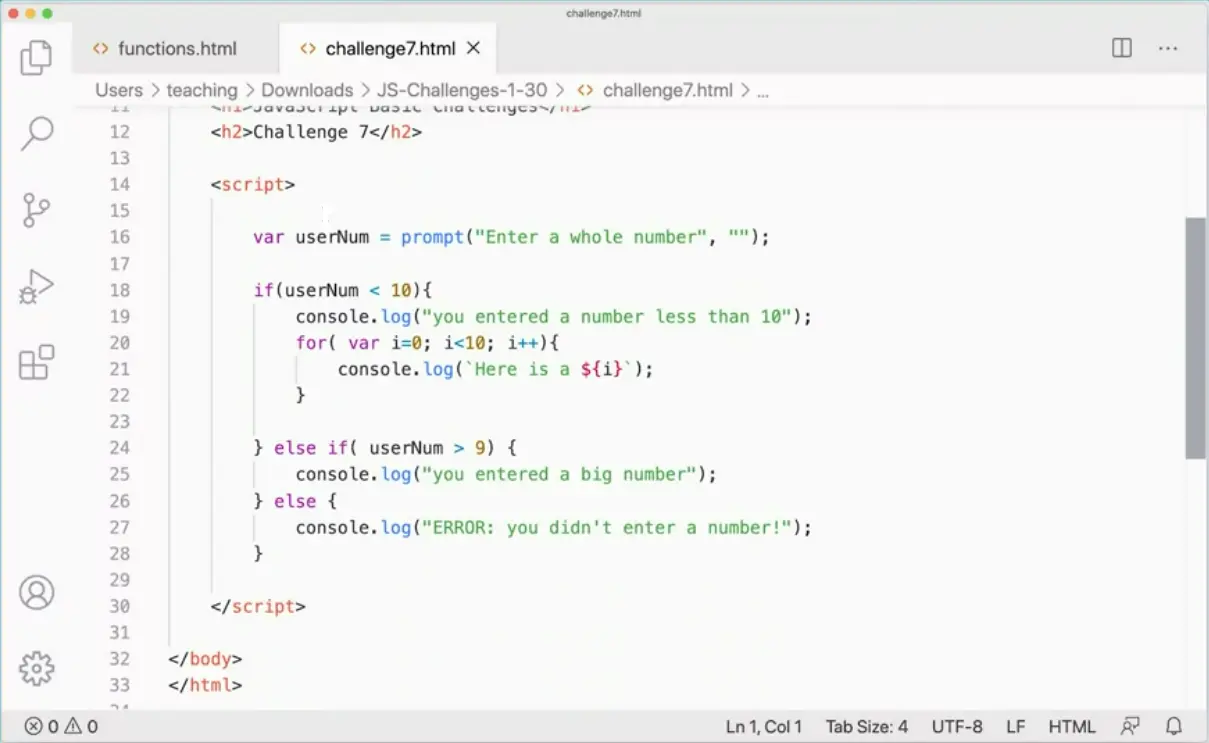
We'll run that function. I went and got challenge number 7 and I have it over here, so here's challenge number 7. How would I take that and turn it into a function? Well, I could do it like this; I could take all of this stuff and I can come over here, and I can go ahead and just paste it right on my page here, right in my file down here at the bottom. I'm going to just paste it on in there.
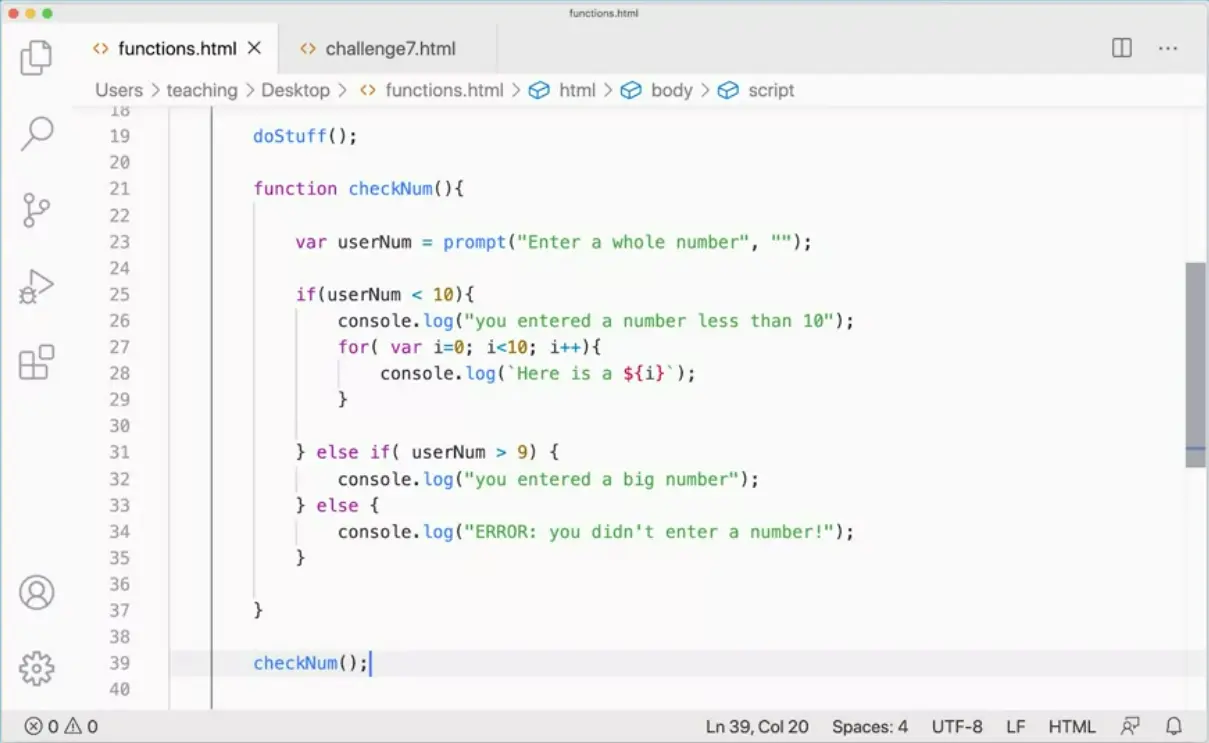
But I'm going to make a new function. What is this thing doing? Well, it's checking a number. I'm going to make a function called checkNum, parentheses, curly braces, like so. Then I'm going to take this stuff, I'm going to stick it inside of checkNum, tab that in. It's clear that this curly brace is ending that curly brace and everything is inside. It's always good to be clear about your indenting if you possibly can, it really does help. Then down here, I'm going to run checkNum, and let's see what happens. Over here when I run my script, it says enter a whole number, 54, and then you entered a really big number. My function is running, it's functioning, it's doing what it's supposed to do, and all that code is now inside of a function.

Functions are even more useful if you can pass data into them, so they can do something with that data.
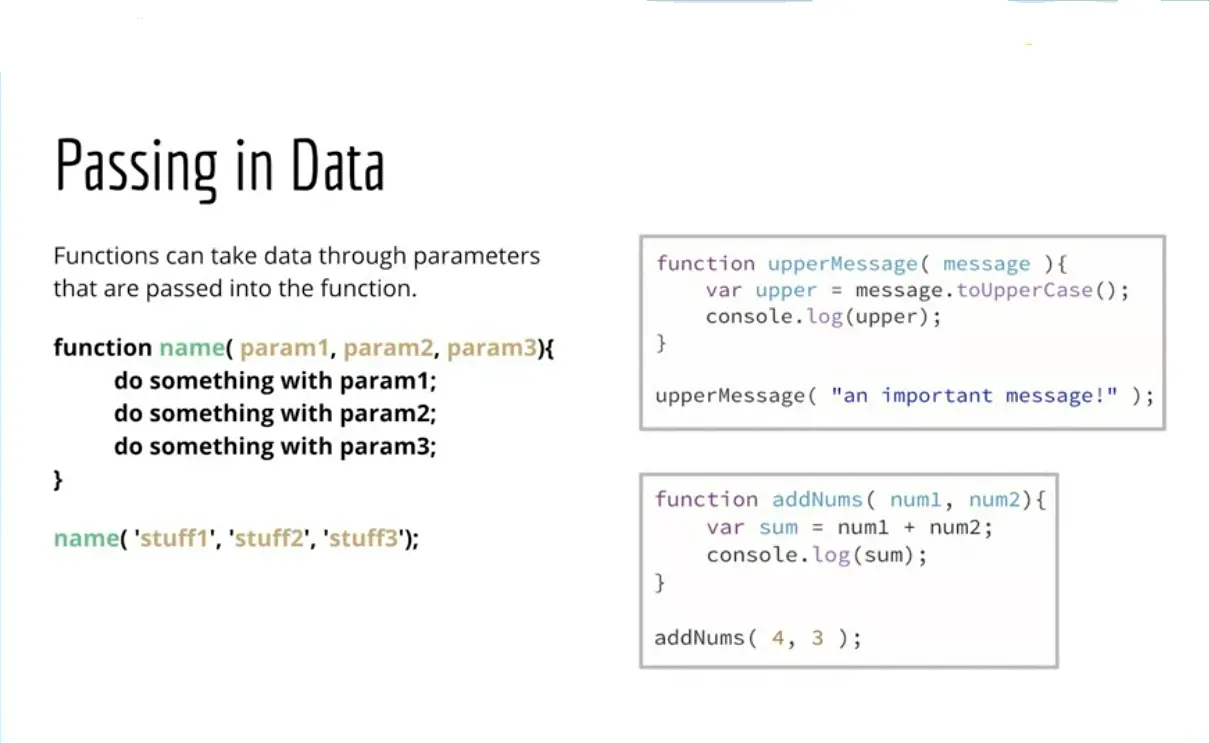
So for example, our first do something message, the first do something function wasn't really useful because it was just taking that string, and making it uppercase, and then spitting it back out again. But we could make it more useful by passing in a message variable, a parameter, this function has a parameter called message. We could pass in a messages and argument to this function, and it will take any message, and make it uppercase, and console log it out.
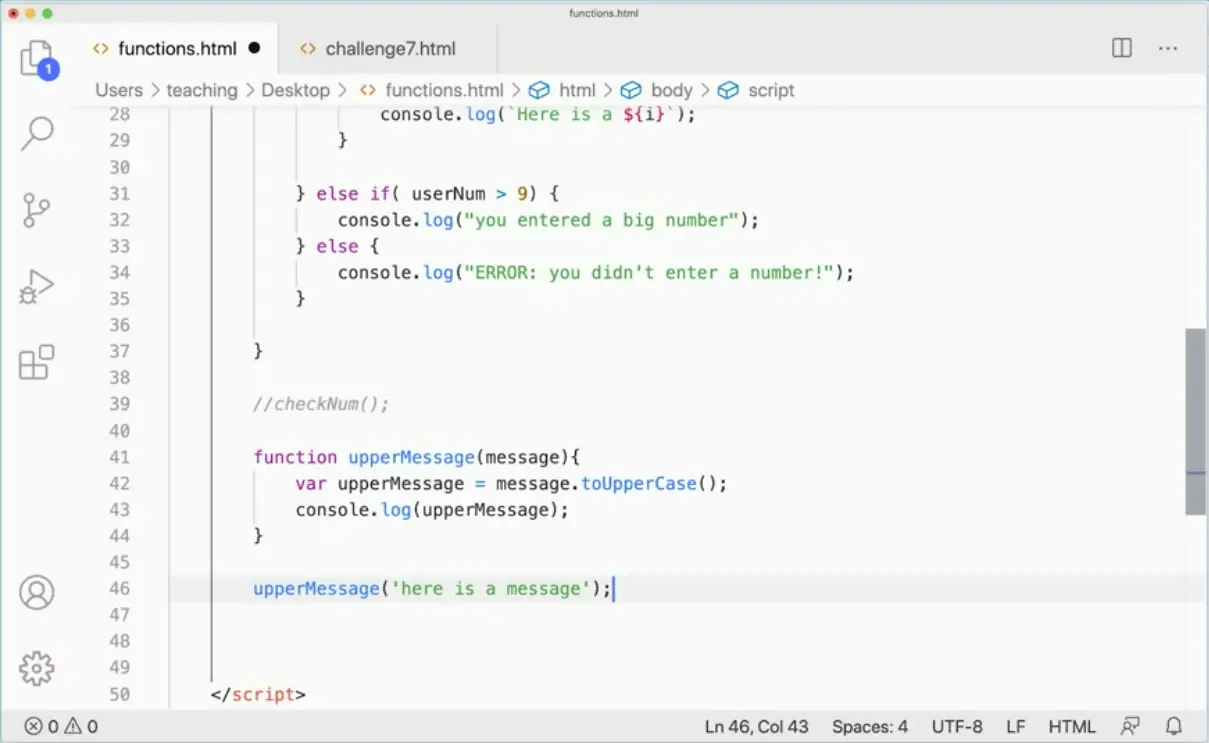
Let's give that a try and see what that does. I'm going to make a function, function upperMessage, let's do that then, upperMessage, that doesn't matter really what you call it. And then I'm going to take message and I'm going to say, var upperMessage = message.toUpperCase. And then I'm just going to console log out, upperMessage.
Now when I run this, I run upperMessage, but I pass in, here is a message. I can pass any message in that I want and it will make it uppercase. Still not super interesting, but it's something that shows us how this actually works.
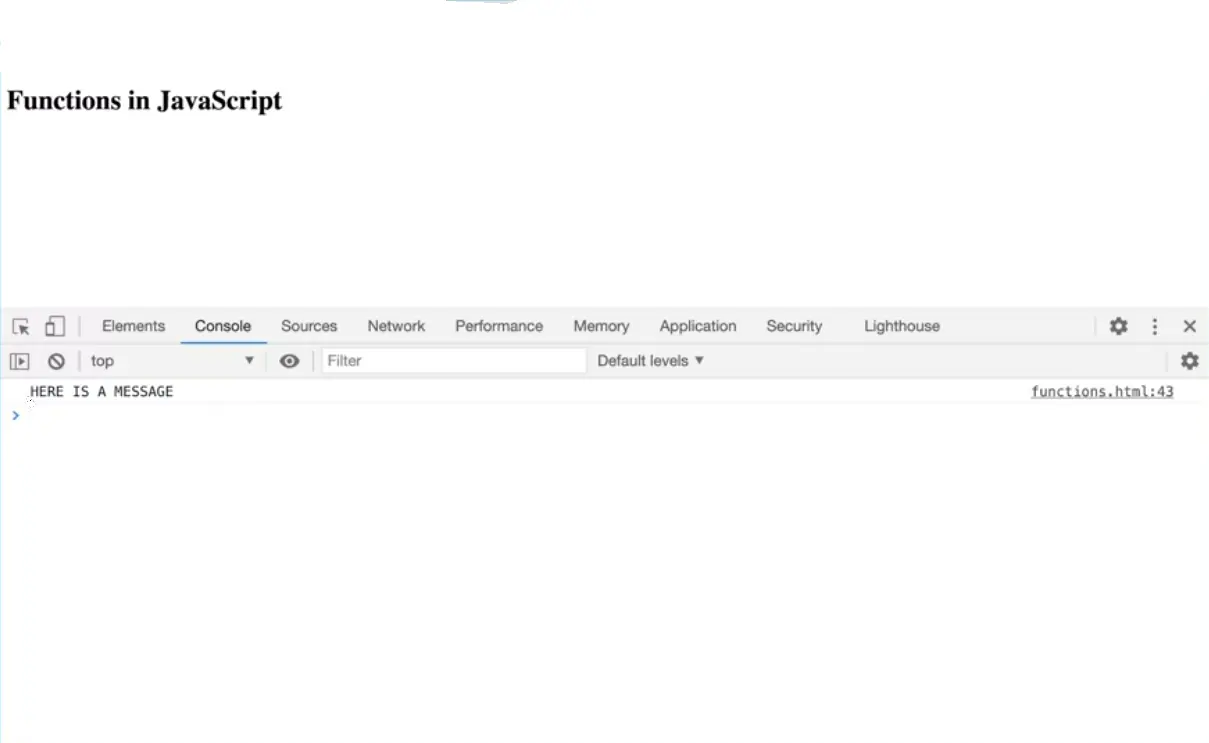
So over here when I run this, my message is turned into uppercase because that's what that function does. It takes some data and does something to it. And beyond that, we could do something like add numbers together. Again, not super exciting, but we could pass in two parameters here. On number one and on number two, we could add them together and then console log them out. And you would run this by using addNums, and you would pass in whatever two numbers you want to add there.
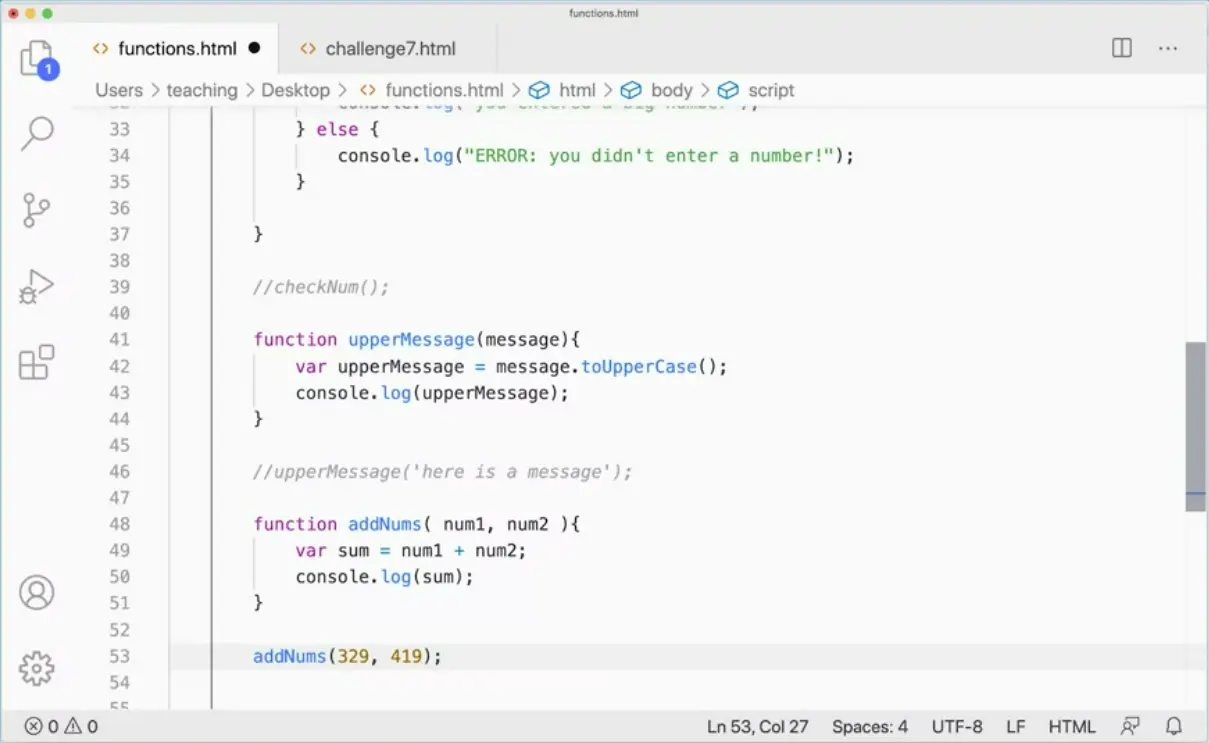
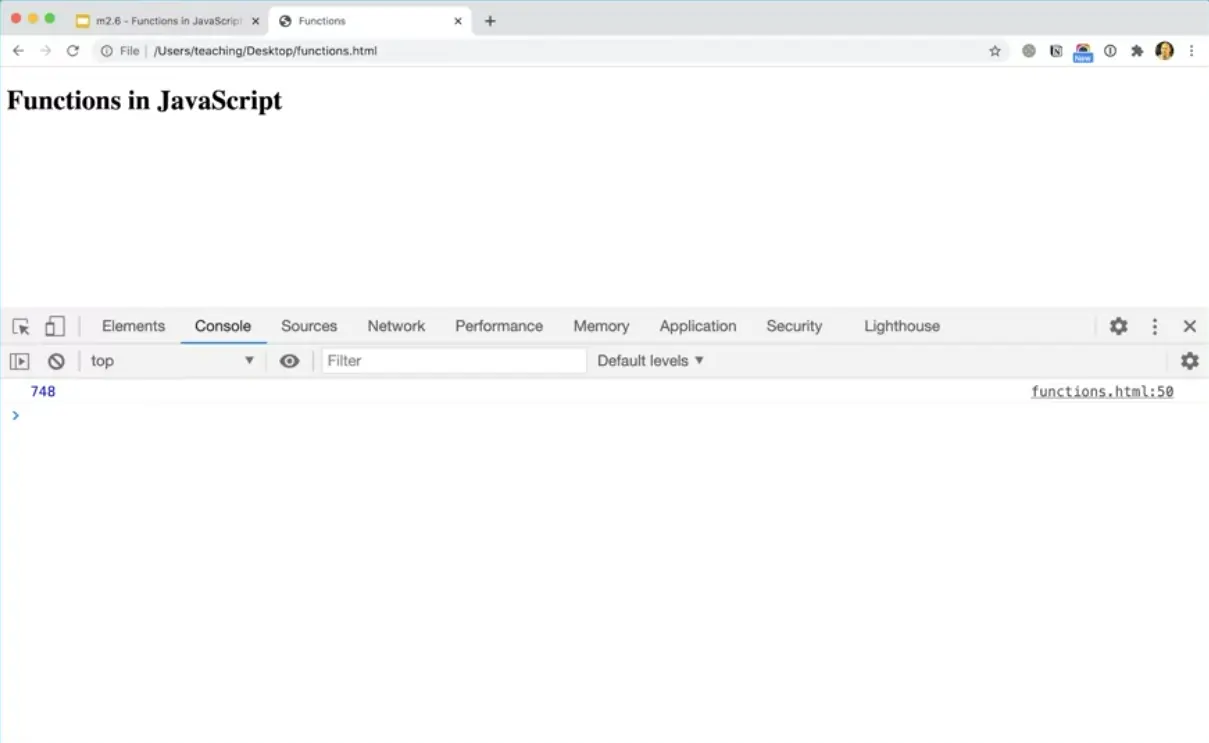
Let's give it a try real quick. Function addNums. We're going to pass in num1 and num2. I like putting these extra spaces in here even though that's kind of not the standard, but I think it makes it easier to read for me. All right, so I'm going to make var sum = num1 + num2. In here, we're using the plus sign to actually do addition, that's what we want it to do. And then I'm going to console.log sum.
Meanwhile, I'm going to comment that out so we don't get that running as well. And then down here, I just need to run it with whatever numbers I want to add, addNums, 329, 419. Sure, you could probably do that in your head fairly quickly. But why bother? We can have JavaScript do it for us, right? So, if we're going to learn how to do this JavaScript stuff, it might as well do something useful, like add those numbers together to get 728. Maybe not super useful, but you get the idea. And that's a really powerful thing about JavaScript is we can pass in the passing data through these variables here, that we can then work with within our function.
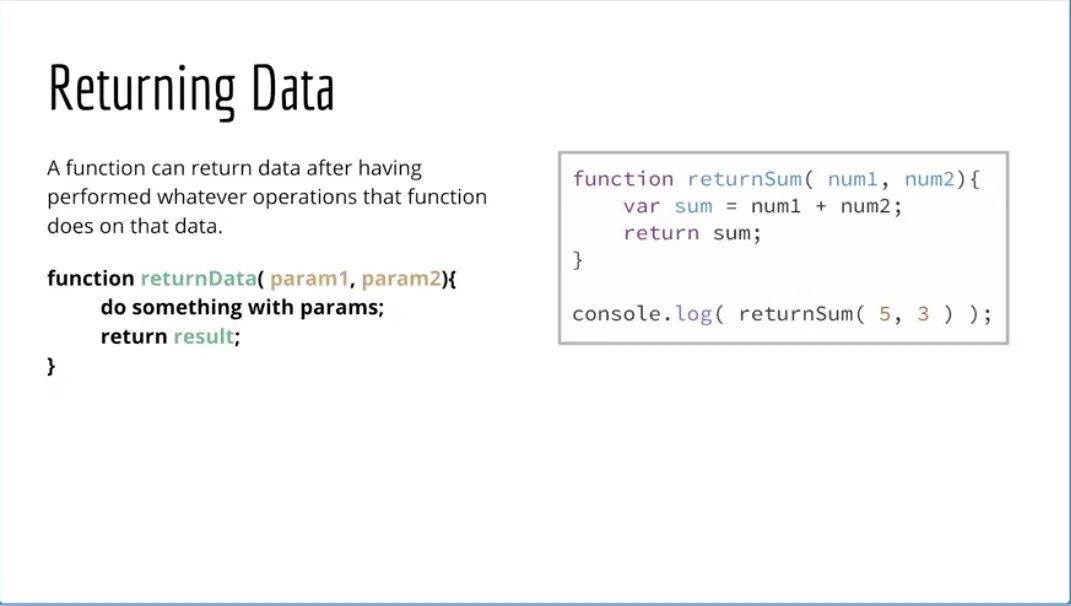
The next thing to talk about is returning data. So far our functions have just done one thing, they've printed out to the console log, because that's really all we have for right now. We will be doing more interesting things, I promise. But for right now, what we have is to print out to the console log.
But we can make functions that return something. And that in this case, it looks subtle. The difference is subtle because in the end, what we have is the console. So we're printing to the console. But here I've updated my function, I'm calling it return sum. And instead of just printing to the console, and returning the sum of these two numbers, and then I can console log that out. Again, it's just going to the console, so the end result isn't all that different. But there is a subtle but important difference between these two things.
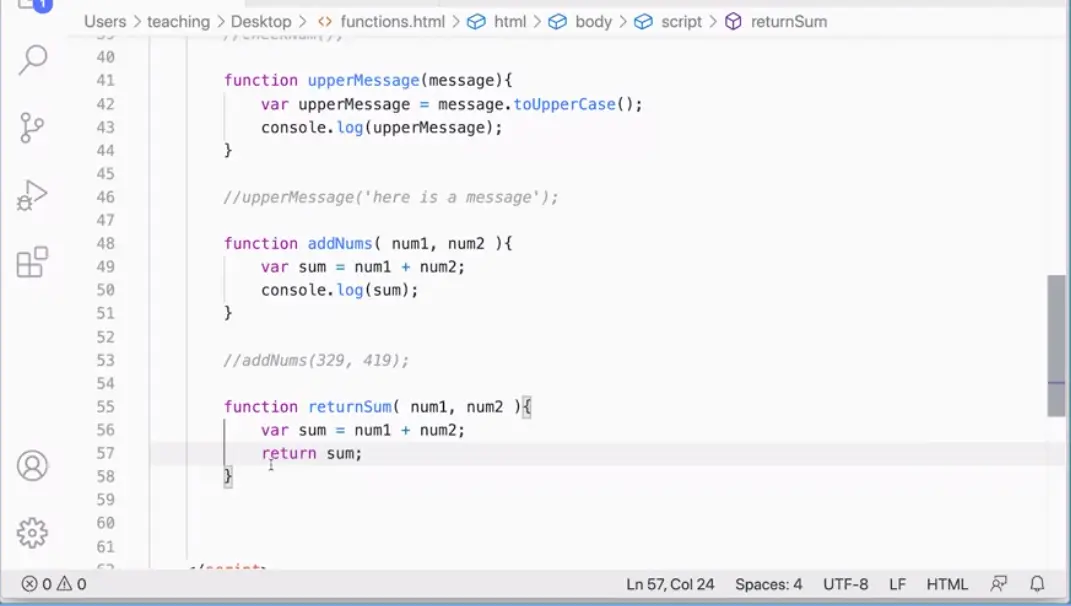
Let's do this quickly. I'm going to come over here and I'm going to copy my addNumbs function, and paste it, comment that previous code out for a moment. And instead call this, returnSum, num1, num2. But instead of console logging it out, I'm going to return it as a variable, sum. So its going to return the value here. And then it's just going to the console log because that's all I've got access to at the moment.
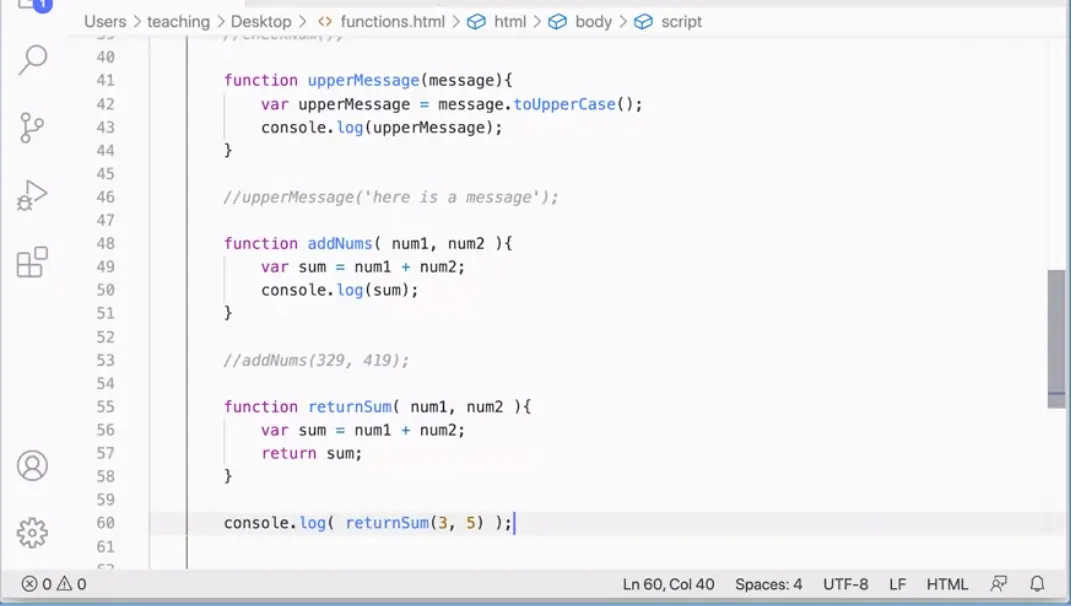
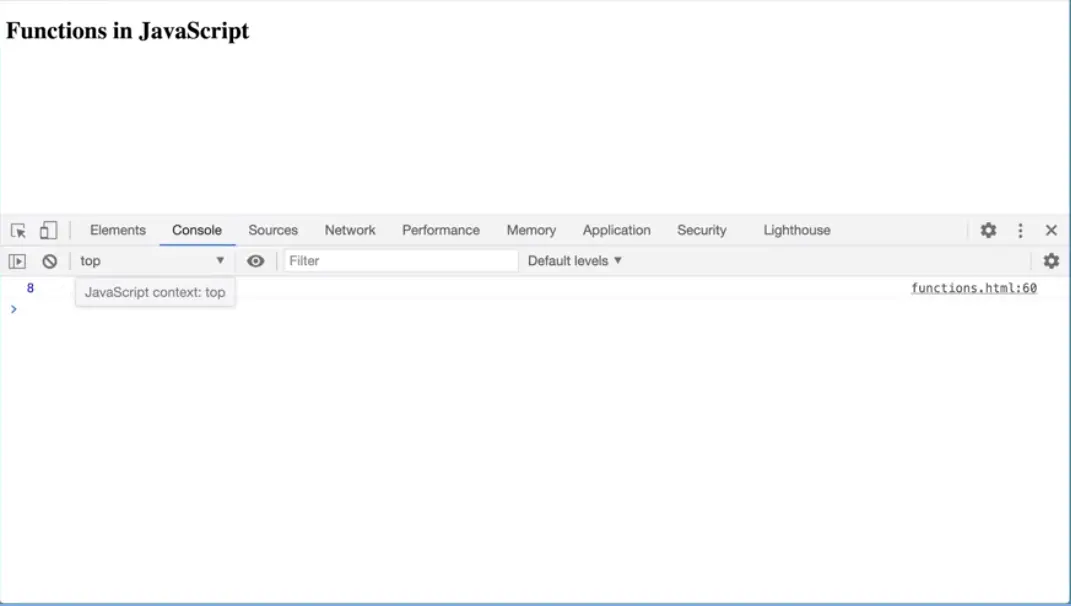
We'll be doing more stuff later. And I can run inside the console.log, returnSum and I can put a 3 and a, 5 in there, whatever. And you'll see, when I run this, Over here, assuming I typed that all right. Then, in fact, they get an eight, and it's still going to the console.
So you might wonder, well, what's the big deal here? What's the difference here between returning the sum and just having it print out the finished thing here? The analogy that I like to use is one, where you're washing your clothes. If you happen to have a washer and a dryer, you have two machines and those machines work together. So you put your dirty clothes in the washing machine. So you're feeding it in dirty clothes, dirty laundry, and you're putting in soap and you're putting in water in the washing machine, agitates it all, and runs it all together. And what it returns to you are clean, wet clothes, which you then put into a dryer, and the dryer will then do its function which will tumble the clothes with air, hot air maybe, and then returned to you clean, dry clothes. So you can think of returning as a machine doing something and processing something, doing something to it, and then returning the result to you so that you can then turn it over to another machine that has its special features and does what it needs to do.
Let's take a look at a useful example.
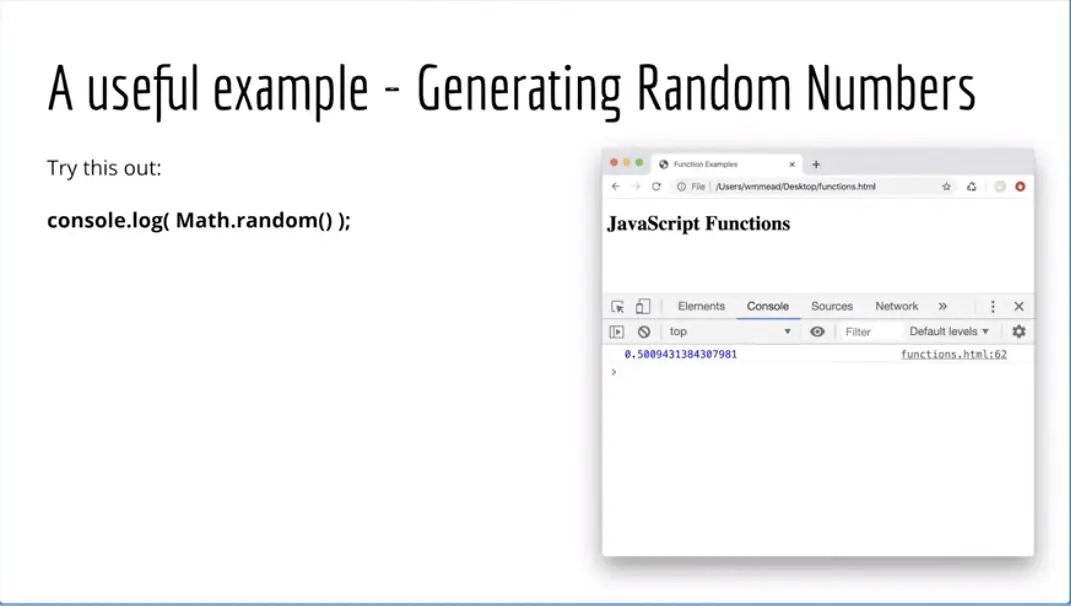
This will show us something that a function can do for us in JavaScript right now, and that we could use in some programs that we write. That is for generating random numbers. Try this out. JavaScript has a random number generator, and I'm going to just give this a try over here on my file.
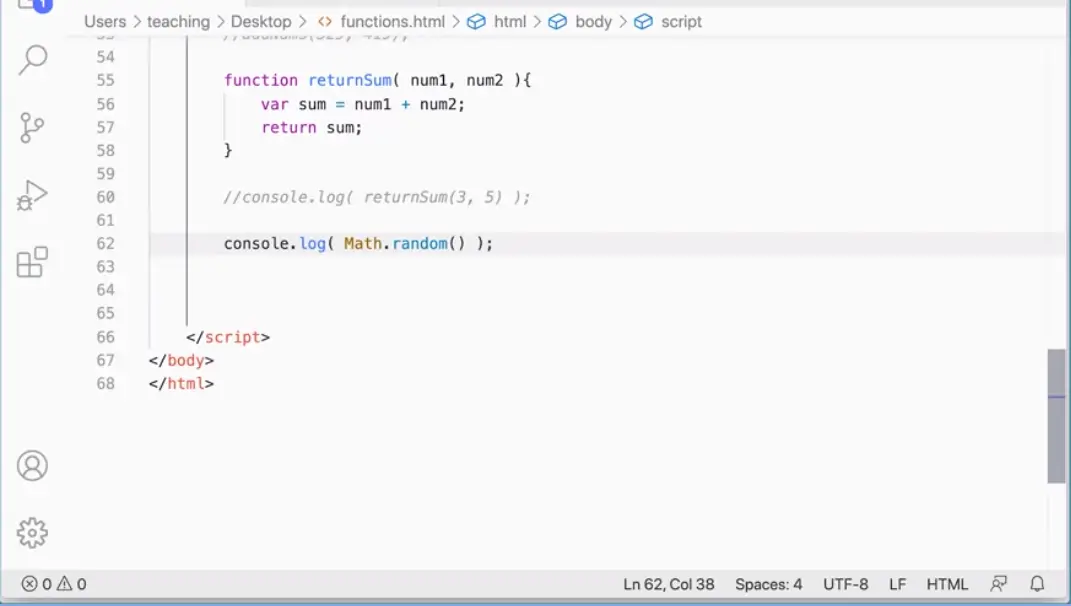
I'm just going to console.log Math with a capital M dot random (Math.random). We'll talk more about what that means in a little bit. But math random is going to generate a random number. If I go over to my browser and run it, you see that I get a number, I can keep refreshing my screen and I'll keep getting numbers.
The numbers that I get will be from zero all the way down to 0.00000000, all the way up to almost one. You saw a minute ago I got a 9.9 something or other. It won't go all the way to one. It'll go to up to 0.999999999. But it won't go all the way to one. It could go all the way to zero, but it won't go all the way to one. But it's somewhere in there. What if I wanted random integers? What if I wanted to get a random number between say, 10 and 52 or something like that, how would I do that? I need to write a function to do that in JavaScript because the random number generator in JavaScript generates random numbers between zero and almost one. Zero inclusive, one exclusive. But if I was playing a game of cards and I had numbered my cards one through 52, and I wanted to make sure I could pick a random card, I would need to be able to pull out a 26, not as 0.35979558399127143. That's not very helpful. I need to figure that out.
Before we go forward with this, I should mention that the random number generator in JavaScript is not truly random. It's using an algorithm to generate the random number and it's random enough for our purposes, but it's not a truly random number. And if you're making a game that was making a program that really needed to be random, like a lottery generator or something like that, you would want to use something other than the built-in random number generator. But for our purposes is random enough. That's worth mentioning as well.
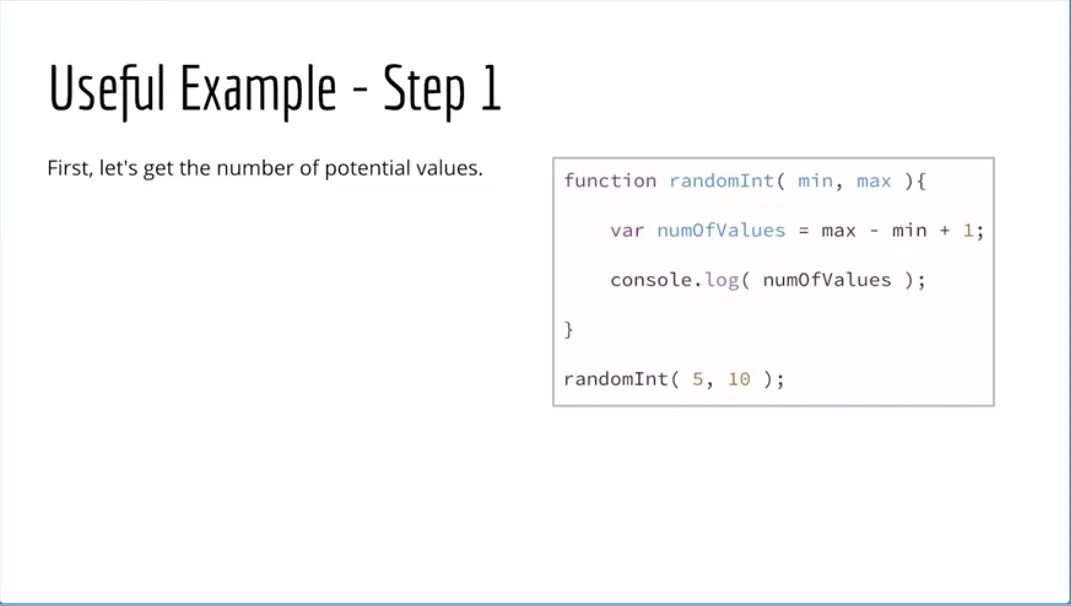
Here's our first step in creating our random integer generator, is we're going to make a function called randomInt, and we're going to pass in a minimum number that we want to get, and a maximum number that we want to get in our random integer generator.
To start with, we need to know how many values we think we should be able to get. I'm going to make a variable called number of values (numOfValues) and it's going to take max and it's going to subtract min, and it's going to add 1 to it. Think of it like this; if I were to run this function with five and 10, if I wanted to get a random number that was between five and 10 and included five and 10, the numbers I could get are 5,6,7,8,9,10. That's six possible values. If I take the maximum which is 10, and subtract 5, that gives me 5 plus 1, that would give me 6 possible values. That's how this actually works.
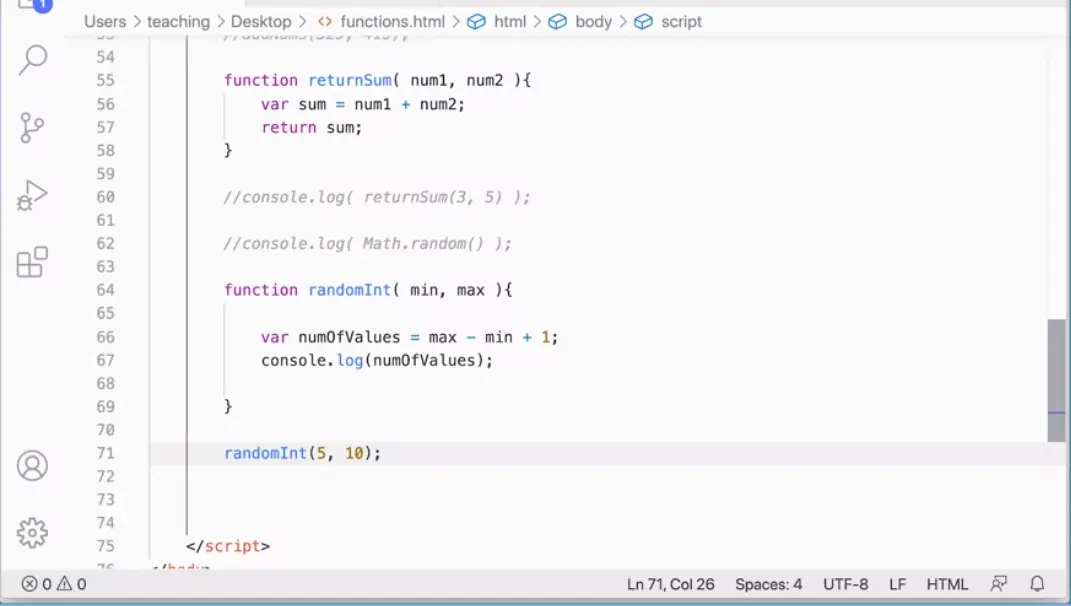
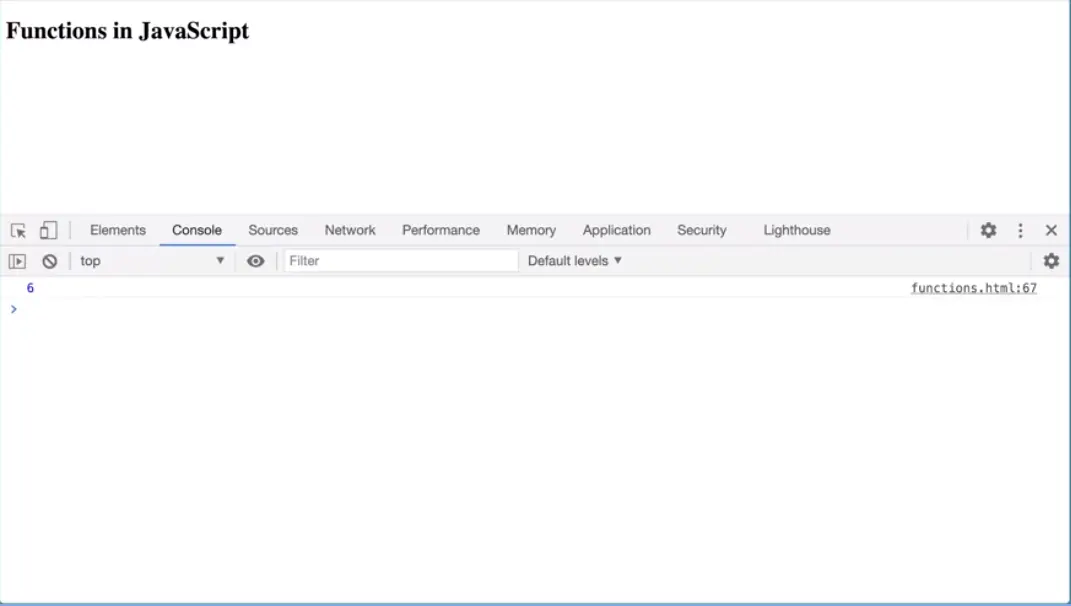
Let's go ahead and go over to our code editor and start writing this function. I'm going to make a function called randomInt, and it's going to take a min and a max. I'm going to have a variable here, var numOfValues. That's going to be the max minus the min plus 1. Then I can just console.log out this number of values just to make sure it's working right. console.log.
When you're working with programming, you want to do this. You want to just check everything as many places as you possibly can just to make sure you're getting what you think you're getting. NumOfValues. I'm going to console.log that out. Then down here I'm going to run this function, randomInt. Then put in a five. I'm going to put in 10. We'll see, we should get a six. That's what we should get. Let's go over and check that. Sure enough, I'm getting a six because the possible values, if I'm going to include, I'm going to say I want random numbers from 5-10. I want to include five and 10, so I could get a 5, a 6, a 7, an 8, a 9 or 10, that's six possible values. Step 1 of this is correct. Then, we'll go on from there to the next step.
In the second step for a random integer generator, I'm going to actually generate my random number.
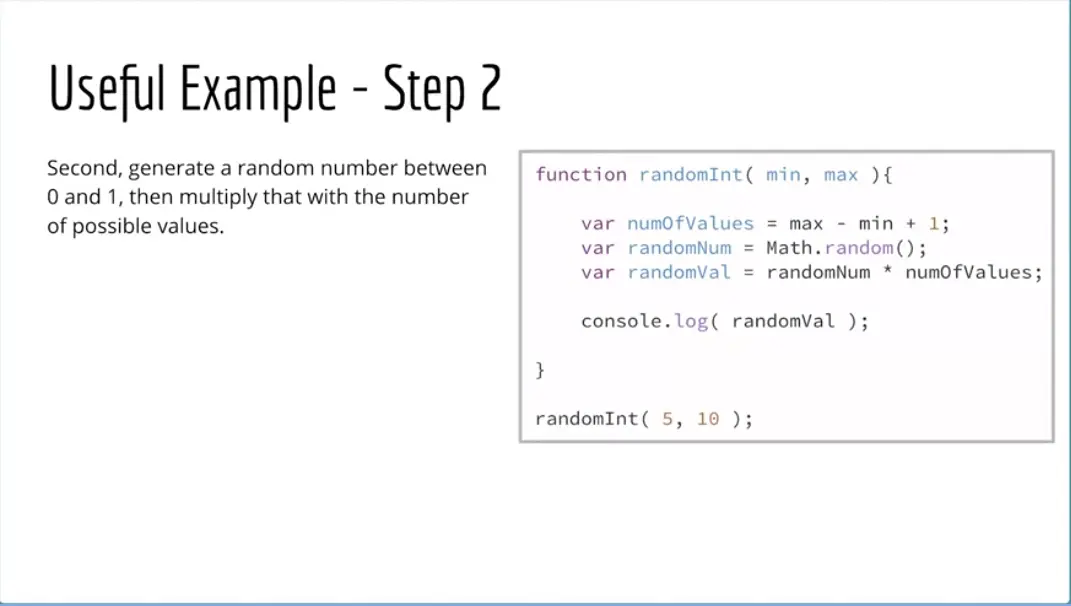
RandomNum here is going to be between zero and one. I'm going to take that and multiply it by the number of values and see what I get.
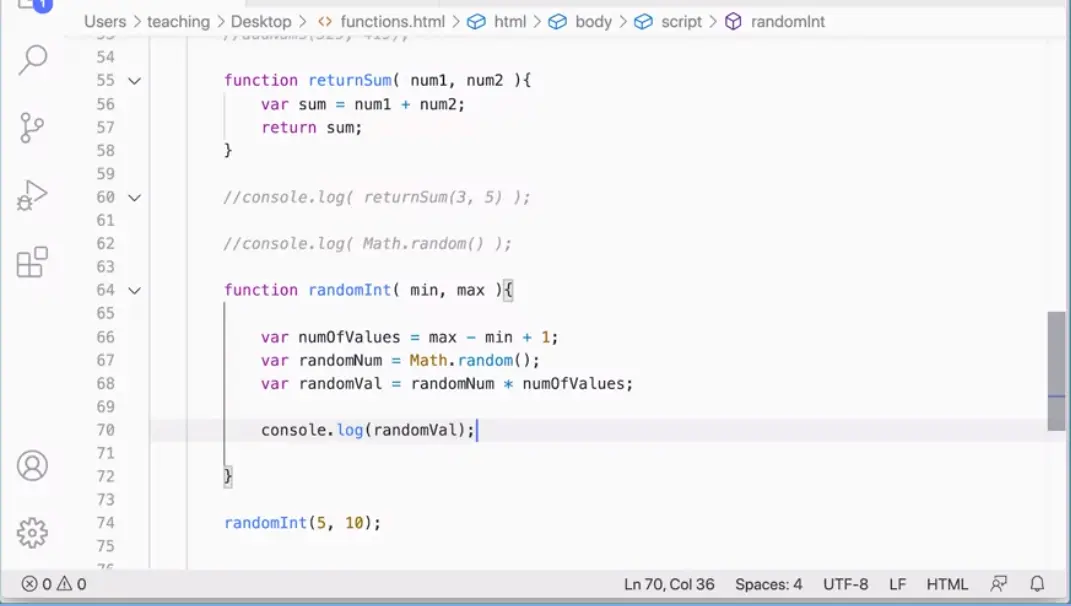
Let's go ahead and add this to our function over here. We've got that in there, we can get rid of this. We know that that's working, so we know that's all good. But now I'm going to get var randomNum and have that equal Math.random. That's going to generate my random number. Then I'm going to say randomVal. I'm going to take var randomVal and have that equal randomNum times number of values. Let's just see what that gets us. console.log (randomVal).
Let's go over here and run that. Now, that's getting me numbers that are between zero and six. It won't go all the way up to six. It will get me to five point something other, but it won't go all the way up to six, and that's interesting.
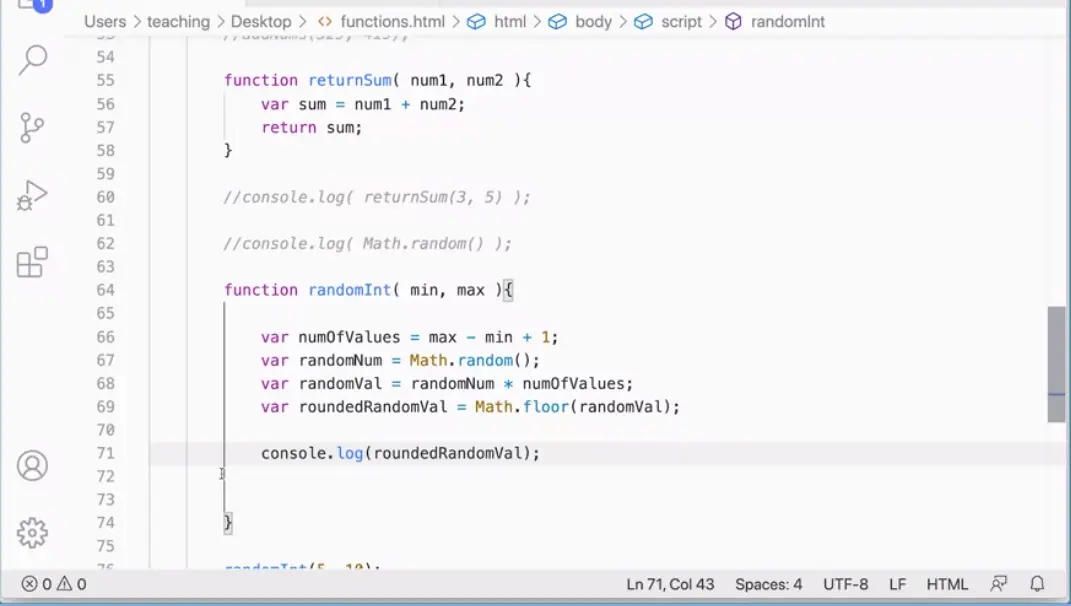
Let's see what we need to do next. Next, I'm going to use the Math.floor method to round down my random number. Now, that should get me a whole number between zero and five. I'm going to use the Math.floor and pass in this random value here. This is my number with all the decimal points.
Let's give that a try over here. I'm going to get rid of this console.log, I don't really need that one anymore. But instead, I'm going to do var roundedRandomVal. A long variable name, you can make it shorter. I'm going to do Math.floor. Floor is a method and ceil is a method, ceil for ceiling. Floor will round it down, ceil, C-E-I-L, will round it up, short for ceiling, if that makes sense. Then I'm going to pass in their randomVal. Once again, just to see what my progress is, I'm going to console.log (roundedRandomVal). You saw I didn't have to actually type that, I just press tab because it came up in Visual Studio code. That will prevent me from getting these long variable names wrong.
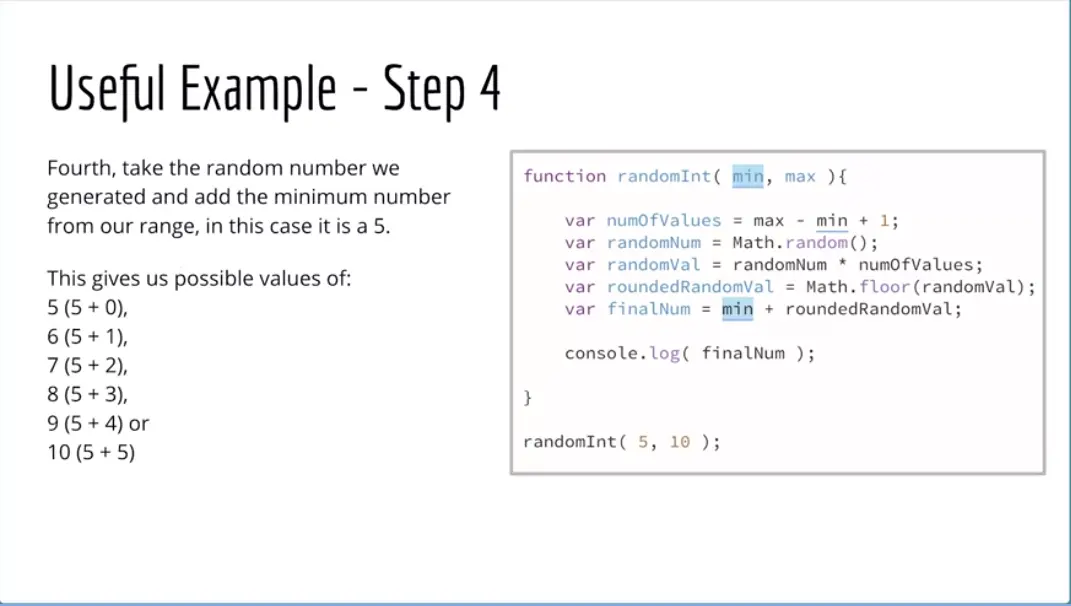
Now when I run this, I get a two. Now, I'm getting whole numbers, but they're not from 5-10, they're between zero and 5. Now, what we can do next is we can get our final number, and we're going to take the min and add it to that randomVal.
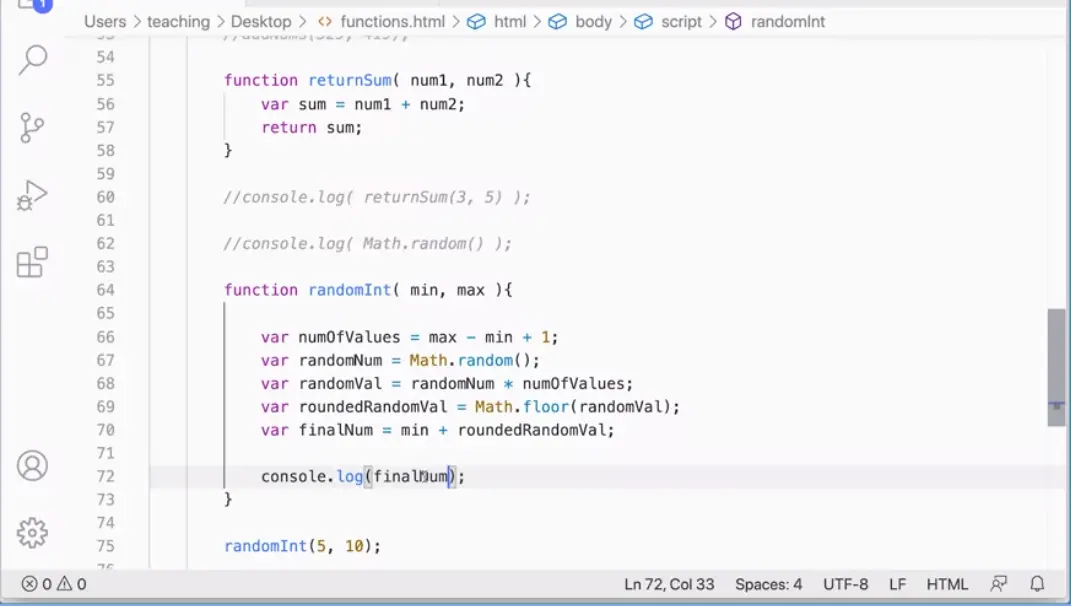
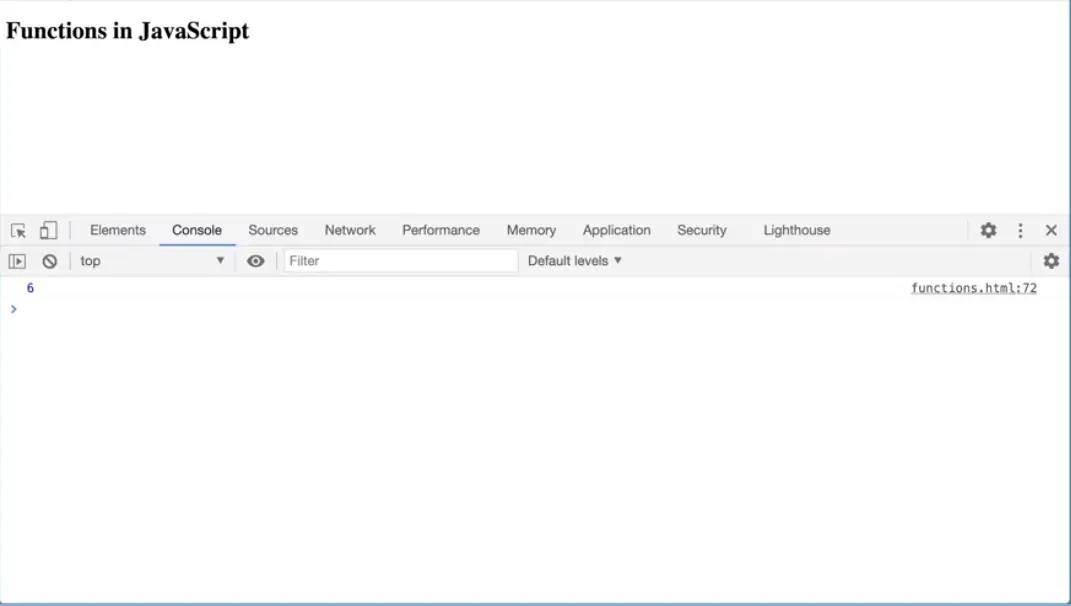
For example, if our random number gave us a zero and we add five to it, we'll get a five. If we got a one and we add five to it, we'll get a six, all the way up to 10. So that will give us our random numbers between five and 10 if we add the min value to this final number here. Let's and add that in there and see what we get. Var finalNum equals min plus roundedRandomVal, and we can console.log that out. Come back and check it, and you can see now I'm getting random numbers that can go as high as 10 and as low as five, and our random number generator is actually working, which is great.
In the next step, we're going to make our random number generator, our random integer generator a little bit more useful.
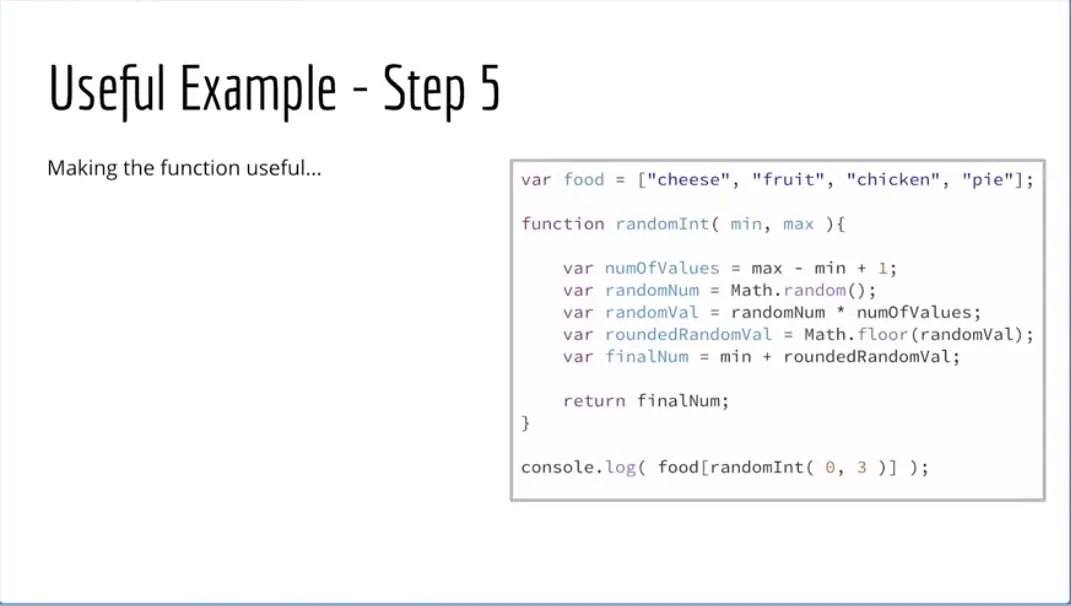
We can generate random numbers, but the only thing we can do with these random numbers is see them pop up in the console, which is really not very useful. If I wanted to actually take this generated number and do something with it, I can't. All this function does currently is print out to the console. What we could do instead, is we could return the final number.
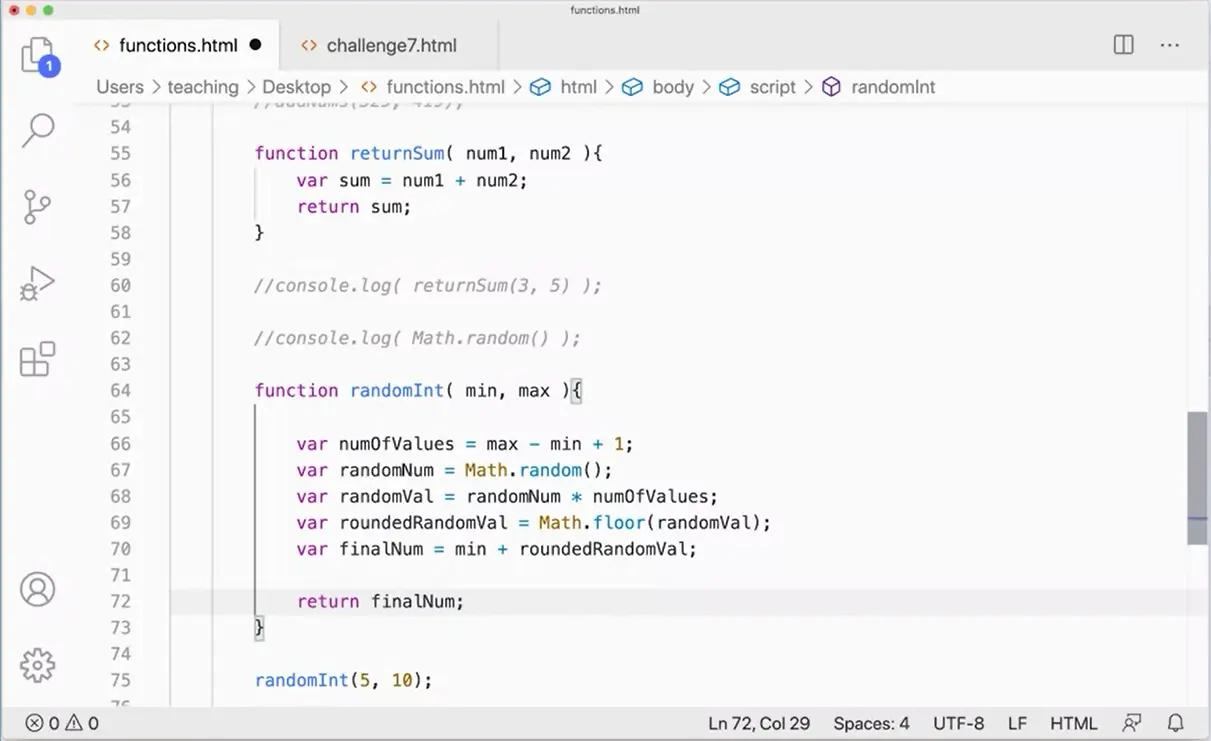
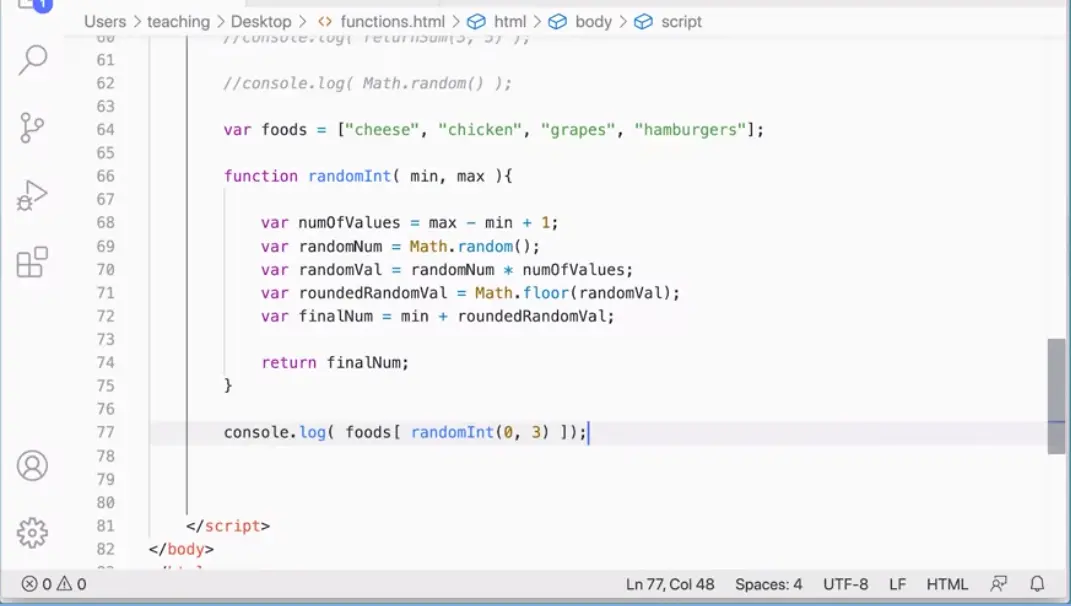
Here, now we can return the final number and we could actually use this function somewhere useful. For example, if I had an array var foods equals square bracket cheese, chicken, grapes, hamburgers, whatever you want to put in there is fine. We could add more things to the list. But if I wanted to randomly get an element from this array, because randomInt returns a number, I know this starts with zero, 0, 1, 2, 3, so I want a random number from 0-3 in this case. So I could come down here and I could say console.log. Let's say foods square brackets, and in here I'm going to pass in randomInt 0, 3. Now, because this randomInt 0, 3 is going to be, because it returns final number, it's going to be a zero, a one, a two, or a three. So console.log foods randomInt, 0, 3 is going to go into the array and get me either a cheese, a chicken, or grapes, or hamburgers.
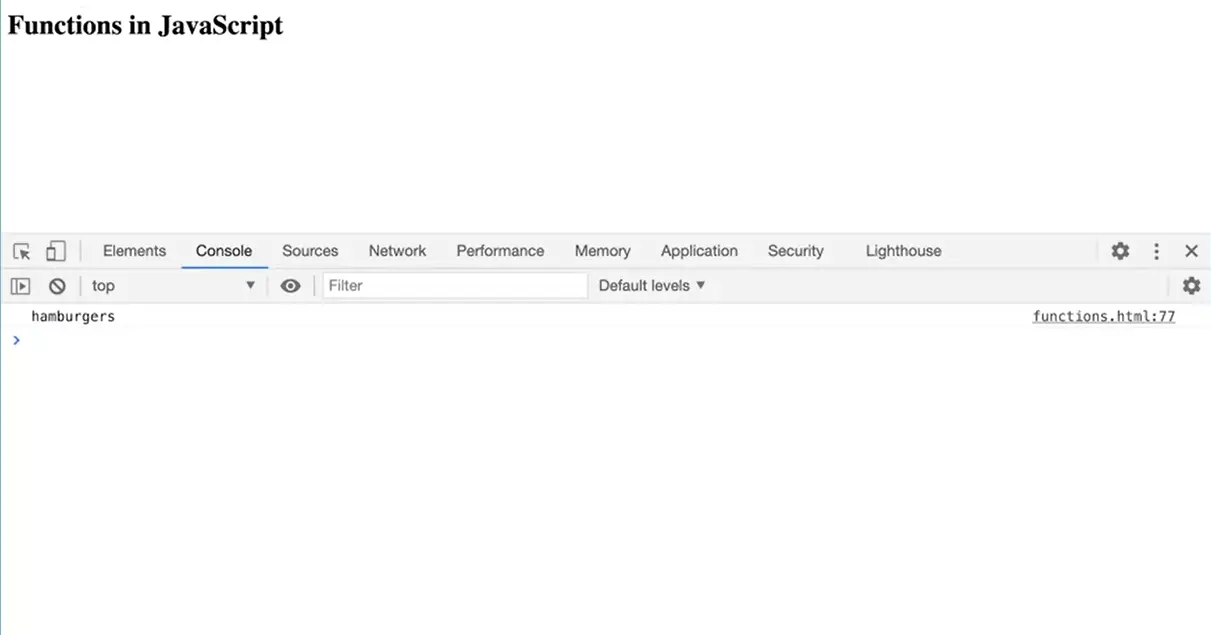
Let's see if that works, if I typed it right. Sure enough, I got hamburgers, and then I got grapes, and then I got chicken.. I can actually use my random number generator to actually do something with another program.
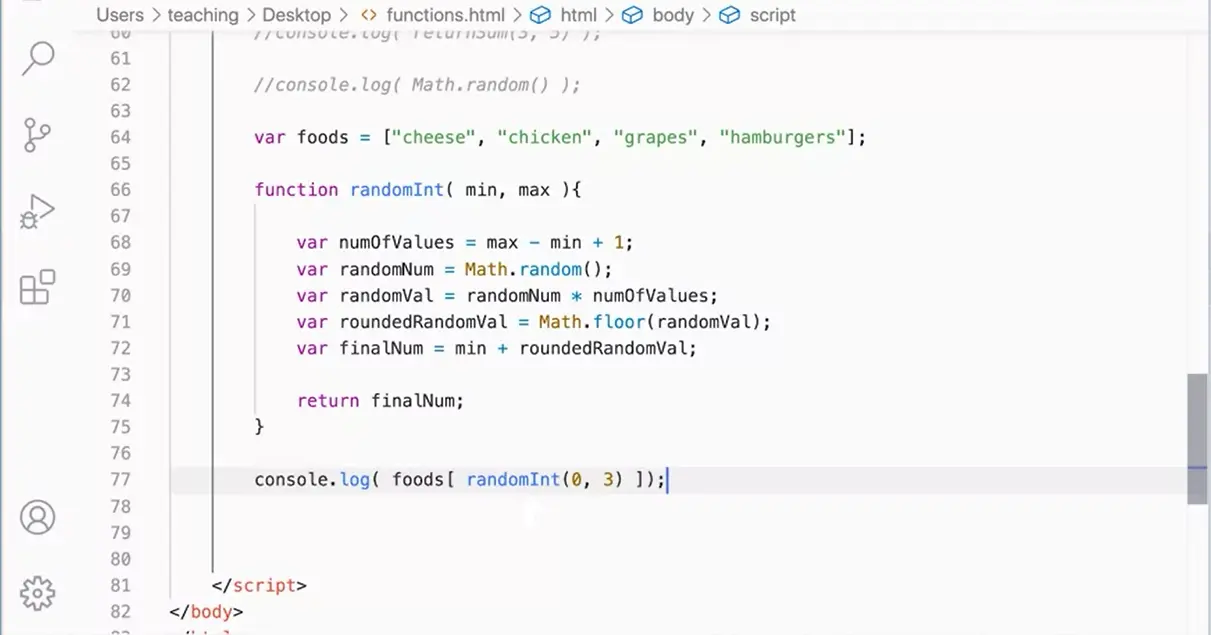
You can think of this randomInt, because this thing returns a random number, I can use that within my tool here to get something out of this array. Going back to the washing machine and dryer example, this is my washing machine. It's returning to me a processed number that I can then use with foods to do something. I don't know. It's not that interesting, but it's a little bit more interesting than what we've been doing so far.
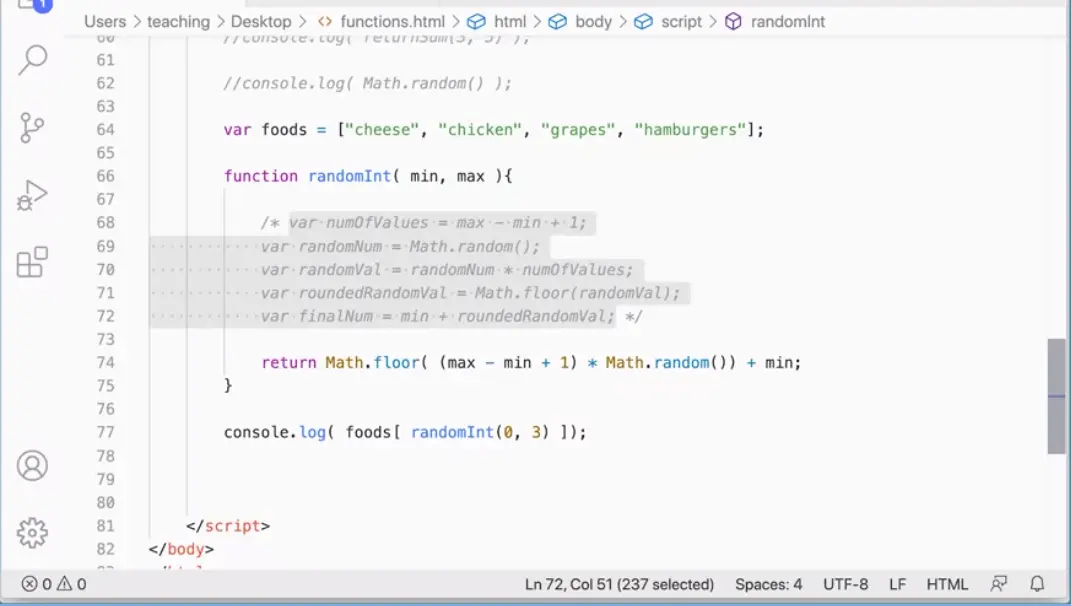
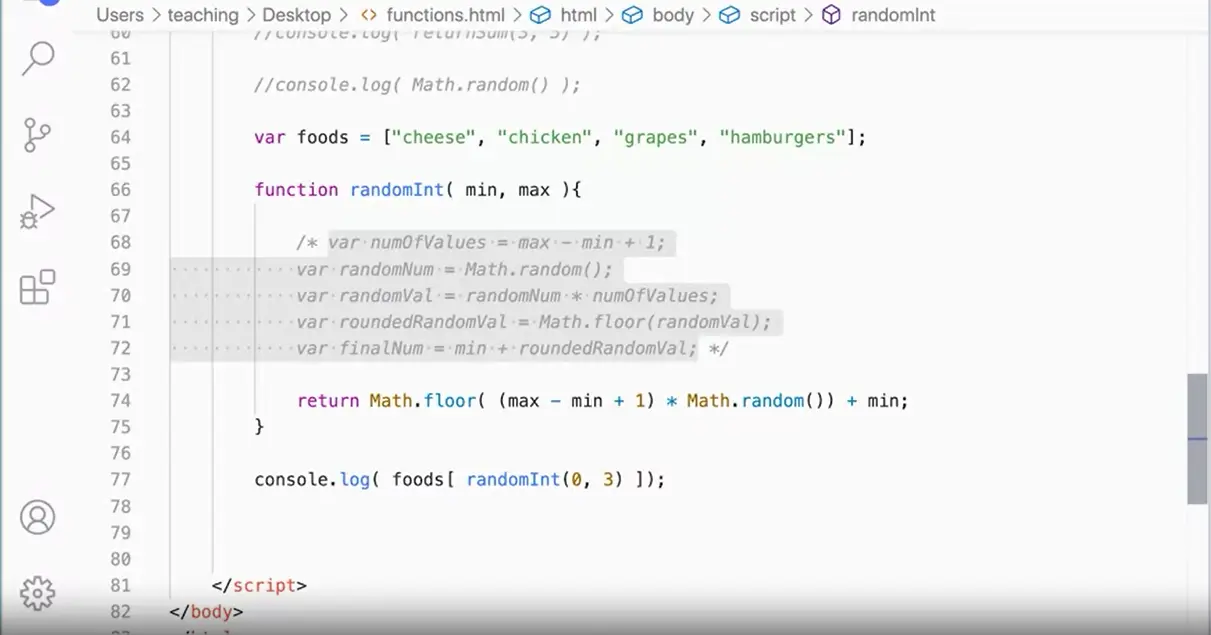
One last thing to look at and think about for this is that this function is pretty long. We could refactor it. What we want to return is really this Math.floor randomVal. I'm going to take that, I'm going to stick it down here. Did I select that right? There we go. I'm going to return ran, I'm going to do that. I'm going to put that in its own set of parentheses, max-min times my Math.random. I'm going to do that, and then outside of this, I'm going to add plus min. I'm going to take Math.floor. I'm going to take my max, subtract my min, and add 1. Multiply that by Math.random. I'm going to round that down and add min. Let's see if I did that right. Over here, if I run this again, I am still getting my items here. This is a shortened version of all of this stuff.
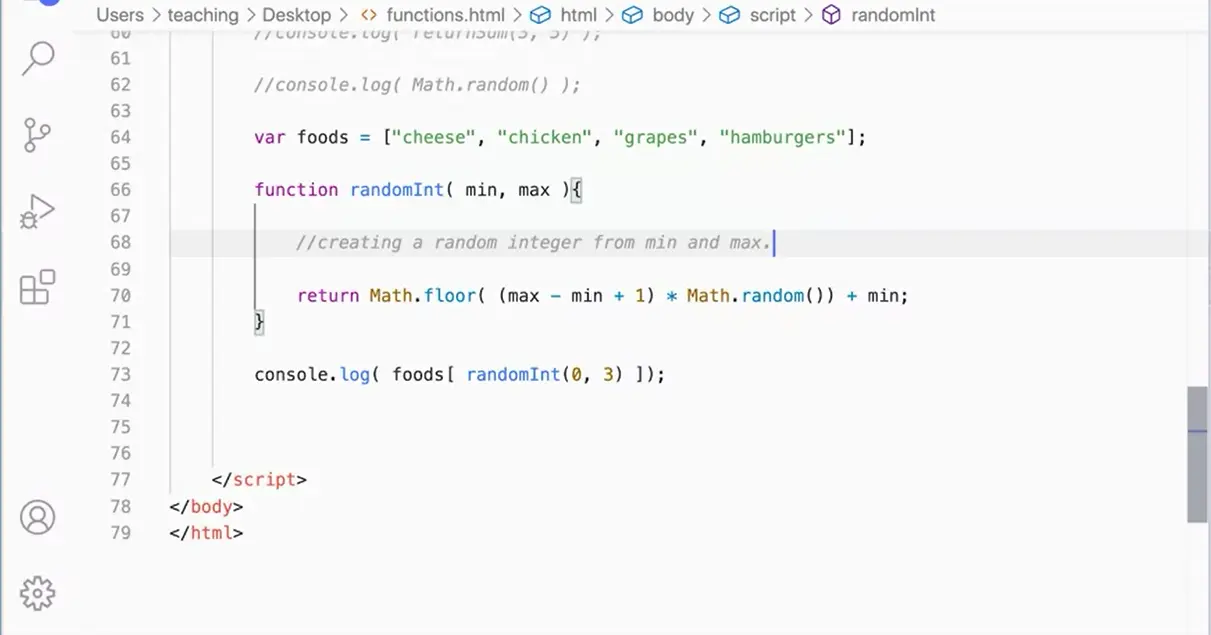
Now, you might look at this and go, "Well, I don't really understand what's going on here." That's a great place for a comment. Here you could say something like, "Creating a random integer from min and max." Or you can put a more explicit statement in here. Sometimes taking a big chunk of code and reducing it down to one line can be difficult to understand exactly what it's doing later. But in this case, I like it. Because if you were to go looking around on the web for a random integer generator for JavaScript, you'll get functions that look like this. You'll find them on Stack Overflow and other places. Sometimes these one-line statements where everything is reduced down become very difficult to read and understand exactly what they're doing. That allows us to create a random integer generator that we then refactor down into one line of code. But by walking through the steps, you could see each step along the way and how that actually worked.

We have a few more things to talk about in terms of functions before we're done with this lesson.
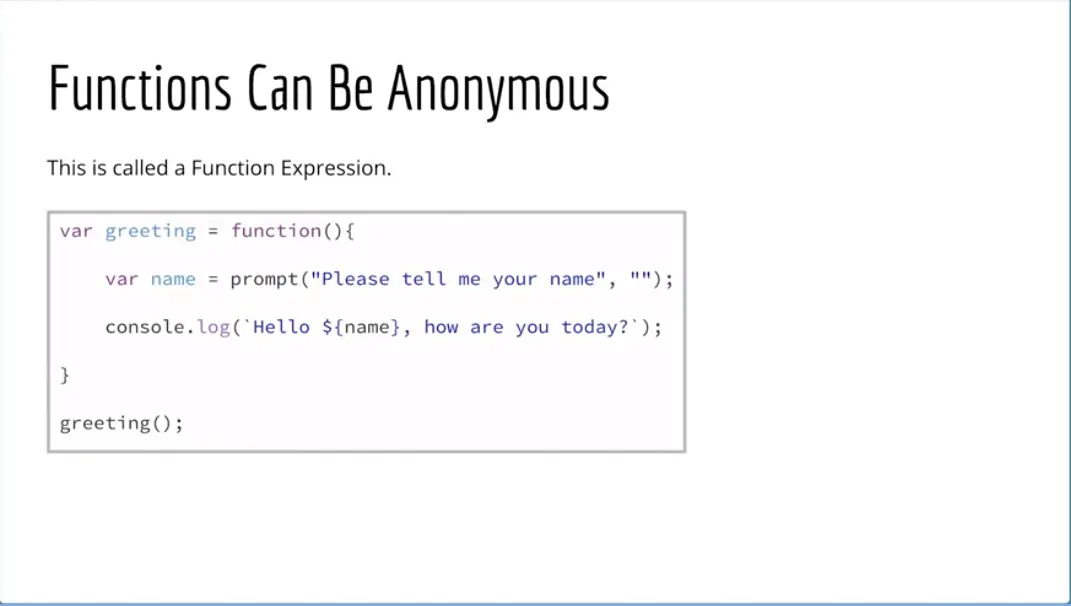
The next thing is, that functions in JavaScript can be anonymous. One of the important things to understand about the way functions work in JavaScript, is that, functions are first-class citizens in JavaScript. Which means, you can assign a function to a variable, the way you could assign a string to a variable or a number to a variable. In fact, you can use a function wherever you can use data in JavaScript, and it's one of the very powerful features of JavaScript.
If you'll recall, we talked earlier about the fact that JavaScript has some features that are really best in class features, for any programming language, and this is one of them. This is really a very powerful feature of JavaScript. You can actually assign a function to a variable, and that function doesn't have to have a name. It can be nameless, it can be anonymous. There are times when this is very useful, especially if you're making a function that's really only going to be used once or in one context. Then, there's really not a reason to create a named function if you're not going to use that name over and over and over again are in different places in your script. Function expressions are useful for that. They're useful for other things as we get into more sophisticated JavaScript. For right now, I just want you to be aware of what they are. We won't be using them much for a while, but eventually, you'll be using function expressions if you keep working with JavaScript.
var greetings = function(){
console.log(“Hello from the function!”);
}
	greeting();
Produces this anonomous unnamed function assigned to the variable greeting.
Let's actually see what this looks like in our code over here. I'm going to come over to my editor here and I'm going to leave that, that's all fine. I'm going to make a variable called "greeting" and I'm going to assign it a function. You'll see that this function doesn't have a name, it's just an anonymous function, and we could do whatever we want in here. I'm going to just for right now, just do console.log " hello from the function". My slide has something a little bit more sophisticated down there, but for right now, this will just do for us, just to see what this does.
Then, in order to call this function again, remember we have to invoke the function, we have to call it or run it. I run "greeting" as if it were a function, which seems weird, but that's the way it works in JavaScript. Greeting parentheses. We run that like a function.
Now, if I come over to my console over here and run this, I'm getting "hamburgers" again, then I'm getting "Hello from the function". That function is actually running. That's important to understand. Again, this is called a function expression, and it's because functions are first-class citizens in JavaScript that we're able to assign a function to a variable just as if it were data.
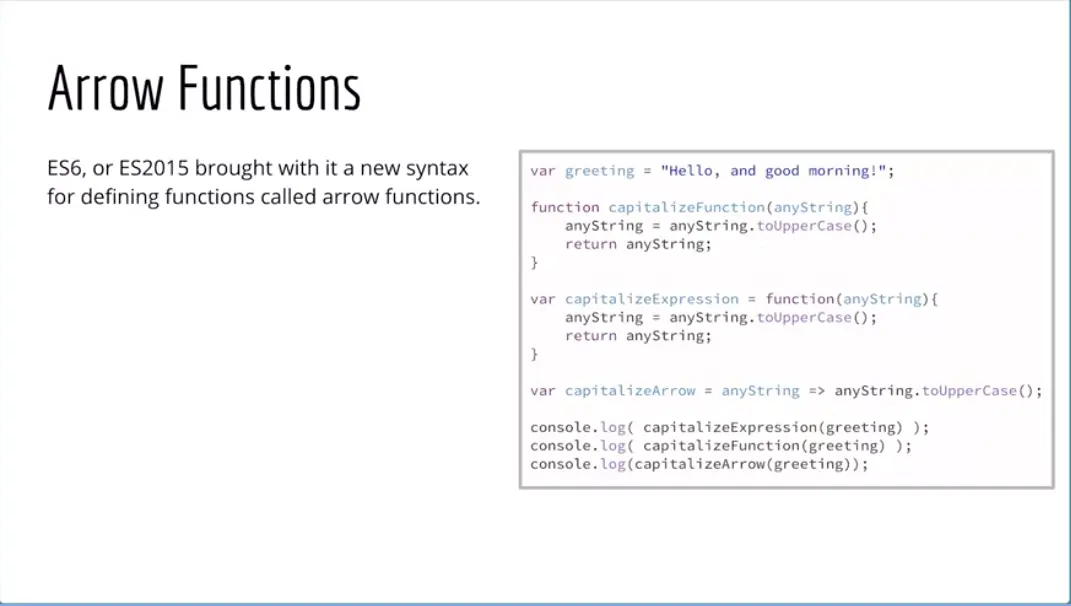
The next thing to understand about functions in JavaScript, and I'm not going to demonstrate this now, but I just want to call your attention to it, because if you're looking on stack overflow, if you're looking up scripts online and seeing other kinds of things, you will see arrow functions. This is again part of ESX or ES 2015. It brought this new syntax and we'll come to it, not in this course, but in the third course, we'll actually start working with arrow functions. I want to mention them now because you'll see them around and when you look at them, you'll look at them and go, what's this? We haven't done this in JavaScript yet. I just want you to be aware that it's just a slightly different syntax for writing functions.
Here, I have a function that should look fairly familiar. I've got a greeting, "Hello, and Good Morning". Then I've got function "capitalized" and I'm passing in a string, and then I take that string and uppercase it, and then I return in a string. This function is going to return the string upper cased. This should be fairly familiar from doing this lesson. So far we've seen this kind of thing and that's not too different from what we've seen. Whereas here, we're using the function expression, I have a variable called "Capitalized Expression". That has an anonymous function that takes a string and then it takes that string and makes it uppercase and returns it. So this variable will become the uppercase string that gets passed in when it's run. That's the function expression that we saw just a few minutes ago.
Now, when we use the arrow functions, the arrow functions is a different syntax for a function expression. In fact, sometimes they're officially called arrow function expressions. We can make a variable capitalize arrow in any string, and then instead of the word function, we can just put in this equal sign and the greater than sign to make an arrow. We can take anyString and uppercase and return that. This becomes one line, which is one of the reasons why these arrow functions have become popular, is they really do lead to shorter code and less syntax to have to deal with. Although when you look at them, it can be a little bit harder to understand exactly what's going on here.
But all three of these functions are actually doing the same thing. They will all return the exact same data. Again, we'll get to the arrow functions later in the third course, but for right now, I just want you to be aware that they exist and that really they're just a different syntax for writing functions.
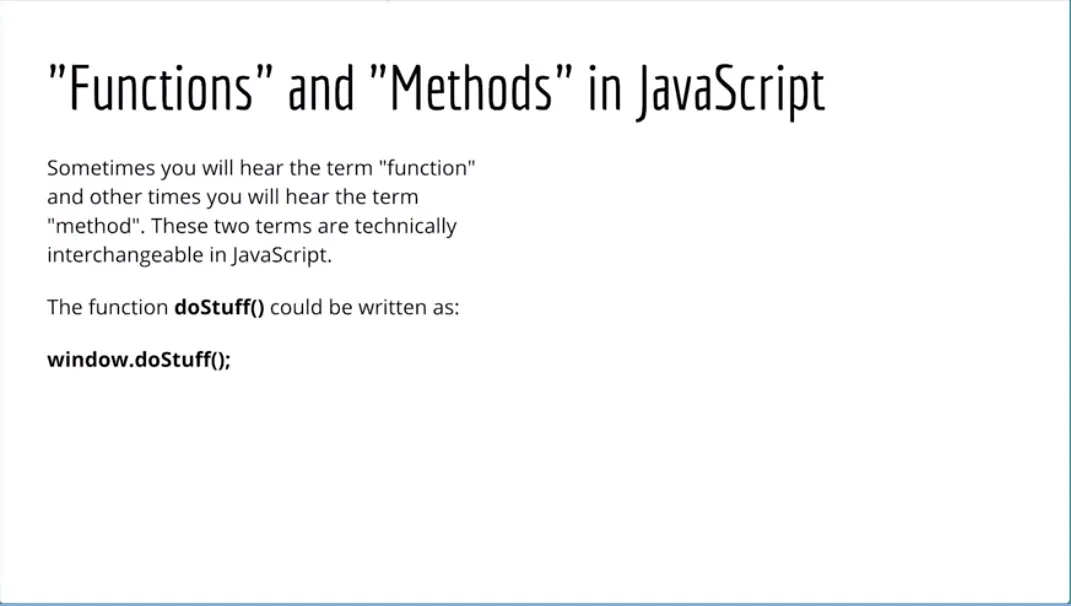
The last thing that we need to talk about in terms of our lesson today on functions is the difference between functions and methods in JavaScript. It can be a little bit confusing because these two terms are basically interchangeable in JavaScript, and you've already heard me use the term method sometimes and functions other times. It's helpful to know a little bit about what the two terms mean and why they're interchangeable.
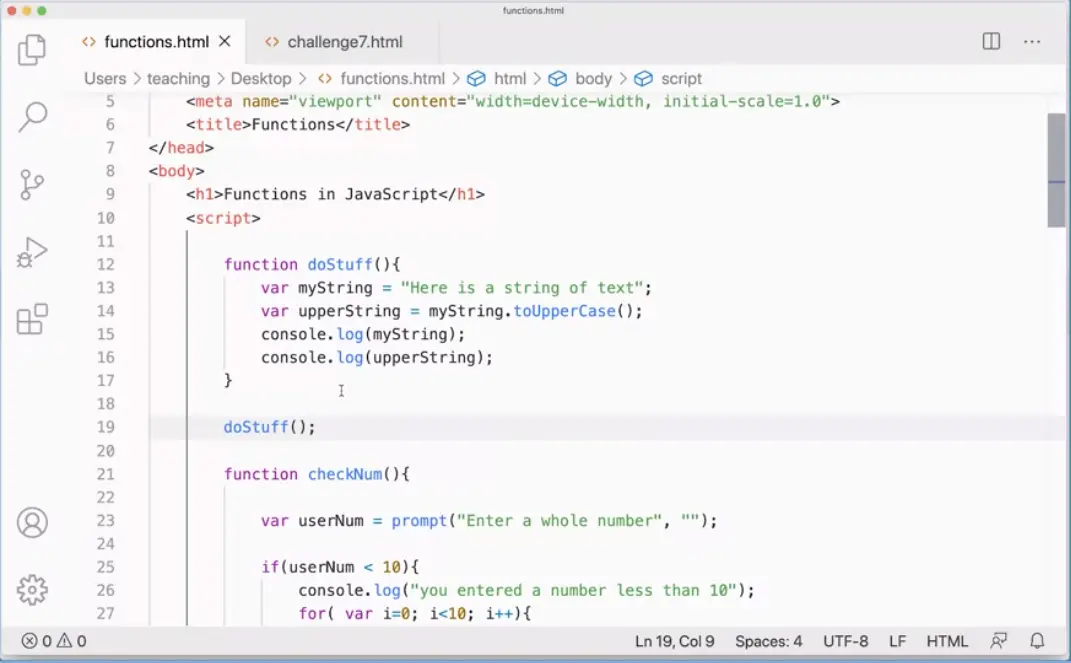
Essentially in JavaScript, when you have a function that belongs to an object, it's called a method. For example, we have the string object and there are functions that belong to string objects like toUpperCase or toLowerCase, and when we have a function like that that belongs to the string object, it's called the toUpperCase method, because it belongs to the string object. Or another example, with arrays we have the push method, which is a function that belongs to the array object. So when we push something into array, we're using the push method and we use the term method for that.
Now, in reality in JavaScript, everything is an object so in that sense, every function belongs to an object of one sort or another. In fact, earlier on in this lesson, we wrote a function called doStuff. But doStuff, since it doesn't explicitly belong to some other object, it does belong to the window, and you could actually write window.doStuff and that will actually work.
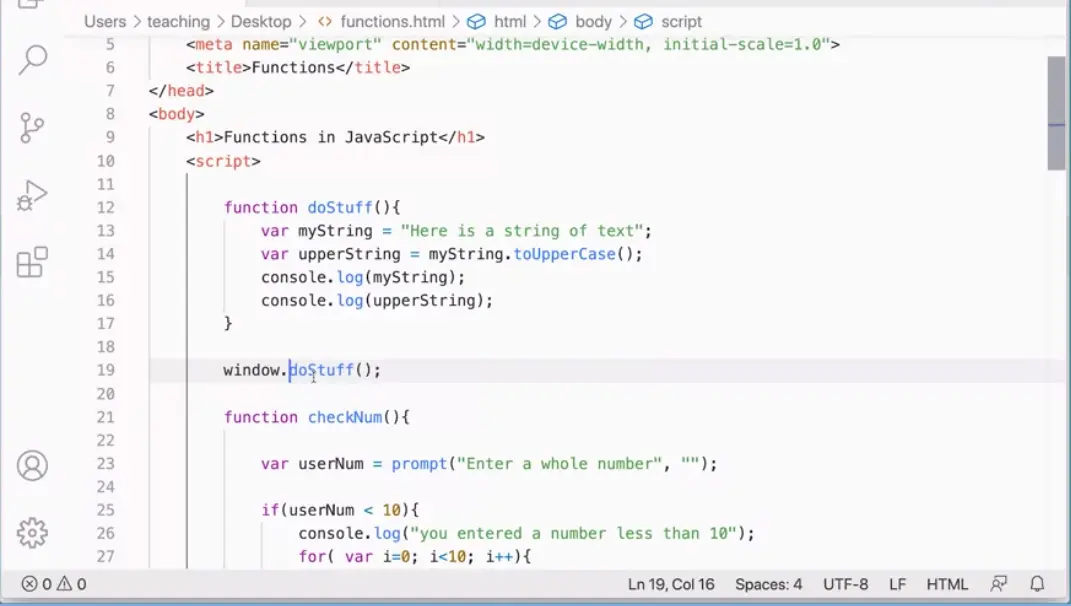
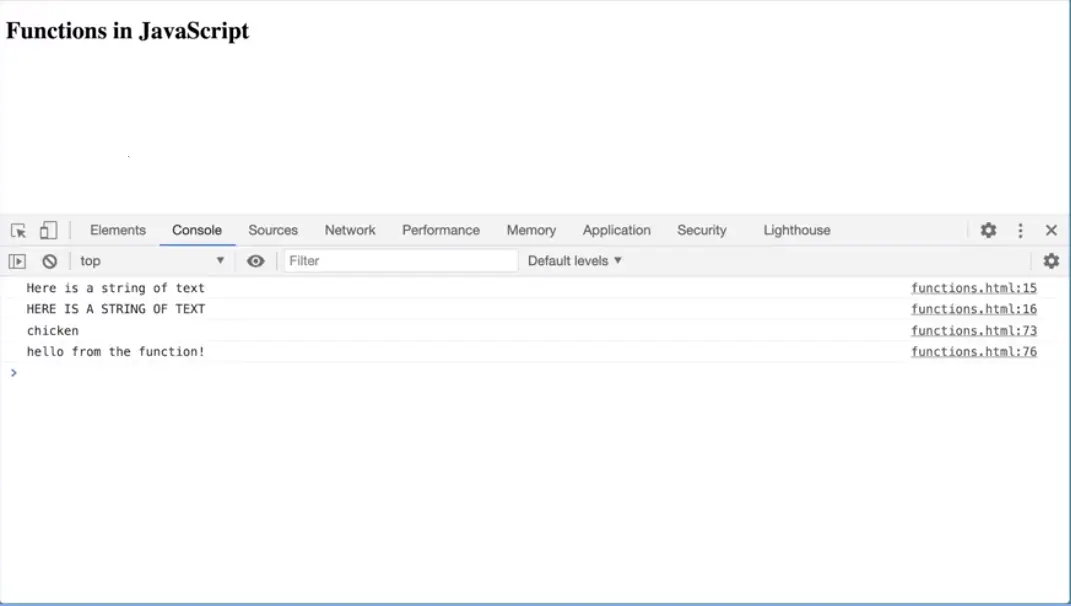
If we go back to our code here, and I come in here and put window.doStuff, you'll see if I save that and come back and test it over here, it actually functions. Because ultimately my doStuff function belongs to the window object.
Now, if a function belongs to the window object, we don't often do this. Occasionally we do, but very rarely will we put window.doStuff in there, we'll just call doStuff. In that case, we'll call it a function. But when a function more explicitly is set to work with a particular object, we're more likely to call it a method. So that's where the difference in terminology comes from. But in reality, in JavaScript all functions are methods. So the two terms really are interchangeable. If you hear the term method and you're confused by that, just think, Oh yeah, that's a function, and that's fine. We've learned a lot about functions in this lesson, and you've already learned a lot of JavaScript.
Along with the challenges, you'll get good at the JavaScript syntax and you'll get good at being able to make simple programs function. From here we get to start doing some much more interesting things where we start working with content on web pages and manipulating web pages. So this course only gets more fun from here. So stick with it and keep working on the lessons, and I can't wait to see you in the next one.

Welcome to the third module on JavaScript. In this module, we'll be doing some really exciting stuff. We'll be digging in and learning how to actually affect elements on web pages. When we do that, we'll also be looking at events, will look at what happens when you want to capture a click or a scroll or the submission of a form or something like that. When we capture these events, we can then make different things happen on web pages. This is where the real magic is in JavaScript, and it's also the reason why JavaScript exists, is because it's so tightly tied into the browser.
Now we can find JavaScript in other places other than the browser. But its main reason to exist is the fact that it is so tightly connected into the browser, and we'll really get into that, in this part of this course during this module. So I hope you have fun with it, and by the end you'll have learned quite a lot of JavaScript.

JavaScript and the DOM.
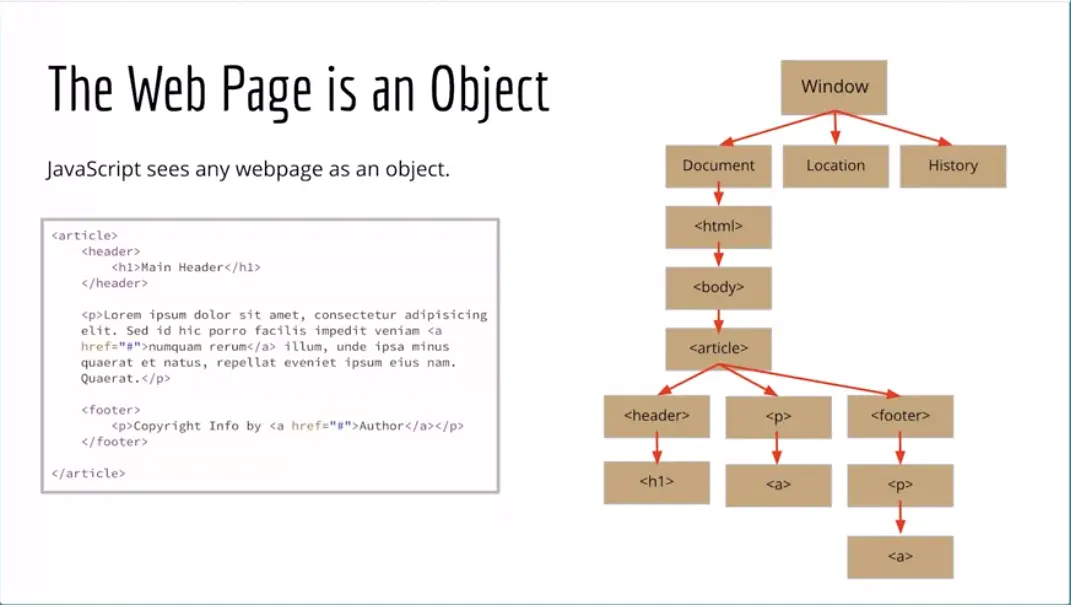
The DOM stands for Document Object Model. JavaScript sees the web doc ument as an object, and it understands it from the hierarchical perspective. The root object that JavaScript sees is the window itself. The window, our browser window is the root object. Then that has three sub-objects. The document, the location of that document, and the history. We're really concerned with the document, and the document breaks down into an HTML tag. We've seen that certainly on our documents and within the HTML tag there's a body tag. Then we could have whatever HTML is making up the page.
Here, I'm showing an article with a header and a paragraph and a footer, and that matches the HTML that's in the image here on the left. If you look at the markup on the left, you can see how that matches the article here, in the diagram. JavaScript sees the article as an object that has children. One child would be the header, and the header itself has a child which would be the h1. Then another child of the article is a paragraph. Another child of the article is the footer, which also has a child which is a paragraph. We can see that represented in the diagram over here.
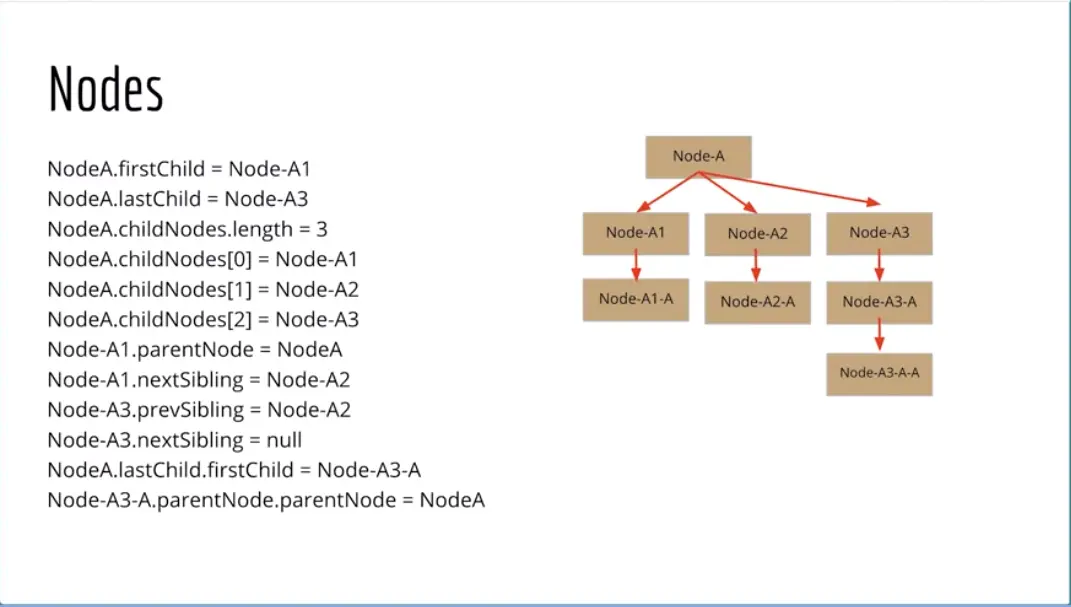
These elements on the page are nodes, and JavaScript understands the relationships between the nodes. And we can use methods and properties to do what's called traversing the document and getting from one node to another so that we could affect it with JavaScript.
For example, if NodeA was that article, and it has three children, you could say NodeA.firstChild is Node-A1, and NodeA.lastChild Is Node-A3. You can look through the descriptions to the left here and understand the relationships between these different elements. So Node-A1.parentNode, for example, would be NodeA, or we can look at the children of NodeA as an array, and we could say NodeA.childNodes[0] would be Node-A1. So on and so forth, right down through this entire list.
We can actually use this relationship to work our way around HTML document using JavaScript and be able to get elements and do things with them. Now, if you're coming to JavaScript from another language like C++ or Java or Python or something like that, this is a little weird. This is strange, but really, when you think about it, JavaScript's tight integration in with the browser and with what happens on our document is really JavaScript's reason for being. Certainly we're seeing JavaScript now outside the browser and in other places.
But JavaScript's main reason for being is the fact that it can do this stuff, and other scripting languages can't, where other programming languages can't. In 2009, when they decided that JavaScript was going to be the programming language for the web, it was going to be native to the browser, that's when this stuff really got solidified and everybody wanted to follow the exact same specification, and even if they were doing slightly different implementations of it, they were following the specification so that this would work with JavaScript in whichever browser you're in. It's taken a while to get to compatibility across browsers with JavaScript, but we're pretty close to there these days.

The dot syntax and methods.
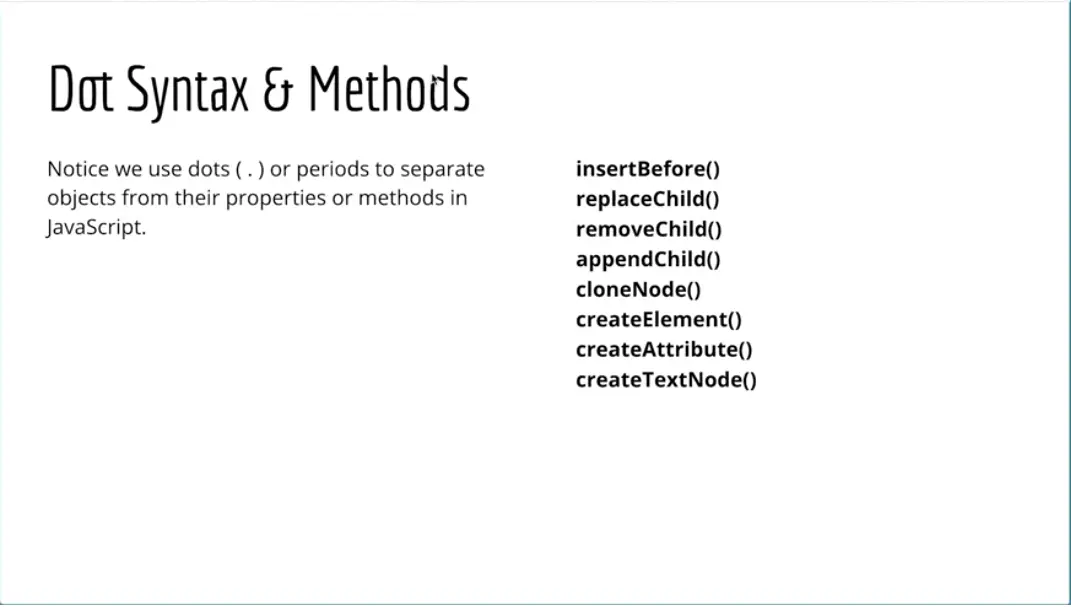
Notice we use dots or periods to separate objects from their properties or their methods in JavaScript. On the right here, you can see that we have a number of methods that are related to being able to traverse the DOM or affect the DOM. insertBefore(), we can create an element and insert it before another element. We can replace a child. We could say, "Take this child out of here." Remove a child. Append a child. We can add a new paragraph to the end of a div or something like that. Clone and node.
We could take an entire div with all its contents and clone it and add it to the page somewhere else. We can create an element, we can create attributes, we can create a text node. These are all methods that JavaScript has built into it that will allow us to do things to the Document Object Model; to the document itself and will affect the document there.
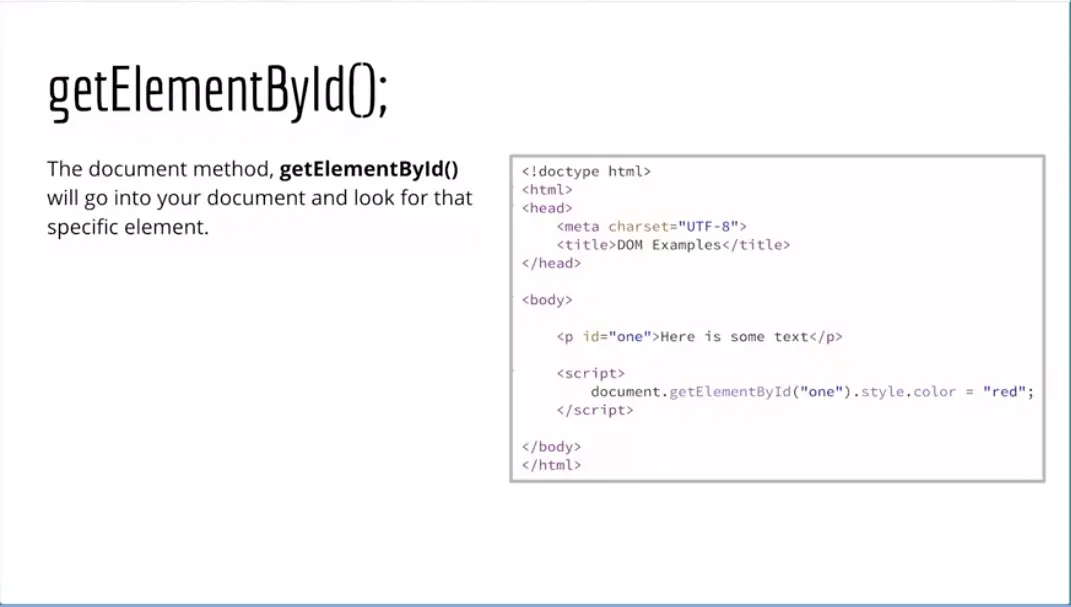
One of the document methods you'll use most frequently and is a good one to learn first is getElementById. getElementById is a document method or a function that belongs to the document object. Remember that's how we define methods. What we can use with getElementById, is we can pass in a particular ID, and then we can do things to that element, that will go into our document, into our DOM or Document Object Model and find that particular element and do something with it.
We could set the style property and the color sub-property to red, for example, for this paragraph that has an ID of one. Remember, in HTML, when you have an ID, it must be unique. It must be a unique ID on the page. This is something I see as a mistake a lot of times with students learning to create webpages. They'll use an ID and the page multiple times. But the whole point of an ID is that it's unique, just like you have a student ID or a driver's license ID or some other ID with a unique ID number on it. The whole purpose of having an ID is that it is unique. Let's give this a try.
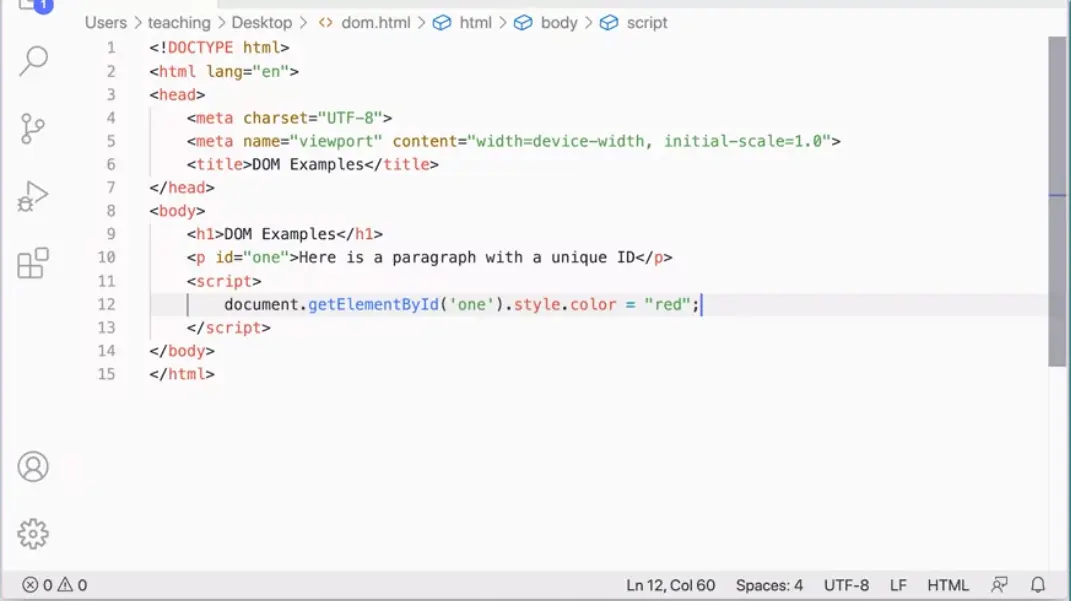
I'm going to come over to my code editor here and you can see I've set up a page and I guarantee you it's a good idea for you to do this as well. I strongly suggest it, but I'm going to come in here and I'm going to add, I'm going to say document if I could type document.getElementById. You can see as I start typing, that it even comes right up here and I can actually select it from the list to make sure I get it right. Because you have to get the capitalization right. It's CamelCased. The get is lowercase, but E is uppercase, B is uppercase and I uppercase, but the d is lowercase. You have to get that right, otherwise, it won't work. I'm going to pass in one because it's going to match this ID here, and I can set the style.color to red.
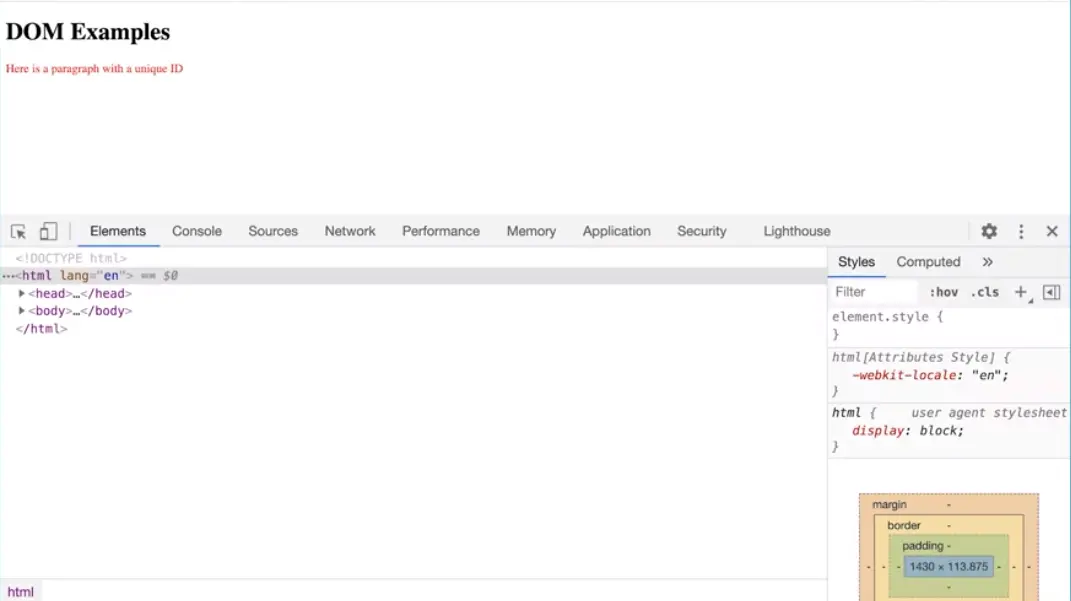
If I save that, and then I come back over here and you can see I have this webpage loaded up here, and it's black here. But as soon as I refresh the page, you'll see that it's turned red. Now, I don't have any code in my HTML that's doing that. It's the script that's doing that after the fact. It's really important to understand this.
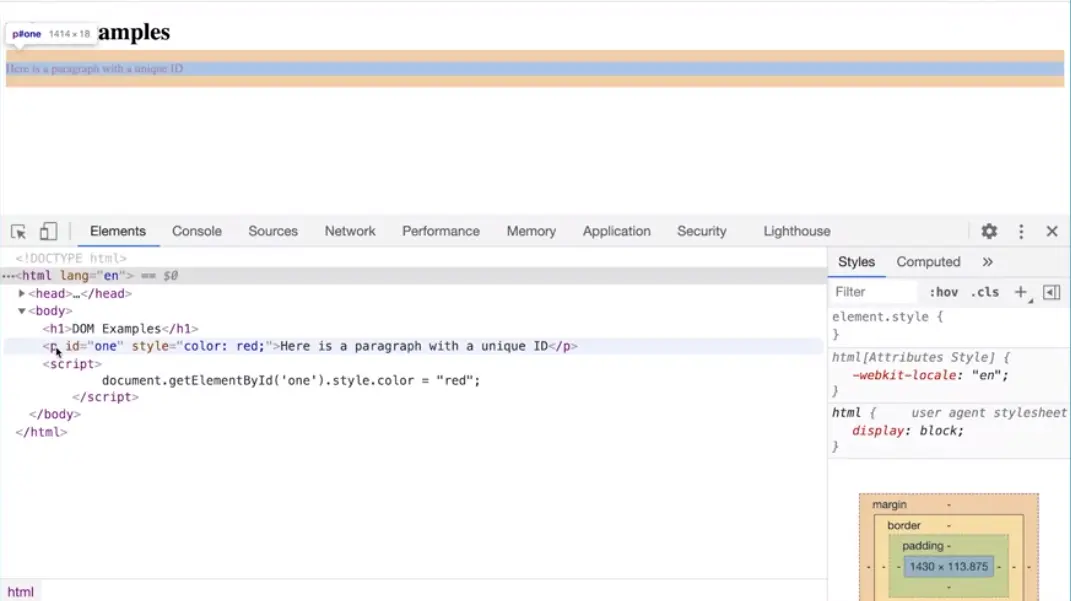
As I come down here, notice paragraph ID1 and then style color red is added here. But I didn't add that. That's not in the HTML that I added. Over here, the HTML that I have, I have the ID1, but I don't have a style attribute on here at all. When the page loaded, JavaScript loaded the paragraph the way I wrote it, and then what the scripted is it went in and found that element with the ID of one, and it added the style attribute here and set its color property to red. JavaScript is doing that on the fly after the page has been retrieved.
Right now we're just loading it from our desktop. But you could be getting it off of the webserver, you'd be getting it from anywhere. That page, when it gets to the browser, it gets rendered by the browser and then the script runs down at the bottom of the page and affects the page after that paragraph has already been rendered. It happens so fast, you don't even really see it. But this is a really great example of a document method, getElementById, which is allowing us to go into our document, find that ID, and then effect it on the page.
Here's another document method that allows us to get elements on the page and do something with them.
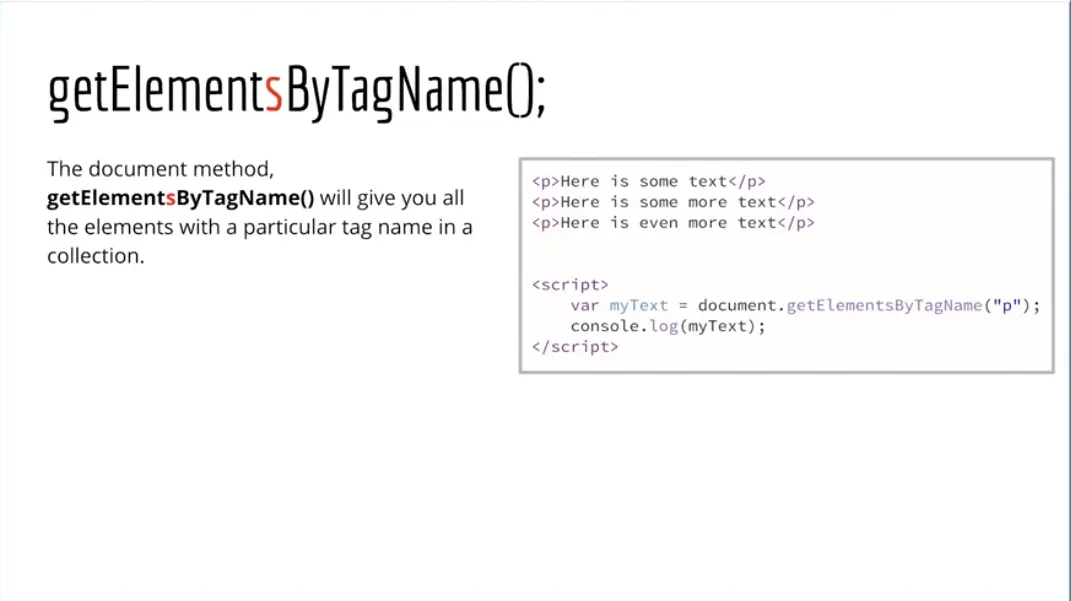
It's called getElementsByTagName, and I have the S and elements highlighted because a common mistake is to leave it off because it's getElementByID, but this is getElements, so this is going to get more than one element, it's going to get a collection of elements, and then we can do something with that collection of elements.
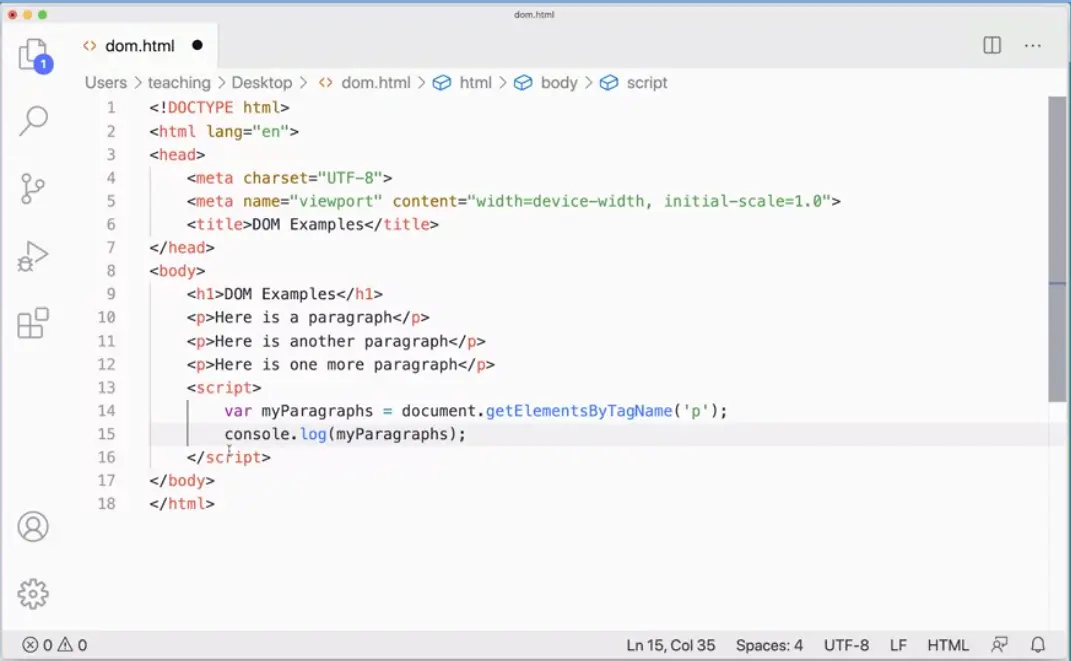
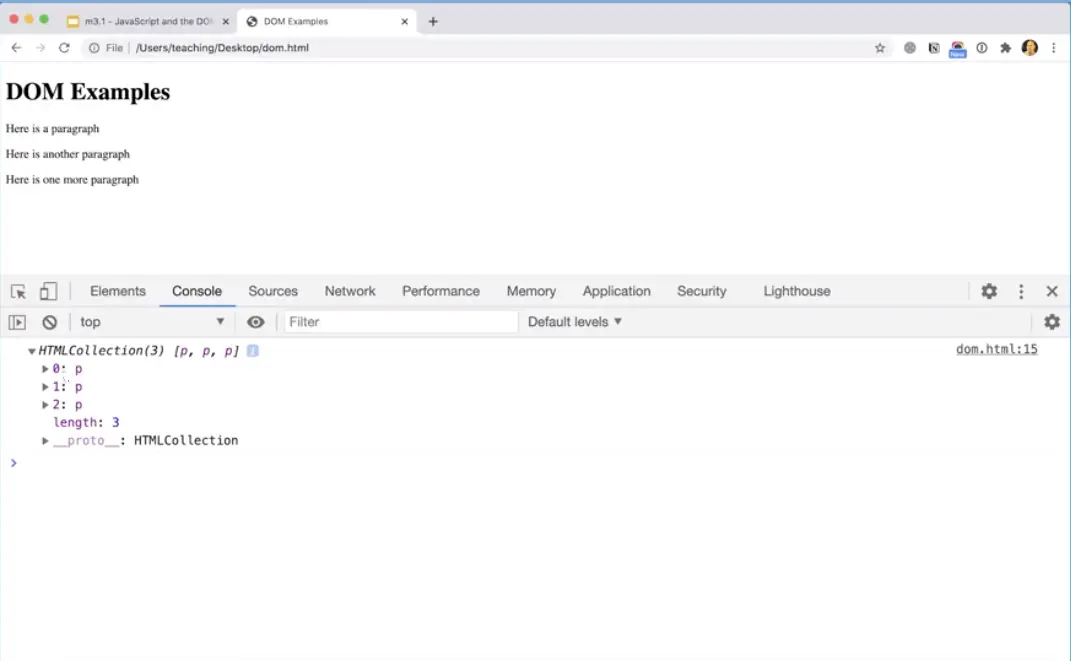
Let's give this a try. Here I have my page, I have some paragraphs on the page, and I can write a script here, document.getElementsByTagName. Then I can pass in, say, a P for paragraphs. What this is going to do is it's going to go in and get all of these elements, and I can assign that to a variable, var myParagraphs equals. Now, myParagraphs is going to hold a collection of paragraphs, and if I console log that out, console.log(my Paragraphs).
If I console log that out, let's see what I get. I'm going to come back over here to my page and refresh, and we don't see any difference here, but if I go to the console, you'll see I get an HTMLCollection of three things; paragraph, paragraph, and paragraph, and that's what's in here, and I could even fold this down and see what the different paragraphs are, it gives me some information about them, but it's giving me the collection of the paragraphs here.
That's important to understand about this particular method. Whereas getElementByID gives me always just one thing. It'll always give me one because IDs are unique. Whereas getElementsByTagName will give me an HTMLCollection of elements that I need to then do something else with.
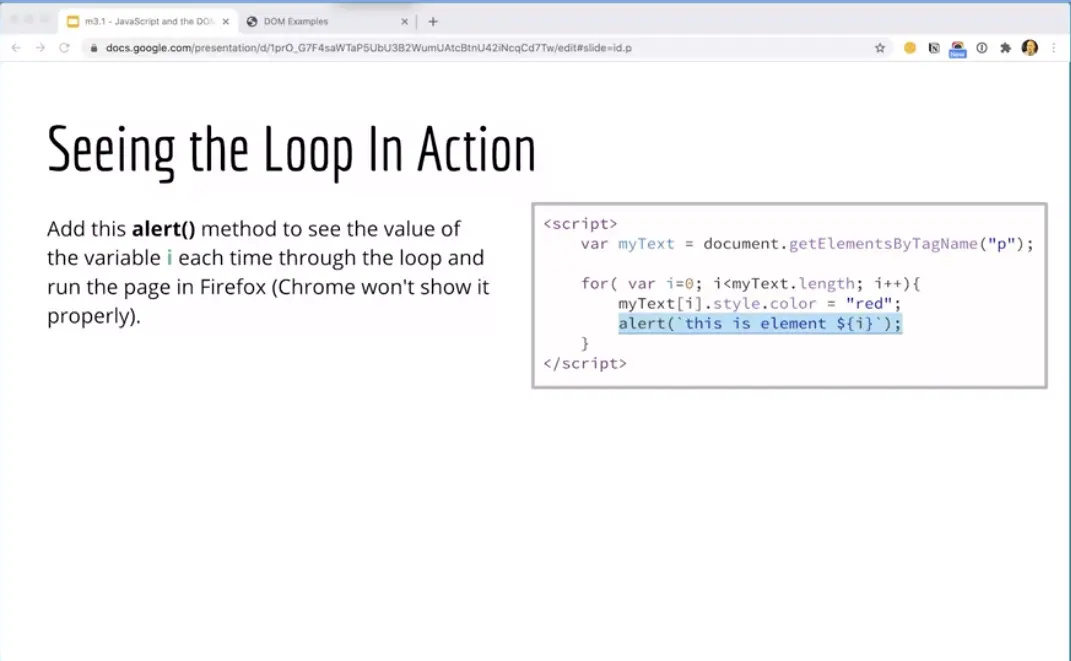
If I wanted to set the color of these paragraphs to red, then I would need to use a loop because I can't apply the style color to a collection of things all at once. I have to apply them to each item in that collection. I need to use a loop to loop through each of the elements in that collection, so I'm going to use a for Loop here, and let's go ahead and do this over here rather than console log this out.
![dom.html - for(var i=0; i<ps.length; i++) {ps[i].style.color='red';} dom.html - for(var i=0; i<ps.length; i++) {ps[i].style.color='red';}.](./images/webp/image317.webp)
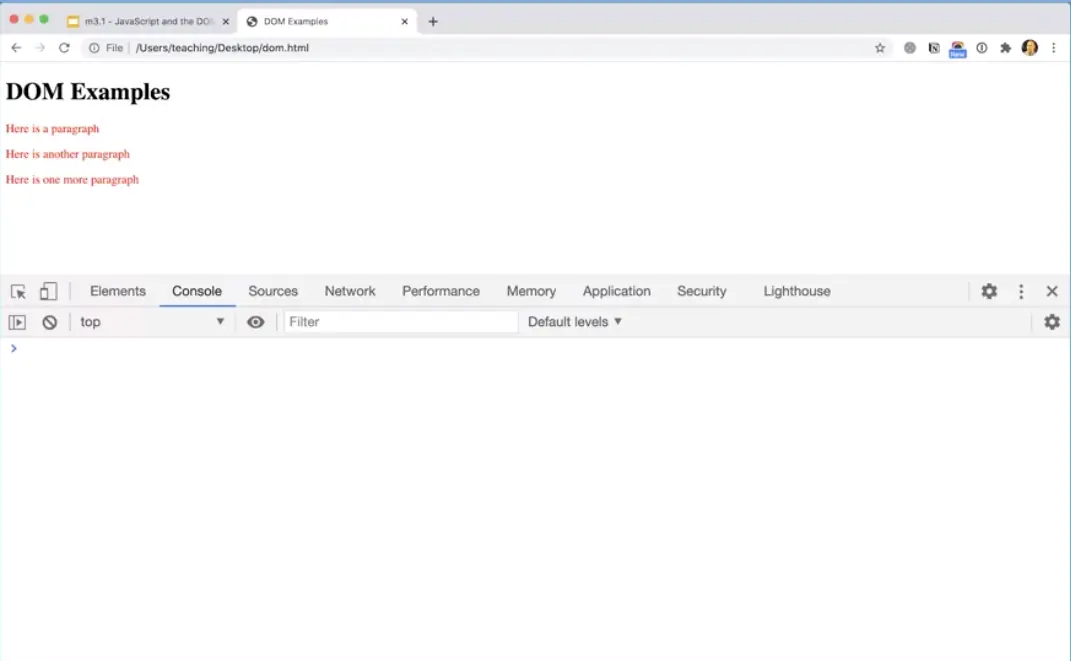
I'm going to use a shorter variable here. MyParagraphs is long, I'm guaranteed to type that wrong at some point, so I'm just going to call it ps, something like that. That's fine for paragraphs. I'm going to make a for Loop, and again, remember, if you've been doing the challenges and really getting used to the syntax, you should be able to just write a for Loop. For var i equals 0 or i is less than ps.length; i plus plus and then we've got our curly braces, and in here I'm going to take each paragraph, so I'm going to say ps [i].style.color equals red. Now, if I just do this, you'll see it'll work. It'll actually go through this entire Loop. The first time through the Loop, this thing has three paragraphs and it's going to get paragraph 0. Let's give that a try. Let's run that over here. If I refresh this, you can see all my paragraphs generate.
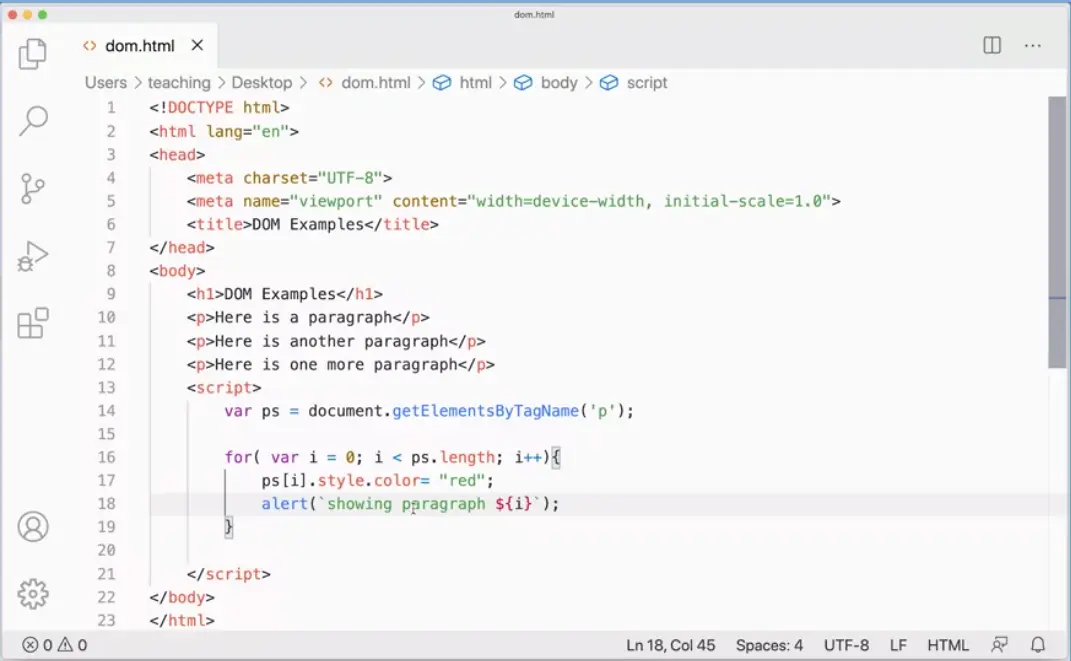
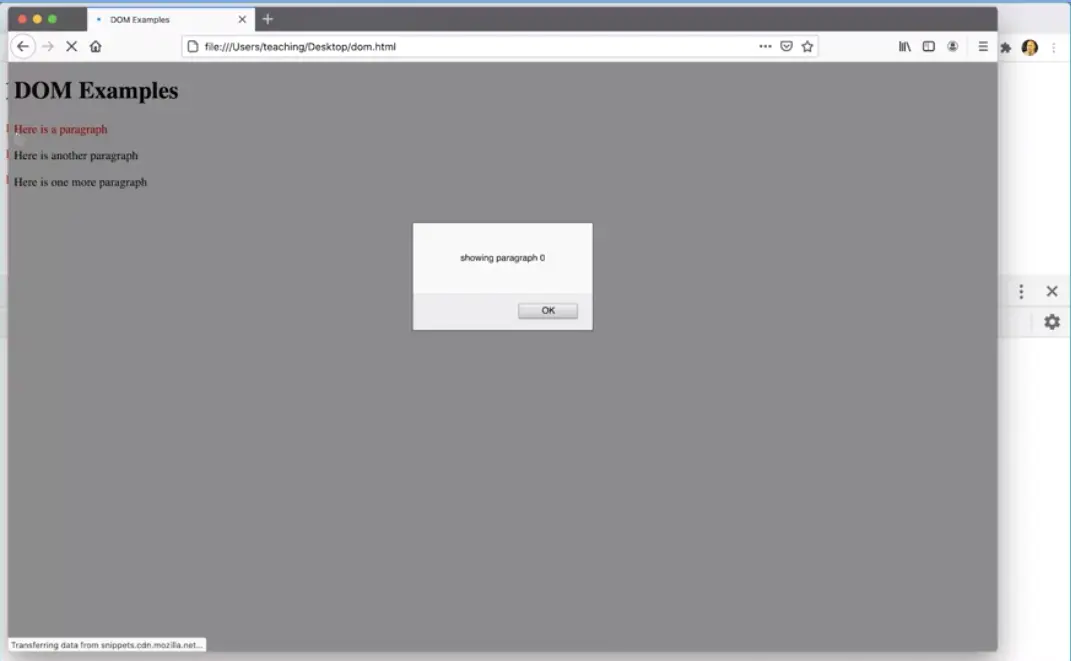
I'm going to come in here and I'm going to add alert. I'm going to use my backticks here showing where I graph, and then don't forget since that's going to be variable in dollar sign, curly brace, curly brace. To show this in Firefox. Firefox does things a little bit differently, uses the Mozilla rendering engine, and so it renders things a little bit differently. I'm going to go ahead and open our page here in Firefox, and there's my DOM HTML, and notice the difference here.
This one actually shows the first paragraph turns red, and then I get the alert, and then we see the second paragraph turn red and I get the alert, and then I get the third paragraph turning red, so you can actually see the Loop actually running, and usually these Loops run so fast, you don't even see them. But with the alert in there, you can actually see that that loop is running and turning the paragraphs red one at a time in the collection.
The next document method that we're going to look at is getElementsByClassName.
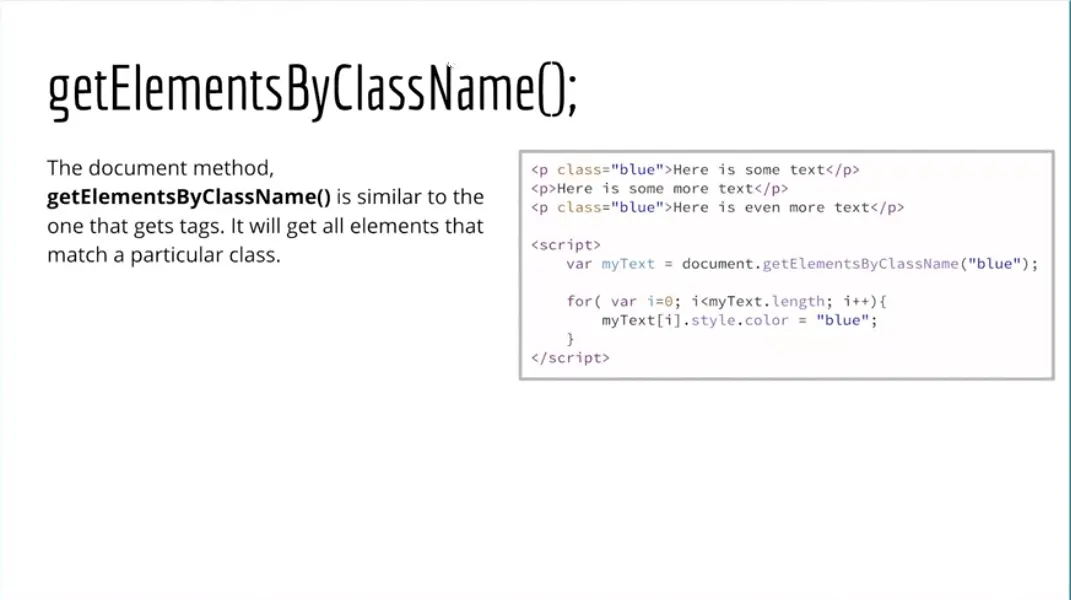
This method will do exactly what you think it will do. It will allow us to go into our document, and retrieve elements which have a particular class name. Then put them into an HTMLCollection.
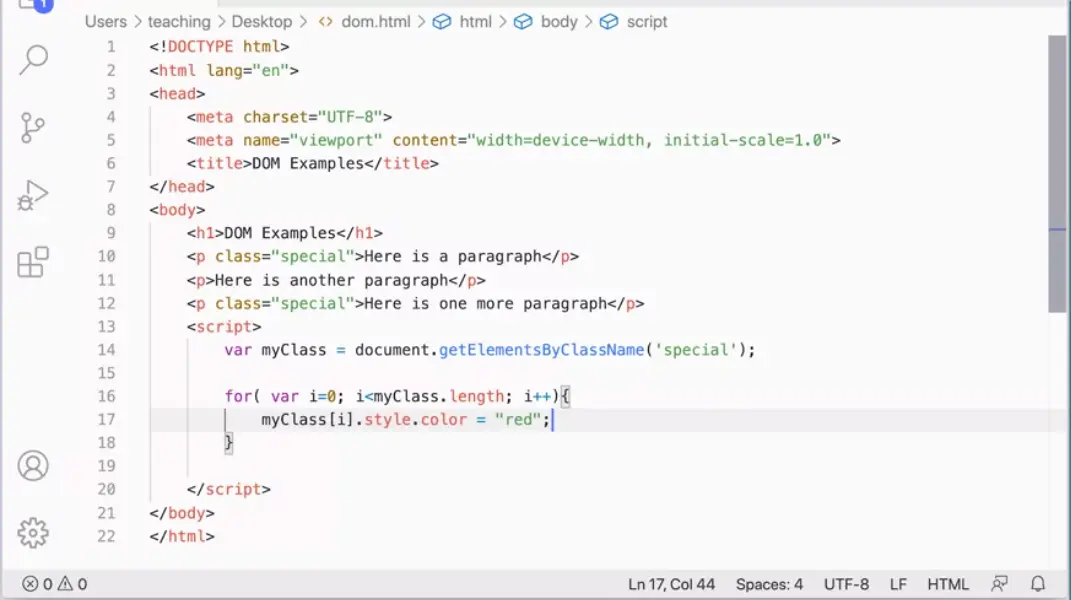
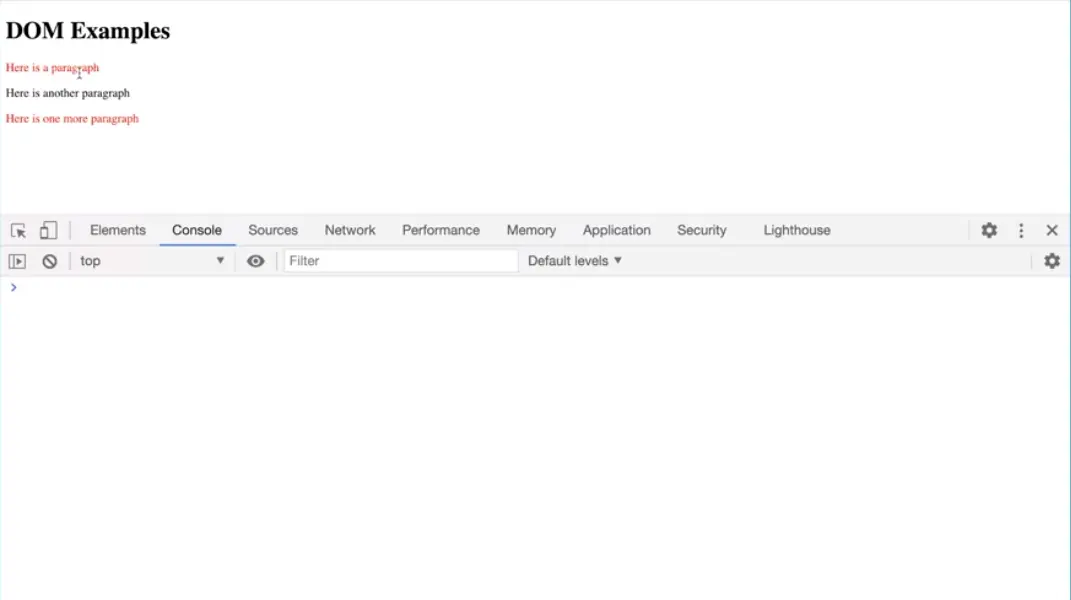
Let's give it a try real quick. Here, you can see I've added class equals special on my image over there it was blue, but whatever class you want to put is fine. It doesn't really matter as long as you set up a variable per myClass equals document.getElementsByClassName, this one here That will take all of these elements. In this case, it's just two and stick them into a collection. Then the same as before, we are going to need to use our loop to go through and change these items. For var i equals 0, while i is less than myClass.length.
First-time to the loop, that's going to be zero. Second time to the loop, it's going to be a one, and then it'll finish.style.color equals red and that should work just fine. Let's go test it out. It turned those two classes red. Now, one more point of interest while we're here. Even if I just had one element on the page to add this class, I could give it an ID. But if I am going to use getElementsByClassName, even if there's only one, it still is going to return a collection of elements and that collection is only going to have one element in it and I still need to use a loop or some other way of getting to the element inside that collection, even though there's only one. You'll see the loop will still work. It'll just run only one time.
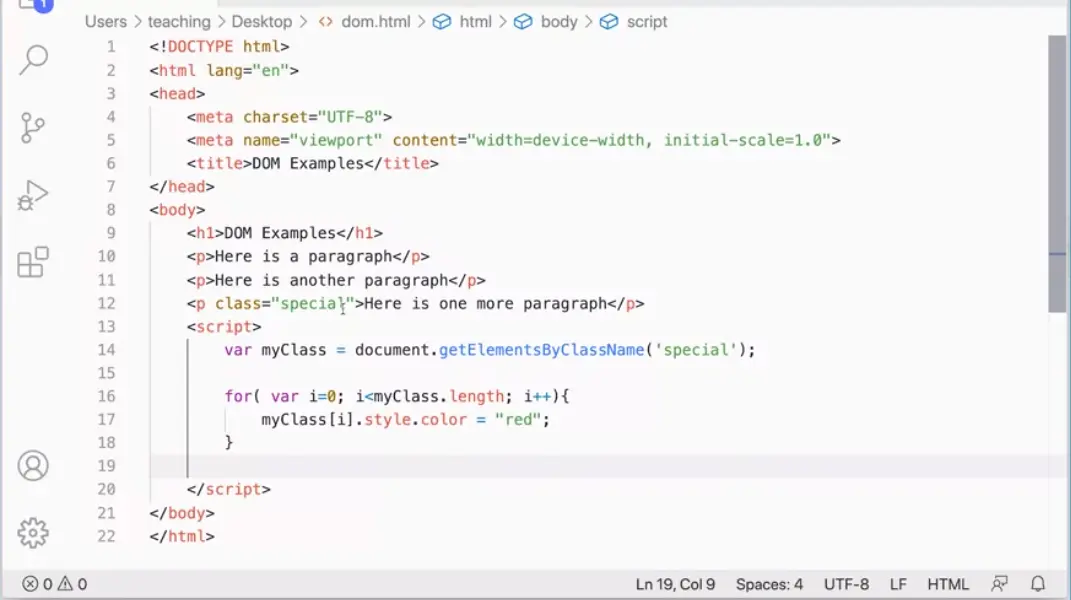
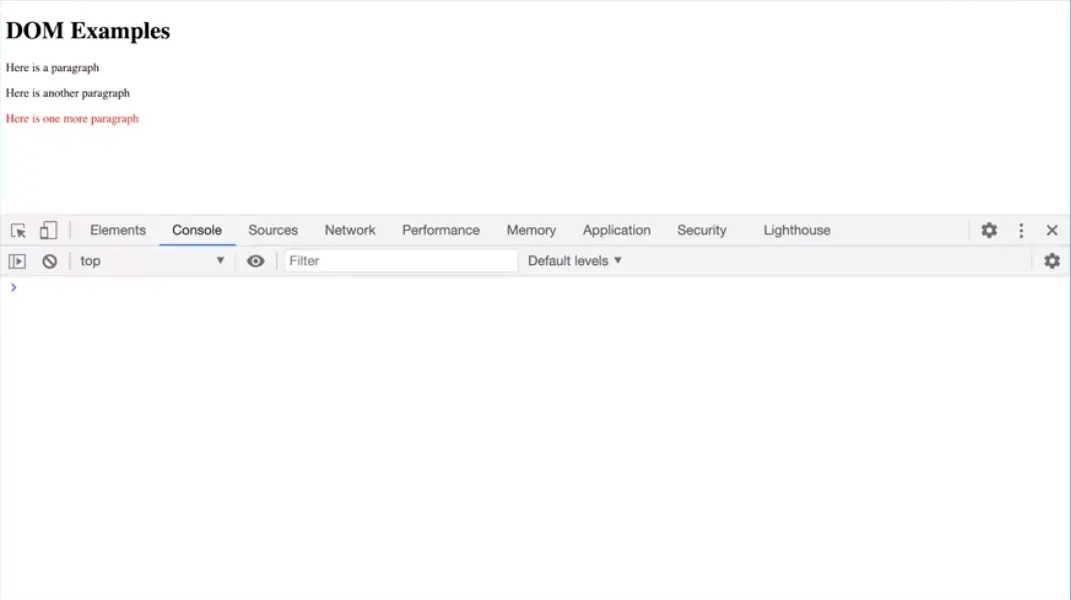
A little bit easier way of doing this, I don't really need a loop here because I know that there's only one element in this collection, so I know it's going to be element zero.
![myClass[0].style.color='red'; myClass[0].style.color='red';](./images/webp/image327.webp)
![Test, output from myClass[0].style.color='red' command Test, output from myClass[0].style.color='red' command.](./images/webp/image328.webp)
So I don't need a loop, I can just make this zero and get rid of the loop, like so. Clean that up a little bit. Now, myClass is getting elements by class name special and myClass zero, since I know there's only one, it's going to be myClass zero. It's going to be that one in the collection. I can access it through because it's treated like an array there. It's not actually an array, it's a collection of HTML elements, but I can treat it like an array to go and get element zero out of there and you'll see that will work just as well.
But the important thing here to understand is that if you're using getElementsByClassName or getElementsByTagName or anything else that gives you a collection of elements, you have to go in and treat it as if it's a collection because that's what it is, and not just as an individual element. That's easy to forget, especially if you have only one. You're like, "Why can't I just change that one? Why can't I just use my class style color red?" Because there's only one element with that class in there. But JavaScript is getting a collection of elements even if the collection only has one element or even if it has zero elements in it, it'll still be a collection of elements. So that's an important thing to understand about getElementsByClassName and getElementsByTagName.

The next document method that we're going to look at is querySelector.
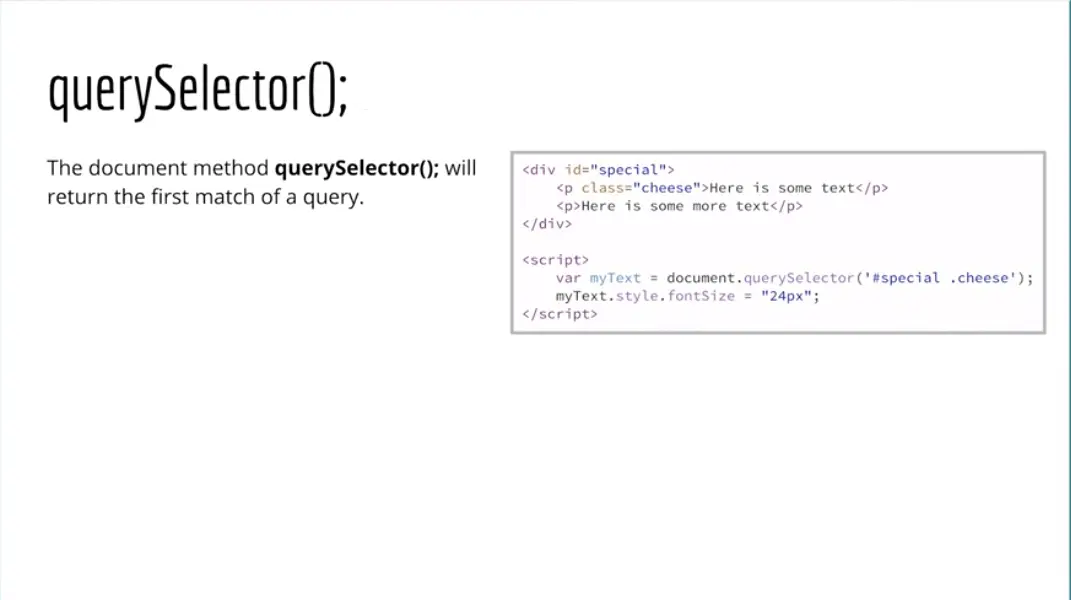
Now, the history here is a little bit interesting. Because in 2009 as we said before, ES5 became the de facto standard for scripting for the web. But there was the rise of a have a library called jQuery that became popular and it remains popular to this day. Less now than it was, but it's still a popular library that made it getting elements in the DOM and doing things with them easier. An API that allows us to use querySelector and querySelectorAll which we'll also look at to get elements from the DOM. And it's a bit more convenient but it works differently than the older get element by ID, get element by tag name, get element by class name methods.
These are newer methods, and they're very useful, but they work a little bit differently. And because of the introduction of these methods, jQuery is not nearly as necessary as it used to be. And what we'll still learn jQuery, we'll be learning that in the second course in specialization. But now we can actually get elements into our DOM a little bit easier than we could just with the older methods.
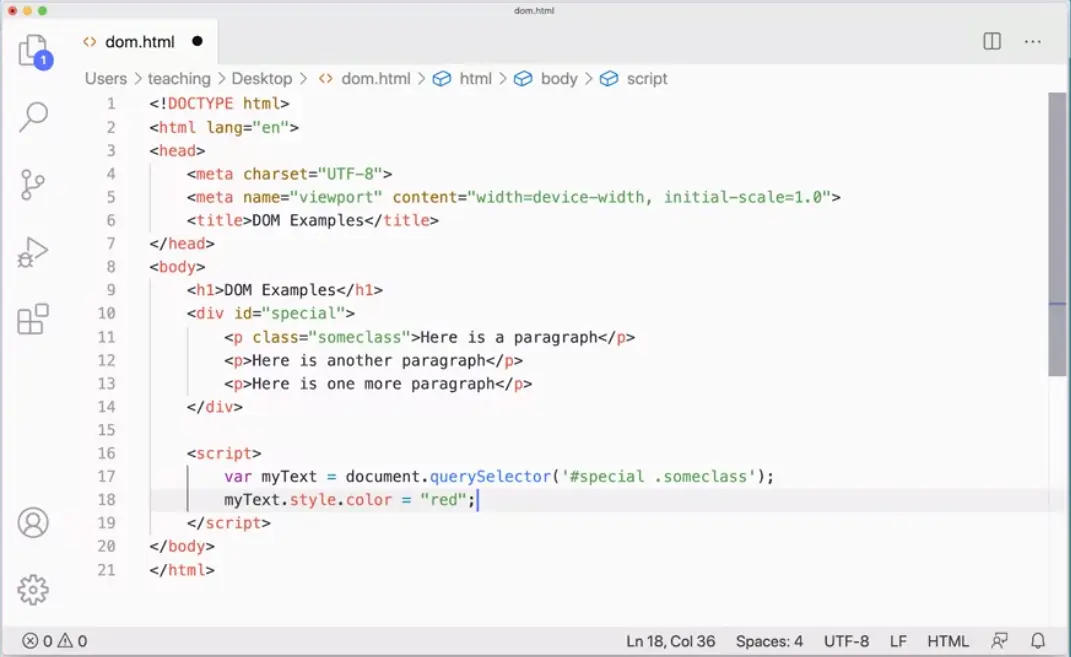
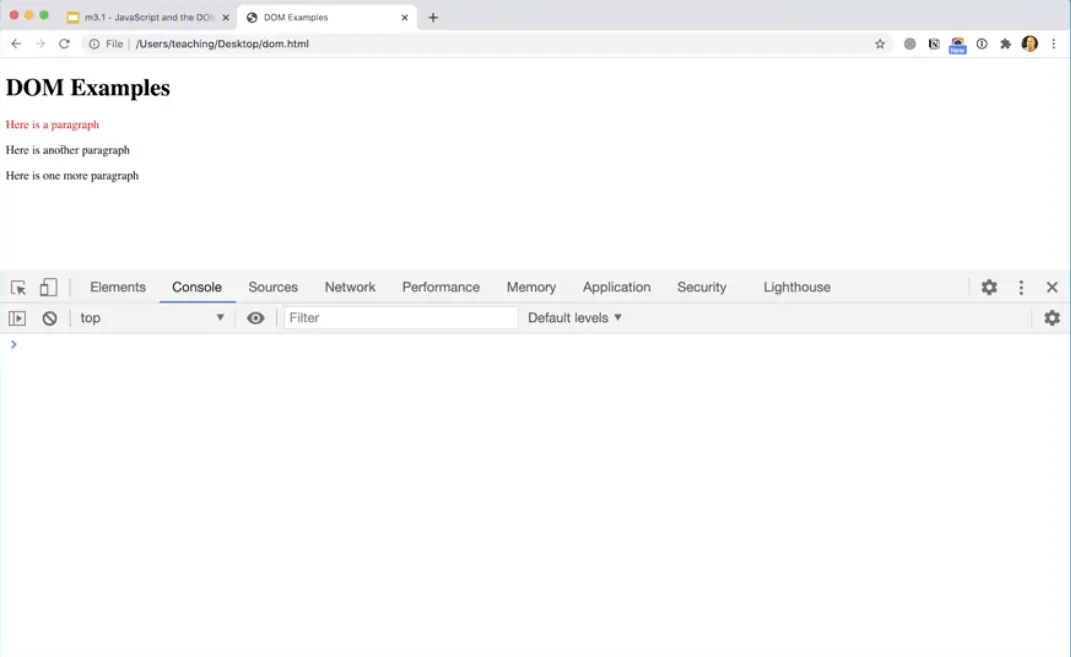
Okay, so let's take a look at querySelector and the way that works. Over here I have a document, and I have a div with an id on it, and then inside there I've got a paragraph for the class. Well, I could do something like this. var myText = document.querySelector. And then what I would pass in is actually instead of just some class, I would put either dots or I could put .someclass.
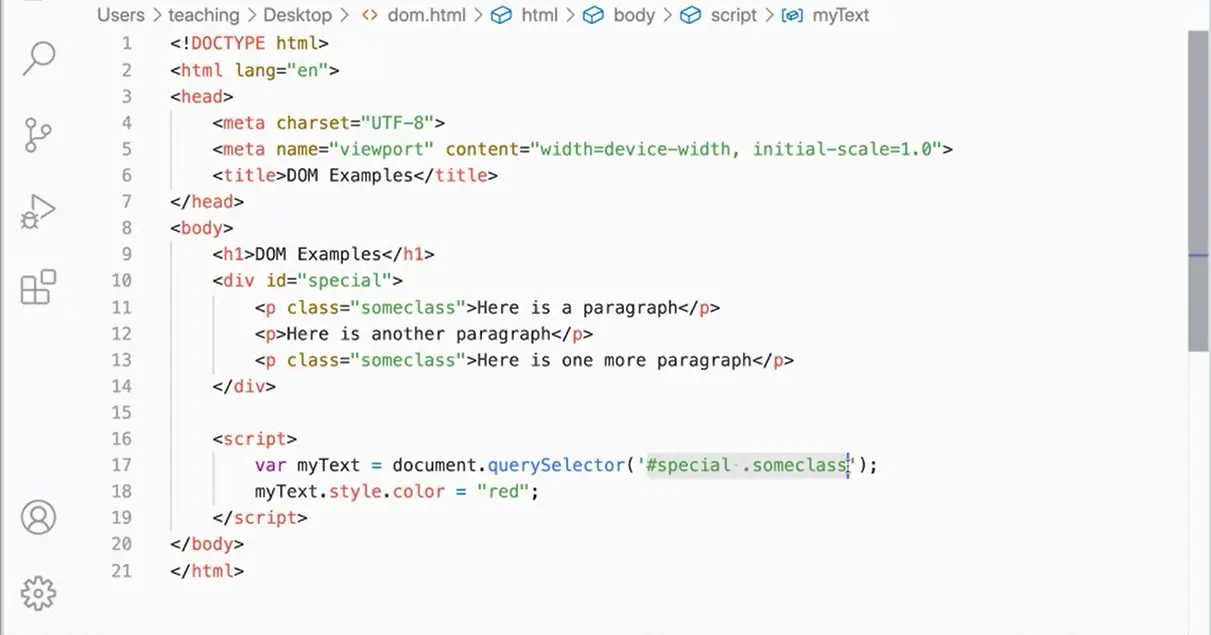
What is different here is before we didn't use the CSS syntax. Now we have to use the CSS syntax with querySelector. Or I could even be more specific and I could say go find #special.someclass. So get to someclass inside the id="special". And what's nice about this is that query selector will always return the first element that it finds that matches what you pass in here. So even if I had another paragraph with some class on it, this will always only return one thing to my text. myText.style.color = "red". And if I go over and test this document, and again I recommend, that you give this a try yourself. You can see that it's settng that paragraph red.
Now if I were to go in here and add my class, "someclass" to another element, you'll see it still only affect the first paragraph. When you pass stuff in, you're passing in the CSS syntax #special instead of just special. Or .someclass, instead of just someclass, that's important with querySelector. Let's take a look at the querySelectorAll method in the next lesson.

The querySelectorAll method does what you would think it would do, is that it allows you to grab a group of elements again, but this time using the newer, more updated DOM API querySelectorAll.
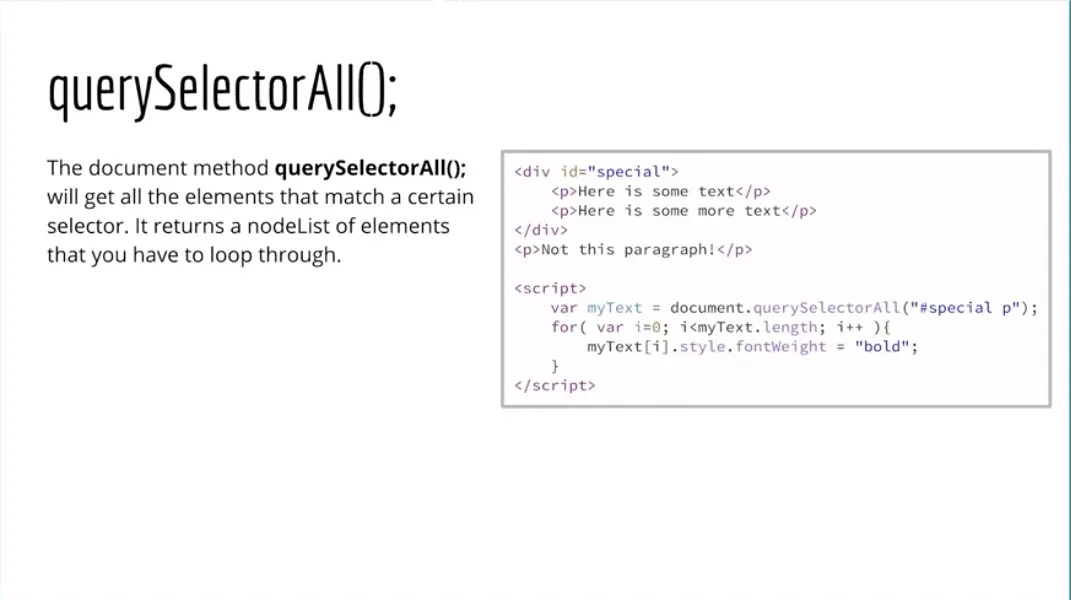
Let's give that a try really quickly here.
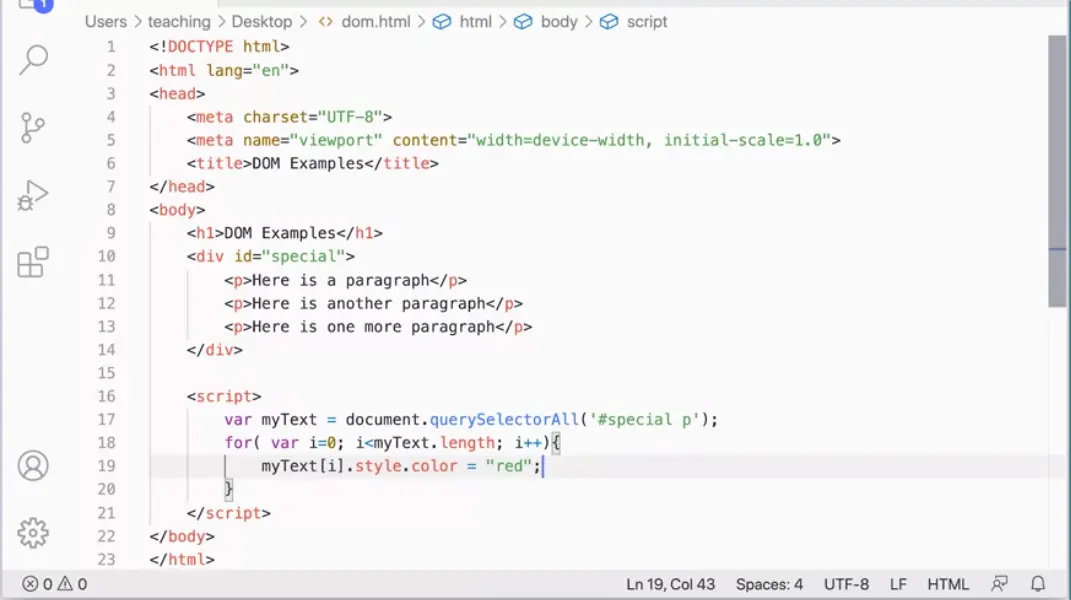
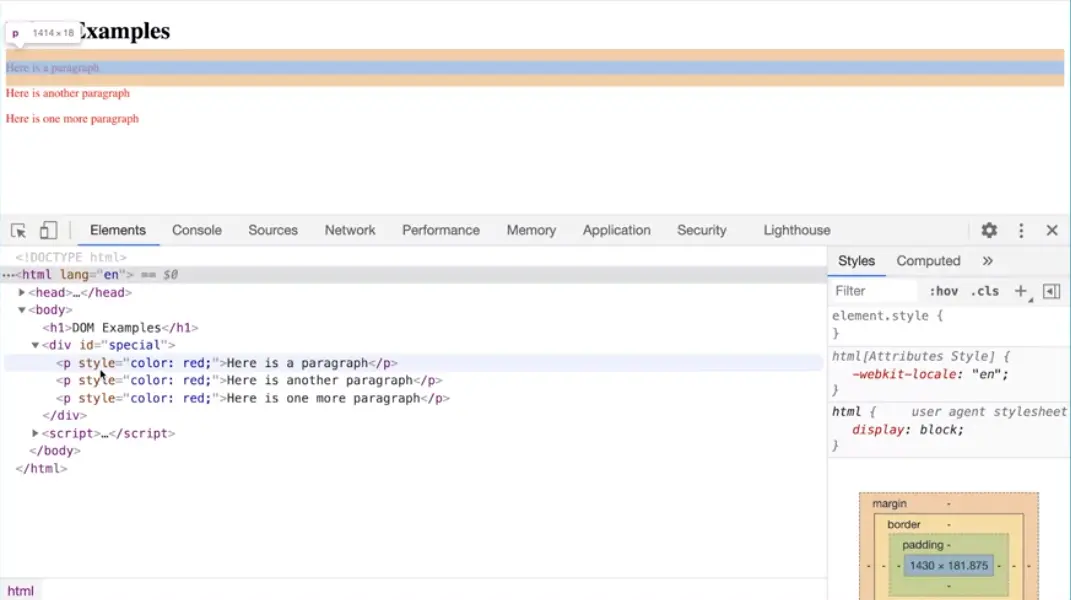
Over here, I've got my div id special and I've got some paragraphs in here, and I can do something like var myText equals document.querySelectorAll and with that querySelectorAll. I could pass in here in quotes, I could pass in pounds special p, and that's going to get me all of the paragraphs that are inside this div special.
I can go into my document and find a particular group of elements somewhere in my document. But again, with this, we're going to need a for loop. For var i equals 0, where i is less than myText. Length; i++. Then I can do myText square bracket i.style.color equals red. Here we go. Save that and then we should be able to test it over here and see, when I refresh the page, it is turning all those paragraphs red. Just one more time to just drive this home, noticing here when I go look in that div, it's added style color red to each one of these paragraphs. That's what it's doing, it's going into special and finding the paragraphs and affecting the DOM after the page, after the HTML initially loaded. It's really important to understand that.
So querySelectorAll will allow us to get groups of elements and then we would loop through them to affect them one at a time. So far we've talked about five document methods. Three of them are older, Document getElementById we still use that quite a lot. Document getElementsByTagName and document getElementsByClassName you might use this less often now because now we have the newer methods, querySelector and querySelectorAll. But these are just some of the document elements that allow us to add elements to the page.
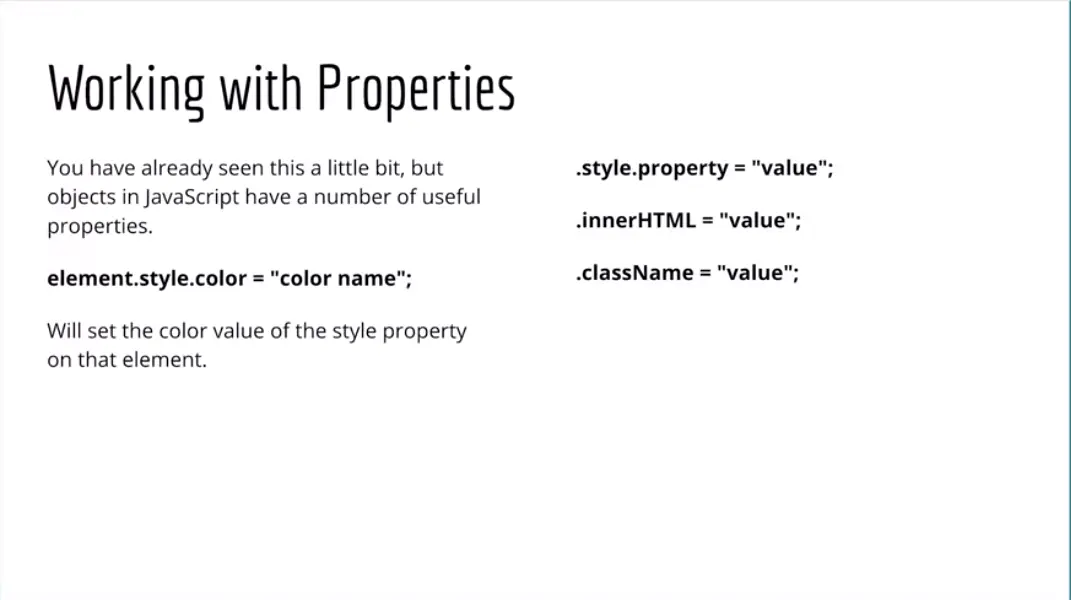
Next, I want to talk about working with properties. We've already seen this a little bit. We've seen element.style.color. So we're going in and we're getting that element, whatever the element is, we've got that element, whether it's paragraphs or whether it's a div; whatever it is, we're getting that element with our document methods, we're getting those elements and then we can apply the style property.
We can get the style property and the color sub-property and set it to whatever color name we want. There are other properties that we can use. There are a number of them. Some of the more popular ones are ones that we use more frequently are innerHTML. We'll be seeing that one quite a bit and className is really useful so that you can actually take an element and apply a class to it. This is useful in modern JavaScript because CSS has become so powerful.
Now, we can put animations in CSS, and then when we want to animate something, we can use JavaScript to add that class in CSS that has the innovation and the innovation will take place on the screen. That's a really great way to create interactive for animated elements on a web page.
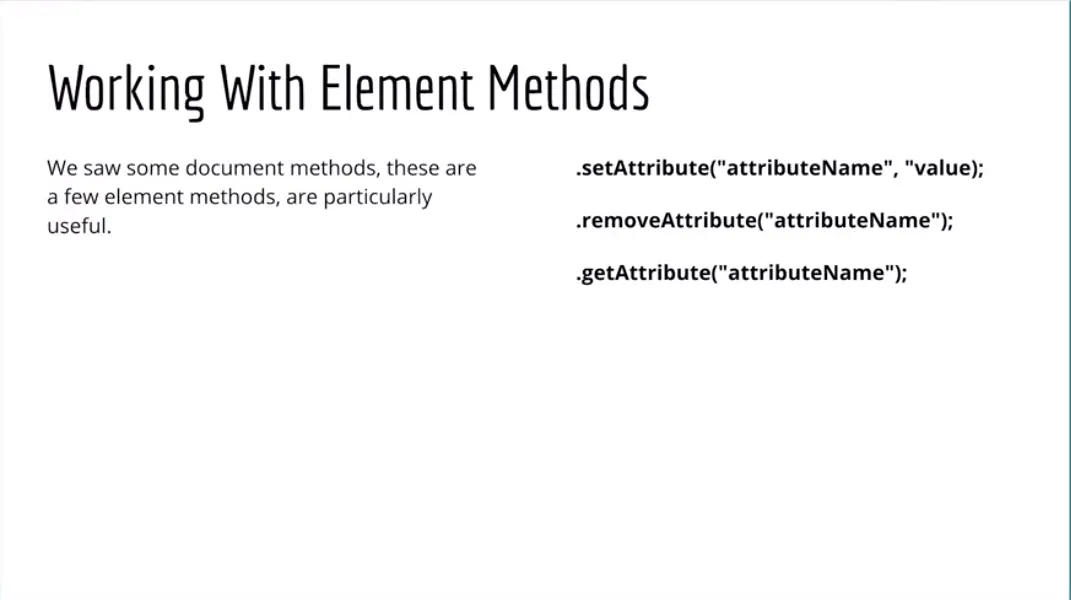
So we have the document methods, and now we have element properties that allow us to work with the properties of certain elements. But there are also element methods or element functions and those are also useful. For example, .setAttribute, we can pass in an attribute name and then set its value.
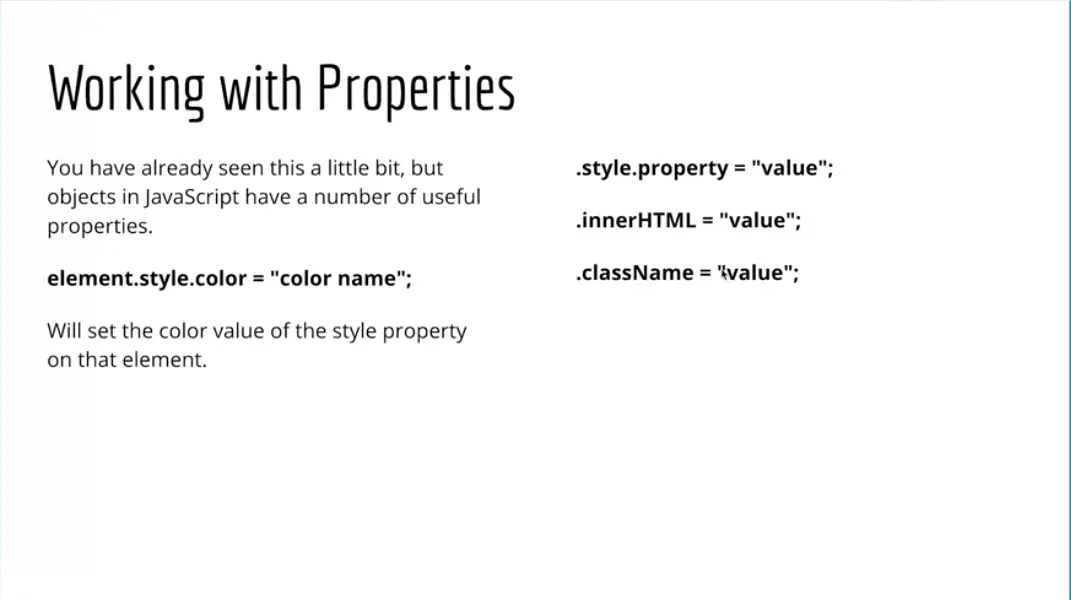
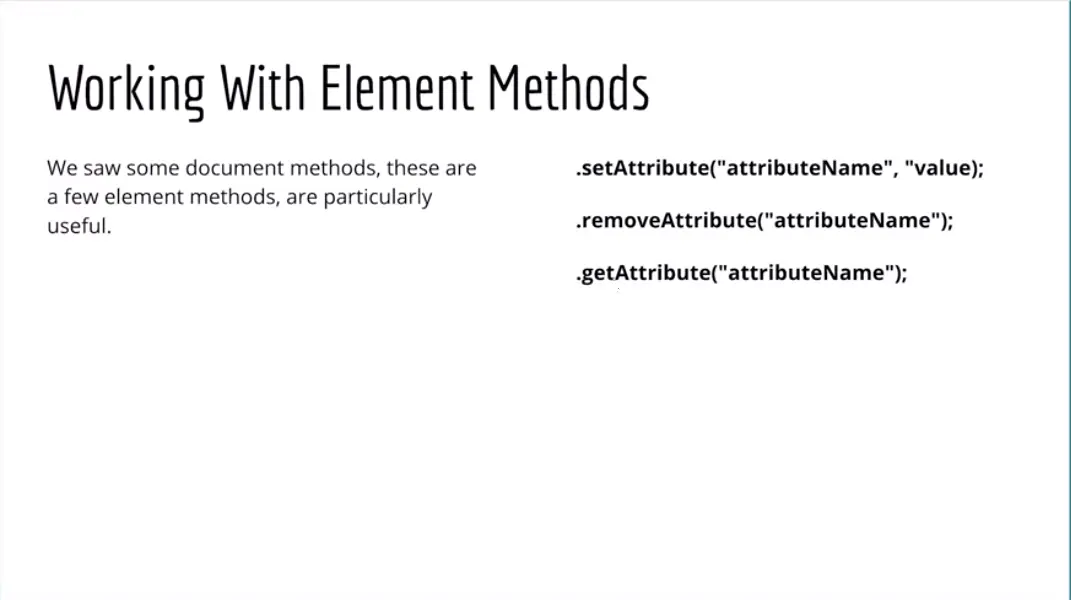
Back here we could set the className by using the className property. Here we could set the className by passing in class and then passing in a value. But we can pass in the value there or we could do something else; we could use an anchor tag, we could set the href attribute and set its value. Or we can remove an attribute or we could get an attribute and do things with it. Notice that methods are distinguished by the fact that they have parentheses.
So when you're using a method or a function, it has parentheses, whereas the properties don't have parentheses, they have an equal sign and then the value. So that's how you can tell the difference between a property and a method. Let's see what else we can do with this. This may be a little bit confusing at the moment, but I promise that as we practice this stuff, it'll start to make more sense. But it does take a little bit of getting used to, all of these methods in properties for working with our document to affect our web pages.

Next, we'll take a look at one of the element properties that we just talked about in the previous video and see how powerful it is.
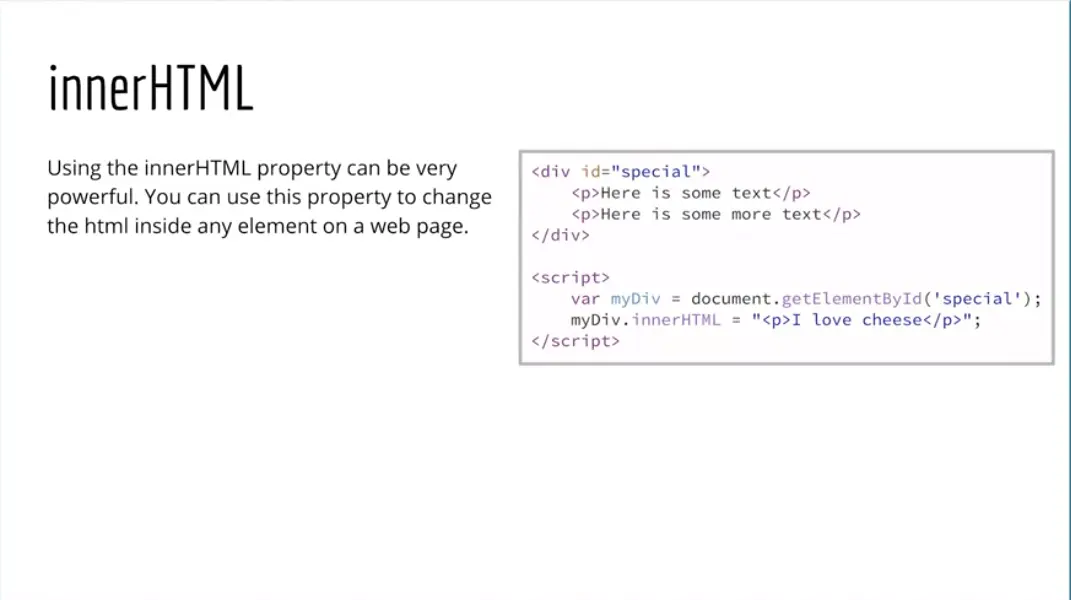
And that's innerHTML. And if you look at this image here, you can see I have a div with an id="special", and I can use any of my document methods to go in and get that div. And then I could use innerHTML to actually change the contents in that div. I can replace these contents with something else entirely, completely new, completely different. And that's something else could have HTML in it.
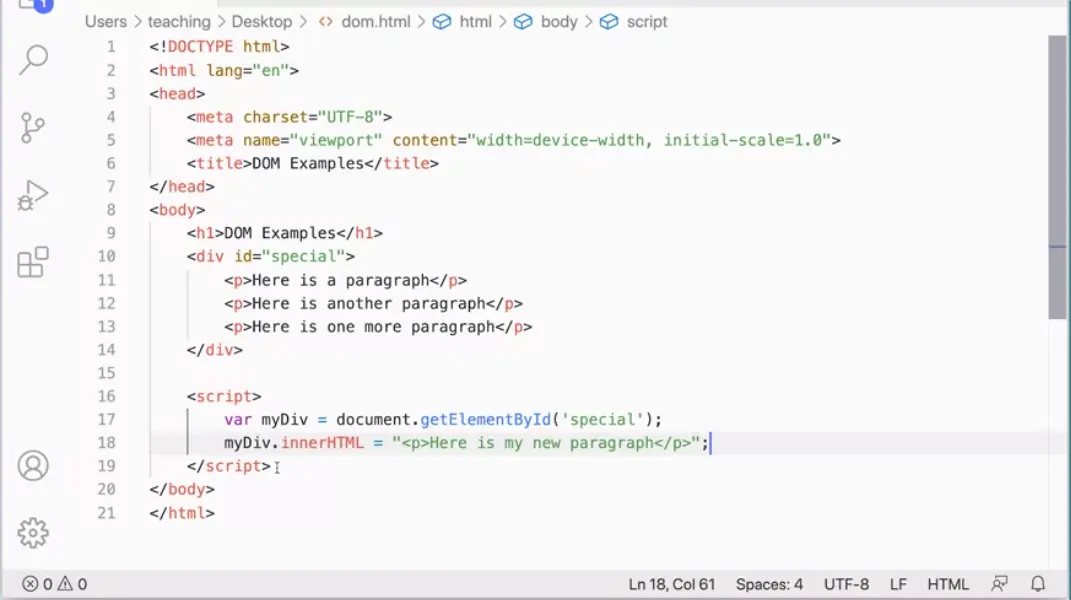
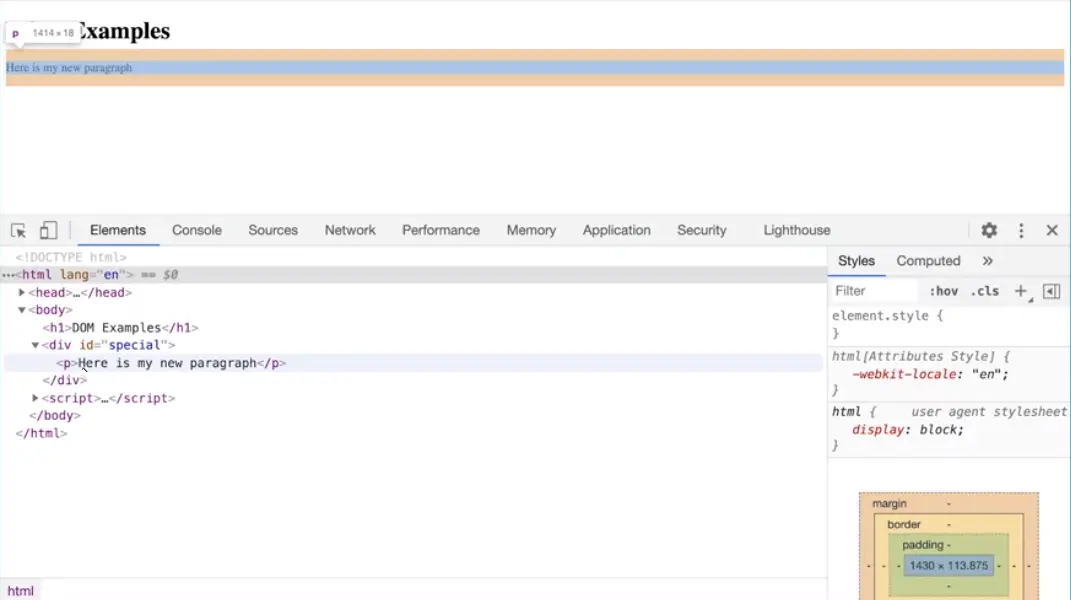
So let's see what that looks like. Over here, I have my div id="special", and I have these three paragraphs in here. But down here I could say, var myDiv = document.getElementById. With this version, we're not using the pound here. We're using the older getElementById. We can switch that in a minute just to see what that looks like. But then I can say, okay, I've got that element, myDiv.innerHTML =. This is an element property, so we use the equal sign, and then inside quotes, I can create a completely new piece of content to stick in there. That's my </p> there.
Okay, great, so now when I run this, you'll see over here, It's still red from before, but that's okay. Those paragraphs are going to get removed and replaced with the new paragraph. Look at that.
And if I come down here and look inspect in my body, and look at div id="special", there's only one paragraph in here in my inspector. Whereas if I were to do View Page Source, you'd see three paragraphs in there. Because when the page loaded, it had three paragraphs, and then the script ran and it removed those three paragraphs and put this one in instead. And that's what JavaScript is doing. Now, here, I'm using getElementById('special').
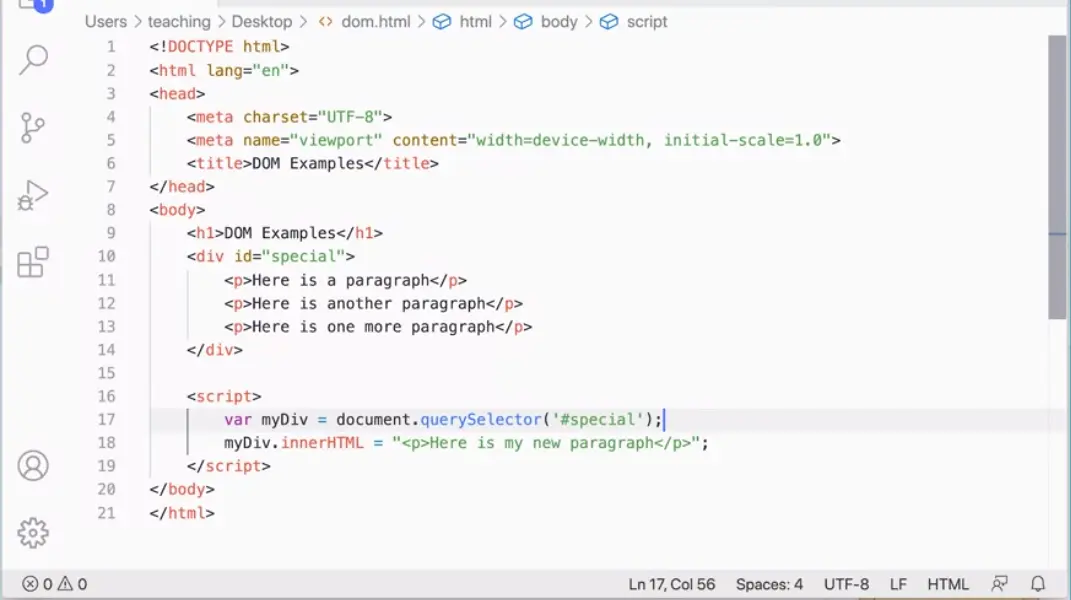
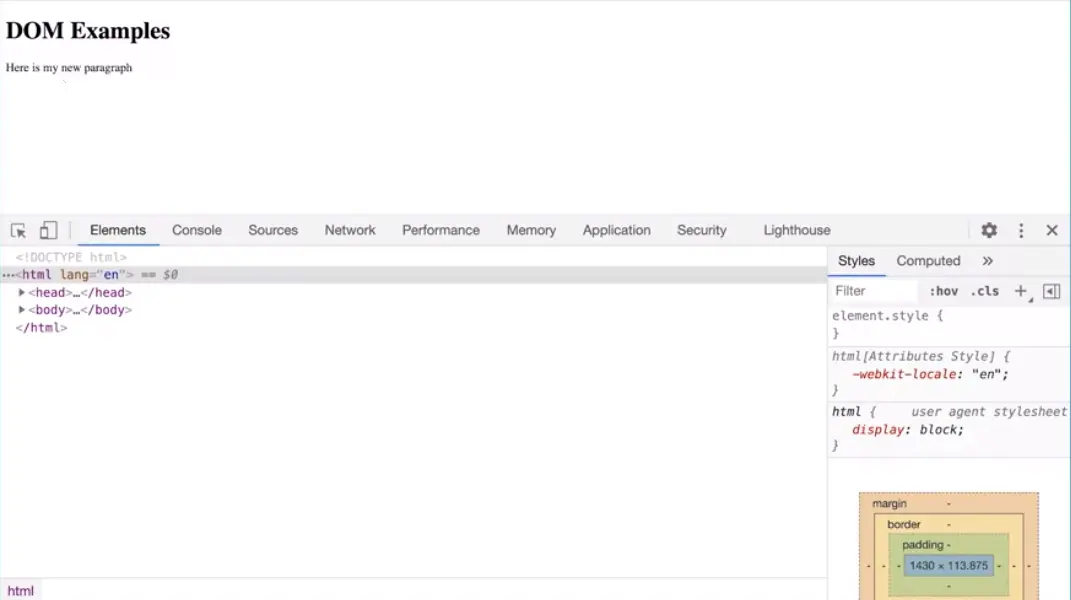
I could also do querySelector. But if I use this one, then I would pass in #special. You see the difference there? This is the newer method, and it uses the CSS syntax to get to that element. But this will work just the same. If I go back and refresh this page, you'll see it'll do exactly the same thing. It'll get my new paragraph and put it in there. So you could use whichever document method you want. Once you get that element, then you can use your element properties to affect the element here.
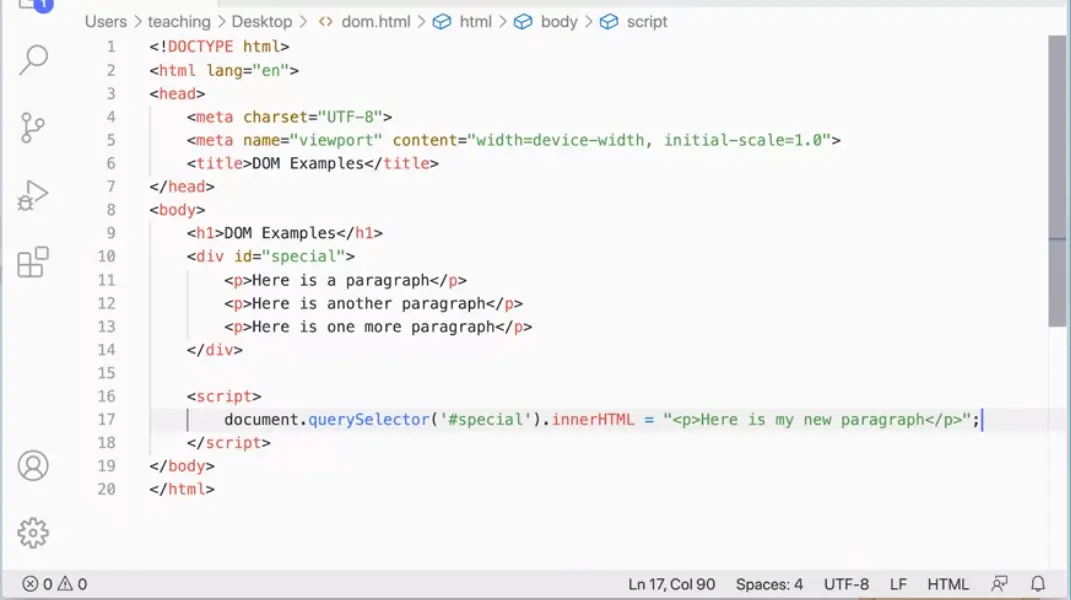
Now, I'm putting this all inside of this div here, but I don't need to use the variable. I could just do document.getElementById('special') and then put this, Here, it just makes for a very long line. So it's kind of helpful, and that'll work. It's kind of helpful to have the variable, but you don't have to have it. I can just go, document.querySelector('#special').innerHTML, and then set my property right there. And that'll work just as well. There's my new paragraph. So that's using the innerHTML. We could use this in lots and lots of places to get elements on our page and then replace those elements with completely new elements. And you can put more HTML in there. We could put an entire document of HTML inside this div. Not just one paragraph, but you could put articles, you can do all kinds of stuff, images. All kinds of things can go in there using innerHTML.

The next element property that I want to show you, which is extremely useful is the className element property.
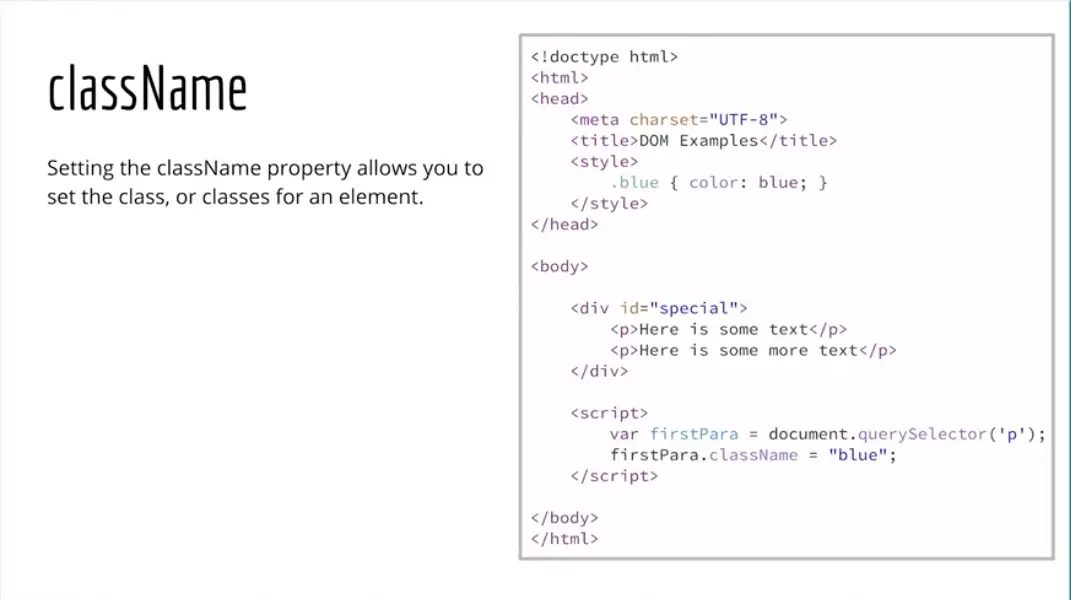
So let's take a look at how this one works. Here I have a div with some paragraphs in here, and I'm using my query selector to get the first paragraph. Because remember, instead of returning a collection, query selector returns the first one that it finds. So it's going to go in here and look for first paragraph. And then I'm going to take that first paragraph and I'm going to use the class name, element property to set the class to blue. And up here I've added style and I've added a class blue here to my document. So let's see how this works.
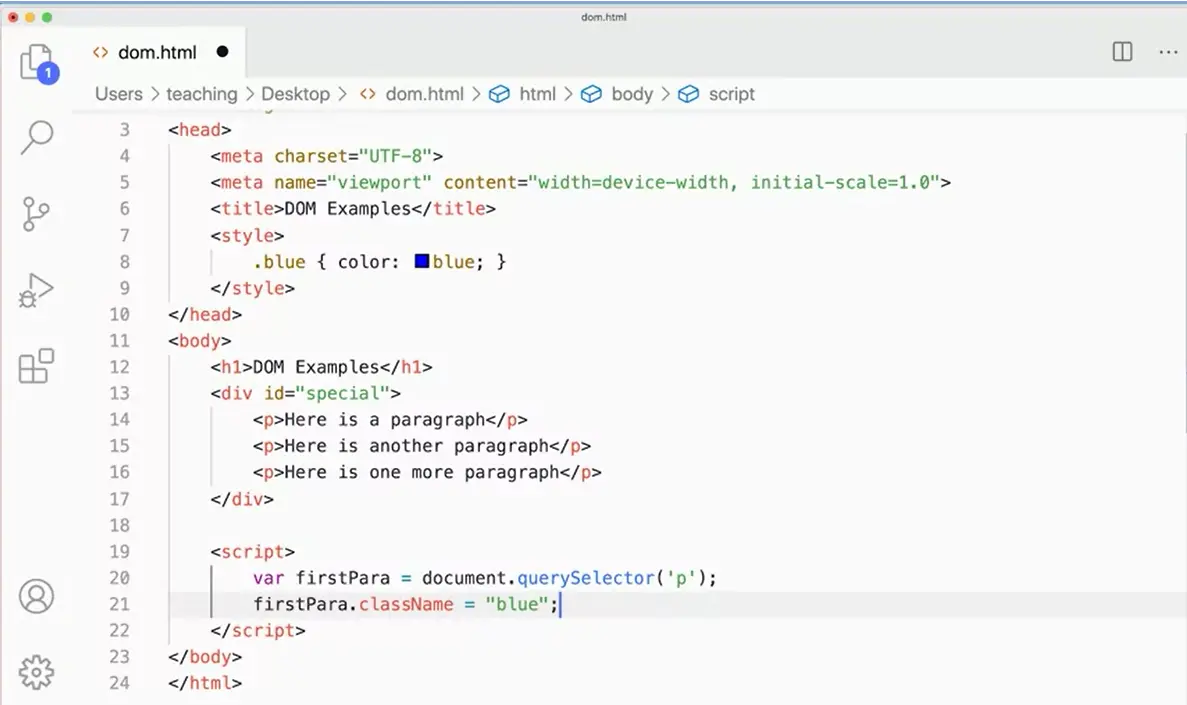
I'm going to go over to my page and you can see I've added a rule here to set for anything that has the class blue. I'm going to call this var firstPara equals document.querySelector. And remember, we have to use the CSS syntax. In this case, it's just a "p" because it's just a tag selector, but I'm going to go get that first paragraph. Now I've got three paragraphs, but remember querySelector just returns the first one. And then I'm going to say, okay, firstPara, set the className to blue.
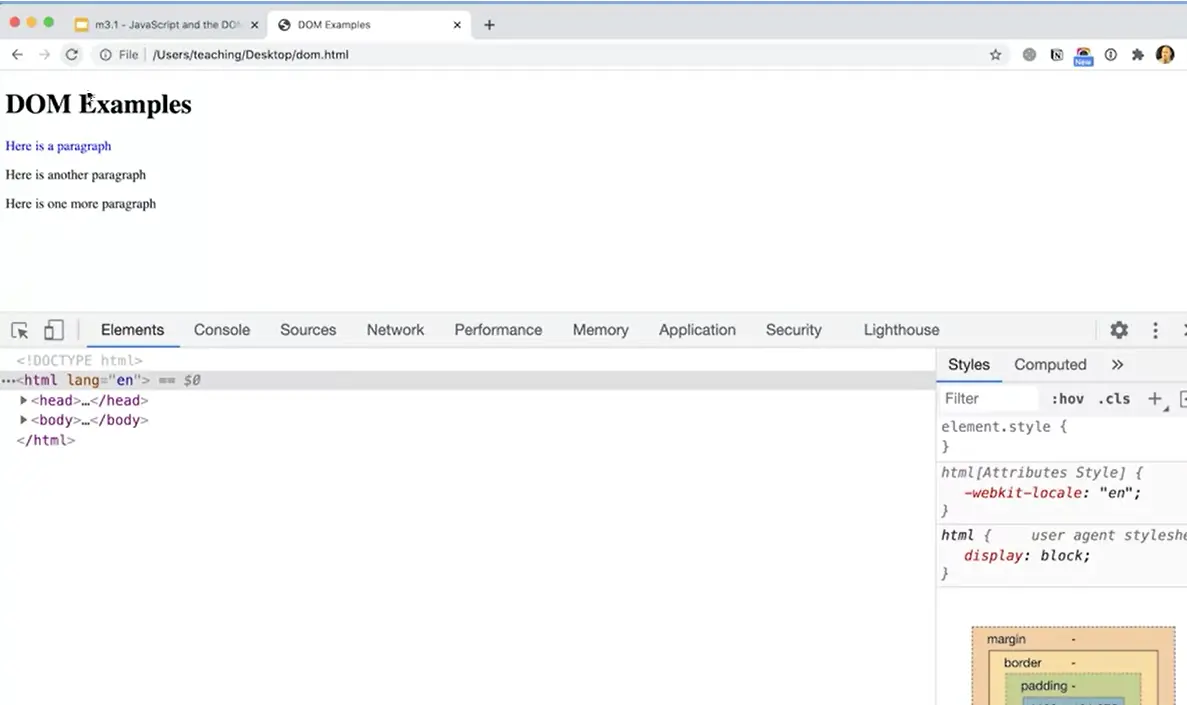
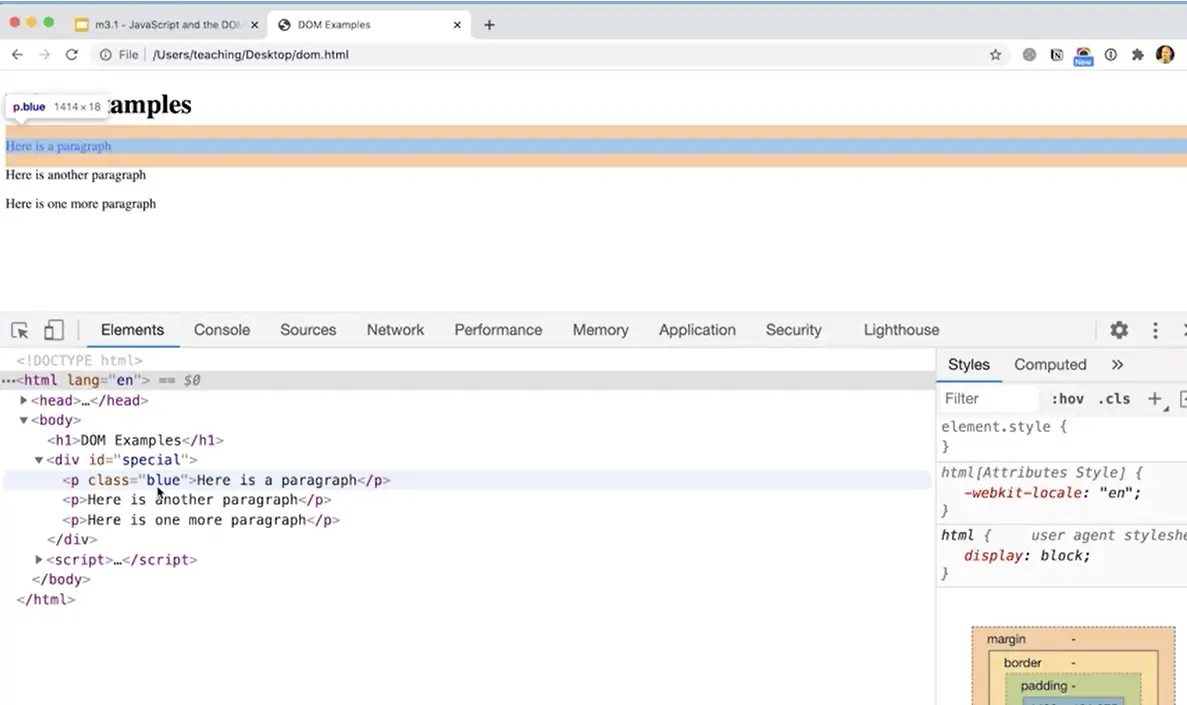
So now when I run this, come back here, click on My document here. I've got my three paragraphs, but when I refresh the page, it turns the first paragraph blue. And if I come down here and look at this, what is it actually done there, but it's added class equals blue on to that paragraph. Sure, I could have set the style color property to blue. But adding the class blue is even more powerful, because even though in both cases and just setting the color. I could have a lot more declarations in this class up here, that would do all kinds of things that could be adding an animation. I could be doing all kinds of really cool stuff, and we'll get to do some of those things in this course. So, hold on to your hat, because it's coming.
But first I just want to introduce the basic concepts to begin with. And this is a super useful one, using the class name property to set a class that already exists on the page. It's just really, really powerful. Back to our slides here, we've looked at a few of the element properties that we can set, the style property with its sub properties for our different CSS features. We can use that one, we can use the inner HTML property, that's extremely powerful for replacing HTML inside of any element. And then there is the class name property that allows us to put a class name on things.
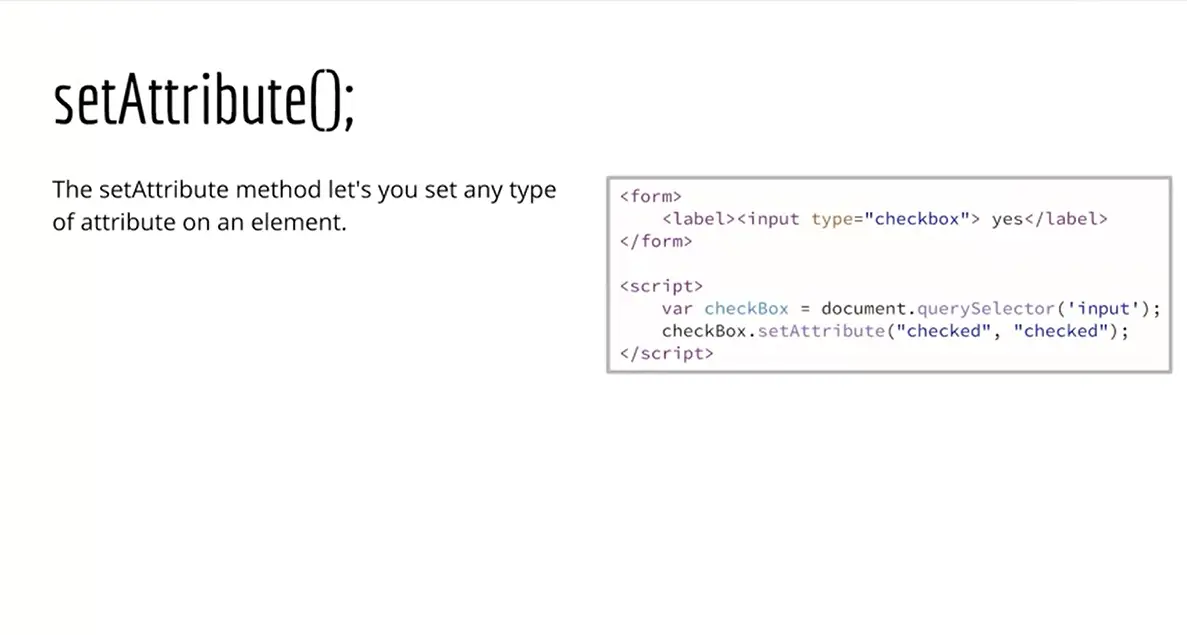
The next thing I want to look at really quickly is some of the element methods. Remember these are properties because they've got the equal sign and then a value, but we also have element methods. And the first one we'll look at is setAttribute.
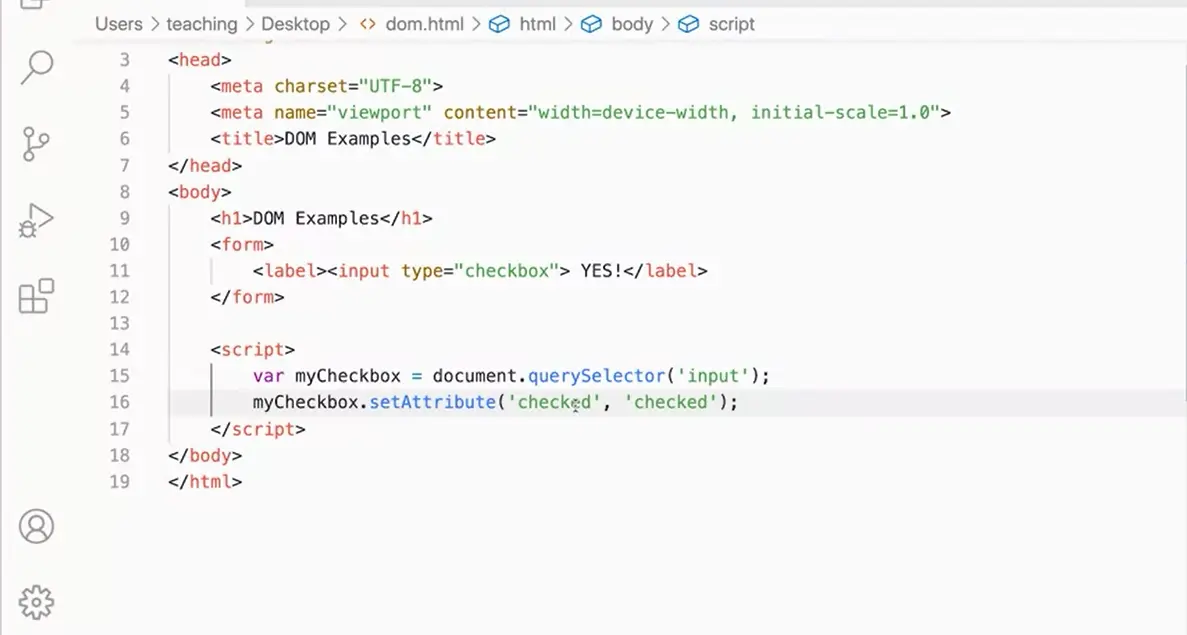
So here I have a form and let's just do this one really quickly here. I have a form and I'm going to say var myCheckbox equals document.get element or I can do a querySelector. QuerySelector input. And then I'll get my first input fields here. And then I could do okay, myCheckbox.setAttribute, and set attribute takes two parameters. I'm going to say what is the attribute that I want to set? In this case it's checked, and I'm going to set the value which is also checked. Checked, checked, and that's the way. What that will do is it'll come in here and it's going to set a checked attribute and set it to checked, which will make the check box checked by default.
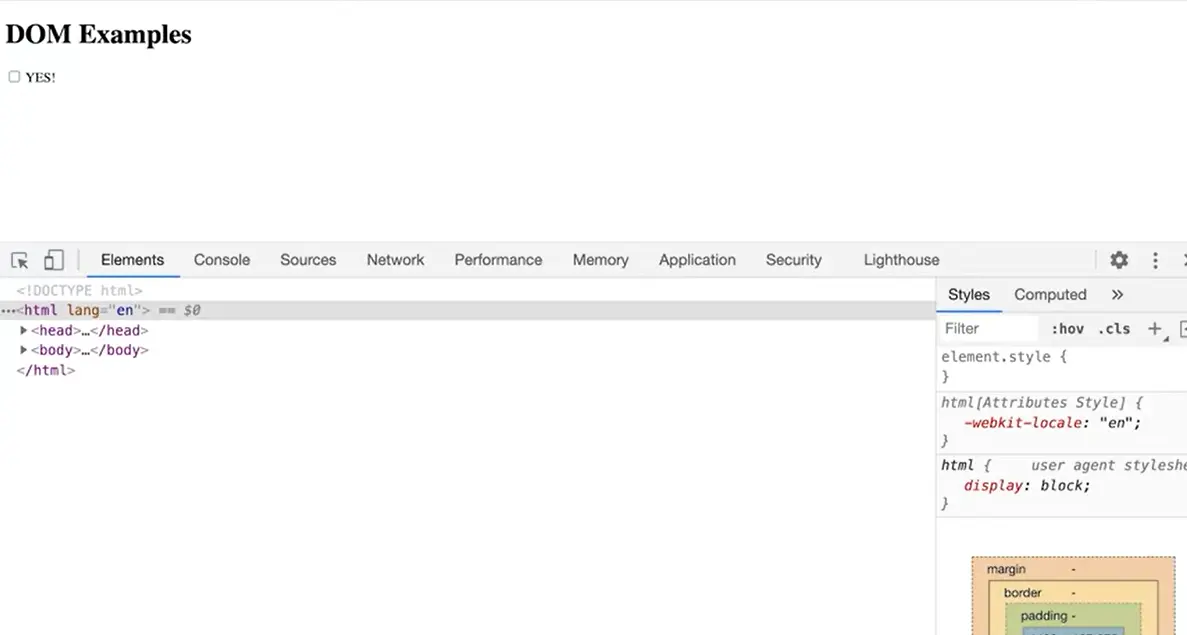
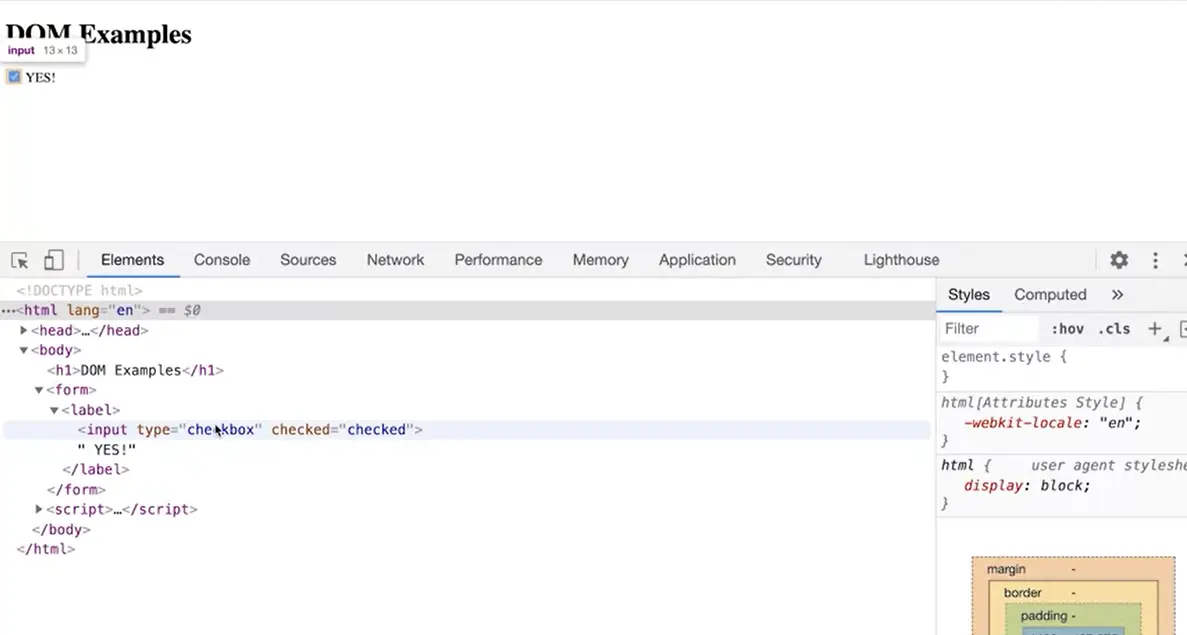
So if we go over and view the page, currently, without having set that checkbox, you can see I've got a checkbox here but it's not checked. When I refresh the page, it comes up as checked by default. And if I come down here and look at this, You can see checked equals check that added that attribute into my HTML here.
Set attribute can be used for any number of attributes. You want to set an image source on an element. You could use this you want to change the HREF on a link. You could use this any attribute can be accessed with set attribute. And you could set it to whatever value you want to set it to. And that is another very powerful tool that allows us to change content on our webpages.

I have shown you a few of the document methods, the element methods and the element properties in this lesson and there are lots more.
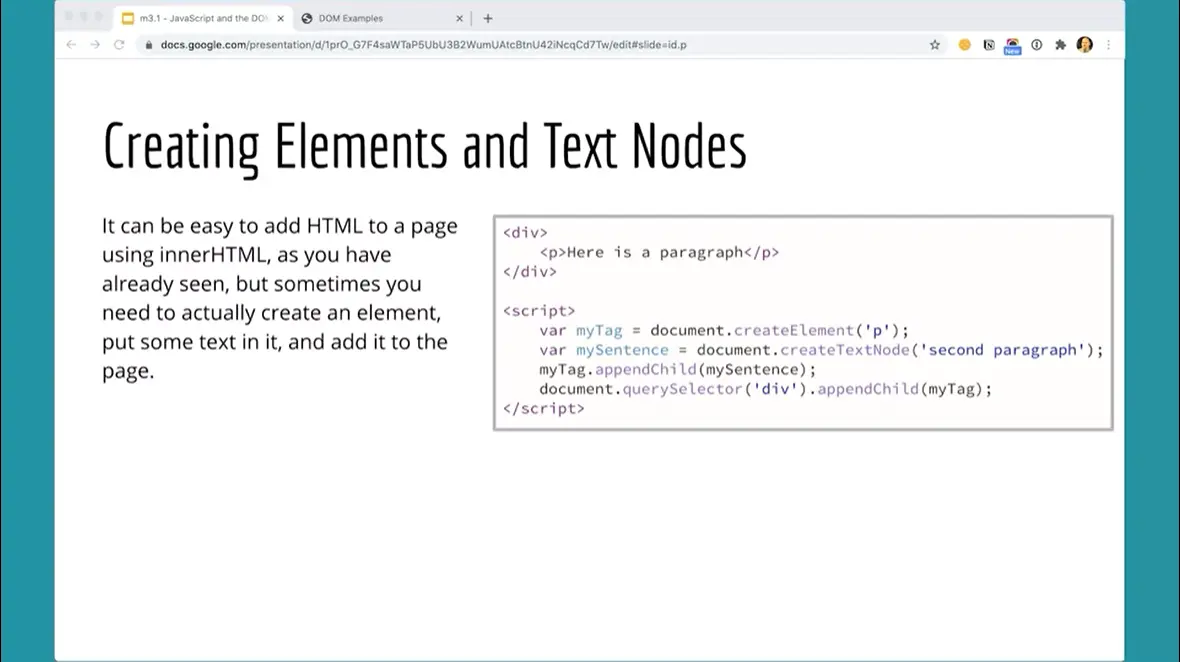
There are many more that you can use to do all kinds of interesting things to your pages. But I think it's helpful to see just a few to begin with, to see how those work and to experiment with those in a limited way and then add more features and methods and all that stuff as you go along.
I do want to show you just a few more in this lesson just because I think it's helpful to see that there are different ways of doing things in JavaScript. This one I want to show you is a way of creating elements and text nodes in JavaScript and then adding them to the page. It's an interesting process. Again, we've used innnerHTML and we can use that to also change content on the page, but this is just a different way of doing it.
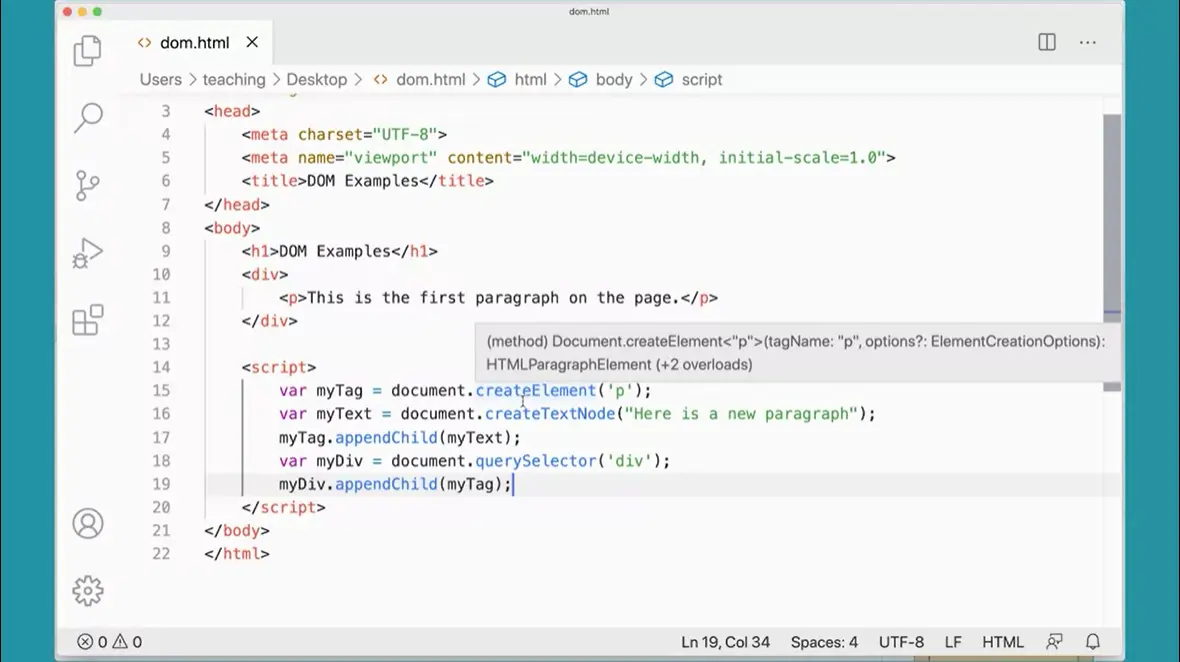
Here I'm going to make a variable var myTag and I'm going to say document.createElement. What am I going to create? I'm going to create a paragraph. This makes a new paragraph and puts it into myTag. Create element is a document property that makes a new element. Then I'm going to make a new text node, var myText equals document.createTextNode, here's a new paragraph. I'm going to make the text node. JavaScript creates a text node, we create the paragraph, we create the text node and then we're going to say myTag.appendChild(myText). That takes the paragraph that we just created, the text node, this text and sticks it into the paragraph tag that we created.
All of this is happening in memory in JavaScript. Then we have to actually put it on the page. I'm going to get my div here, var myDiv equals document.querySelector div. That's going to go find the first div on the page. Then I can say myDiv.appendChild(myTag). We're doing a multi-step process here, where we're creating a paragraph, we're creating some text, putting the text in the paragraph and then going and getting our div and appending it to the end of the paragraph here.
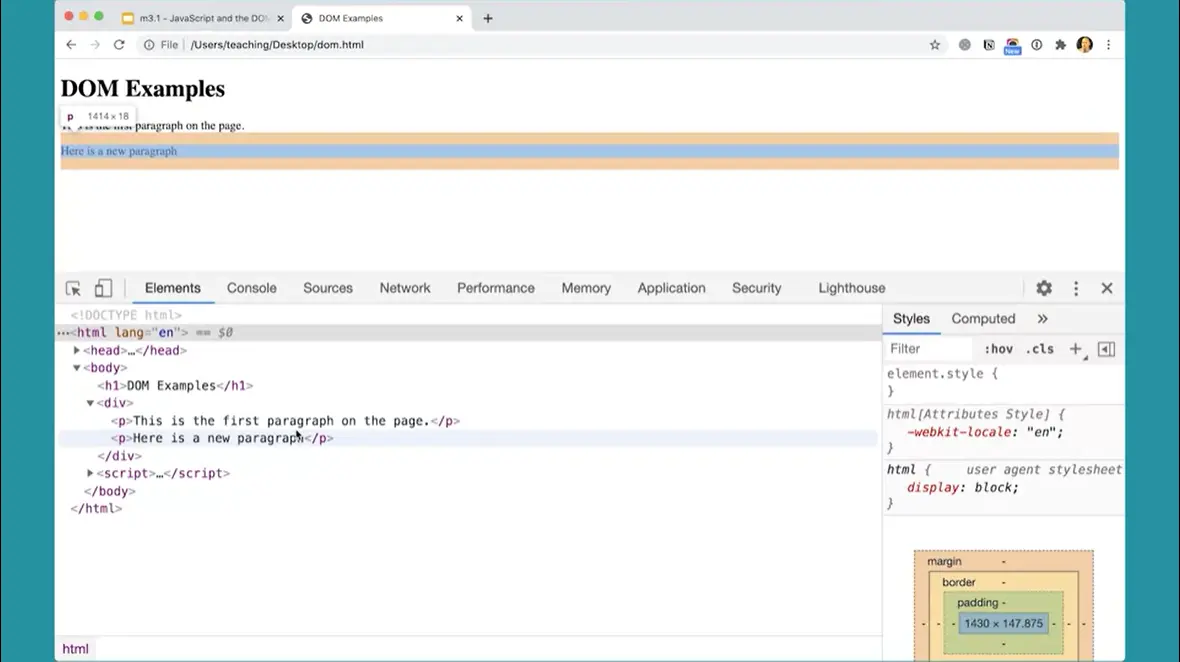
Let's see if I did this right. If I come back and do this over here and refresh, you can see that my first paragraph is here and a new paragraph has been appended inside the div. It's been added to the div here and JavaScript is doing that through this process.
Could I have just used innerHTML and added and changed the contents of this div so that it had these two paragraphs? Sure, I could have done it that way. But sometimes it's useful, this seems like a convoluted, complicated way, but sometimes it's useful to actually create the elements using the document method, create element, to create content, to stick in those elements, and then to append them to the page in particular places. Sometimes it's useful, and sometimes a better way to go than using innerHTML in certain circumstances.

One last method that I want to show you in this lesson is how to remove an element from another element.
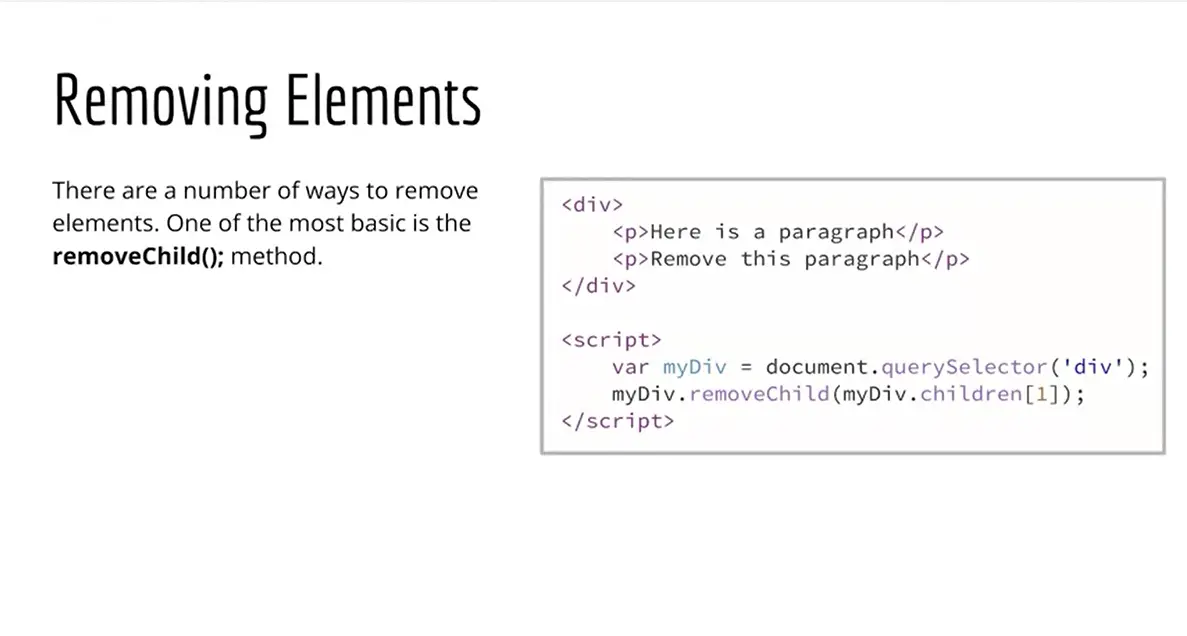
Again, we could use innerHTML and just replace all the contents all at once, but sometimes removing elements is useful. Let's take a look at this example really quickly.
![Define myDiv = document.querySelector('div'); & removeChild(myDiv.children[1]); Define myDiv = document.querySelector('div'); & removeChild(myDiv.children[1]);](./images/webp/image364.webp)
Here I have a div with two paragraphs in it, and I'm going to go ahead and get that div and put it into a variable, var myDiv, and assign a document.querySelector('div'). So that'll go get the first div on the page, which there's only one, so that's nice and easy. Then I could do myDiv.removeChild, that method. Which child am I going to remove? Well, I'm going to say myDiv.children[1]. What that's going to do is it's going to go into myDiv, look at its children, and find child number 1. Remember, this is child number 0 here. That's zero, this is one. That will actually go and remove this second paragraph from this div. Put a semicolon there, save that, and then let's go over to our browser here.
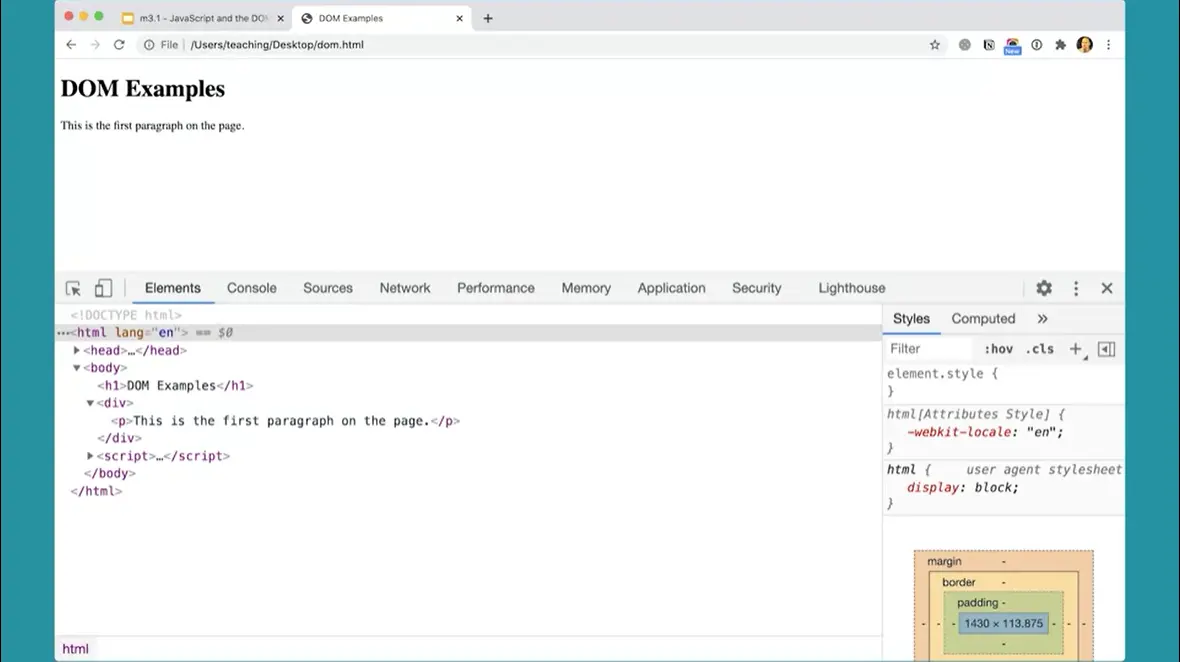
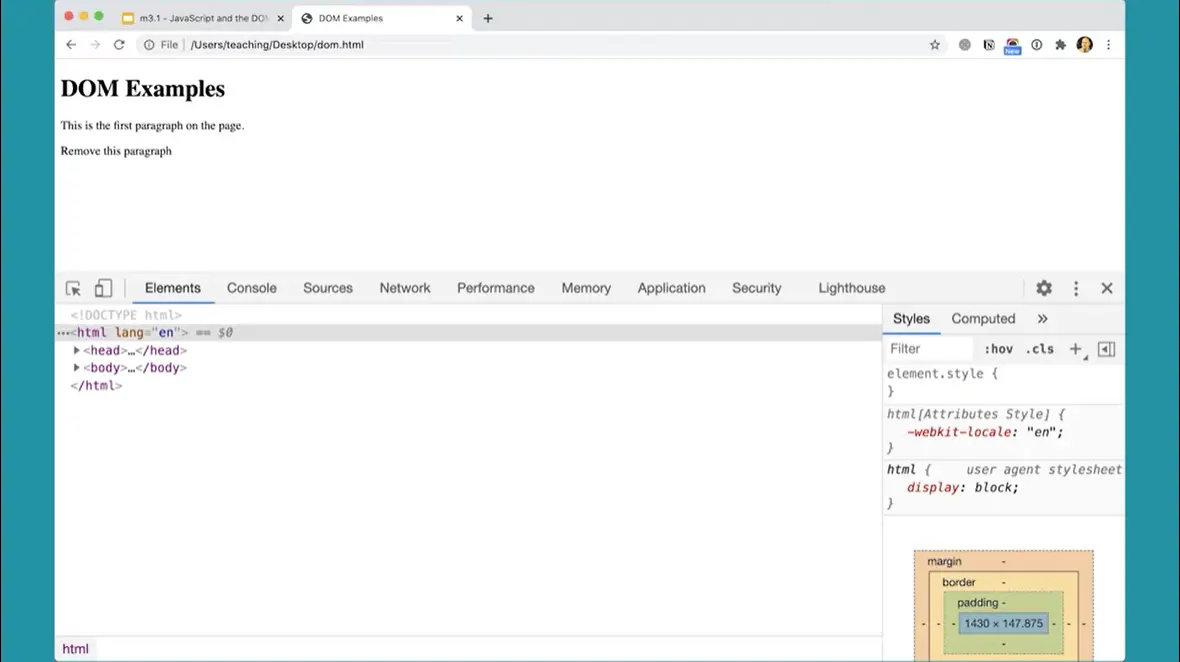
You could see I've got the two paragraphs there, when I refresh the page, that second one is gone. Down here you'll see it's not in here anymore. It's been taken out. JavaScript removed it. Removing elements using the remove child method is a really useful tool for removing elements from the page, if you need to do that.
Here we've seen a lot of different methods that we can use on our webpages to do all kinds of things. We've talked about some of the document methods, some of the element methods, and some of the element properties that we can use to go in and affect content on our page.
Remember, JavaScript sees the page as this tree of objects, starting with the window, and building down from there. We can traverse that document and find elements on there, and then affect them using these different methods and properties, and that's how we're going to create all kinds of interactive elements in our webpages.
Capturing Events with JavaScript.
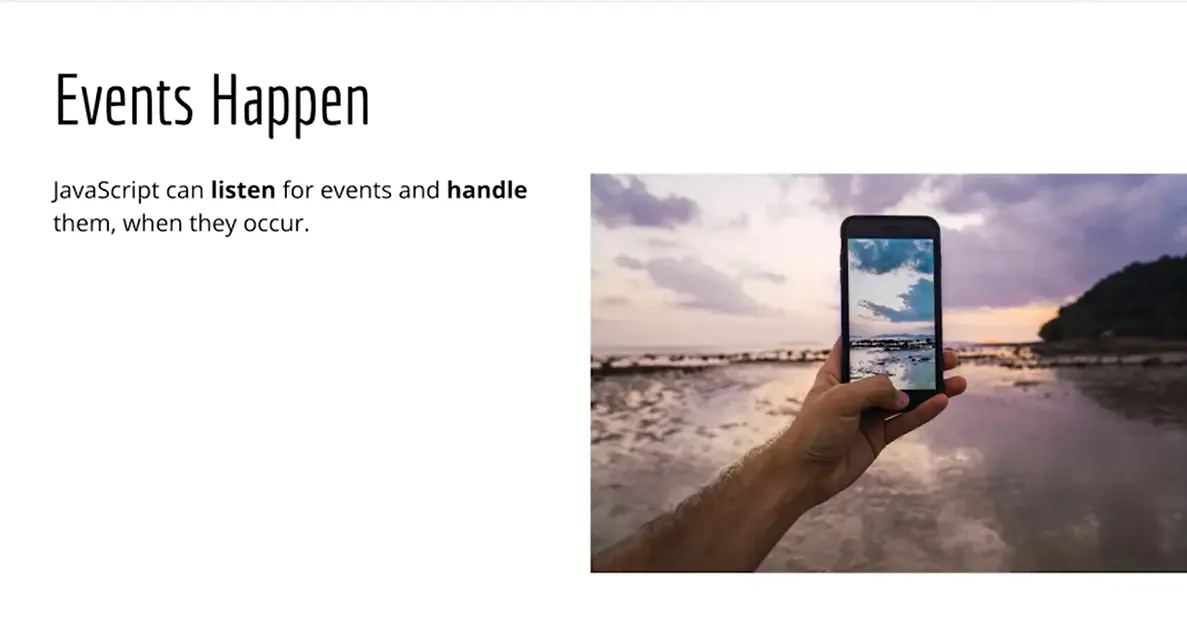
Events happen. Users will click on something, they'll scroll the page, they'll submit a form. Events happen on webpages. And when events happen, JavaScript can capture them and then they can do something with those events. When we combine this with manipulating the document, like we saw in the previous lesson, this is where a lot of the power of JavaScript really happens.
Once we've talked about how to capture events and handle them, you have all of the basic pieces of the puzzle to make interactive webpages. Because we can use our logic float structures, sequence, selection, loop, along with our document methods and our element methods and properties to change elements on the page when events happen. And that's how we can get interactive webpages.
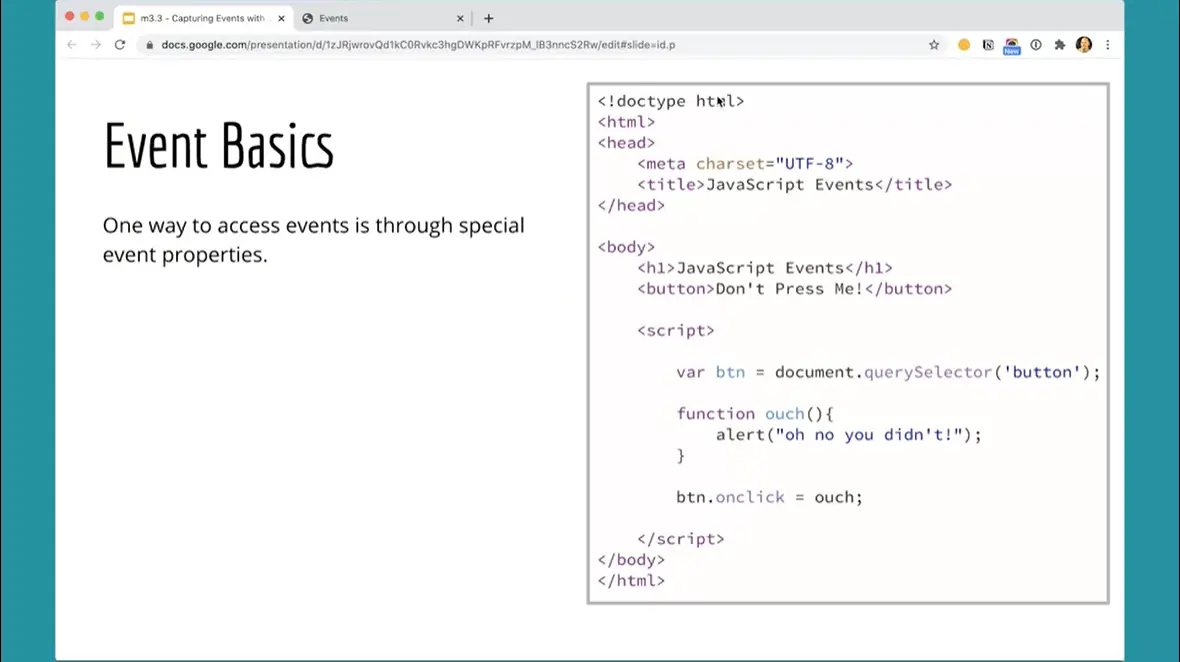
Let's take a look at this very basic example. Here I have a webpage with a button on it. And when you click the button, it's going to pop up an alert saying that you clicked the button, something that shows that you actually clicked the button.
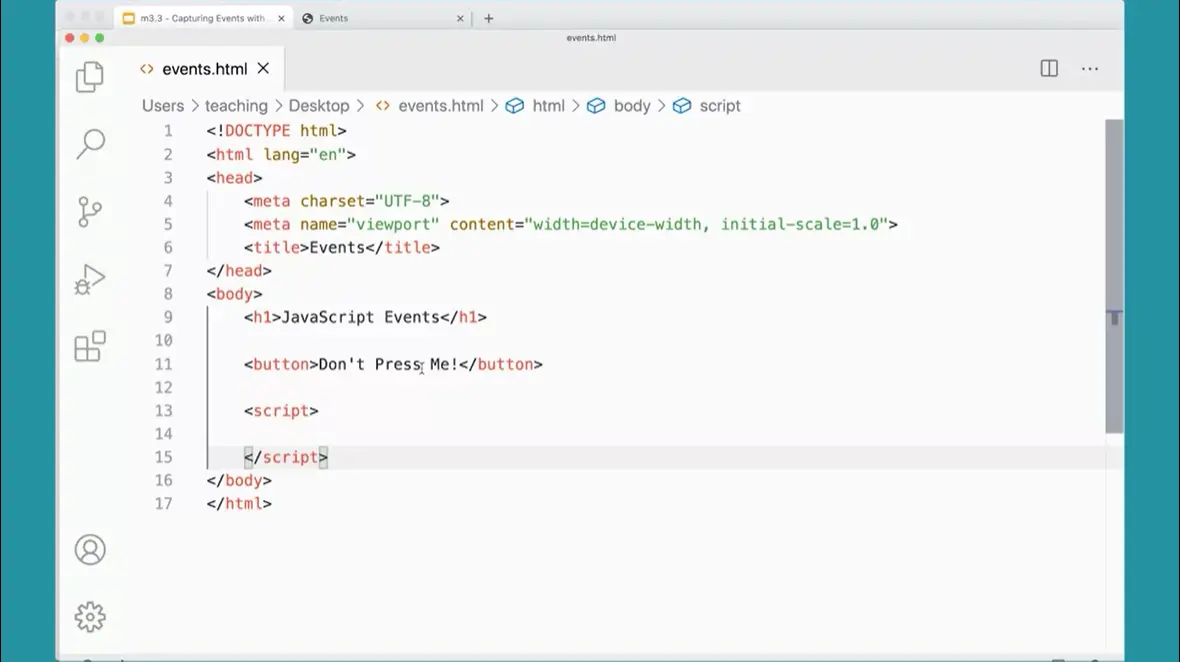
Here I have a webpage, I have a button on the webpage, it says Don't Press Me! And I'm going to grab that button using my document element methods.
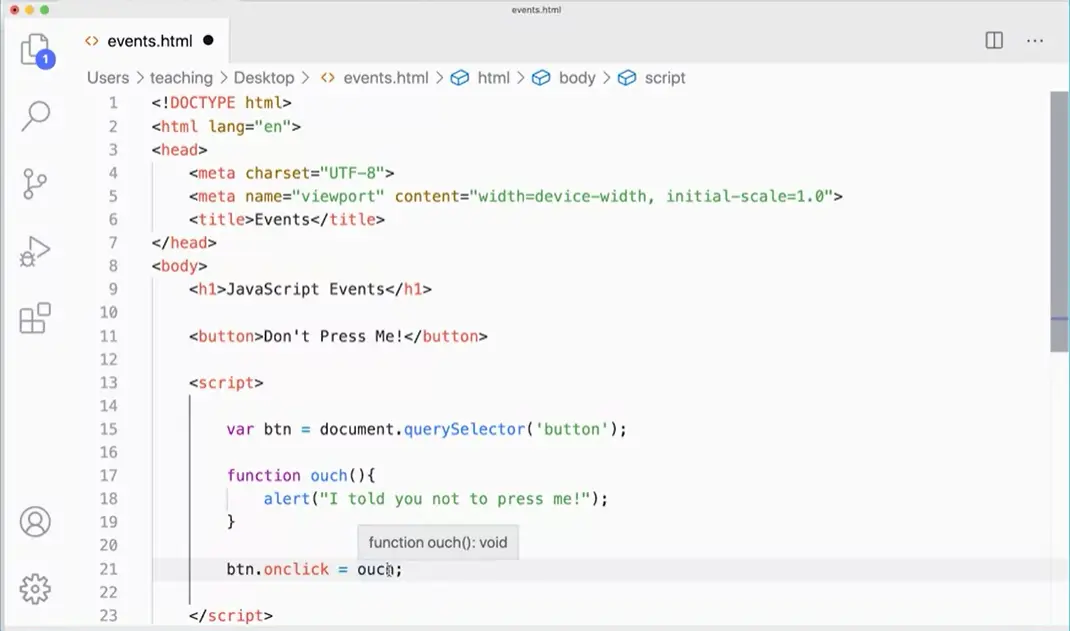
So I'm going to make a variable var btn, and I'm going to assign it document.querySelector, Button. And that'll get that button. There's only one button on the page, so it's easy to get that one button. And it's going to assign it to button, to btn there.
And then I'm going to make a function. Remember, we talked about functions. I'm going to make a function called ouch, And all that function's going to do is do an alert, I told you not to press me. You can put whatever you want in there, that's fine. And then I'm going to say, okay, btn.onclick run this function ouch. That's going to run the function using the onclick button. And we're using a special property that will capture the click event.
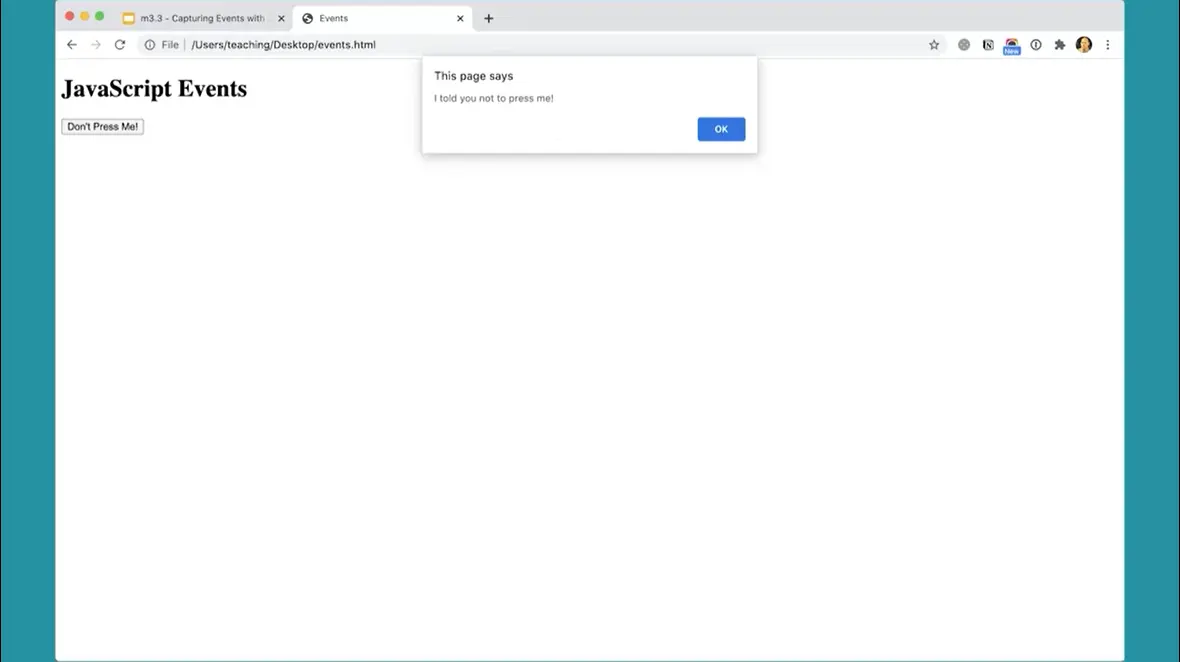
If I come over here and refresh the page, if I click Don't Press Me, I get an alert that says I told you not to press me. I'm capturing that event of the clicking of the button. And the way I'm capturing that event is with the onclick property. One thing to notice is that I define this function, and when I assign the function to that property, notice I didn't put the parentheses at the end here; btn.onclick = ouch; If I did, btn.onclick = ouch(); then that function would run right away, it would run immediately. It's not going to wait for me to click. Instead, it's going to run right away.
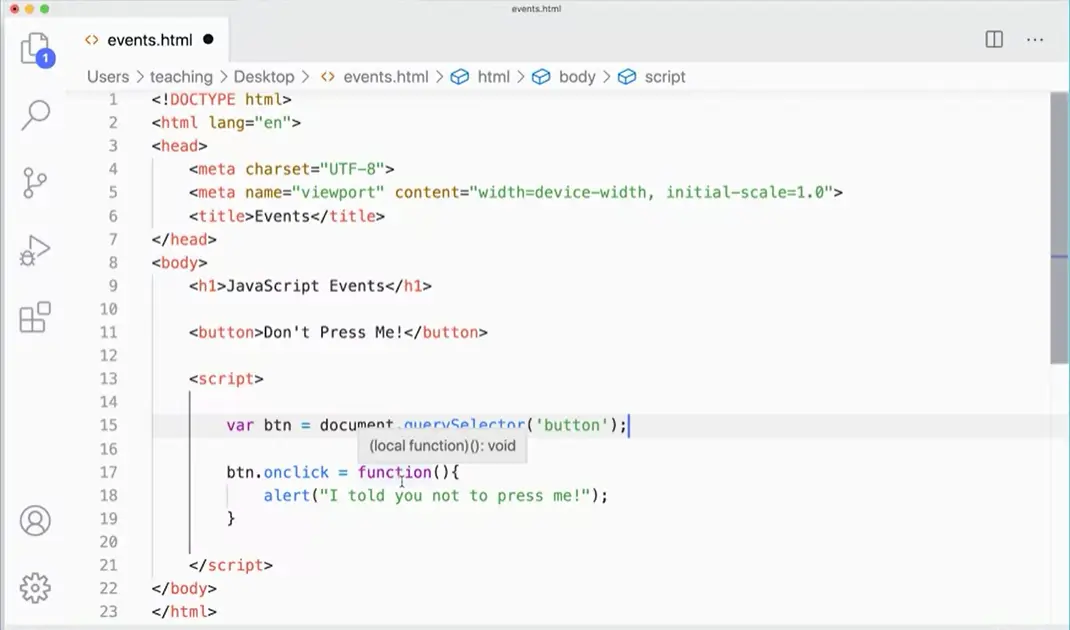
Now, you don't have to define a function here. We can actually just use an anonymous function here. I could say function, parentheses, curly braces, and just stick the alert in here, And get rid of this altogether. And frequently, when you're using something like this, you're only going to run this on this particular button in this circumstance. There's no good reason to create a named function if you're only going to run this in this one case here. I can use the anonymous function to do that.

The onclick event property is useful, but a more frequent method that you'll see of capturing event is using the addEventListener method.
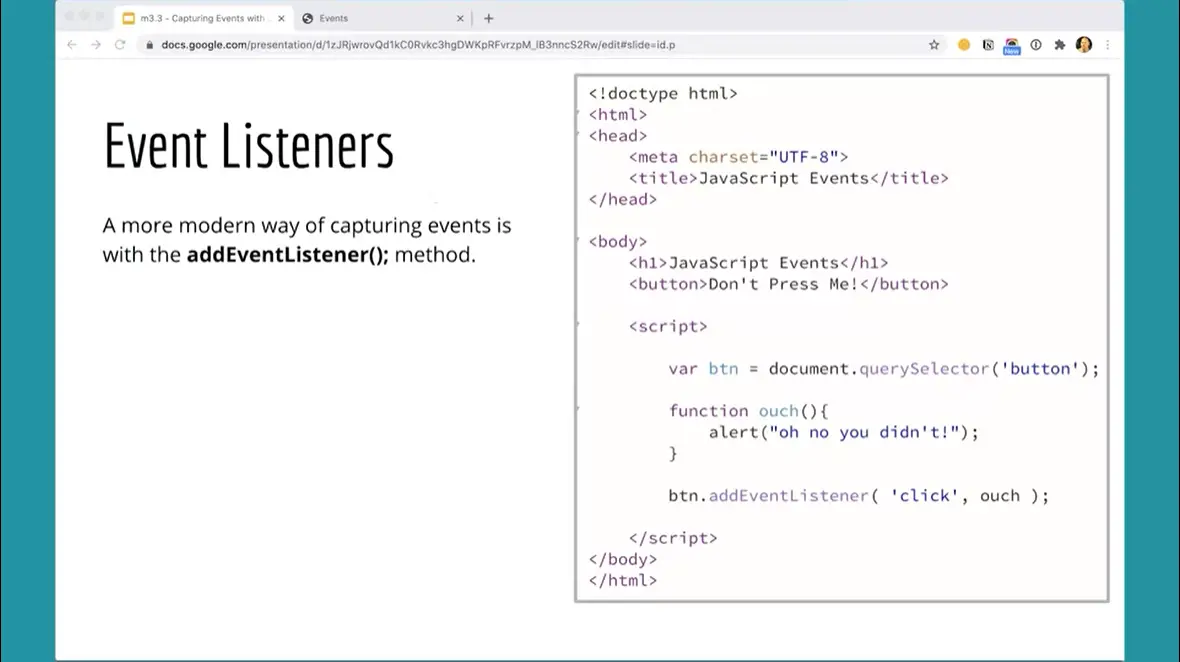
This is a great way of capturing events because you can capture all kinds of events with addEventListener method. You can even tell it what type of event you want it to capture. And what's really great about it is you can actually put multiple event listeners on one element whereas with the event property, you can only put one. You can only be listening for one thing at a time. Here, I'm going to go back to our version with the function ouch. In the alert in there, and then we'll use the addEventListener instead.
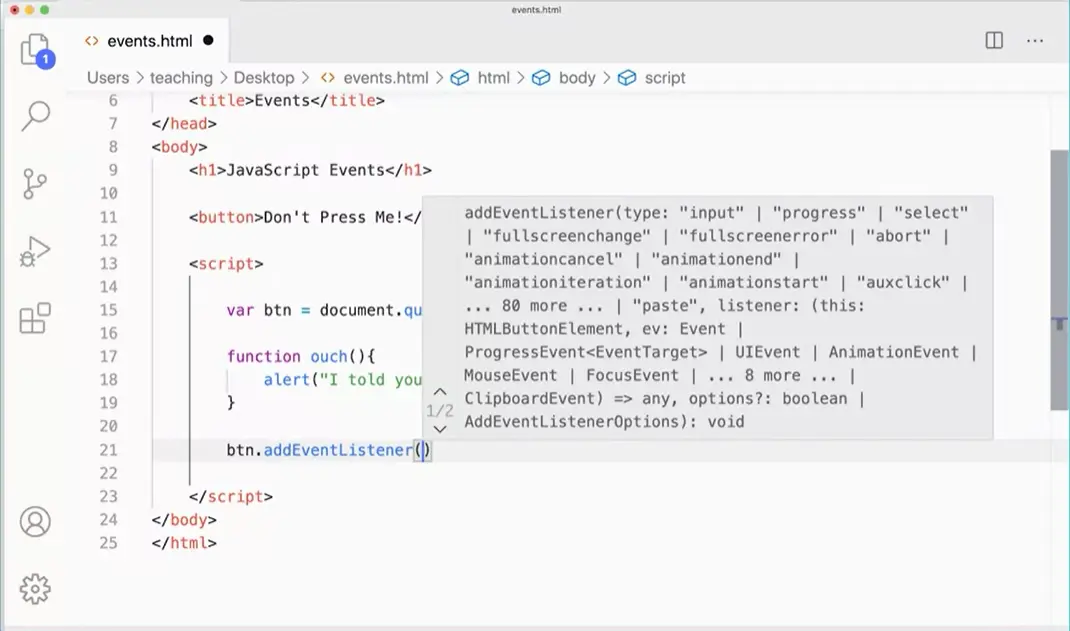
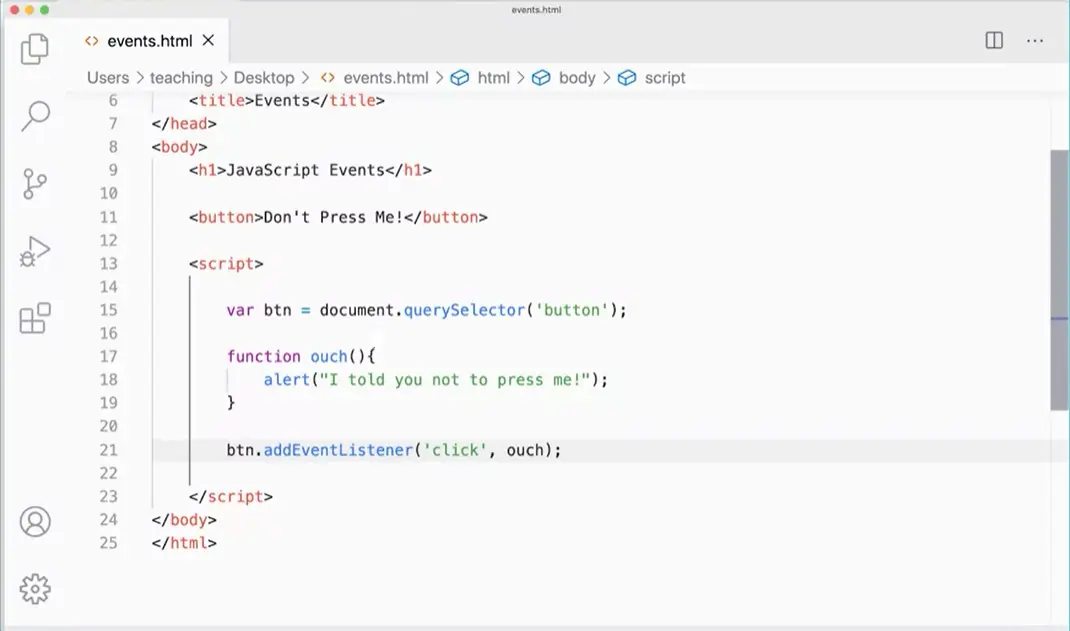
Let's give that a try really quickly over here. Instead of using the onclick event for button btn property, I'm going to use the addEventListener, method. And notice the difference between the two. The onclick property is a property because it's onclick and then an equal sign in what you're assigning to it. With addEventListener, it's a method because it's got parentheses, we're going to pass in a click. That's the event we're really listening for. And then we're going to pass in the function that we're going to run. When that event happens. And this is a very much more modern way of doing things is using the addEventListener method here.
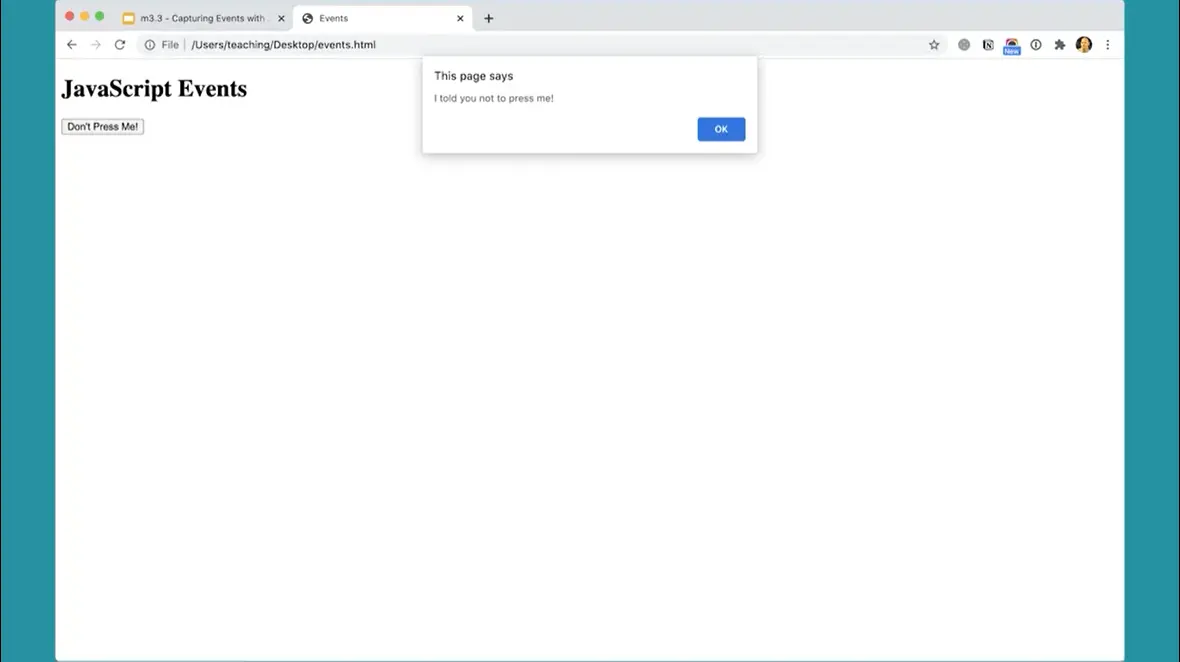
Let's see if that works. And sure enough, it works just the same as before.
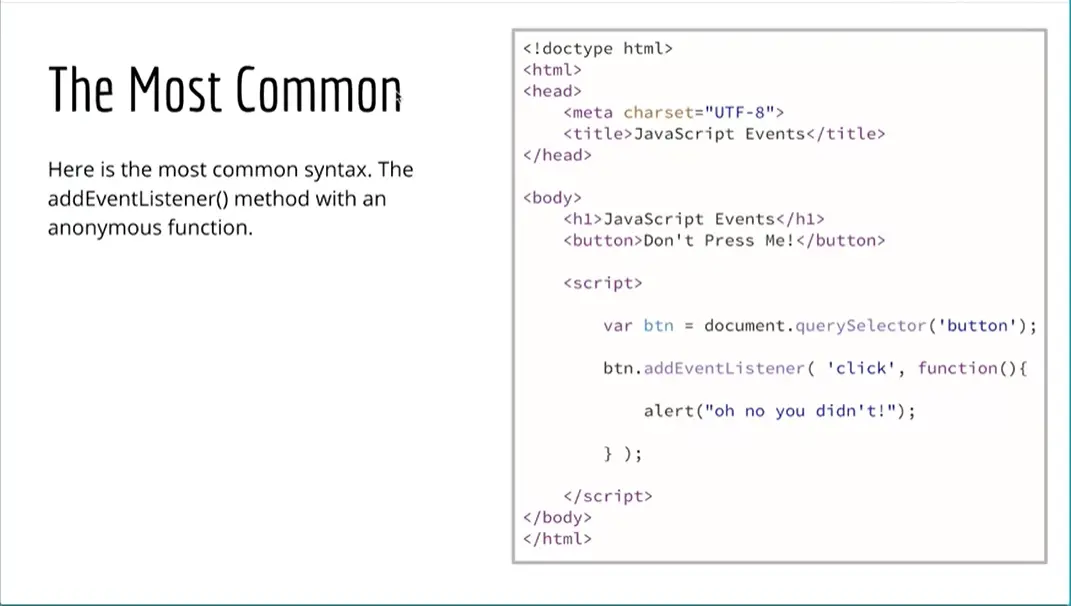
The most common syntax is to use the addEventListener with an anonymous function. It combines the two that we looked at before. Let's take a look at that instead.
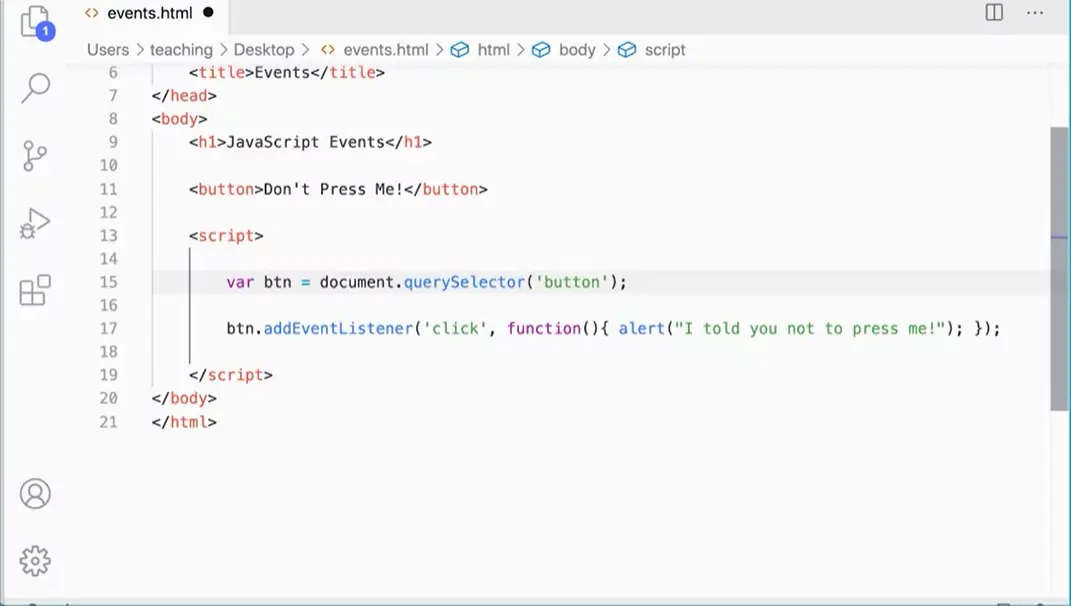
Down here, instead of running the function here, ouch. We're going to put in an anonymous function, with its parentheses and curly braces. And this function is going to run, when the click happens. And in here inside the curly braces is what it's going to do. We're going to put in the alert. You can see that we're running, this function starts here and ends over there.
We're going to run that as an anonymous function. Again, we use an anonymous function because unless you're going to be running this alert on lots of buttons, in which case then it does make sense to pull it out and turn it into a separate function. But unless you're going to do that, you're probably only going to use it within the context of this particular button. And in that case, an anonymous function is more appropriate.
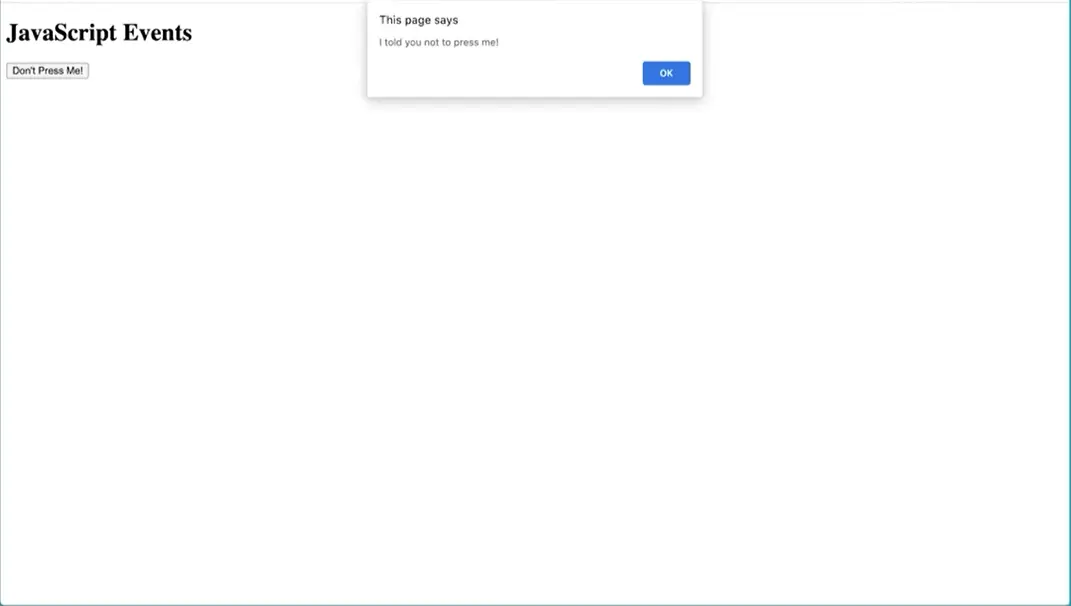
I'm going to come back and let's just test it one more time refresh the page. Don't press me and I get my alert.
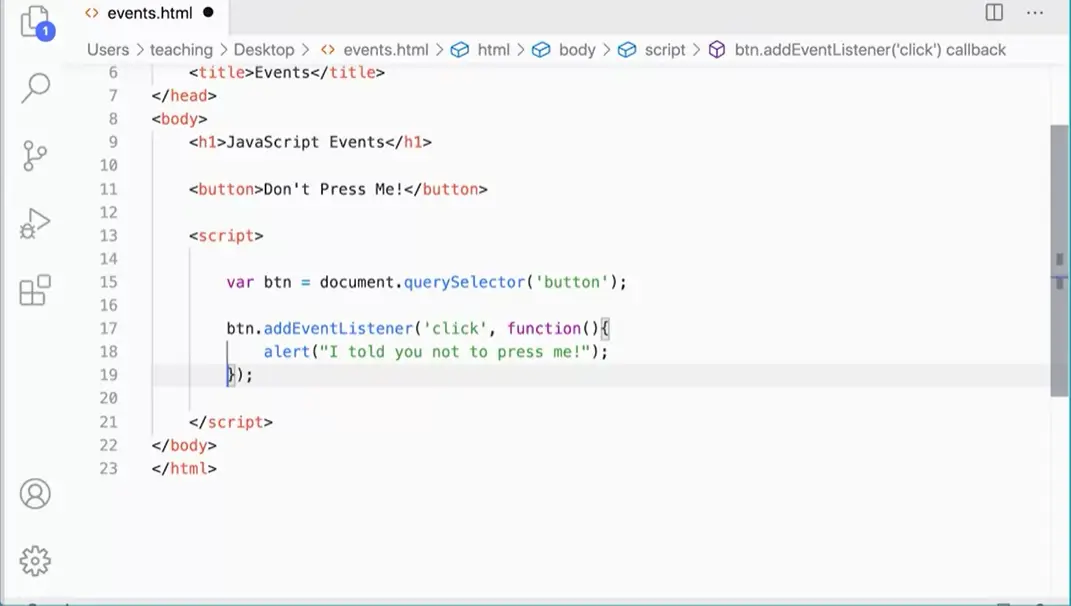
Now, this syntax this line is getting kind of long here. Usually you would break it after the curly brace, and then this curly brace can come down here. Notice when I type this. One last thing I want to show you before we go, I'm going to do it again. Notice when I type it, I type it from the outside in. I typed my function with the parentheses in the curly braces, and then I come in here and I add my alert, or whatever I want to have happen inside this function. Because with doing this, you're going to end up with a bunch of extra, punctuation and it's really easy to get confused. And if you lose a curly brace or parentheses, or semi colon or something else, it's really hard to those. Those problems are some of the harder ones to track down and you'll have fewer problems you'll be less frustrated.
If you do it this way, where you always type from the outside in so when I add a function, I type its parentheses and curly braces, and then go inside and put in what I want to put in here, okay? So that will really help you with making sure that your syntax is clean.
The next thing to look at is the event object.
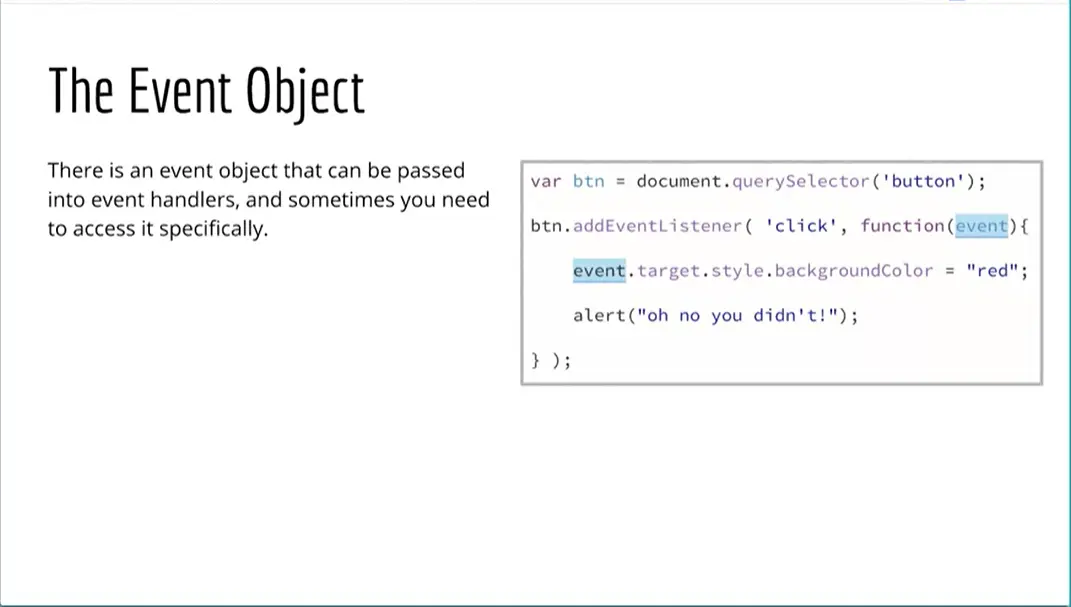
The event object can be passed into the function that runs when an event listener happens, and it's a very useful object to have access to. Let's take a look and see what it does.
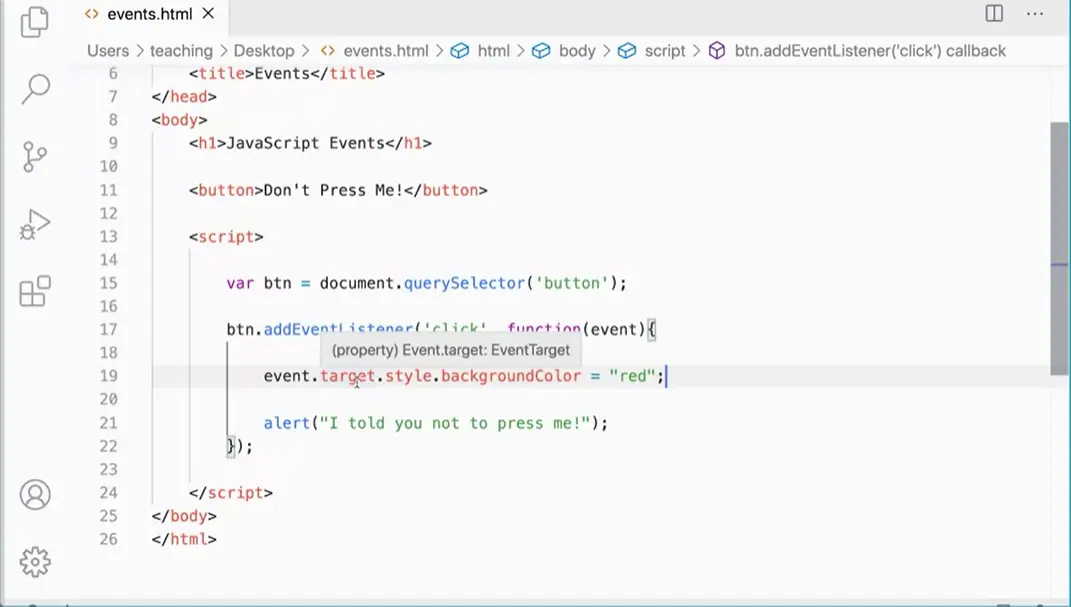
Over here, I'm in my event listener here, and I have this function here, and I could still do my alert here. I told you not to press me or wherever I want to put in there. But we can pass in the event object. Sometimes it comes in looking like this. This is just a variable that represents this event object, and I can pass that in and I can do event.target. The event.target will say what is the thing that triggered this event? Event.target.style.backgroundcolor equals red, something like that.
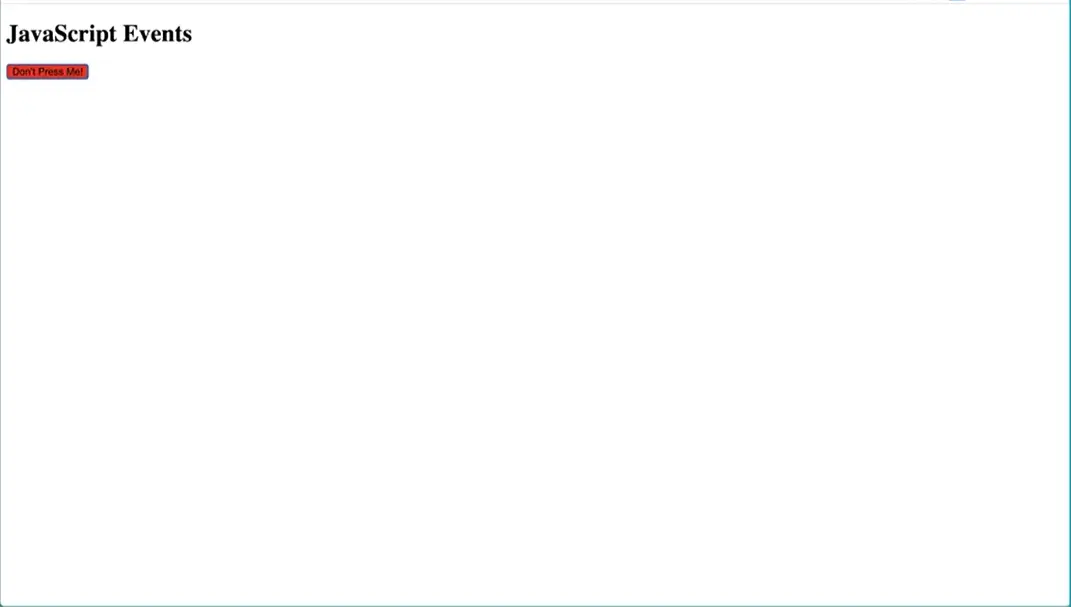
Let's see what this does. If I come over and run this, refresh my page, don't press me. It does that and sets the background of the button to red. What's going on here is we can use the event object and the event target to actually know which element was triggering this event, and then we can do something with that event.target. This is often very useful.
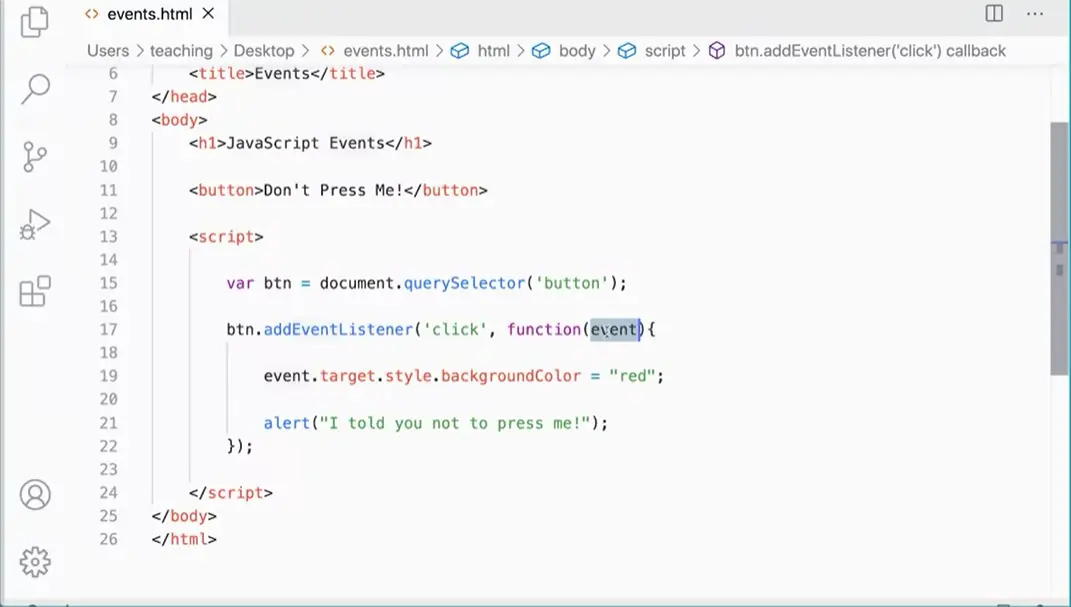
Now, this "event" is just a variable. You could call it whatever you want, it represents.
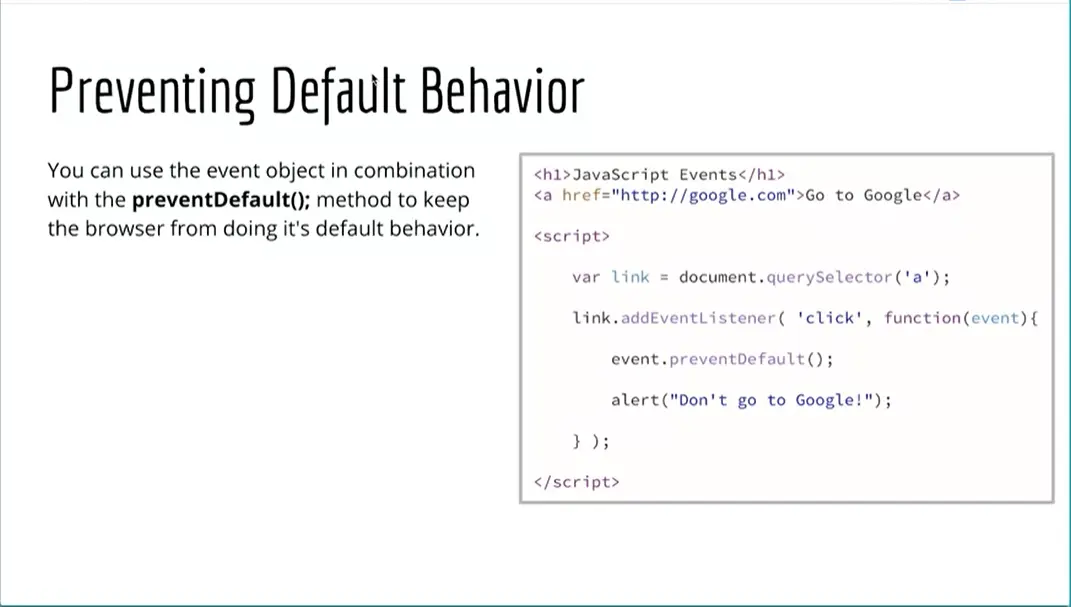
One of the ways the event object is used most frequently is to prevent default behavior. This is especially true when we're working with forms and with the submission of forms, we want to prevent the default submission of the form so that we can do something with that form data before it's submitted, and so we'll use that frequently.
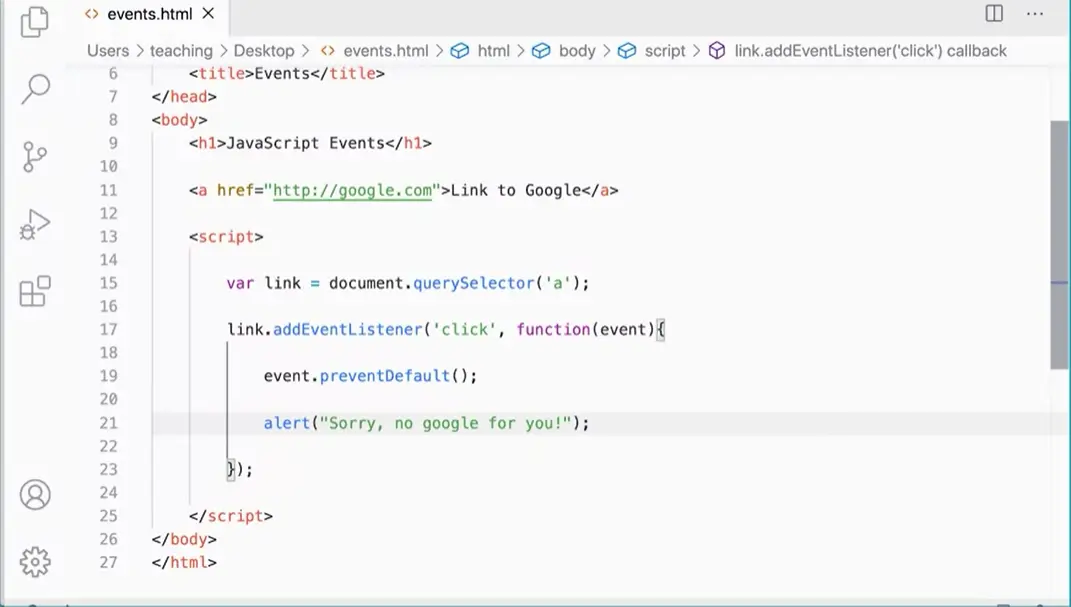
Let's just take a look at a simple example of this here. If I go over to my code editor over here, I have just a link to Google here. Just a normal anchor tag with an HREF going to Google. Down here, I have variable link document querySelector a is going to go into my document, find the first anchor tag, it would find, which is the only one on the page, and then I've got attached to that link.addEventListener when you click passing the event. We'll use the event object in combination with event.preventDefault to keep that default action from happening. In this case, we won't go to Google so I could do alert. Sorry, no Google for you.
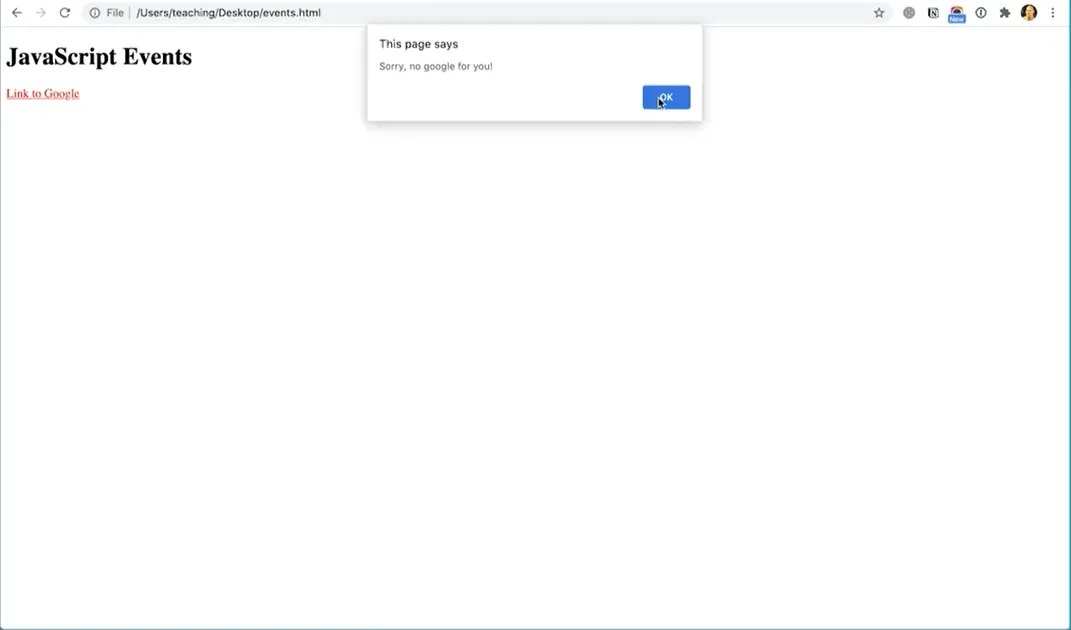
Now, if I test this page and I come over to my events page and refresh here, I now have a link to Google. When I click it, I get, "Sorry, no Google for you," and the page does not go to Google. But it's the event.preventDefault that's keeping it from going into Google.
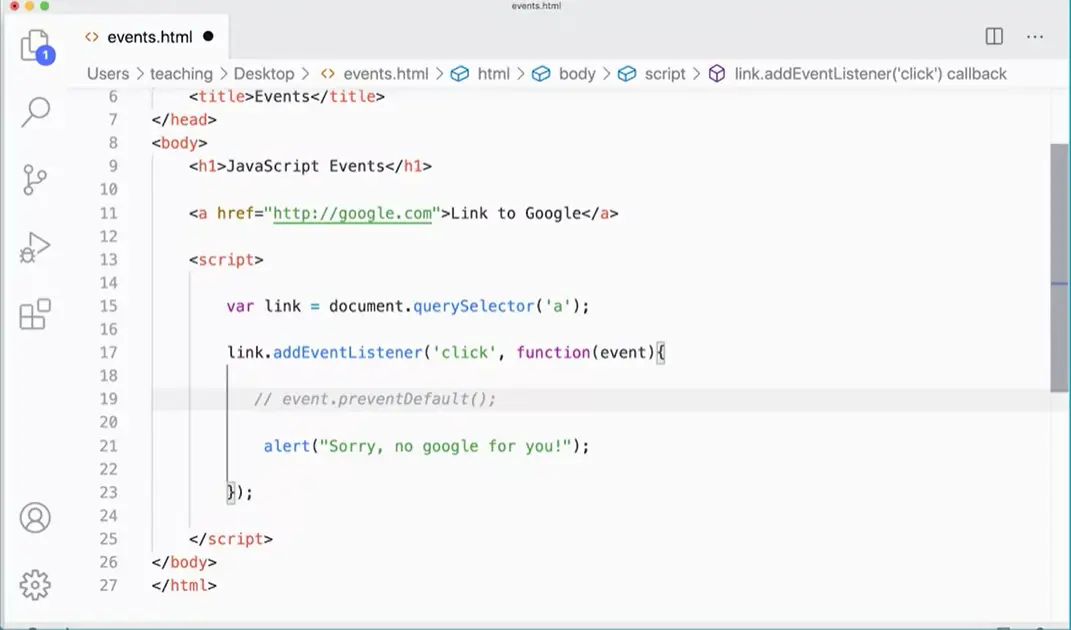
If I were to come back and comment this line out here, you'll see what we get over here. If a refresh, I get the sorry, no Google for you, but then it'll actually go to Google because the event.preventDefault is needed in order to keep that default event from happening. This is a particularly useful function that we can use with the event object is prevent default, and we'll be using that frequently in a number of our projects.

There's a lot more on events.
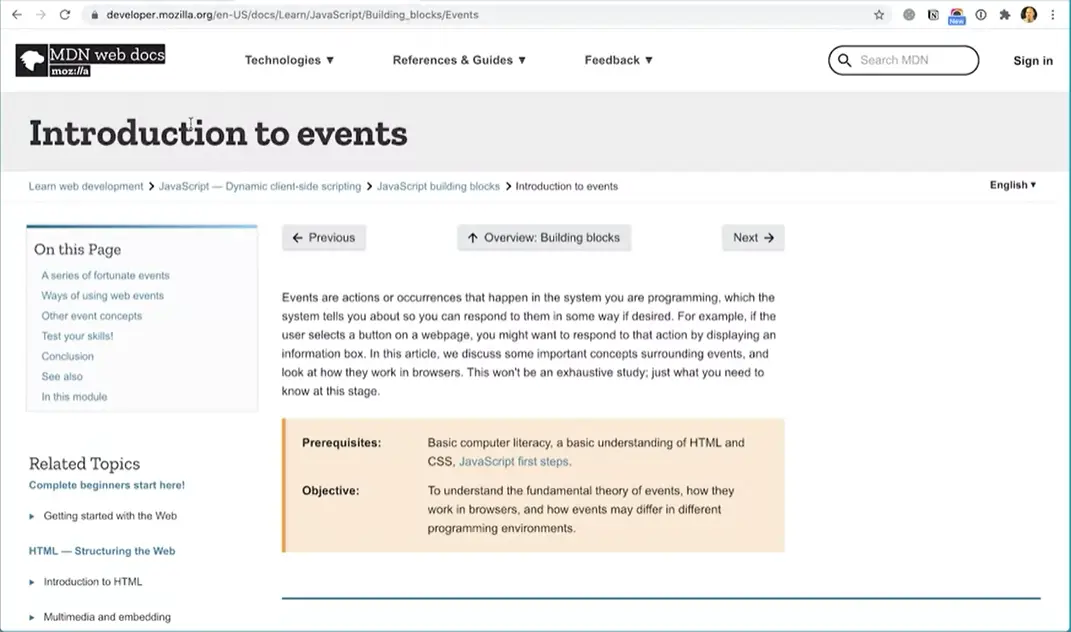
And if you want another take on the basics, you can go to this MDN web docs page on introduction to events. I'll put the link in with the lesson. So you can click it and look through this page. This page gives you a very thorough overview of events in the way they work in JavaScript. And some of the more advanced things that they get into like bubbling and propagation, all this kind of stuff we'll look at later in the course. But this will give you a thorough introduction to events in JavaScript here as well.
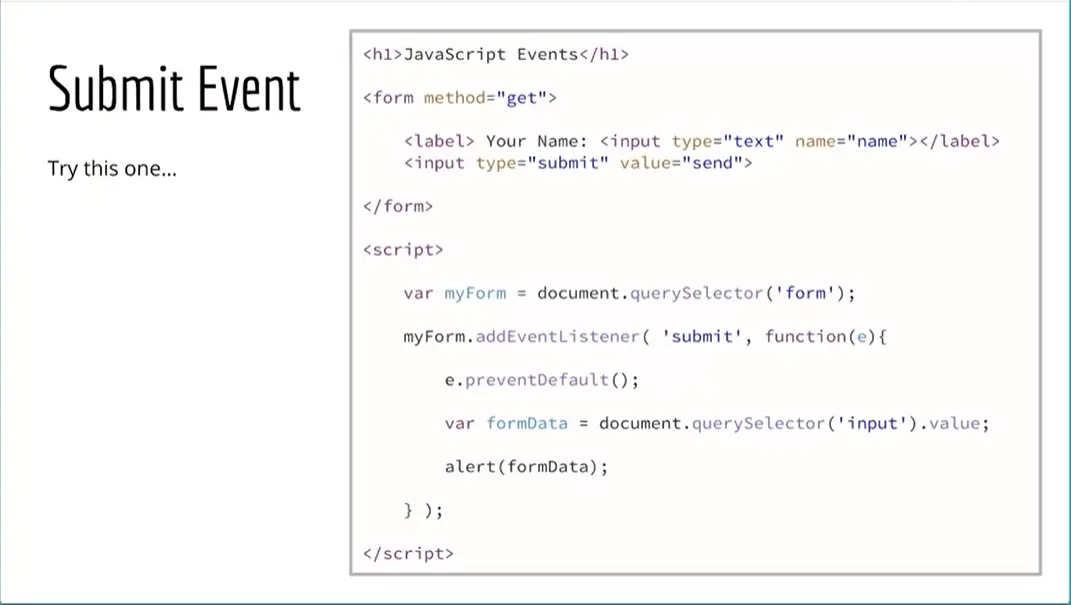
What we're going to do next is actually capture some different types of events, and see what we can do with them in JavaScript. The first one we'll look at is the submission of a form. Let's take a look at this example, and I recommend that you type this code out, because they're going to be helpful to come back to. When you do, the event challenges coming up, for some of our other projects, it'll be helpful for you to have these scripts to reference.
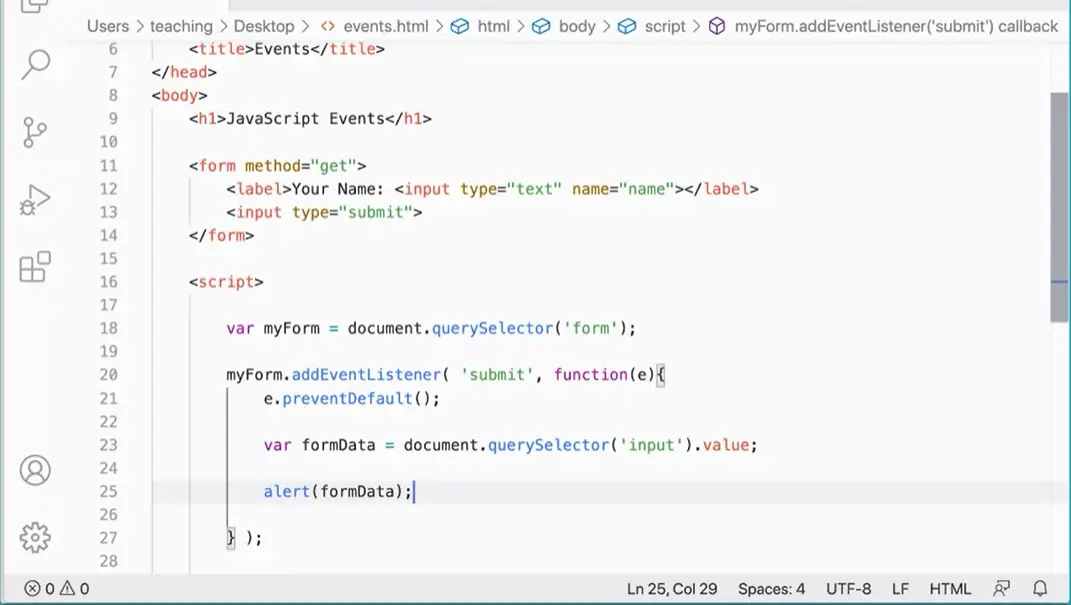
Here I've got a form on my page here, and it's set to method get. We'll see why in a few minutes here. And down here, I'm going to get my form and stick it into a variable bar. My form documents, I'm going to use my document query selector method to get the form. There's only one on the page so I don't have to do anything special there. If I add multiple forms, I could give it an Id. And then I could get it by the Id and that would be fine too. But since I only have one that's kind of nice and easy, and that's great, that gets me my form.
And then I'm going to put an event listener on that form. myForm.addEventListener. And the event that I'm going to listen for this time is the submission of the form. Submit tickets. Before we looked for click and often we want to capture clicking of things, but in this case, we want to capture the submission of the form. I'm going to look for a submit and then I'm going to run a function when the form is submitted. We're listening for a submit and then, we're going to run a function. Now the very first thing I'm going to do is, I want to stop the normal submitting of the form. I want to do something other than that. I'm going to pass in my event object here. In this case, I'm just going to use e as a shortcut. And then down here I can do E dot prevent default. I'm going to prevent the default, submission of the form.
Great, so we got that working. Next, I'm going to get the value that somebody types in this field up here, and I'm just going to alert it back to them. It's not very exciting, but it gives me kind of an idea of something I can do. I'm going to do var form data. Equals document dot query selector. And I'm going to just do input in this case, because this will actually go and find the first input. It's going to find this input here. And really what I want is the dot value. Okay, so I want to get that property the value property of this input here. Now if you're not familiar with HTML or not, very familiar with that. I can add a value here value equals bill and that will come up by default, but if. Somebody types a value into the field, then that default value would be replaced with whatever they type into the field. So I'm getting that value property since I'm not adding the property there explicitly, it'll be Whatever somebody types into the field, okay, so then I can just alert out alert form data and now if we go try this.
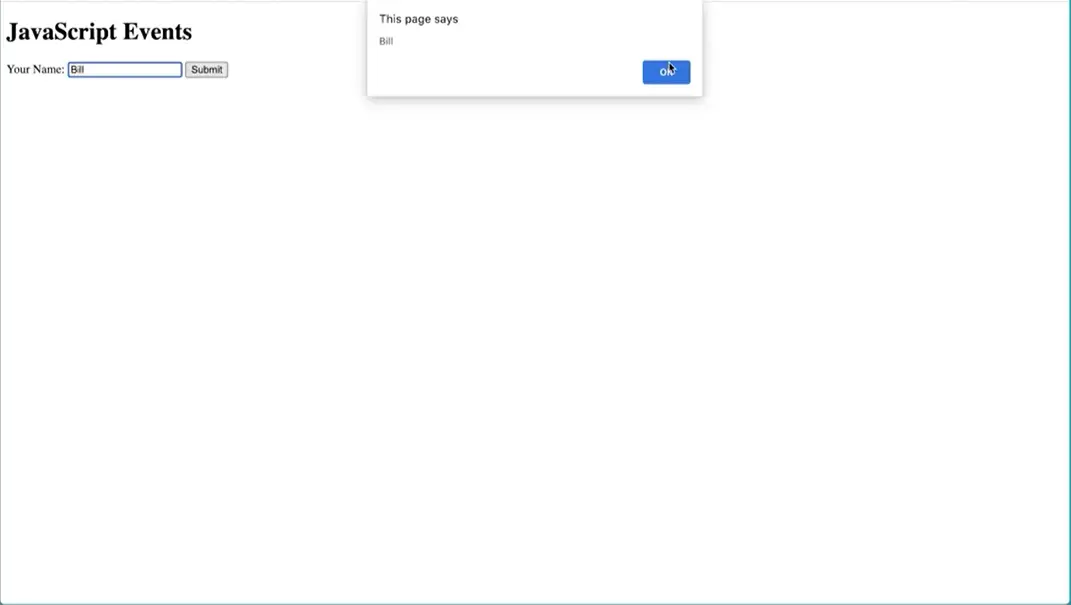
I need to open my file again. That's open. Here it is. And if I type something in here, no and submit. You'll see it says bill, and the form data is not processed but the the prevent default, has kept this from happening. So if I comment this out watch what happens here.
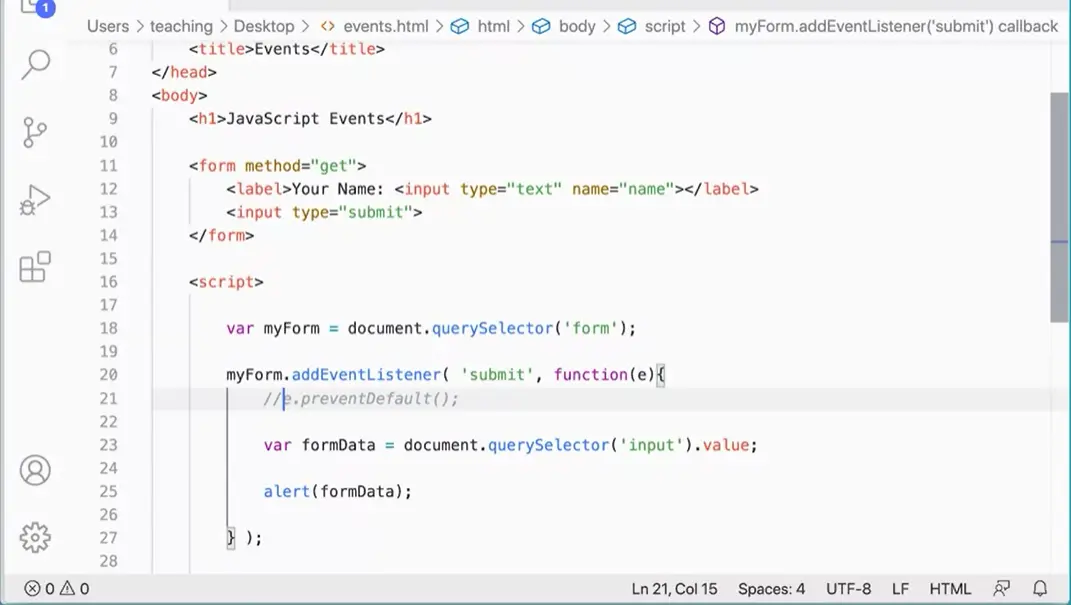
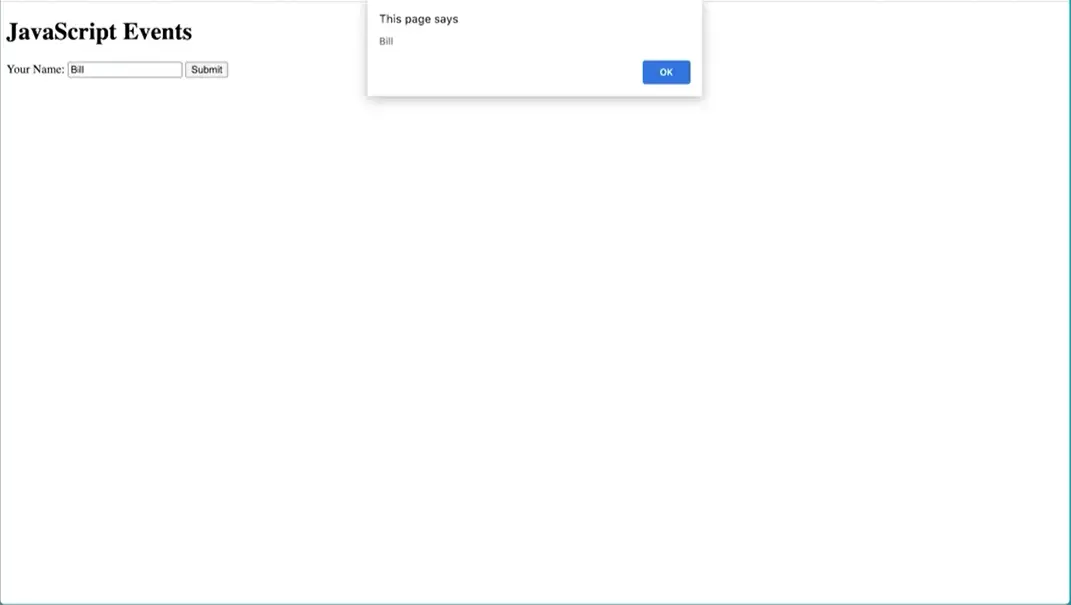
Refresh this. If I take no again and now if I click submit you'll notice. Does that but then it actually processes the form. And I can see that up here because I use the get variable.
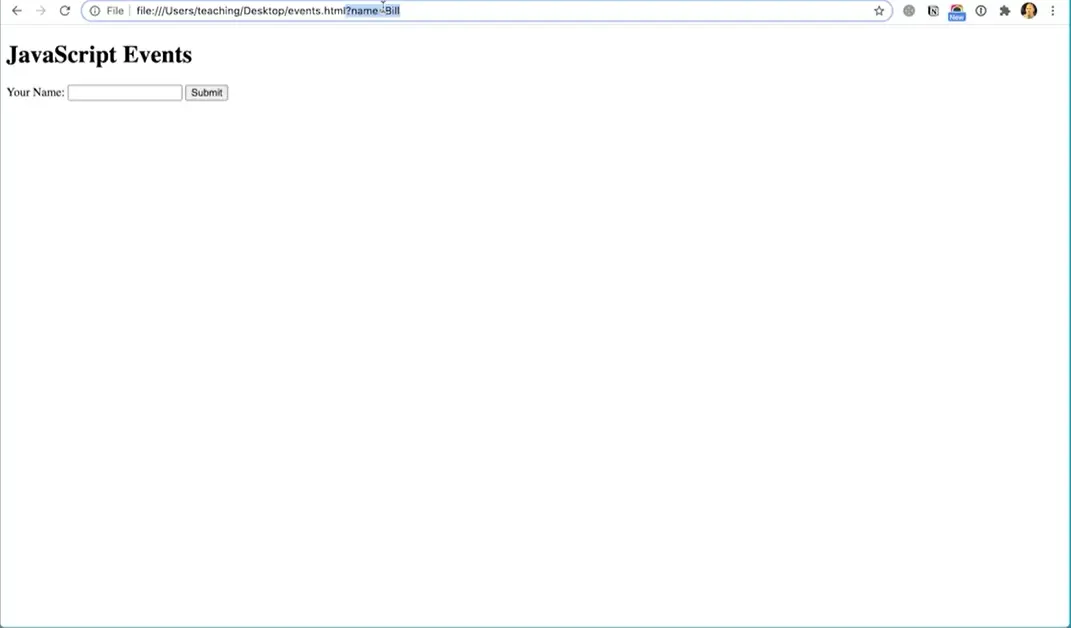
I use the get method, it's actually putting the value that I typed into that field up in the URL, by default, a form a form element when you submit it. The default behavior is that it will go to whatever you set the action here.
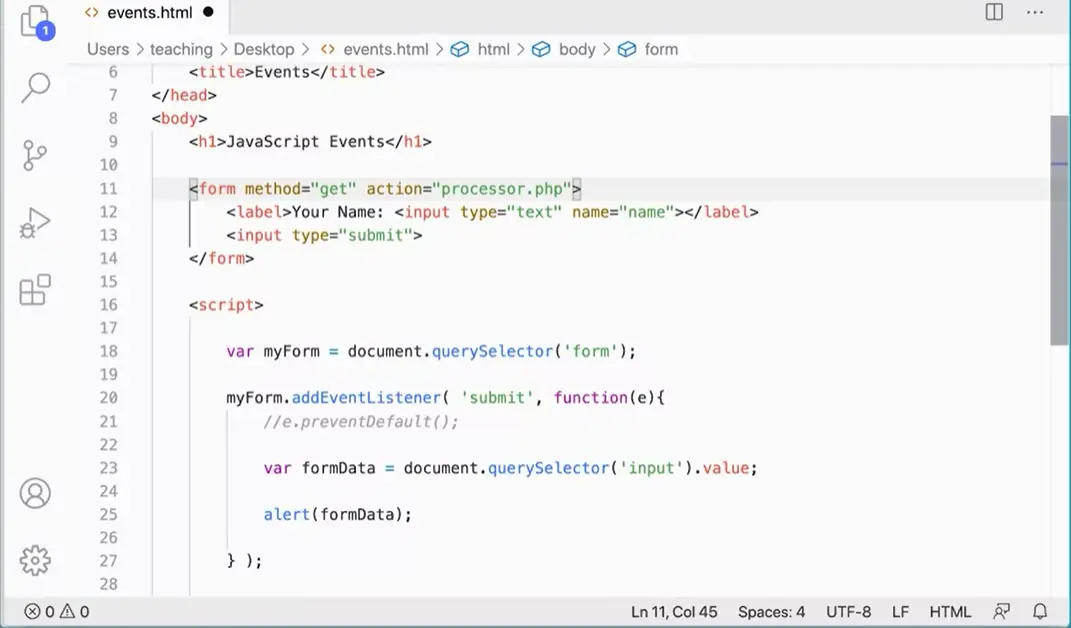
If I had an action="processor.php", some other file that's going to process the data, it would go to that page where we tried to, in this case, it won't be able to because that page doesn't exist.
If I do, submit, it's going to do that. It either tries to go there or it just refreshes if I don't put an action attribute up here, it will just refresh this page. And often I don't want to refresh the page. I want to use JavaScript to capture this data and do something with it.
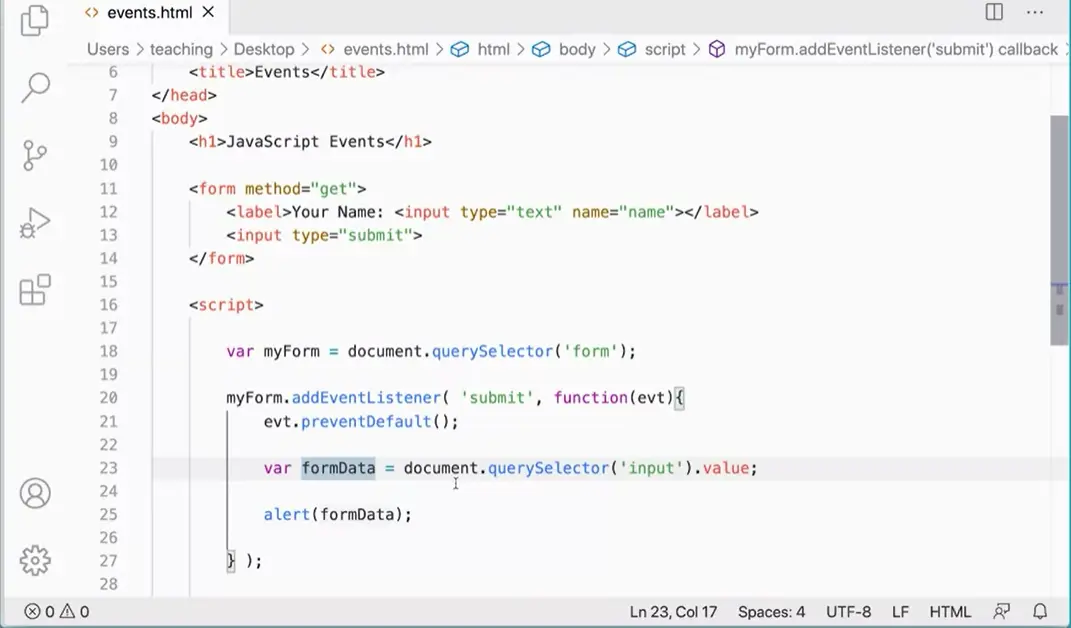
That's why I'm doing prevent default down here, and I passing in this event, and he again, it's a little bit Unclear maybe use evt instead, if you want to keep it short. And that will pass in that event object and prevent the default behavior so that we can do what we want to do with JavaScript in here.
You know how to work with the click event, and now you know how to work with the submit event.
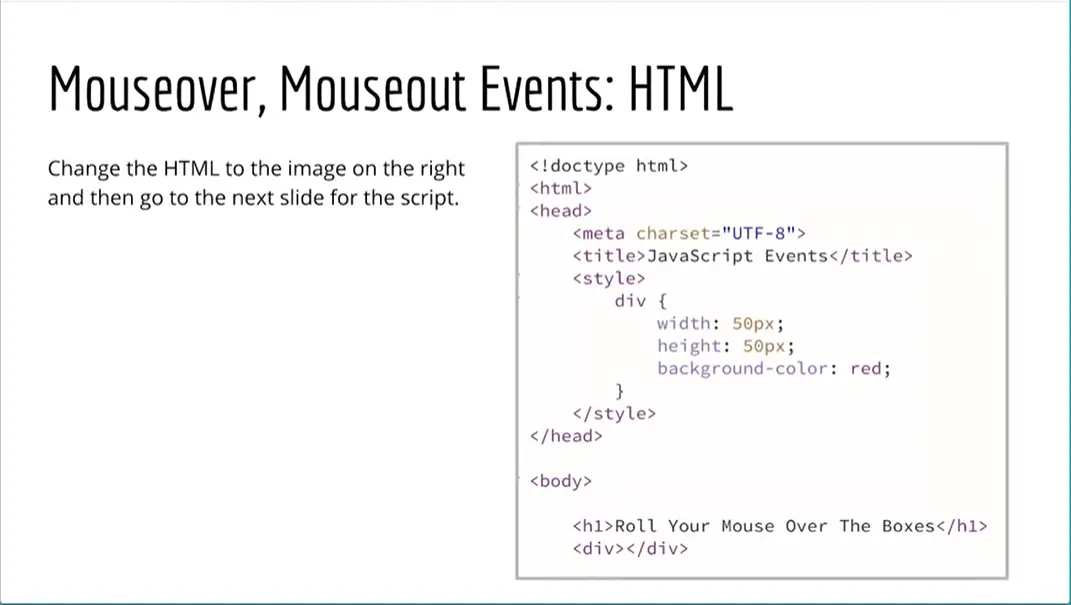
Now we can work with, have some fun with mouseover and mouseout events in HTML and JavaScript. This is the HTML here, so create a page with this HTML in here. All I have is h1 that says, "Roll Your Mouse Over The Boxes" and a div here. We can roll our mouse over these two elements. We can apply the style and do some fun stuff with mouseover and mouseout.
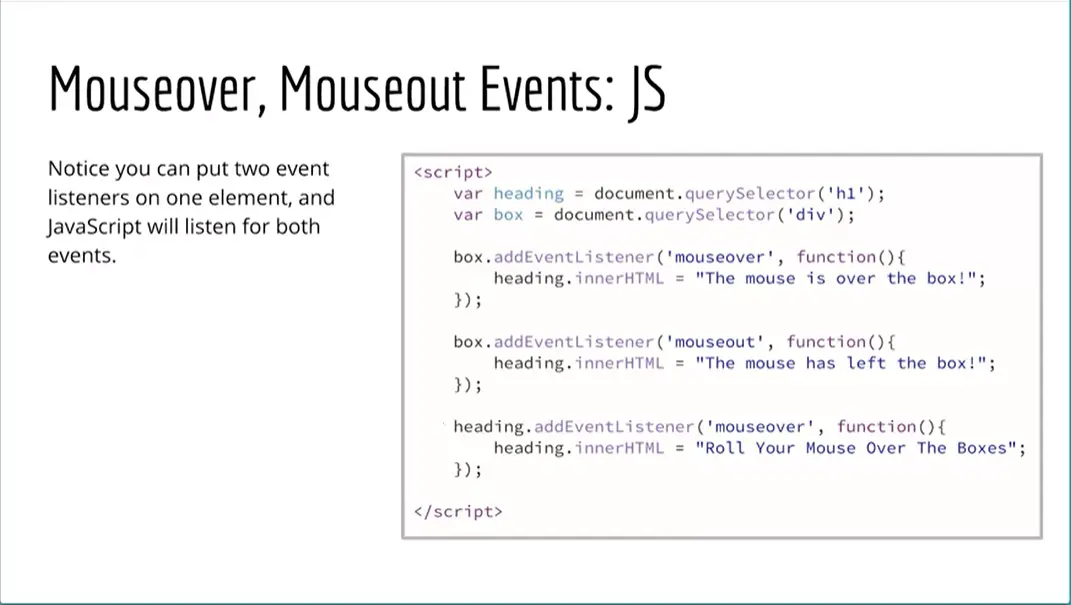
Now, let's take a look at the script we can actually write to do this here. Let's do this over here. To begin with, I'm going to make some variables for my heading and for the box to get those two elements.
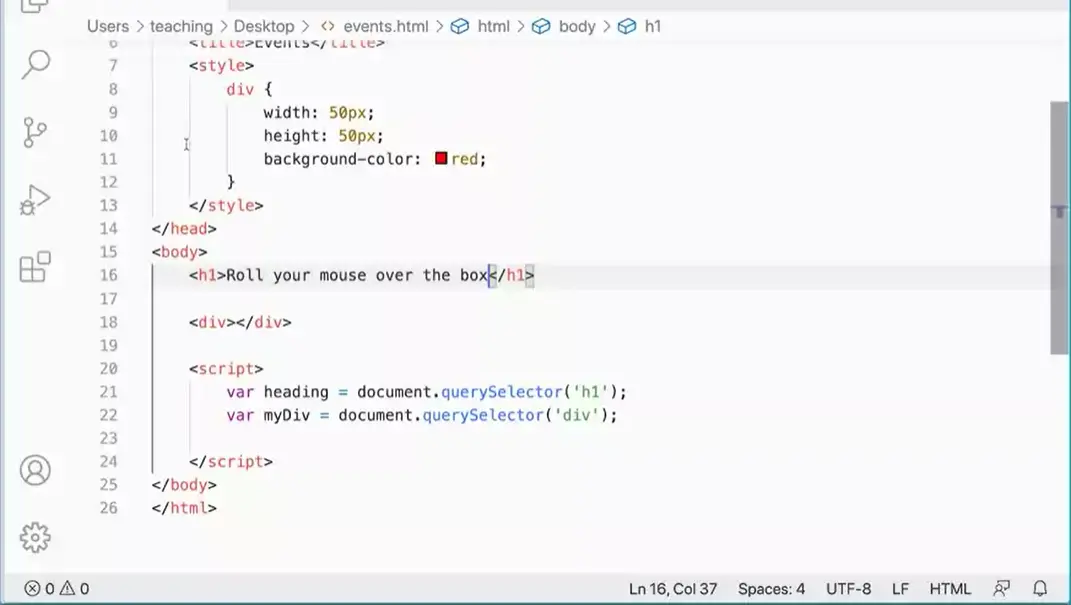
Let's start with that. Down here in my script, var heading = document.querySelector('h1'), and var myDiv = document.querySelector('div'). That will get those two elements there. I also want to change this text to, "Roll Your Mouse Over The Box." Let's do that.
Then let's just go see with this page is looking like. If I come over here and refresh this, I have a box and I have directions to roll my mouse over the box.
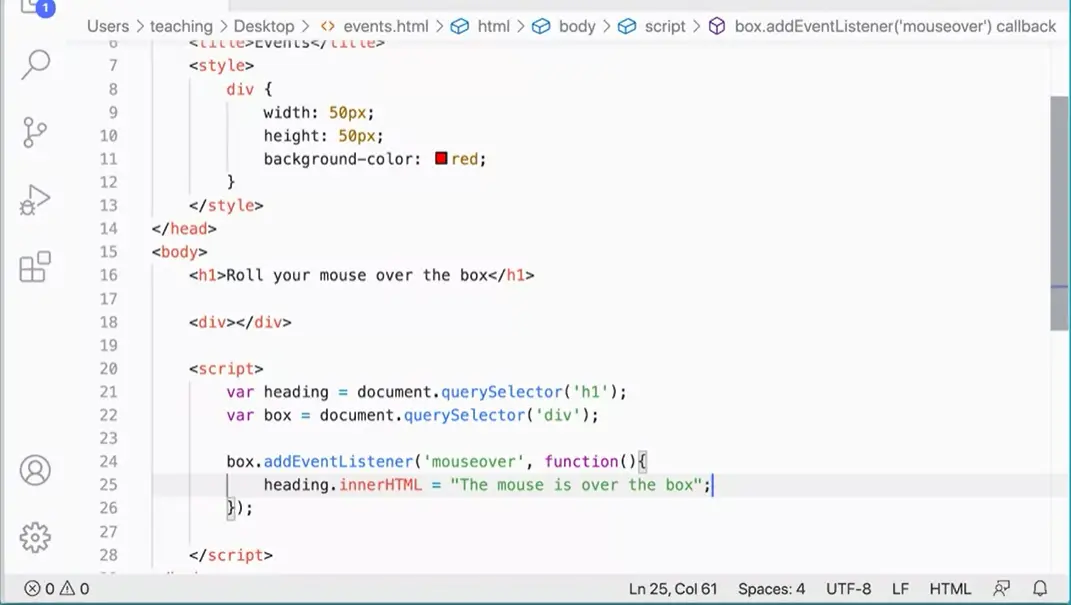
Now, I'm going to put an event listener on the box that when I roll my mouse over the box, it's going to change the inner HTML of this div right here. We're going to add this here, box out event listener. When we mouse over the box, we're going to change the inner HTML for the heading, the mouse is over the box, so let's do that one, box.addEventListener. I guess I should call this box to make this match my slot, addEventListener. We're looking for a mouseover event. Then when that happens, we're going to run a function like so. We'll put the cursor in here and then we're going to say, okay. When we roll over that box, we're going to go get the heading and change its inner HTML. Remember that's a property so we use the equal sign and we're going to change it to something like the mouse is over the box.
Let's see if that works. Let's test that. We come back to my page over here, refresh, when I roll over the box, the mouse is over the box. Great, so that works, but now it's stuck there. It changed that content.
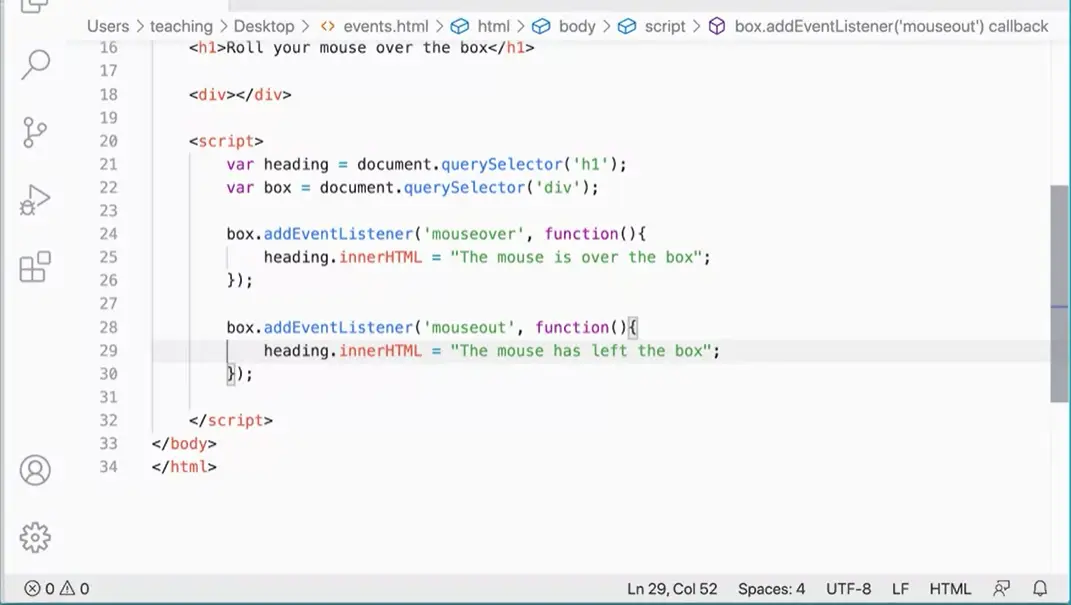
Now I want to do something where when I mouse out of the box, I'm going to change the heading to, the mouse has left the box. It's another two event listeners to box; Both mouseover and mouseout. This is part of the power of using the add event listener method is that we can be listening for multiple events on one object, which is really handy, so let's do that. When I come back here and rather than type this off from scratch, I'm just going to copy, paste, change this to mouseout, the mouse has left the box. Cool, that's great.
Let's go give that a try. Roll your mouse over the box. So the mouse is over the box. When I leave the box, the mouse has left the box. Mouse is over the box, mouse has left the box, so I can go back and forth. But it'd be nice if I could return the page to its default state without having to click the refresh button.
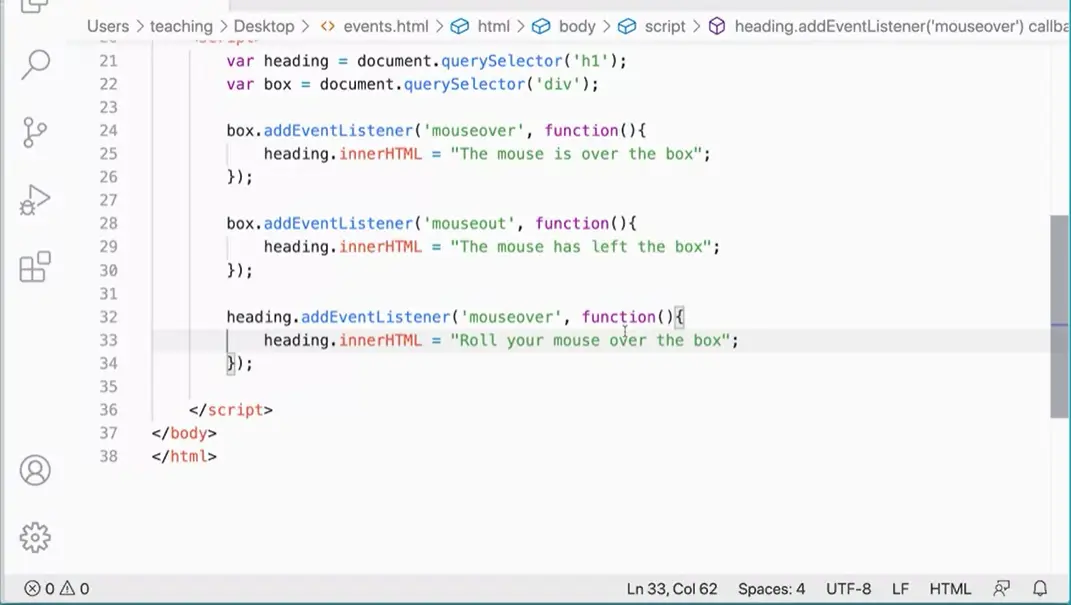
I'm going to add one more event listener for the header. So when I roll over the header, it puts the original texts back in there, like this. Roll your mouse over the box and box is there, but really there's one box. Yeah, so let's just fix that right here. I'm just going to copy this and paste it. But I'm no longer working with box. I'm going to put it on heading, addEventListener mouseover and I'm going to put the same texts that I have here and here to the heading, to put it back to its default state of where it was before.
But now I can roll over them up, box roll off it and the event listeners are working. If I roll over the header, it puts it back to its original state. This is a really great example of how we can use eent listeners and mouseover and mouseout to change content on the page. Plus you're making use of the inner HTML property. That element property that's taking that element and replacing the HTML inside of it with something else. Now you're starting to see we can actually do some interesting things to web-pages when we're no longer just putting stuff in the console.

The next event type that we can look at capturing our scroll events.
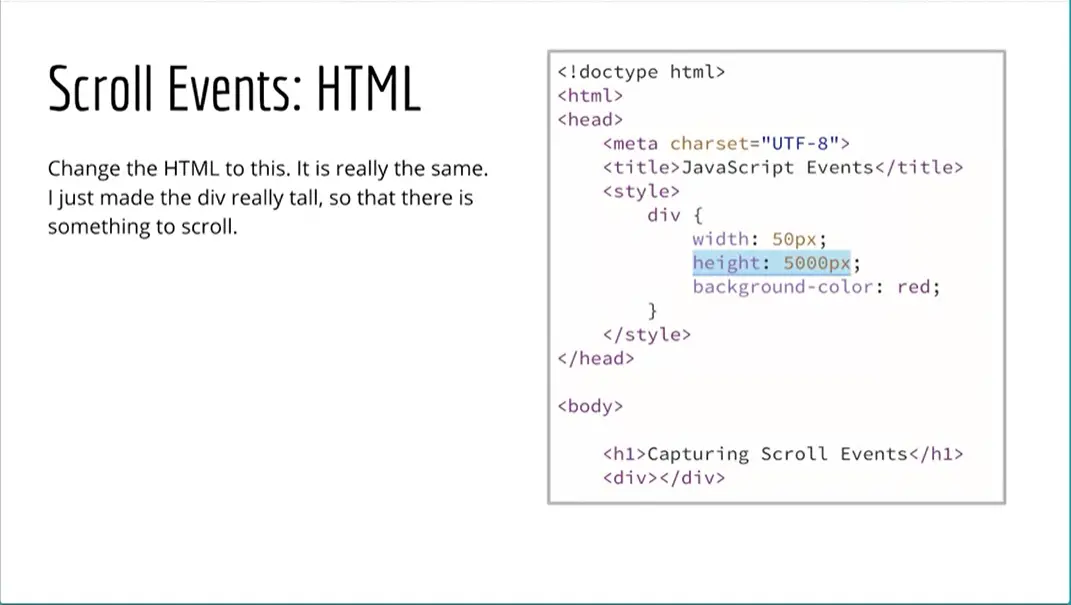
Change the HTML on the page that we just had to something like this, I've just changed the height to 5000 pixels for this div that's on the page. So I've got capturing scroll events and just an empty div that's set to 5000 pixels high and I've set it to 5000 pixels high so we have something to scroll. Otherwise there's nothing to really scroll and we can't really capture that event, okay, great.
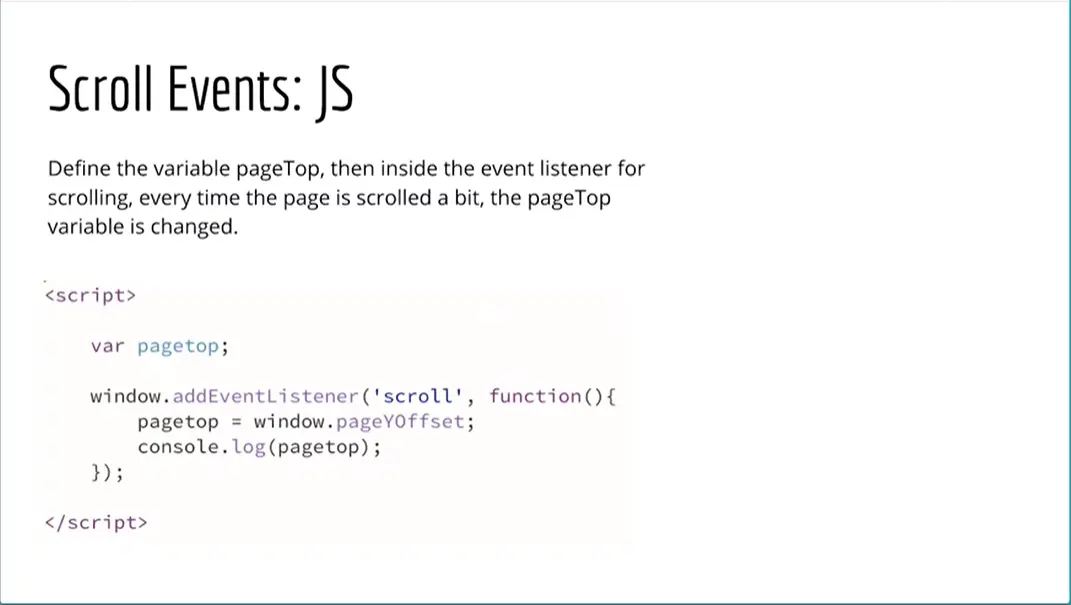
I've got a script that's going to capture the scroll event and see what we can do with it.
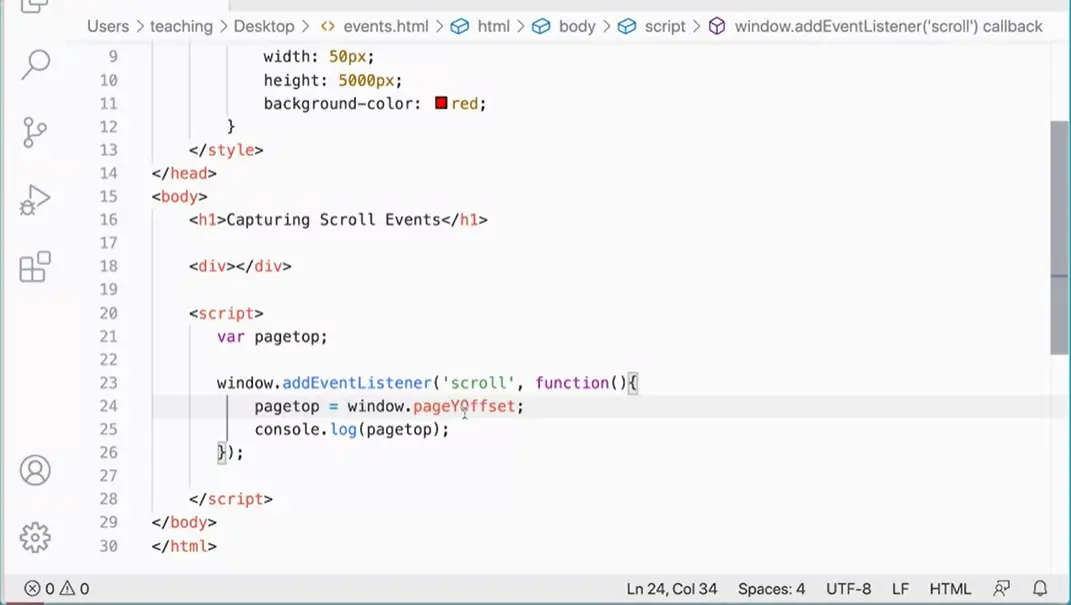
Over here on my script, the first thing I'm going to do is create a variable called pagetop and this variable is undefined at this moment. I've created a variable pagetop and then I'm going to create an EventListener and the EventListener in this case is going to go on the window object. I can actually do window.addEventListener, so I can listen for events for the window, and I can listen for scroll. Scroll a bit and then I'm going to run a function when the scroll event happens.
Okay, so we've got a function that's going to run here and what I want to do here is I want to take pagetop and update its value it started out as no value at all. But update the value of pagetop to be equal to window.pageYOffset. We're going to set it to that and then I'm going to console log out pagetop. For now, just so we can kind of see what's going on as we're scrolling the page.
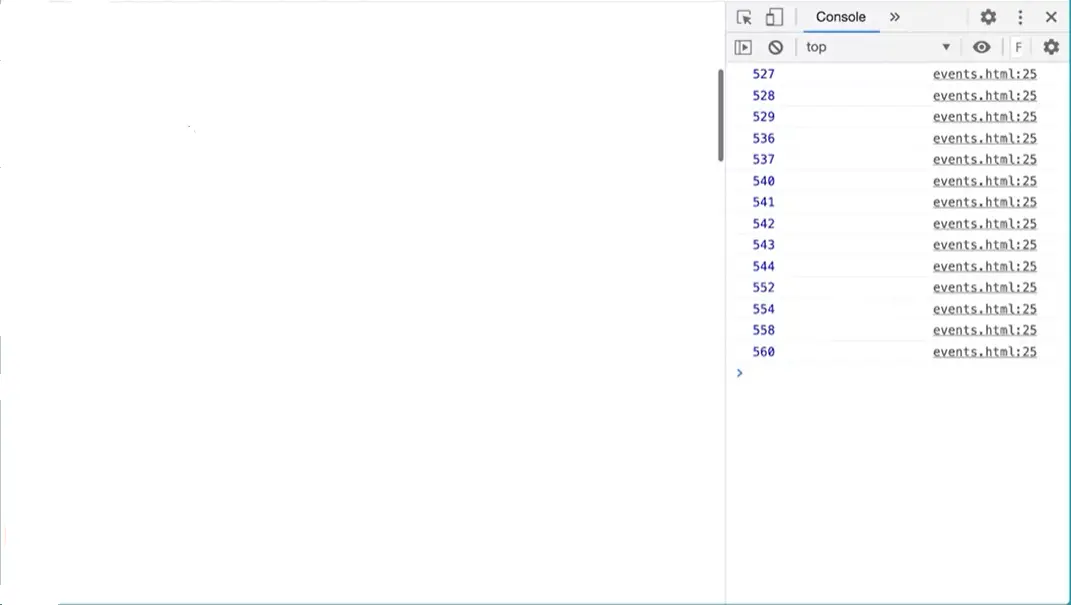
I'm going to go over to My browser over here and here's my page, I'm going to refresh that and here's my div that's 5000 pixels tall. I have my inspector open in the console selected over here so I can actually see, as I scroll my page it's capturing that counter.
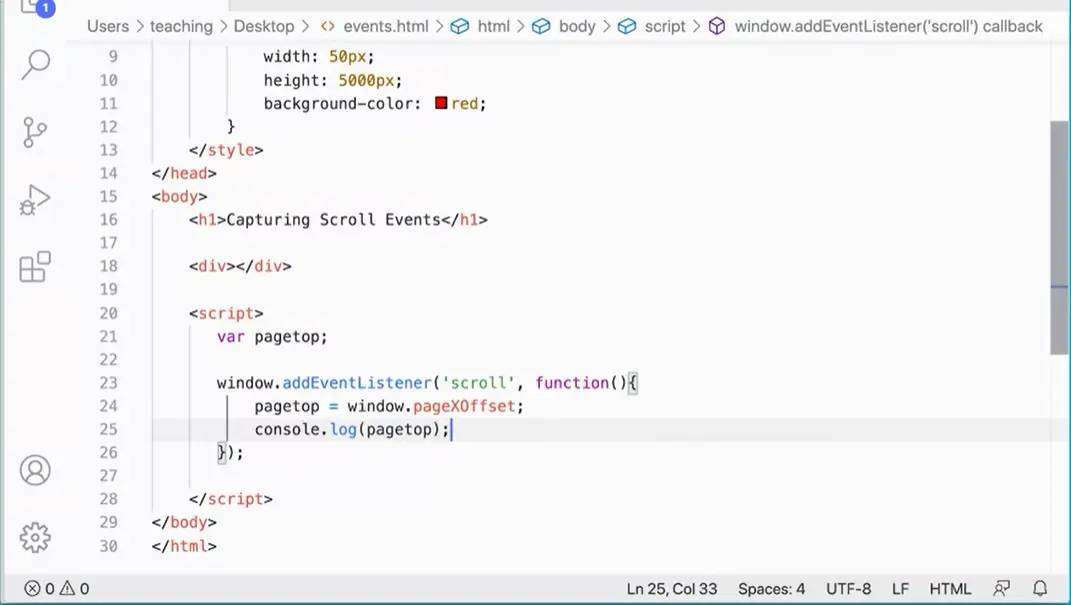
Now, one thing to note here is that this EventListener is firing very, very often a couple things to note, it's firing very, very often, it's firing every time I scroll just a little it. This event listener is going 123 boom, every single time I scroll just a little bit, it's firing that EventListener. So that makes the scroll EventListener very expensive in terms of processing and the kinds of things that JavaScript is doing. So you need to be very careful with the window add event listener scroll event because it's going to fire frequently.
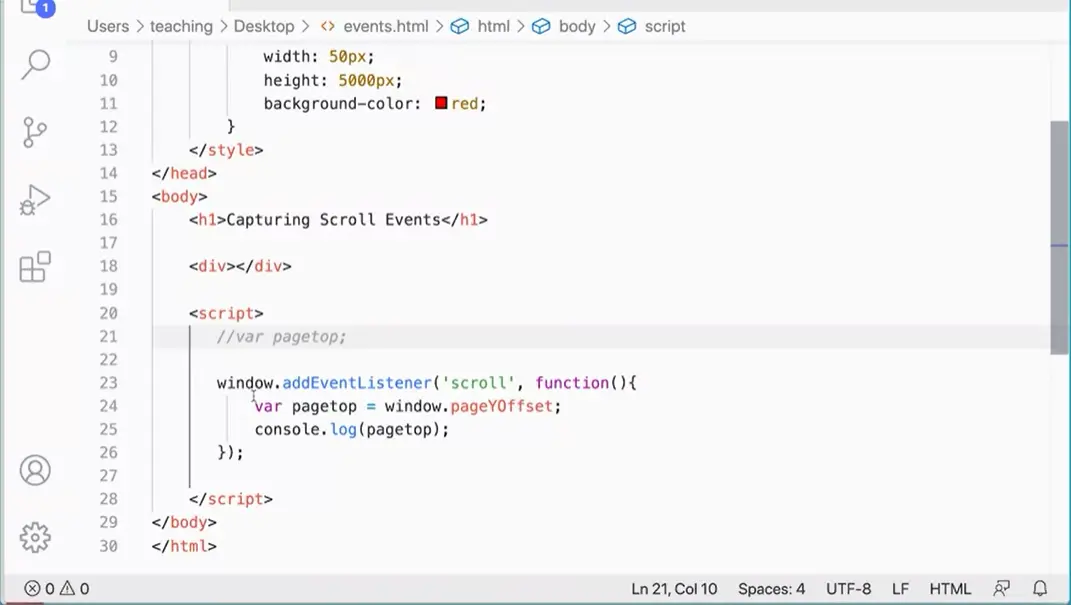
That brings me back to this, I could have just put var page top here. Instead of defining it here, but every time I scroll just a tiny little bit, it's going to ask JavaScript to recreate the page top variable from scratch.
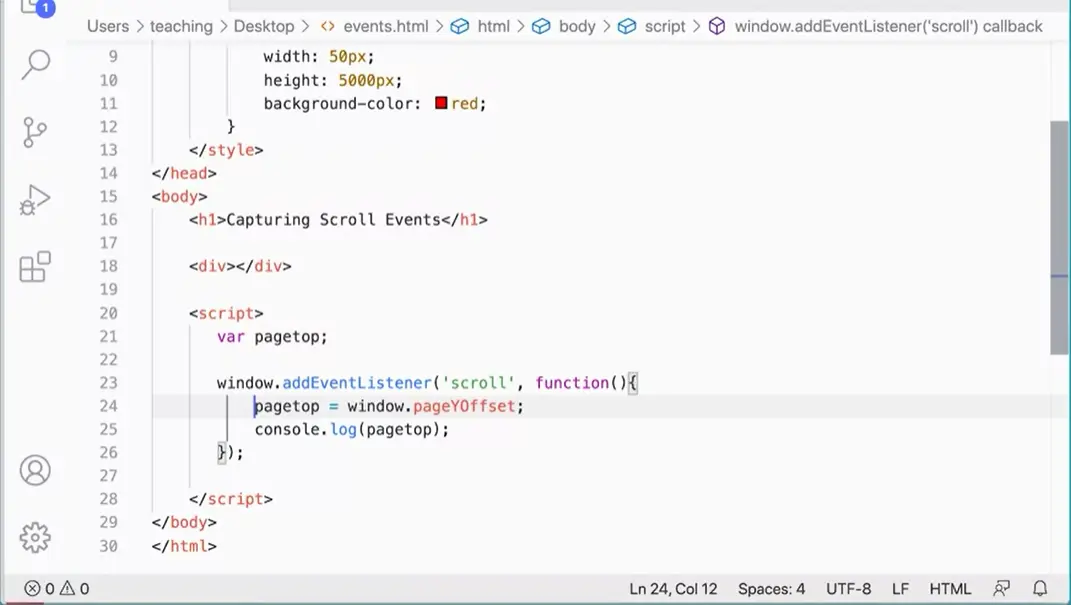
And then assign a value to it whereas if I do it up here, it's a little bit less expensive, because now I'm just updating the value of pagetop. I create the variable once and then update it as I scroll down the page, it's not a big difference, you're not going to notice a huge difference in this example. But it's sort of important to mention because when we talk about creating events that are about scrolling the page, we need to be careful about what we're asking JavaScript to do. Because you can get your page can get bogged down really quickly keeping track of all the scroll events that are happening. And there are some techniques you can use to, to sort of mitigate the effects of that and we'll look at some of those later in this course.
Okay, but for right now all I want you to be really aware of is that we can capture the scrolling the window. In this way that's very effective here and scroll back up to the top and refresh Scroll down, you'll see it's capturing this numbers, so this is an effective way of doing it.
One last thing I want to mention while we're here about the scroll event is notice it doesn't capture every single pixel. If I scroll slowly enough, capture a lot of them but you can see I've missed a few of them in there. If I scroll really fast, it will skip lots of them more frequently, so that's another thing to pay attention to. If you're looking for a very specific pixel, it's harder to get with the scroll event.

Another simple example that we can look at is watching for a resize of the window, and this is useful in responsive design.
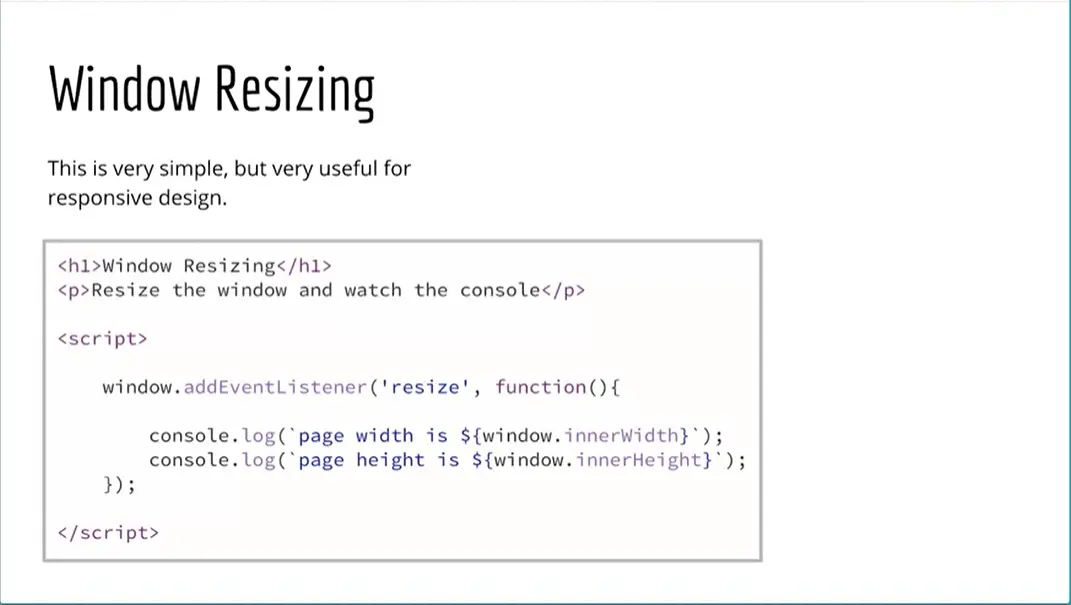
Down here, I can actually do another window.addEventListener. But in this case, the event we're going to look for is a resize.
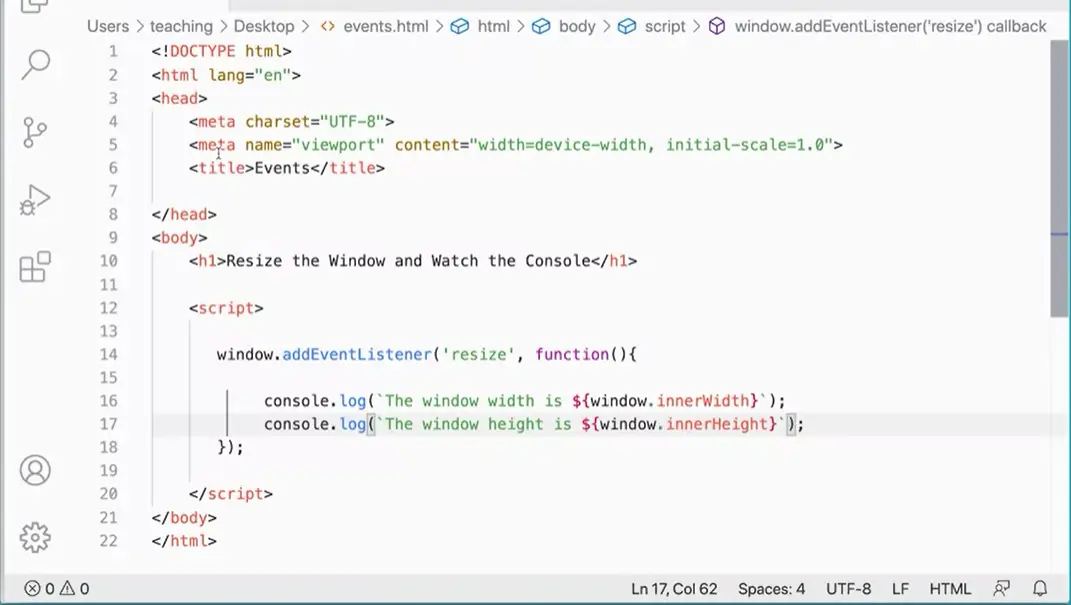
I'm looking for resize the window, and then we'll run a function And then, I'm just going to add two console log statements in here. I can watch for resizing both the width and the height of the window. I'm going to do console.log, parentheses and use my tickmarks and put in here The window, width is, I think it's window.innerWidth. Is that right? Let me check my slide over here. Window.innerWidth, yes, and window.innerHeight, window.innerWidth, and that's a variable so I'm going to put a dollar sign and a curly brace. And at the end, I put a curly brace. We can get the number of pixels for the window with this.
Those are a couple more properties to add to your list of things, list of properties that you know about. I can come over here and go to my Events page. I'm going to refresh this. And if I actually pull this off of here and let me see if I can position it just right here, there we go. And then I'm going to resize this window. And as I do that, you can see that I'm getting some comments over here about how wide and how window height is undefined.
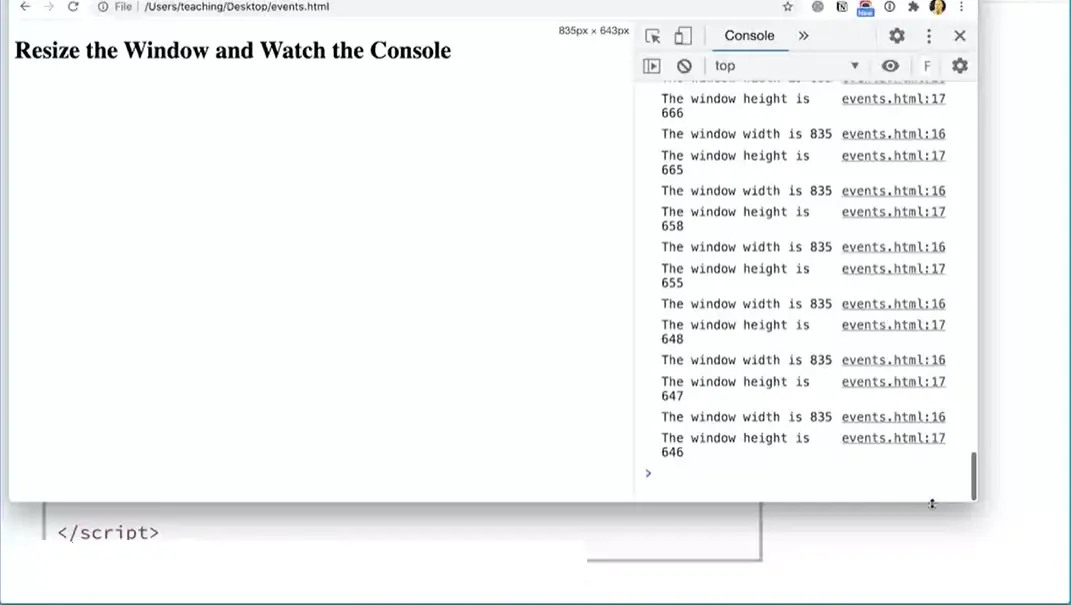
Right, so now I'm getting, the width is changing because I'm changing the width here. And then if I come down here and change the height, you can see the height is changing. We have a tool that we can use to find out how wide & how tall our window is. This is useful in JavaScript. And the resize event can be useful too if you're doing something with responsive design.

The next type of event that we're going capture is when you've pressed a key on your keyboard.
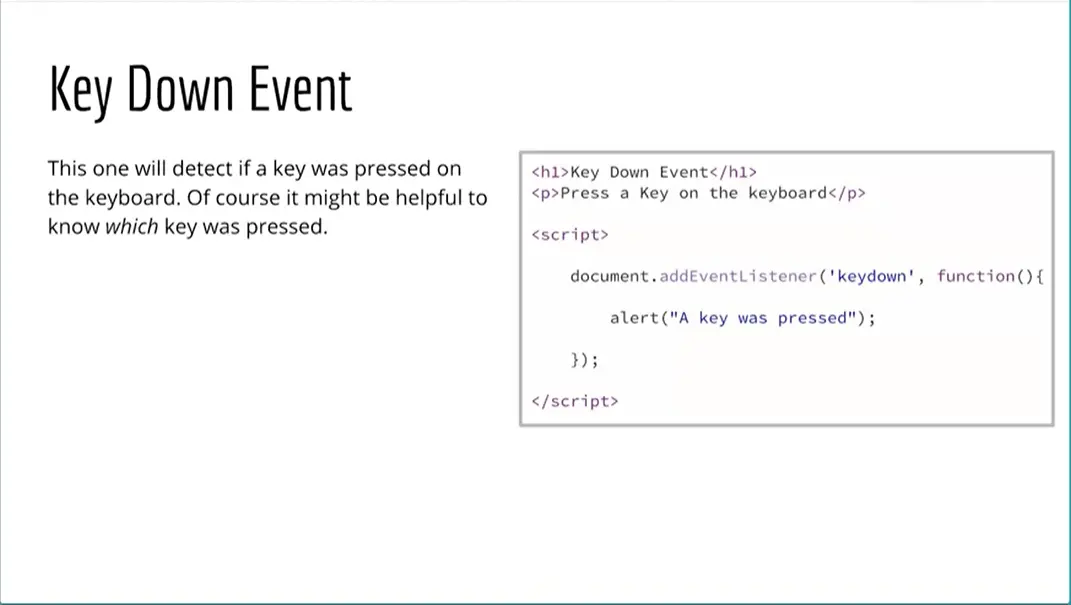
Imagine creating games that you could play where you're pressing keys on your keyboard and things happen in the browser or something like that. That would be fun.
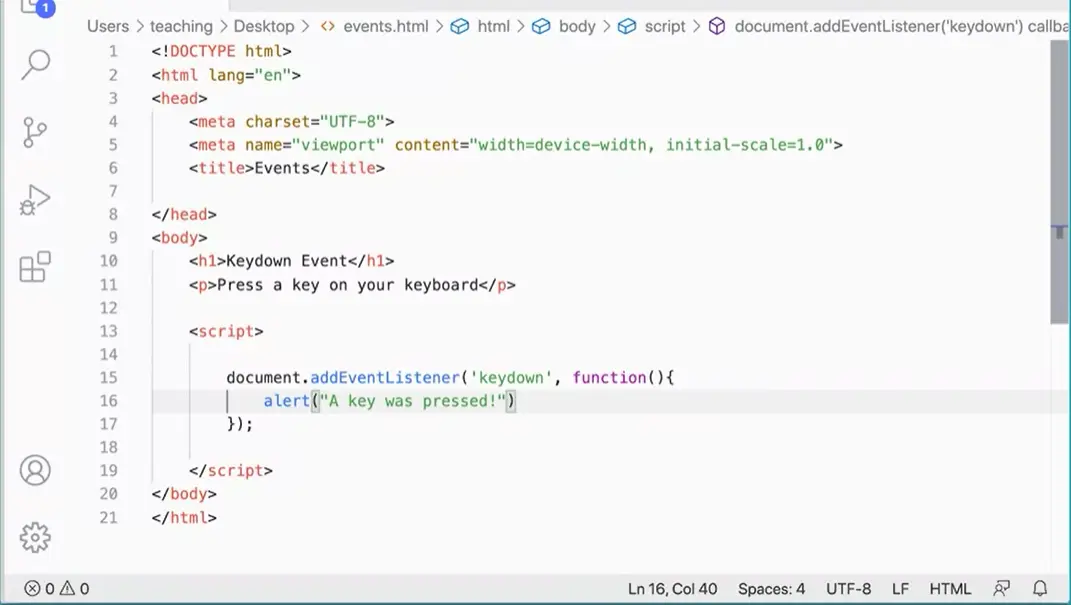
Over here on your HTML page, we can just add a script. This time we're going to actually attach the EventListener to the document itself. Let's just do that. It's a really simple thing to do. Let's come over here. I've got a Keydown Event, press a key and I'm going to actually say document.addEventListener. In here, I'm going to look for a key down event. You could also look for key up or some other types of events that have to do with keys as well. Function. Then I'm just going to alert, A key was pressed.
Let's go over and give that a try over here. I refresh this page and press key. I get a key was pressed. I can detect when a key was pressed. Now, we can check to see that a key was pressed but it would be nice to know which key was pressed.
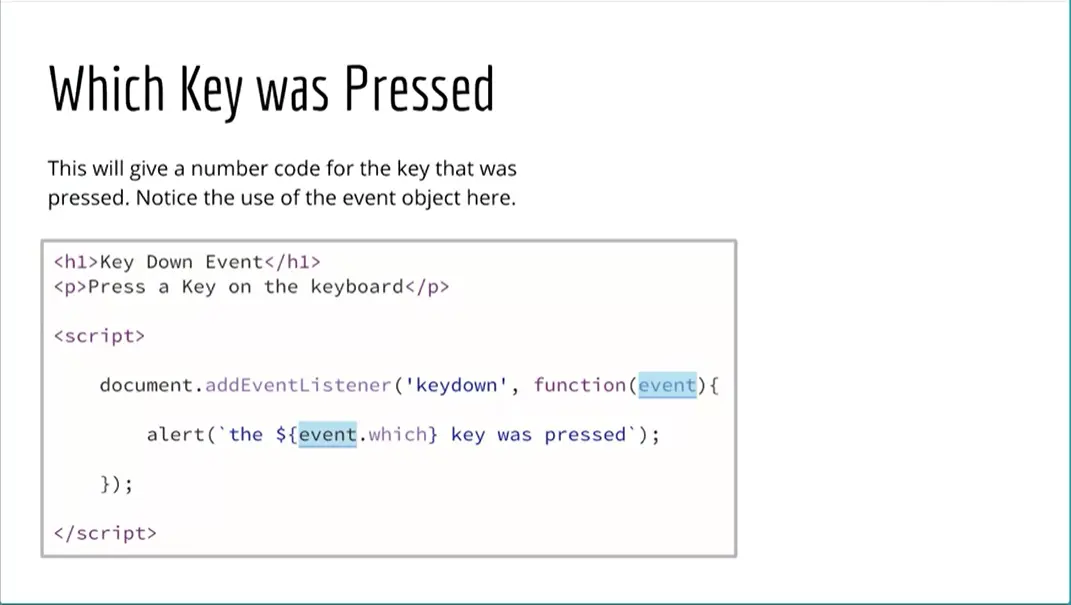
We can find that out through using the which property on our event.
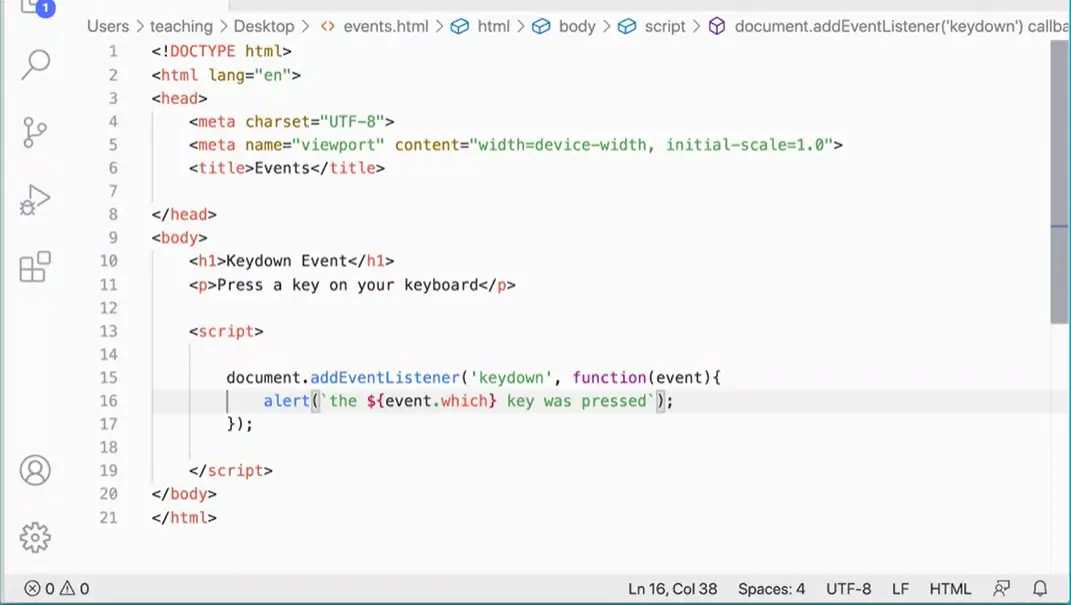
Let's give that a try. I'm going to pass in here my event object. Then in here, instead of using my quotes, I'm going to use the tick marks and say the event.which key was pressed. An event.which is a variable so I'm going to put a dollar sign then a curly brace and then a curly brace.
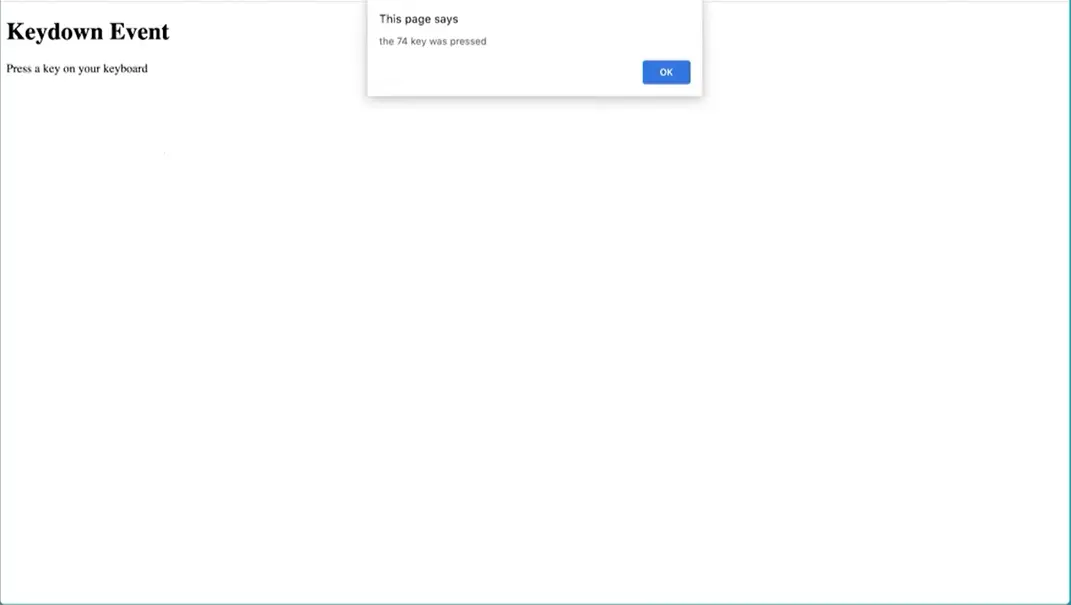
Let's give that a try. Now, when I press the J key, I get the 74 key was pressed. I'm getting a code that goes with each key. I press the L key I get 76. If I press an A key, I get a 65. I can do this kind of thing to find this stuff out. Now, what's interesting here is that the which property has been deprecated. I just found out about this recently. More recently than I put together this lesson. This is something that happens with JavaScript and with web stuff, in particular, is that things change. Part of learning about the web is getting comfortable with finding out when things change and what to do about it.
From my understanding, the which property was deprecated because, keyboard layouts can change a lot all over the world. They decided that that was not the good way to go.
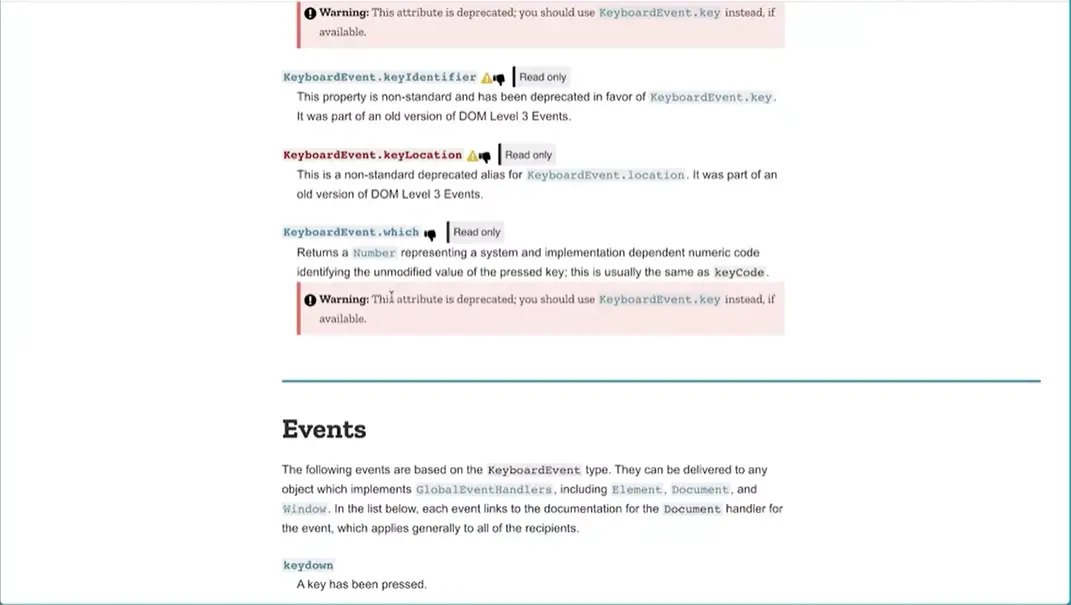
If you come over here to this MDM page, you can actually find out a lot about the different events and down here, it'll actually say the keyboard which key has been deprecated.
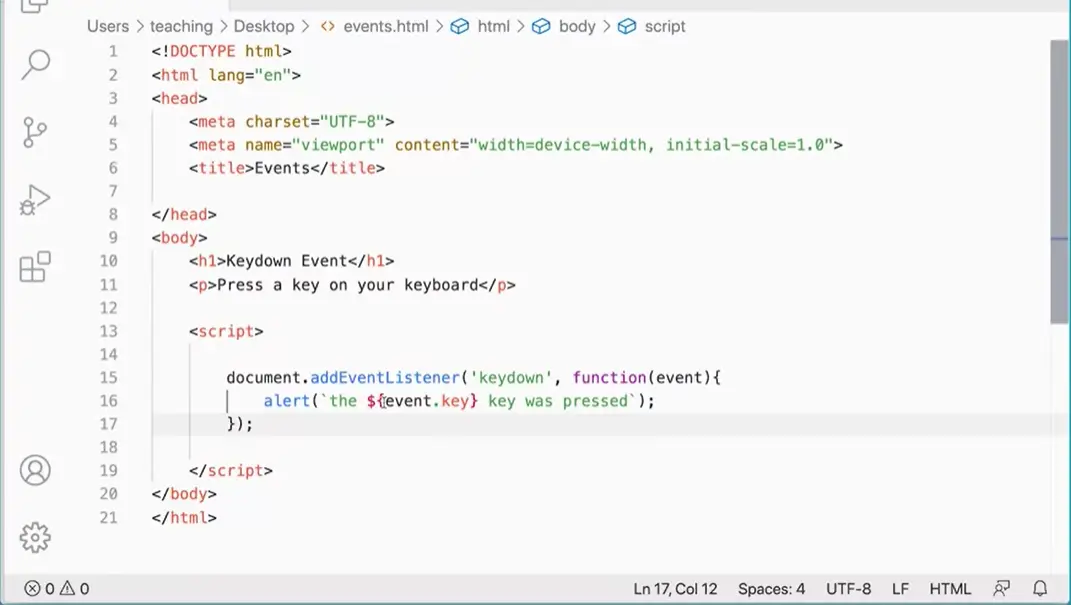
Now the reality is, is that browsers will support it for a long, long time to come. You could certainly use it, but they're saying you shouldn't use that, you should use event keyboard key instead. Let's give that a try real quick. Back here on my page, and I'm going to change which to key. Because that's what the MDN says I should do and they're the most authoritative resource on this stuff.
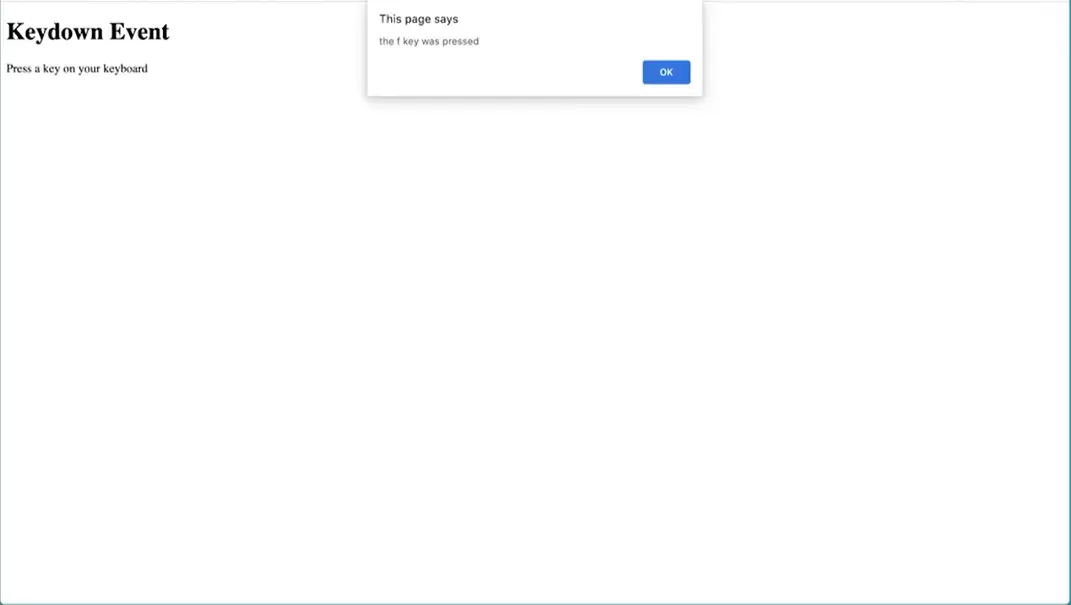
Let's go over and check that out over here. If I refresh my page, if I press the F key, now I'm getting "the F key was pressed".
We've captured a lot of different types of events now, from the click event to the submission of a form, to the mouse over and mouse out and scrolling and capturing keys. There are all types of events, these are just a few examples. There are plenty more events that you can capture and you can look up the full list on the Mozilla Developer Network, if you wanted to start really poke through them all. But these will keep you busy for quite awhile. Just these few events.
By capturing these events and combining that with manipulating the page, we can do some really interesting things in our webpages now. You really have a lot of the basics that you need as a foundation to start building interesting, interactive web pages. We'll be going on from here and we'll be talking about a few more basic concepts and techniques. Then we'll be practicing a lot of this stuff and building some projects so you can actually try it out. Plus there's lots of challenges along the way, challenge exercises and challenges within the projects for building stuff. Hopefully, you'll find it fun and are willing to come along with me on this journey and continue to put what you've learned with JavaScript to use in actually making some interesting fun things.
Here are resources related to these lessons:

The next topic we need to get into is the way scope works in JavaScript.
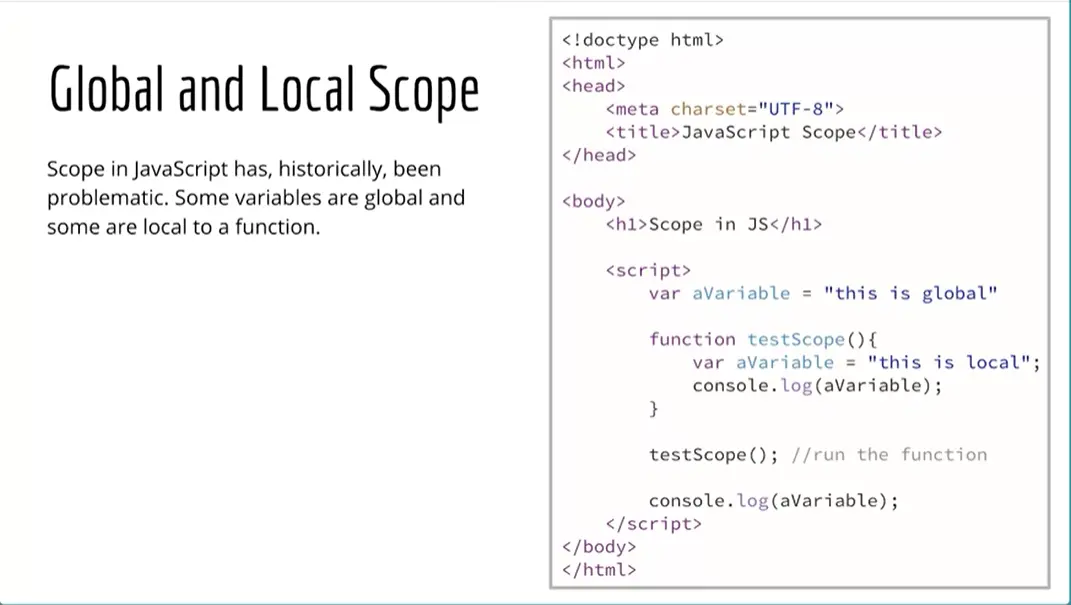
This is an important thing to understand because in JavaScript, when JavaScript was originally written, you have to keep in mind that they really thought that it was going to be very short scripts that were used on web pages to do some interactive things, and that's about it. They didn't expect JavaScript to become a general all-purpose programming language at that point.
Scope was not really very big of a concern, but JavaScript has become a general programming language and scope is now a pretty big concern and we need to be careful about it. This is another thing in the language that is potentially problematic and you want to be really clear about and have some best practices around, so you don't make mistakes and get unexpected results and spend a lot of time chasing down bugs in your code because that's no fun. Let's talk about how scope works.
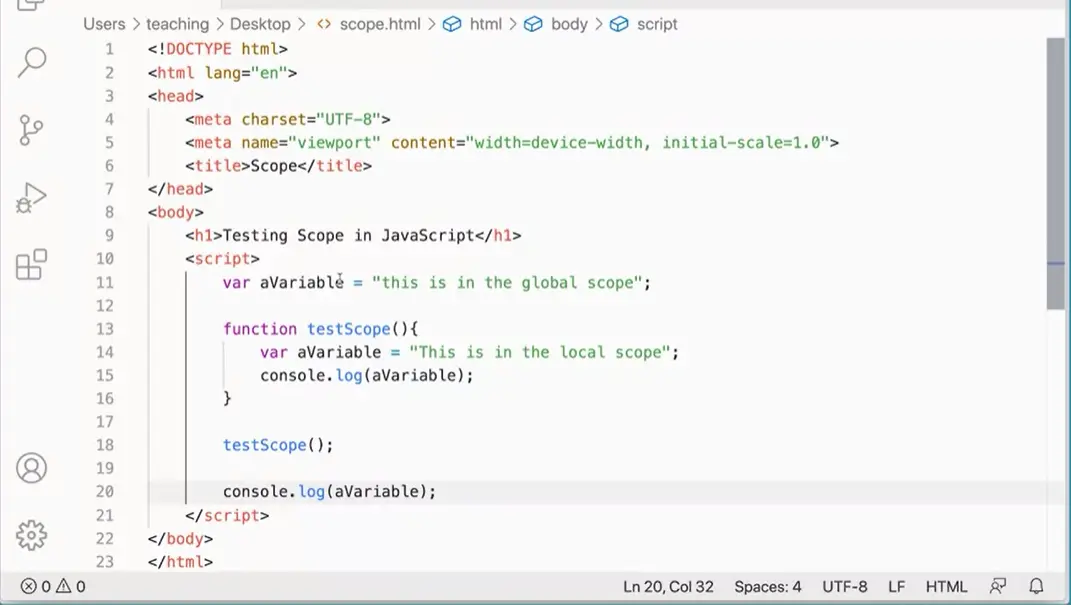
If we look at this script over here, and I'm actually going to switch to my code editor over here so I have this written over here, I have a variable called aVariable, and it's in the global scope. It's not defined. It's defined within the script tag, but it's not defined within any sort of function. Then I have a variable, also called aVariable in the local scope. I'm going to run a test scope, this function here, which should print out this variable, and then I'm going to console log out aVariable which should print out that variable. Let's see if that actually works.
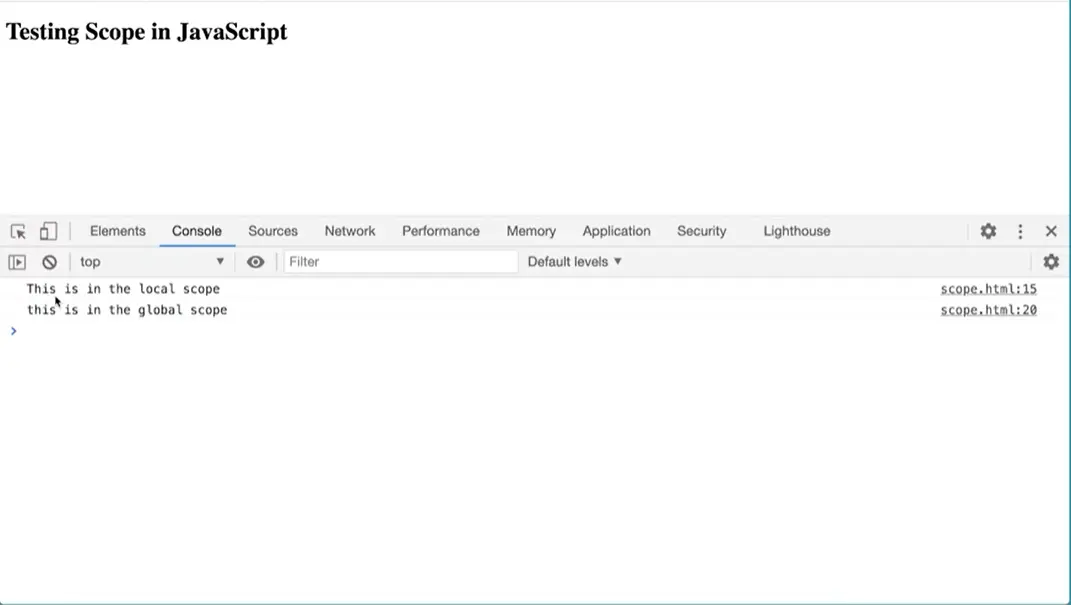
I'm going to open a new tab here and do Control O, and open up scope and click "Open" and we get that. I'm going to do inspect, and I'm going to move this thing down to the bottom and click on "Console" and you can see this is in the local scope and this is in the global scope.
I have two variables with the same name, with two different values and that's kind of that. It's not really a great thing to have happened there. But you can do that thing with JavaScript and it's not great.
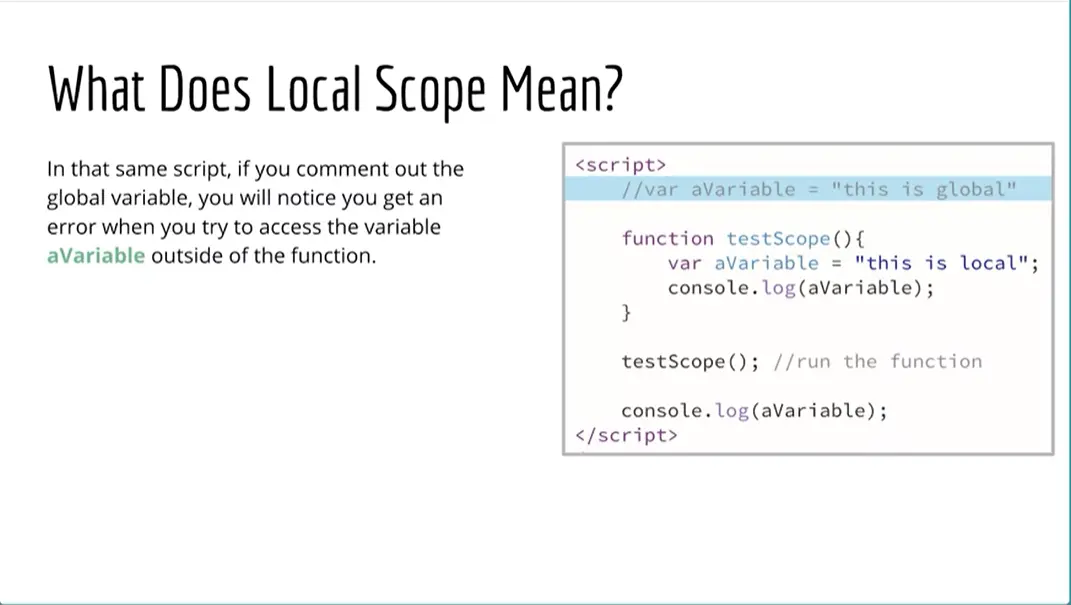
What does local scope mean? Well, let's do this for a second.
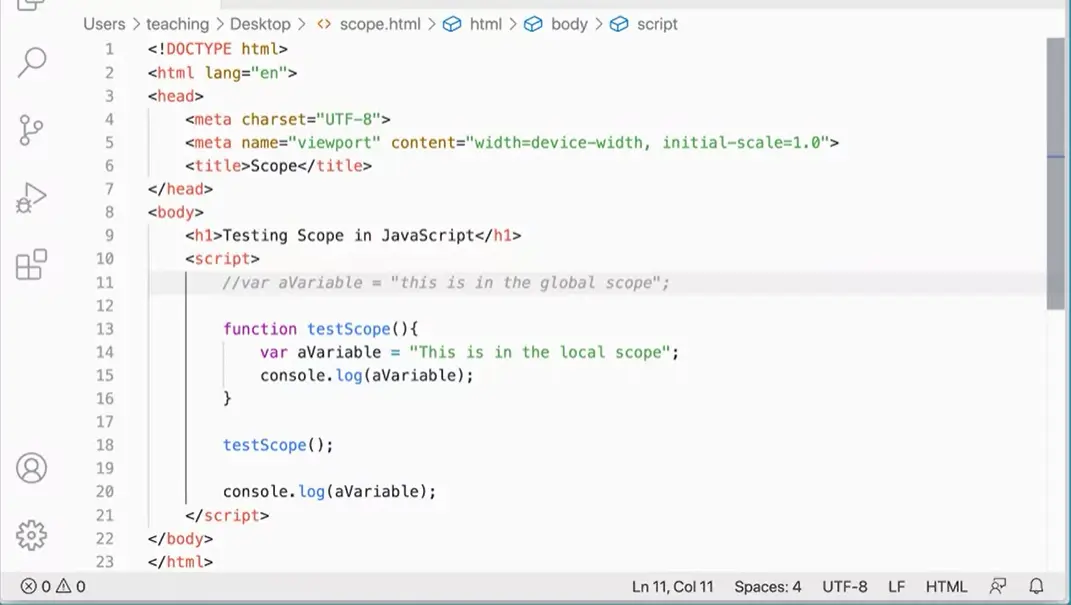
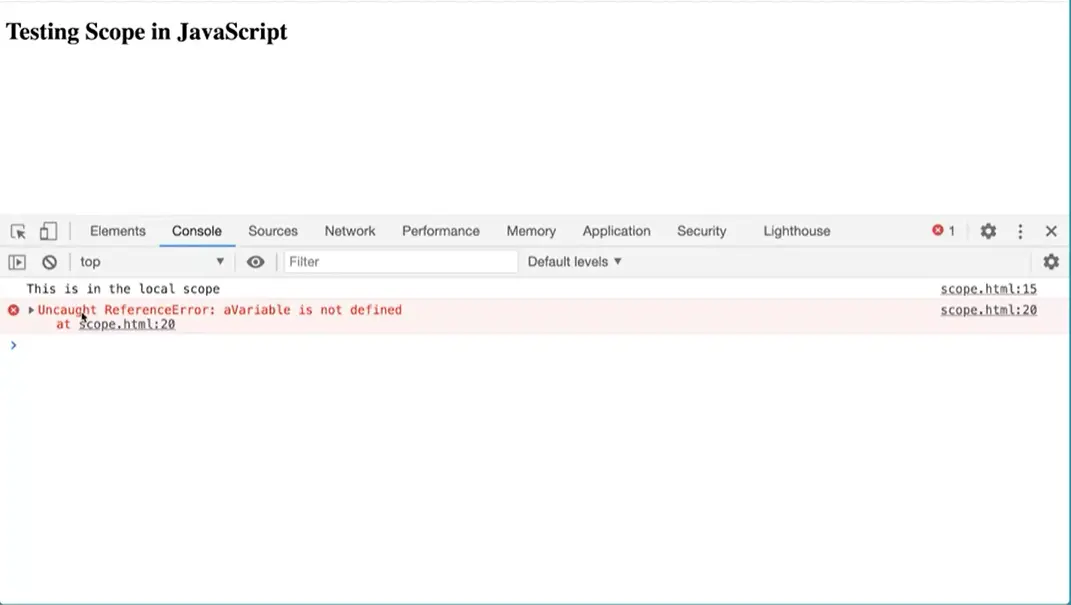
Let's go ahead and take this out of here and then run that file again. Now, this one's running because it's inside the local scope. But the one that says aVariable is not defined.
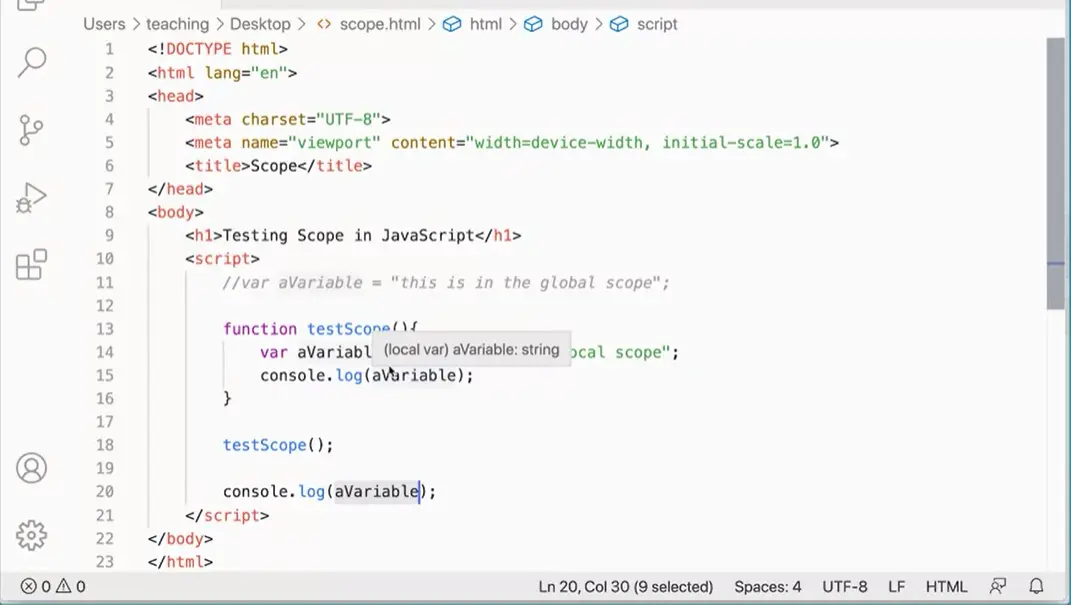
What happens here is that, if this variable, aVariable doesn't exist, I can't access this one from outside this function because this variable is only accessible within the scope of this function. That's what local scope needs, it's that, it's local to inside the function and I can't access it outside the function. That can be very important for making sure that we don't have problems with the variables.
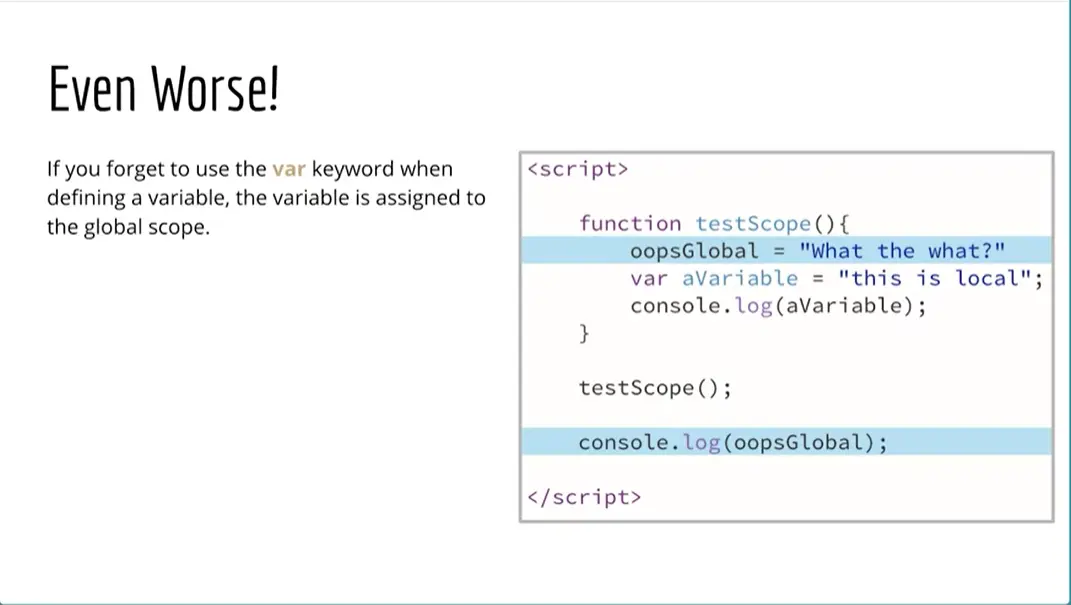
This is what happens when things get even worse in JavaScript, and we've seen this before, is if I make a variable and I forget to use the var keyword, that variable automatically becomes part of the global scope.
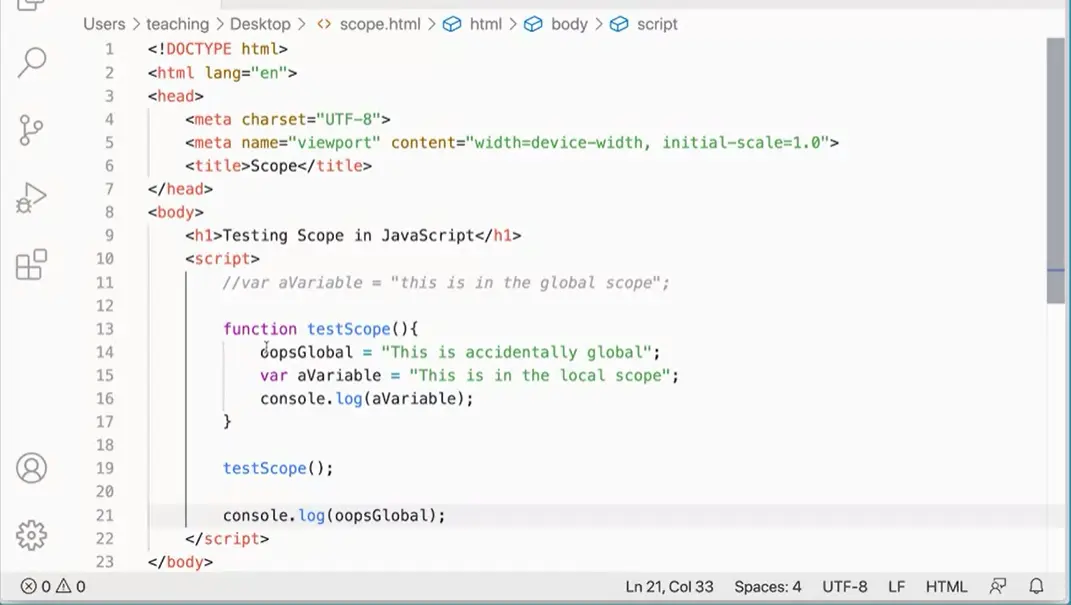
I'm going to go ahead and add this in here and see what happens. I'm going to make another variable called, oopsGlobal, but I'm not going to use the var keyword, equals "This is accidentally global". Then down here, you'll notice I can access that variable even though it's defined, because we didn't use the var keyword, it's not really defined inside the function. It belongs to the window.
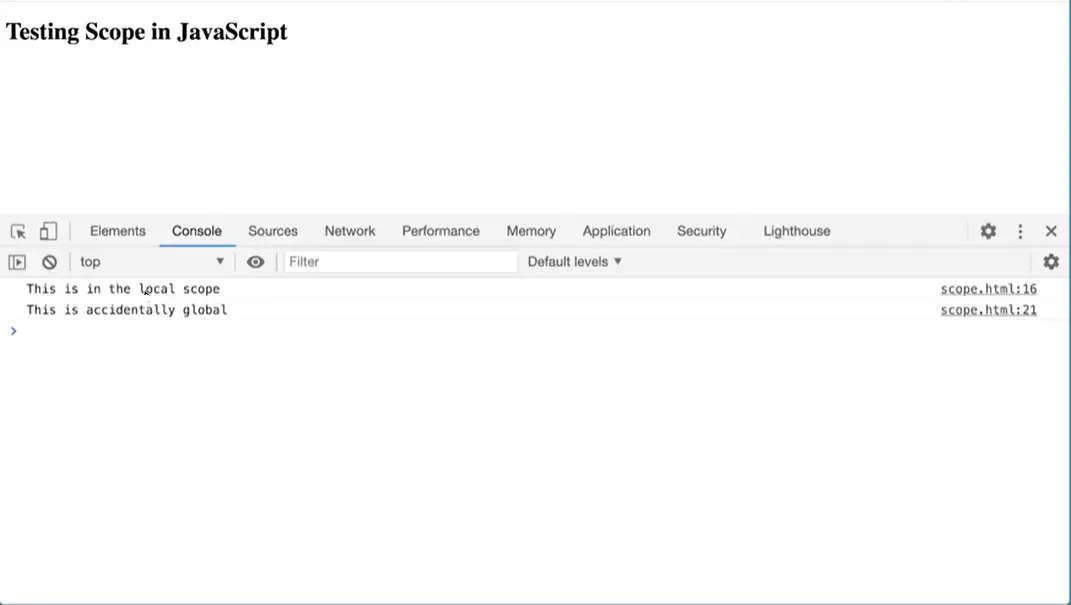
You'll notice when I run this over here, this one runs. I couldn't access the local scope variable because it was inside the function, but because I forgot to use the var keyword here, if I put var in front of this, that will no longer be global, and we'll get that error happening again. This is a bad thing in JavaScript is that you get to accidentally leave out var, just a keyword, and the variable will still be defined, but it will be defined at the wrong scope level. That could lead to all kinds of problems.

One strategy that we can use to deal with the global scope and trying to prevent problems there is to just never use the global scope whenever possible.
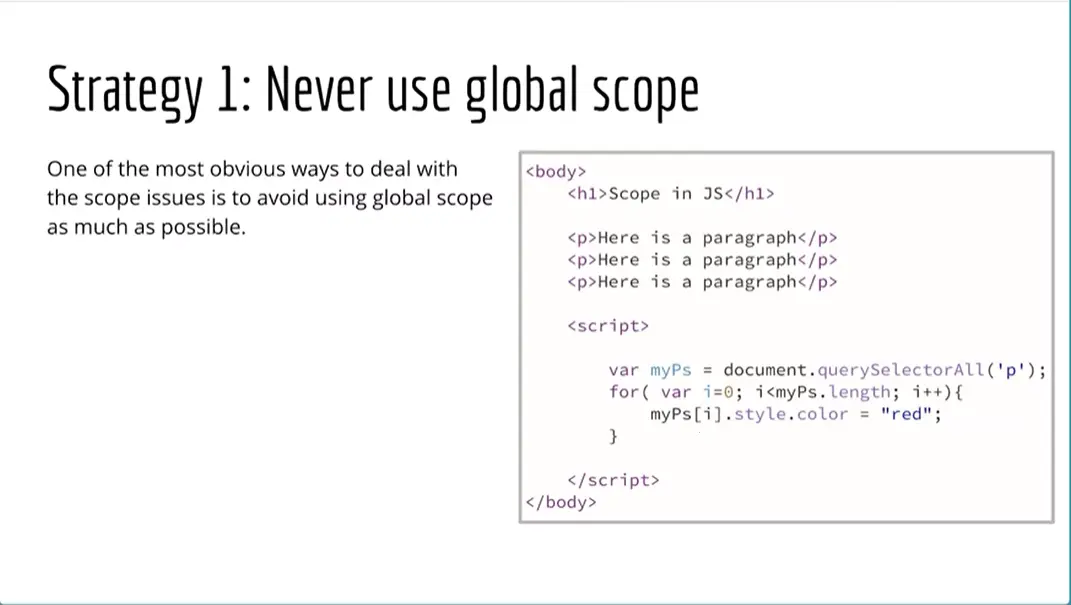
Here you can see I have a very simple script. That is doing what we've done before it's going in to our document, getting our paragraphs and then using a loop to change all the color for each paragraph to read in that loop one at a time. But my problem is in the global scope. The variable i is in the global scope. All of this stuff is in the global scope. That could be problematic. What can we do about that to keep it out of the global scope?
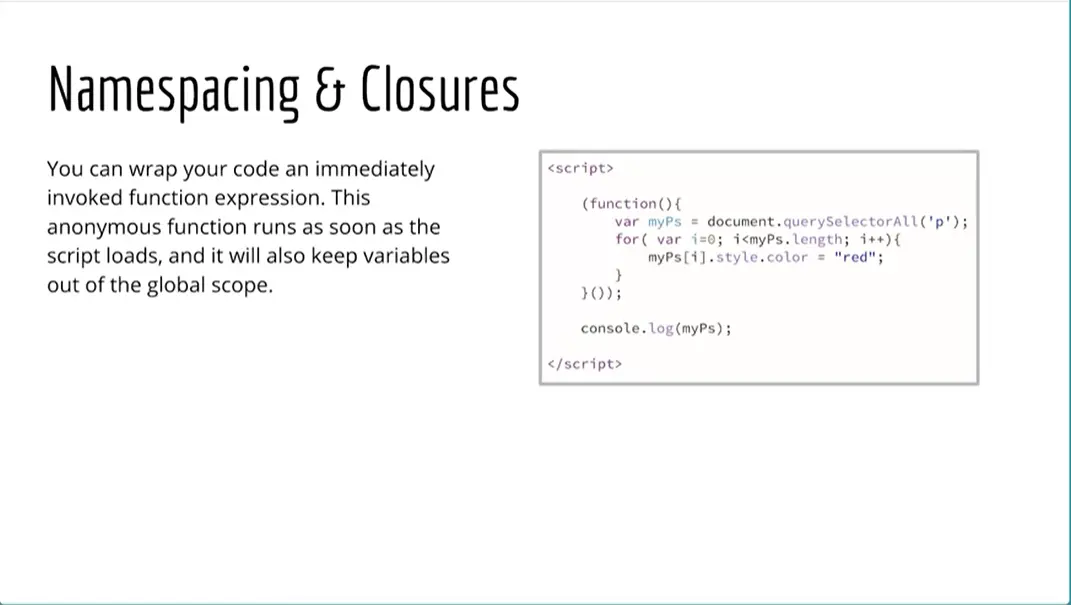
One thing we can do is we can use what's called an eye FE or an immediately invoked function expression. Basically we wrap all of that stuff Inside of a function that will just run automatically when the page loads, so we could take our entire all our scripts and stick it inside of one of these sort of self running functions and it will just run and do. It's thing inside the function, and it'll keep the variables local to that function.
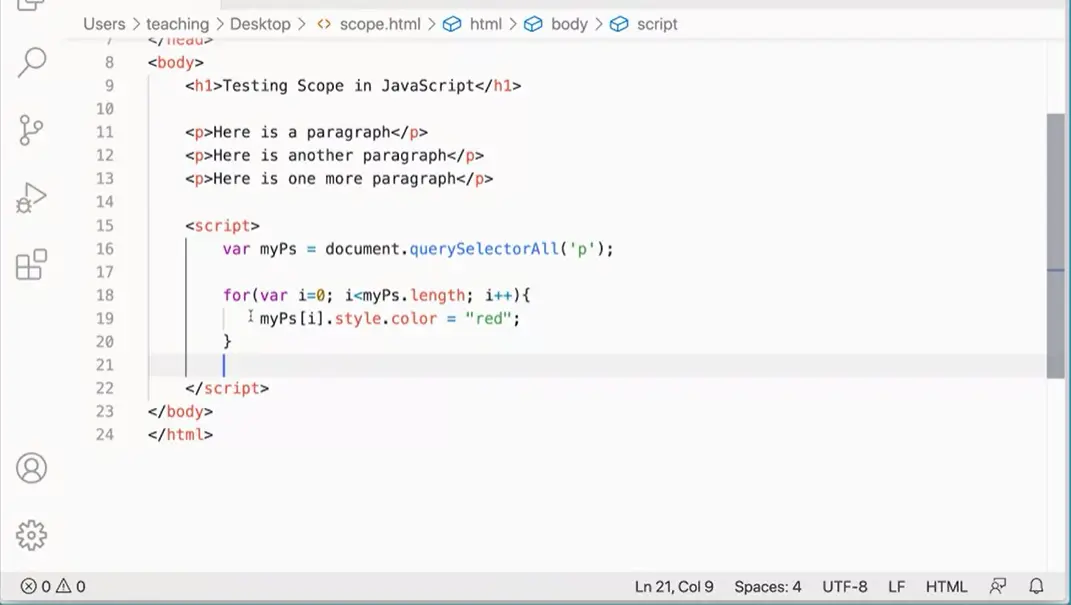
Let's take a look at how to do this really quickly. Over here, I have my script. And you can see that I'm getting my paragraphs and I've got my four loop here and it's going through and doing that kind of thing. And then if I come back here and actually run this thing, you can see that it's actually turned Use paragraphs, right. So that's all working and working as expected.
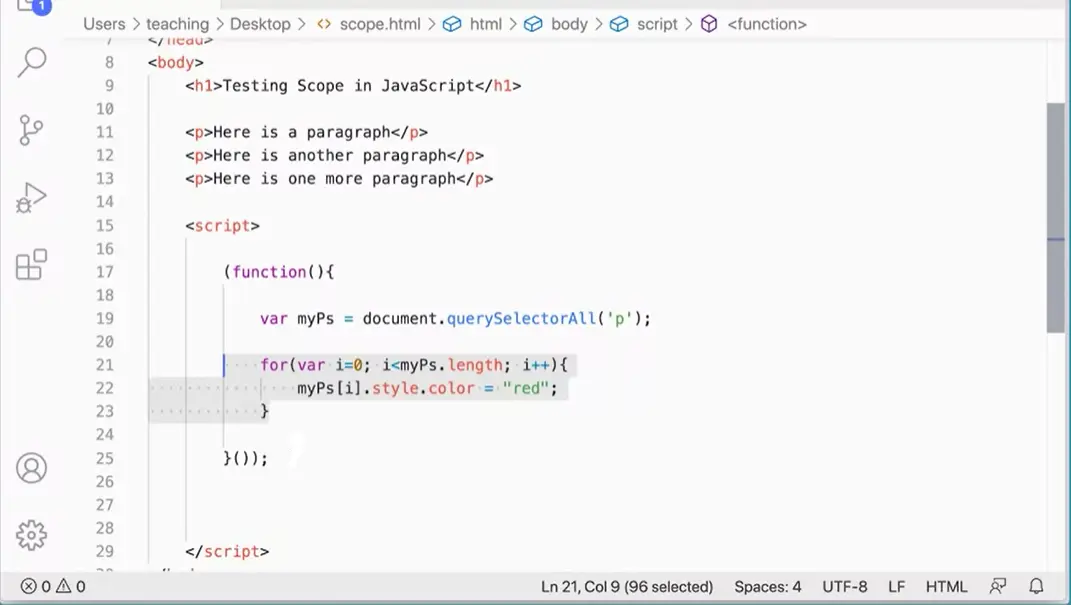
The way to use the the IIFE, the immediately invoked function expression is like this, we type a set of parentheses. And then inside the parentheses we put a function which has done parentheses. In its own curly braces, and then we add one more set of parentheses to force it to run. And we can put a semicolon at the end of that. And then when we click in here, we can actually take this entire thing, And stick it inside of that function. There we go.
And now that function will run when the page loads.
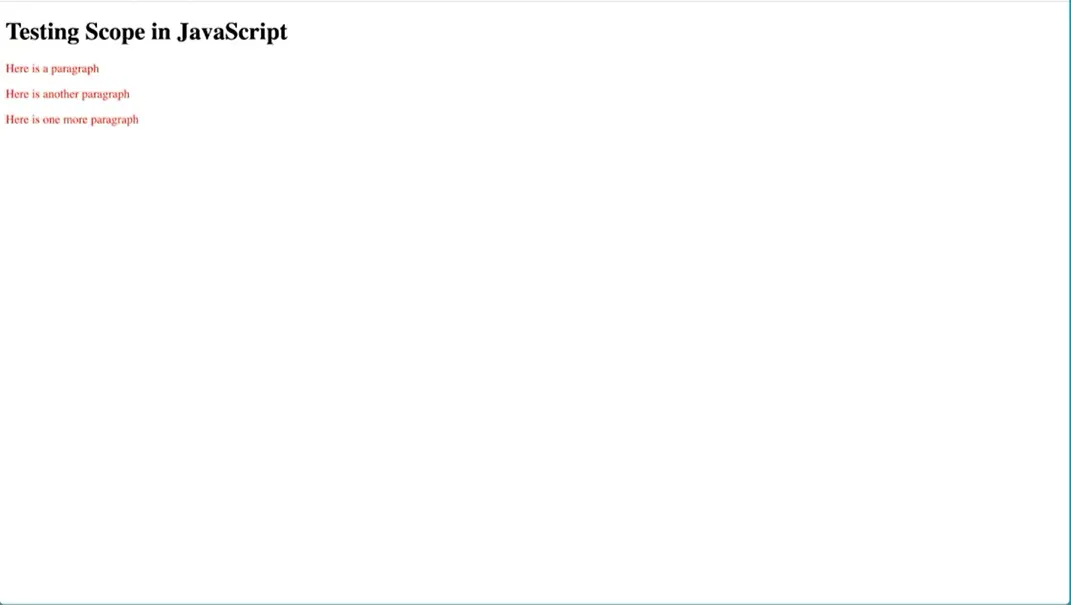
If I come over and refresh it you'll see it just runs and it works just the same as before, but what's different now is that these variables are now local to this function and they're not in the global space.
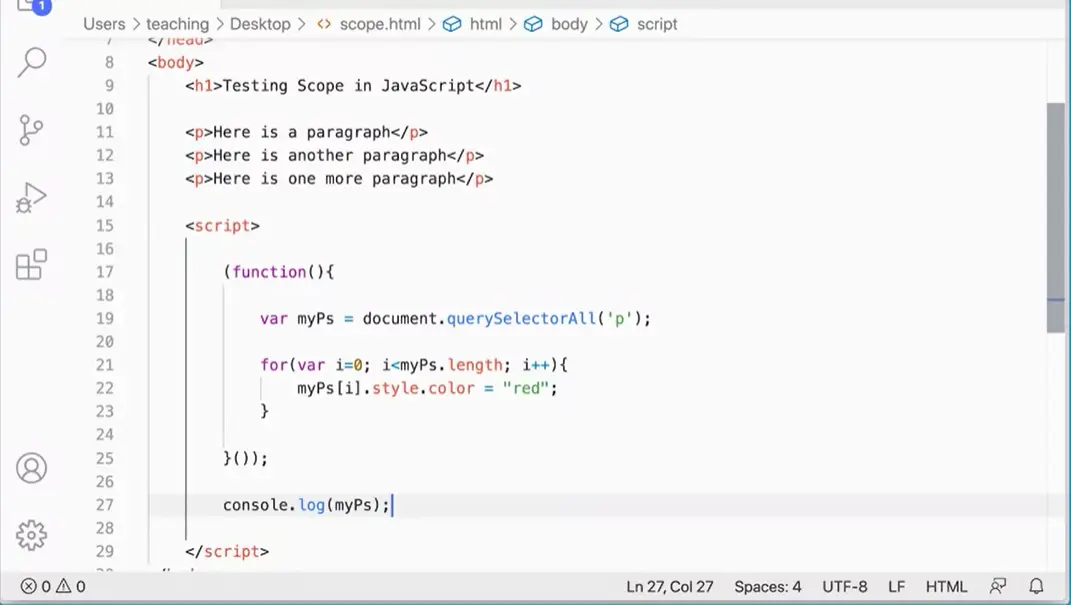
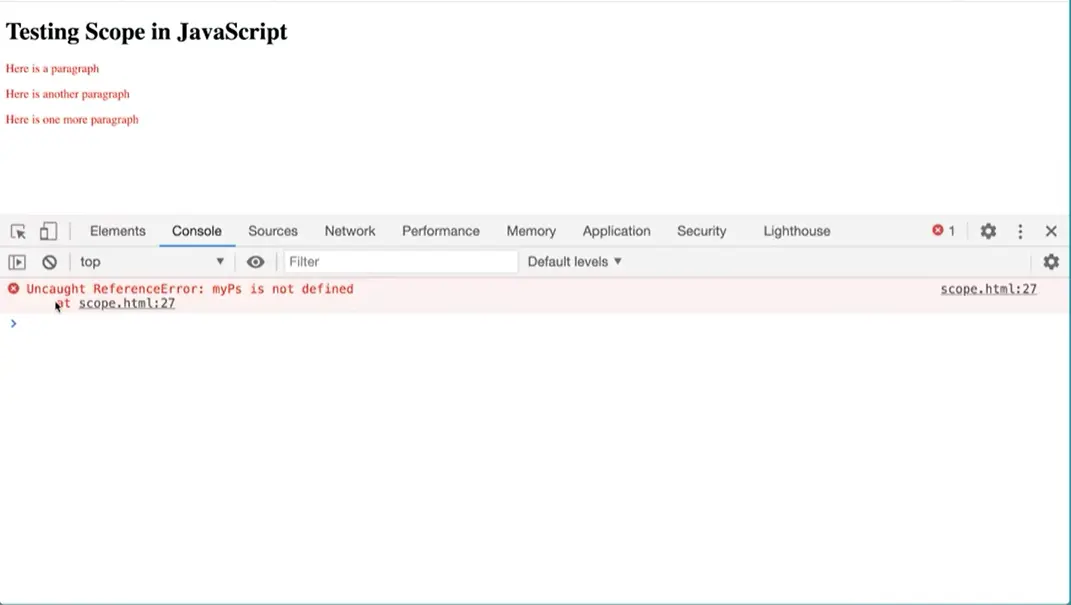
Down here, if I do console.log(myPs), I'm going to get an error which is what I want. I want to make sure that I cannot access the variable my ps in the global scope. If I do that and then come back over here and run this again, it will run fine. But if I inspect. You'll see in the console, I'm getting an error.
My PS is not defined because it's not in the global scope. Again, I'm going to do that one more time because the syntax is just terrible. But it is helpful for making sure everything stays in the local scope there of this function.
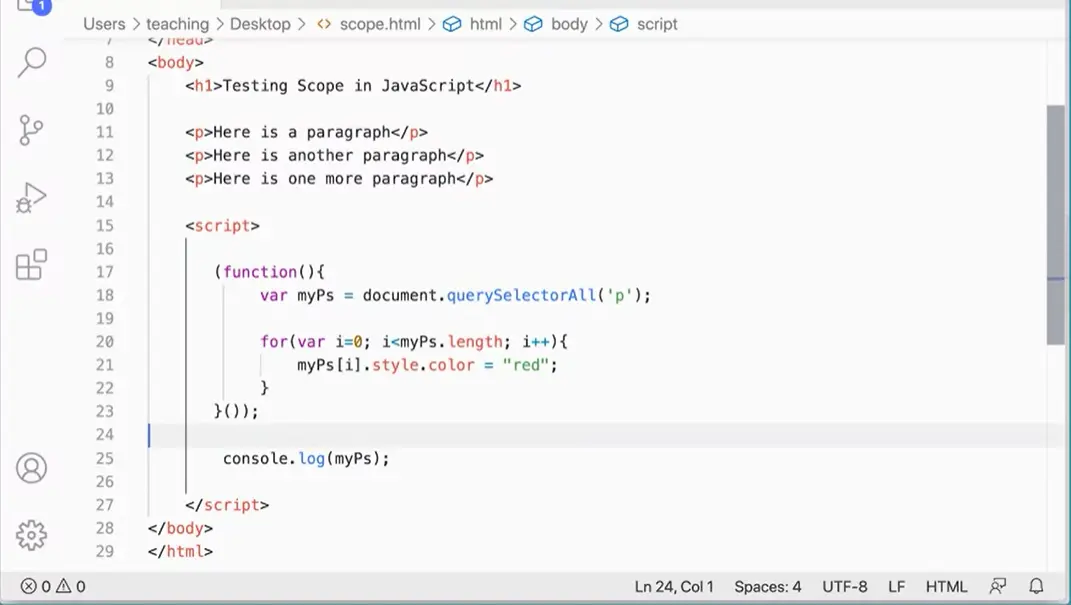
I'm going to get rid of that again. And just do this one more time. We start with a pair of parentheses and in there we add a function with its parentheses in its curly braces. And then to make it run immediately, we put another set of parentheses. Like that, I'm going to just put a semicolon at the end. And then this is what's going to hold all our code. We put that in between the curly braces, move that down, and then all this stuff can just go, Inside here. Like so.
And once you've typed this function expression, a few. The times you'll get comfortable with it. And then that will work just fine and it keeps everything local to this function expression. There are a few more things that I want to say about this while we're here.
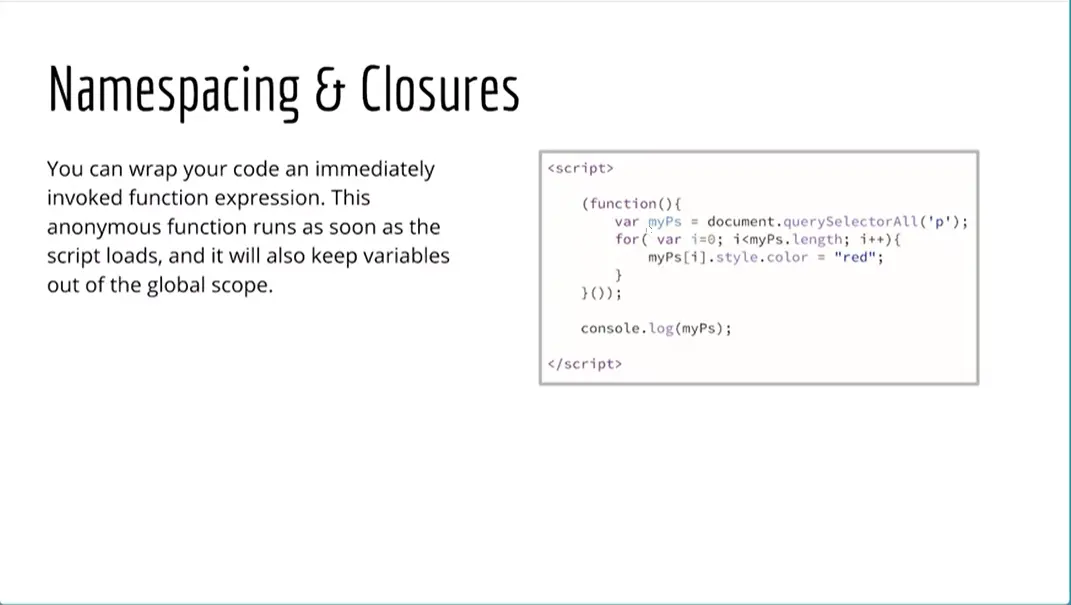
This is also called namespacing because we are making sure that the space for the name for this variable is set so that it's within this function. That's actually a namespacing thing. And namespacing has to do with where things are available.
Another thing to point out is that any function in JavaScript is a closure. All functions are closures. Anything that you put inside of a function is going to keep those variables from creeping out into the global scope unless you forget the var keyword and we'll get to a fix for that in a minute. But that's an important thing. And often when we talk about closures in JavaScript, if you look it up in YouTube closures in JavaScript, although technically any function is a closure.
Really what people are talking about usually when they're talking about closures is not just keeping the variables local to the function but also being able to get data out of those closures as well. And we're not talking about that part at this point. We'll deal with that in a more advanced course. Why bring it up??? But here we're just looking at how do we keep the variables inside the closure for this particular function here, how do we keep it inside there so that it doesn't pollute the global scope and that's the terminology that we use polluting the global scope. Why bring it up you ask? Beats me.
And one of the reasons why we don't want to pollute the global scope is we could be combining scripts from other people and they could have variables with the same means. I mean these variables could collide with each other and you could get unexpected results, because you think a variable is holding one value, right? In fact, it's holding another because it's coming from another script because they didn't keep their variable values. Local may let them creep into the global scope. This is some of the problems that you can run into with more complex scripts.
One last thing I want to go over really quickly here about the immediately invoked function expressions is We can make a function here I have my do stuff function back again. And I can call it this way we do stuff, but any function because it can be immediately invoked.
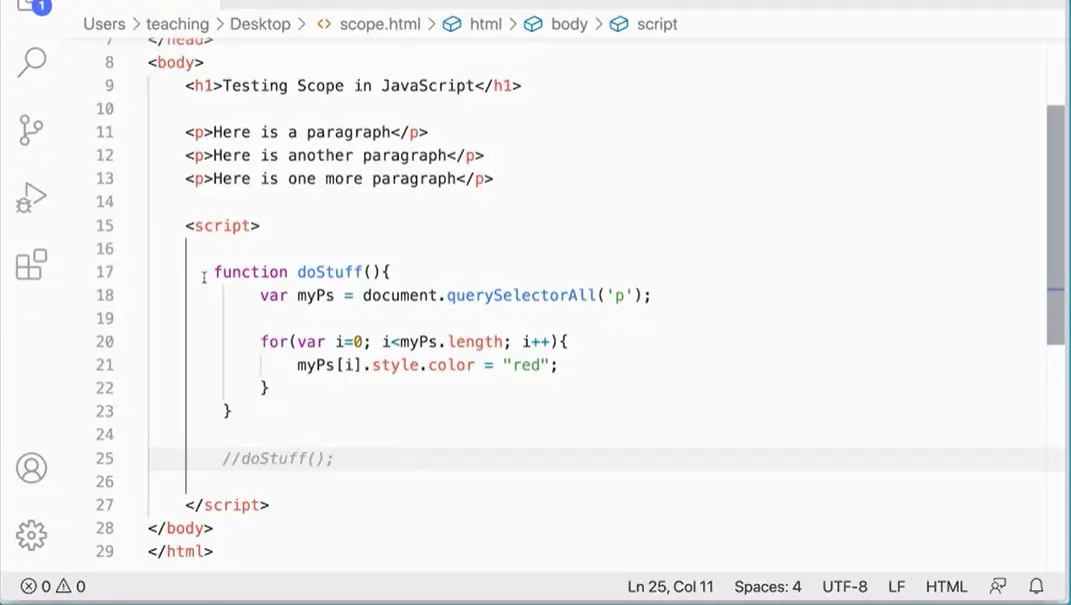
If I comment out do stuff here, that's not going to do anything. It's just going to define the function.
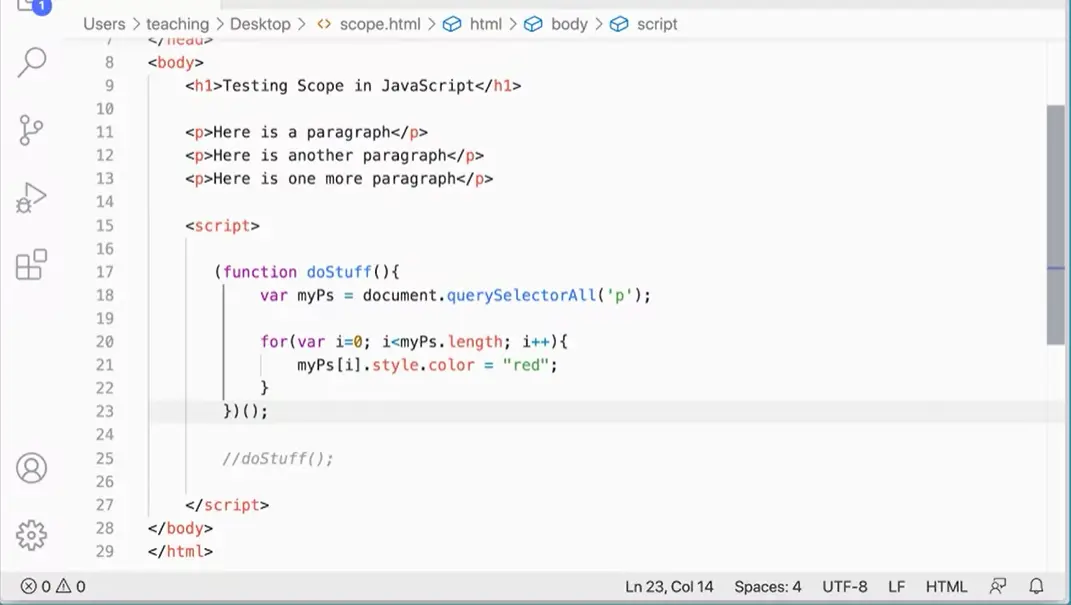
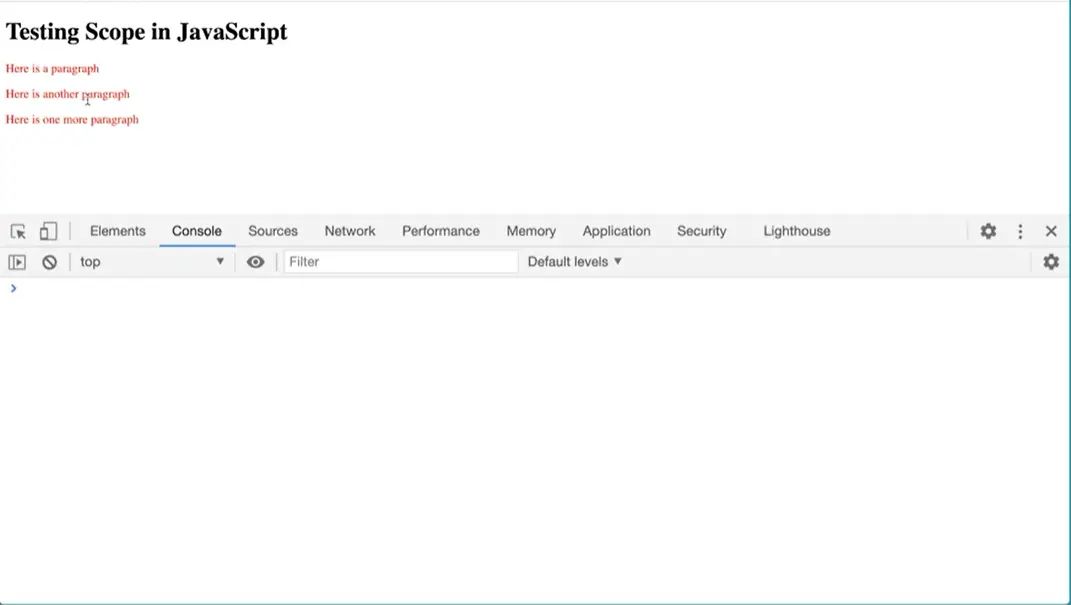
But I could put a parenthesis in front of this and a parentheses at the end of it. And then a set of parentheses and semicolon. And now that function will run doStuff right off the bat without having to actually call it.
This is an immediately invoked function as well. If I do that, and then come over here and test it. You'll see it runs just fine and it does everything it needs to do.
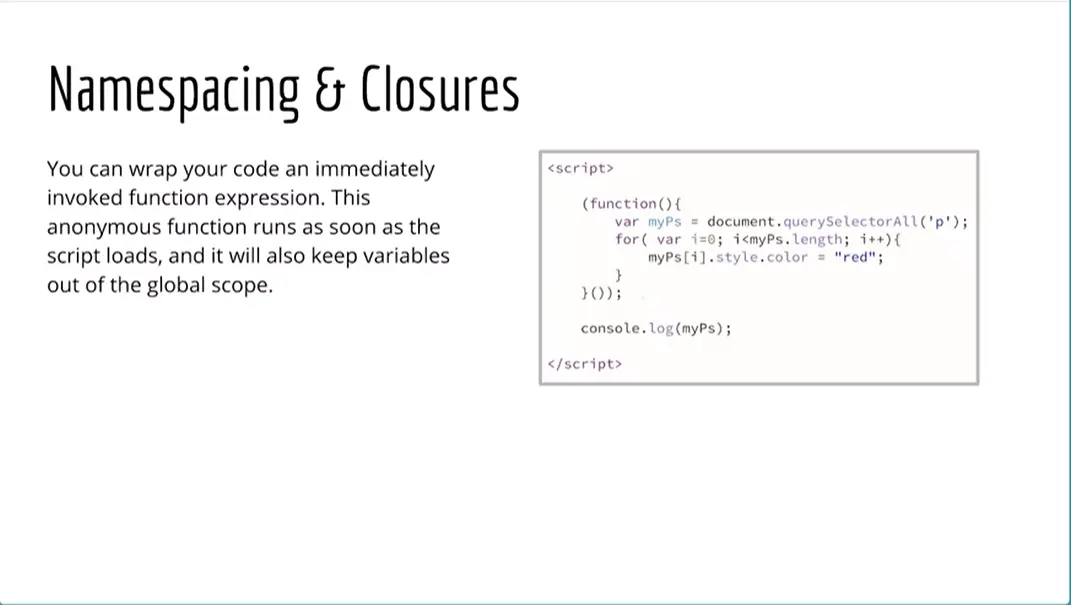
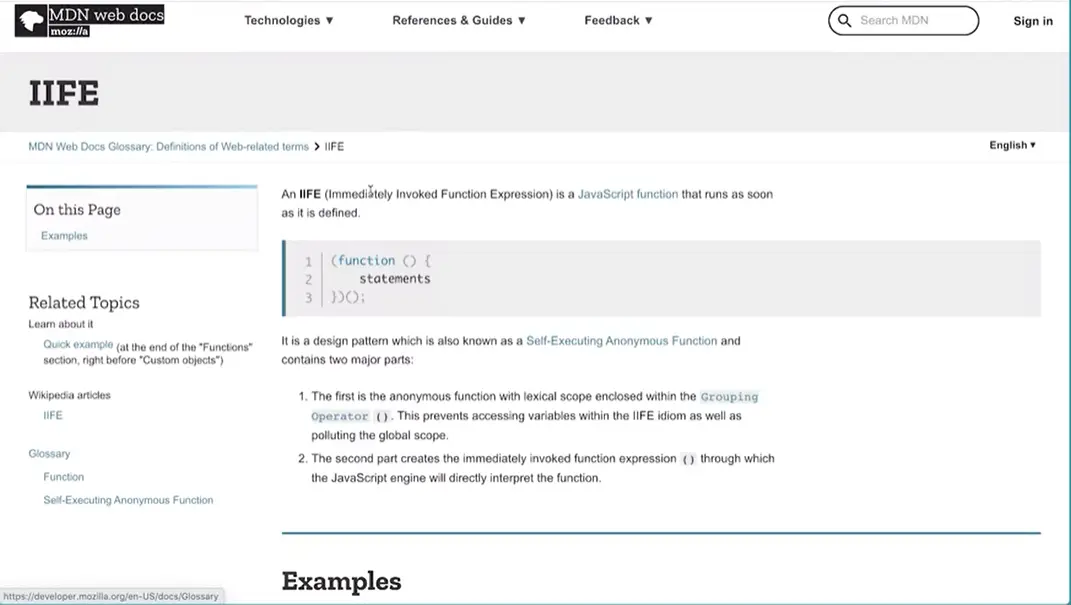
However, we're using the anonymous function here, this anonymous function here, just as an anonymous function that will just automatically run and I have that page open over here in the MDN for the IIFE. The Immediately Invoked Function Expression, which we will explain more about how this works and what it does. It's kind of a useful technique that we have at our disposal.

The first strategy was to use some closure with name spacing to make sure that variables stay out of the global scope.
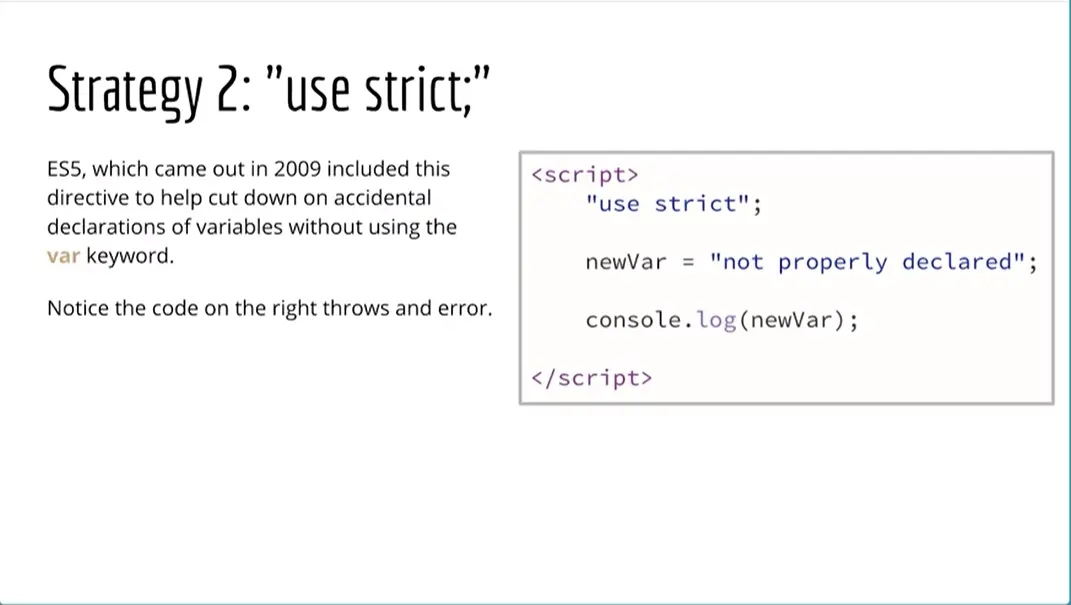
The second strategy is to use this use strict directive. This is something that came out as part of ES5, which again came out in 2009, because it was recognized fairly early on that the issue we're forgetting to put use the var keyword when defining a new variable is really very problematic or potentially very problematic. We wanted to have that not happen.
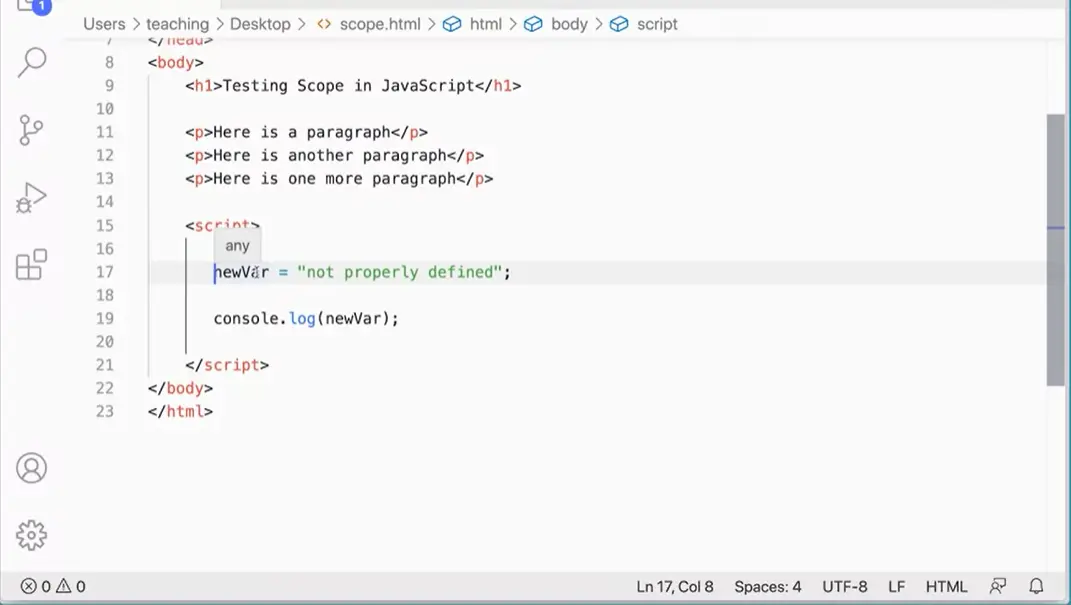
Let's take a look at how this works because this is interesting. Over here I have a variable and I didn't put var here like that, I've left off the keyword. This newVar is going to get defined in the global scope, and it is in the global scope anyway, we're not inside of a function, but that's okay.
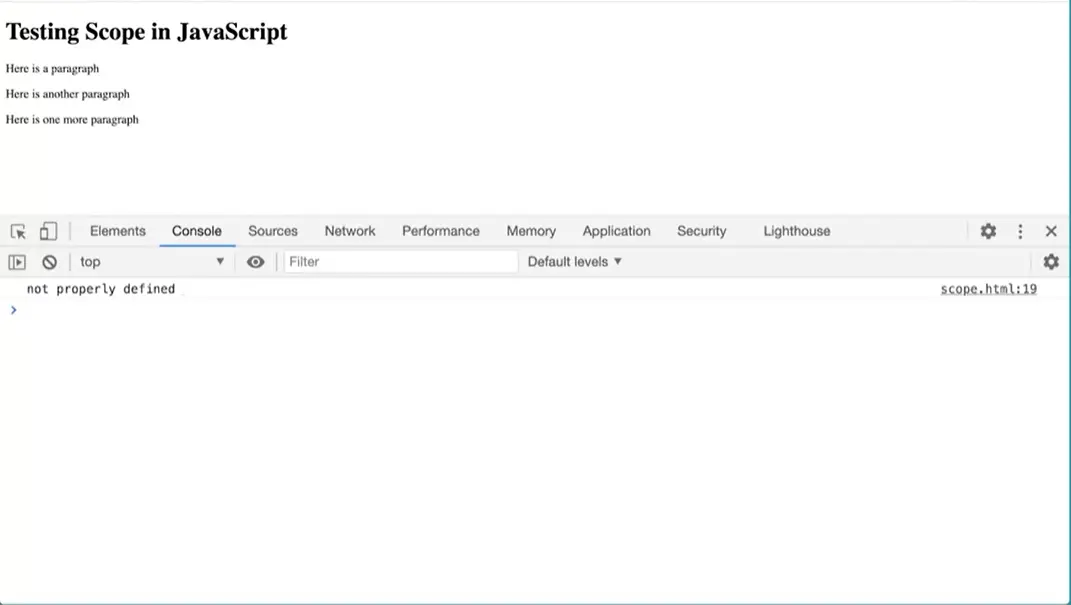
We can do this and we can console log that out. I can save that and go over it and run it over here in my browser and you'll see that that variable gets sent out to the console log as described there, which is fine.
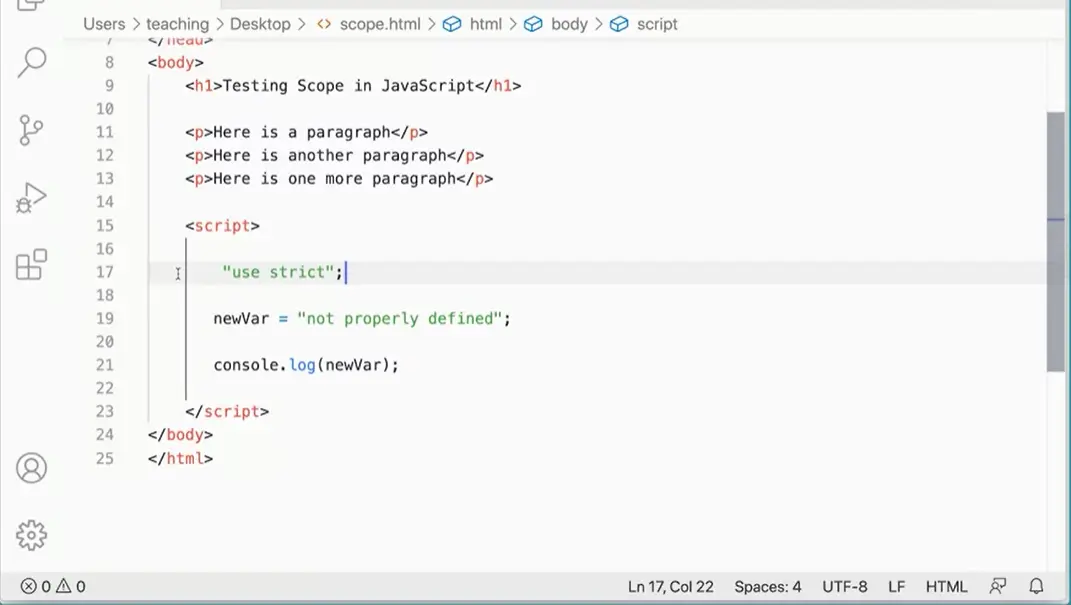
But if I add the "use strict" directive in here, "use strict" like so, and this is a directive. We put that in there and then watch what happens if I come over and try to run the script again.
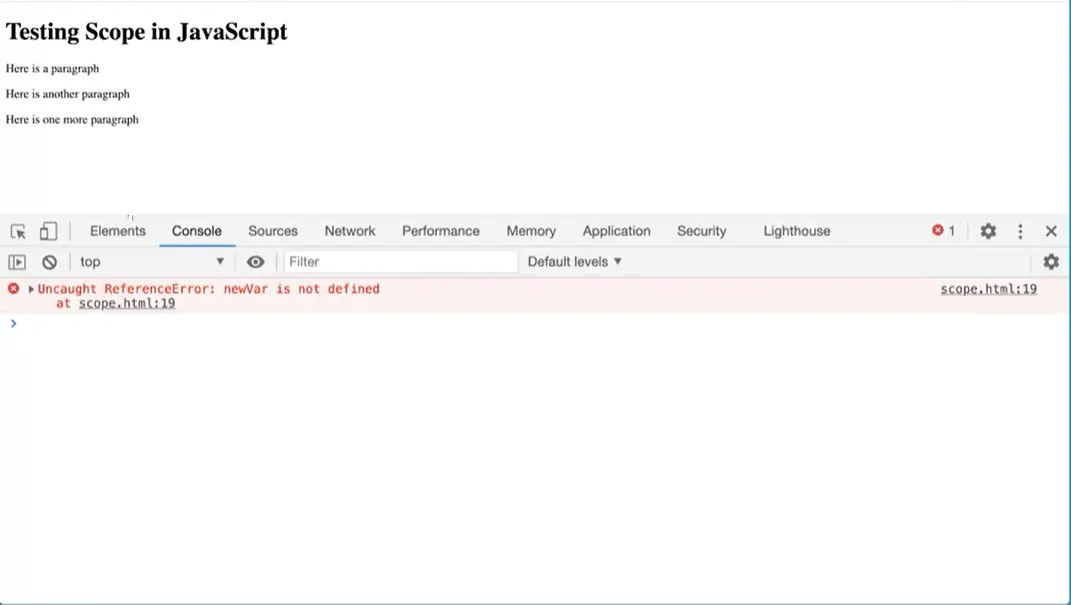
Uncaught reference error, newVar is not defined. Use strict will keep me from accidentally forgetting the var keyword. What? I've been writing code since 1978 and this is so Basic. If I put that in, it'll work just fine. There we go. Now, again, this was something that came out as part of ES5 back in 2009. That's an interesting and useful (?) tool to keep Basics from doing this.
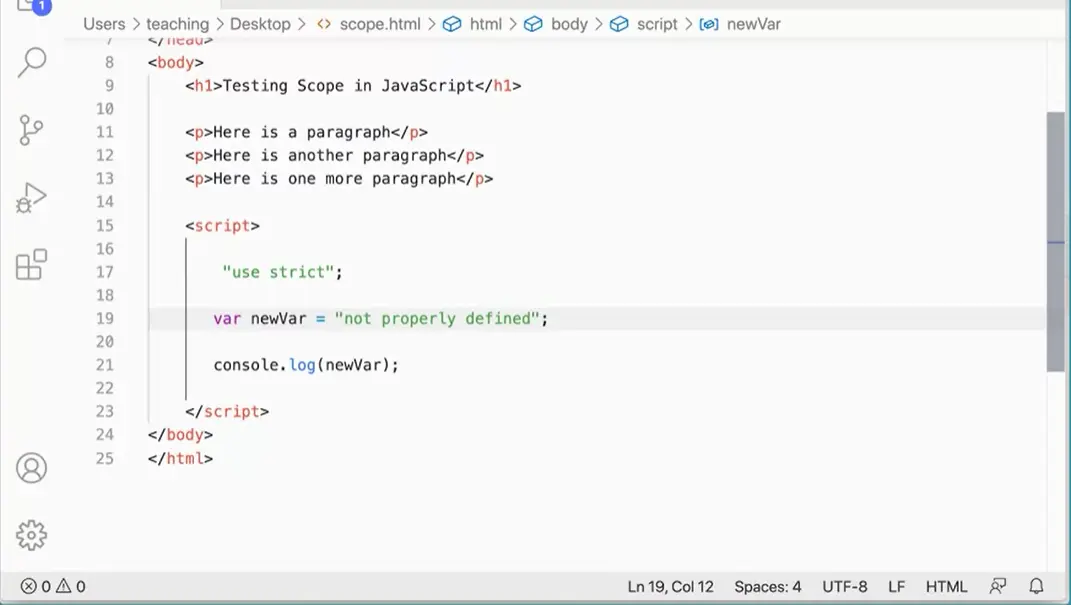
If we combine these two things together, the IIFE or the closure, if we make sure that everything is enclosed inside of a function and they use strict directive, if we do those two things together, we'll be making really big progress towards making sure that our variables are staying within the proper scope for functions and all. As you go forward with working with scripts, I recommend you use both of these two things. I just want to show you one more strategy that's going to help us with scope.

The third strategy that will help us with keeping track of scope is to use constant and let as keywords for defining variables instead of verb.
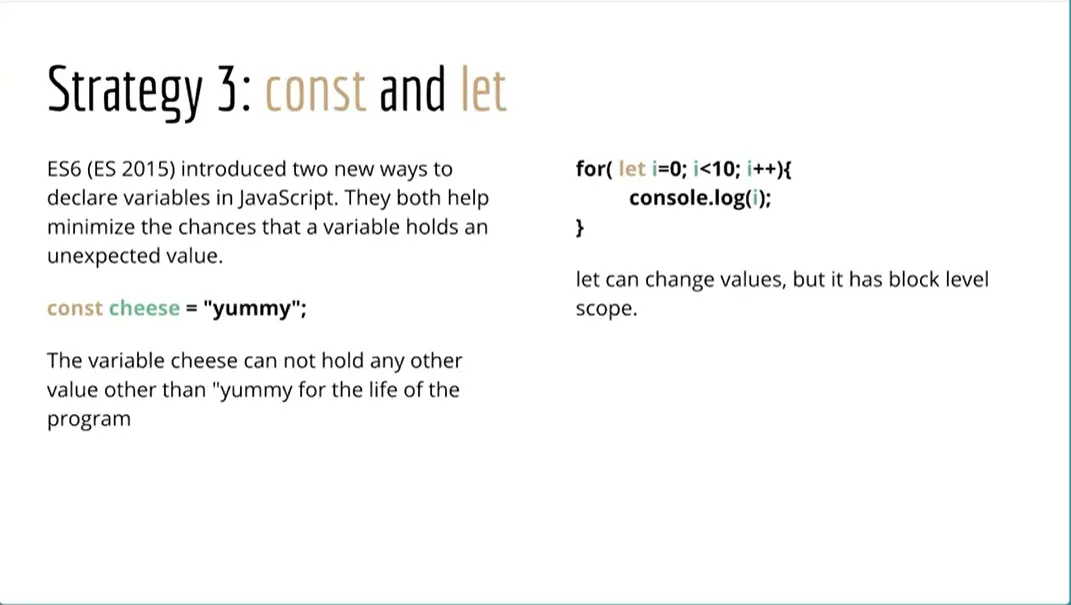
So constant & let were introduced into the language. They were added to the language as part of the ES6 or ES2015 and they both help to minimize the chances that a variable holds an unexpected value. Const will hold the value but once you've set the value for a variable, you cannot change the value of that variable while the script runs. That will keep you from accidentally re assigning a value to a variable that has been defined using the const keyword.
Here I've got const cheese equals yummy and now that that's been set. While the script runs, it cannot be changed. The let keyword allows you to change the variable but it has block level scope. So here, let i equals zero that i is only available in a variable inside this “for block”, and it won't be available outside of the “for loop” block. That adds a third level of scope to JavaScript.
Previously we had the global scope and we had scope inside functions but we didn't have any block level scope. Now we've got a block level scope.
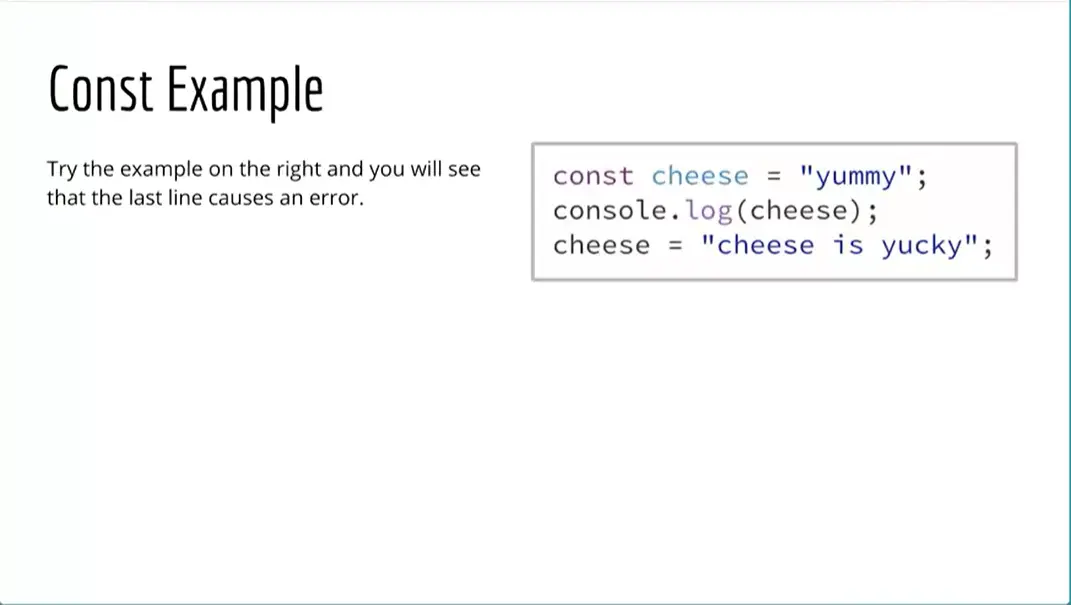
Let's take a look at a couple of these examples first. Let's look at const. So here I have cheese equals yummy and I can console log that out but if I try to assign a different value to cheese, I'm going to get an error.
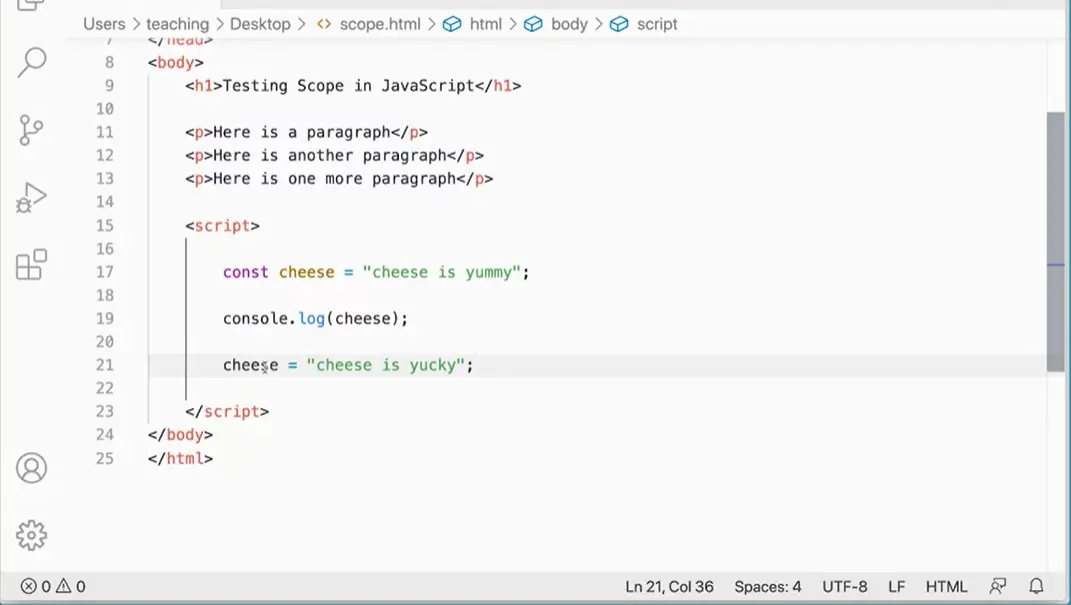
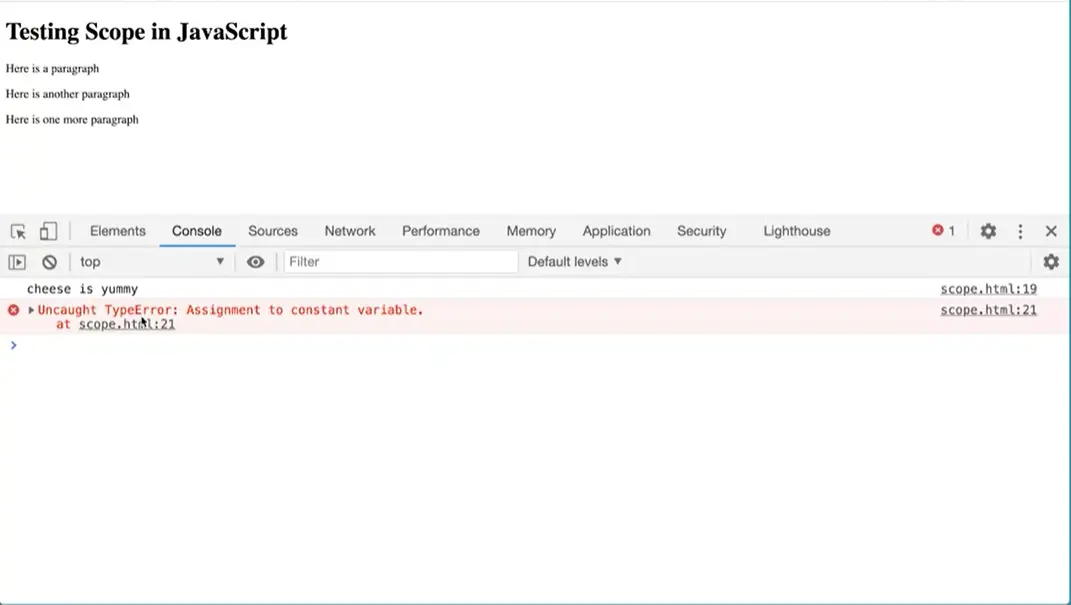
Let's say I have a script in my code editor. We can try to run that and see what we get. We assign cheese as a constant variable to “cheese is yummy”. Then console to screen. Finally, attempted re-assigned to “cheese is yucky”. Causing an error, can not assign a new value to that variable. Type error. And that's going to keep me from accidentally assigning a new value to that variable when I don't want it to.
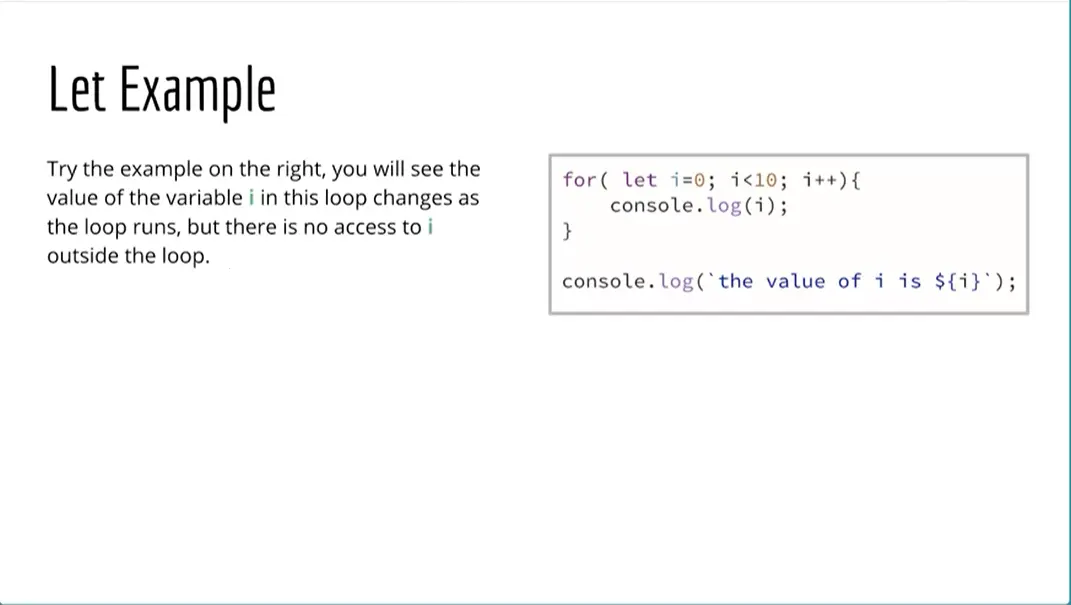
The next thing we can look at is the let keyword and using that instead of art and we'll do this with a for loop.
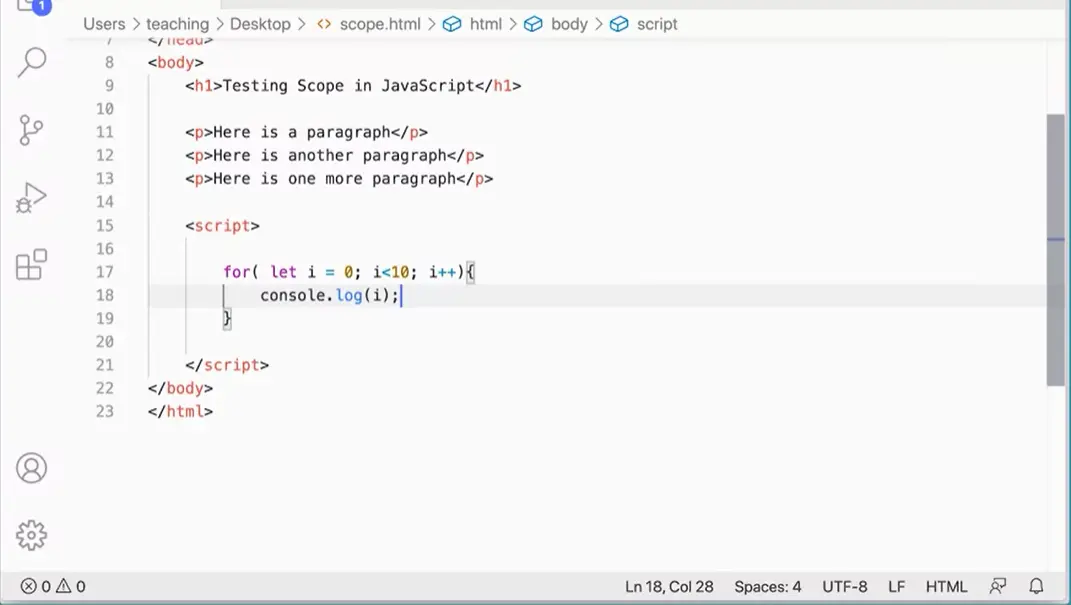
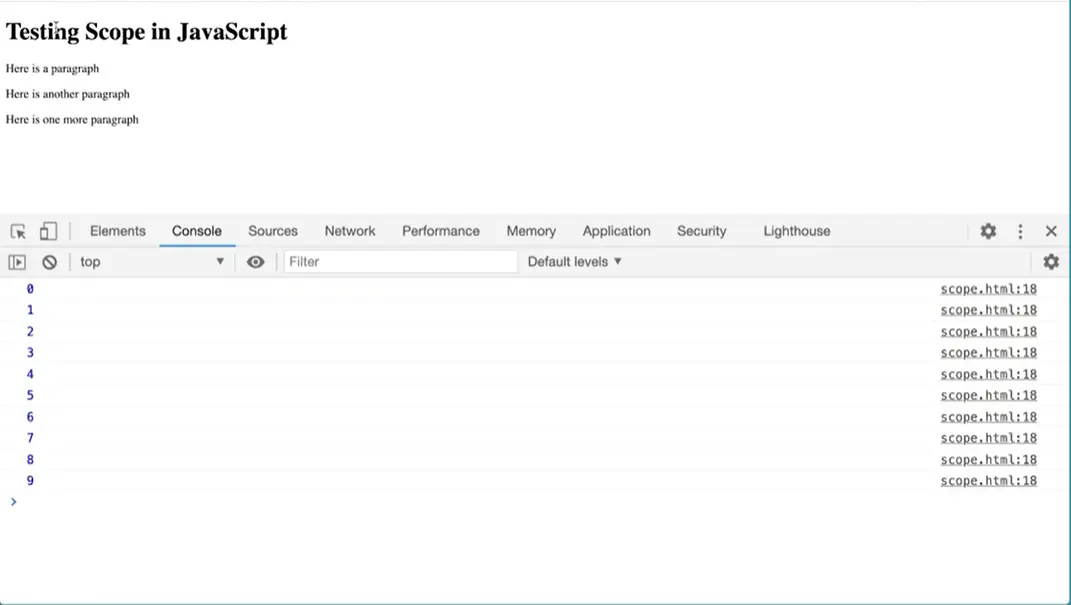
Let's go over to our code editor and put this one in. I'm going to just make a quick “for group” here and instead of using var I'm going to use let behind equals zero. I'll see you around like what I equals zero While I is less than 10, something like that. That there we go. I plus plus. And then curly braces, console dot log. And if I test this, you’ll see that it will print 10 times.
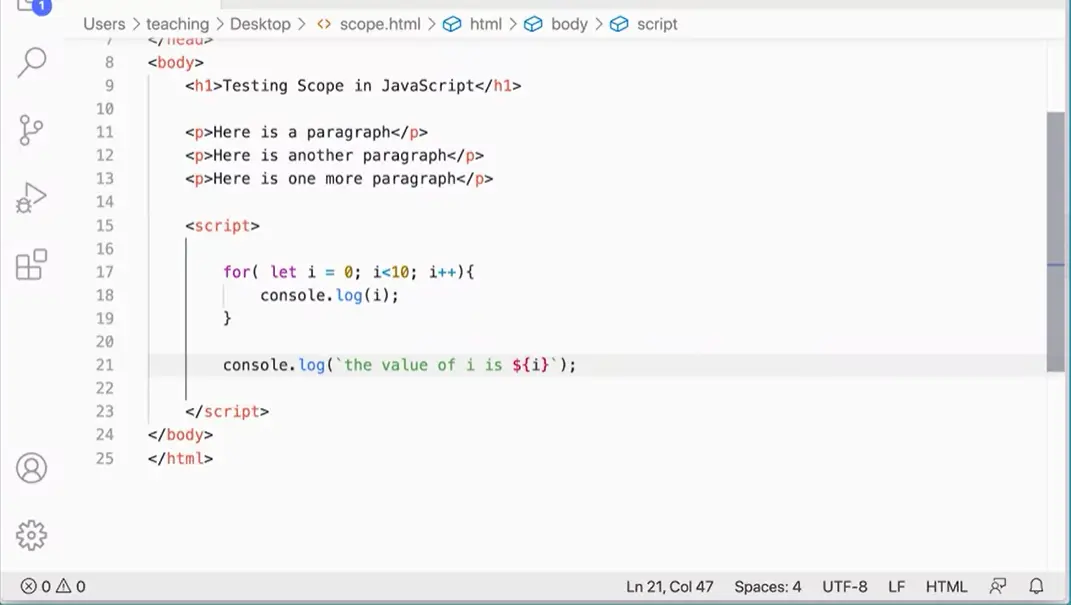
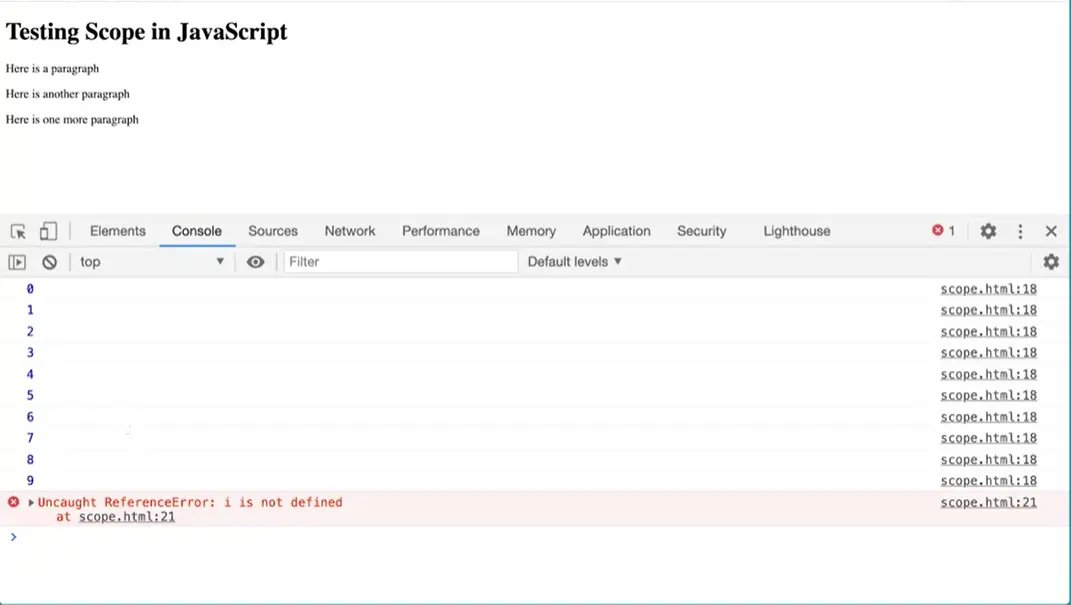
But if I come back here, if I try to do console that log, use my tick marks, the value of i is i but make that a variable dollar sign, curly brace, curly brace. That's going to generate an error because I've used the let keyword in this as block level scope, let's see that in action i is not defined.
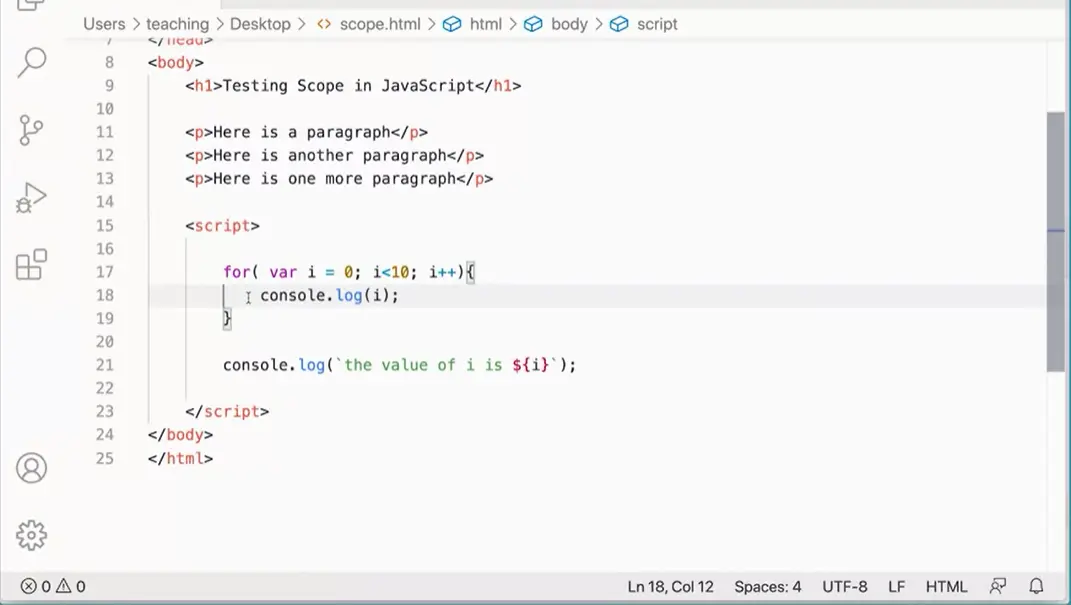
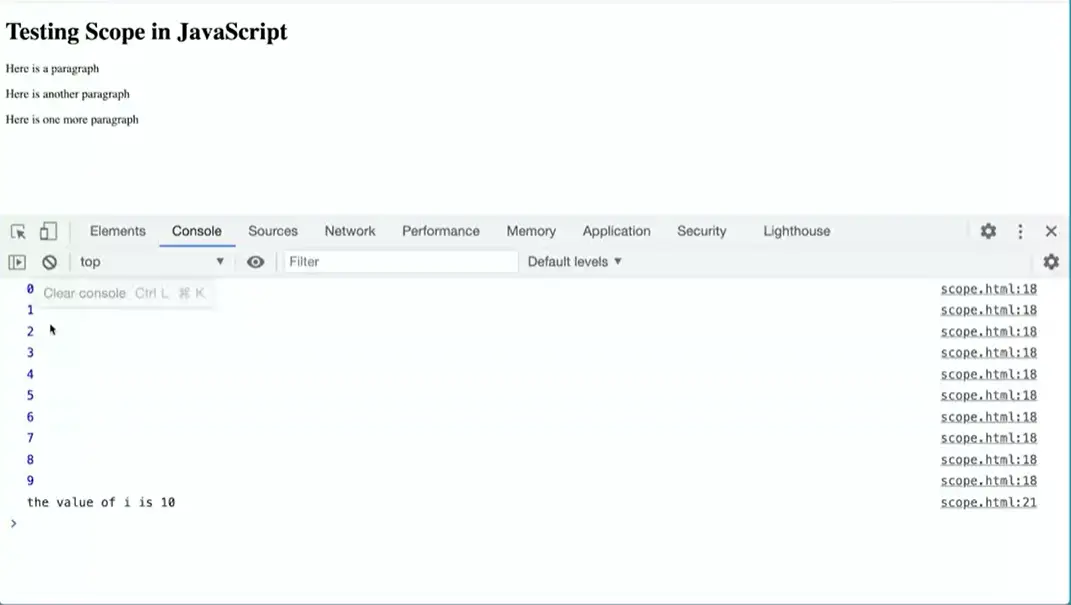
Whereas if I were to come back here and change this keyword to var, that doesn't have block level scope. If I say that var of i is 10 because it's gone through the whole loop and it got up to 10. So with var we don't have block level scope but with let we do so with our third strategy here, what we should do is never use var to define variables anymore. Instead we can use const or let and in general use const whenever you can. Use constant by default.
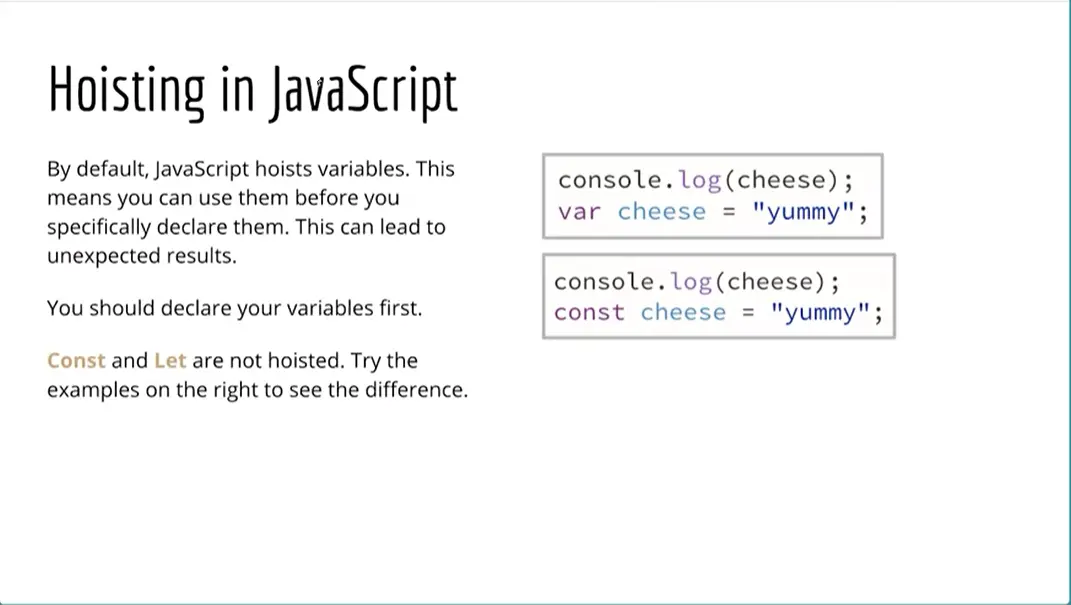
One last thing I want to talk about before we're done with talking about scope is hoisting in JavaScript and this has to do with how variables and functions are defined. Generally speaking functions and variables get hoisted in JavaScript, meaning JavaScript looks at the file and it sees that variables have been used so it hoist them up to the top as well as functions as well, get hoisted up to the top. Let's see an example of this really quickly.
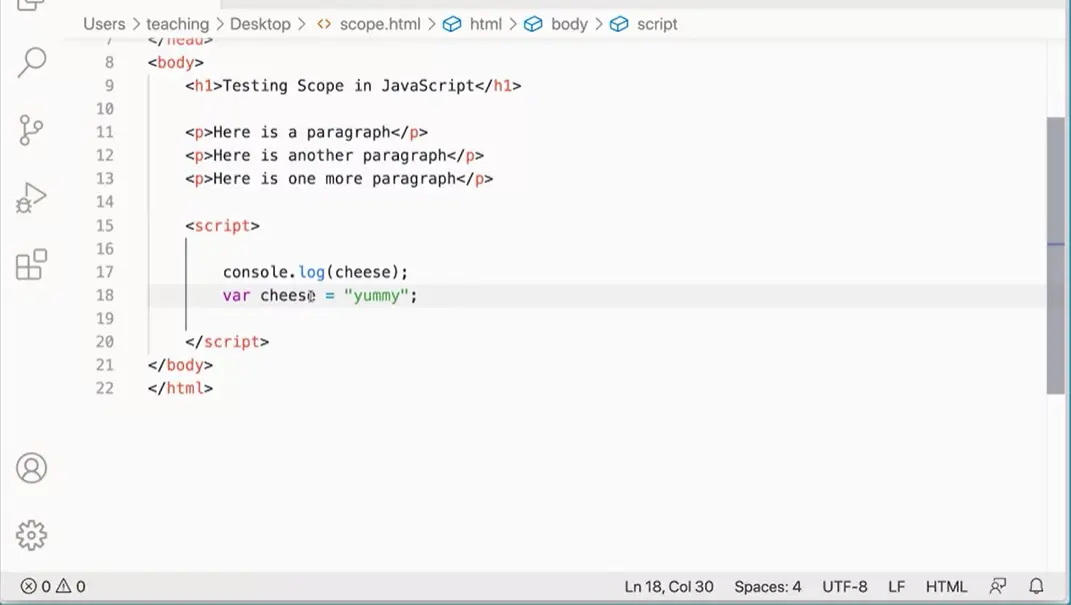
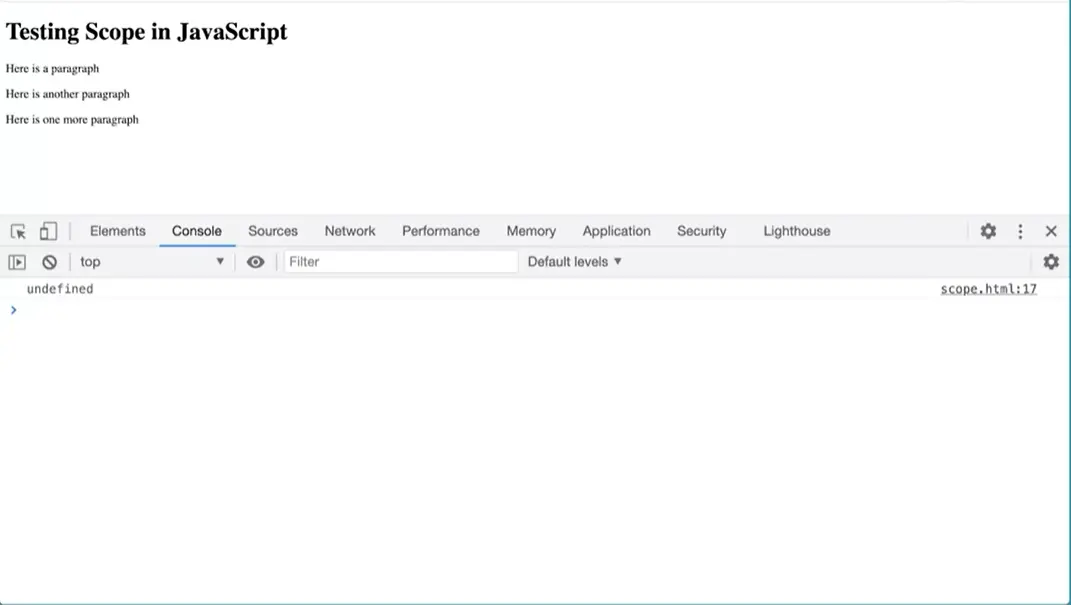
For example, if I use the var keyword to define cheese, but I console log cheese out first, see what happens. Over here in my code editor, I have console log cheese and then I'm defining the variable after I'm trying to run it in the console. Notice I get undefined because the variable has not been defined at the point at which I'm using it, but it knows that exists because of the hoisting.
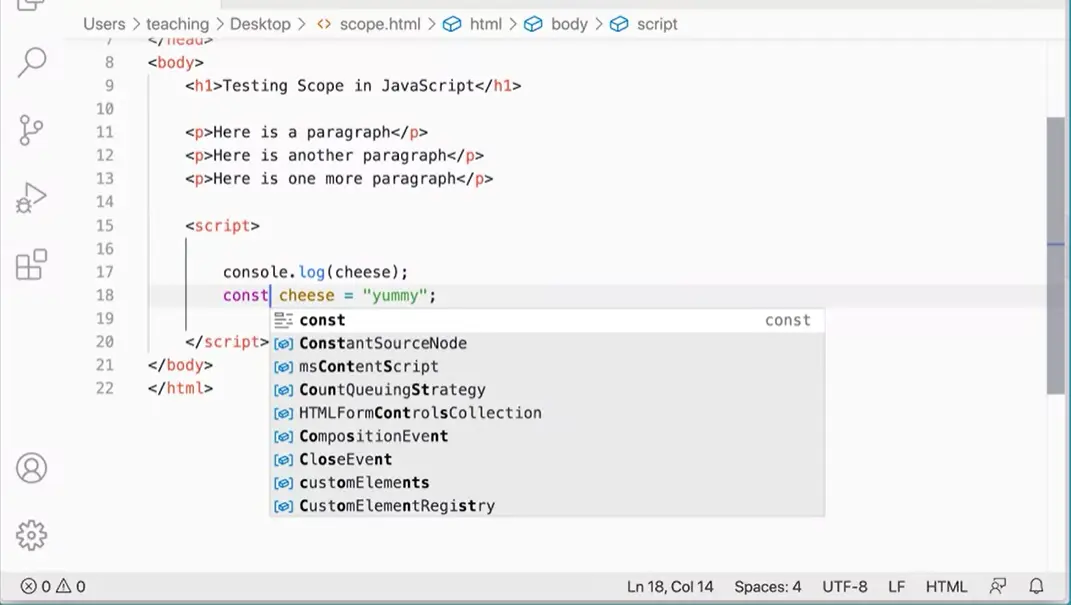
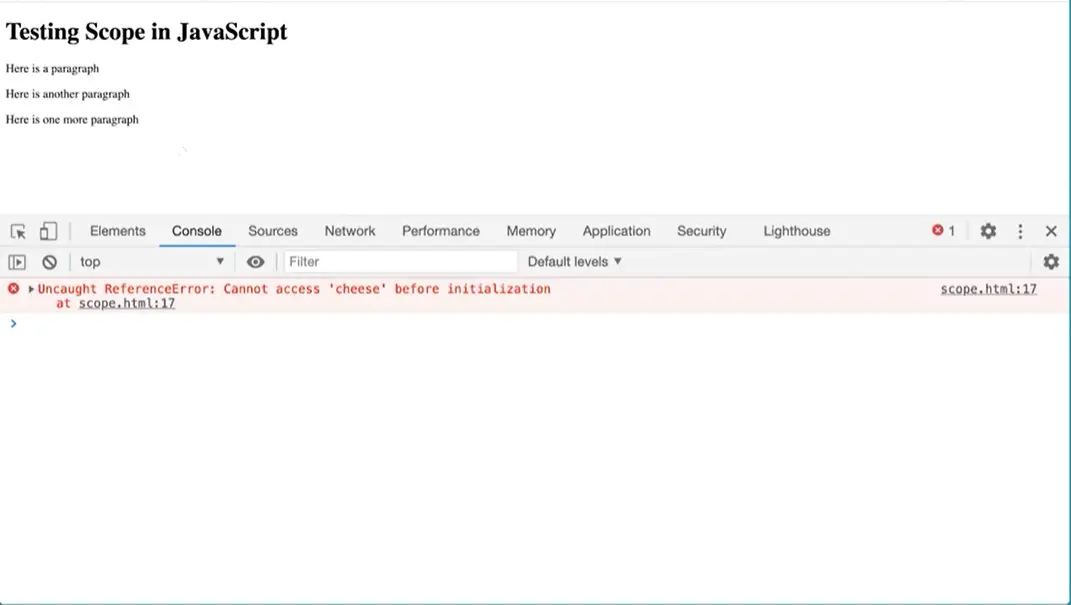
Whereas if I change that variable declaration to const watch what happens now, I get an error; Cannot access “cheese” before initialization. And you may be thinking why would I want an error? Well really what we're trying to avoid is unexpected results. And if you can explicitly get an error that says that it didn't get called right, then that's better than getting something that's undefined or unexpected. In this case even though we don't want errors, it helps us identify problems in our scripts before they become big problems and bugs that are difficult to track down.
With that you've learned a lot about the scope in JavaScript and the different strategies for dealing with scope and JavaScript. And they include first and foremost using some sort of closure or name spacing with the immediately invoked function expression to keep variables out of the global scope. That's number one. Number two, use the EU's strict declaration to keep us from having variables that are accidentally declared without using the var keyword or any keyword from going into the global scope. And then use constant (const) and let as keywords to define variables. Those three strategies together will really help with making sure your scripts are more bulletproof and less prone to bugs and mistakes.

The scope techniques that we just discussed take some getting used to.
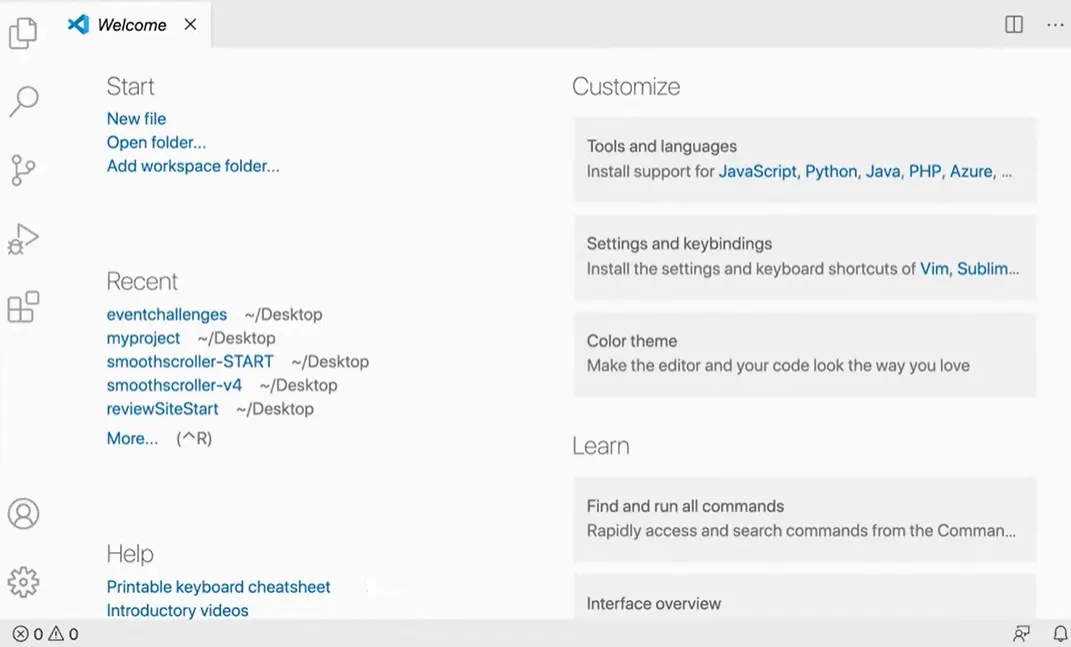
I strongly recommend you do this exercise to help you get used to them and get comfortable with them. Previously, you had done some event challenges, and I have that folder over here.
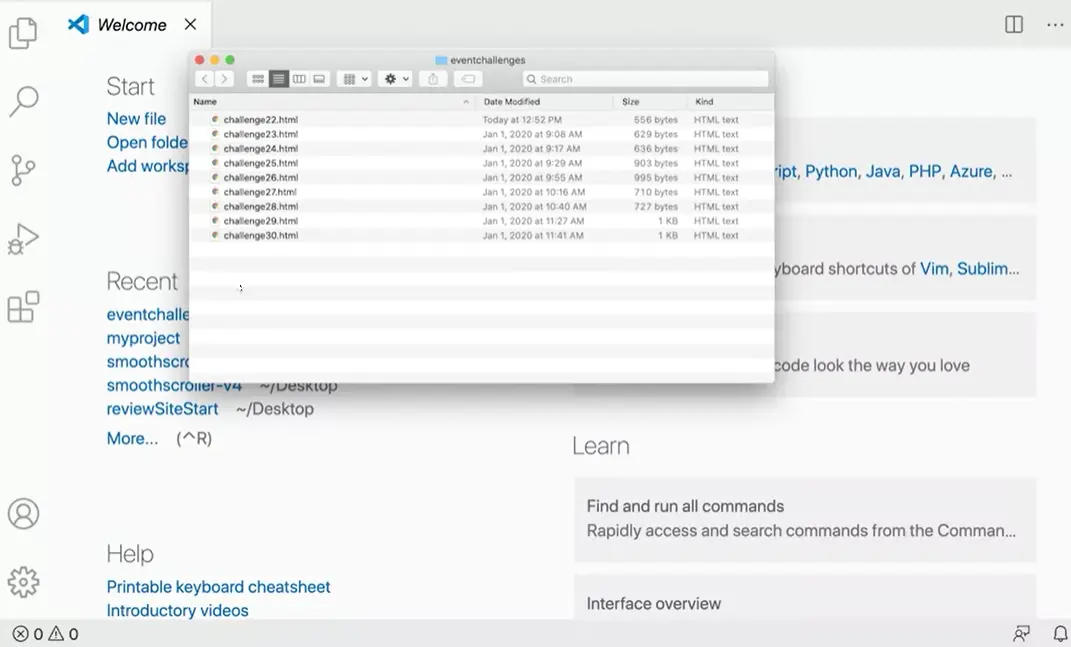
I have a folder here with challenges 22 through 30. And hopefully you have those as well, with all the completed challenges in there. If you don't, you should go do those challenges first. Then I have my code editor here.
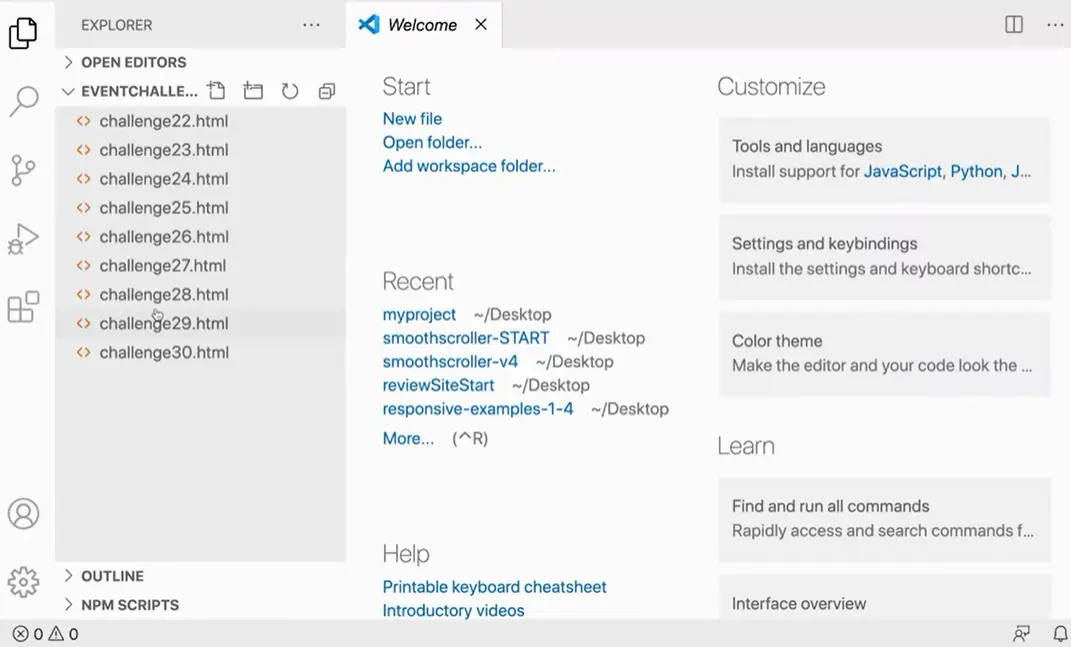
I'm going to open that folder in my code editor by clicking, Open Folder and I can open my event challenges folder here and it will show up on the side over here.
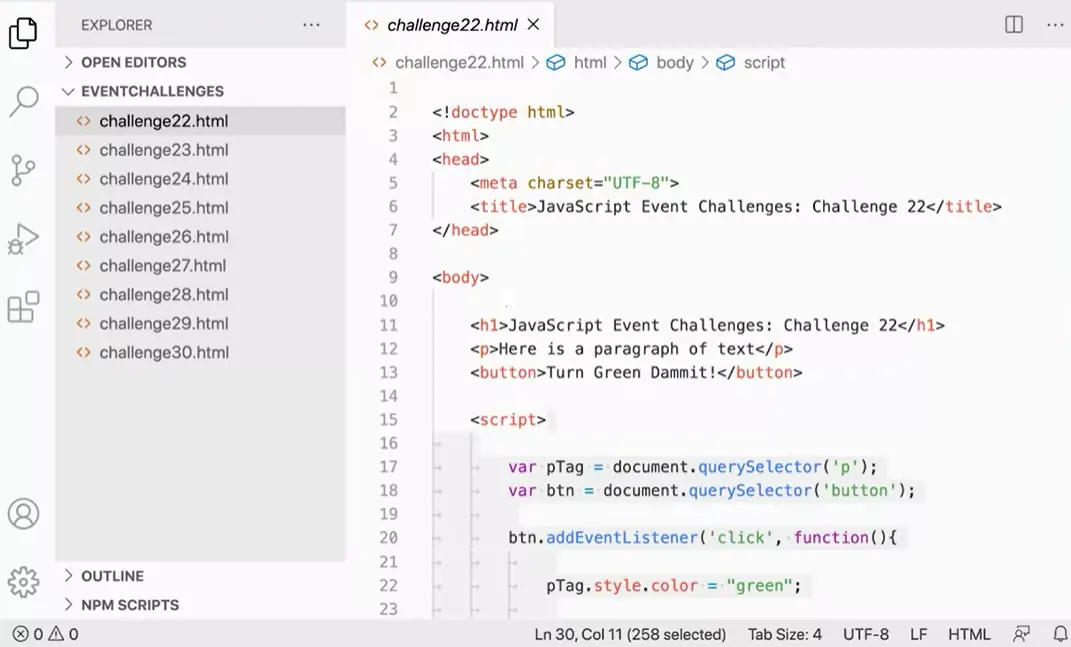
Next, I'm going to do these best practices around scope and around some stuff around file management as well. And working with scripts and files. Here I have my challenge 22, challenge that I did with the script at the bottom of the page. What I want to do is I want to move the script off of the bottom of the page to a separate, linked file. And I want to make use of my best practices around the immediately invoked function expression. That runs automatically as well as the use strict directive that will keep me from accidentally having variables that don't have a keyword starting them. And then I want to switch my keywords from var to either const or let wherever I possibly can.
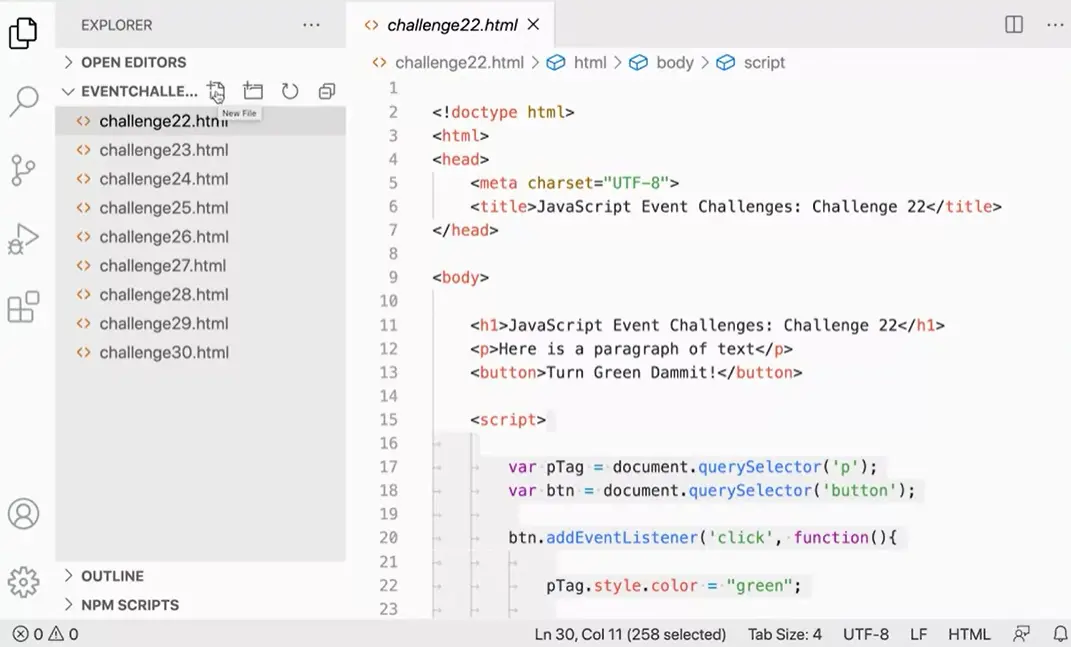
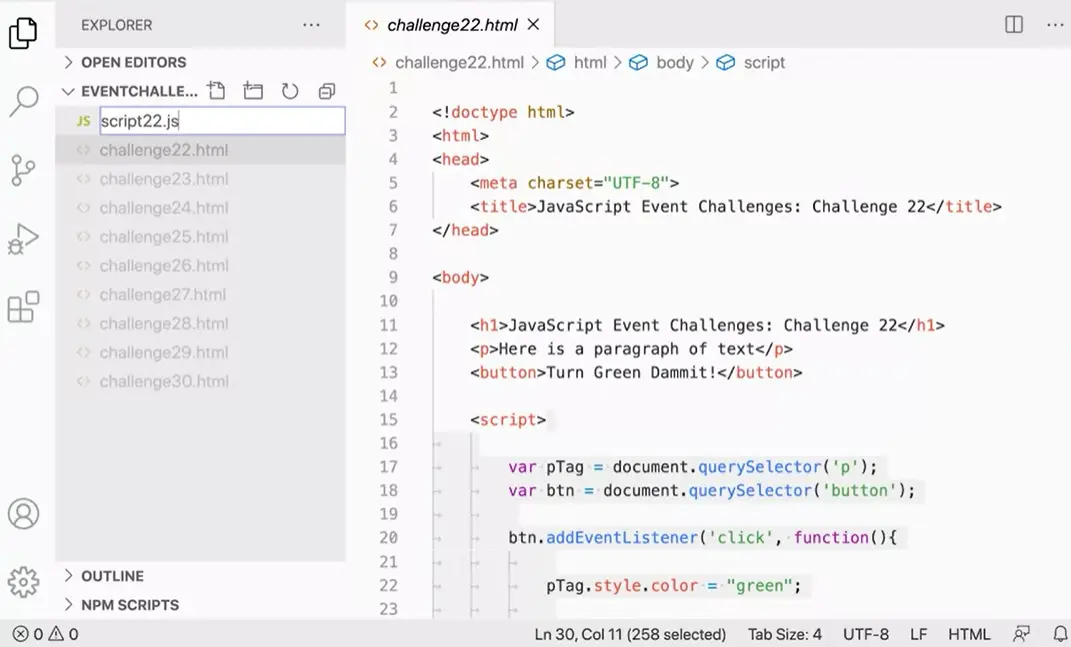
So let's do that. Over here, I'm going to make a new file and you can click this button here to make a new file. I'm going to call it script22.js to go with challenge 22 here.
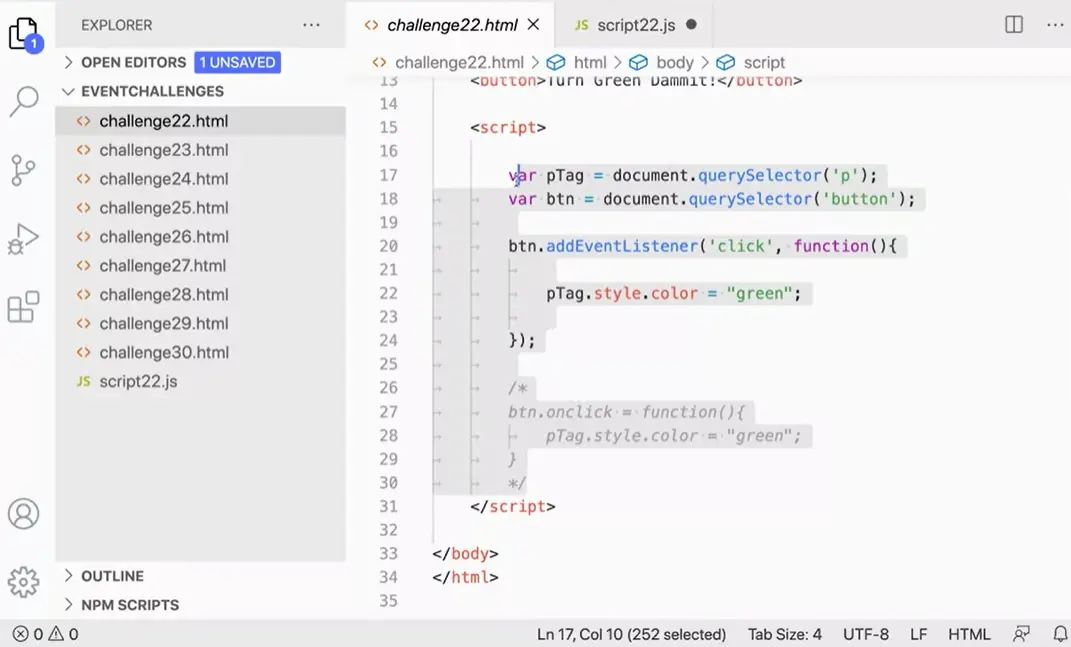
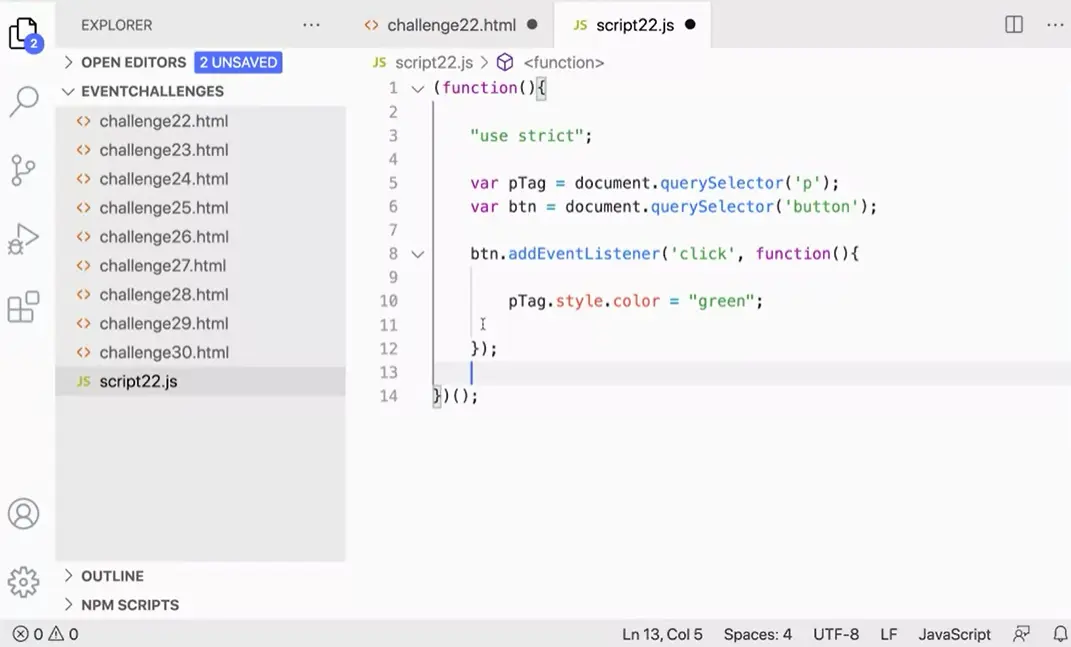
And on script 22 js I'm going to start by adding my immediately invoked function expression by starting with the parentheses. And then I'm going to put in here function that's parentheses and curly braces. And then don't forget, I need one more set of parentheses to make that actually run. Okay, so I've got a function here, and in here, I'm going to add the use strict directive. Then what I'm going to do is I'm going to come over to challenge 22 here. And I'm going to come down to the bottom, and I'm going to copy or cut, I can actually just cut Command x or Control x. Cut this script right from here, and instead I'm going to paste it in here. Might have to shift tab to move that over.
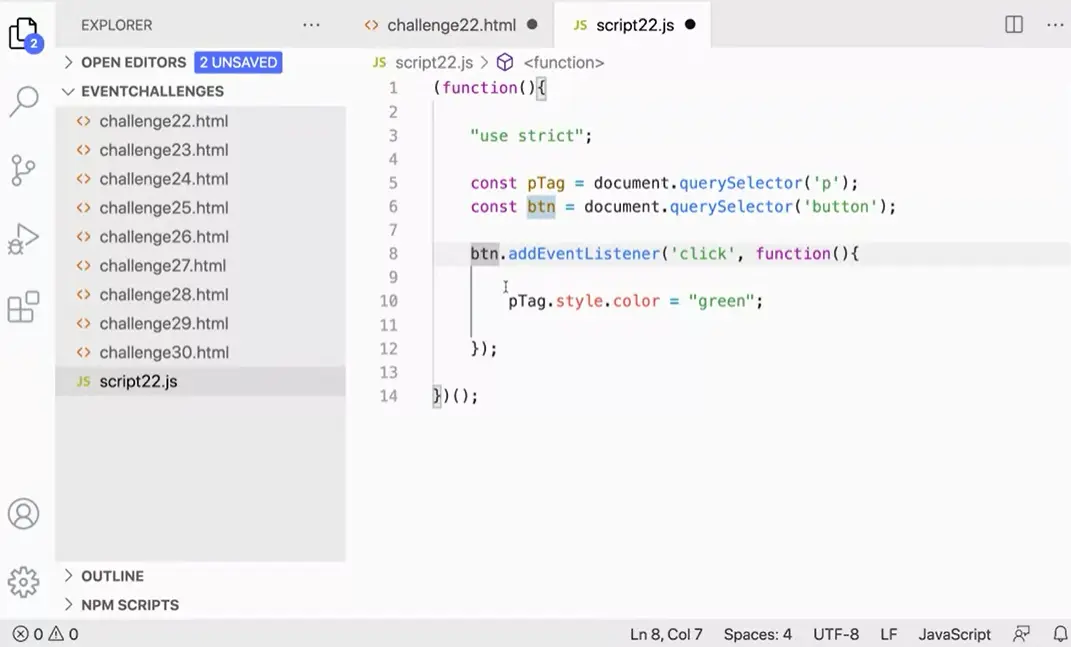
The next thing I want to do is replace any variable declarations. So they're not using the var keyword they're using either const. Use const wherever you possibly can, and use let where you have to. So this can be const and this can be const. Why? Because I'm going into my document and getting these elements out of the document that's not going to change during the running of the script. I've done my three things, I'm using my function expression here, by immediately invoked function expression as a closure. And then I'm using the use strict directive, if I forgot to put const here that will catch that problem and tell me explicitly that I've done a bad thing. And I've changed my variables declarations from using var to const.
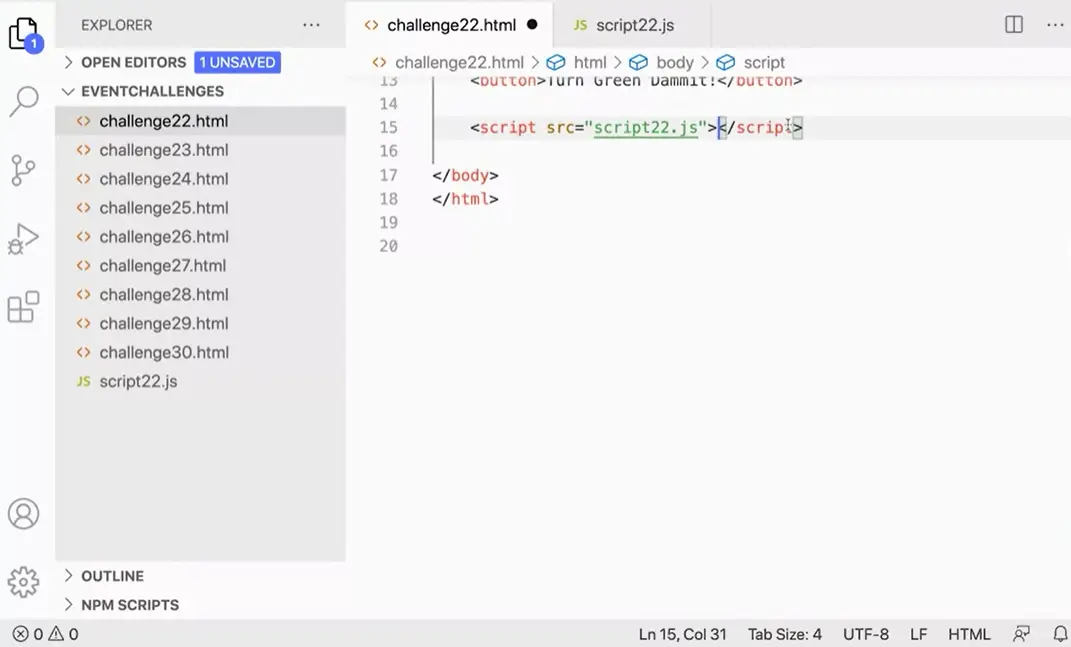
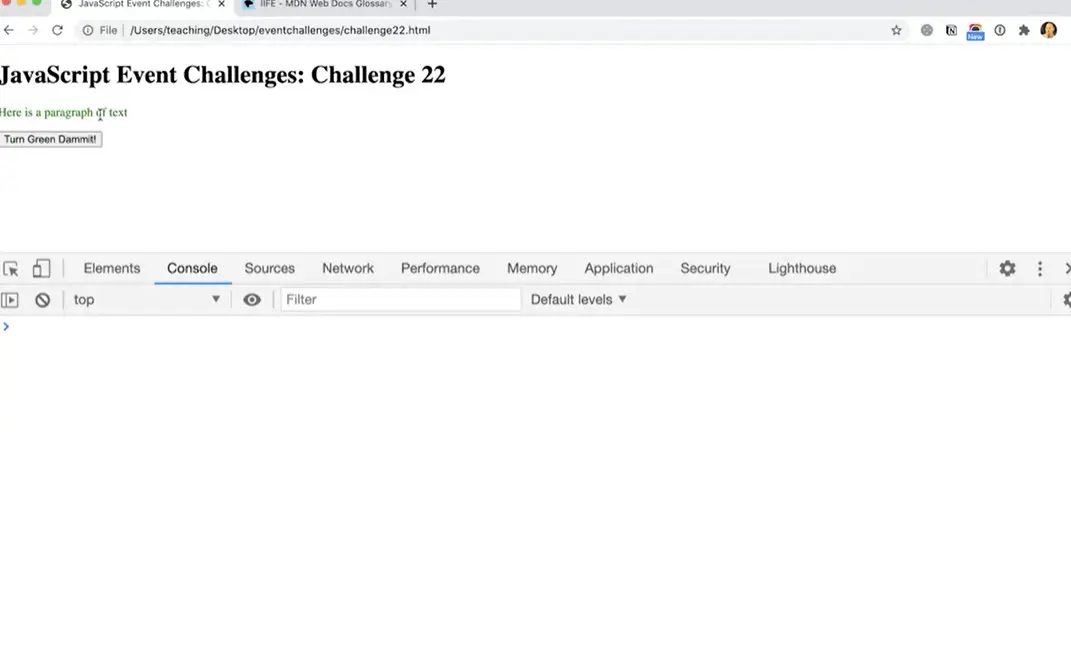
Now over here in my file, instead of having the script here I'm going to add a source src=. And then I can actually put in here, script 22. And that's fine and I can move this up to here really. So you have to keep the closing tag but that will work. And now I can come over to my file in the browser (right image) over here, refresh, test it and you can see it still works. It still functions just fine.
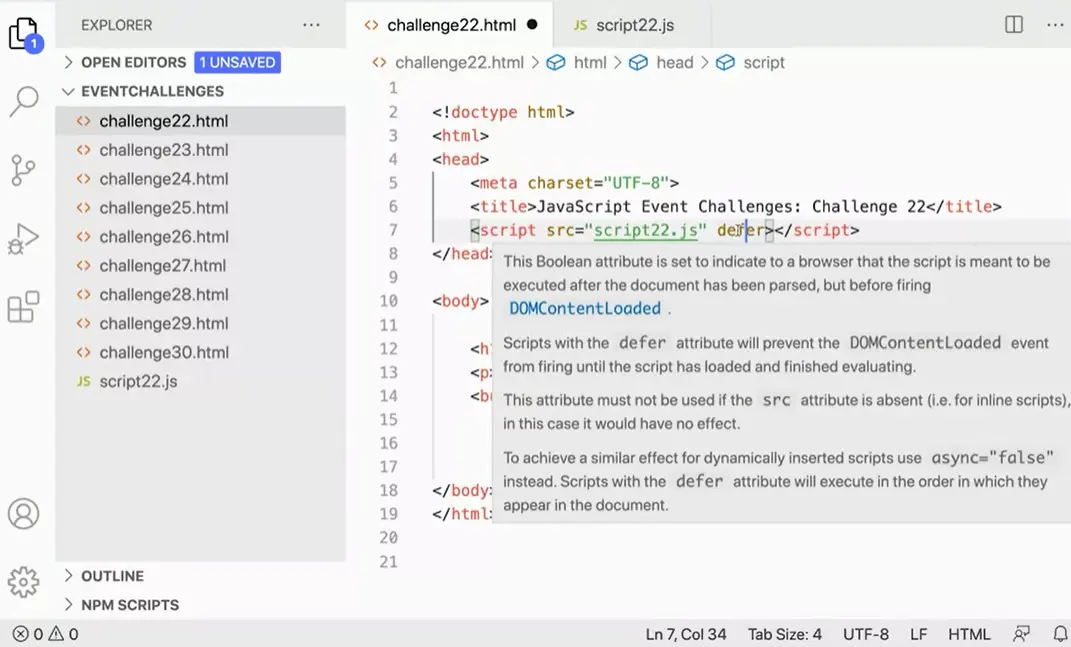
Even more if you want you could take this further by moving the declaration for the script up to the top of the file. I can put it in the head, but I have to add the defer key word here. With defer it will make it run as if it's at the bottom of the page. And you'll see that still works.
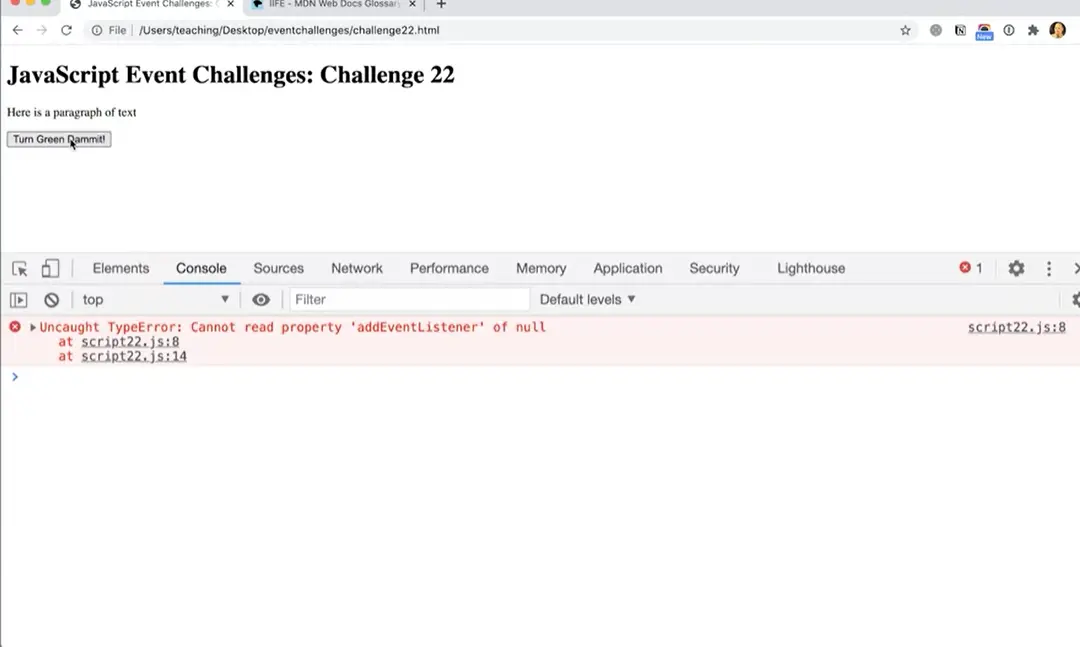
If I take defer out of there, watch what happens. Refresh and, it doesn't work. Because, addEventListener is null. What's going on here, is that the page loads from the top to the bottom. So it's loading the script first, before it gets to the button. And on the script, it's saying, put an event listener on the button. We can't put an event listener on a button, that doesn't exist yet. But adding the defer keyword up here makes it so that it loads that script after the rest of the page is loaded.
You can go through the rest of these and you'll create a new file for script23.js. And you'll do the same thing on this one. On challenge 23, you'll notice that can be const. This down here has to be let, that'll have to be let. Go through and put in const and let wherever there's a var. Use const as much as you can, and only use let where the variable actually has to change here we're using an incrementer.
That's going to change as we loop through this for loop so it has to be let. But use const wherever you can. And if you do that and create all these files you'll start to get comfortable with the syntax of the immediately invoked function. And using use strict and you'll start to get used to using const and let instead of var for your keywords and that will help you out in the long run.
Simple JavaScript slideshow demonstrating basic DOM manipulation and event handling.
We've done a lot of the basics and you've learned a lot about how JavaScript works and how you can manipulate the DOM and capture events. Now, it's time to put together some scripts that are actually doing some interesting things and will allow us to test out what we know so far.
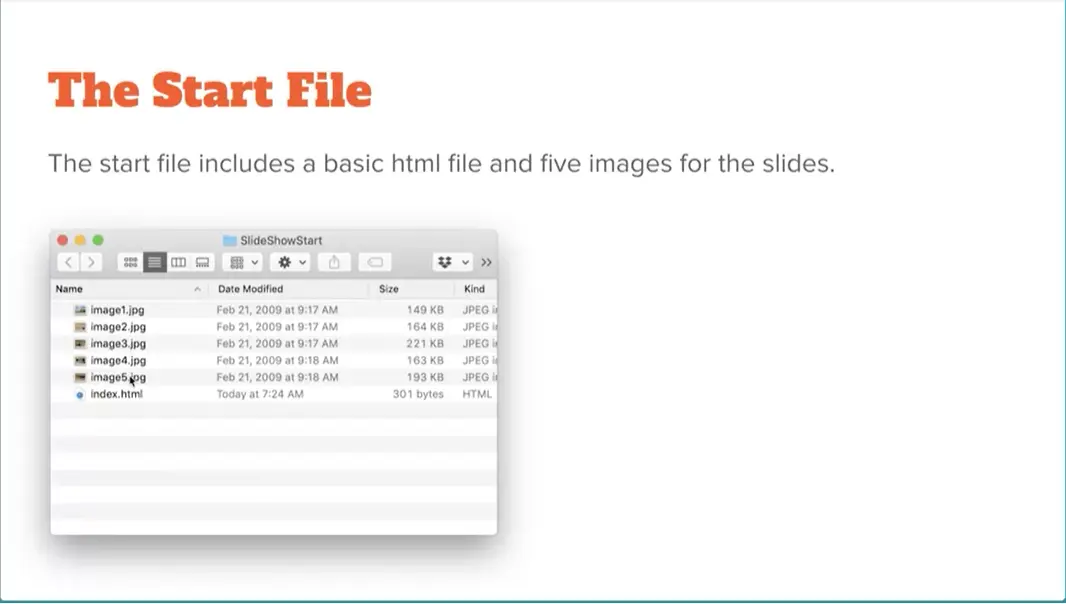
If you look in the start files for this project, you'll notice there's some images and an index.html file.
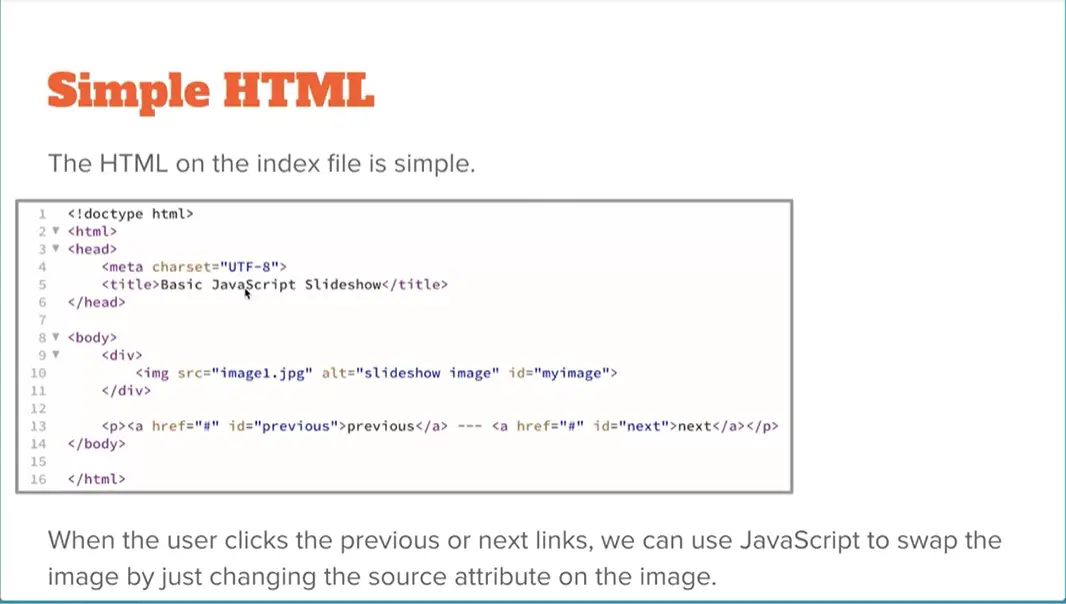
If you open up that index.html file in your code editor, you'll see that it's just got some very basic markup inside of it that includes a div with an image, one of the images in the folder, and a paragraph with two links, one for a previous link and one for our next link.
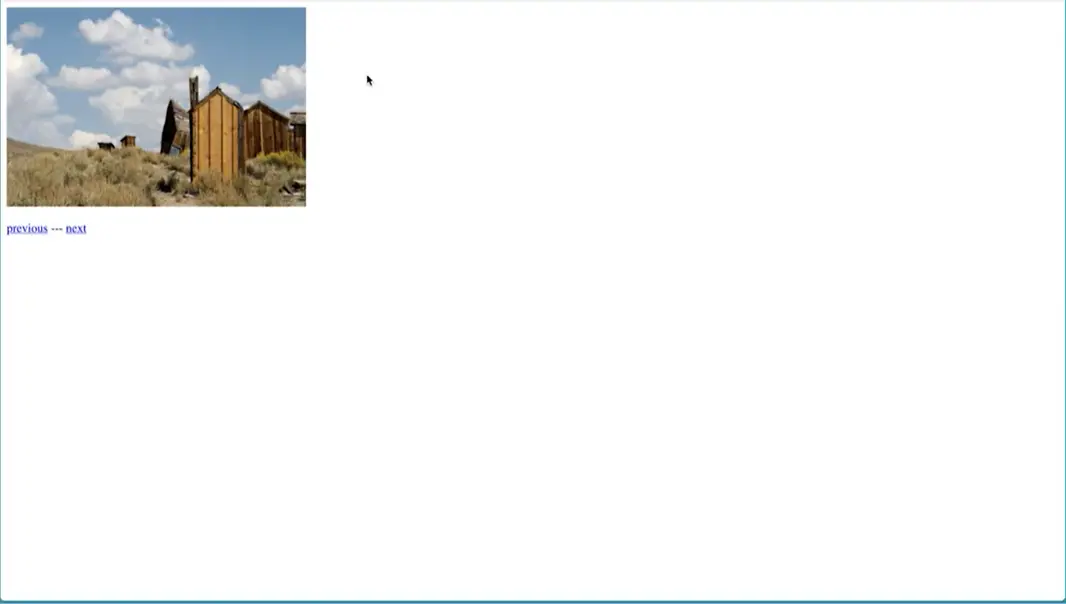
Over here in my browser, I can see that it looks like this. When the user clicks the "Next" link, it'll bring up the next picture and when they click the "Previous" link, it'll bring up the previous picture. That's what we're going to make in this particular exercise here.
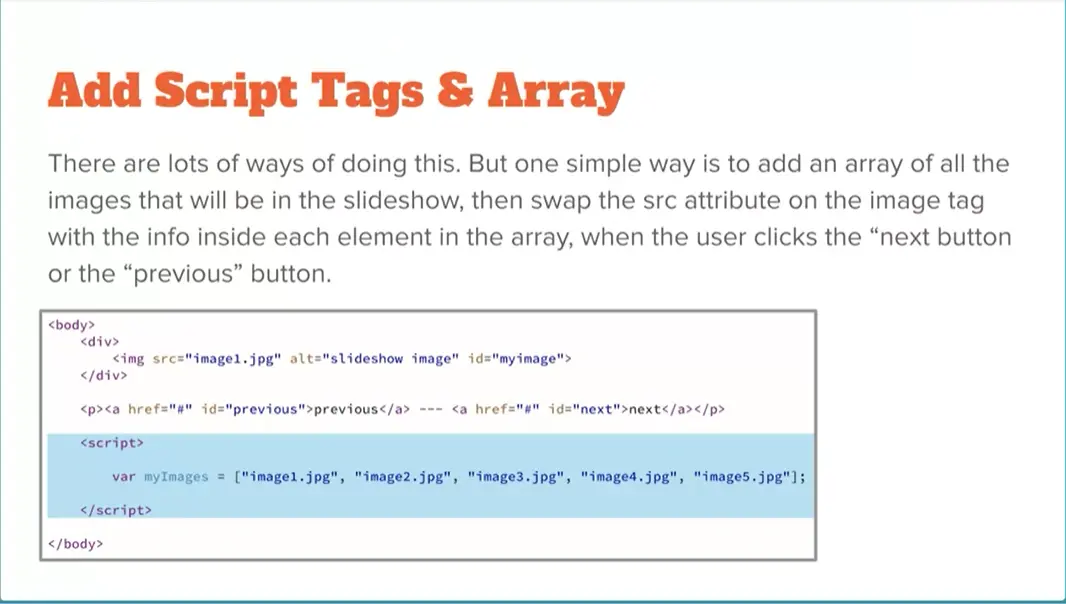
There are lots of ways of going about creating this simple slideshow. But one way of doing it is to make a variable that includes an array and a variable which is an array, and it includes all of the images that we have in the folder. Let's start right there with that because that's a really nice simple place to start. Then what we're going to do is when the user clicks the link for next or previous, we're going to swap out the value of the source attribute with a value from this array. If we'll start with getting image 0, which is image 1.jpg number 0 in the array, and then when you click ''Next'' we'll get image 1, which is this one here, which is actually image 2. It's a little bit confusing because these are labeled 1, 2, 3, 4, 5 but they're actually in the array 0, 1, 2, 3, and 4. But let's start by putting in the array into our script over here. Down here at the bottom of the page, just add script tags like so.
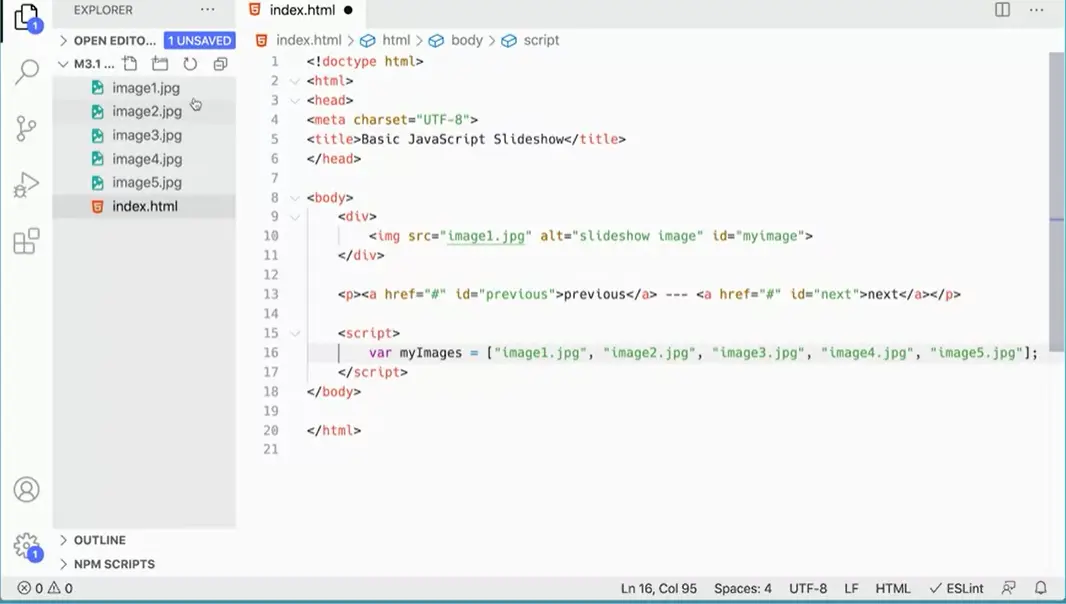
In this script tag, we're going to add an array, var myImages equals square brackets, and then each element goes inside quotes. It doesn't matter if they're single quotes or double-quotes. It doesn't really matter. You can do it either way. image1.jpg, image2.jpg, image4.jpg and finally image5.jpg. There's our array, and that's going to go and get these images, and they're all in the same folder as the index.html. Next, we'll start working on how to actually capture the event of clicking the next button and then handling the swapping of the source attribute.
You will need some variables that we can adjust along the way to capture which image that we're on in this array.
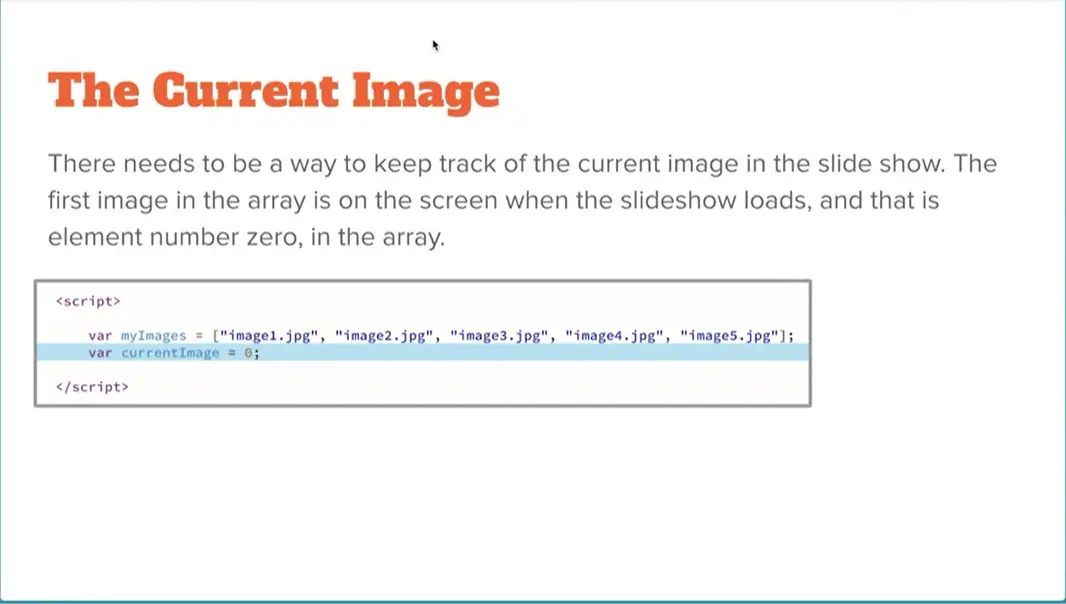
I'm going to make a variable called currentImage and I'm going to set it to zero because when the page loads, this image is showing which is number 0 in the array. Images square brackets zero would get that image.
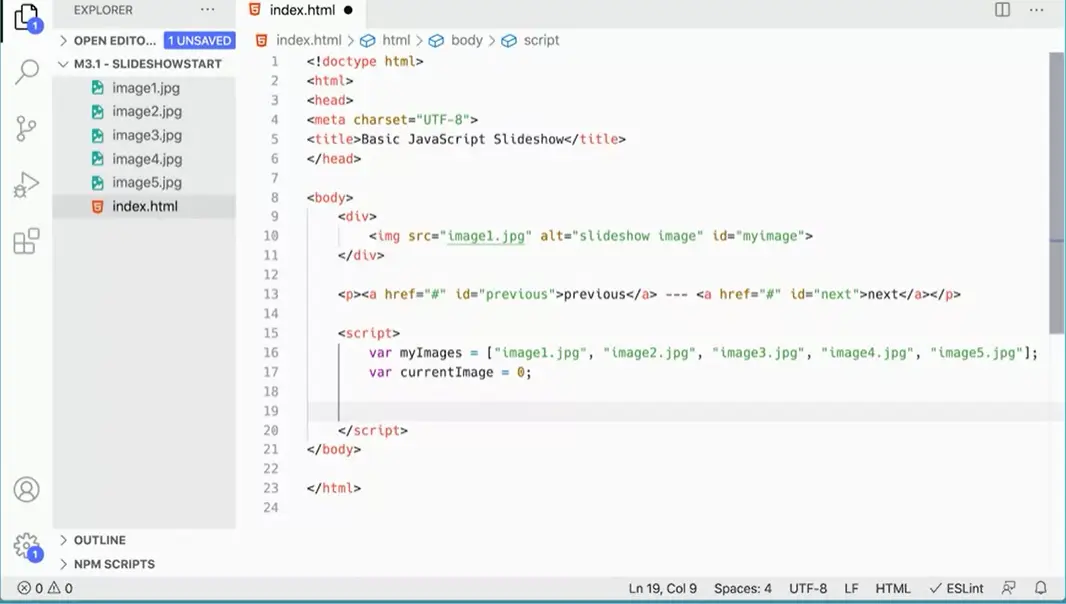
Let's set that over here. Let's make a variable here, our currentImage and set that to a value of zero to start with.
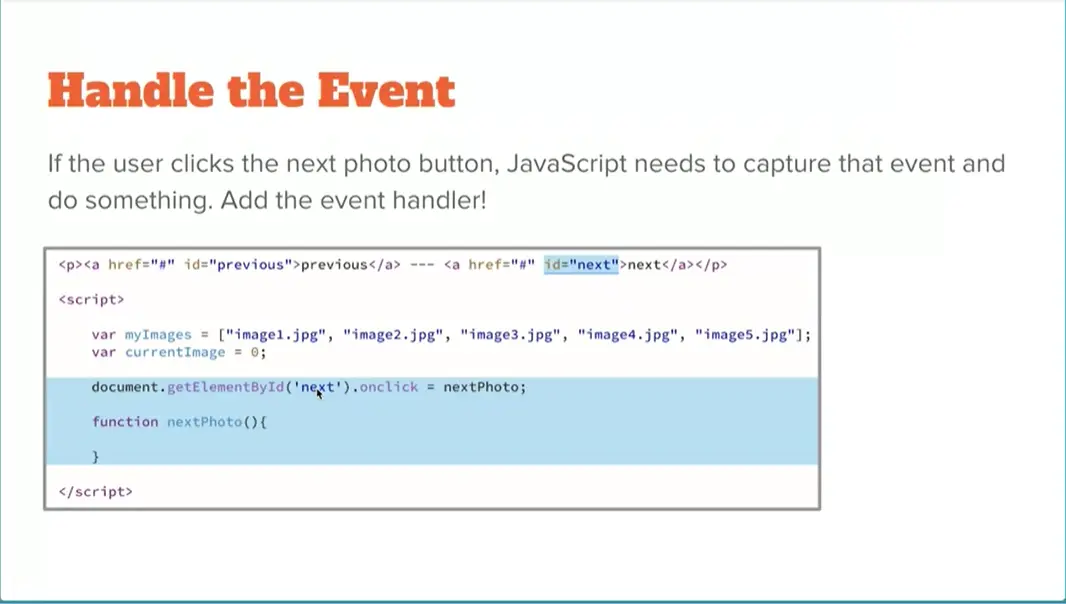
Then from there, we need to create an event handler that will handle the clicking for the ''Next'' button. We'll do the next link first. This is what it will look like; document.getElementById('next'). It's going to go into our document and find that link that has the ID set to next. I'm using the Onclick event property. I'm going to run a function called nextPhoto. Notice it doesn't have parentheses at the end of it, but I'm going to assign it a function called nextPhoto, so then I can create that function nextPhoto.
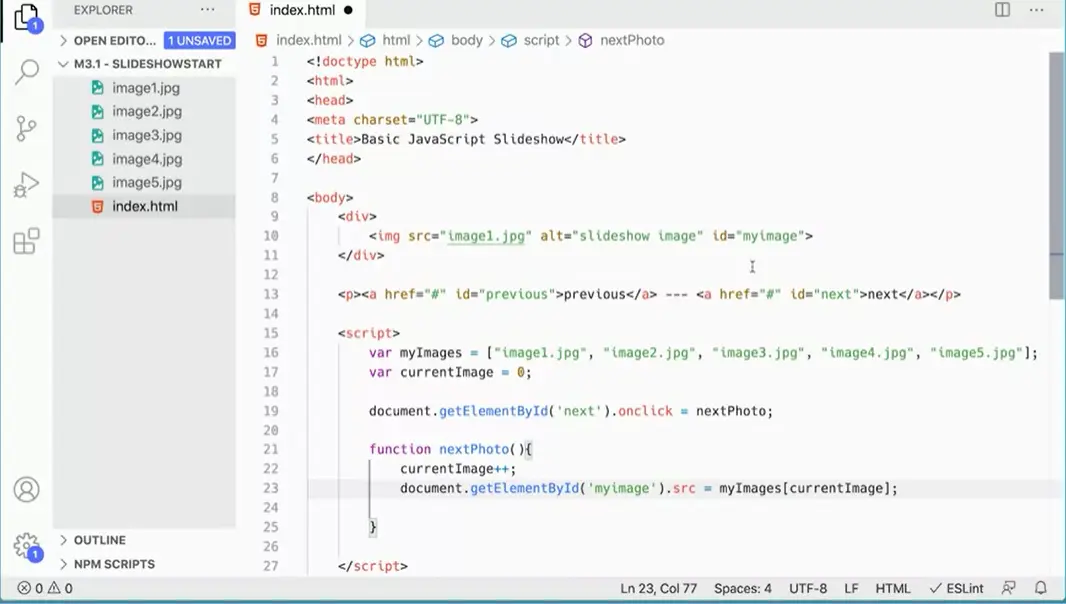
Let's go ahead and add this to our script. Document.getElementById. That's going to go in here and look for this link here that has the ID of next. It's going to go into our document link for that. Onclick equals nextPhoto;. Then down here we're going to make a function called nextPhoto. Notice that if we look at this image tag here, it has an ID that has a value set to myimage. That's what we want to get. We want to change the source attribute on that image, if this button has been clicked. Also, we want to take currentImage here and increment it. I'm going to say currentImage++. Now I'm going to come in here. I'm going to say, I need to go document.getElementById. What ID do I want? I want myimage up here. I want to set its dot source SRC equal to myimages, that array currentImage. That will go into this array here and find currentImage.
Now, the first time I click that link, currentImage is going to get incremented to one. It will come in here, that's zero, this is one. So it says, that's image2.jpg. This is going to be image2.jpg and I'm assigning that to this source attribute up here the source. Instead of saying image1.jpg, it's going to say image2.jpg. Let's save that and see if that works.
Come over here, refresh. If I click ''Next'', you can see that it's changed.
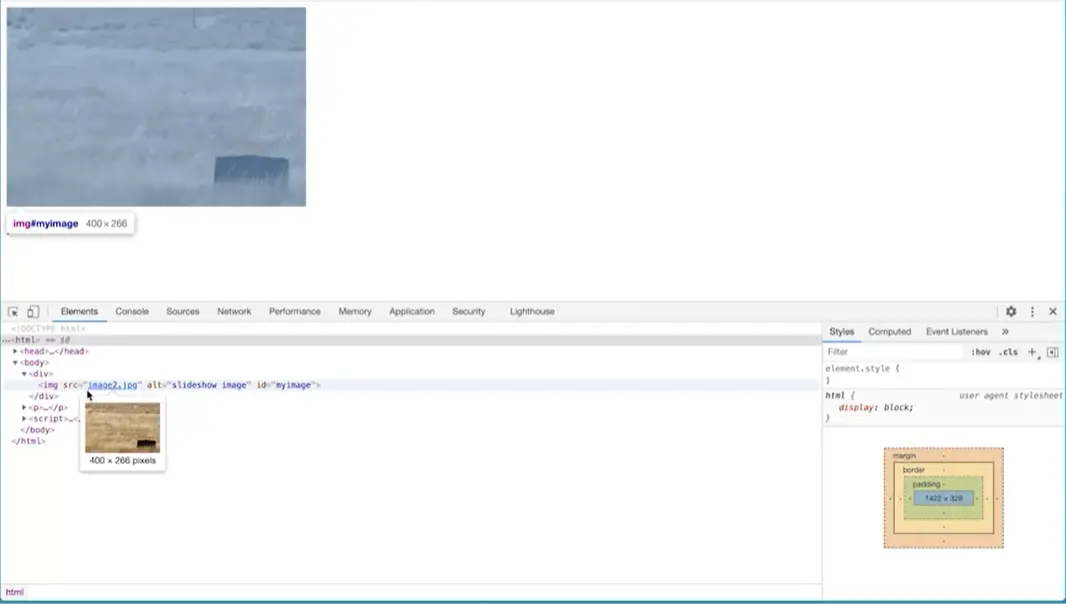
If I do inspect down here, let me arrange this the way I want it. I'm going to put this down at the bottom. I'm going to turn off that button there. But if I come in here and look at this div, notice this source says image2.jpg. If I click ''Next'' again, notice that got changed to image3, image4, image5.
What happened? We got to image5 because there are five images. Then I click ''Next'' again, and now I have undefined. You'll notice there's an error over here as well. I can go to my console log and see undefined error file not found. Could not find I've gotten beyond the end of my array. At a certain point, it ceases to work depending on how many pictures are in the array. That's what we're going to fix next.
Let's think about this for a minute.
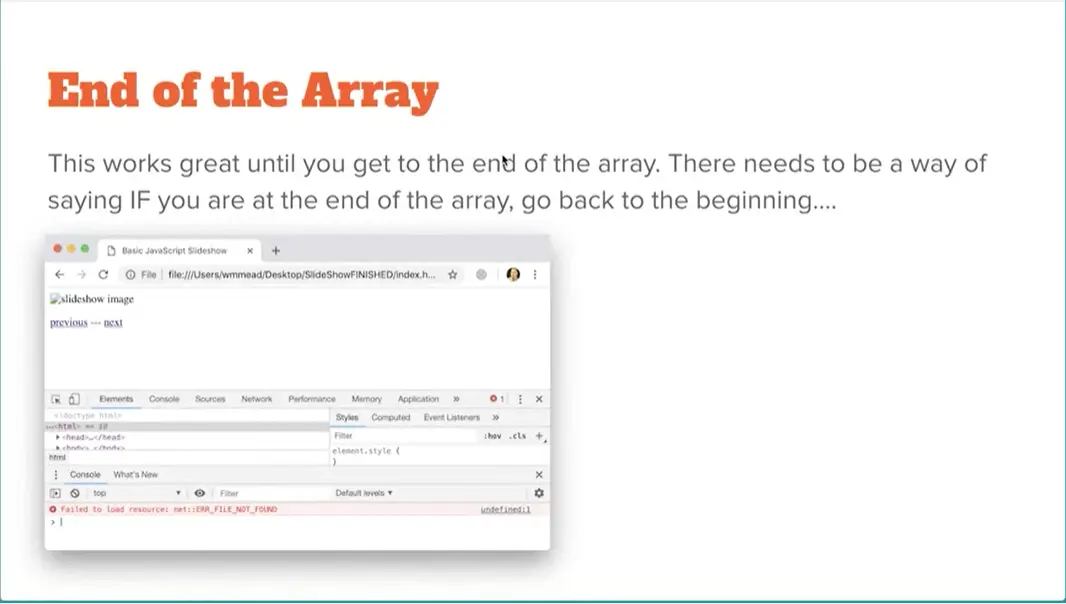
What we want to do is we need some code that says, if you're at the end of the array, go back to the beginning. Think about that for a minute. What do we know about JavaScript that will allow us to do this kind of thing? What logical flow control structure can we use to handle this?
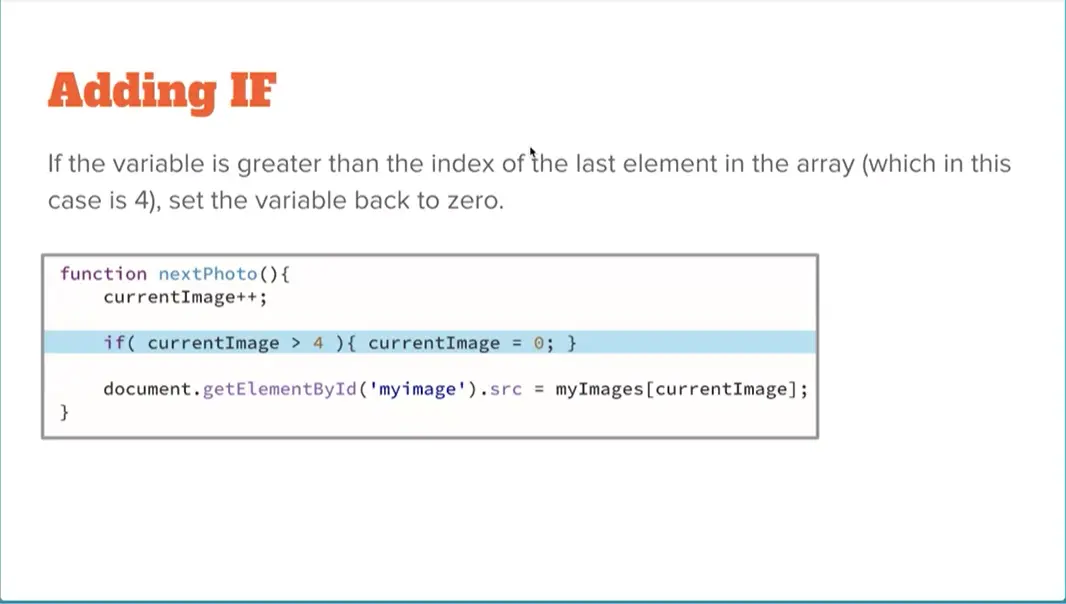
If you were thinking of something like this, you're on the right track. If current image is greater than four, because remember, the numbers in the array are 0, 1, 2, 3, and 4. If it gets greater than four, V becomes greater than four.
We can set current image back to zero, and then go and get the next image. With this if statement in place, you can make the slideshow effectively loop around.
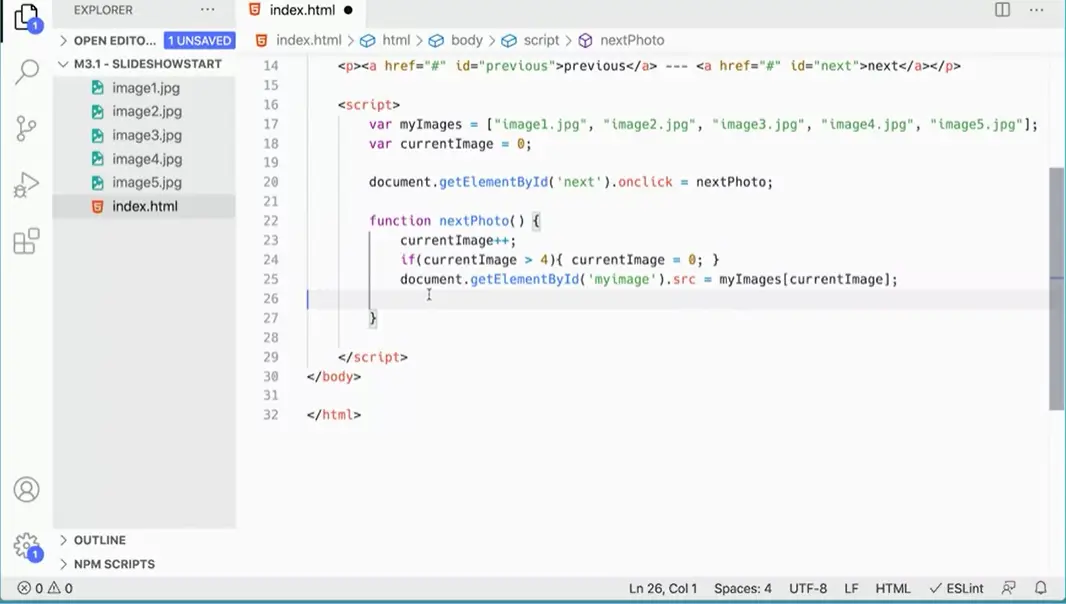
Let's go ahead and add this. I was just going to go in here, if parentheses currently rises. In the parentheses we want to say, if current image is greater than four. Current image equals zero.
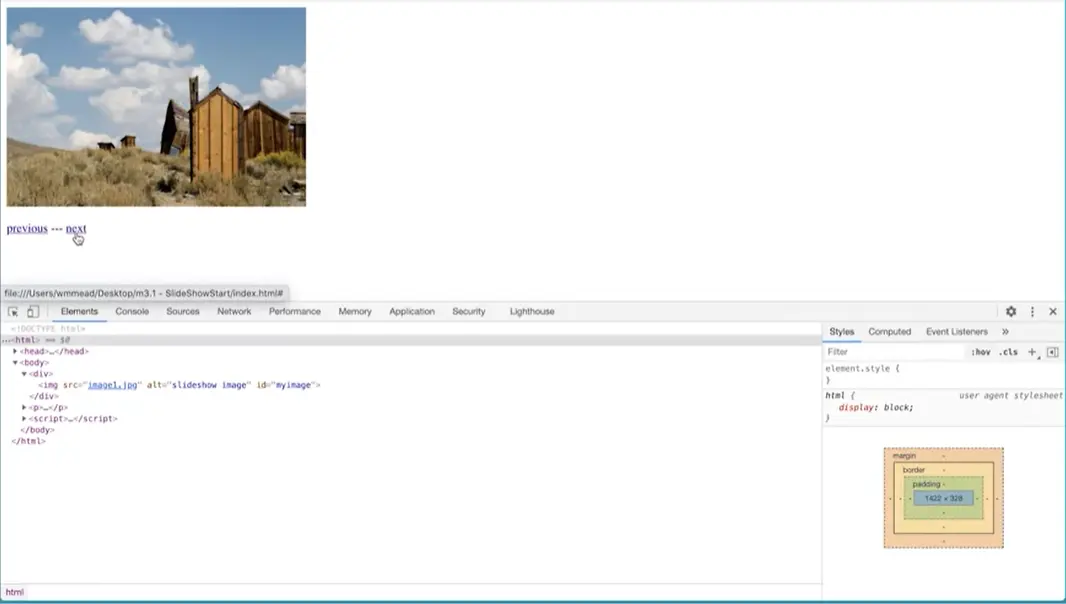
Let's test that. I come over here and refresh this, and I click "Next" and down here in the elements, I'm going to come down and see in my div, you'd see that's image 2. Next three, next four, five. Then if I click "Next" again, it should get set back to zero, which we get as image 1. That works. Now the next button is looping around through all of the images that we have.
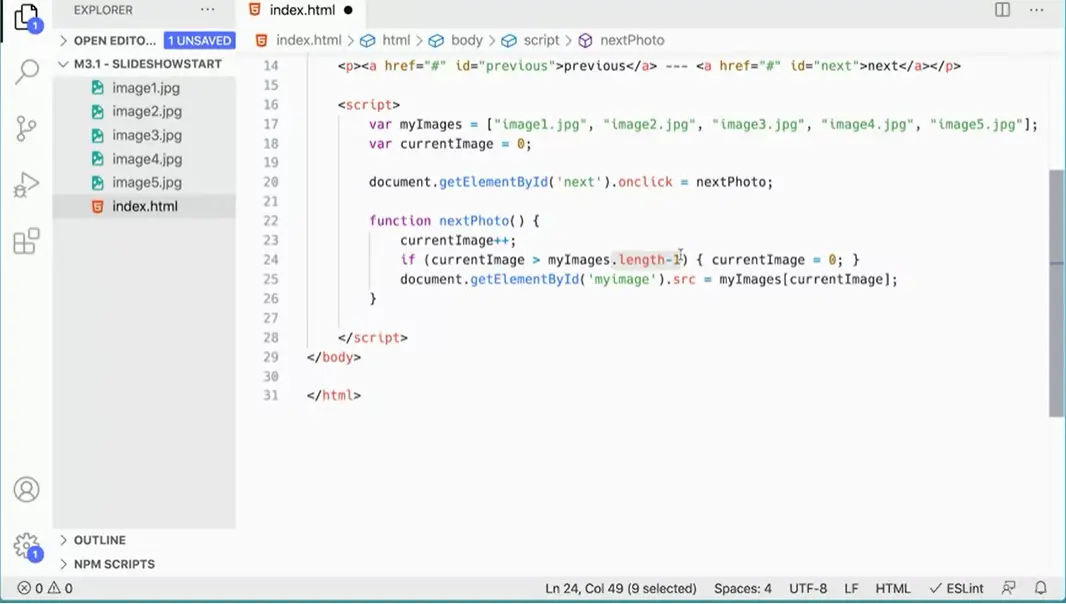
Now it would be a little bit better if we could generalize or script a little bit. Rather than greater than four here, I know that it's four because I know it 0, 1, 2, 3, 4. I can use my length property to get that. I could do, is less than myImages.length. The length of the array minus 1 is often what we want because arrays start counting at 0, 1, 2, 3, 4. So myImages.length minus 1 will give us 4. It's generalized that if I were to add more pictures, then the script would continue to function without having to make changes to the number of images. .length will give it.
Next thing we need to do is handle the previous button. Maybe you can do that for yourself. It's great challenge. It's not that different than what we just did. It's a little bit different, but it's not that different. You might be able to do the previous button by yourself.
To get started with the button for getting the previous photo, we first need a event handler that will go in and find that element with the idea of previous and add the unclick event property and run a function called Previous Photo, and then we can set up that function.
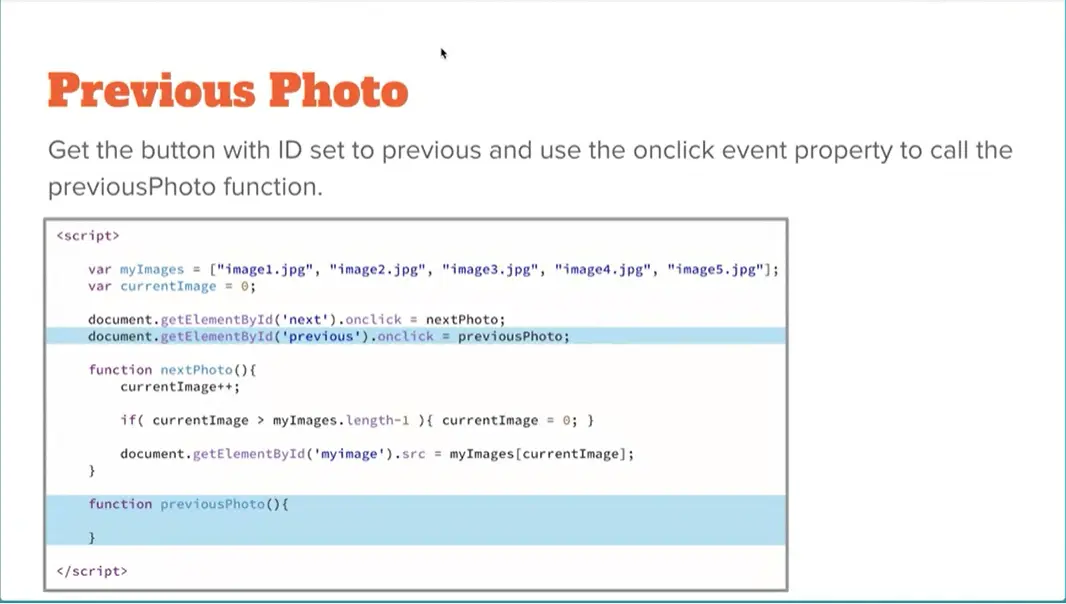
Let's do that first. Up here and you can even copy and paste this if you wanted to. Sometimes, it's best to do that just to avoid making mistakes, but you have to be sure to change everything you need to change.
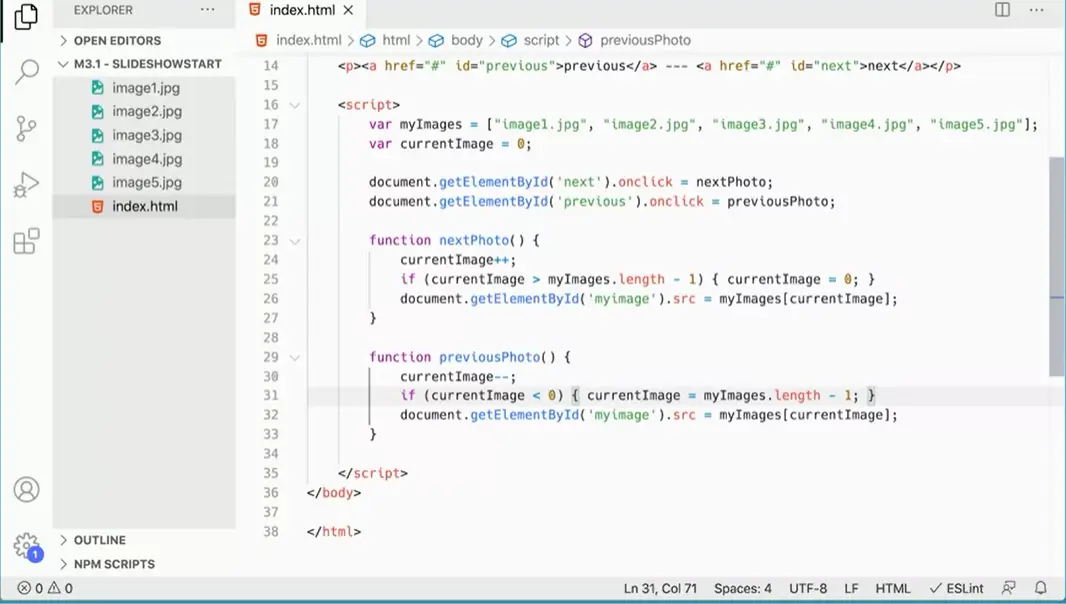
Instead of next, this is previous instead of next photo. Now we've got our event handler. And now we need a function. Again copy and paste always good to make sure the names match function. Previous Photo, parentheses curly braces. Now the way to think about this the Previous Photo button is you have to think backwards. And the easiest way to do it is to think about what happens if you're on the last photo? Suppose we're showing on the screen image five, and current image is currently set to four. What do we want to have happen when we click the button previous photo?
We want current image to decrement. We wanted to go from 4 to 3. And then we want to go in and get this image. And then when we click it again, it goes from 3 to 2, and we get that image and then it goes from 2 to 1 and we get that image. And then it goes from one to zero and we get that image to zeros, okay? If you click it again, we don't do some sort of if statement, it's going to go from zero to minus one and that's not going to work. So if the value of current image is less than 0, we want to set it to what? Well, we could set it to 4. That would work or we could set it to myimages.length - 1, right? Let's take this piece by piece. Let's do this part first. I'm going to decrement current image, currentImage. That's the same as saying current image equals current image minus one.
We're going to decrement current image and then we can do this again. If we leave off the if statement all together, you'll see when we get down to the bottom of the images, we're going to have an error, but let's just do it just to see how that happens and what that looks like.
Over here, I can refresh this, and I'm going to click Next until I get to the end to the fifth photo here. Oops to summon four one more. So now I'm on five. And now I can click previous and it'll go to four. They'll go to three, it'll go to 2, it'll go to 1. And now if I click it again going to have an error because current image is going to be minus one, and that's not going to work. Okay, undefined. So that's where we need our if statement. So let's come back here and see if we can write that if statement. It's going to look like this. So images will copy this one and pasted in here. But instead of current image is greater than my images.
Where I'm looking for is current image less than zero? Is current image less than zero? And if it is, I can set current image to four. And that would work because that puts it back at the end of the array. That'll work just fine. But even better is to use the my images dot length minus one. Again to keep the script generalized. My image is length minus one. So now you'll see if l do this. I'm going to come back here, refresh the page. And again, I'll go back up to the end of the list here. There's 2,3,4,5. Okay, now if I click previous, it should go to four And then to three, and then to two, and then to one. And now if I click it again, current image is now going to be minus one that's less than zero. That's going to kick off that if statement and say, all right, it's less than zero. So it's going to set it to the end of the array. And there it is. There's five again, because current images four which is getting image five from the array. So now I can loop through in either direction I can loop through, going frontwards and I can loop through going backwards.

Everything is working.
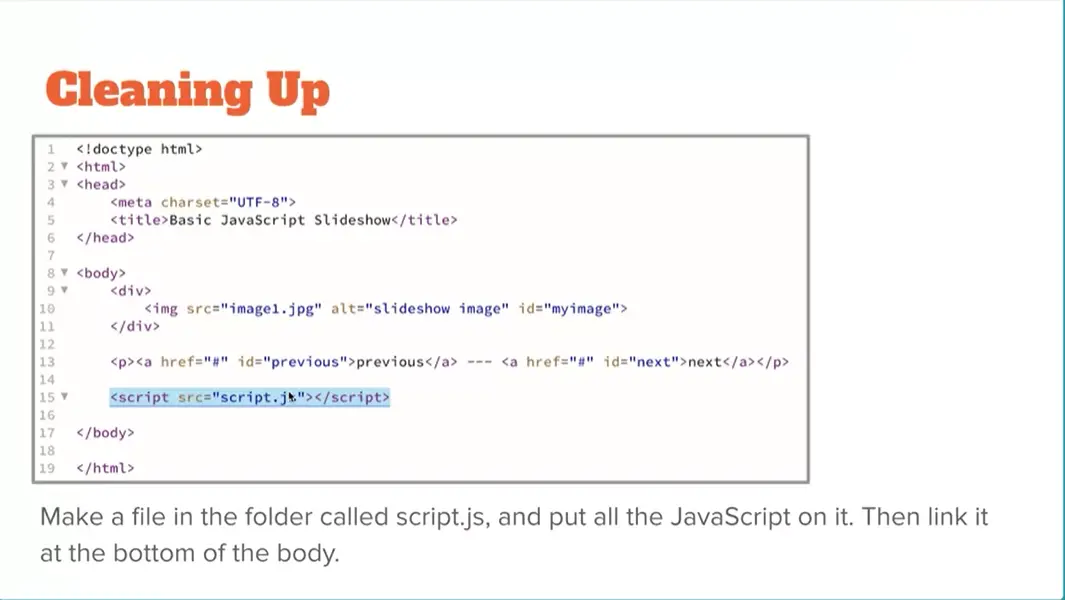
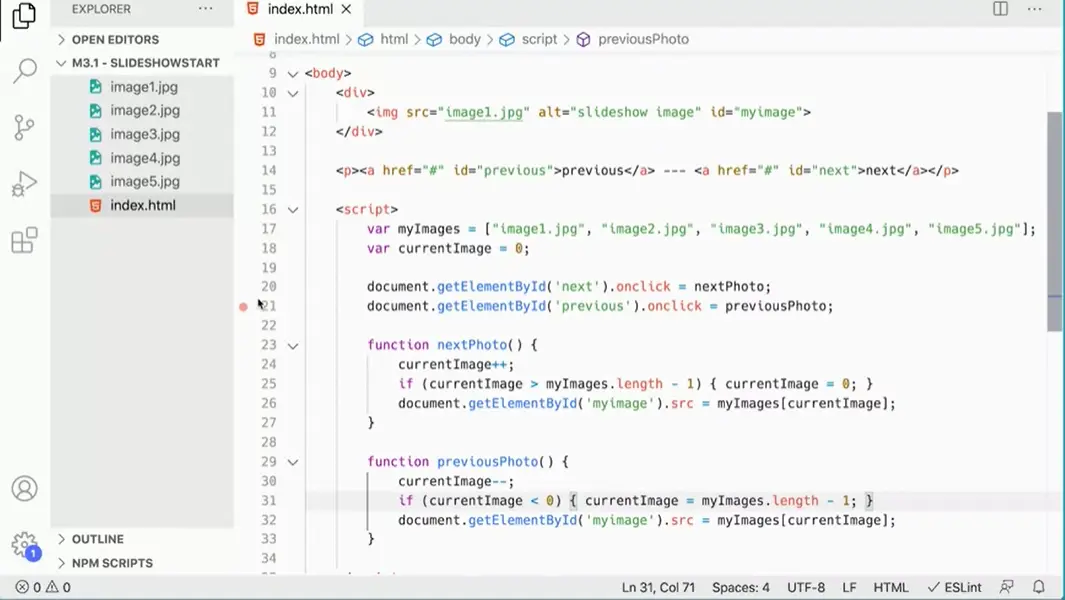
Now all we need to do is clean up this script just a little bit, make it a little bit better. One way of doing that is to put it in a separate script file. For this script, it's short enough, you could leave it at the bottom of the page if you wanted to. But just to practice our best practices, let's move this script into a linked file. Over here, I could make a new file and call it script.js.
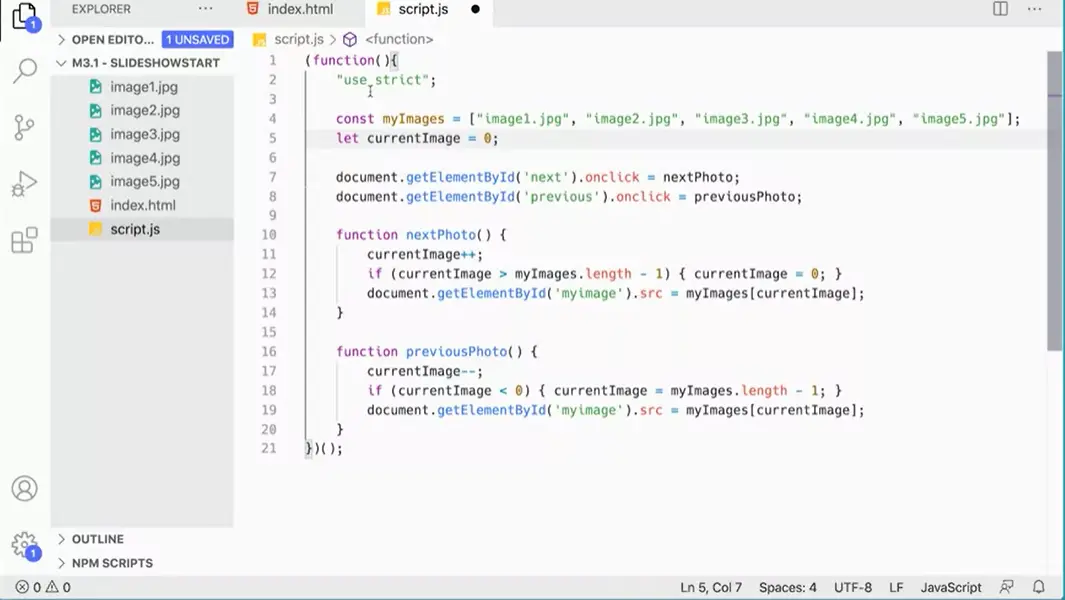
On this file, I could put my function expression that will be immediately invoked. We do that with parentheses, and then in the parentheses we put in Function with its parentheses and its curly braces, and then one more set of parentheses and a semicolon. Terrible syntax, but this will run when the script loads. It's an immediately invoked function expression. It will keep us from having any variables in the global scope, which is always to our benefit. Because if you wanted to include the script on a web page with other things, perhaps you've got other things going on in the web page, perhaps you've got other JavaScript elements going on the web page.
You don't want current image to conflict with some other current image variable for some other script. So you want to keep everything inside of this function. I'm going to click between here and I'm going to also add my Use Strict directive. Then in here, I can just paste my entire script from here. There it is. Shift tab to move that back. Even better would be to replace these variables with const.
They're not going to change. Well, actually, this one can't be constrained image, that one's going to change. That one needs to be let because current image is going to get reassigned as we go through our scripts down here. But these variables will now be local to this function and they won't be available at the global scope.
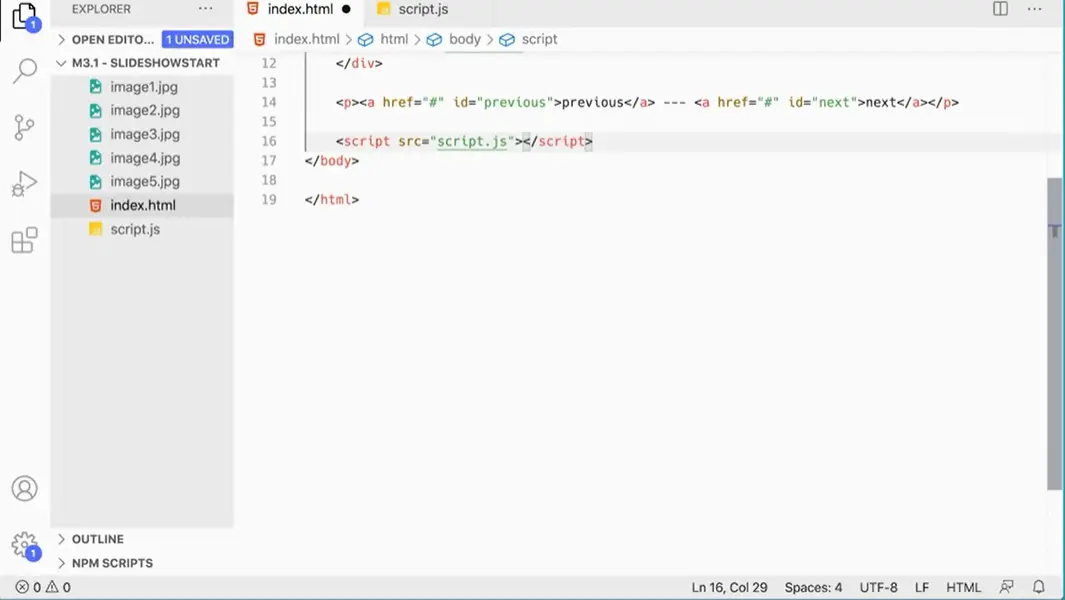
Over here, I'm going to remove that stuff and instead up here, just link src equals script.js, it even pops up there in my menu. I still need this closing tag, but I can move it up there. That should work just as well.
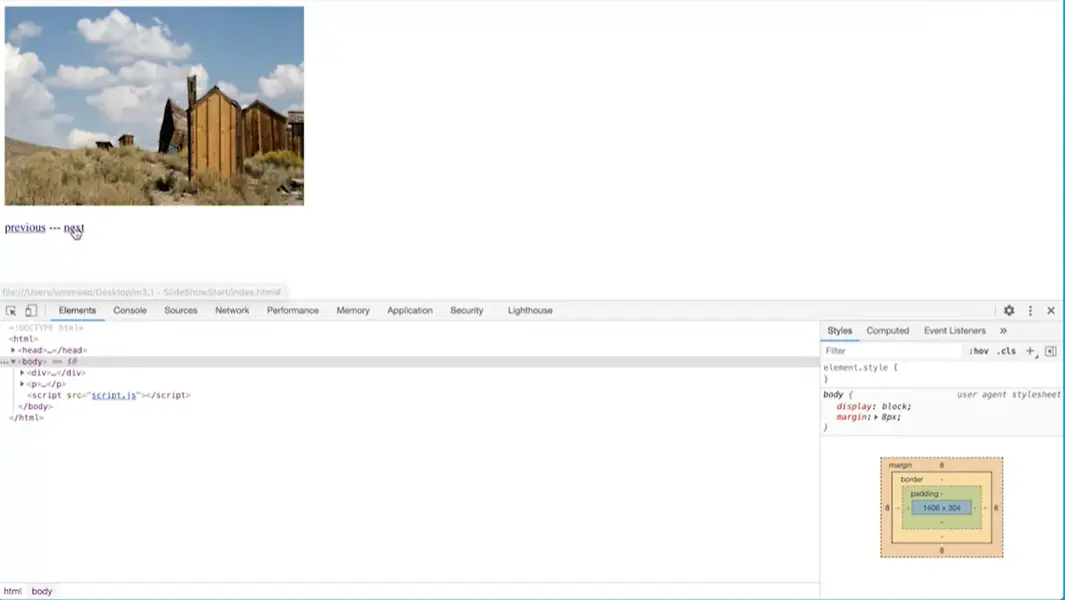
We should go back and test it, make sure that we didn't make any mistakes in the process of moving stuff around. You can see that it still works just exactly the same as before. Now, we could leave the script here at the bottom of the page. There's nothing wrong with that, frequently I leave my scripts there.
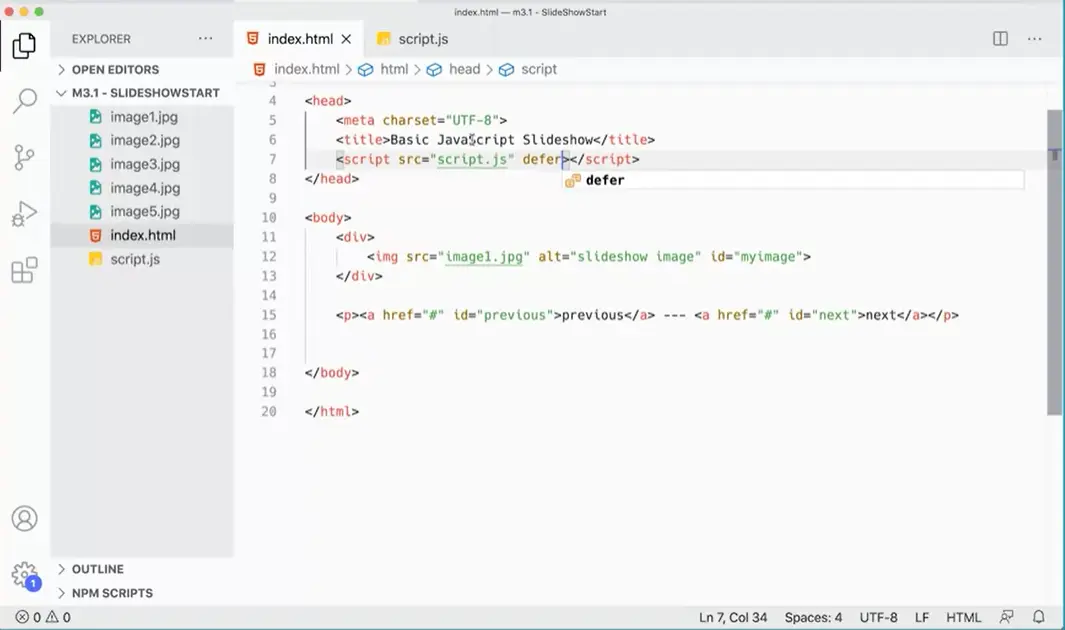
But even better is to move it up into the head of the page and add a defer attribute here. That will make the script load after the rest of the page is loaded. It keeps it out of the body of my HTML, which I really want to keep my HTML as clean as possible so it's easy to read, easy to understand, easy to update, easy for Google to crawl. All of those reasons. I want to keep my HTML as clean as I possibly can without any extra attributes, without any extra code or anything else. But once I've got that all in there and working well, I should always come back and just test it to make sure I did it right. Next, previous, and that's working just fine.
With that, we have a really nice script that's all set up and working well. In this lesson, we've combined a lot of the basics that you've learned in the course. We're using some control structures such as the sequence and the selection. We don't have a loop in this one, but we're using sequence and selection. We're using the custom functions. We've got event listeners. When there's event listeners trigger, we're affecting the DOM to change the web page.
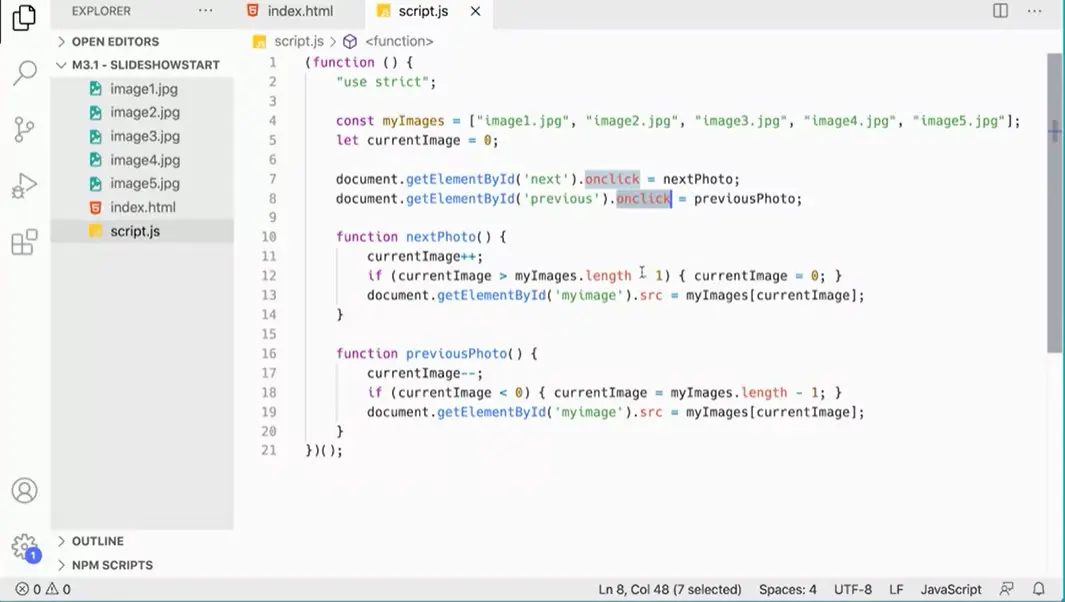
Now, what you could do to make the script even better, perhaps, or just to test what you know so far is go back to the script, and how could you replace using the Onclick event handler with using the Add Event handler method instead? I recommend giving that a try because that's a really good challenge to see if you can figure out something on your own without making it too hard, without going too far.
Slideshow with crossfade effect: JavaScript with CSS animation.
For this version of the slideshow, we're going to do something very similar to what we did before, but with a little bit of a twist. It's going to be a little bit more sophisticated.
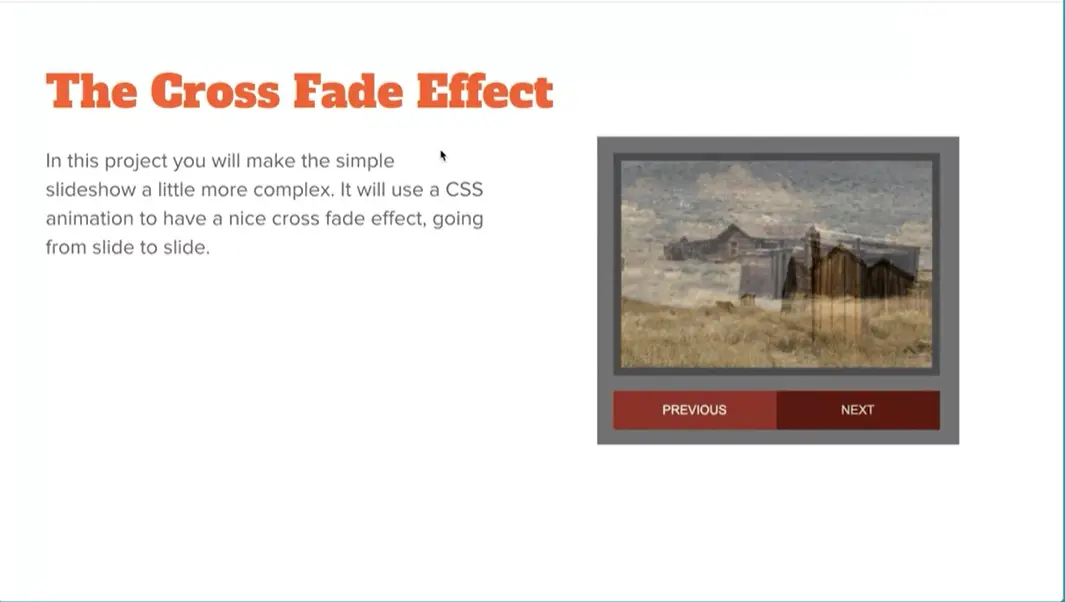
I've got a little styling in here to make the slideshow look a little bit better. But instead of just swapping out the source, we'll have a crossfade effect as we go from one slide to the next, and we'll be using CSS to do that animation. It's going to be a little bit different than what we did before, but very similar otherwise.
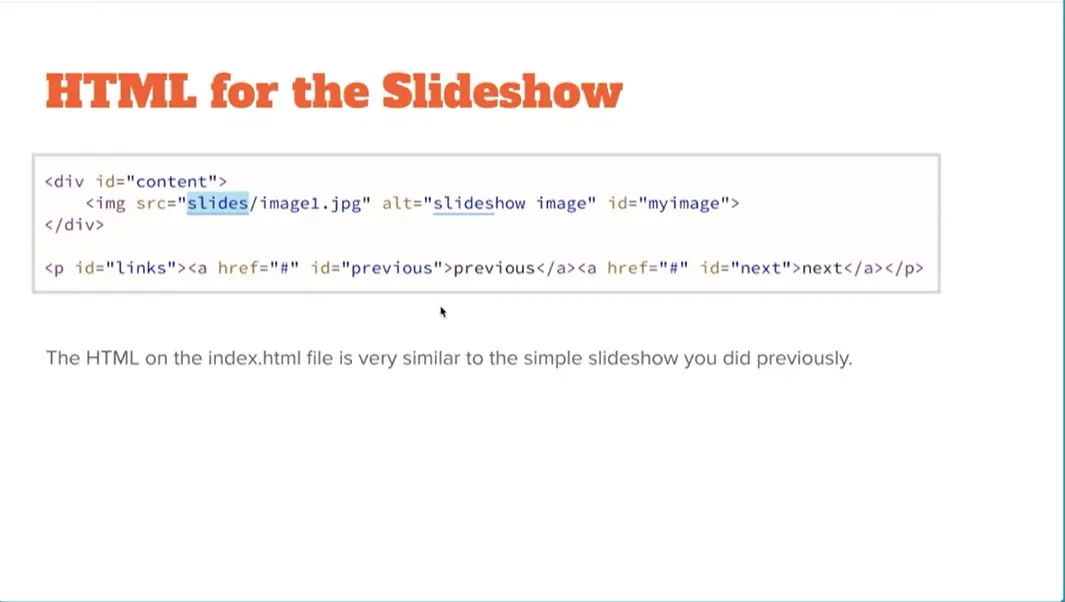
The HTML for this slideshow is very similar to what we had before. We just have images, but now I have a folder called slides, so image source slide image 1. Then I've got an alt tag and the ID for the image here, and then I've got my next and previous links as I had before. You can see that over here in my HTML.
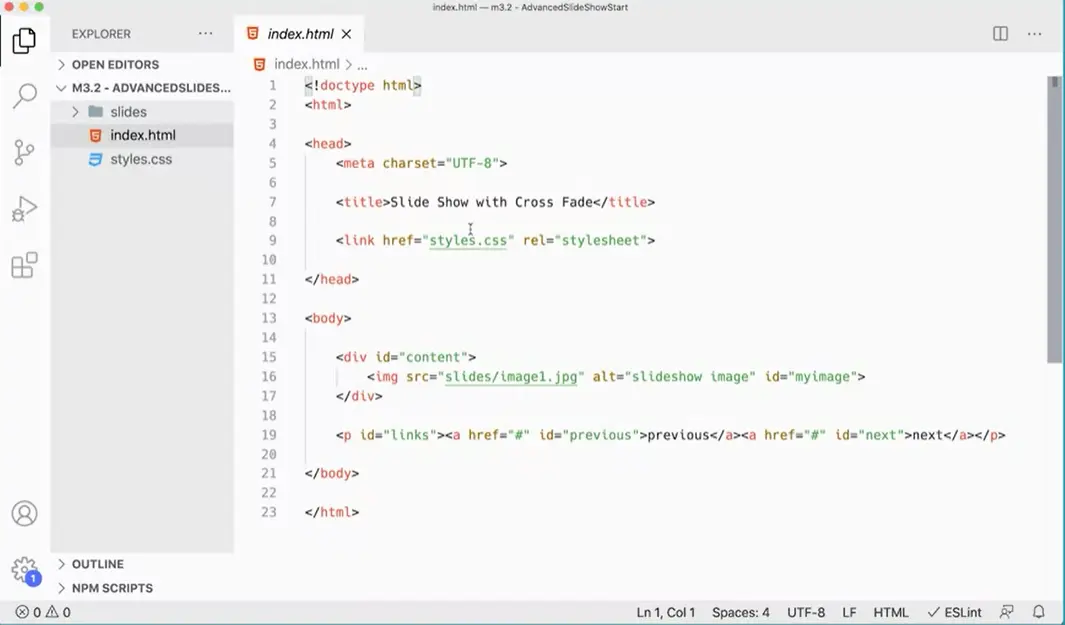
Very simple set-up with an image inside of a div called content.
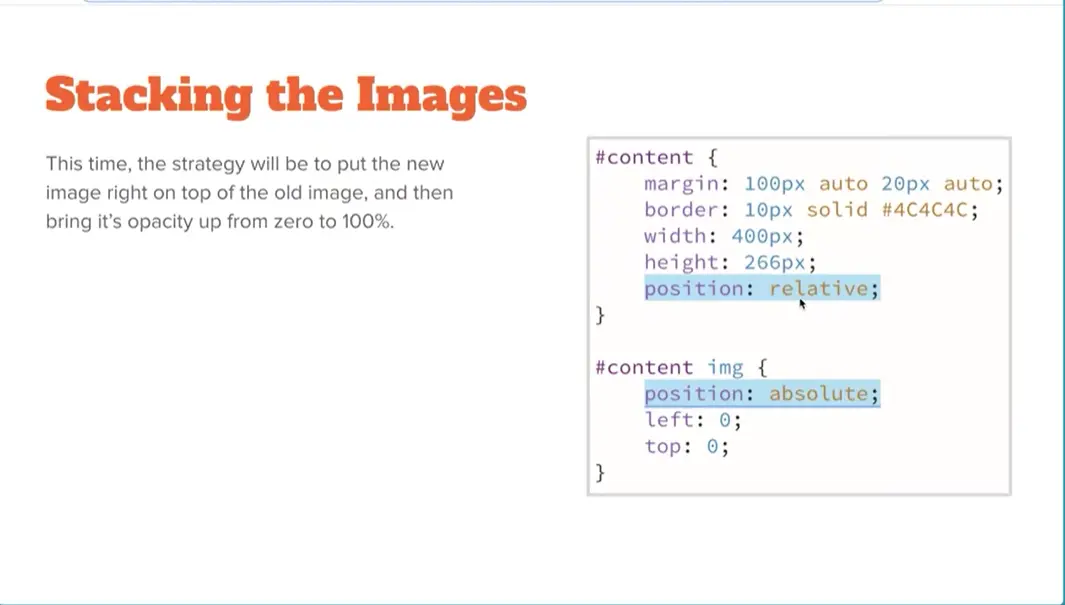
One thing that's different is that this time I'm using CSS to create, to tell that content to be positioned relative. I'm absolutely positioning these slides inside of here.
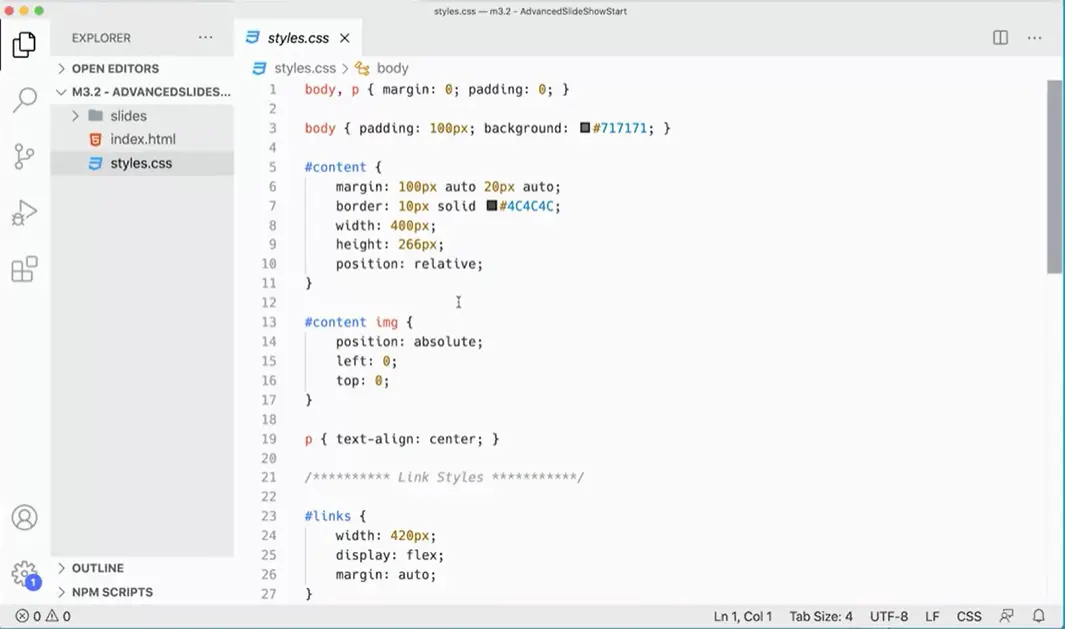
So this content is set to 400 by 266 pixels, which is the exact size of the images that I have, and over here you can see it here on the page.
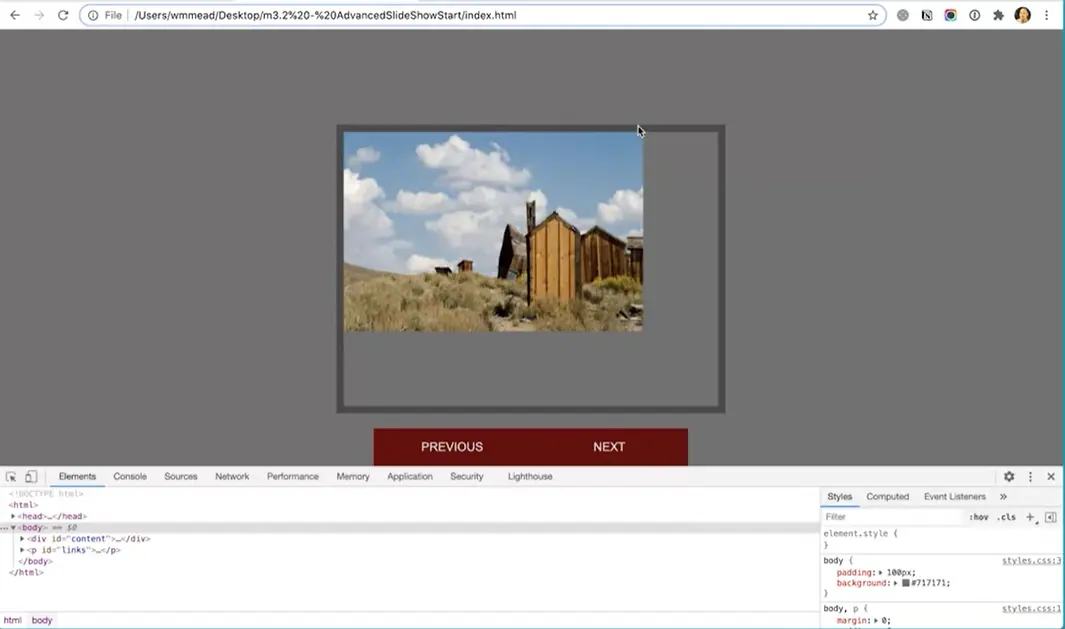
Now if I were to go into my CSS over here and adjust that, you'd see a little bit better exactly what's going on here. So if I made this 500 wide instead of 400 wide, and 366 instead of 266, and save that, you'd see over here when I refresh this, that the image is pinned to this upper left-hand corner. Before it was the same size as the box that it was in, whereas now, I've made the box bigger. So you get this empty space up here, but the image is pinned up into the corner.
It's important to understand that because the way this slideshow is going to work is we're going to put a new image right on top of the old image, and then we're going cross, we're going to put it in fully transparent, and then we'll fade it in so that you'll get that crossfade effect. But you can see the image here is position absolute, left 0, top 0. That what's putting that image inside this parent element, this container at the top left corner, left 0, top 0, and that's what's going on there.
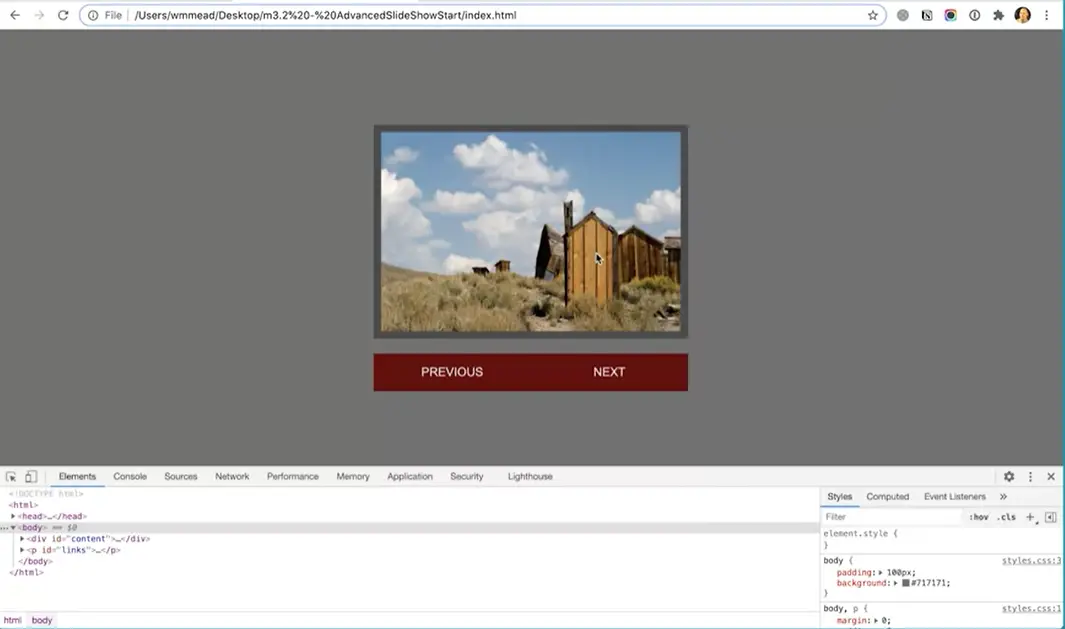
We can put these back because that's just for demo, and you'll see if I refresh this that the image is now once again fitting inside that box perfectly. So it's important to understand that setup before we start with this.
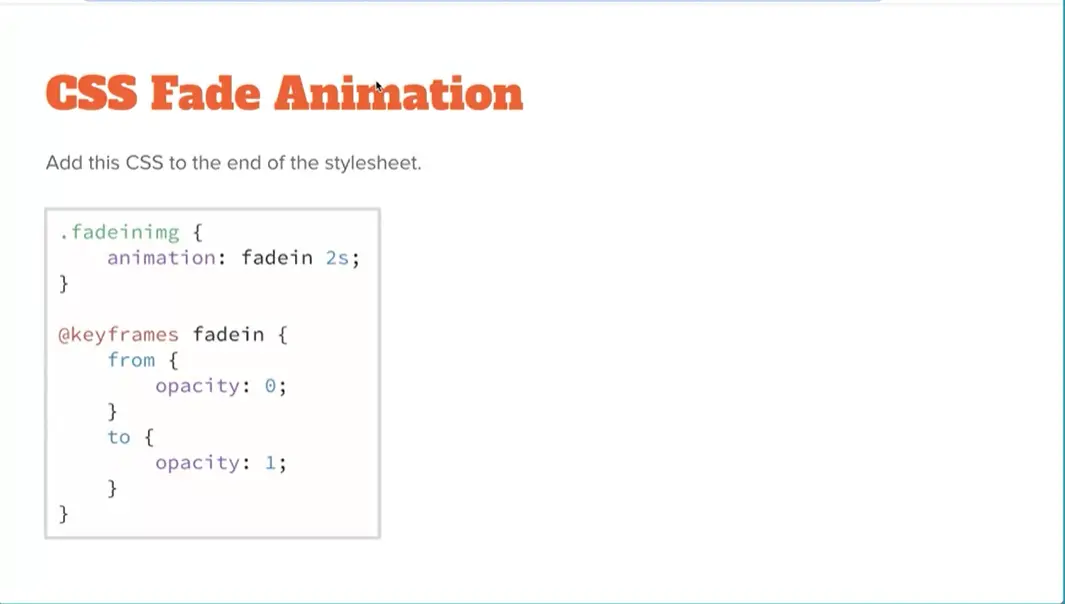
The next thing we need is the actual CSS animation that's going to actually do the crossfade effect. We need to add this to the style sheet. Go back to Visual Studio Code and on the styles down here at the bottom, we can add these animation styles.
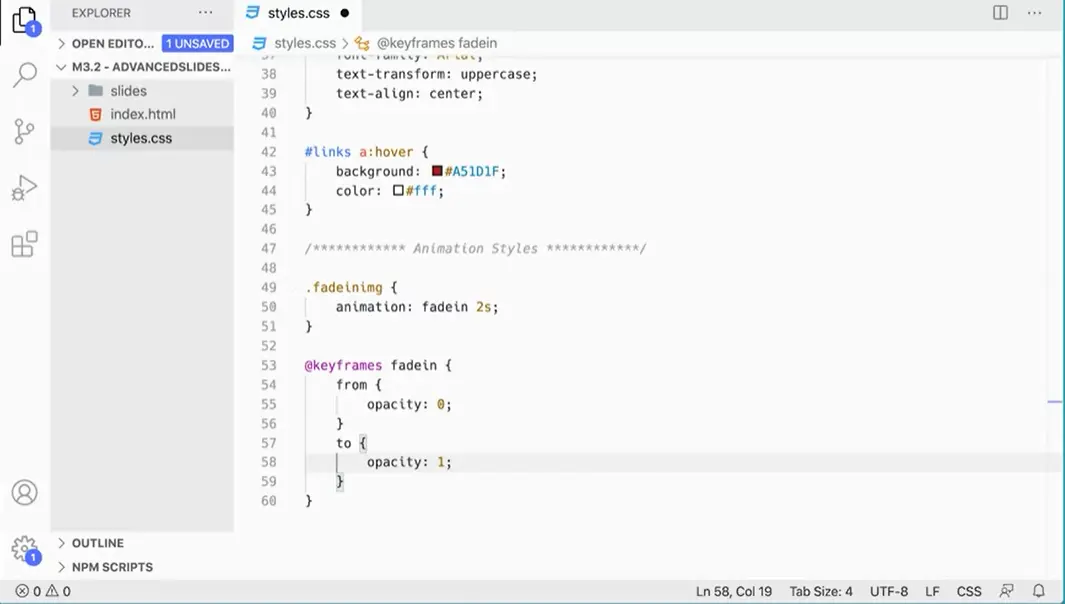
I'm going to add a class called fadeinimg. What is that class going to do? It's going to, come over here and see here. We're going to run an animation called fade in over two seconds. Two seconds is slow, you can make it one second, you can make it even slower. I'm making it slow so you can really see it taking factors as we do this, but you could make it run a little bit faster. Animation, and then we want to do fade in over two seconds, and that's fine. Then down here, we're going to have a function that will allow us to fade it in, enact keyframes function called fade in, so these two names have to match. We'll add at keyframes, fade in, and then we're going to go from opacity zero to opacity one. It's a very simple animation. You can make much more complex animations using this; fade in from opacity zero to opacity one.
You've saved that, and make sure you have this in here correctly. Because when we add an image on top of the other one, we're going to add this class to it, and then this class is going to run this fade in at keyframes fade in here, which will start at zero and then go to one. So it'll come in completely transparent and then fade into one, which is completely opaque, over two seconds. That's what's going to actually create that crossfade effect. None of this is being done in JavaScript itself, and that's actually great because you can do this kind of thing in JavaScript, but it's much more efficient to do it in CSS. If you do it in CSS, then you can take advantage.
The browser will take advantage of the GPU, the graphics processing unit of whatever computer or device you're using, whereas if you do it in plain JavaScript, it's just the normal CPU. The GPU is really optimized to handle this kind of thing, so it'll be nice and smooth and work much better if we can do the actual animation in CSS. We're frequently going to do that with JavaScript, where we use JavaScript to trigger CSS animations. Although we can do the animations directly in JavaScript, whenever we can use it to trigger CSS animations, it's better for performance across all kinds of devices.
Now we're all set up and ready to go, and ready to start writing our script.
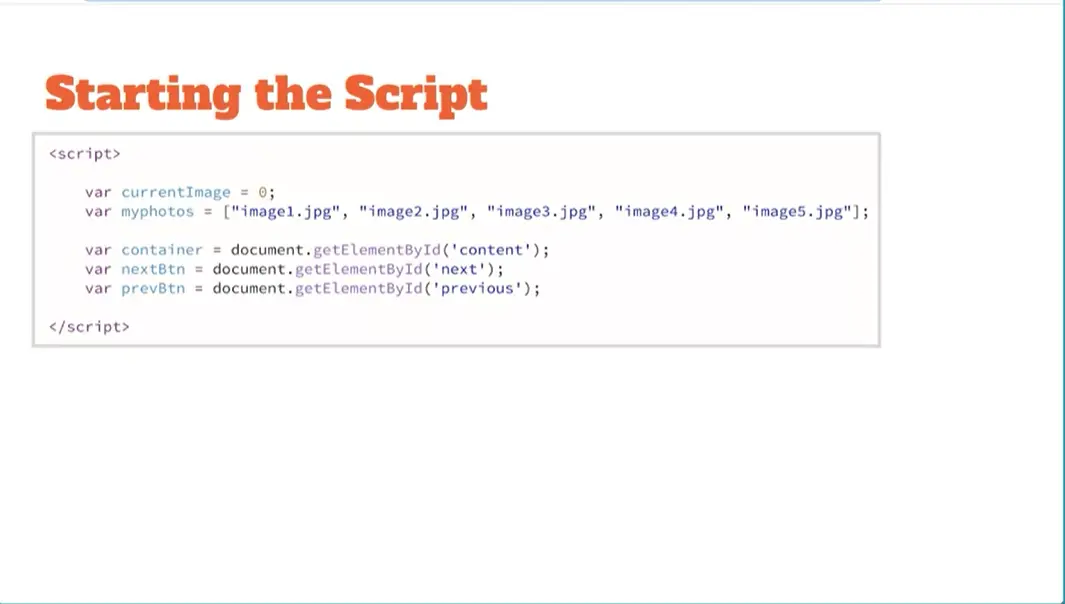
Our script is going to start with just a basic variable, again, for our current image and our array, same array that we had before, same current image variables. Then I've got variables for the container, which is going to go get that container that's holding our image, and then for the next and previous buttons as well. Let's go ahead and get these setup in our script.
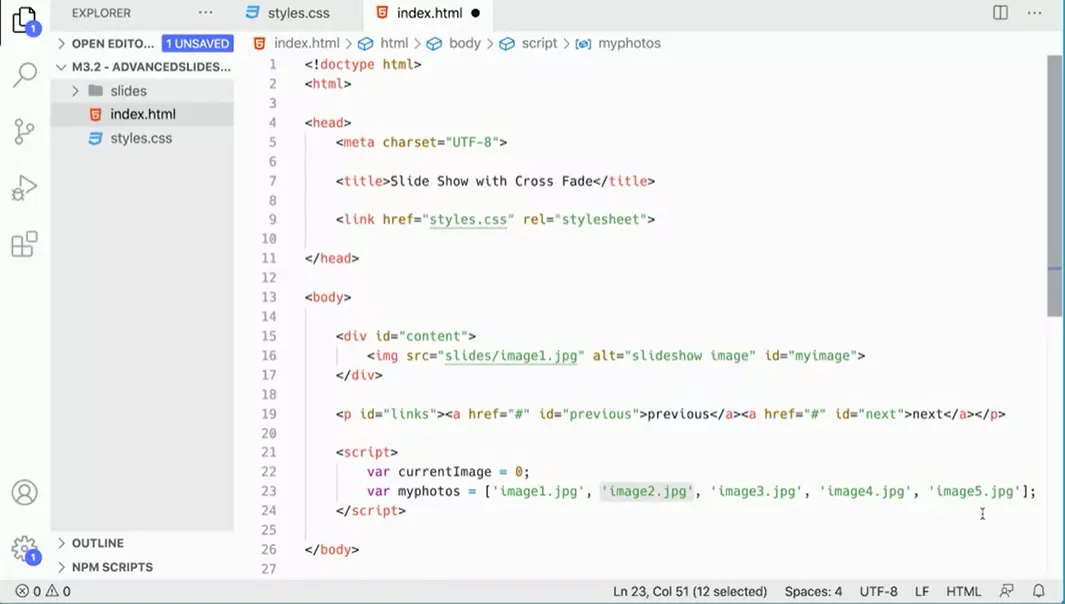
Going back to our index file here, I'm just going to add script tags at the bottom of our script here, our HTML script, like so. Then I'm going to add var currentImage, and I'm going to set that to a value of 0 initially. Then I'm going to have var. Then I'm just gonna copy this. Again, it doesn't matter if you use single quotes or double quotes. Then the next thing we need are to get some variables. Var Container equals document.getElementByID and the ID that we're getting again, is this one, content. It's always good to copy and paste so that you don't spell that wrong. That's going to get us that element.
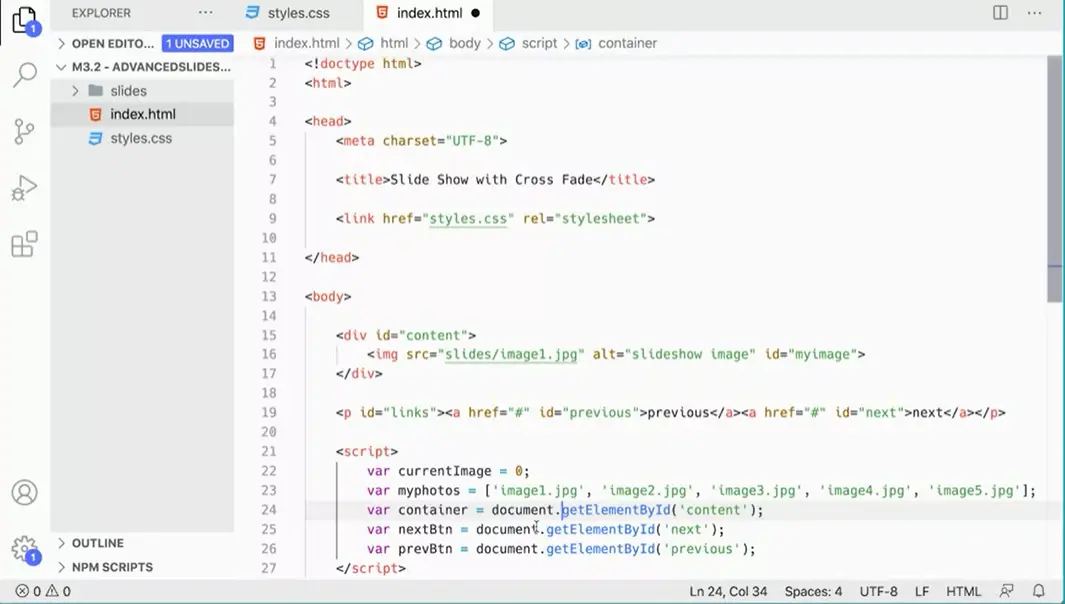
We also need the next and previous links. Var nextBtn equals document.getElementByID. Next, var prevBtn equals document.getElementByID previous. That's going to go into our document. We're going to get our Next button. We're going to get our previous button, and we're going to get our content div that we're going to be putting into these elements here. I have an extra space there that I shouldn't have, make sure you fix that if you have that in there. Document.getElementByID content next and previous. In the next lesson, we'll add the EventListener for when you click on this next link here to go to the next slide. Just like we did before, we'll build out the next one and then when we're done with that, when we get that all working or work on the previous one. We'll go ahead and work on that one first.
Here's our event listener for when we click on the the next button.
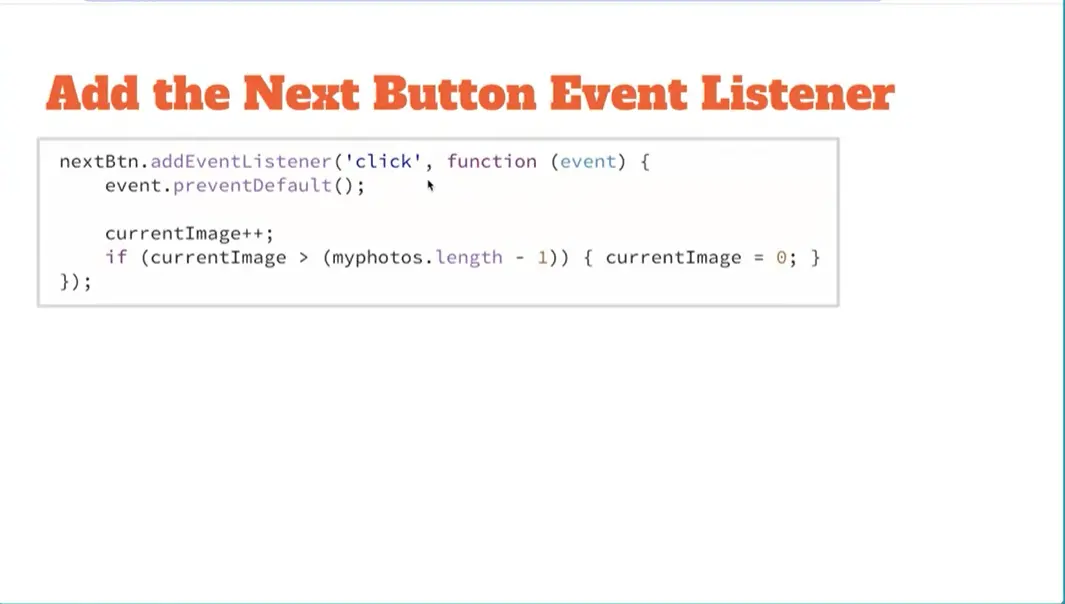
For this one we're using the add event listener method instead of the on click property. We'll look at this method and we're going to add the event listener right to that next button variable that we created. When it's clicked, we're going to run a function. This is an anonymous inline function, and we're going to pass in the event object so that we can prevent the default behavior of what happens when you click the link.
We don't want the browser to handle clicking the links the way it normally would, we want to prevent that default behavior and prevent default will do that when we pass in this event object here, so it will prevent default. Then just like before, we're going to increment the currentImage and then we're going to check once again if the current image is greater than the length of the array that we've got minus one. If that's true, we're going to set current image back to zero. That part’s the same as before.
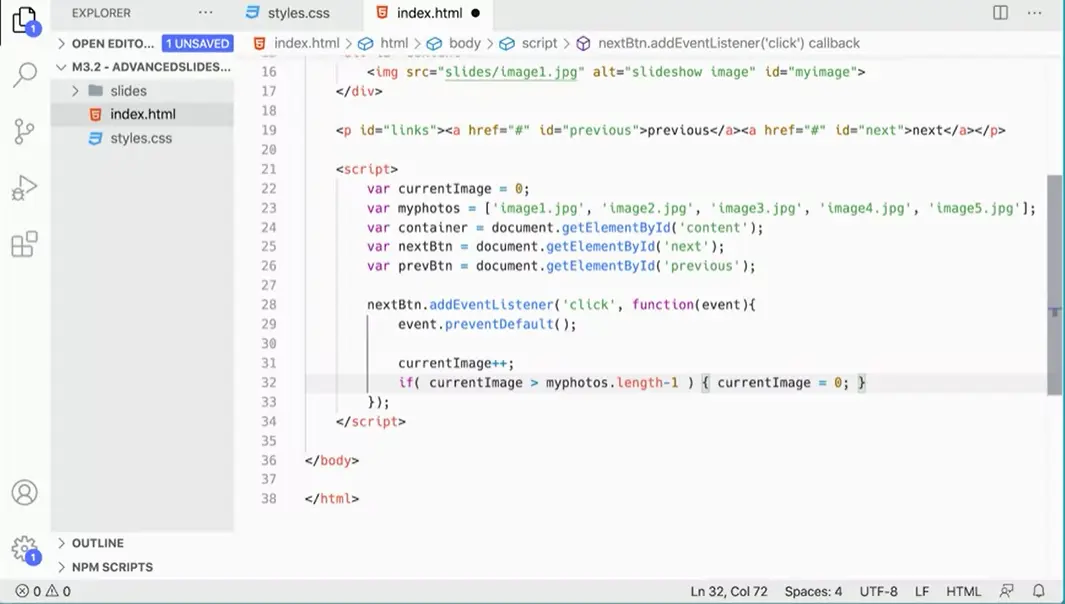
Let's put this in. I have my next button here which is already going and getting that element. Now I can just do nextBtn.addEventListener and I'm listening for a click. When the click happens, I'm going to run a function and I'm going to pass into that function the event object. This function is going to run when the click happens. Then I'm going to click inside here and I'm going to add something like event.preventDefault. That'll prevent the default behavior so that when I click on this link, I don't actually get the hashtag coming up in the browser. It prevents even trying to go to this href at all. Then what we're going to do is we're going to increment current image.
Current image plus plus same as we did before, and just like we did before, if current image is greater than myphotos.length - 1. So really a four; 0, 1, 2, 3, 4, if it's greater than four, my photos length would be five. But I want to check to see if it's greater than four. If it's greater than four, then what I want to do is I want to move it back to current image equals 0. That will put it back to where it was initially. Now current image is going to increment, it's going to go up, and it's going to go from zero to one, to two, to three, to four, and then back to zero.

Here's the new part.
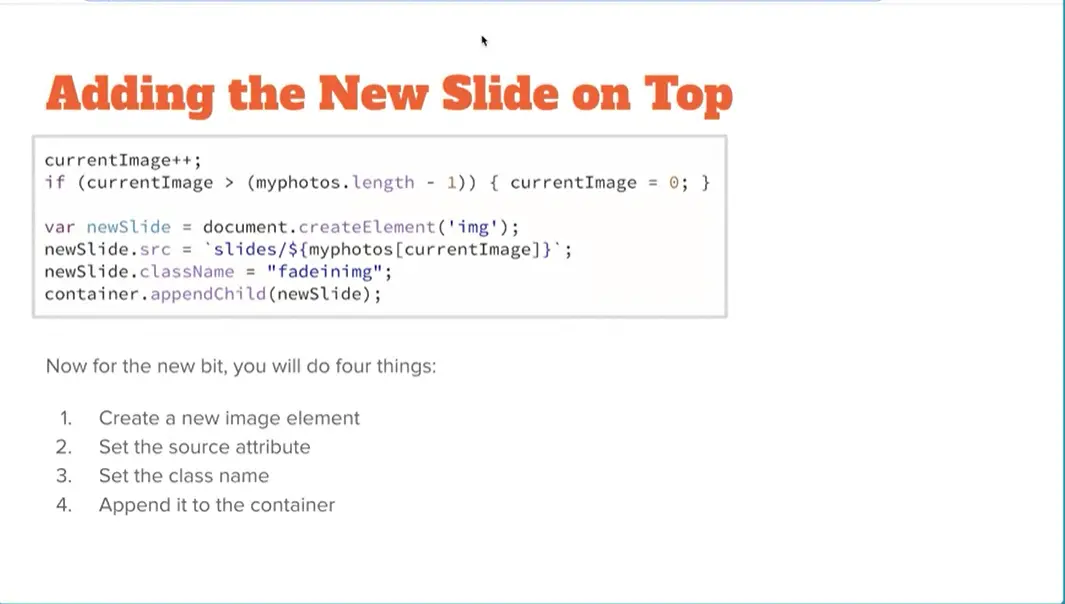
Instead of just swapping the source attribute, which is what we did in the first slideshow. In this one, what we're going to do is we're going to create a new image element, document create element IMG, so that makes a new image tag. I'm going to put it into this variable called newSlide. And then I'm going to set the source newSlide.src = ‘slides/${myphotos[currentImage]}’;.
Notice the use of the tick marks here. And the dollar sign curly braces can hold the variable for the my photos thing. That's getting the next photo from the slides folder. And then I'm going to also add a class name fadinimg. And you'll remember we just added that class to the CSS. So, we know what that does when we add that class. It runs that animation over two seconds of actually feeding in the image. And then we append the child to the slide, contaner.appendChild(newSlide). The new slide gets appended to the container. It gets appended with this source in this class. As soon as it gets appended to the container that animation runs and changes the opacity from 0, it starts at 0, and it goes to 1, completely transparent to completely opaque.
Because we're adding it into this container and the CSS for that container is to make these images position absolute, it's going to get put right on top of the previous image. And because it's the same size as the previous image, it will completely cover it. But because it comes in as transparent, you'll see the other image underneath it at first, and then over two seconds it'll become opaque and that's what will cause the fading effect.
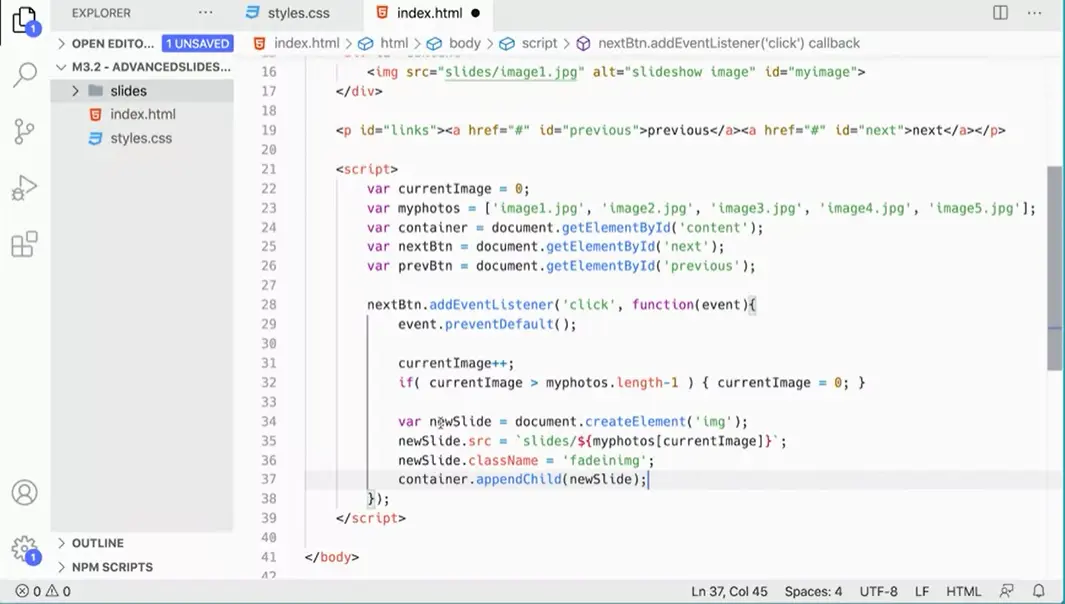
So let's go ahead and add this to our code over here. var newSlide. And I'm going to set that to document.createElement(‘img’). And what am I going to create? I'm going to create an image, IMG. Now we've got a variable that's holding a new image element. The image element is not on the page, but it's there. And then I'm going to say newSlide.className = ‘fadeinimg’. Again, we do the dollar sign and the curly braces so we can do a variable. We want my photos, square brackets, current image.
So when we click the next button the first time it starts off at 0, when we click it the first time it gets incremented to 1. So when that gets incremented to 1, a new photo gets created and the source gets set to, this gets incremented to 1, so the source gets that to image two and that goes in there. So, it's slide slash, that'll be an image2 dot jpg, the first time you click it. The next time you click it, it will be an image3. And when you get to image5, if you click it again, that gets beyond the length here, so it gets set back to 0. So, it'll go back to 1.
Now, the last thing we need to do here is append this to the container. And we created a variable here for the container. We can say container.appendChild(newSlide). That would take the new slide that we created here as an image, set the source, set the class and put it on in there.
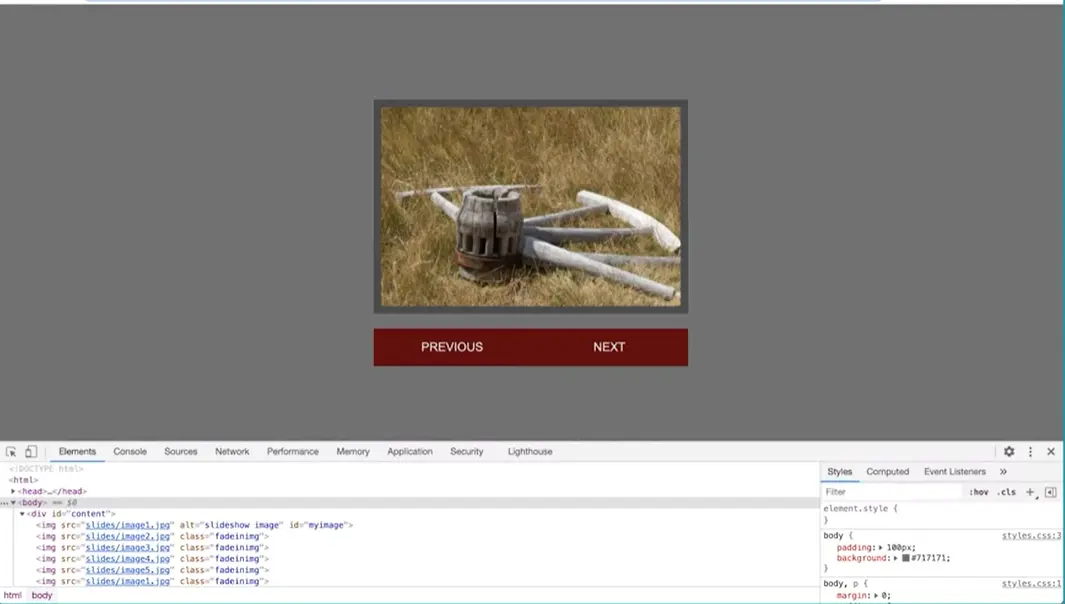
I'm going to go over to my slide show here, click refresh, and then click Next. And look at that, it's working. It's working just perfectly. Next, and I can see in here that it's adding the images one on top of the other. Put three on top of two. It put four on top of three, it put five on top of four and now it'll put one on top of five. And you'll see as you're adding them, that animation is taking place. In over two seconds the picture comes in as transparent and then over two seconds it fades to opaque, and that's what's creating that crossfade effect.

As you just saw, this is working, and the images are coming in, and they're stacking one on top of the other invading in.
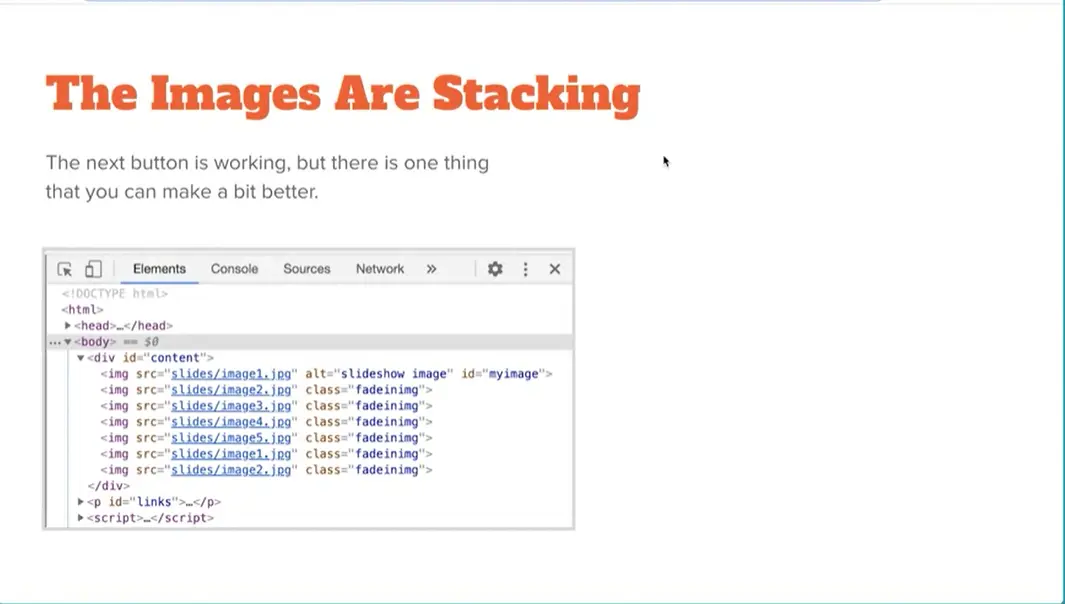
But there's one thing that we can do to make this a little bit better. I don't really like that every time I click the link, it's adding more images to the DOM, especially when it starts adding the same images to the DOM over and over and over again. I think that it could be a little bit more efficient, and a little bit better, and a little bit cleaner.
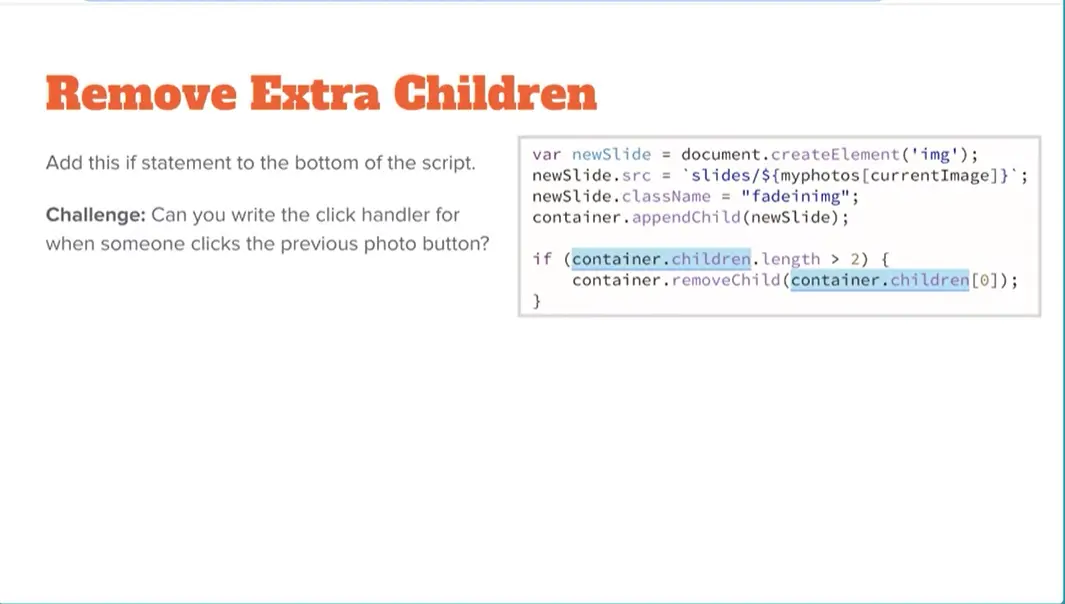
What we're going to do is we're going to remove the extra images as the new images come in. What we'll do is we'll say, okay, container, you have children, the children of the container are the images, and if I have more than two images, if children.length is greater than two, I'm going to remove the first one in that container, the bottom image, I'm going to remove the one from the very bottom of that list, which is not showing anyway, it's at the bottom of the stack and it's not going to be seen anyway.
That means you'll have one image, and then you'll put another image on top, and as soon as you click next and add a third image, then the one at the very bottom of the list will go away, so that you never have more than two in the list, and I think that that makes the script a little bit better, keeps our DOM a little bit cleaner because we're not continuing to add more and more elements every time somebody clicks the link for next.
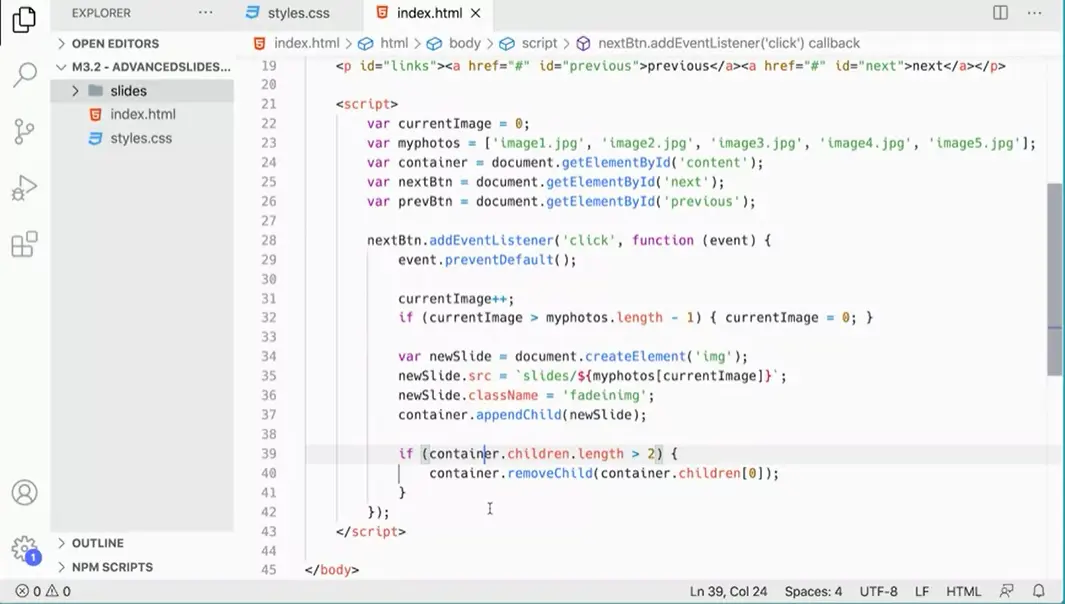
Let's go ahead and add this to our script over here. Down here I'm going to say if, and in here I'm going to just put container.children.length, if that's greater than two, then I want to do something, and what do I want to do if it's greater than two?
What I want to do is I want to say, container.removeChild(container.children[0]);. I want to remove a child. Which child do I want to remove? I want to remove the bottom most child from the list.
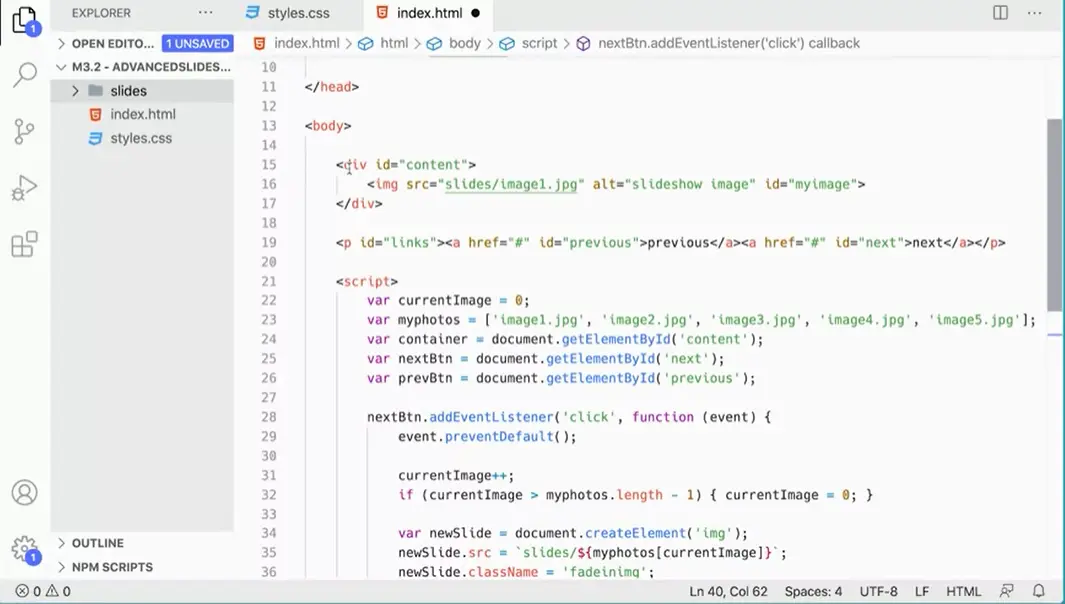
Again, up here the container is this thing, this div id=’content’, and it has children which are images. When we start off the page, there's just one, but as we've been clicking the link, it adds more and more and more and more in there, and we really don't want that to happen. This will keep us from adding more than two, because once we get more than two, it'll remove the bottom one from the list.
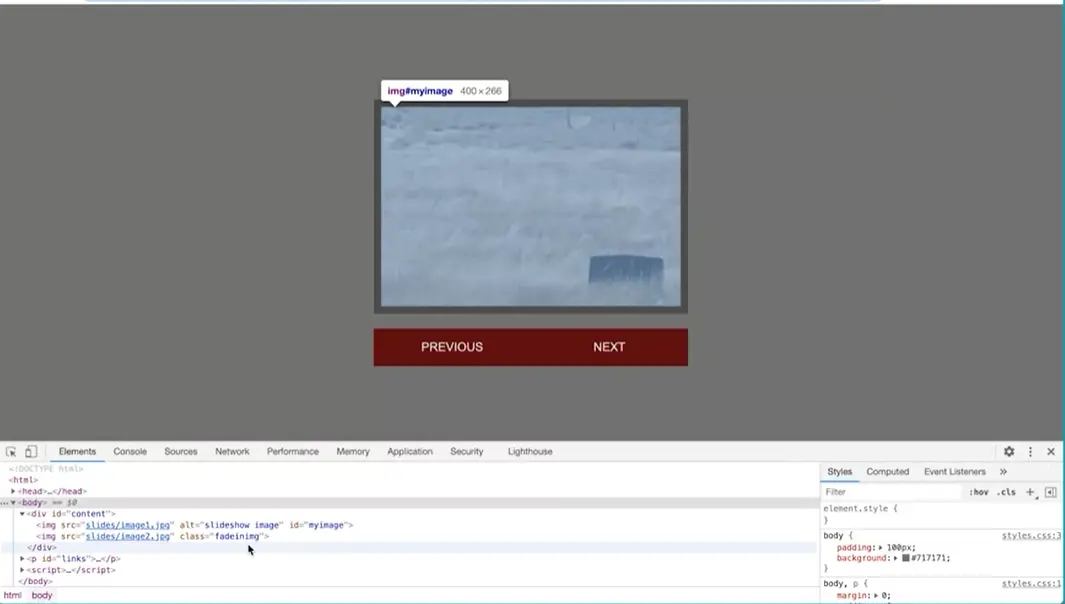
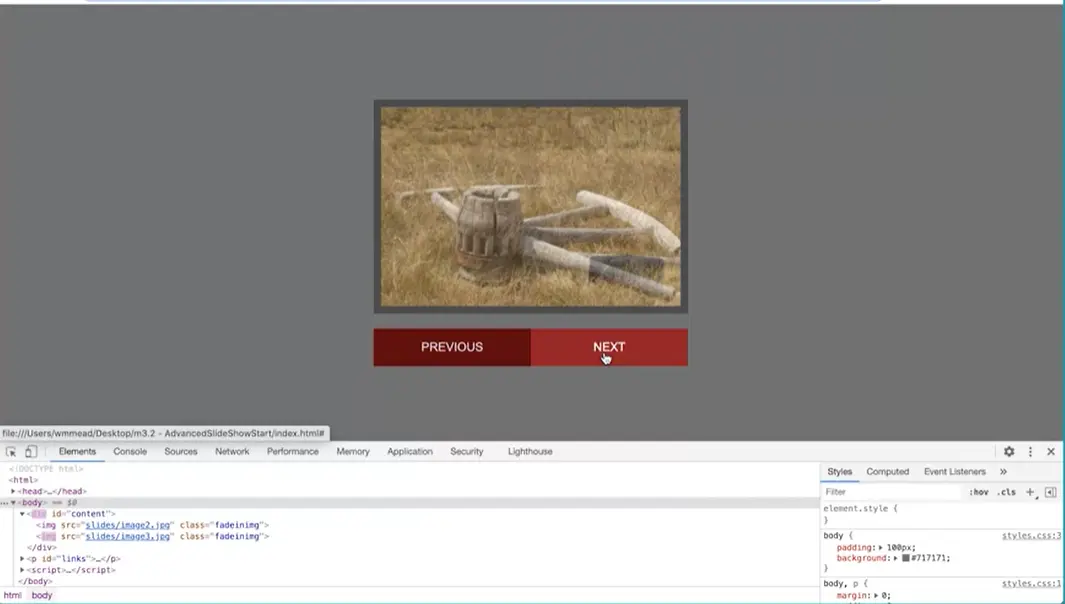
Let's save this and see if I typed in all right, and test it over here. I'm going to look at my content. Here you can see I've got one image there, I add one, so that adds image number 2 on there. Coming in here, you can click next, and it's adding that on there. Now when I click the third one, it should add the third image, but also remove the first one at the top of this list. Now we've added image 3, but image 1 went away, and I can keep going, and it'll do image 4 on top of there, and then image 5, we've got four and five on the screen, four is in the bottom, five is in the top, and image 1 is now on the top.
You might be wondering why the one down here at the bottom is on the top. You have to remember the page renders from the top to the bottom, and the fact that these are set to position absolute means that this one gets added to the page first, and then this one gets added to the page second, and because it gets added to the page second and because of the absolute positioning, that means it ends up on top, it's on top of the first image, so that's working just great.
We have our next button working just fine.
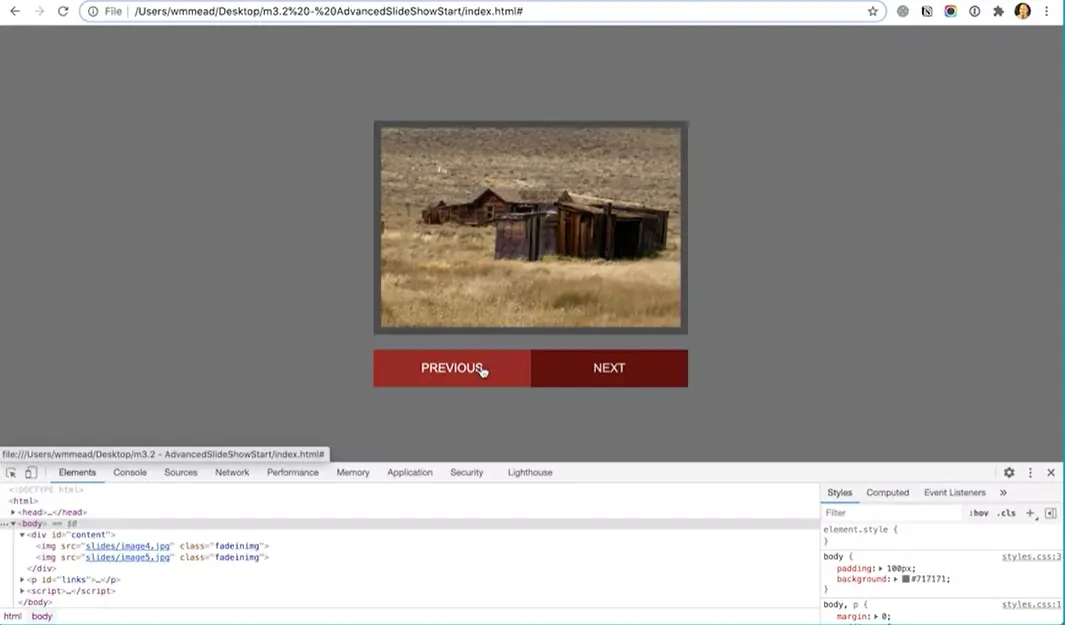
I can click "Next" and it will go through the slides. Not only that, but it's nice and clean because it removes any extra slides we don't need as it's adding new slides on top. That's really neat and that's working. Now the question is, how do we get the previous button to work? Because currently clicking that does nothing but reset the page. Notice we're getting the hashtag up here. How do we get the previous button to work?
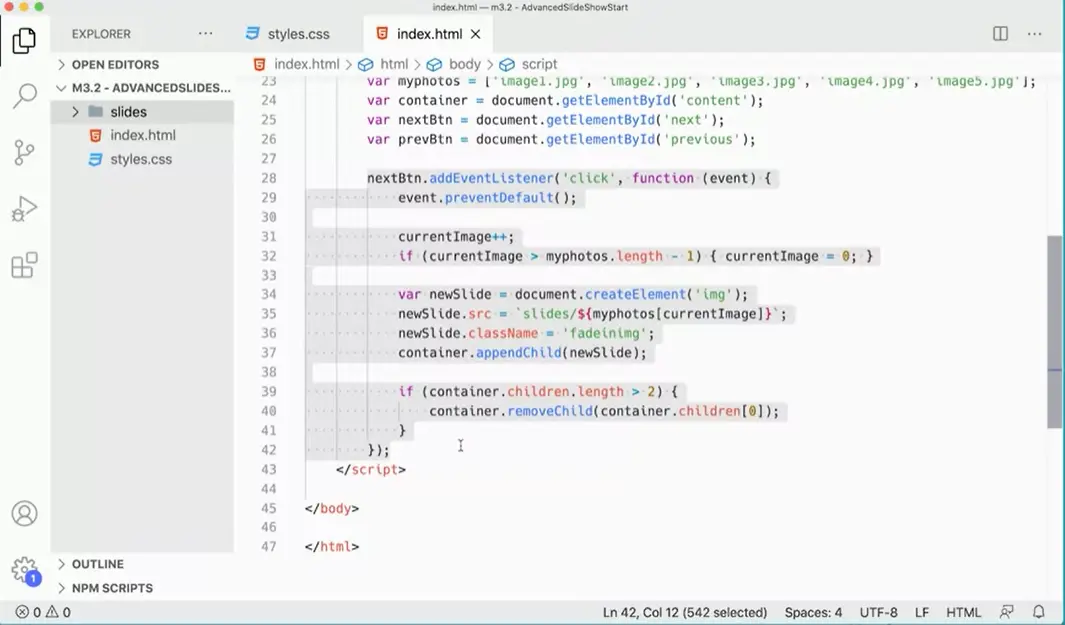
What we want to do is pretty much the same thing that we did with the next button but with the previous button. See if you can do that challenge on your own. You can even go ahead and take this function that we've written for the next button here, this one here, ''Copy and Paste'' it and see what you need to change to make it work for the previous button. Just like before, you can actually use the previous project, the earlier version of the slideshow to figure out how to do this. Because we're going to decrement the image and this is going to change, but all of this is going to remain exactly the same.
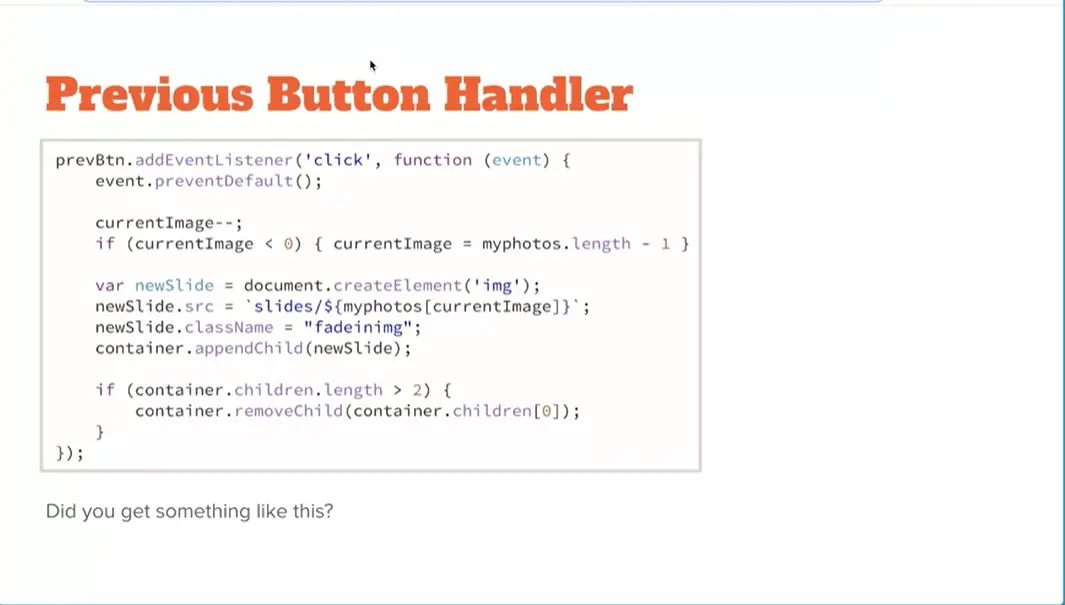
Did you get something like this? Hopefully, you did. Let's take a look at what's changed here. What's changed is, here, we're putting the event listener on the previous button instead of the next button. So that's different. The rest of this is all the same. Instead of incrementing current image, we're decrementing it. So that's different. Then down here, the if-statement has changed a little bit. If the current image is less than zero, we're setting current image to photos length minus one, just like we did in the previous slideshow. Other than that, everything else is the same. Let's see if we can actually make this work.
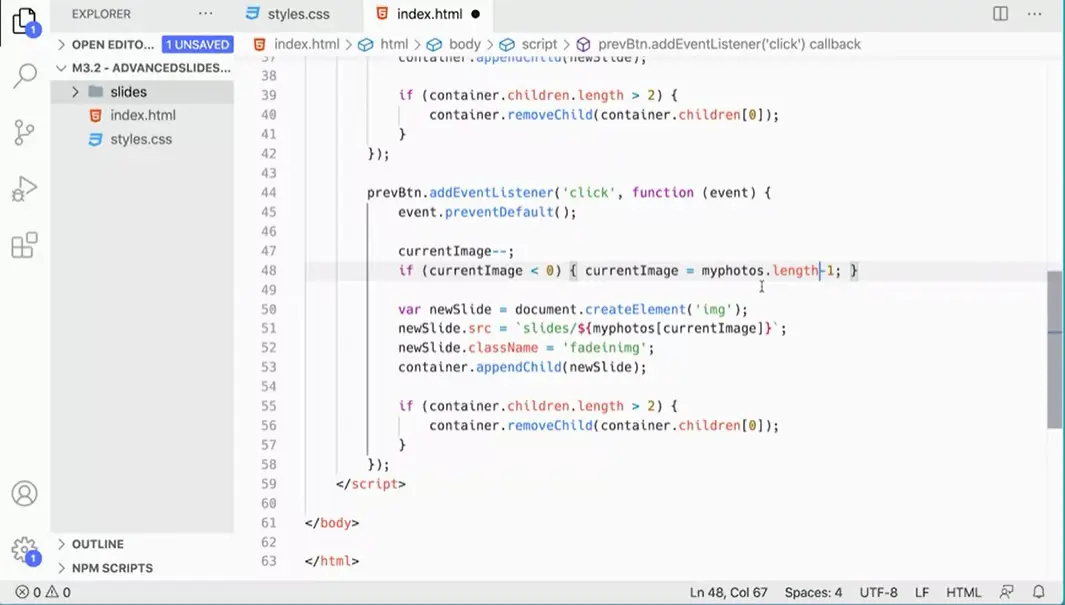
Over here. I'm going to copy this script and then paste it here and just change this to prevBtn, which is what I have up here. That's going to go into the DOM and get that button and add the event listener to it and all this stuff is the same. The only thing that's different is here, this gets decremented. Then down here, if this is less than zero, then we're going to set current image to myphotos.length minus one. That's going to set that all up there to work for the current image for that one. That should be it that's all we needed. The rest is going to be the same.
We're still going to create an image. We're still going to go get the image from the array based on the value of current image here. Then we're still going to apply that class to it, and we're going to stop put it on the page, and we're still going to remove the extra children. All the rest should be the same.
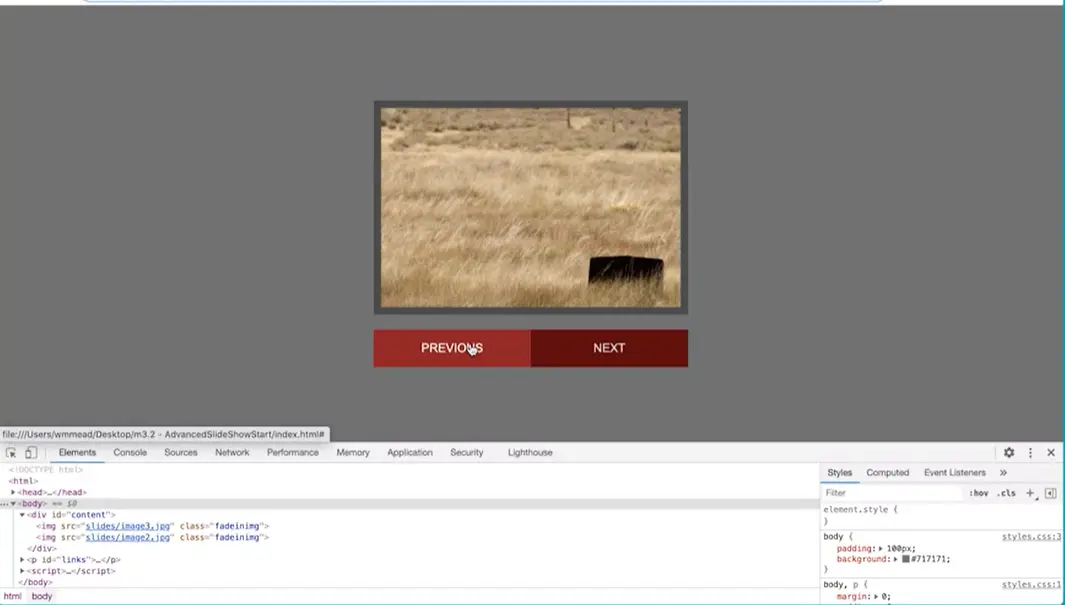
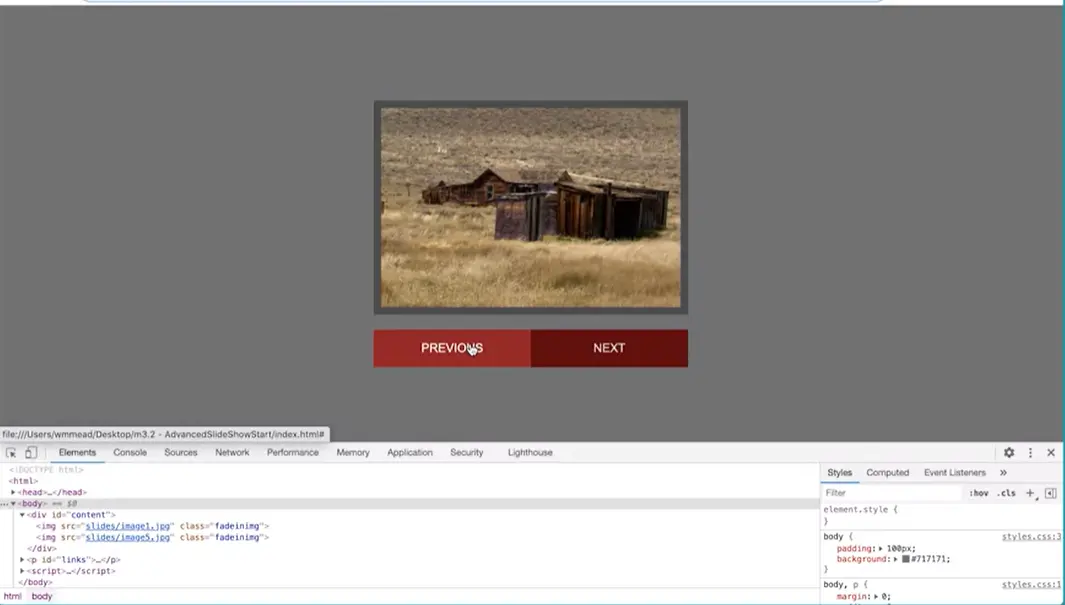
Let's see if this works. Come back and click "Refresh". Next works. I can add images, and over here you can see they're getting added. Image 2, Image 3, I could add one more Image 4. Now when I click "Previous", you can see Image 3 got put on top and Image 4 is down on the bottom. Image 2 is now on top, Image 3 is on the bottom. Image 1, and then Image 5, because we are going to the end of the array. Then back on down through the array like that. That's working perfectly. Just exactly what we want.
Your script is working great, and you could just leave it the way it is, it's totally fine.
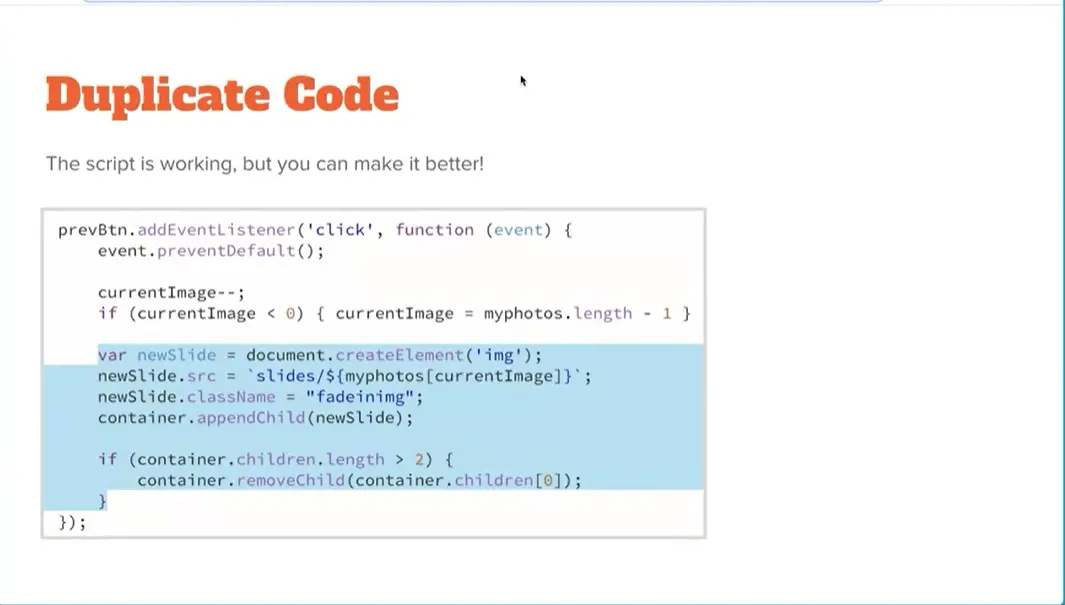
But you'll notice that we have a fair amount of duplicate code.
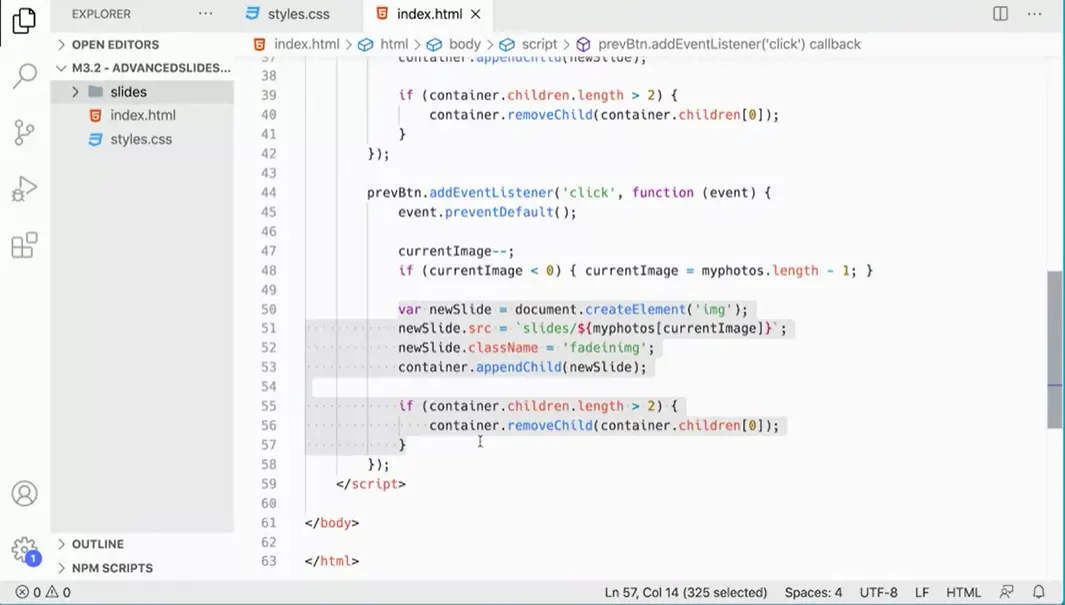
If we go over and look at our script, we've got this chunk of code in here. That's a several lines of code which is exactly the same as this chunk of code up here. And there's a concept in programming called Don't repeat yourself 'DRY', don't repeat yourself. What we want to do is, instead of repeat this code twice, pull it out and put it into a separate function. We're going to make a function called swapImage. And that function is going to have this chunk of code in it. We can run that function twice, once in the next button event listener function, and one in the previous event listener button function.
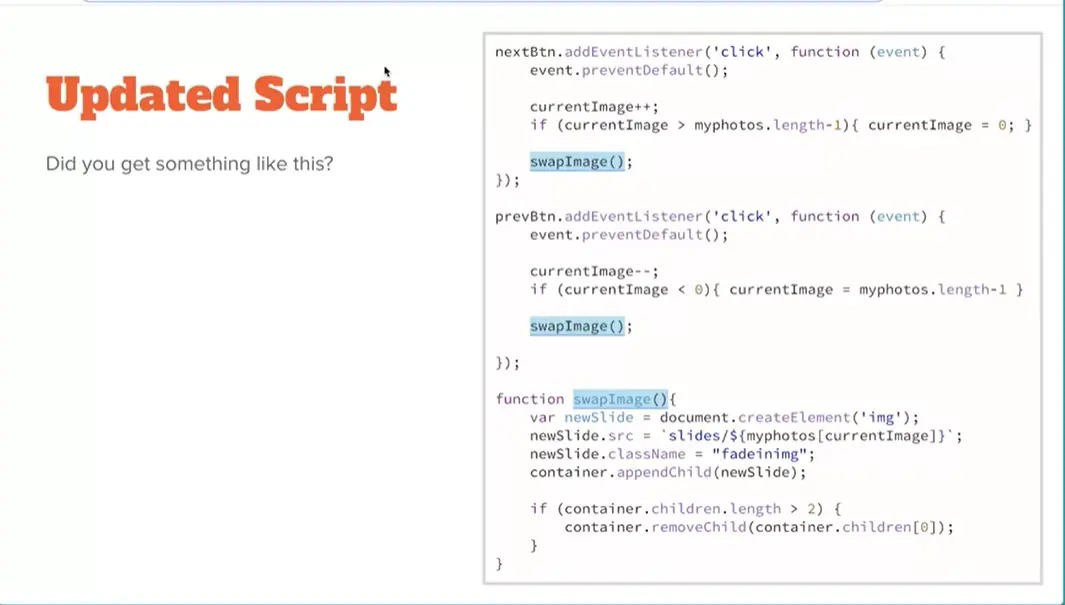
So down here, I'm going to make a new function, function swapImage. And then that function is going to contain all of this stuff in here.
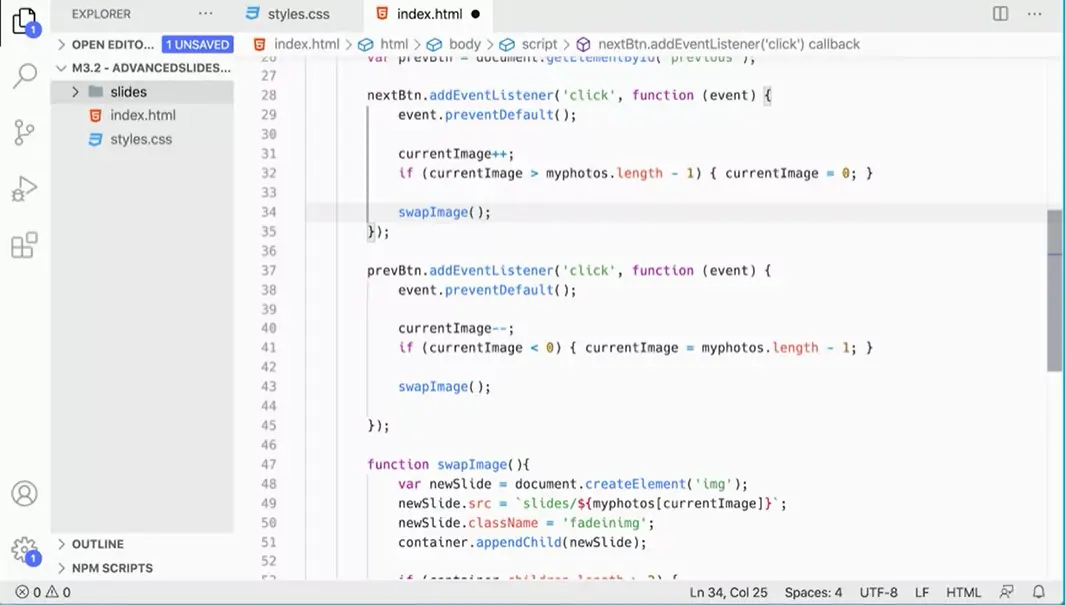
So now we've got a function called swapImage that will run twice. It'll run the same function basically, if you're clicking the Next button or the Previous button, and that cleans up our code because we can see here clearly that the next button is incrementing this variable and then checking with an if statement and then running function.
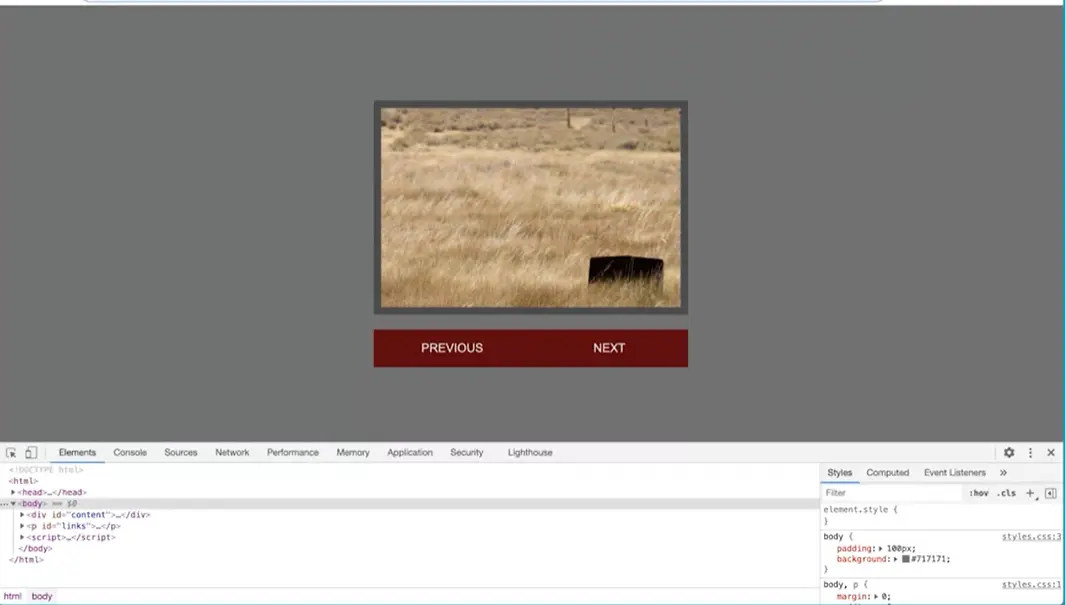
Let's test it and make sure we did it right. So over here, I'm going to refresh the page. If I click Next, you can see that the script is working exactly the same as it did before. Nothing else is changed really. We're not adding any new functionality. We're just refactoring our code. You always want to refactor your code and try to make it better and try to reduce the amount of code or make it cleaner or make it easier to read all of these things you want to do. And often when you're working on projects, you'll find ways. You'll look at an old piece of code. You go, wow, I could have made that simpler. And you'll do that. And that's just part of the normal process for any programmer.
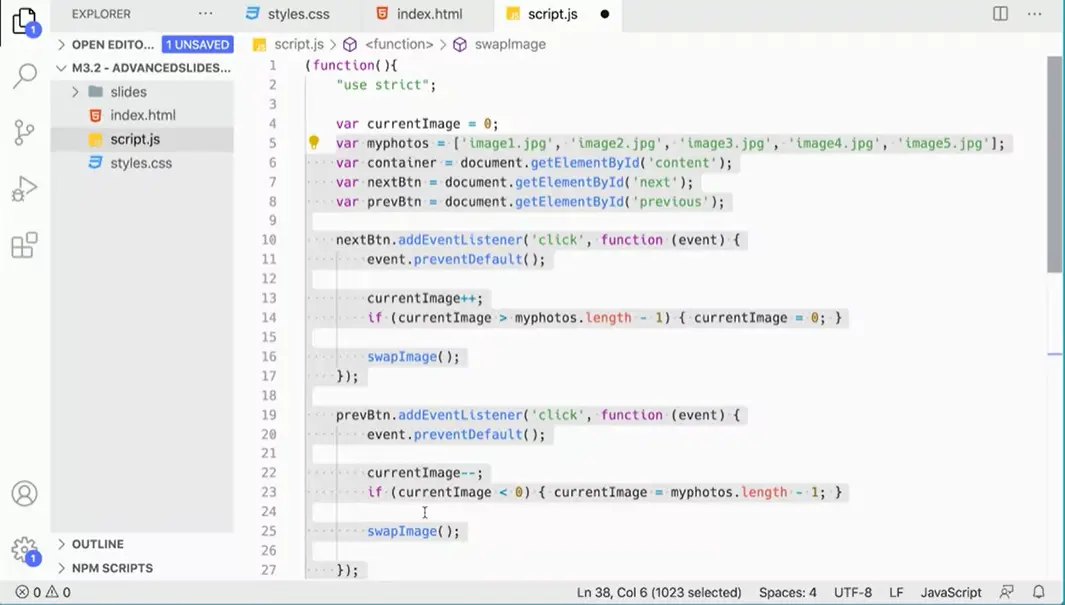
Now the very last thing to do here is to put it in a separate link file. I'm going to make a new file on here, click new file here and call it script.js. So make sure it's not inside the slides folder. On the script file, once again, I'm going to add my immediately invoked function, parentheses, curly braces, and then an additional set of parentheses and a semicolon. This function will run immediately when the page runs, and then click between the curly braces and move that down.
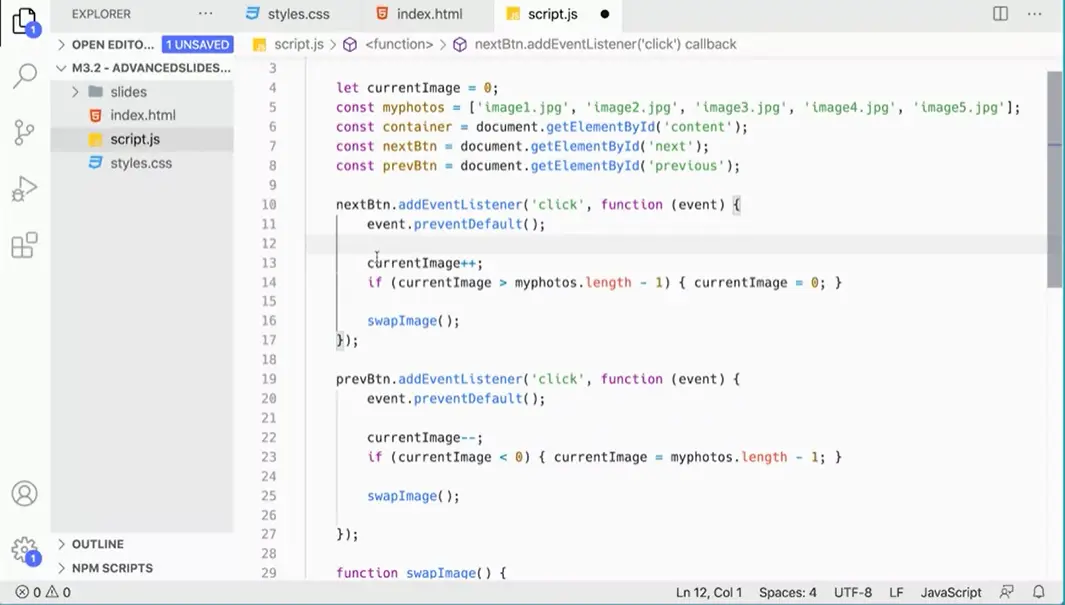
And we're going to add use strict in here. Now we can come over here to grab our script from the index file. I'm going to copy that. And I'm going to stick it over here and paste it in the script.js file.
Now the last thing I want to do is I want to go through and fix the variables here. This one current image is going to change. That variable is going to change down here we can see that.
There needs to be let, but the rest of these can all be const, because those aren't going to change during the script at all during it&s running.
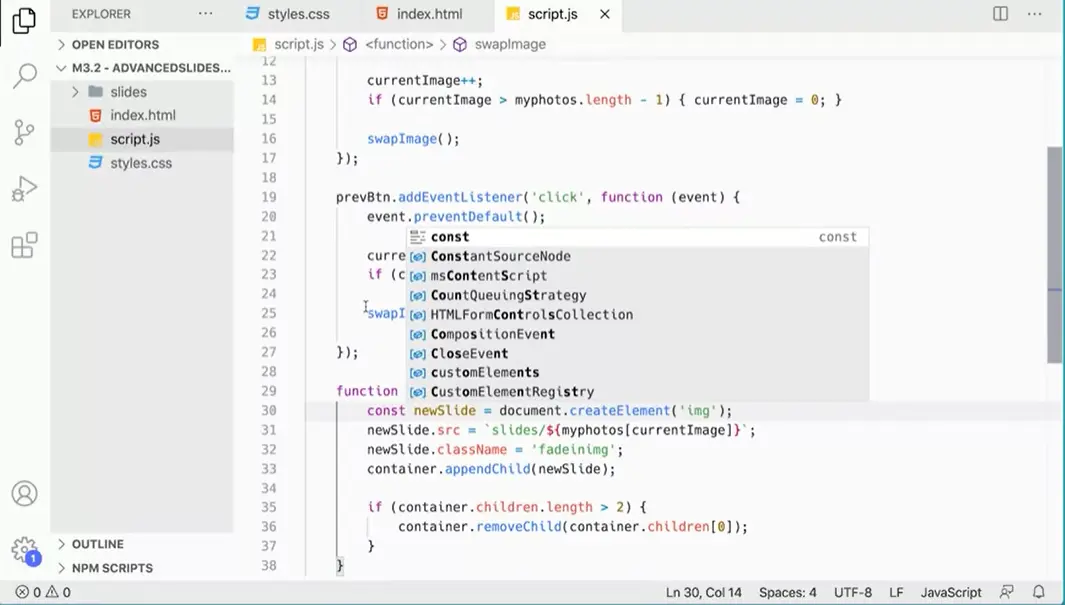
And then down in the swapImage we have a variable here. That one can also be constant. Now we've got our files and that's all looking good.
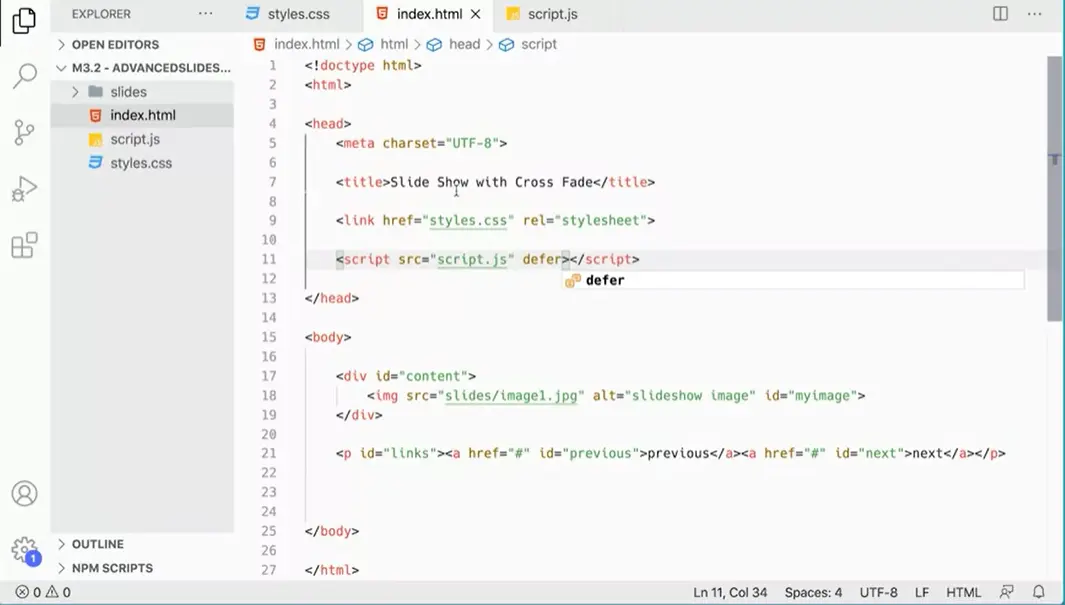
Over here on written index file, we need to get rid of that stuff and put it in here, src equals script.js, that's our file. And we can put this up here like so. We could leave it like that. Or even better, we could take this and move it up here into the header of the page and add the defer attribute here, save that.

And then always check to make sure you didn't mess things up along the way. And look at that. It's working perfectly. Everything works great.
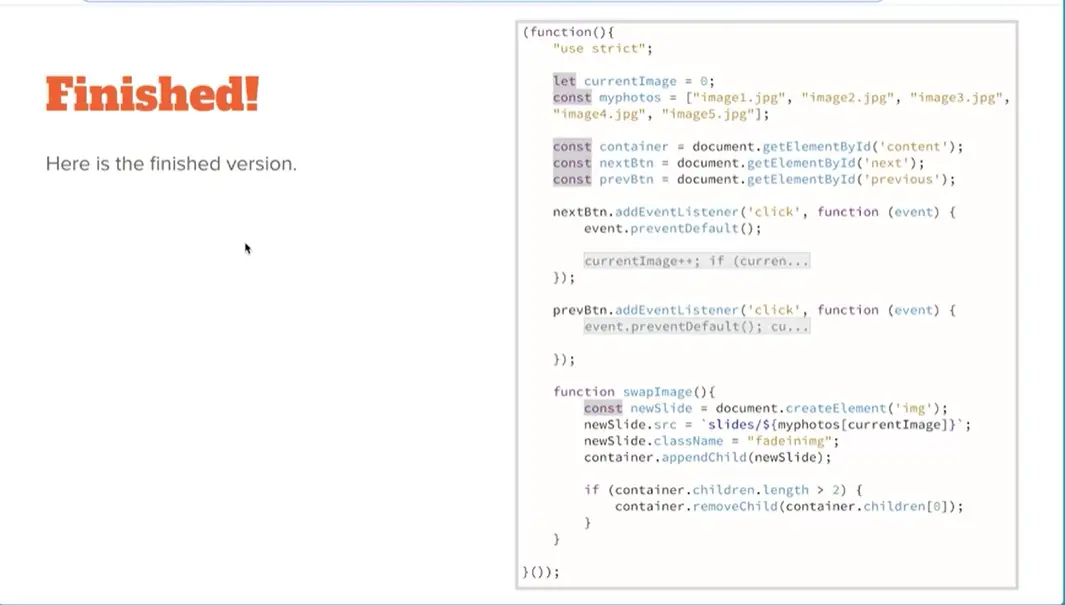
We have finished our script, and we've cleaned it up. And in this lesson you've learned a lot about some different ways of doing things, and how to add elements to the page, and remove them from the page. Using our document object model (DOM) as well as our event handlers. And this is a great slideshow that you could use on any webpage.

Hello, and welcome to the fourth module of this course. Congratulations for making it this far. You've learned a lot of JavaScript so far, and this fourth module is going to really help you push your skills even further. In this module, we'll be doing a lot of practice. To learn JavaScript, you really have to practice. You have to get used to the syntax. You have to think about how to break problems down into smaller pieces to actually make something that works. And we'll be doing that in this fourth module.
And by creating interactive elements and practicing what you've already learned, you'll be making some things that are interesting and fun, but also learning JavaScript along the way. So let's get to it. And hopefully, by the end of this module, you'll be excited about what you've learned so far in this course, and you'll be excited to go on to the next course and learn even more about JavaScript.
In this project will take an interface that I've already created, and make it work so that we end up with this little tool that will convert miles to kilometers.
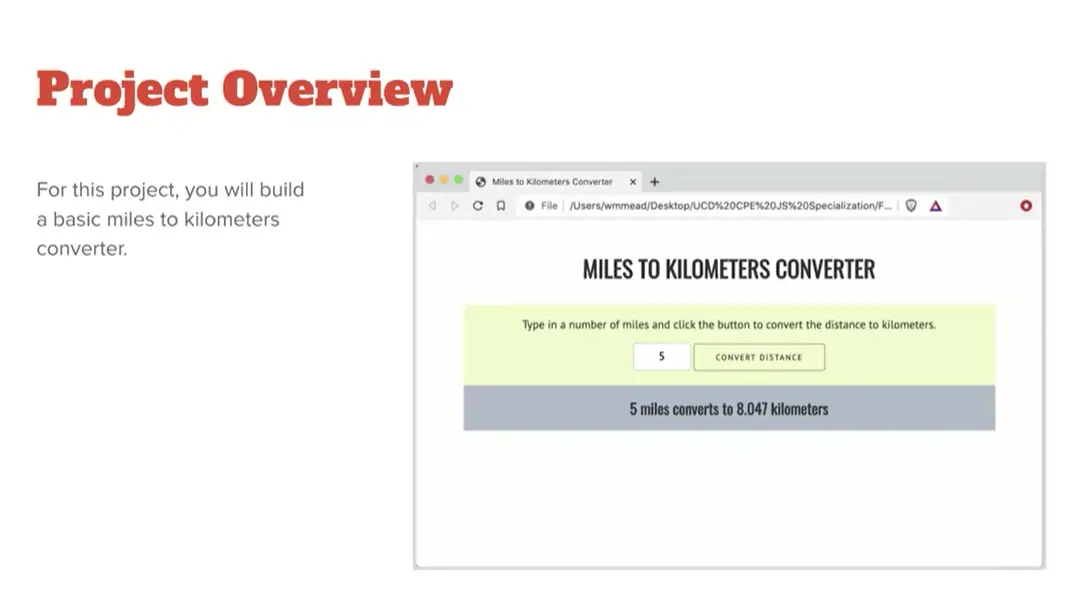
Through doing this project, you'll get to use a bunch of the pieces we've talked about already. Learning JavaScript. You'll capture data from a form element, and manipulate the DOM, change the DOM, by adding this actual conversion down here. We'll do a bunch of the different types of things that we've been doing so far with JavaScript to create this little tool. The interface is already created, you can see I have it over here.
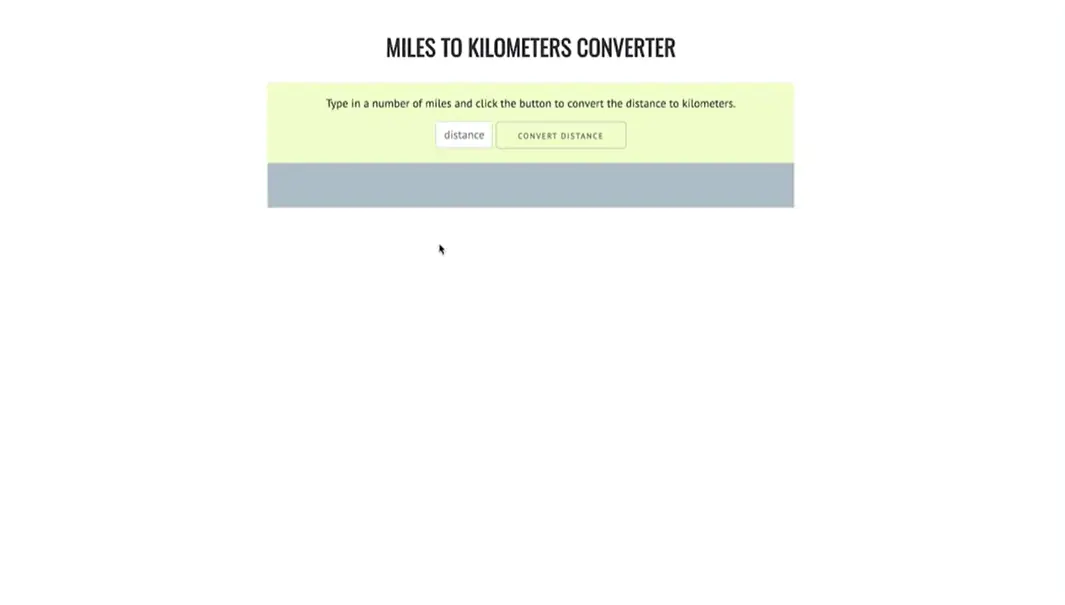
The HTML generates this interface, but at this point it doesn't function. Our job today is to make this thing actually function, and write the JavaScript to take the data that somebody types into distance and convert it to kilometers. Let's take a quick look at the HTML that we have here.
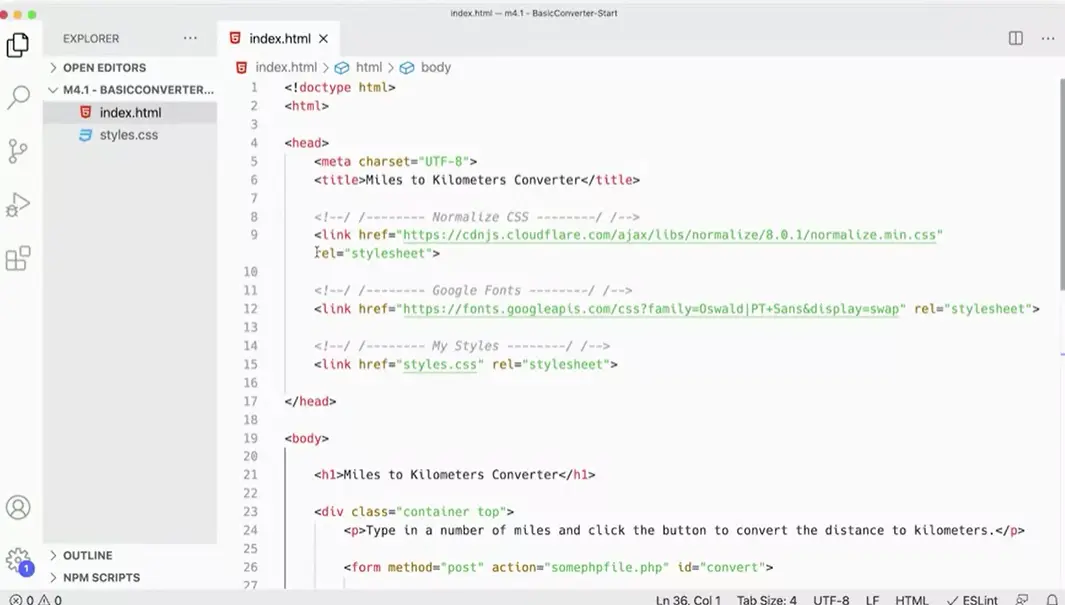
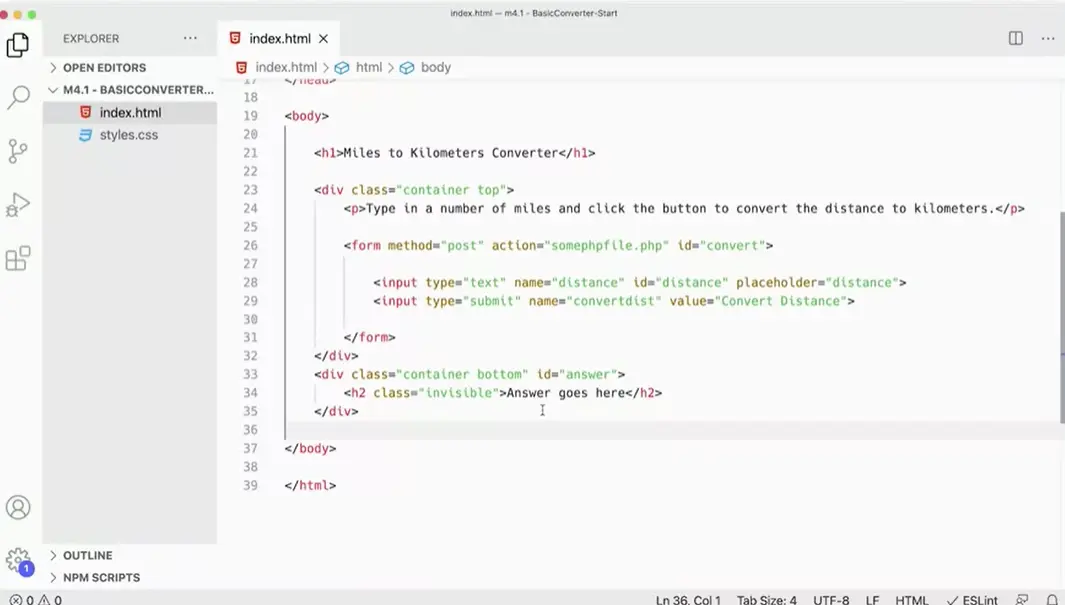
Nothing too fancy here, we just have some basic HTML with a form, and in a container down here where the answer is going to go when we convert the miles.
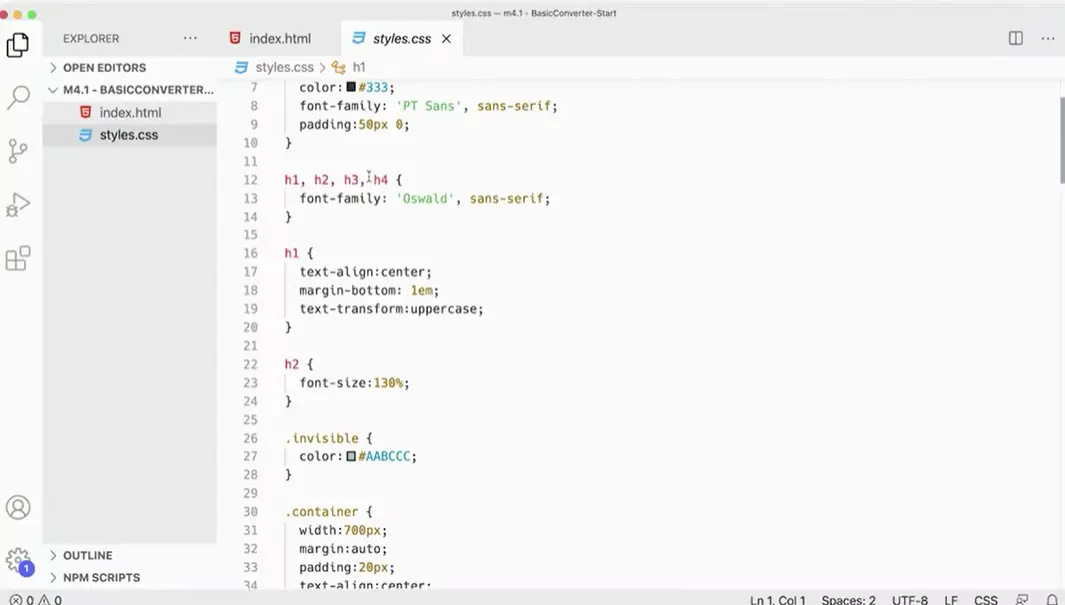
Then I've got some styling over here already in place, probably more startling than I really need, but that's okay. We don't need to touch any of that.
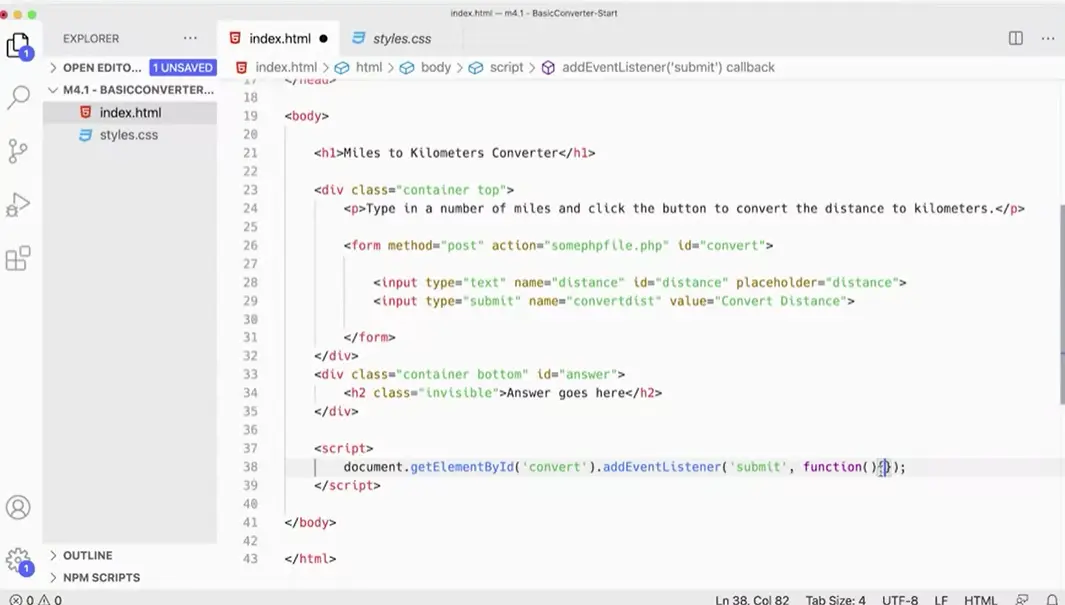
At this point what we're going to do, is we're going to add a script tag down at the bottom, and start figuring out how we're going to capture this. Then in here we want to capture this submission of this form. You call it convert. We've got an Id for the forms or converts. We have a document.getElementById. Then we want to get the Id convert. We want to add an EventListener. The event we want to capture is a submit event. When the form is submitted, we want to do something. We want to run a function. Now, all the rest of the code for this script is going to go between these two curly braces here inside this anonymous function. We've got our EventListener here.
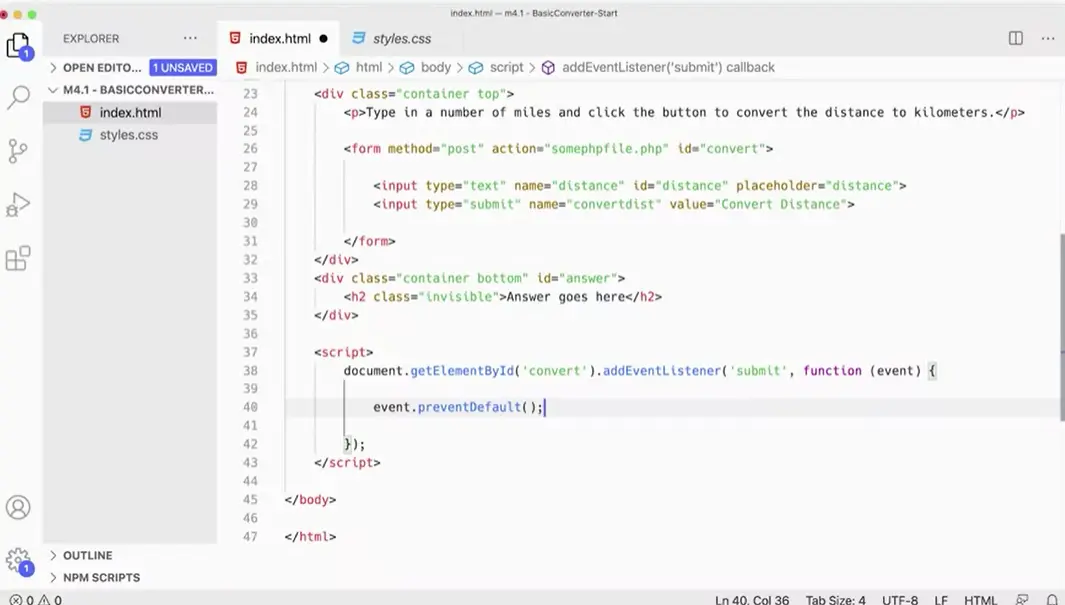
Now, normally, when events happen like the submission of a form, either the data from the form goes to some PHP file to be handled, or if you don't have an action, it will actually refresh the web page. We don't want that to happen. We want to stop the normal processing of the form. In that case we're going to pass in the special event object, and we can pass it in as event or some people pass it in as evt or some people will just use E. I'm going to leave it as event just to make it clear that that's what it is. It's the special event object. Then we're going to keep that form from being processed by using event.preventDefault, which is a method that will keep that form from getting processed, and from refreshing the page, or trying to go to that PHP file when we submit the form. That's the thing we want to do first here.
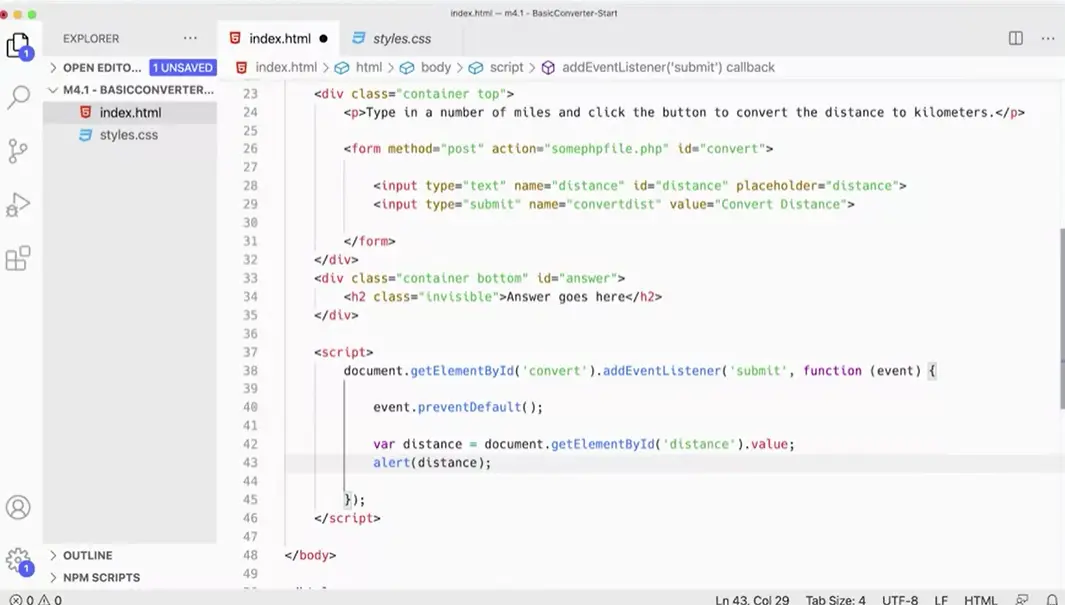
The next thing that we want to do, is we want to capture the data that somebody typed into this input field here, with the idea of distance. We want to capture that data, and we want to put it into a variable. Let's make a variable distance, var distance. I'm going to go ahead and put mine in, document.getElementById. Which Id do I want? I want this Id distance, and what do I want from there? I want the dot value. That's going to take whatever somebody is typed into the field, and stick it into this variable distance.
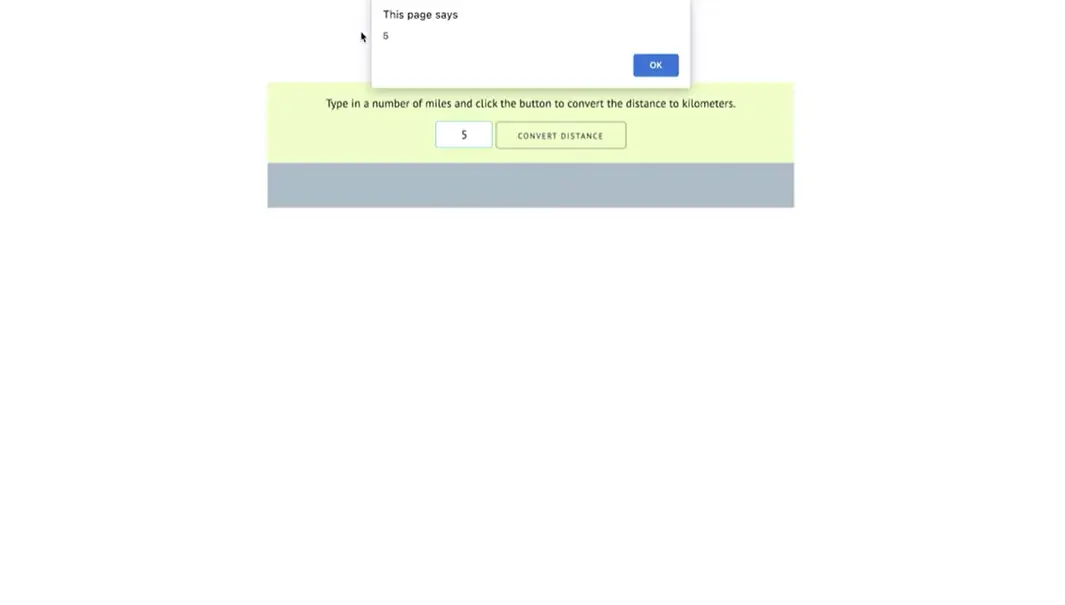
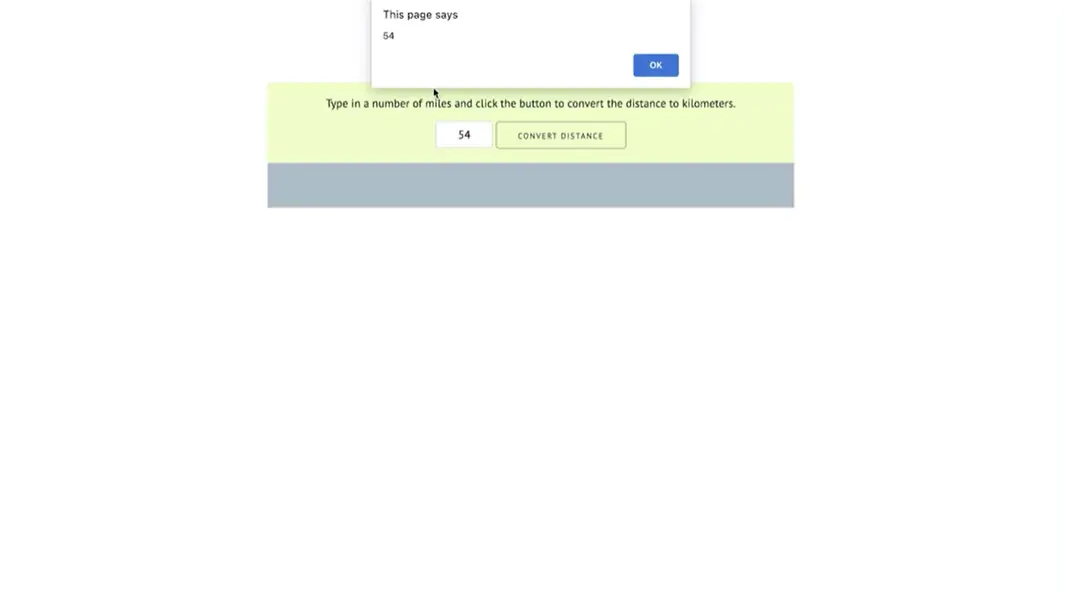
Let's give it a try real quick. If we do alert distance, we should get that data coming up here. If I come back here and refresh this, and then type in five, and click convert distance, you can see that the alert pops up, and it gives me five. If I put 54, it'll come up, and it'll give me a 54. That is capturing that value. It's preventing the default behavior of submitting the form, and trying to go to the PHP file. If you don't do EventPreventDefault, let's just see what this happens for a second here. I just comment this out, and come back here and refresh this.
If I don't do preventDefault convert distance, it gives me the five, but then tries to go to some PHP file, which we don't want. It is getting that data, but then it's trying to go through to the form. We don't want that. We want to prevent the default behavior and that's what that does. We're getting that distance there, and we're often running here with our project.
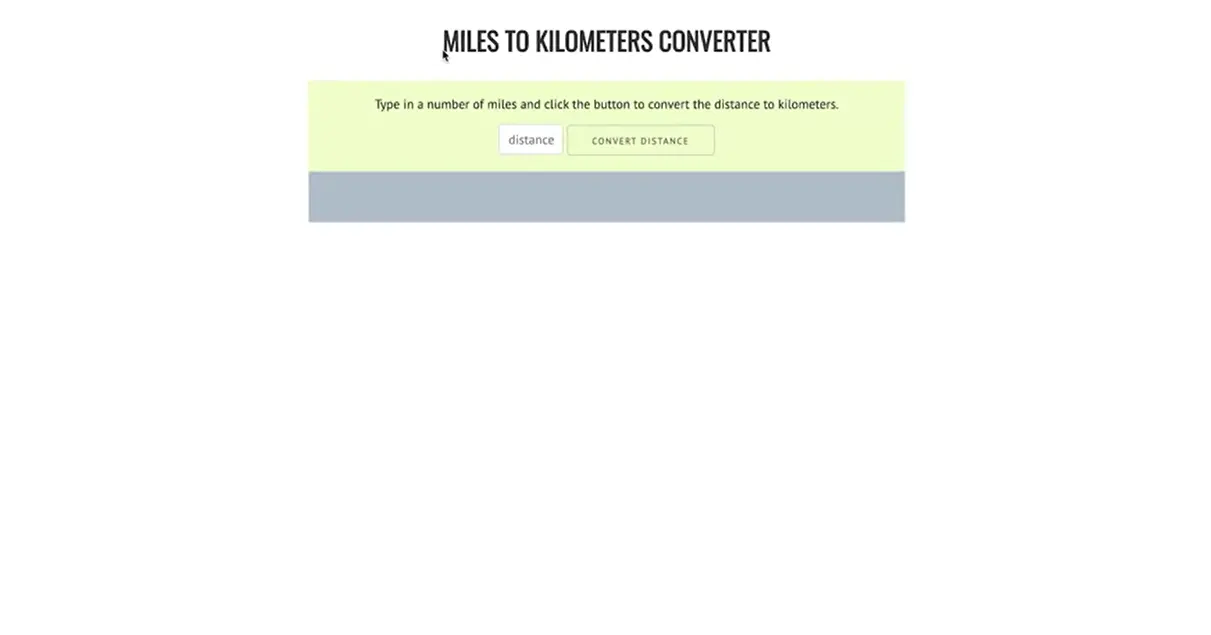
The next thing that's important to understand is that when you type a number in here, JavaScript sees that number as a string. If I type a five in there, it'll be a string that holds the value five rather than the number five. I need to actually take that string, and convert it to a number. We could use a method in JavaScript called parseInt. But what parseInt does is it will only capture the integer of the number rather than a decimal number. It's possible that I would want to capture 5.5 miles and convert it to kilometers.
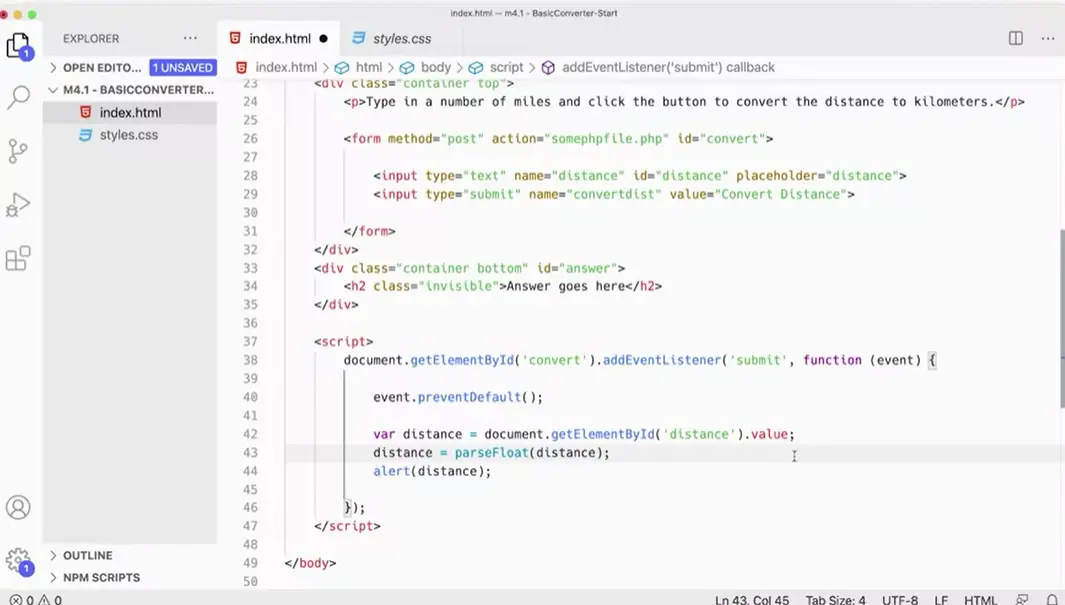
What we're going to use instead is parseFloat. What parseFloat will do is it'll allow us to take that number and convert it to a floating decimal point. Down here, I'm going to leave the alert for a second here. But I mentioned before that, I'm going to say distance equals parseFloat distance. I'm taking distance and running it through parseFloat, then assigning it back to distance and I can alert that out. Let's just see what that gives us over here.
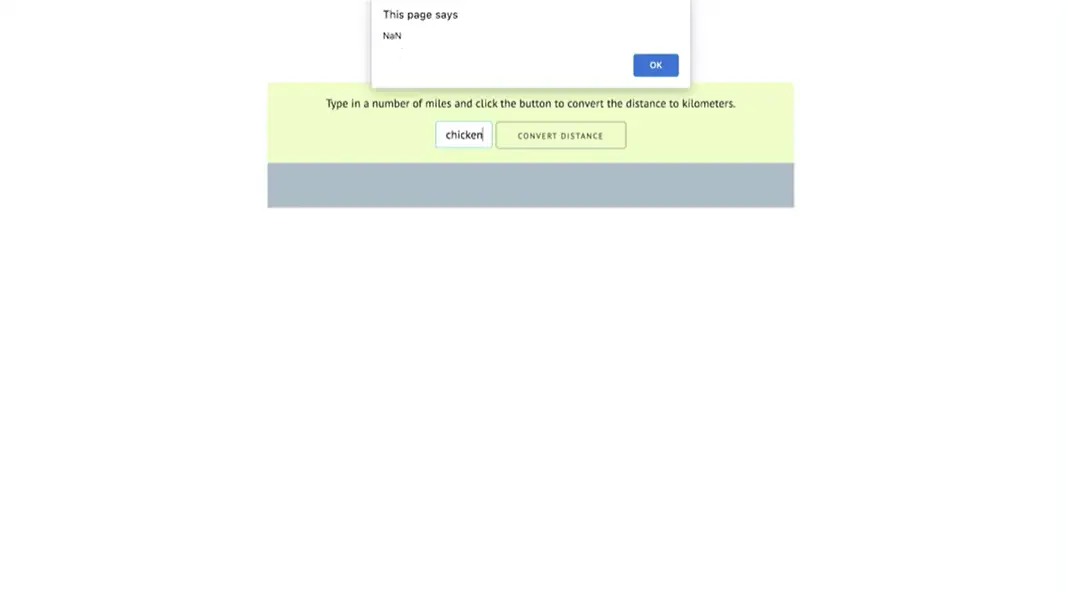
If I come back and refresh this, you have to refresh it, if I put in a five and convert distance, it'll give me a five. But if I put in chicken, it'll give me NaN, not a number, which as you know, resolves to false. Not a number is false, it's falsy, just like zero or a number of other things are falsy, but a number is true. Five will work, 5.5 will work. Interestingly, zero won't, zero is still false. I don't know why you'd want to convert zero miles to kilometers since they're both just zero. But that's what we need to do first to get that to turn into a number.
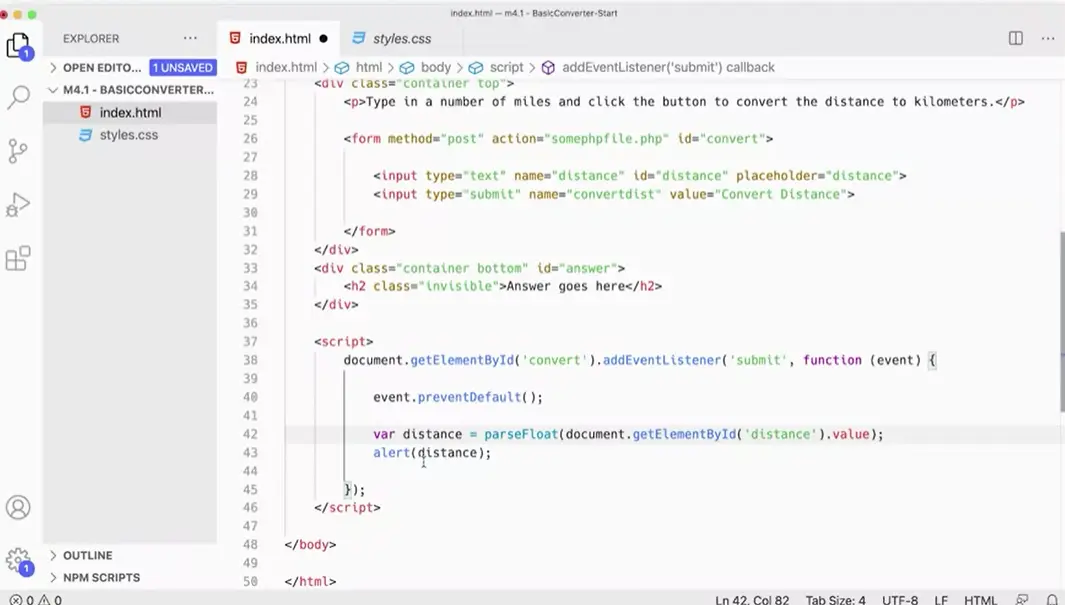
Now, down here, we can actually combine these two lines into one line here by instead of having this distance, and then assigning it back to itself, we could actually put parseFloat here with its opening parentheses and then we can close the parentheses at the end after the value, we can get rid of this line, that does the same thing all in one line. It takes the value from the distance field and then runs it through parseFloat and assigns it to distance. Remember, JavaScript works from the inside out.
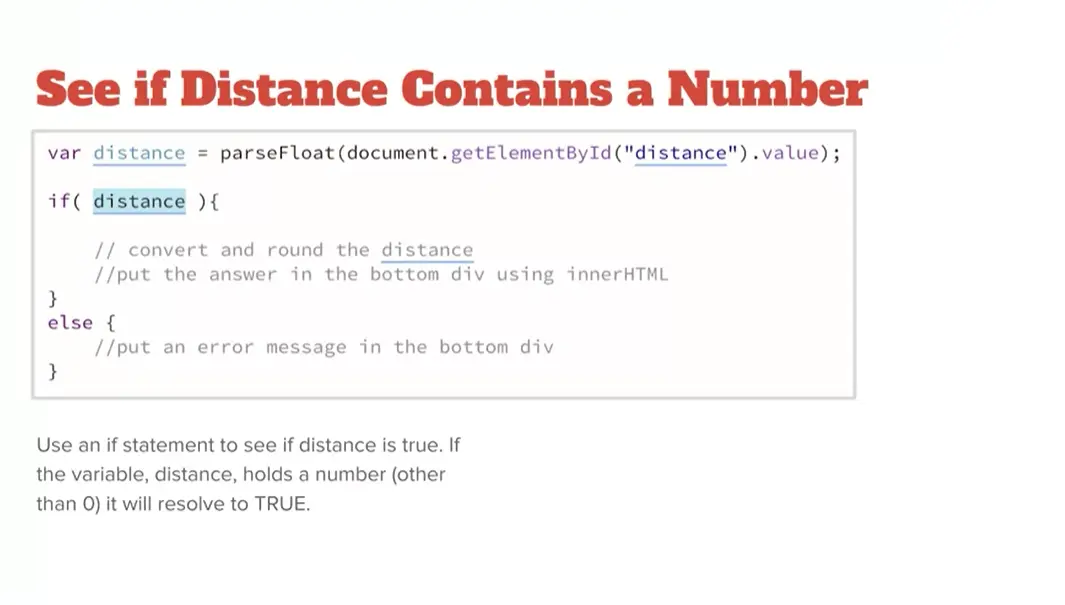
The next thing we need to do is check to see if distance is an actual number. If somebody put in something that's not a number, we can't convert that to kilometers. We need to make sure distance is a number. We can do that with an if statement. Remember, if we put it in a number like five or 5.425 or whatever it is, that's going to come back true. That's true, that's truthy whereas if you put something that's not a number, parseInt is going to convert it to NaN, which is not a number, and that comes back false or zero will come back false, those kinds of things. We can just say if distance is a number, because we're getting a number here, then we're going to convert it around the distance and then put the answer down at the bottom, otherwise it will display an error message down at the bottom.
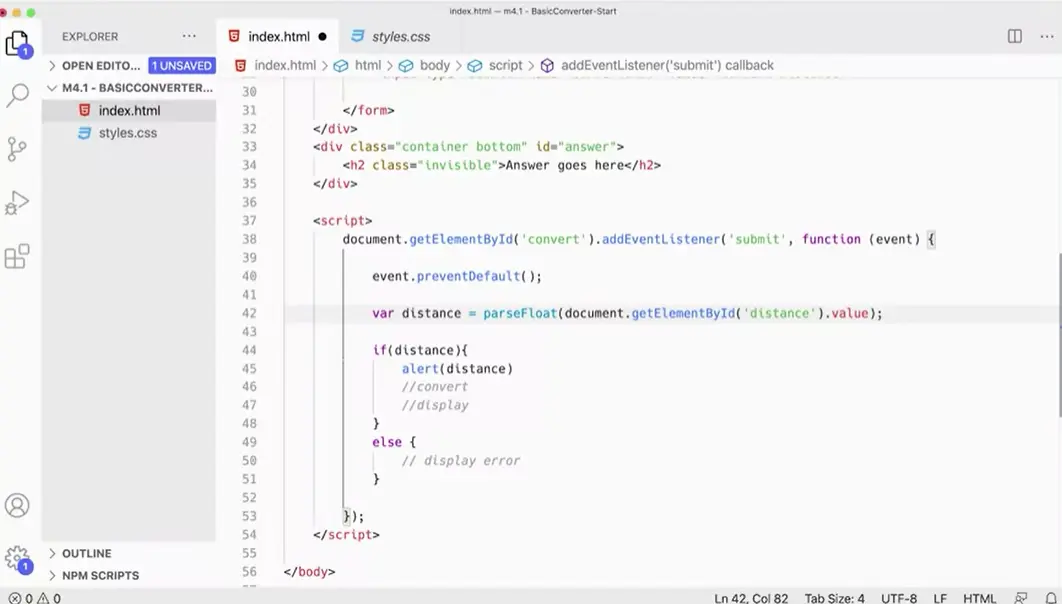
Let's add this if statement down here. We're going to convert and then display the answer. Let's take this alert(distance) and stick it in our if statement.
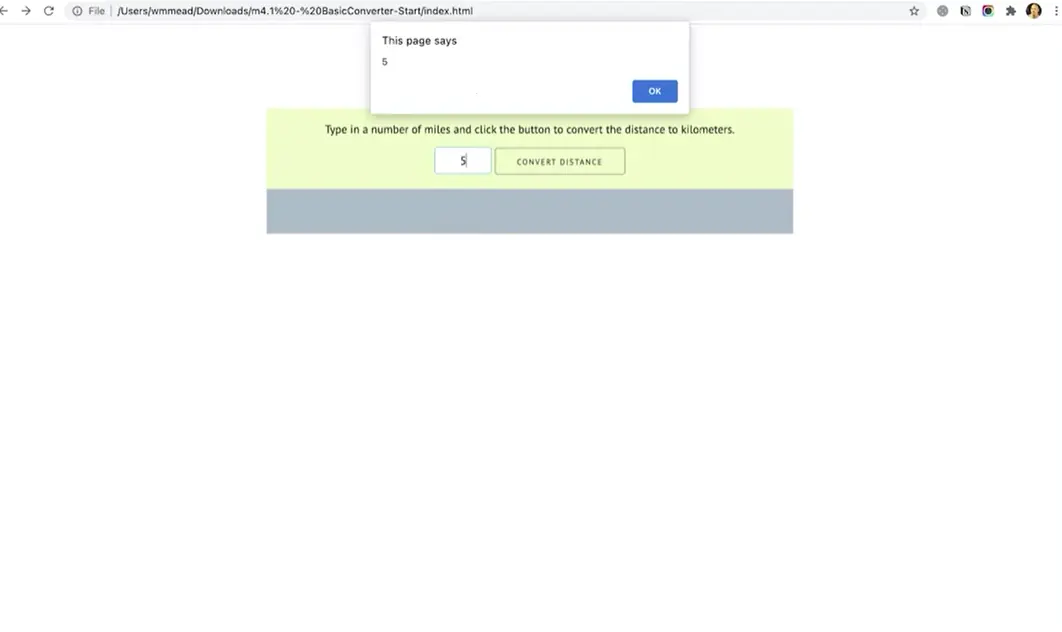
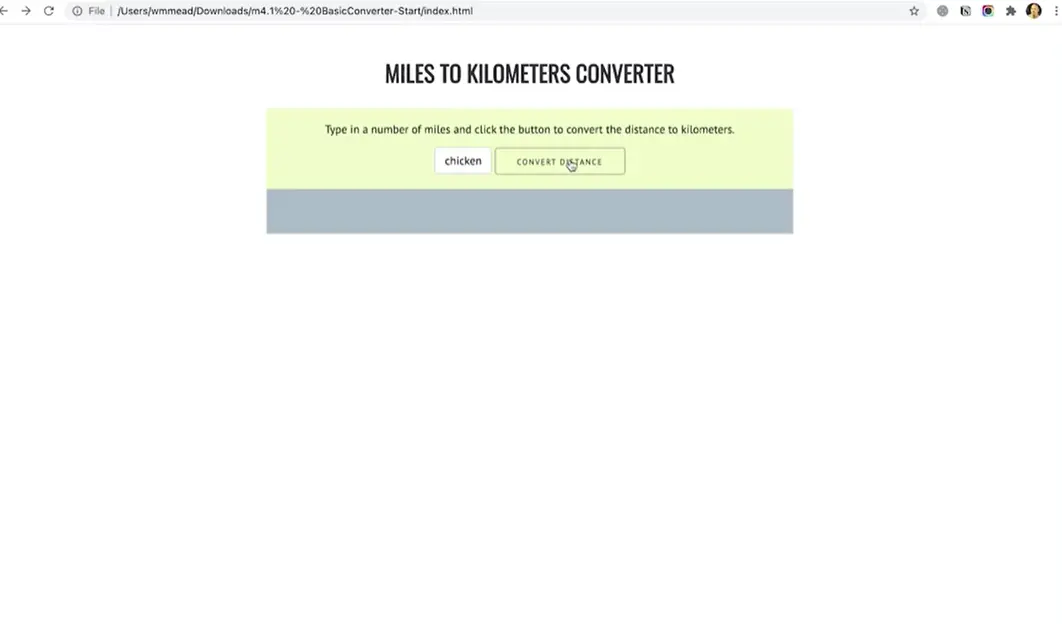
You'll see now with that, if I test this, if I put a number in here, it'll alert out the number that I put in there. If I put something other than a number in there, it won't, because the else is running. We haven't actually done anything with the else, but it is running and it's not doing that alert. We're all set up here and ready to write the rest of our script.
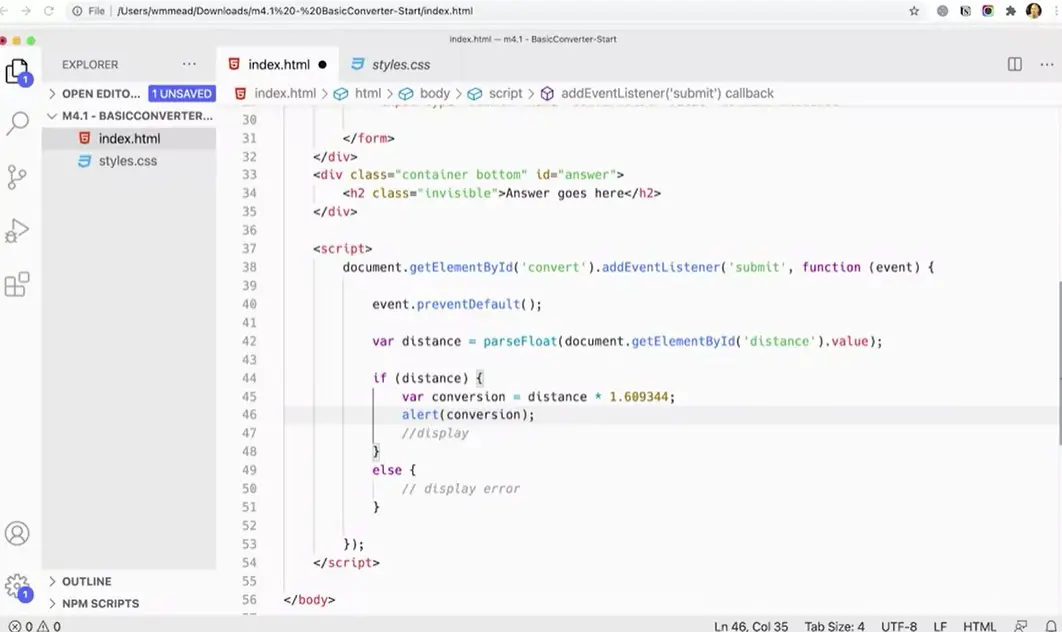
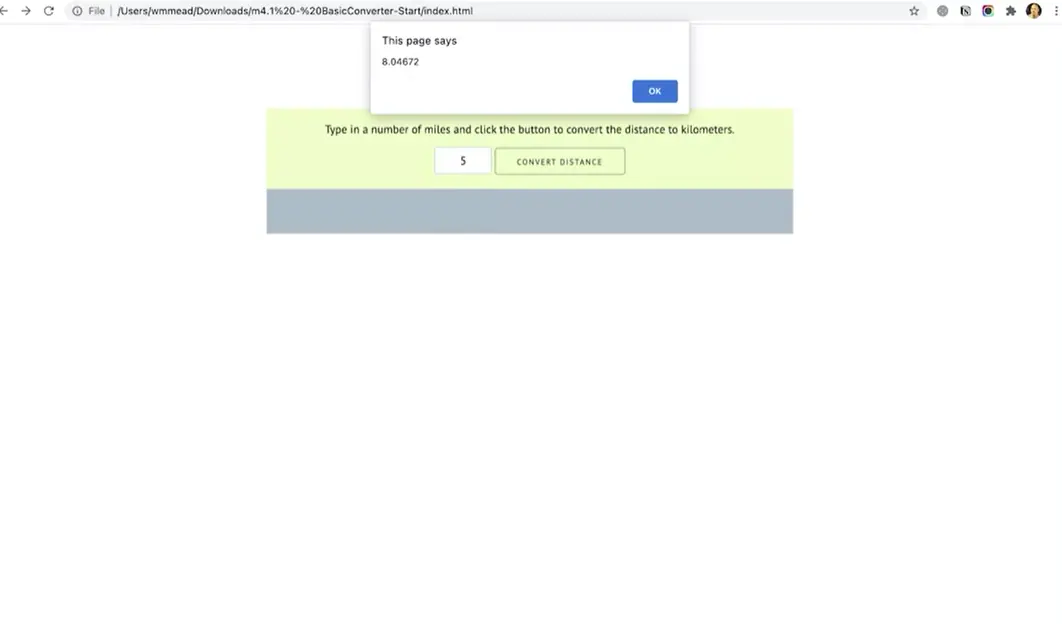
We have a variable here, conversion. It equals distance times 1.609344 and what that will give us is the actual distance converted. But it's going to give us a very large number or a number with a lot of numbers after the decimal point potentially. And test that you'll see what I mean. I put in a five here, I will get 8.04672. I don't want all these desperate numbers and they can get even longer than that. That's kind of long. I just want to three decimals.
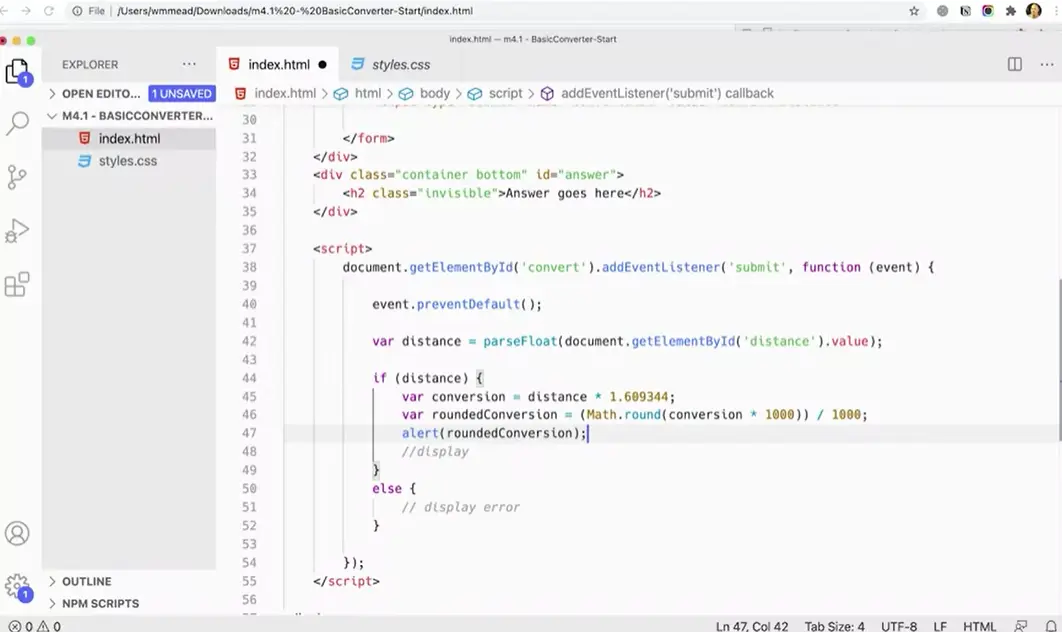
There are a couple different ways of addressing this. In dealing with this, I'm going to show you the manual way and then the way that's a little bit easier. I think sometimes it's it's nice to see the manual way. I'm going to make another variable roundedVariable equals Math.round(conversion). What that's going to do is it's going to round it to the nearest whole number. I want some decimal points in there. What I want to do is take that number and multiply it by 1000 and then after the conversion, divide by 1000. That's going to take the number round it and then divide it by 1000 for 3 decimal places.
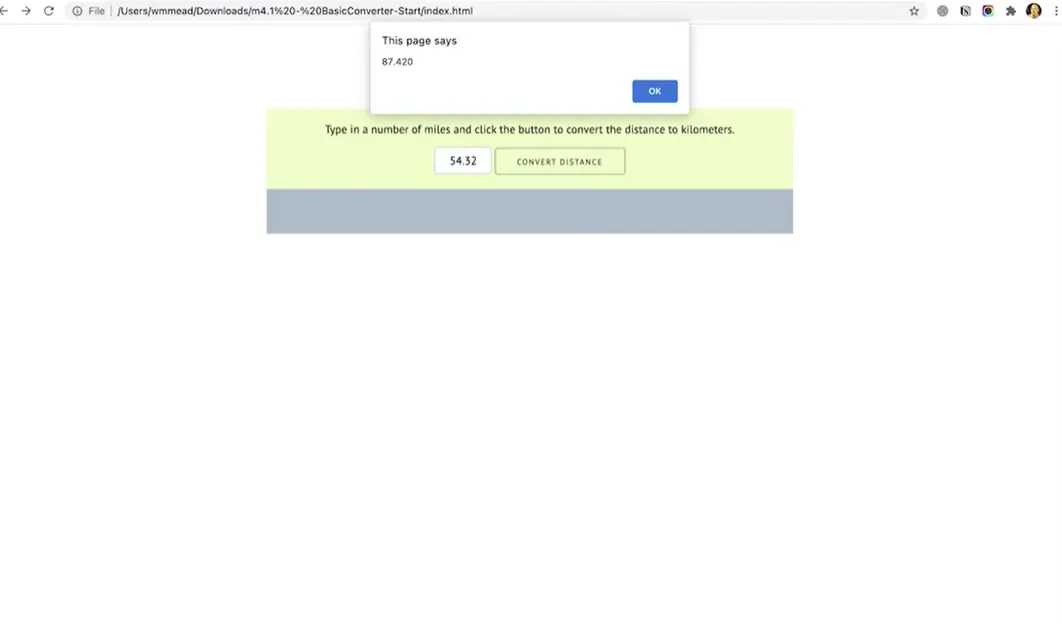
Now let's see what that gives us. We come back here now if I try to convert this 54.32, and you could see that it's cropping it off here after two decimal places here really wanted more decimal places than that.
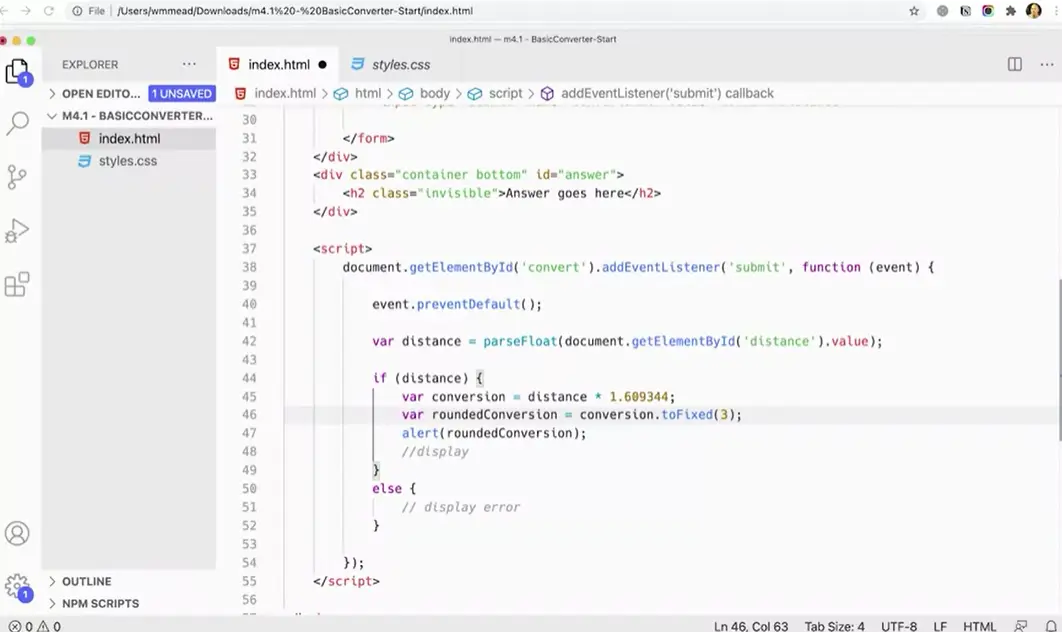
The other thing you can do that's easier, a little bit easier than this is to use, something called toFixed. It's a method called toFixed so I could say conversion and put toFixed and three in there and that will make sure I get surrounded to three decimal points.
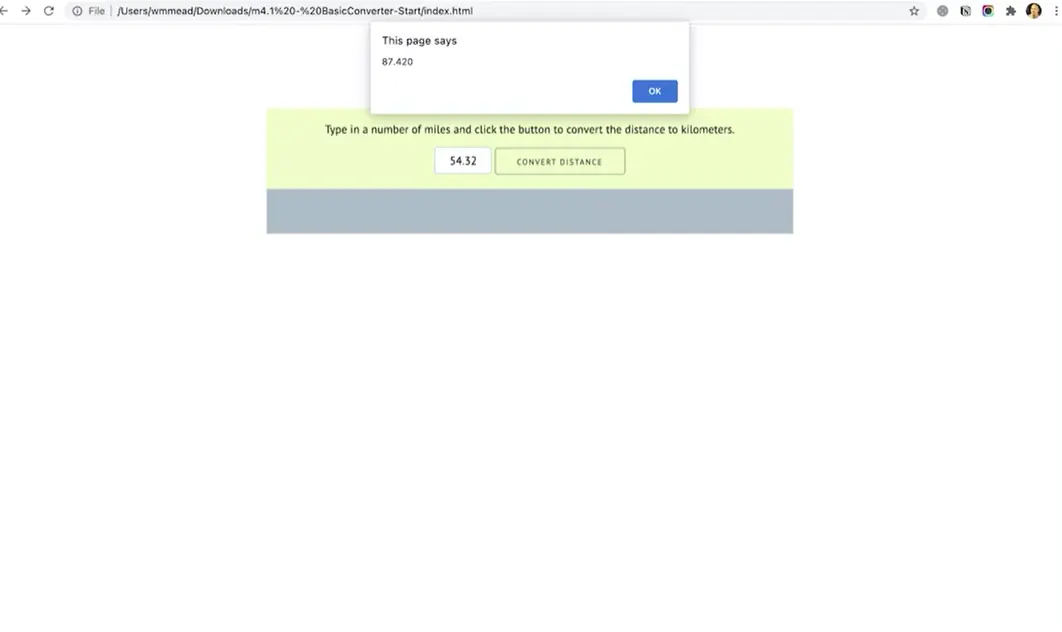
Let's see what that does 54.32 and now I'm getting 87.420, which is the right thing there. That's actually rounding it and making it work exactly the way I wanted to go, giving me three decimal points. That's kind of the easiest method to work with years is to fixed.
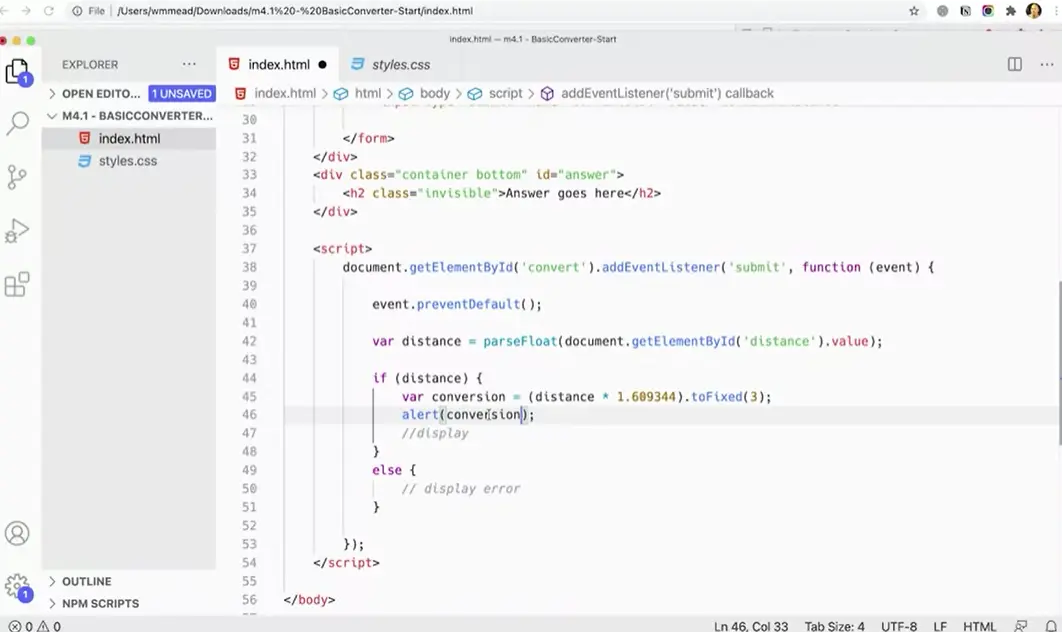
Now I can calculate the distance variable in parentheses adding toFixed(3) for 3 max decimal places.
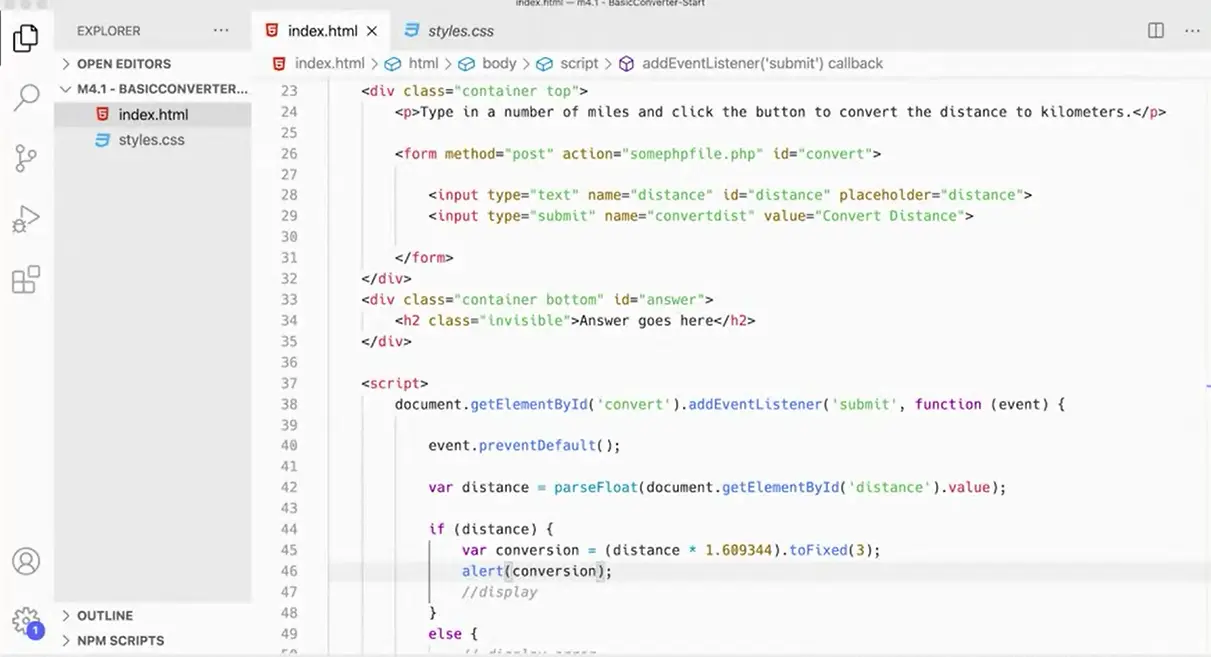
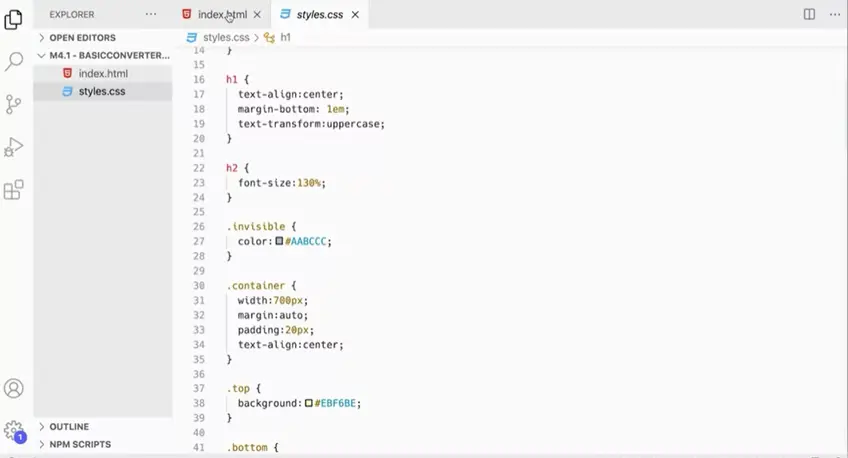
Okay, one thing we want to look at really quickly here before we go on with the script, is at this h2 down here. Right now, I have an h2 in there with a class of invisible. If you go look at the styles, you will notice that this class, invisible, over here in the styles, it's basically setting the color of that text to the same color as the background of this div.
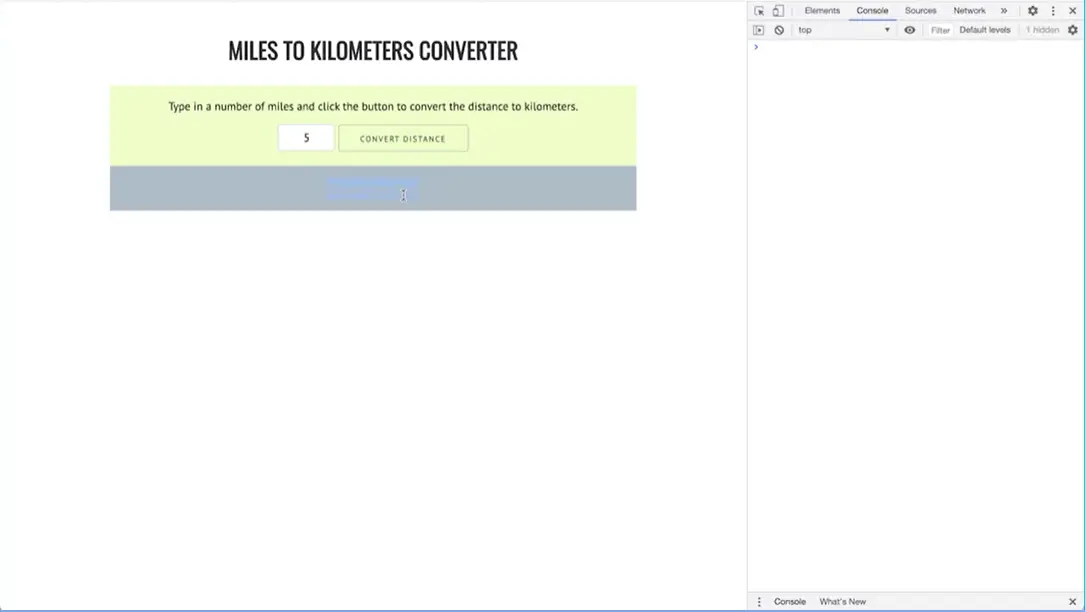
Over here, if you go and actually look at this thing, you'll notice down here, that the answers is in there. It's in there, you can't really see it, because it's the same color, but it's actually there. Currently, what it says is, answer goes here.
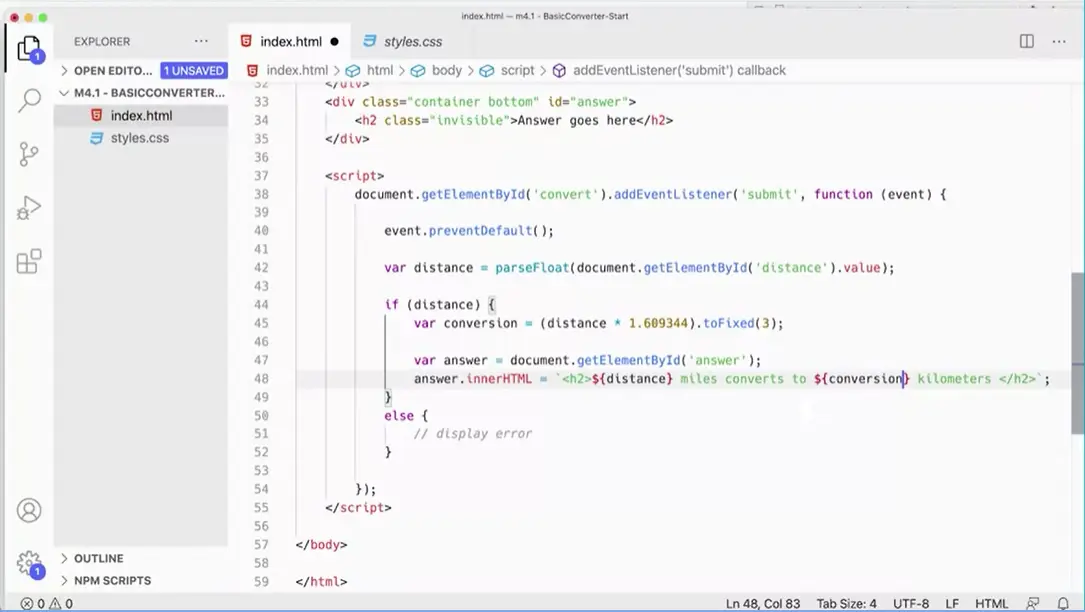
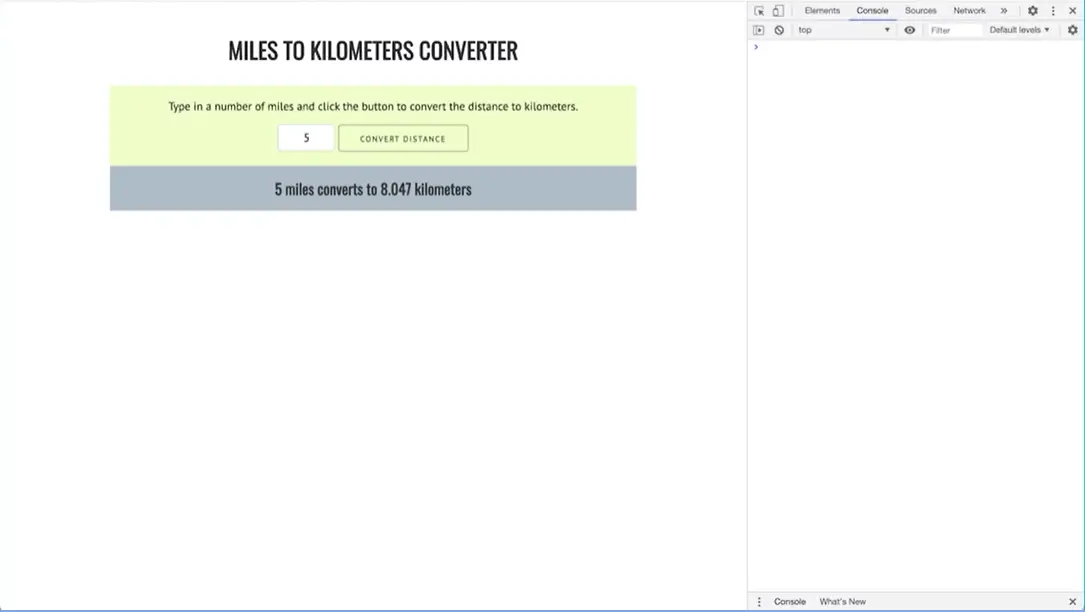
What we can do is, we can use innerHTML to replace this entire h2 in here, with a new h2. That h2 that we put in there, won't have the class invisible, so it will be visible. We want to get this div id answer here first.
First, I'm going to define a variable var answer, and set that to equal to document.getElementById(‘answer’). That's our element there that we're getting. Then we want to get that element and we want to use answer.innerHTML equals tick marks, like that, semicolon. h2 close h2. This is going to be a string, literary when we're done here. In here, I'm going to add the distance. I want to put in here distance, miles converts to x kilometers, where distance is really this variable distance here. That's going to be a variable. In there, I'm going to put curly braces, dollar sign, curly braces, distance, because that's a variable. Miles converts to, and x is going to be dollar sign, curly braces, conversion in there.
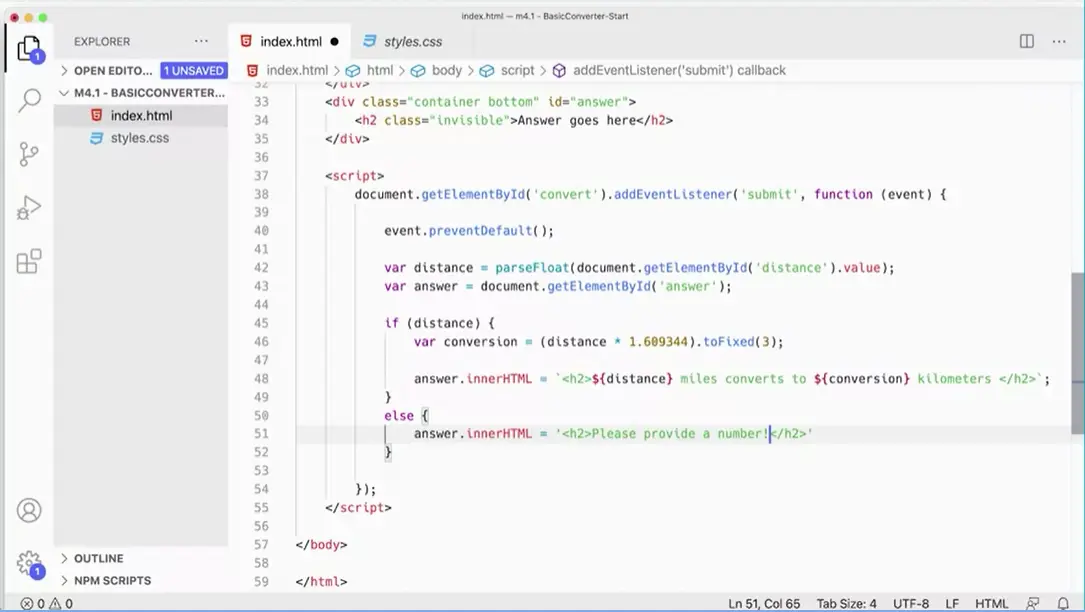
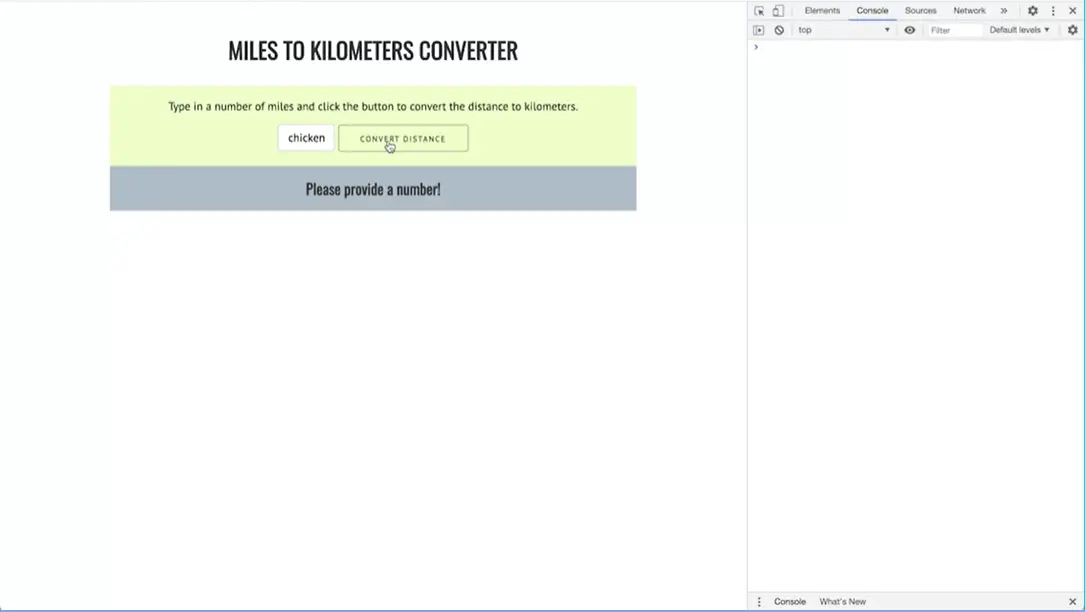
The next thing we need to do is handle the error down here. We're going to put it into this same element here, this answer element here. I could use document.getElementById, and go get this answer div again, using innerHTML again. Since we've already gotten this and put it into this variable here, it makes more sense to move this variable out of the if statement and stick it up here somewhere, go anywhere really, I'll stick it here. That's going to get defined to begin with. It could even go after the preventDefault, it go anywhere really. I'm going to just put it there. Then I can use the exact same variable down here. Answer.innerHTML equals. I can just use regular quotes, h2 close the h2. Always open and closed before it, then work on the inside from that way. Please provide a number. That will handle the error.
Let's make sure that works. If we come back over here, and refresh this, if I put a chicken in here, a chicken cannot get converted to kilometers, so it says please provide a number.
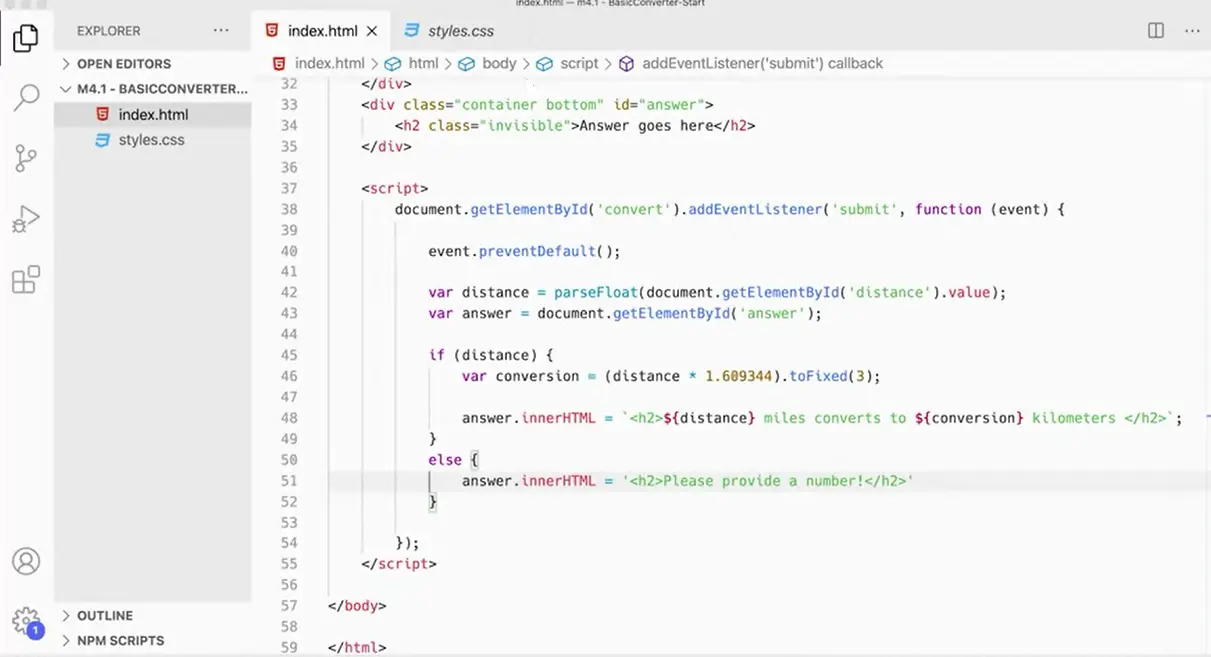
This is our entire script and it's working pretty well at this point. We've done a little bit of refactoring to get it to a little bit more compact and a little bit more readable. We've tried a few different methods to make that all work, and it's all working great. We could leave the script at the bottom of the page, there's not that much to it and it's fine.
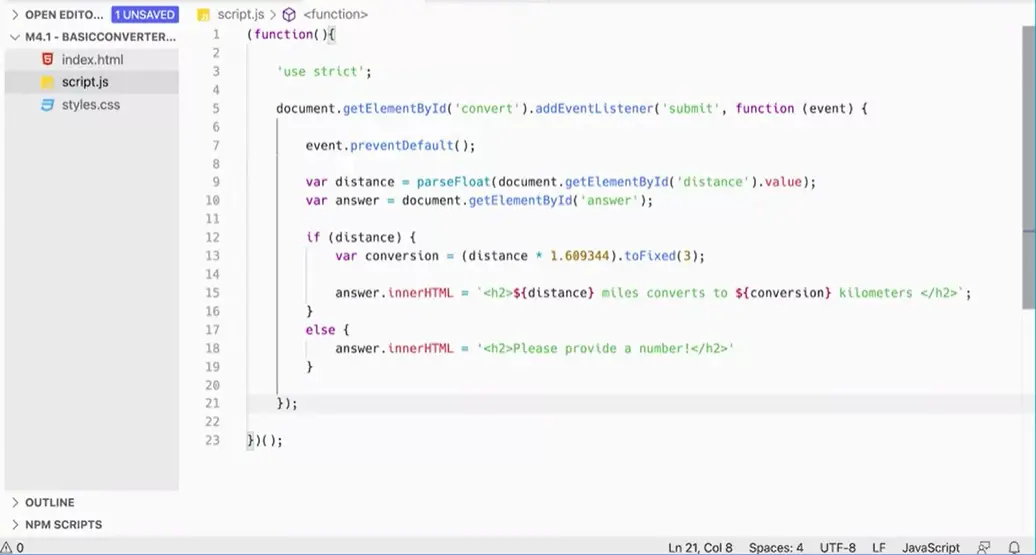
But just for the sake of practice, let's move it to an external file and link it up and then use our scope and best practices for converting everything. I'm going to come over here, I'm going to need to make a folder. I'm going to make a file and call it script.js. On that file, I'm going to add my IIFE, my Immediately Invoked Function Expression. That starts with parentheses, and then in there I add a function with its parentheses and it's curly braces, and then another set of parentheses and a /semicolon. This thing will run when the script file loads, and my script is going to go inside the curly braces, so I'm going to move those down.
Also I'm going to add in here my use strict directive, which is going to make sure that I'm not defining any variables without the var keyword, they don't get put into the wrong scope. You don't really have to worry that much about scope here since it's all pretty much within this one event handler, but still it's a good idea to put it in. Then I'm going to just going to copy all of this stuff, or you can cut it and paste it over here.
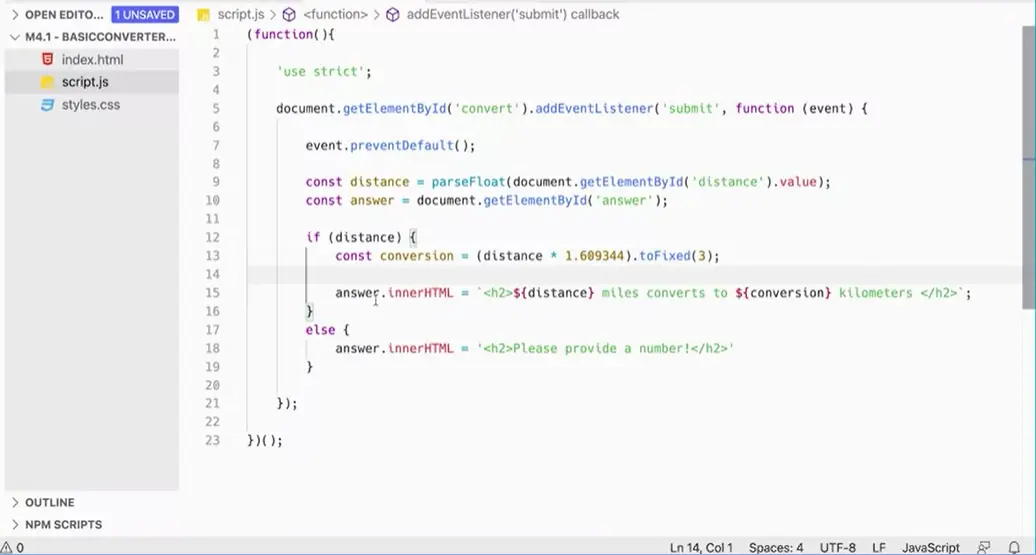
In here, I'm going to come in and change my vars to either const or let. I think they will all work with const. Distance is going to get that once, and that's in distance is not going to change. Const is going to come down here and answer is always going to be answer, and then this one here const as well, conversion. We've got all of that set.
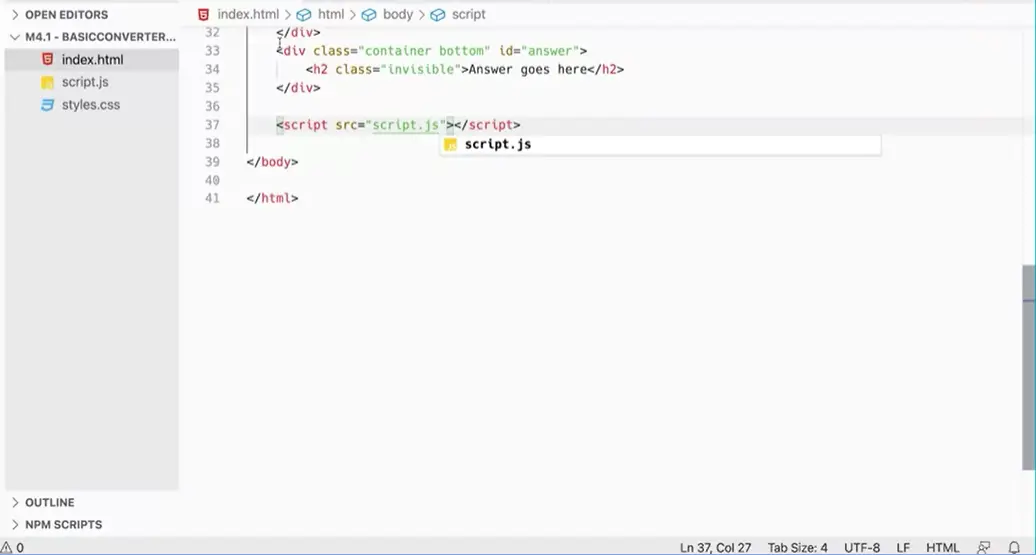
Over here on my HTML file, instead of having this script here, I can leave it at the bottom of the screen if I want, that's fine, and just link to it here, src equals "scripts.js", and that should work just fine. If I go ahead and test that, it should work exactly the same as it worked before, and it works fine, that's great.
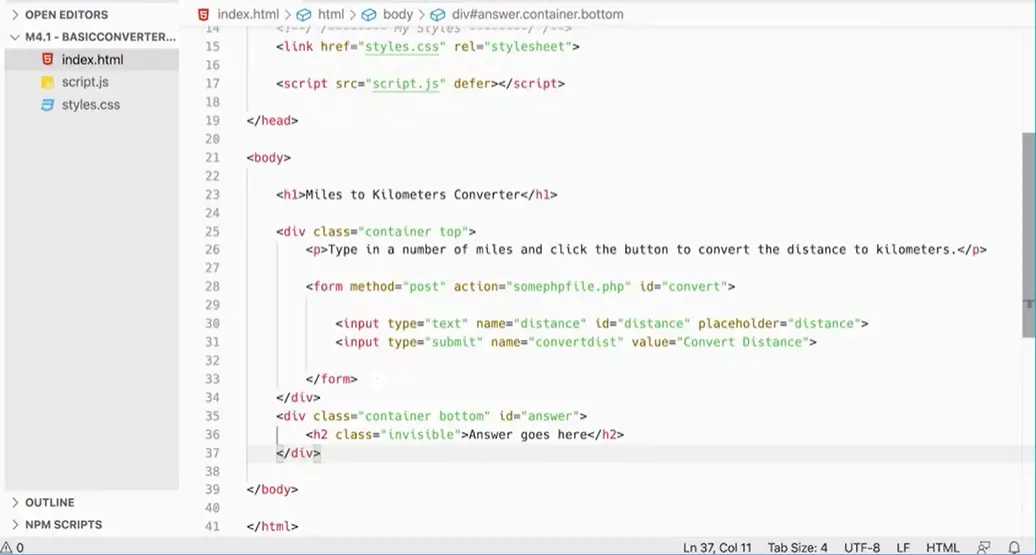
I could (and will) also move the script up into the head of the page, but I have to add the defer attribute here.
If you forget the defer attribute up here, then it's going to try to run that script before the page loads and it won't work properly. Your file couldn't be accessed. It's trying to go to the some PHP file because that script never loaded and it never prevented the default behavior. That didn't work, so you need to have that defer keyword in there to make sure that the script is deferred until the rest of the file loads. But there we have it. It's a great little tool and it's allowed us to practice many of the things that we've been talking about during this course, and we'll look at a slightly more advanced version of the project next.
Advanced Distance Converter, Using JavaScript to Convert Distances.
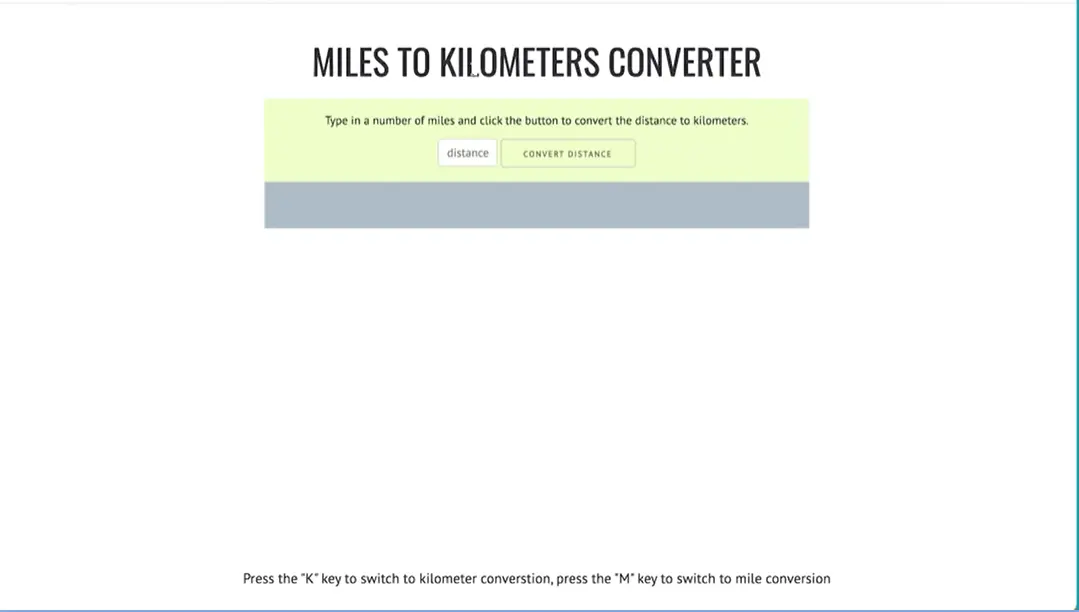
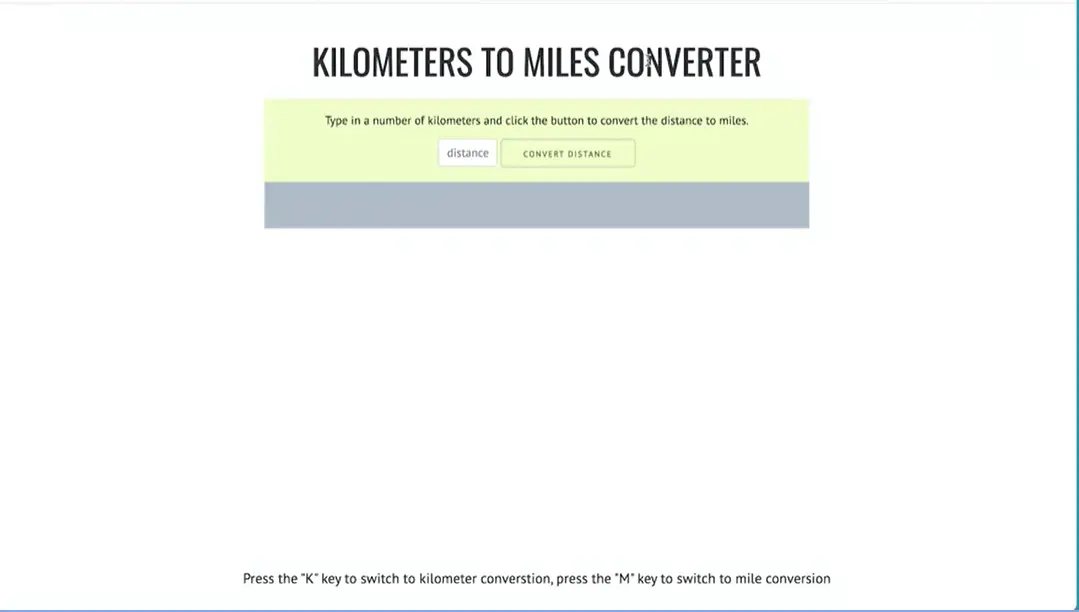
In this project, we're going to use an extension to what we did in the earlier project for the distance converter. We're just going to add an additional feature. What that additional feature is, it'll convert miles to kilometers, where we can press the "K" key to convert kilometers to miles, or we can press the "M" key to go back. We can go back and forth between doing different types of conversions.
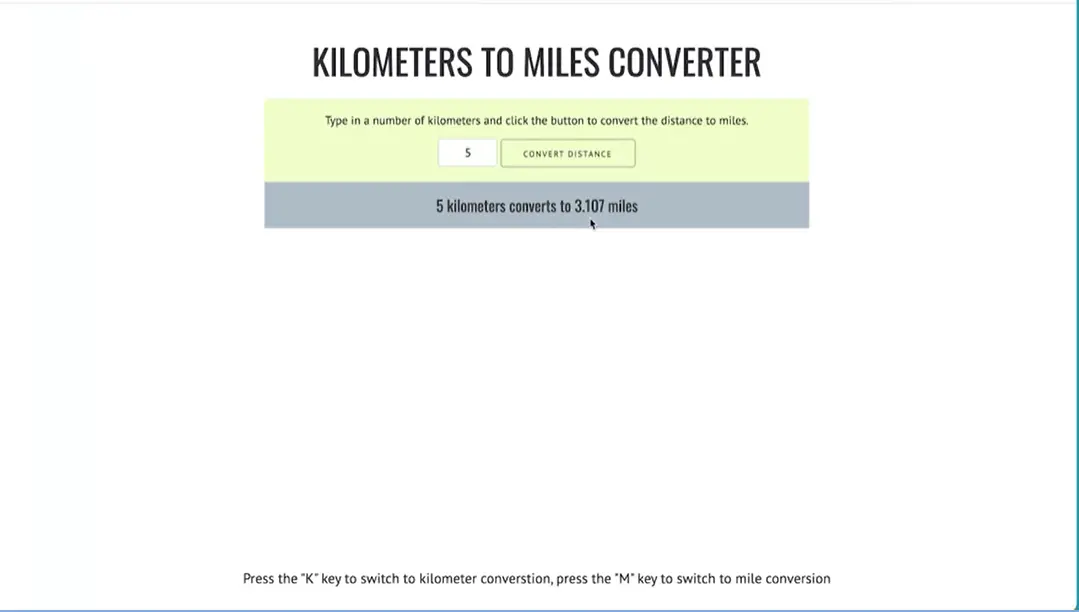
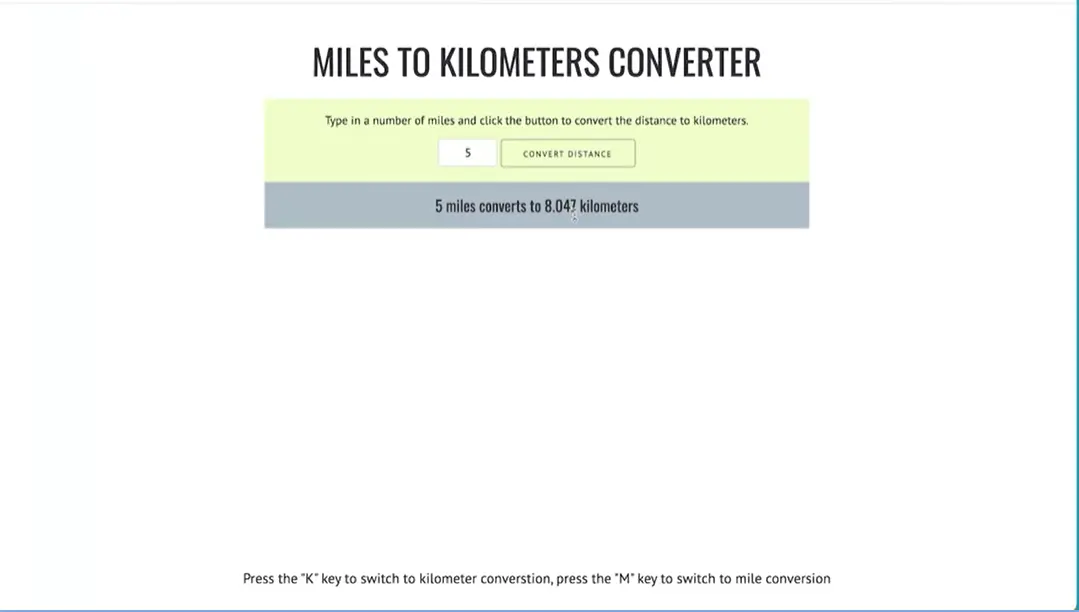
If I put a five in here and click "Convert Distance", it'll tell me five kilometers converts to 3.107 miles, or if I press the "M" key, I can convert five miles to 8.047 kilometers. That's pretty neat. Notice that a few things are changing when I do this, the header changes here, this little piece of instruction changes slightly here, and a few other things have to be managed down here. I've got a set of instructions down here in the bottom of the page that tell you which keys to press, and that kind of stuff. That gets us set up to start coding this project and getting the script working.
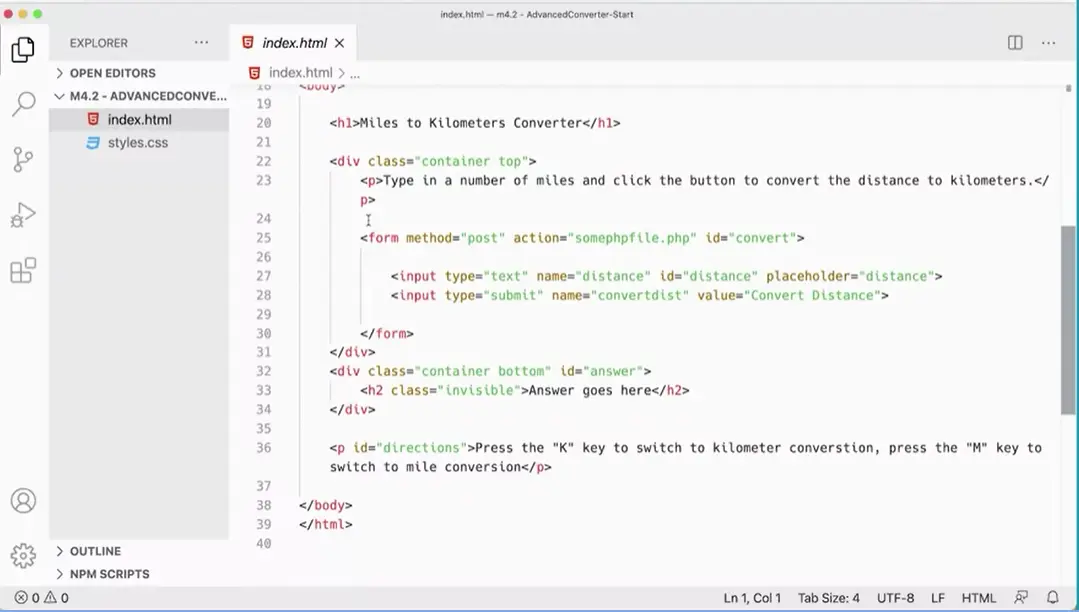
You'll notice that, if you look at the Start file here, it looks very similar to what we had before. We just need to get started with a script tag down here, and then the very first thing we're going to put in there is just some variables that we need in order to make this work.
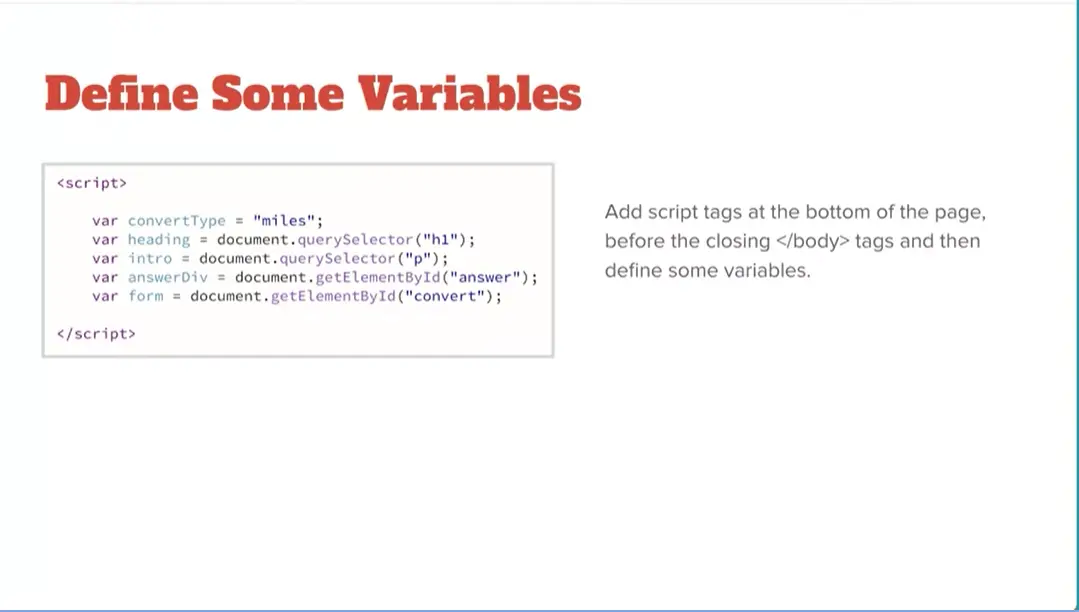
We're going to need a variable called convertType that's going to be set initially to miles, and then when you press the "K" key or the "M" key, it's going to update that value to kilometers or miles, depending on which key you press.
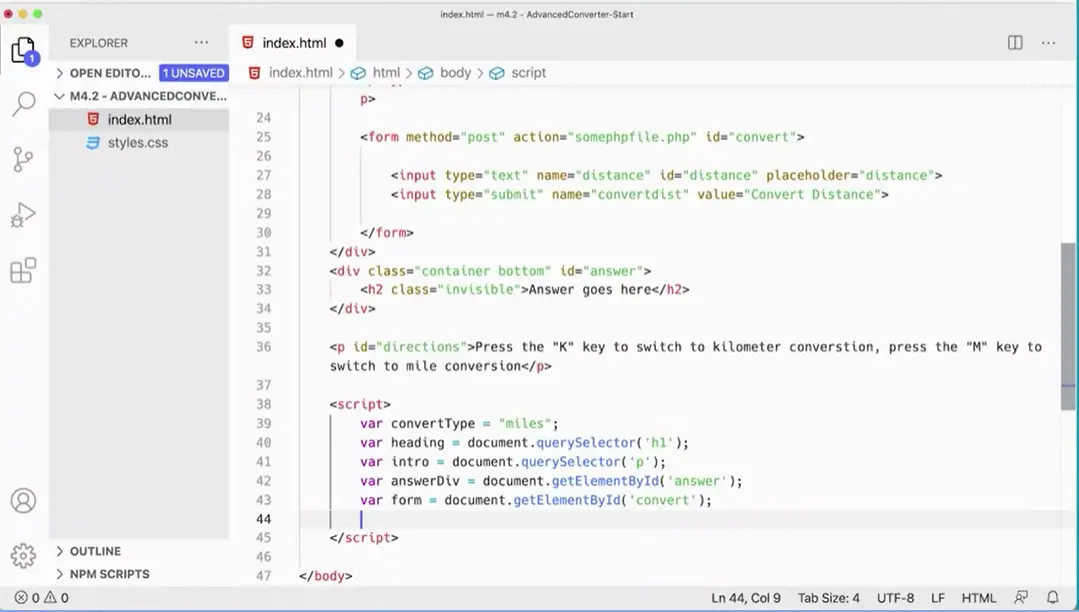
Then we also need to get the h1 because we're going to change that in the intro text. We might as well gather the answer element down there as well, and also the form that we have in there.
Let's add these variables, var convertType. Set to “miles” initially. Then I've got var heading = document.querySelector(“h1”);, that will get the heading. Then we need this intro paragraph here, var, and just to make it match what I have over here, it doesn't really matter, I'm just going to call it intro = document.querySelector("p");. This is the first paragraph on the page. Actually, it's the only paragraph on the page.
Remember, the querySelector will grab the first one that it finds, so that's handy. I can just do querySelector(“p”); I don't have to do anything complicated to get to that paragraph. We might as well grab this answerDiv down here. var answerDiv = document.getElementById(“answer”);. Then we might as well also get the actual form. var form = document.getElementById(“convert”);, and the form is as the ID, set to 'convert'. That gives us all the variables that we need right here at the top of our script, and we're ready to start working on what we need to work on to continue the script.
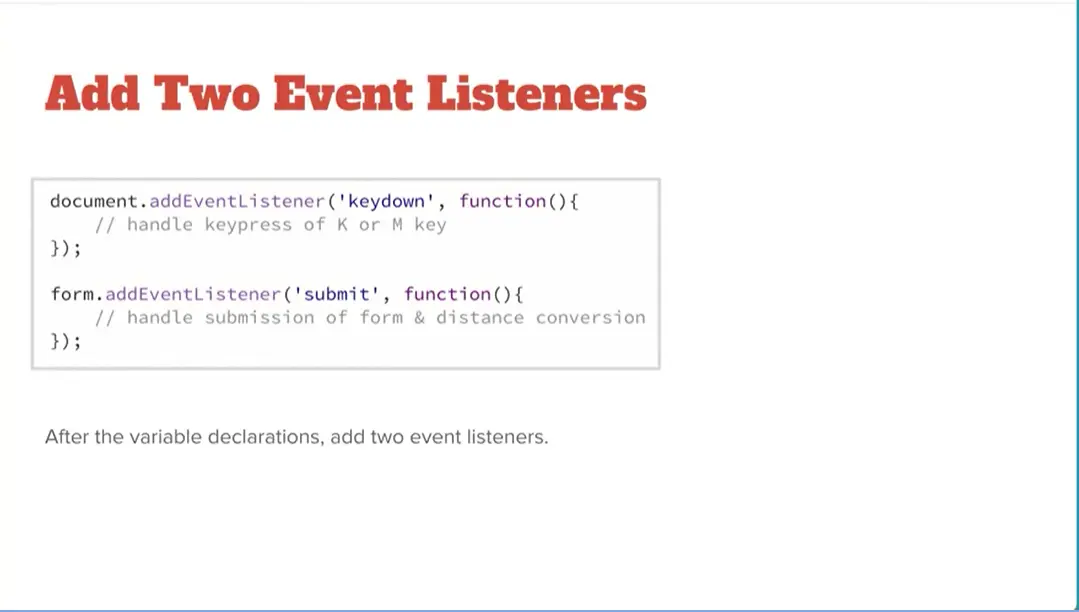
Okay, next we need to add two event listeners. One is going to handle key down. When we handle the press of the K key, the M key and the other one is going to handle the submission of the form. Let's add these two event listeners before we do anything else.
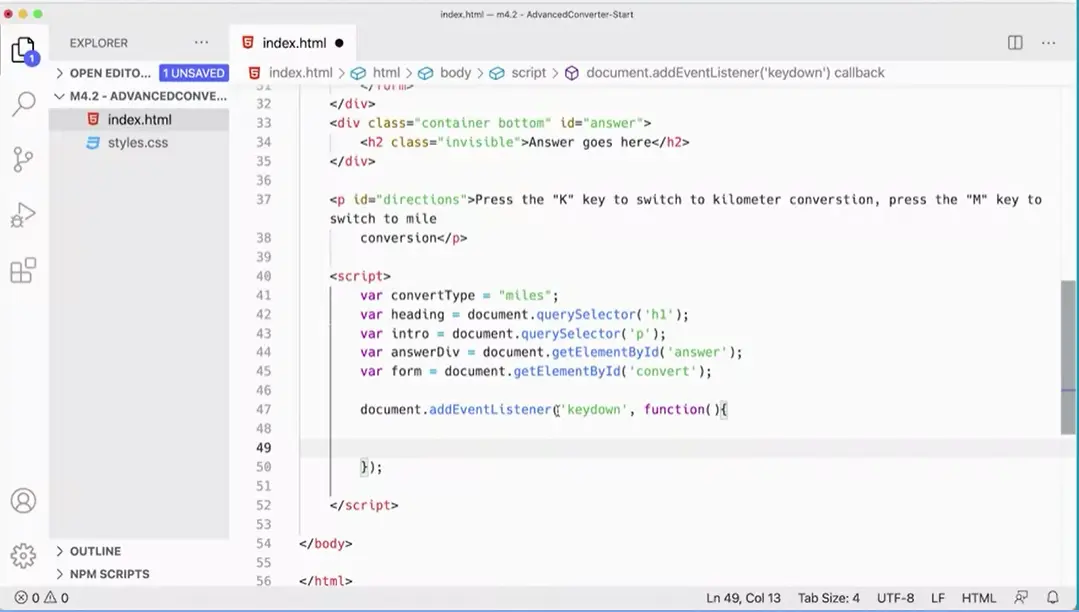
Come over here to my code. Down here, my script, I'm going to have document.addEventListener. The event I'm listening for is a ‘keydown’ event. Then I'm going to run a function. Everything for that event listener will go between those curly braces, that's one.
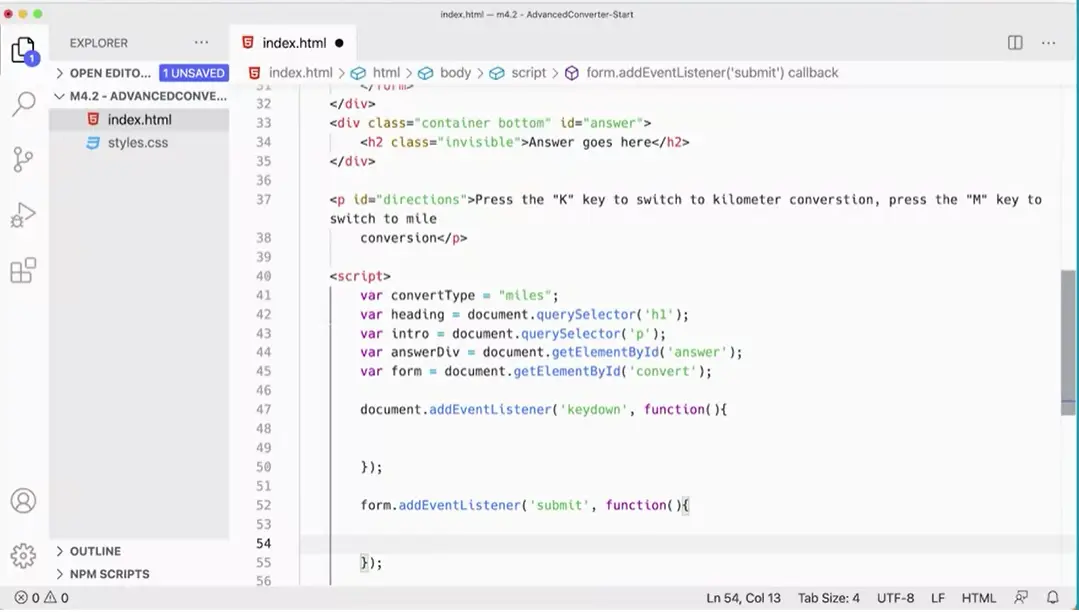
Then we need to deal with the submission of the form. We already have a variable that's getting that form by ID, so I can just do the form.addEventListener, and again, we want to do submit. When the form is submitted, we want to run the function. It's going to run and do all the fancy stuff. That is going to happen in there.
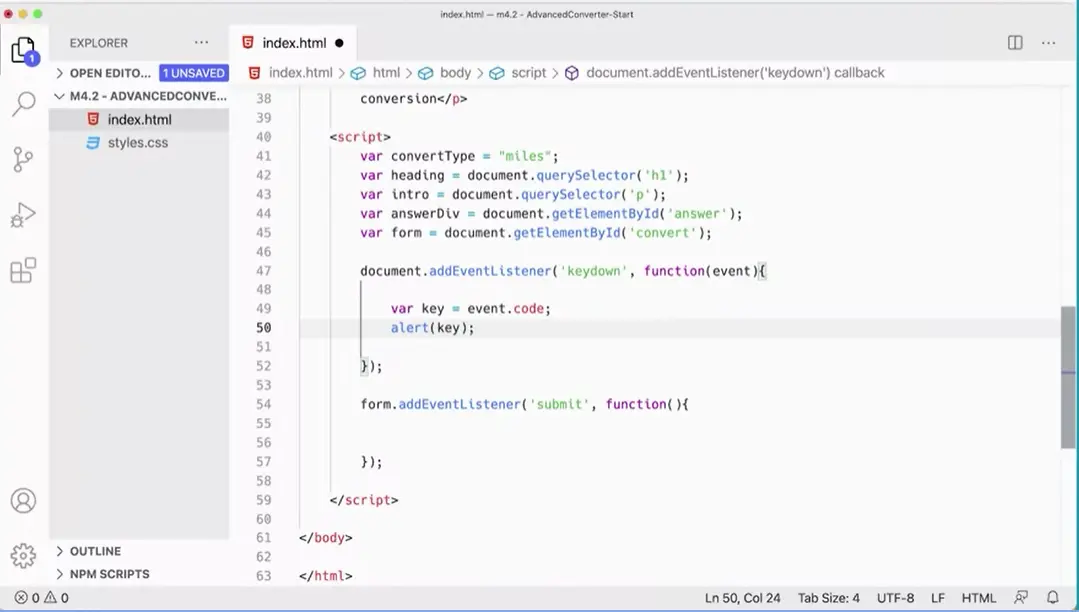
We've got our two event listeners and we're ready to get started the keydown event listener first. To do that, we're going to pass in the event object here. Before we had used event.which, to figure out which key was pressed. But event.which is now deprecated. Really what they want us to be using over MDN is event.code. Let's assign that to a variable, var key = event.code. Then I'm going to alert our key to see what I get.
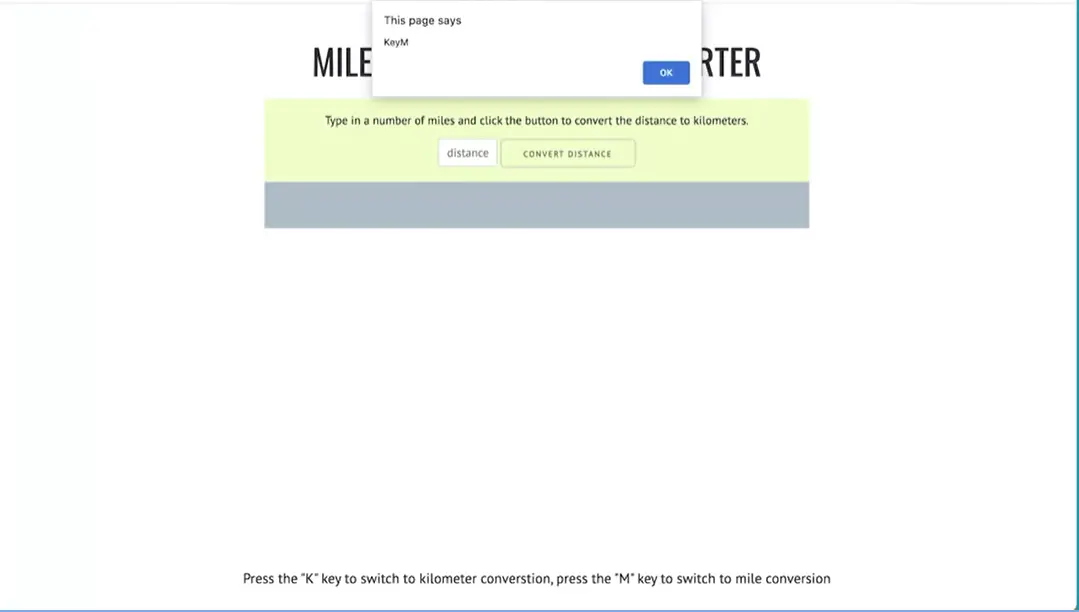
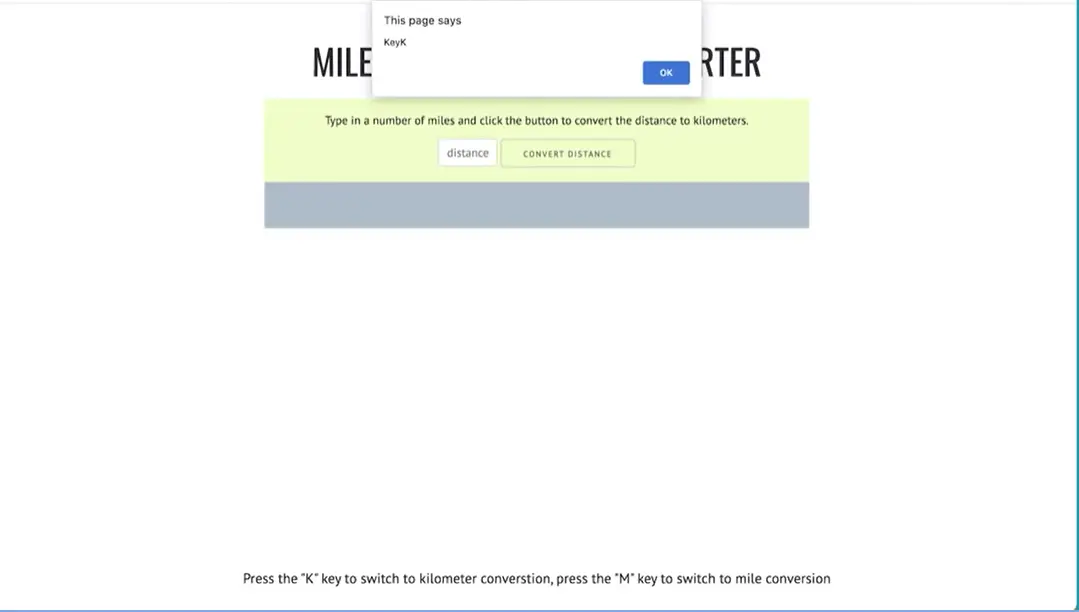
All right great, let's go over here and test this. If I refresh and I press the M key, I get key M. If I press the K, I get key K. Instead of giving you a number, gives you actually a key within the letter than the actual letter that you're pressing.
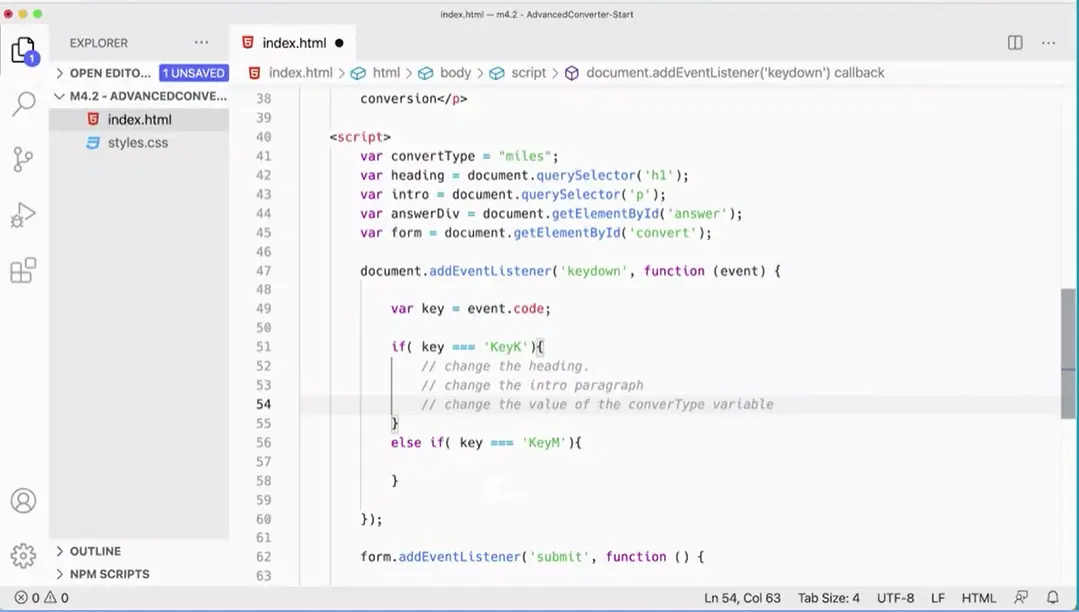
We know how to capture those keys and know which one has been pressed. From here, writing the If statement is very simple. We can say if key is the same as; you could even do triple equals if you wanted to. key K, we're going to do one thing, else, if key is the same as key M we're going to do something else. What are we going to do in here? We're going to change the heading. We're going to change the intro paragraph and the convertype variable. Those are three things that we need to do in each of these as we go forward here with this function.
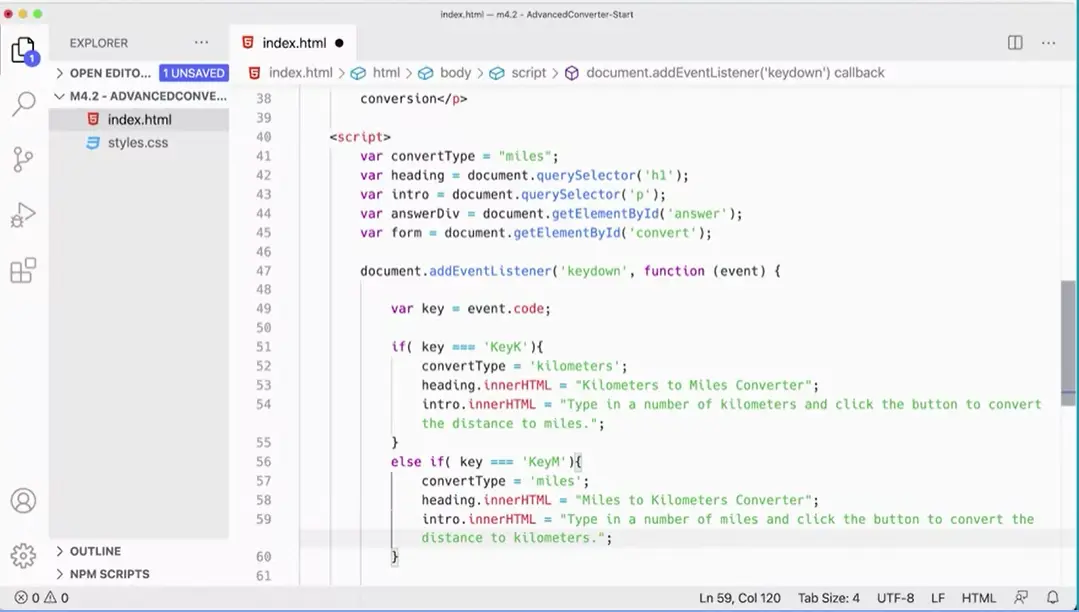
Okay, so now we're going to put this in here, and have var convertType because we already have it defined up there, so you don't use var.convertType = "kilometers". That's going to get set to kilometers as a value, as opposed to miles. You could just use K and M in there if you wanted to keep it short, and that's fine.
And then I'm going to change the heading in here next. heading.innerHTML = "Kilometers to Miles converter". That's going to change the heading up at the top of the page. And then the third thing I want to do is just change the intro paragraphs. That's the variable intro.InnerHTML = and then I'm just going to paste this in, but you're going to have to type it. Type in a number of kilometers and click the button to convert the distance to miles. We've got all of these set in here.
And, what we need to do is put the same thing down below. But instead of kilometers it's going to be miles. And then over here we're going to say Miles to Kilometers converter. And then type the number of miles, and click the button to convert the distance to kilometers. That should be working in terms of which key I pressed here and how that's going to work.
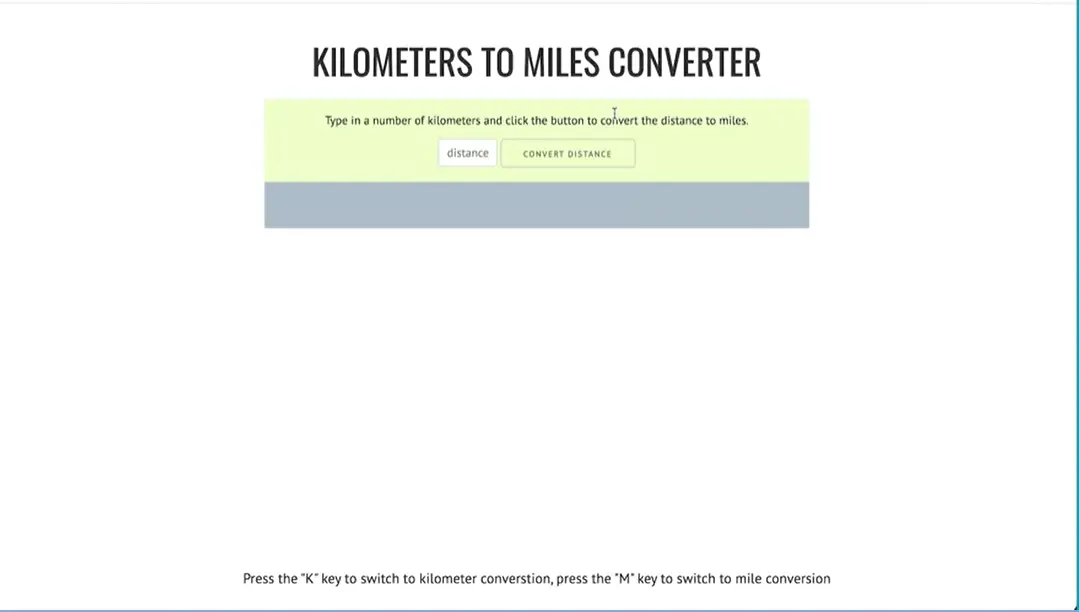
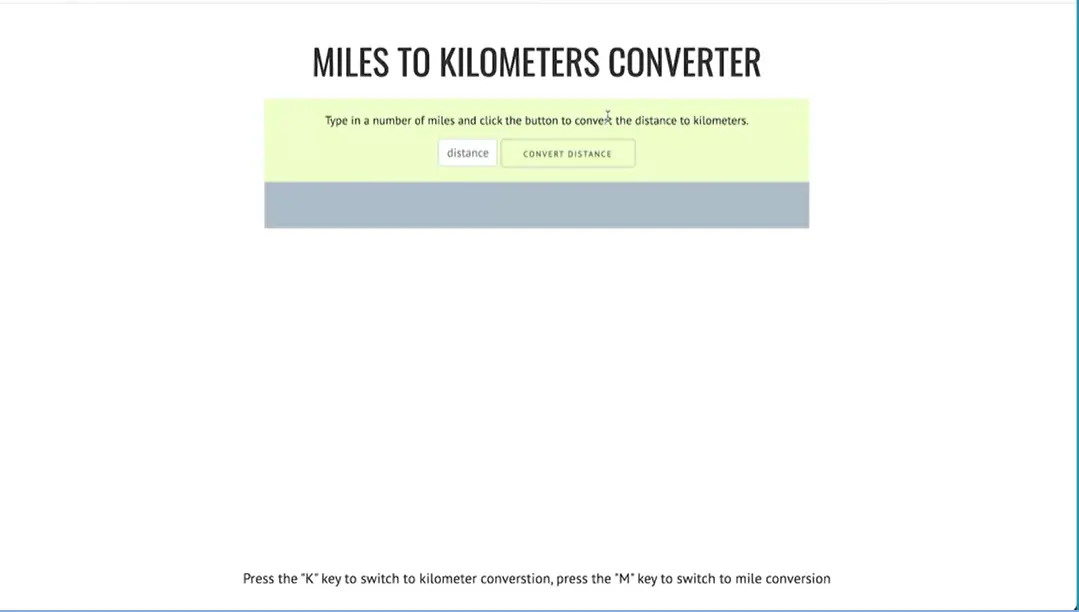
And if I come over and test this, you should see if I press the K key, it switches to kilometers to miles, the statement changes. And if I press the M key it switches back.
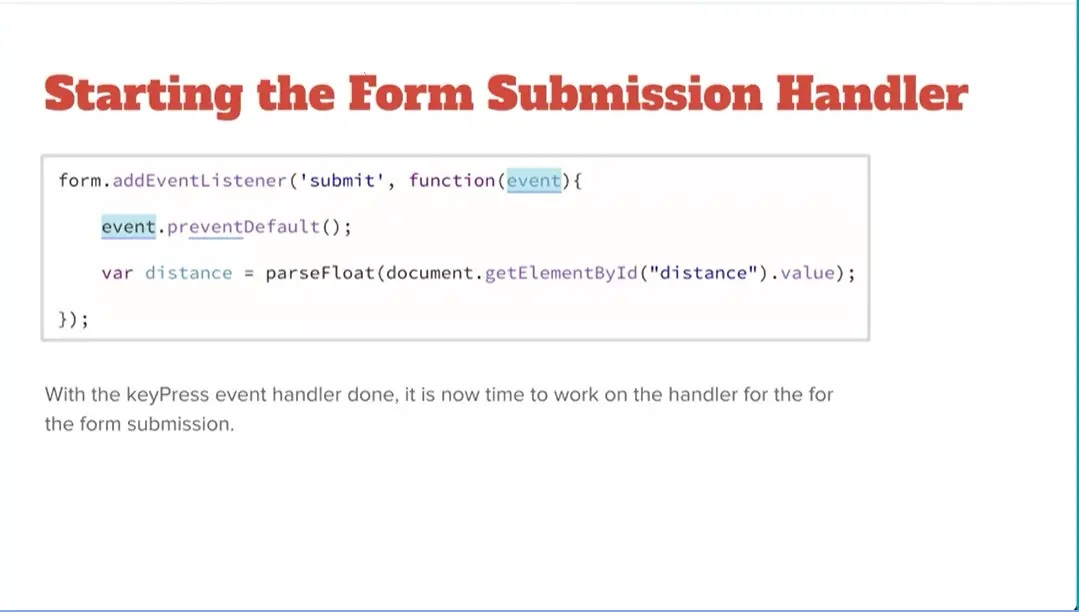
Now we can start the second part of the script which is the form submission handler. And we can pass in the event and once again do event.preventDefault to keep that form from being submitted, actually submitted. So we're going to pass in our event object here.
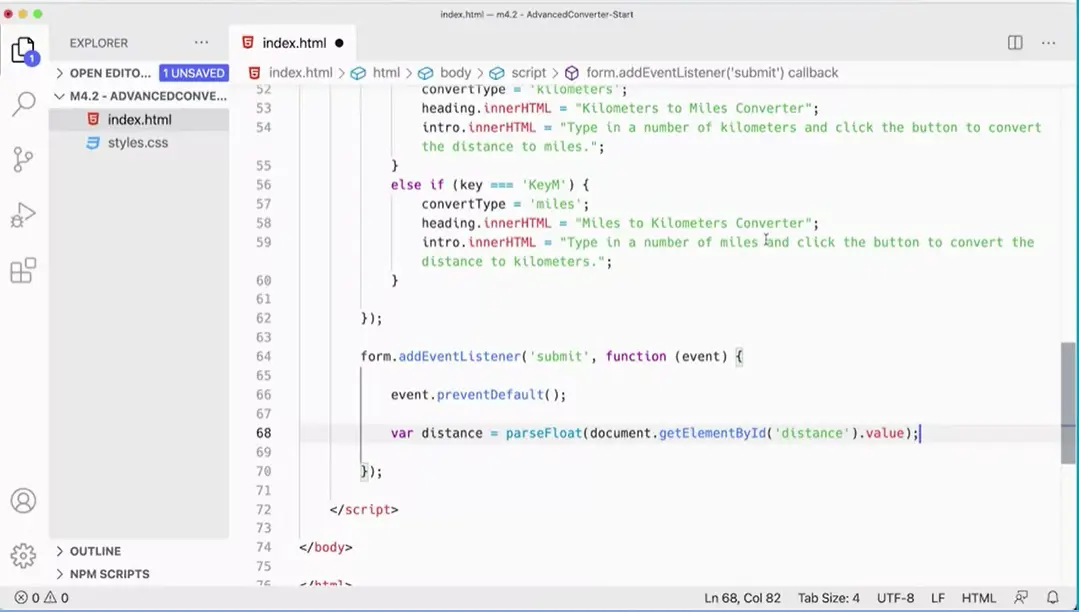
And down here again do event.preventDefault. And then we want to do the same thing we did before and get our variable out of their distance. var distance = document.getElementByID. And we're going into our form and up here in our form we're getting this distance ID here. So getElementByID ('distance').value like that. But just as we did before we want to put parseFloat in front of this, parseFloat, parentheses, and then close the parentheses at the end after value there.
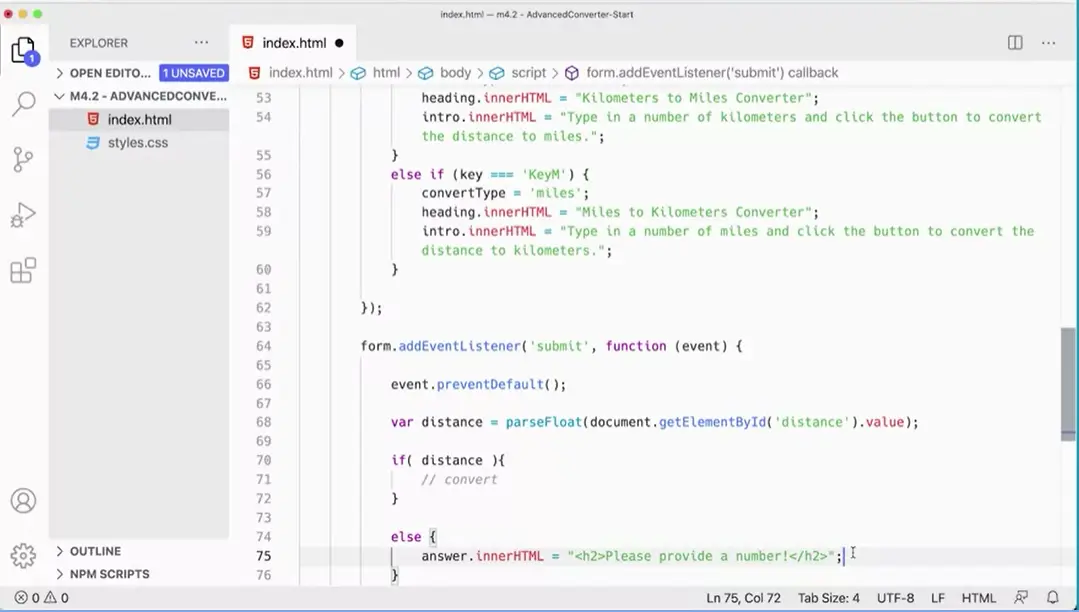
Also, same as before, we're going to stay if (distance), if that's really a number, then we're going to do something here, right? Otherwise, we're going to do something down here, else, and really, what we want is just to set that answer.InnerHTML = h2 and in there I'm going to just say please provide a number.
So that will handle the error if somebody doesn't put in a number. But in here, what we're going to do is this is we're going to check to see what the value of this variable convertType is because it's either set to miles or kilometers. Because if it's one, we're going to do one type of conversion, if it's the other, we're going to do another type of conversion.
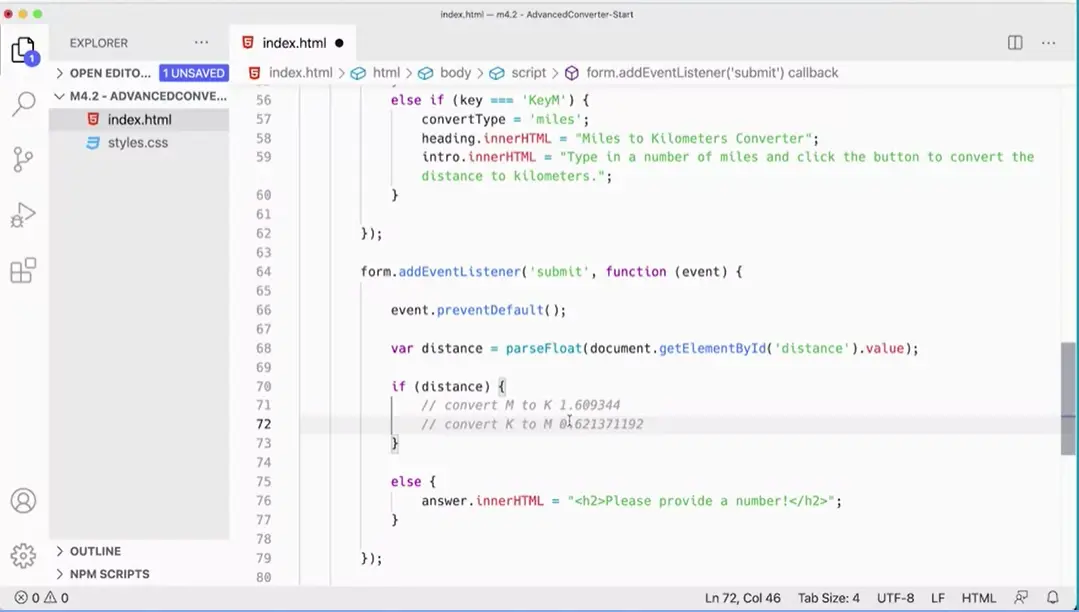
Okay, so now we need to actually do the conversion here, and based on which value this variable has your convert type. To convert miles to kilometers, the ratio is 1.609344 and to convert K to M, the ratio is .621371192.
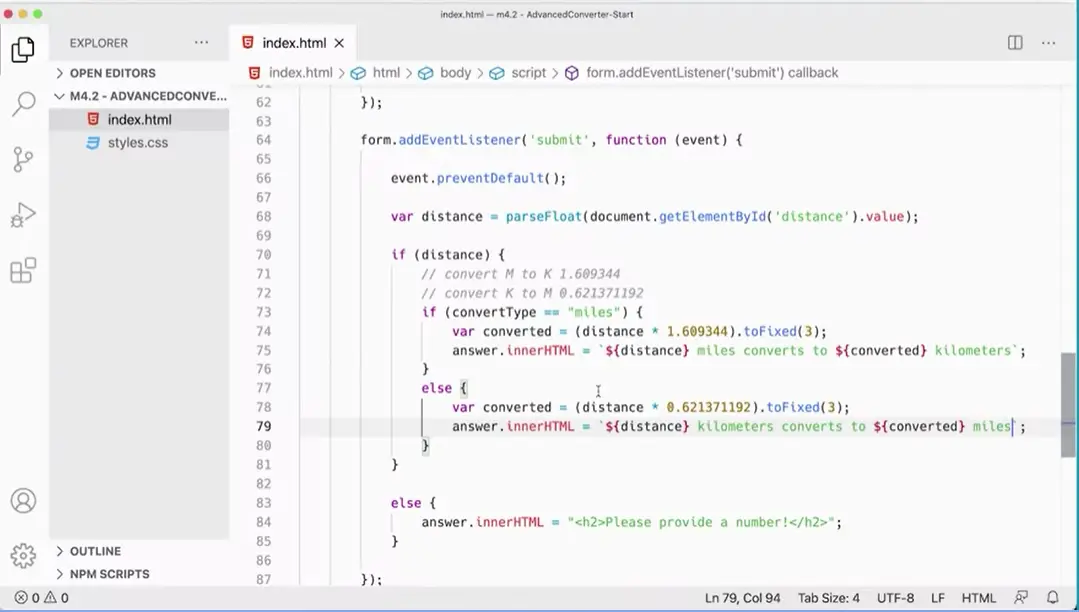
if(convertType == "miles"){ var converted = (distance *
  1.609344).tofixed(3);
} else { var converted = (distance * .621371192).tofixed(3)}
answer.innerHTML equals we're going to use your tick marts and we're going to say. X miles converts to y kilometers. But x is now going to be dollar sign curly braces, and in there I'm going to put distance converts to Dollar sign curly braces, converted.
There we go. And down here, it's going to be the same thing. Answer, copy that, stick that down here except instead of miles, that's going to say kilometers converts to miles. There we go, so now we're able to convert both miles and kilometers and put the correct answer.
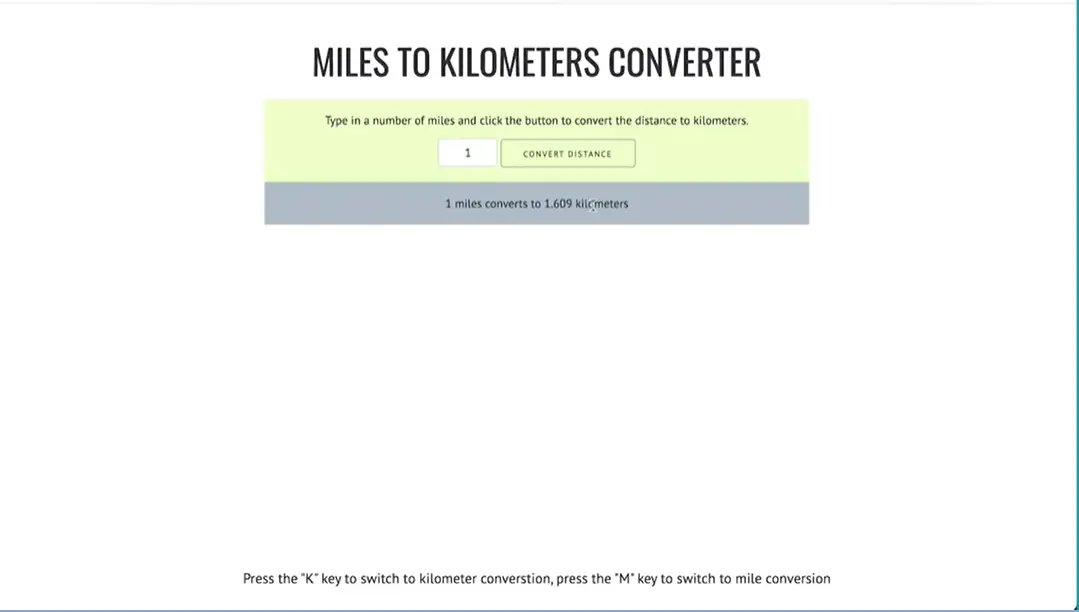
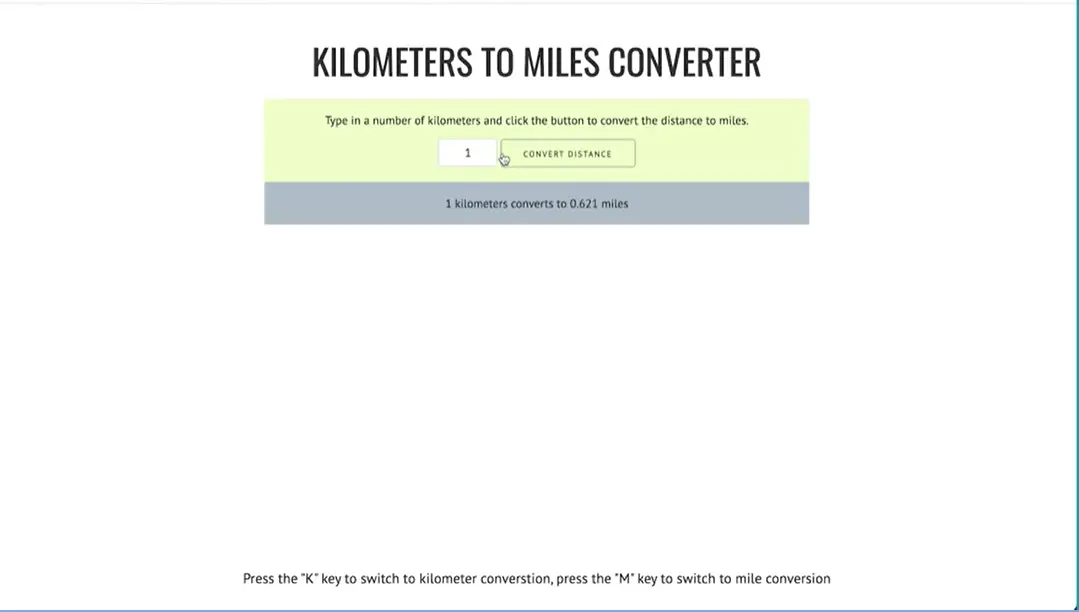
Yet if somebody enters in something, that's not a number that will still be handled, and that should work, let's test it and see. Refresh miles to kilometers if I put in one mile that converts to 1.69 kilometers, that's correct. If I press my K key kilometers to miles, convert and I get 0.61 miles, and that's correct.
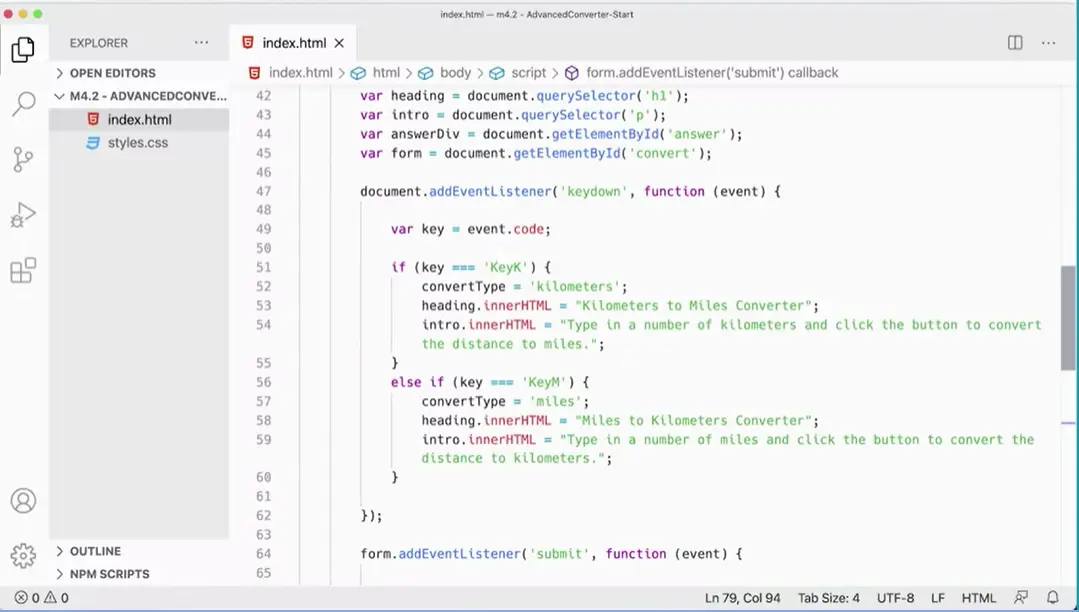
We have a working distance converter for more advanced distance converting, that will allow us to switch between miles and kilometers. And over here in our script, the important thing to recognize here is that we're using a variable up here at the top convertType. And we're adjusting the value of that variable here based on the key pressed. And then, we're adjusting which one of these were going to be using based on what the value of that variable is.
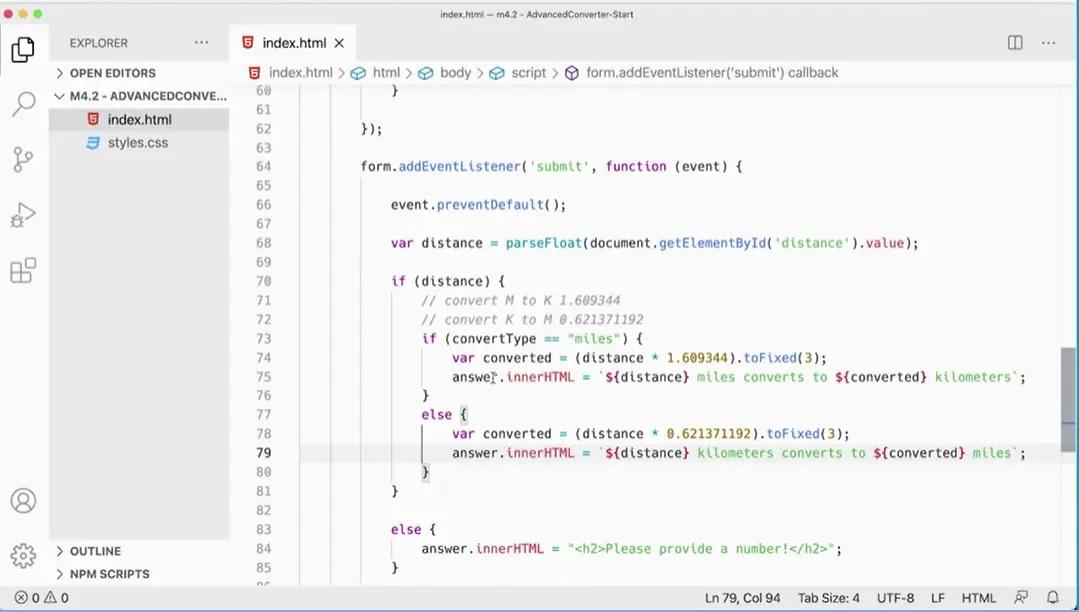
Now, this is where we're starting to get into some scope and some it's a little bit more complex because we're looking at a value that you need to get set in this function here, and then access it in that function there. And we're doing that by defining the value up here. The last thing you should do with this is put it all into a script file at the top of and link it to the top of the page instead of having it here in the bottom, and use all your best practices for that.
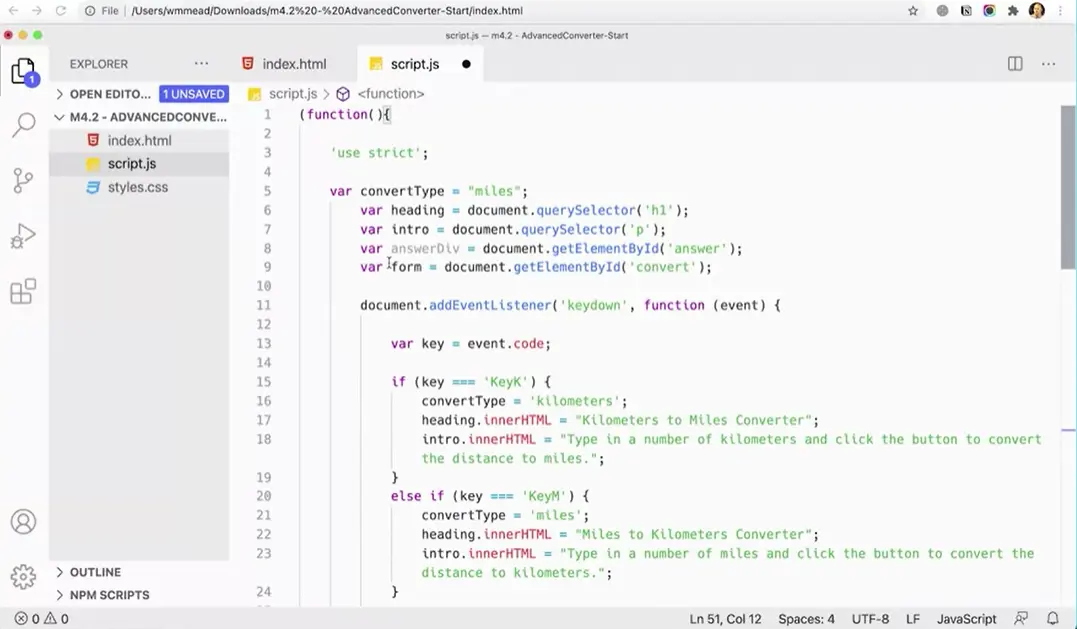
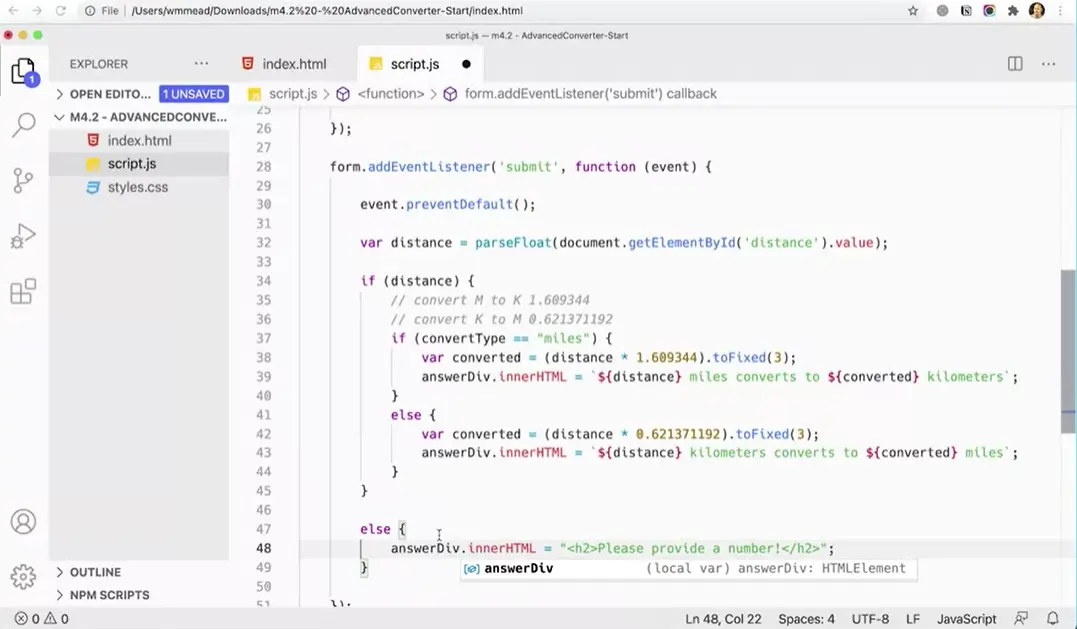
You may not need to watch this video right now, but because you should know how to do this already, but I'm going to do it anyway. I'm going to create a new file here called script.js, and you can name the file whatever you want. On this file, I'm going to add my function here, my function that will run automatically, function and it's parenthesis and curly braces, and an extra set of parenthesis at the end. This is my automatically invoked function here. Then everything's going to go inside the curly braces, and here I'm going to add, "use strict" that directive to make sure I don't have any variables being defined in the wrong place.
Then I'm going to come in here and just copy all of this script, the whole thing, all the way from the top, all the way down to the bottom. I'm going to paste it over here like that. Now for this one, it's more important to do this then we than for the previous script, partially because there's more code going on here, but also because we actually have some globally defined variables here. It's possible that you want these to not get used in the wrong place down there. AnswerDiv. It should be answerDiv.
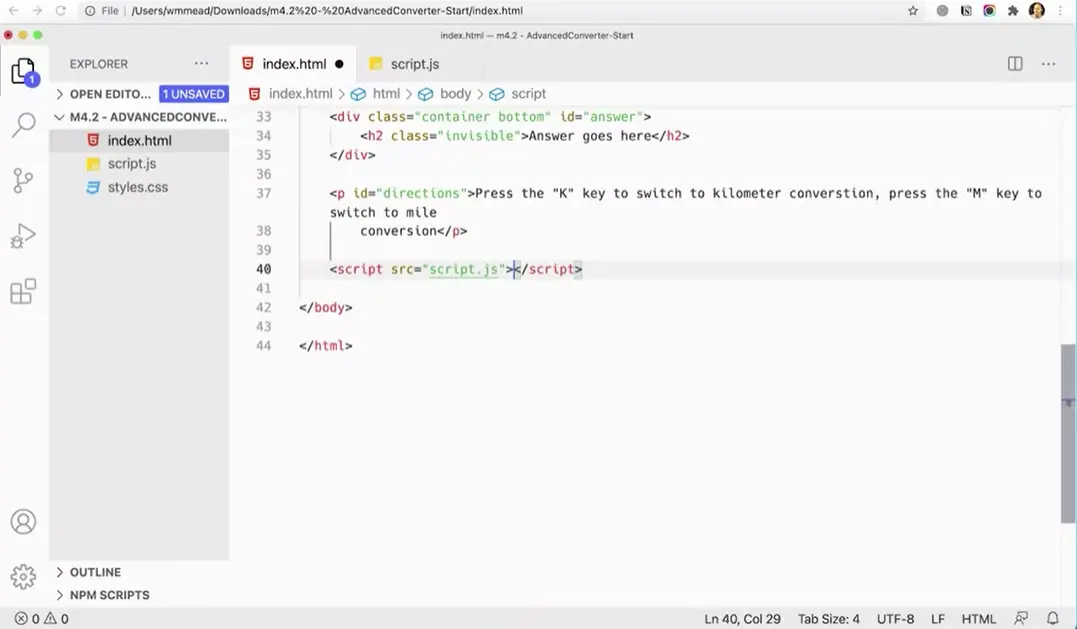
Over here in our file, we can get rid of this stuff, and instead, we can link to SRC = script.js.
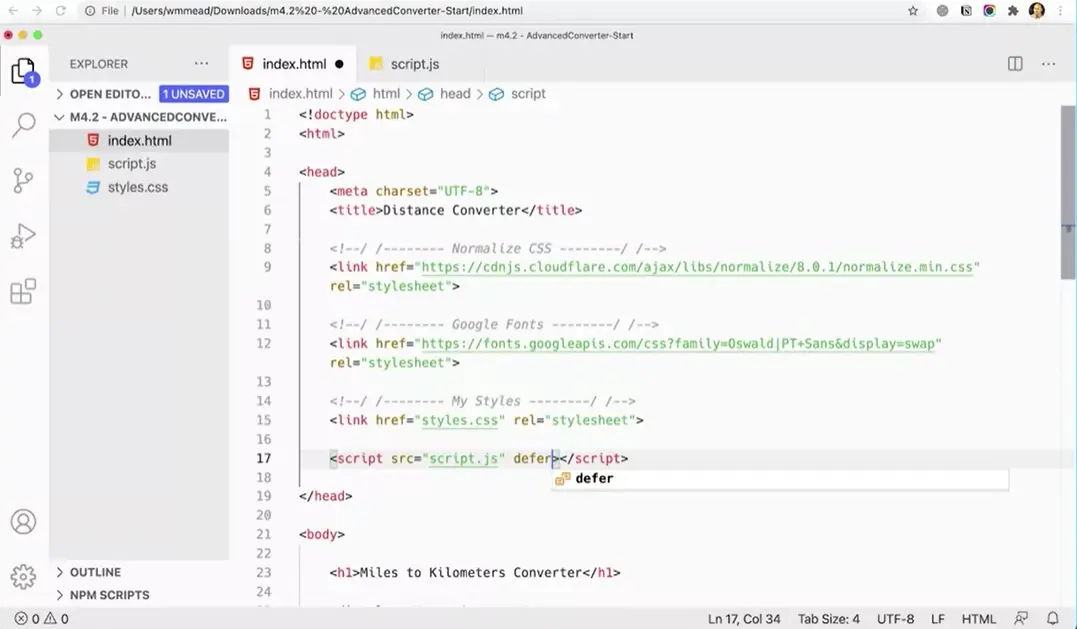
Now, we could move this up to the top of the file here. defer, there we go.
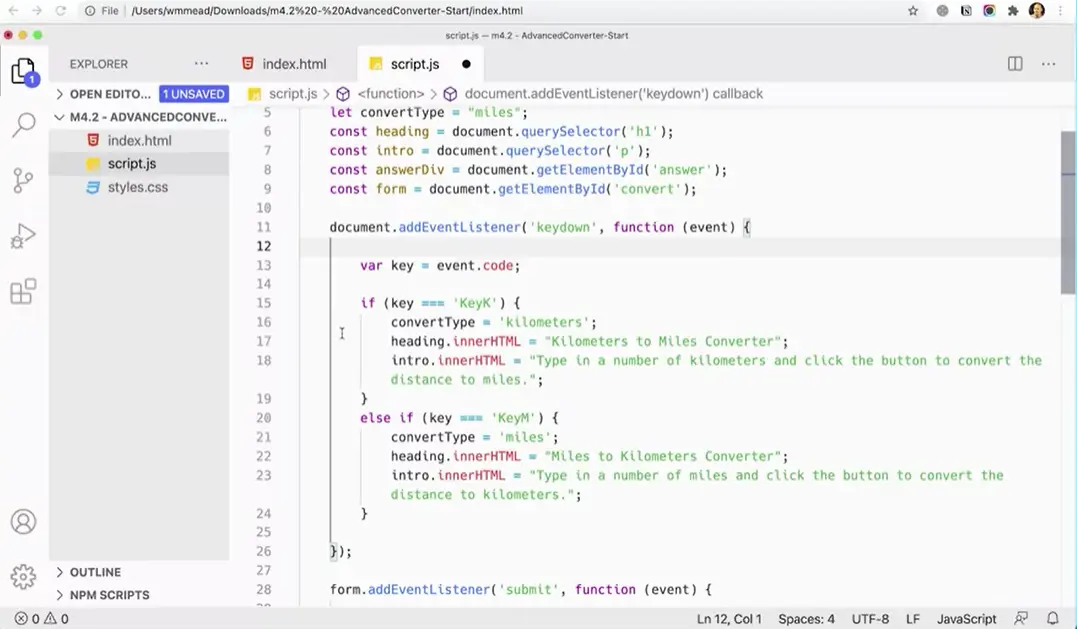
The one last thing I didn't do is I didn't come in. Now convertType needs to be let because that one's going to actually change values. But the following variables can be const; heading, intro, answerDiv, and form.
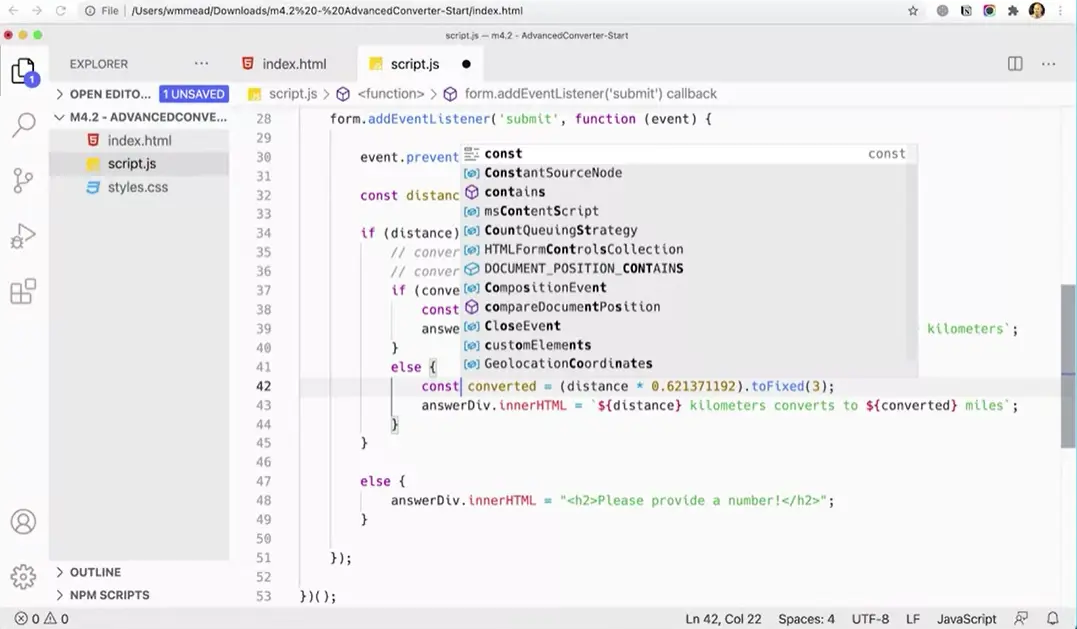
We have used a lot of the things that we've learned about in this course so far, in terms of capturing some data from a form, being able to manipulate that data, and then change the DOM, change the actual webpage based on what the user has done, including capturing key presses, which is pretty neat.
Vacation destination list. For this part, we're going to be building the HTML and CSS for this ‘vacation destination wish list app’ for lack of a better word, we'll call it an app. It's not really an application in that it's not really that sophisticated. There's no database involved but, we'll call it an app for lack of a better term.
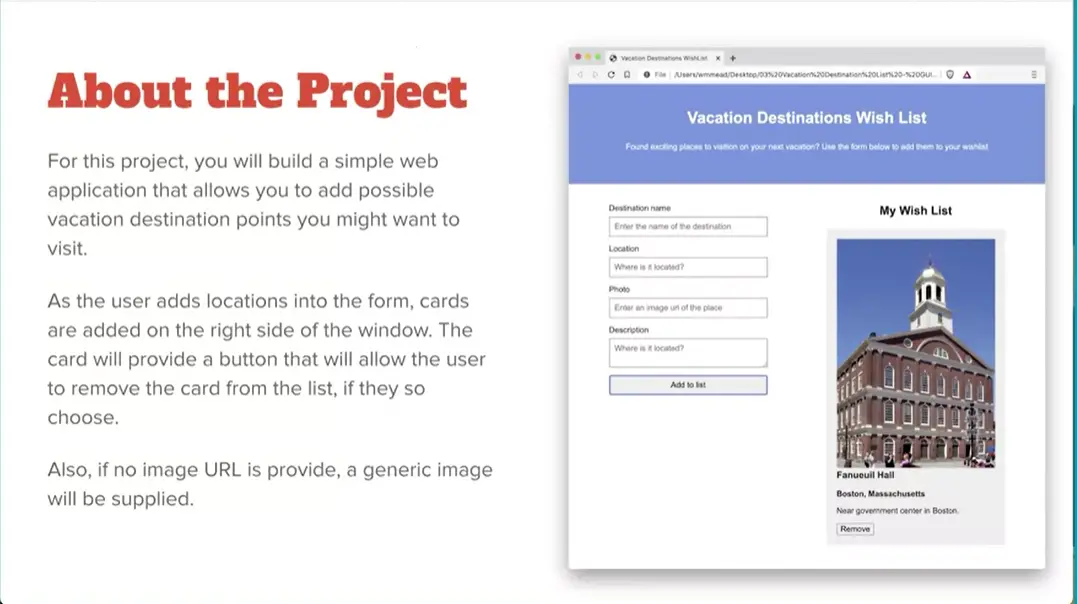
Basically, what we'll do here is we'll have a form and you can add destination name, location, photo and description to the form, and it will add it to your wish list. But before we get there, we need to build up the HTML and CSS, and in previous projects, I've given you the HTML and CSS done, but with JavaScript because it's such a relationship between JavaScript, the HTML and CSS, the three of them together working together to create your interface. It's important to see how the HTML comes together for this project. It's not super complicated, but it's definitely more complex than the previous projects we've done the distance, converted projects and those kinds of things.
This is a great capstone for the end of the first course, which will bring together everything that you've learned in this course so far. And again, we've got three more courses to go after this.
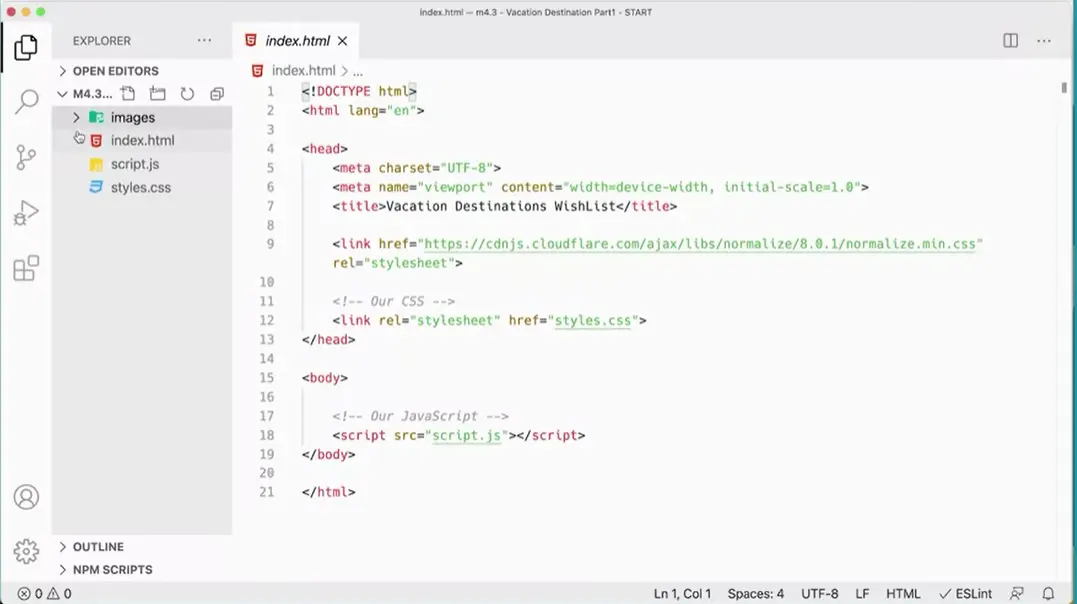
Okay, they are going to add some some information to the page here including a URL for the picture but if they don’t have a picture URL, one will be provided. It will put a generic image. A sign post JPEG. And if we go over and look at the files that we've got the start files, fairly simple.
We've got a link to the normalize CSS script, which will make sure that different browsers render pretty much the same way. Sort of normalizes the differences between browsers in the way they render things so that you don't end up with a different looking page in a different browser. And usually it's just minor things, like different spacing and stuff like that but, that could be frustrating if you're a designer and you're you want it to look a certain way and and it and it changes up.
Plus, we have linked a style sheet, which is currently empty, and we'll be adding some styles in there and then on a body of our page. We have linked a JavaScript file, which is also empty, and in part two will actually be building the JavaScript for this project.
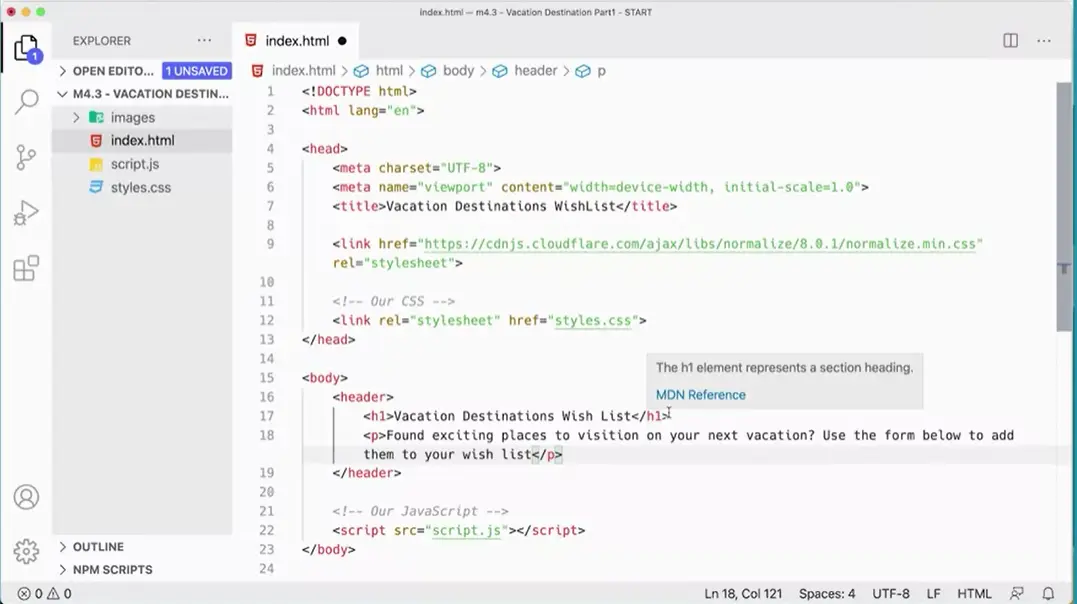
The first thing we need to do is add a header element which will open and close, and inside the header element, I'm going to add an h1 heading and a paragraph, and I'm going to paste them in here but you're going to have to type these.
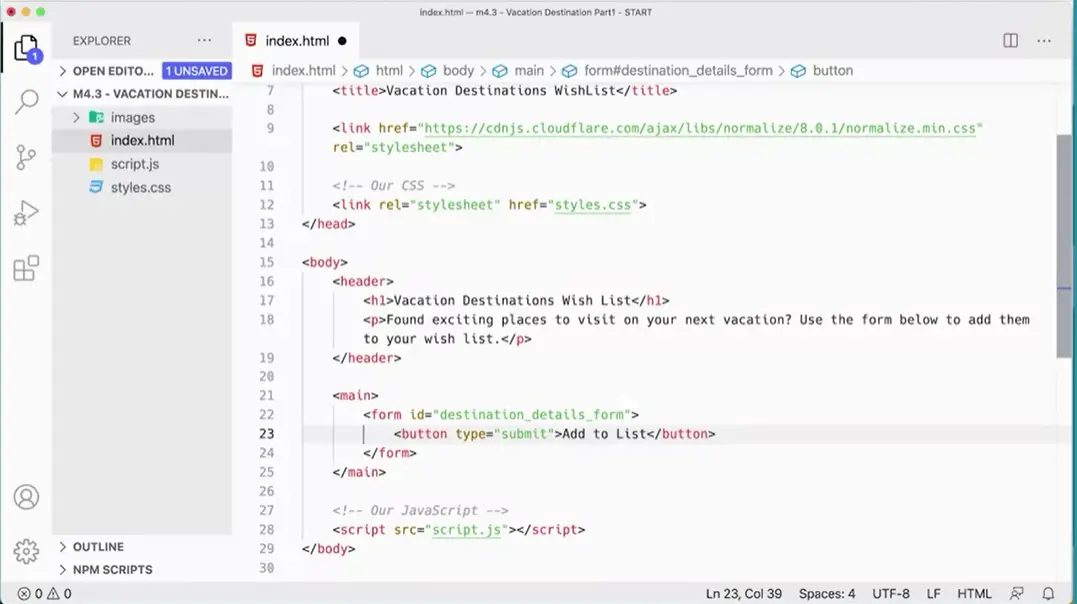
Add h1 ‘Vacation Destinations Wish List’. Each h1 should have a main heading. If it all possible, that Google will search as an index. And then I've got a paragraph “found exciting places to, to visit on your next vacation. Use the form below to add them to your wish list”.
Next, add the main element. And inside the main element, we're going to add a form. And then inside the form, we're going to add a button. The form needs an Id and the idea that I'm going to use which is descriptive for me, so I'm going to use this Id = “destination_details_form”. Then the button is going to get a type=”submit”. Then we need to add some text to the button, which is going to be ‘Add to List’. That is the text that shows up on the button here. We'll stop here, and we will pick this up in the next lesson.
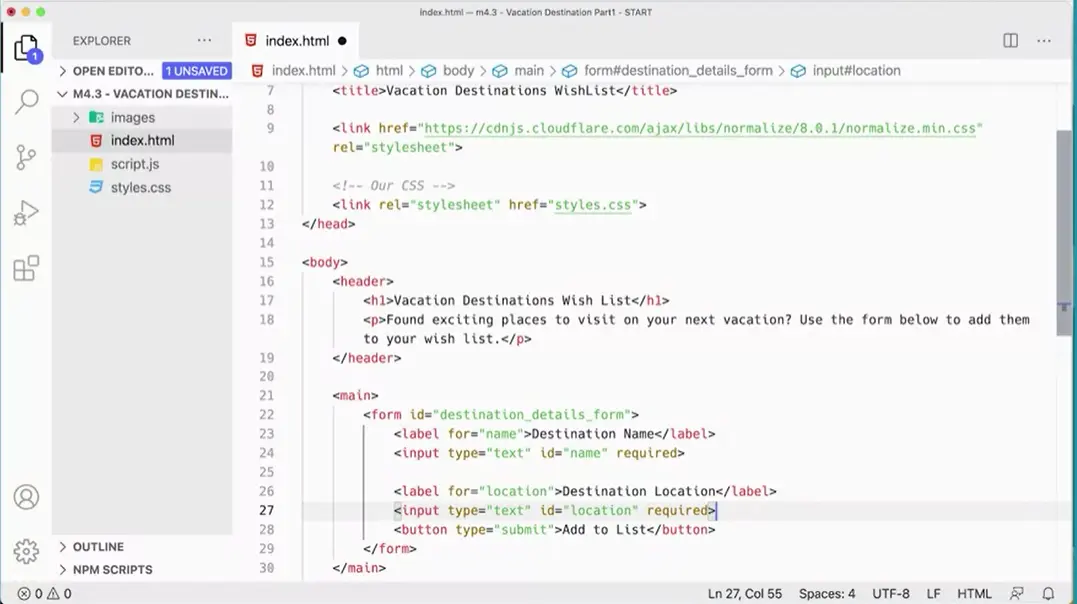
Next, we'll add two fields. One is going to hold the name of the destination and the other is going to hold the location of the destination. Each of these fields needs a label element, destination name and that takes a “for” attribute for name. That “for” attribute connects to the id of the input that goes with it. Input type equals text, id equals name, and then also we want to make sure that users use this, so I'm just going to put required.
Now your browser has to support this for this to actually work, but rather than built-in some form validation, which we're going to do in the next course. We'll talk more about form validation. But here we'll just use the built-in browser form validation, which isn't perfect, but it'll help. Now we've got a field here that is required that has an id that's going to match the “for” attribute, and it's typed text.
Then we're going to need another one, label for location. Maybe I'll do destination location something like that and then of course we need the input for that, input type equals text, id equals location, and required just like before.
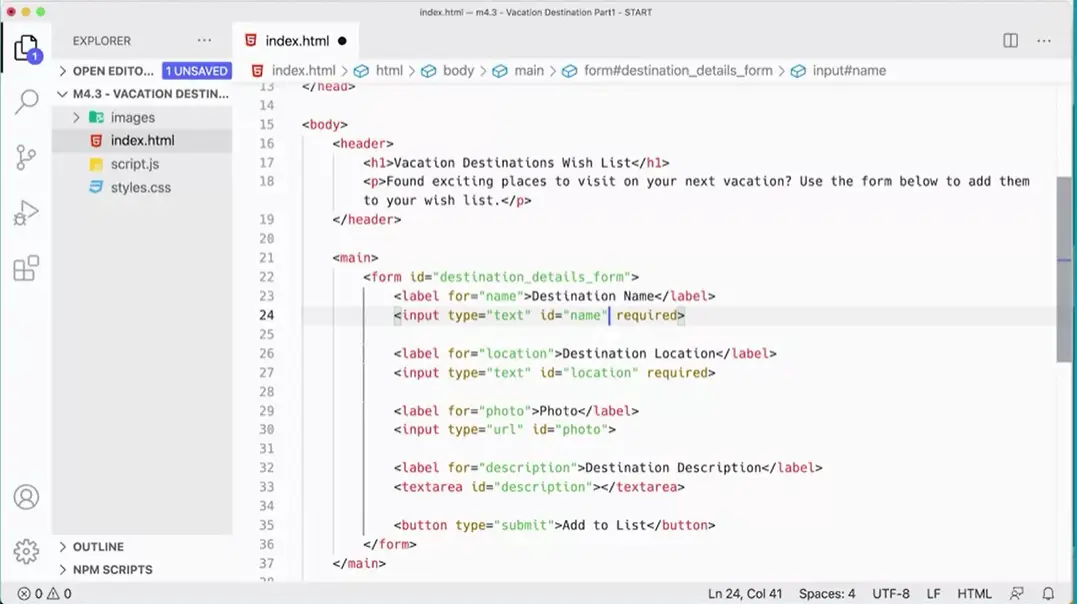
From there we're going to add a couple more fields. We want two more fields. One for the photo, so I'm going to have a label for photo. This one is going to be an input type equals URL because we're going to paste in a URL here for a photo that's already online rather than upload a photo or anything like that, that would be much more complicated.
But we can just very easily find a photo online of where we want to put it and put that in there, and your id is going to be set to your photo. This one is not going to be required because we can have a default photo in case we need it.
Then the last one we need label for description will have a location or destination description. This is going to be a text area, like so. It needs to have an id, so to description to match the for attribute, and there we go. A form is basically built.
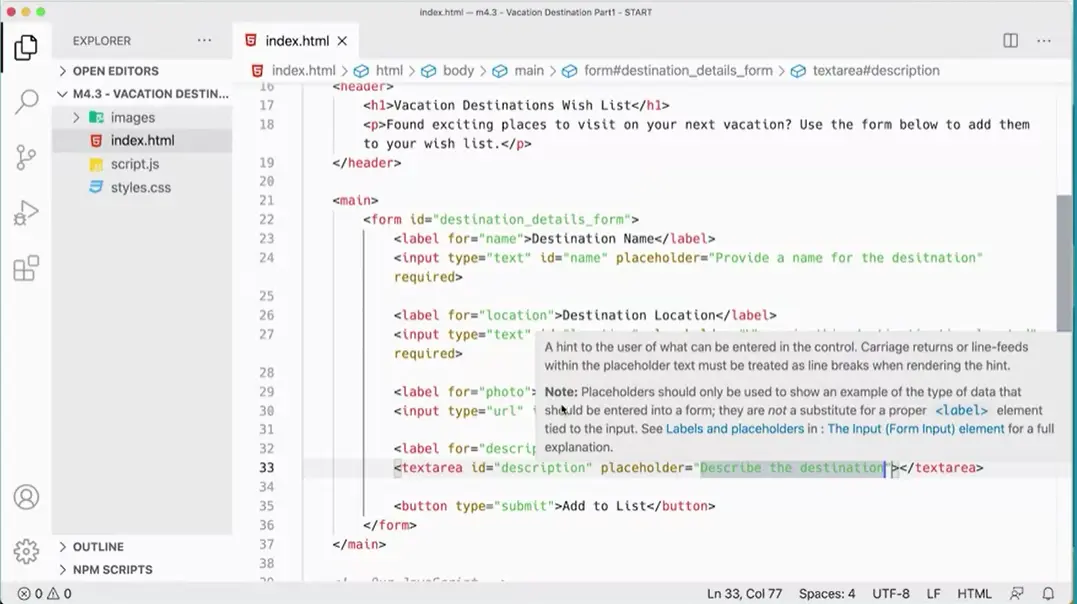
Another thing that would be nice is if we had some placeholder text in these fields. We can add a placeholder attribute and set it for each. Placeholder for destination name, destination location, photo and description.
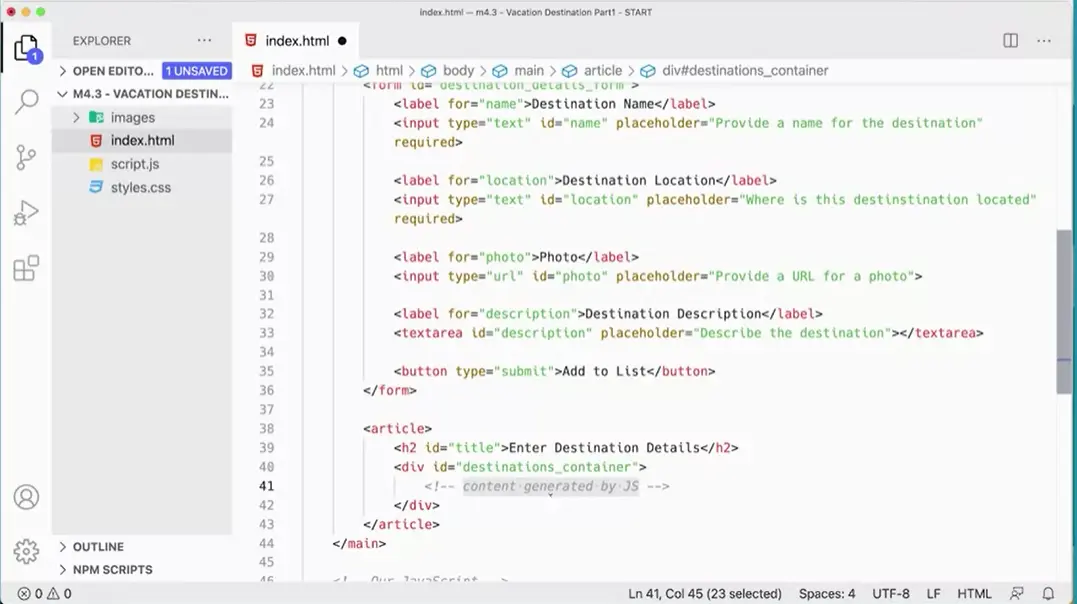
We're ready to add the element that's going to take the results we put in there. That will be an article after the format an article, and then we're going to add an h2 with an id set to title. Initially, this h2 is going to have a value set to enter destination details. That's giving us some instructions there.
Then after that, we're going to have just a div that's going to be a container for this thing, and it's going to get an id destinations container like so. This div is going to have in it the content generated by JS. That's going to get the content that JavaScript is going to generate is going to go inside this container. I believe that finishes the HTML that we need for now. That'll pretty much finish the software for all the HTML we need.
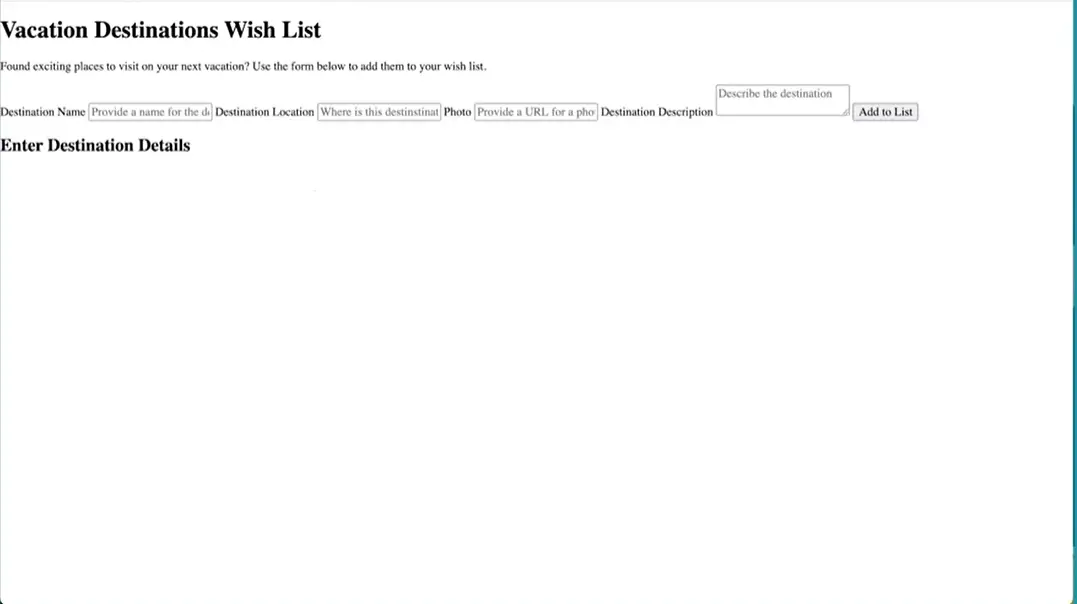
Save the file and then let's just go take a quick look at it over here. If I refresh this, you'll see it doesn't look like much, doesn't look very good. We don't have any styling in here yet, so we'll do the styling next.
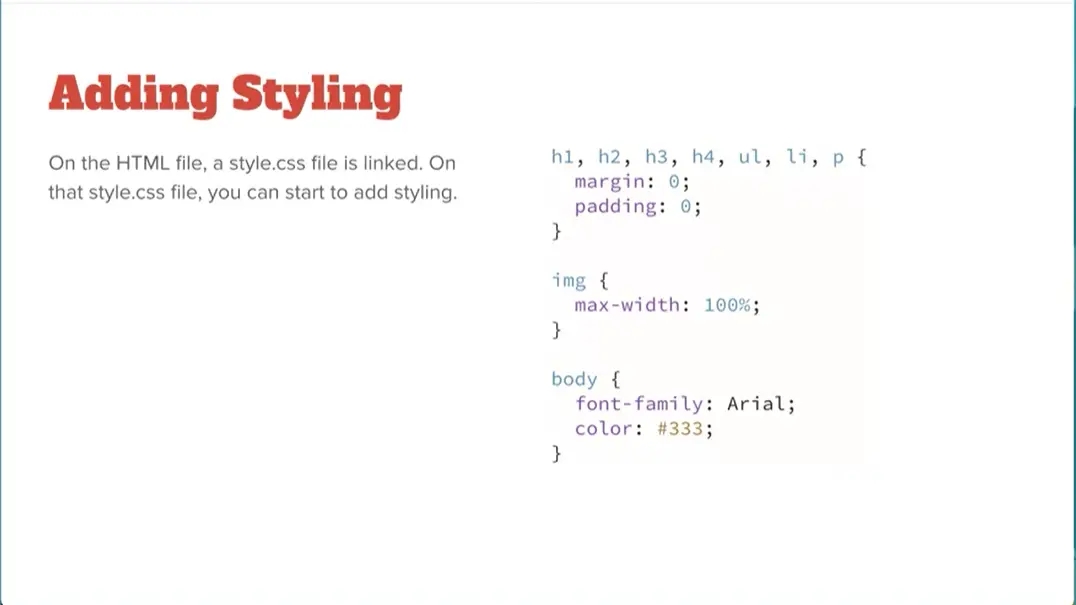
We have the HTML in place, and now we're ready to start styling the page and making it look a little bit better.
We have the normalized script up at the top of the page, which will help smooth out the differences between different browsers but beyond that, personally, I find it helpful to zero out some margins and padding and some elements and then add them back the way I want them in order to get them to work. I have here a few reset CSS things that are helpful in general. This is just my own personal preference. You could leave these out if you wanted to but generally, I think they help with zeroing out some of the base styles that most browsers display by default.

I'm going to add these in. Over here I'm going to add on my style sheet here a rule for h1, h2, h3, h4, ul, li and p. I'm putting this in the script page, styles.css. h1, h2, h3, h4, ul, li, and p { margin: 0; padding: 0;}. That gets rid of the margin and padding.
It's also helpful to say img {max-width: 100%;}. I think that's helpful to make sure images don't bust out of their containers. If you put an image in for URL that's too big to fit in the container, it will overflow it. We don't want that to happen. We'll set that as well, and then I also have over here just some styles for the body.
I'm going to set the font to Arial. Arial is the font that most computers have so they work pretty well. I'm going to set the color of the text to dark gray in this basic rule here. I'm going to have body{font-family: Arial; color: #333;}.
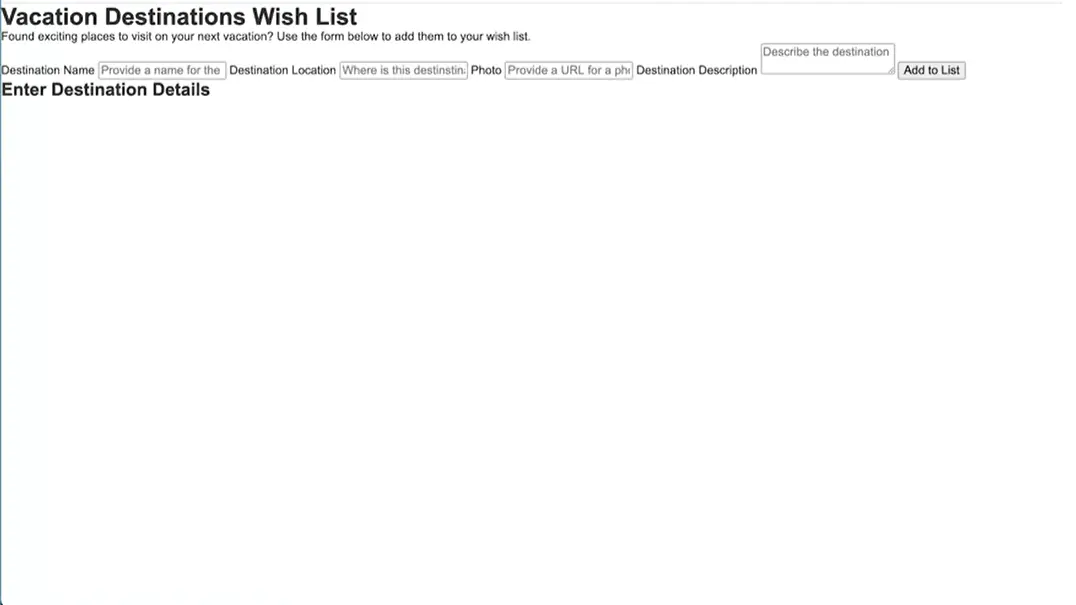
Already you'll see that the page is starting to come together a little bit with some of that styling. Notice that we've lost a bunch of the margin and padding on those things.
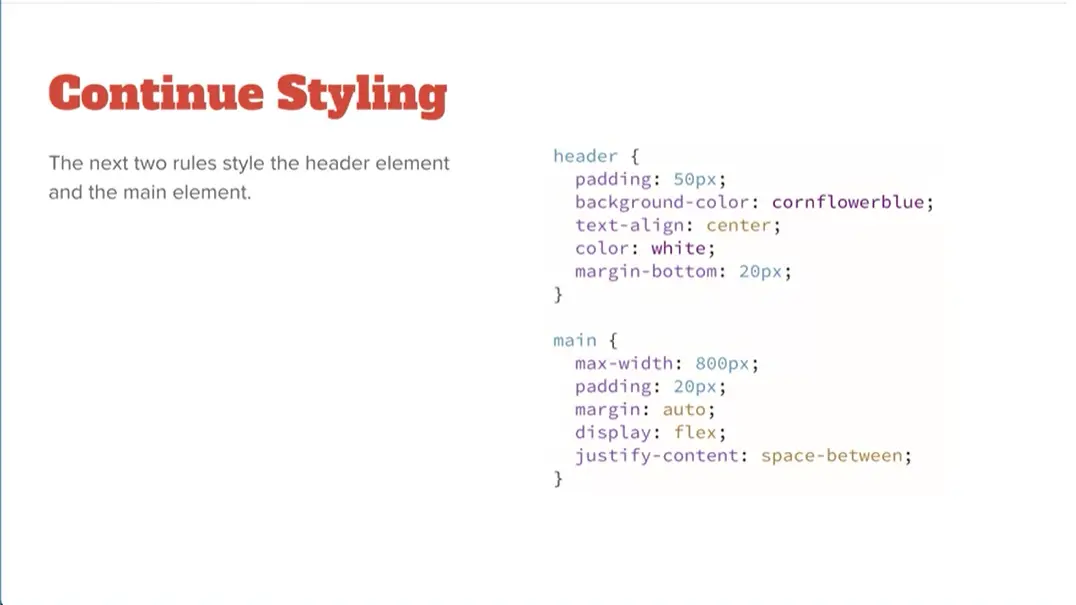
Next we're going to style up the header and the main content to get them to look the way we want them to look. Header, I'm going to set the padding background color, text align center, the color of the text in there, and then the margin on the bottom. Let's go ahead and do that. Header, padding, 50 px, background color. I'm using this cornflower blue. We're setting the color of the text to white. Text-align, center. I put the margin, bottom 20 px, and anything else that I did over here.
Then for main, we're going to have a max-width of 800 pixels, padding 20 pixels, margin auto that will center it on the page, display flex, that will make the two items in there sit next to each other and justify-content space-between, and then we'll set percentage width or a specific width for those two items that are going to sit next to each other on the page there. Let's go ahead and add that in. Main, max-width, 800px. It's a narrow page, but that's okay for what we're doing. Display, flex. That turns it into a flexbox and, I did some stuff with margin and padding. What did I do here? Padding 20 pixels margin auto. That above there. Actually it doesn't really matter. Padding 20 px, margin auto. There we go. Then with display flex; we do justify-content: space-between; which will put a gap between those two items.
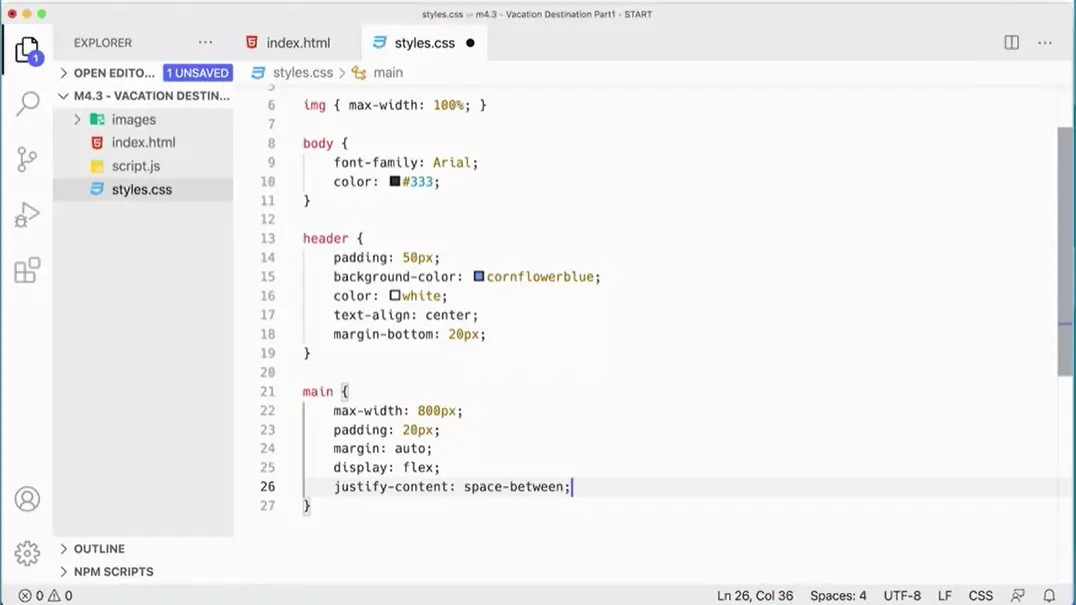
The two items that are going to go next to each other are the form on the left, and then this article on the right, those become flex items. They're going to sit next to each other in our design.
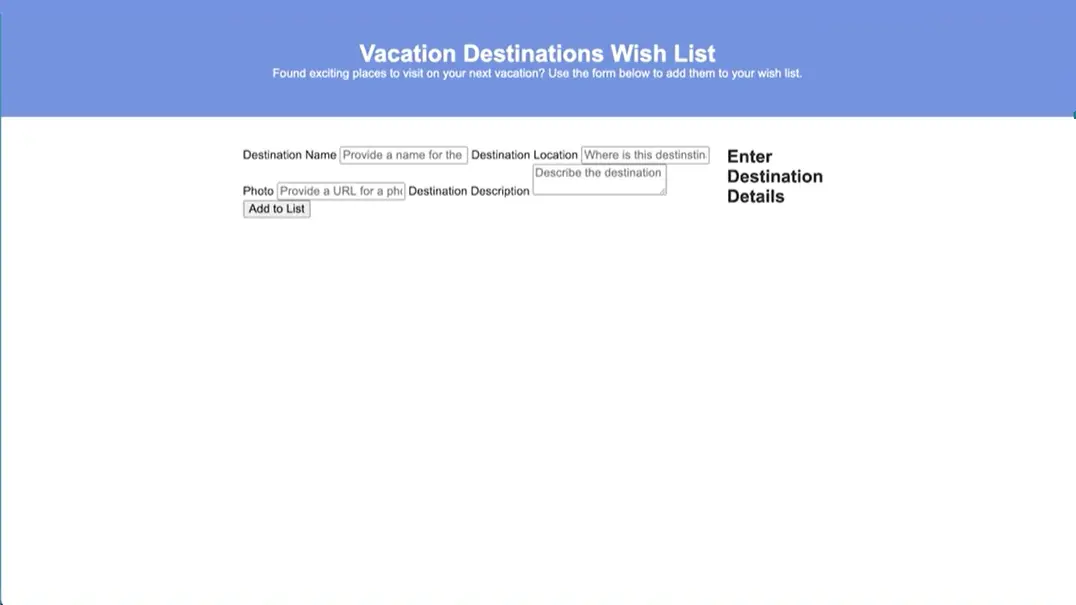
Just like that and even with just those two rules, you'll see it's starting to come together a little bit there. Not very much yet, but it's starting to come together. Well pick up the styling in the next video.
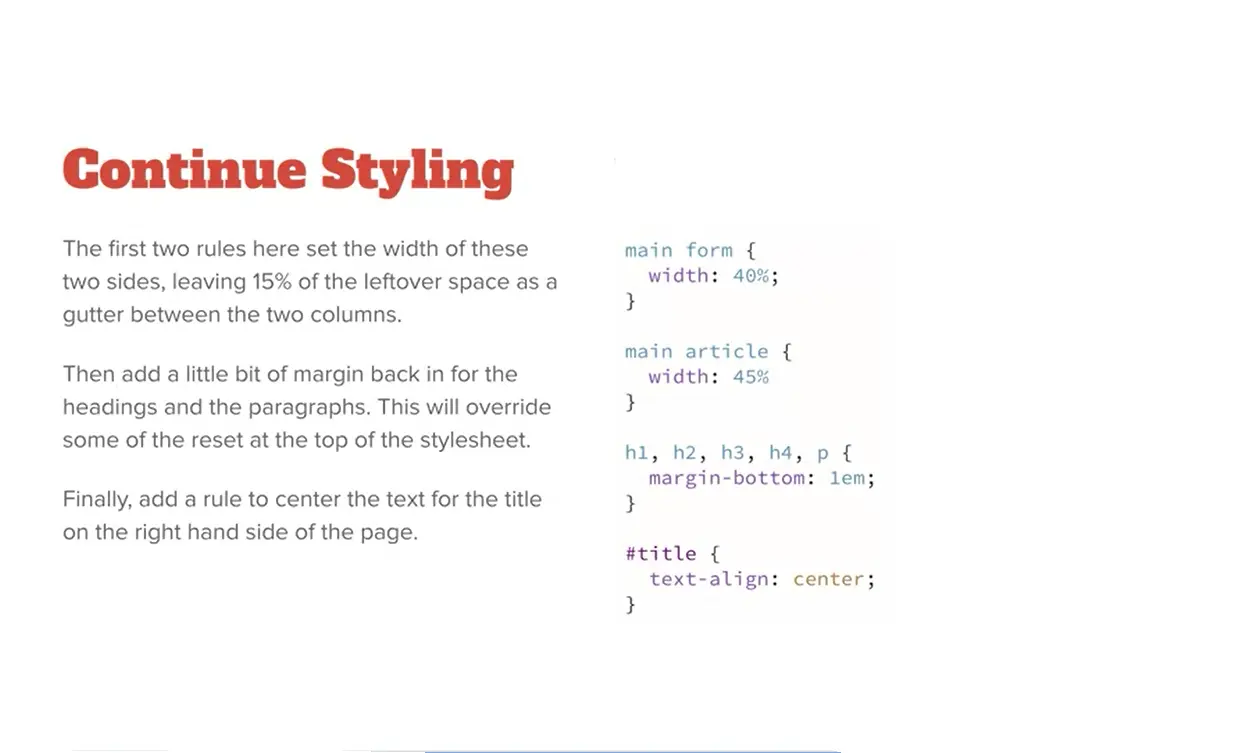
Next, we're going to set the width of the form and the article respectively. We'll add some margin back in the bottom of these elements so they start to look a little bit better and then the title is going to get text-align to the center. We'll be able to do all of that here.
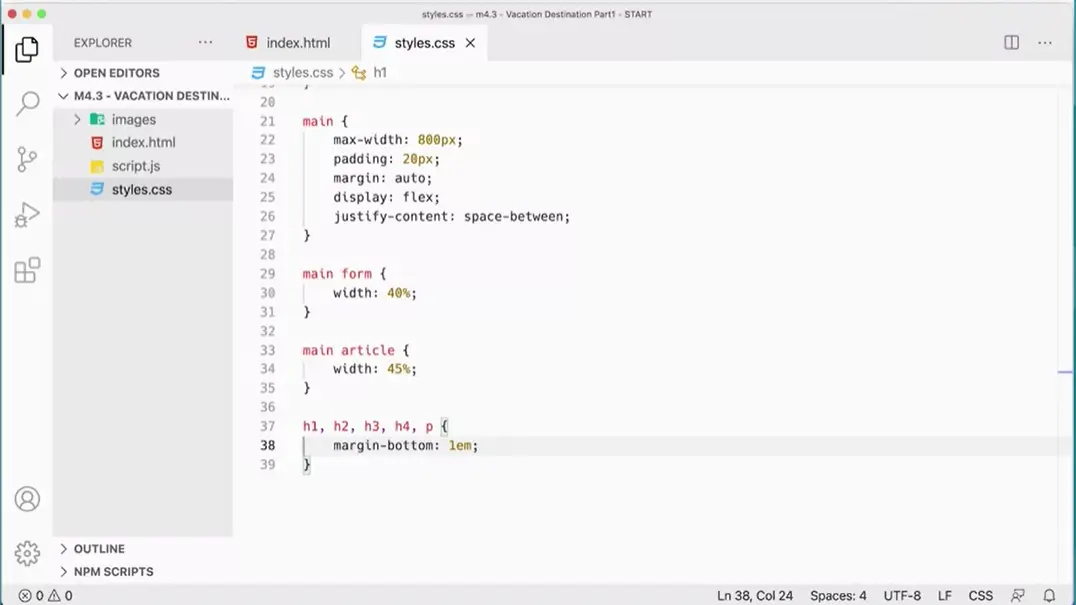
Let's add that into our style sheet here. Main.form will target the form itself width 40 percent. Setting it up a little bit to be responsive but not entirely. Main article is going to be width 45 percent. That adds up to 85 percent, which means that 15 percent will be left to be the gap between those two to create a little bit of a gutter between these two columns here. We've got that in, and then we can just put the margin in the bottom of these elements, h1, h2, h3, h4, we have all those, we might margin-bottom 1em.
You might be wondering, well, it seems silly to tick the margin out up above and then put it back in down below. But I've found that I get a lot more control over the look of my pages and the visual spacing between things. If these elements only have margin on the bottom and not margin on top and bottom, which is what they get by default in most browsers.
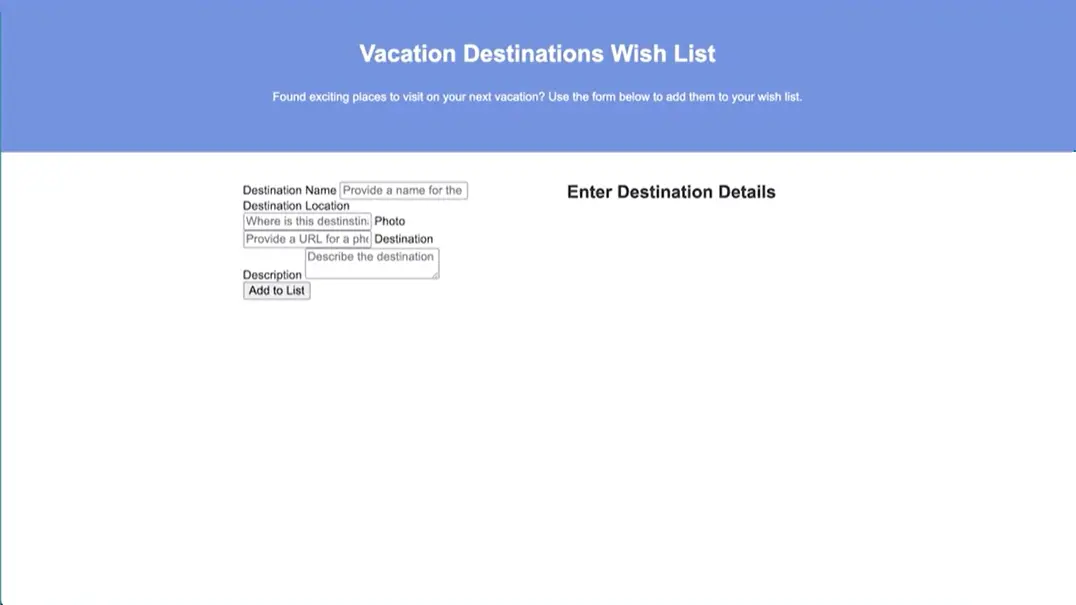
Save that and check it over here, you can see it's starting to come together a little bit more. But the last thing I was going to do is center that title over there. We've got #titled text-align center. Let's see what else we need to do for styling. Got that going so that is centered over there now it's great.
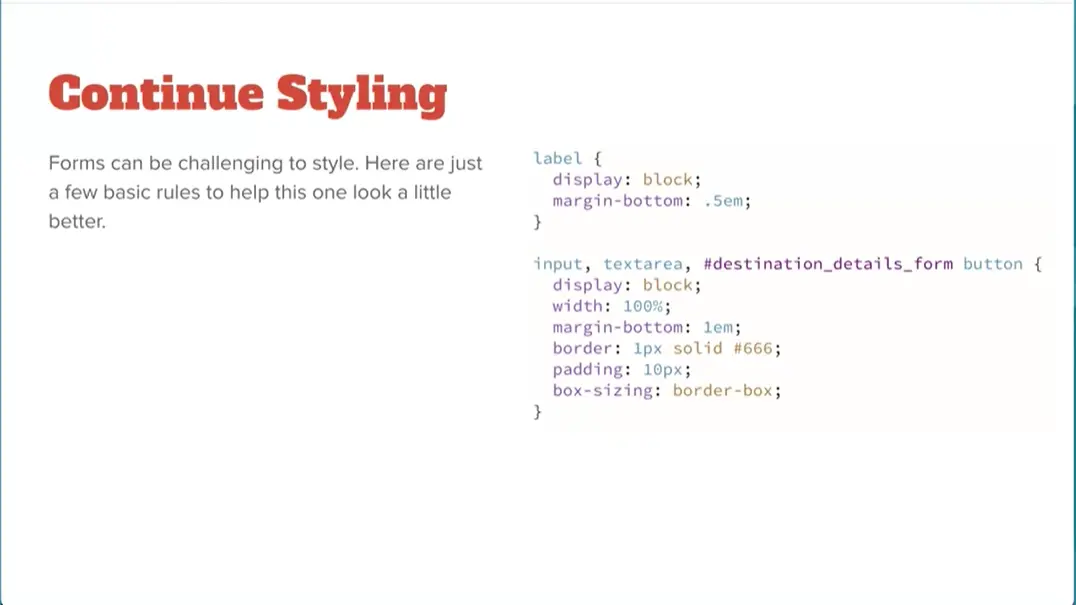
Now, we're just going to do a little bit with forms. With forms, you can spend a lot of time designing forms and styling them. We're just going to do a little bit right now. What you should notice to begin with is that by default, form elements are inline or phrasing elements and we'll go next to each other and we don't really like that. We wanted to stack. If you set them to display block and then work with them, they're a little bit easier to work with.
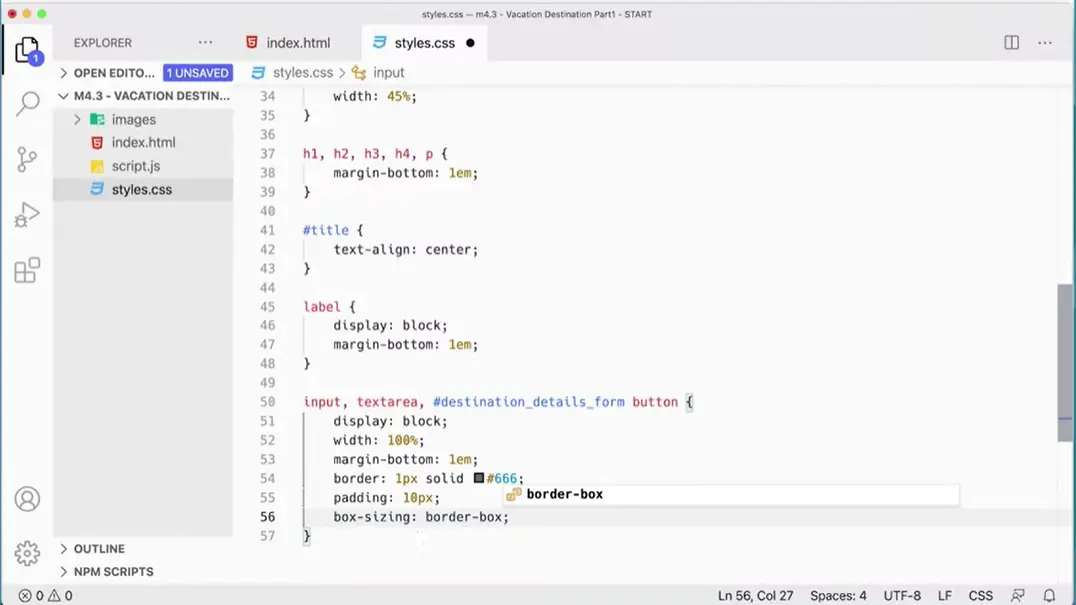
Let's add these rules in here. For the label, we're going to tell that to display block and put a little bit of margin on the bottom margin- bottom, 1em is fine. Then for the other thing we've got input, we've got the text area, and we've got this form. Put it a half over here. I called it, which is the destination details form button. This is just the button inside the form and I'm being specific because we might end up with another button later, #destinaton_details_form button.
That's this form, destination_details_form, and then this button down here and put an ID on it. Being specific there and what we want to set is just display block width 100 percent margin-bottom 1em and put a little border on it with a sort of medium gray and some padding and box-sizing border-box. Display block that will make each one ticket its own line. Width 100 percent margin-bottom 1em. Border 1px solid 666, padding 10px, box-sizing border-box. With box-sizing border-box, does is it makes the padding and border part of the width of the element? Remember, we set the width to 45 percent so we don't want to extend beyond that size there.
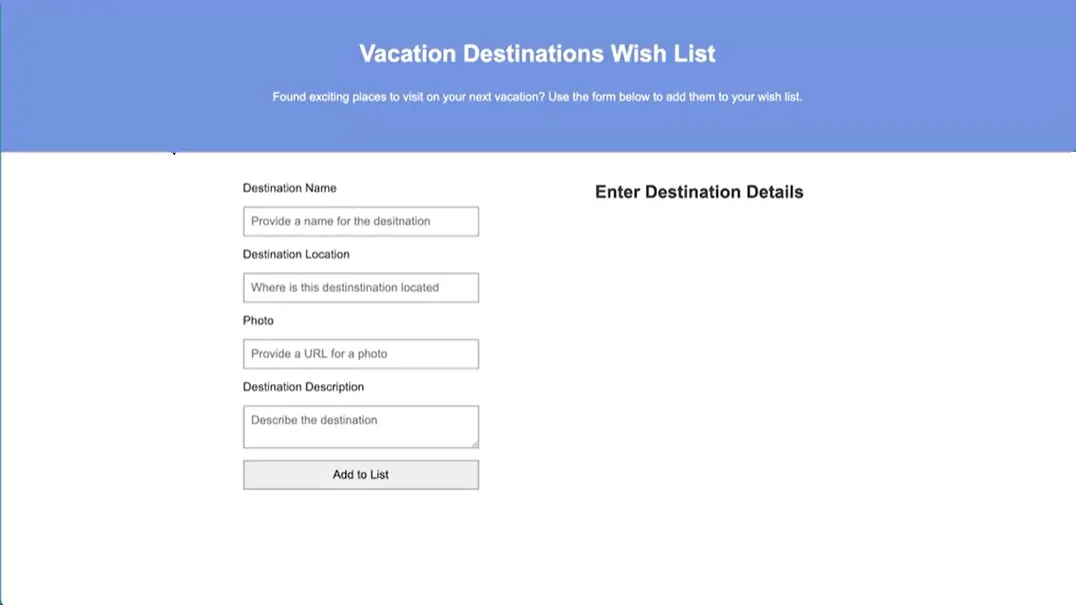
Let's take a look and see what that looks like over here. That's looking much better, much cleaner. We will finish up the styling in the next lesson.
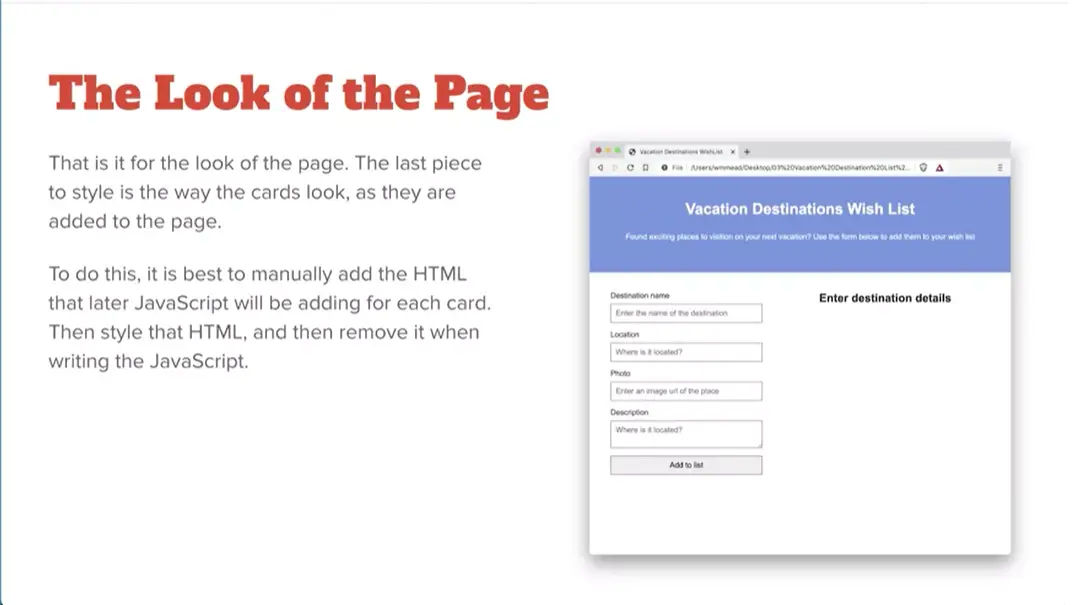
We're going to add cards dynamically using JavaScript, but we want to know what they're going to look like. The best way to do this is to add one manually, add a card that would get added by JavaScript with all the correct HTML, style that so we know that what it's supposed to look like, and then remove that card. That's what we'll do next.
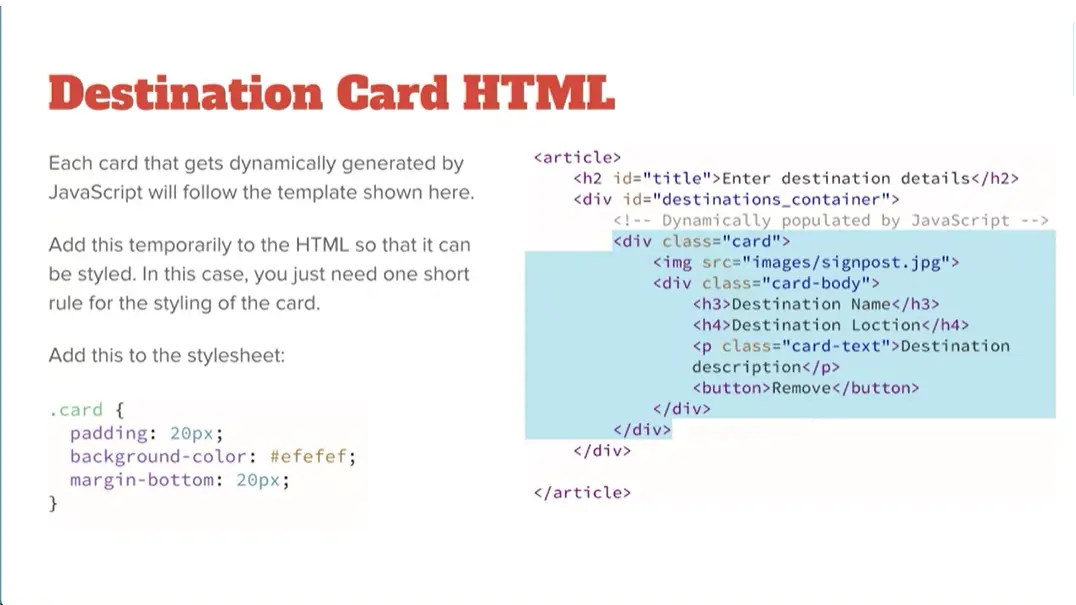
We're going to start by going back and adding just a little bit more HTML. We need a div with a class of card and an image with the signpost, and then in there we're going to have the card body with an h3 and h4 and a paragraph in button. We do have another button here.
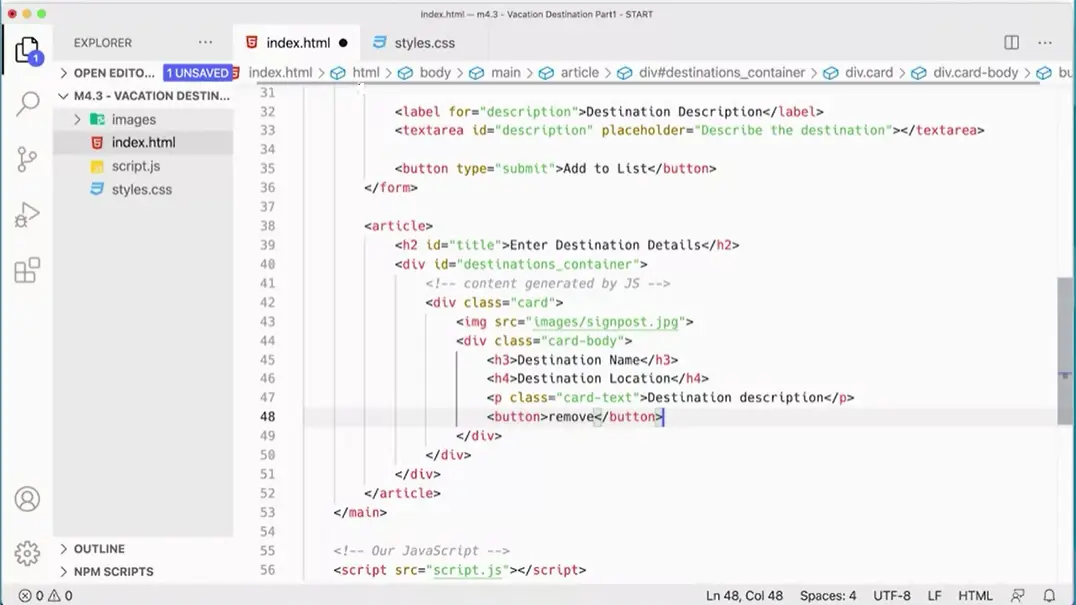
Let's add this into our HTML over here. It's going to go down here inside this generated content by JavaScript here we're going to do div class equals card-body. This has to be a class because we're going to have multiple cards. We'd have multiple cards on the page, so you can only use an id once. That has to be a class. Then let's add an image.
Images/signpost. I'm not going to put in all tag on it at the moment. We've got that image and then we've got the card body coming next. div class="card-body". Then inside the card body we're going to add h3 destination name. Then we'll do a h4 destination location. Then we're to add a Paragraph p with a class set to card-text, destination description. Then we're going to add a button that will allow you to remove the card if you need to. We'll have a feature that will allow you to take a card off, so we'll add that button in there. I believe that's what we need for the HTML.
Let's take a look over here. Yeah, there we go. So we've got all of the HTML for that card in. It won't look particularly good.
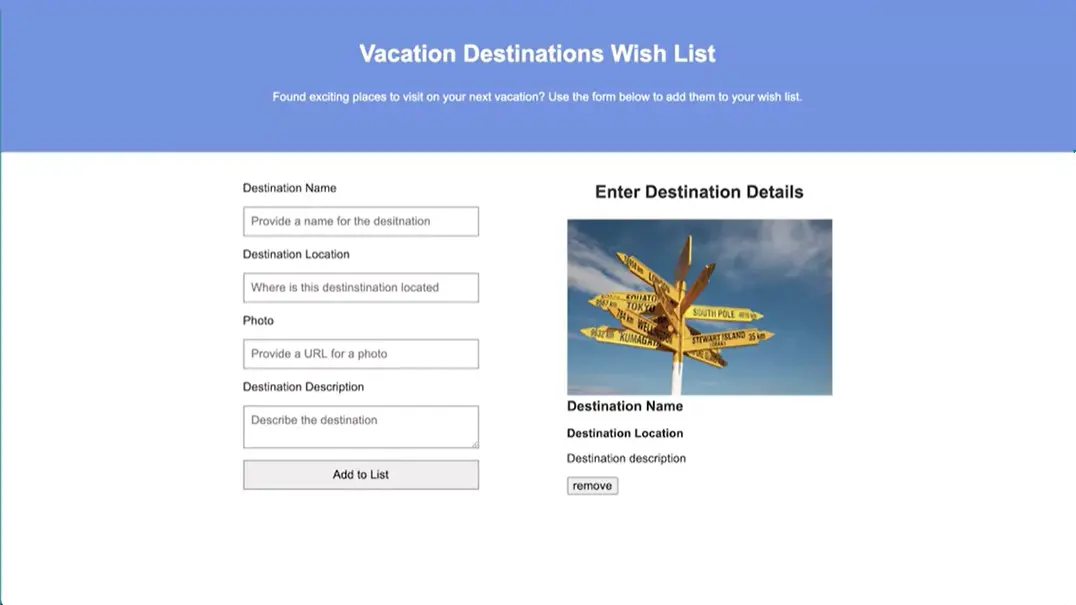
Let's see what it looks like. Doesn't look terrible, but it looks okay, but we might want to do a little bit more with it. Actually, it's fine for now. We'll leave it the way it is. We've got our basic card in there. Although I do have a background color in there, don't I? Let's have that. Instead.
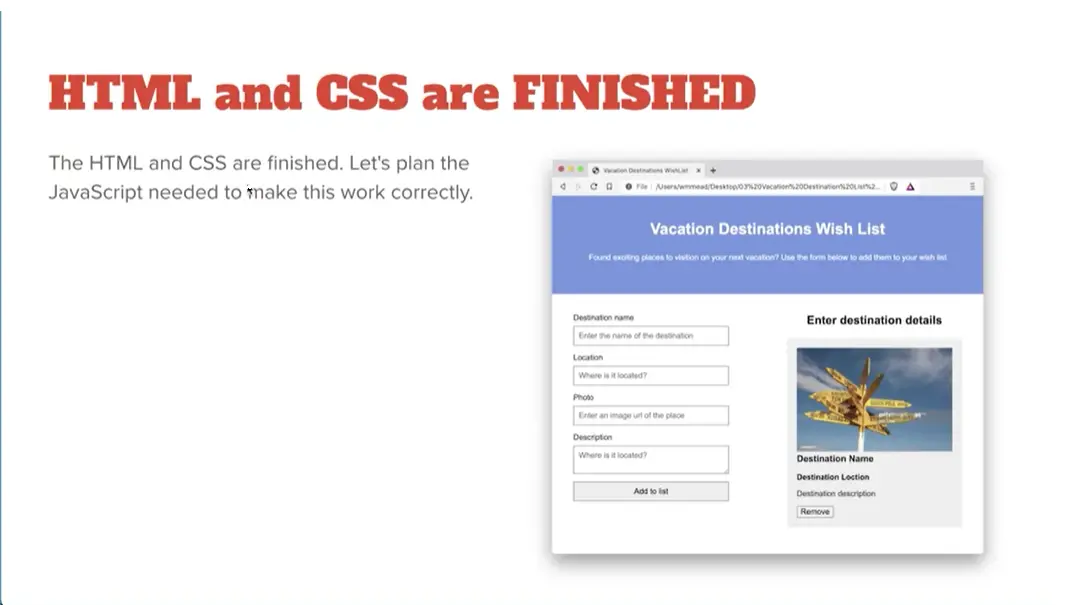
One last rule down here. For the card. I'm going to just give it a little bit of padding, set a background color, and set some margin on the bottom and that should look good.
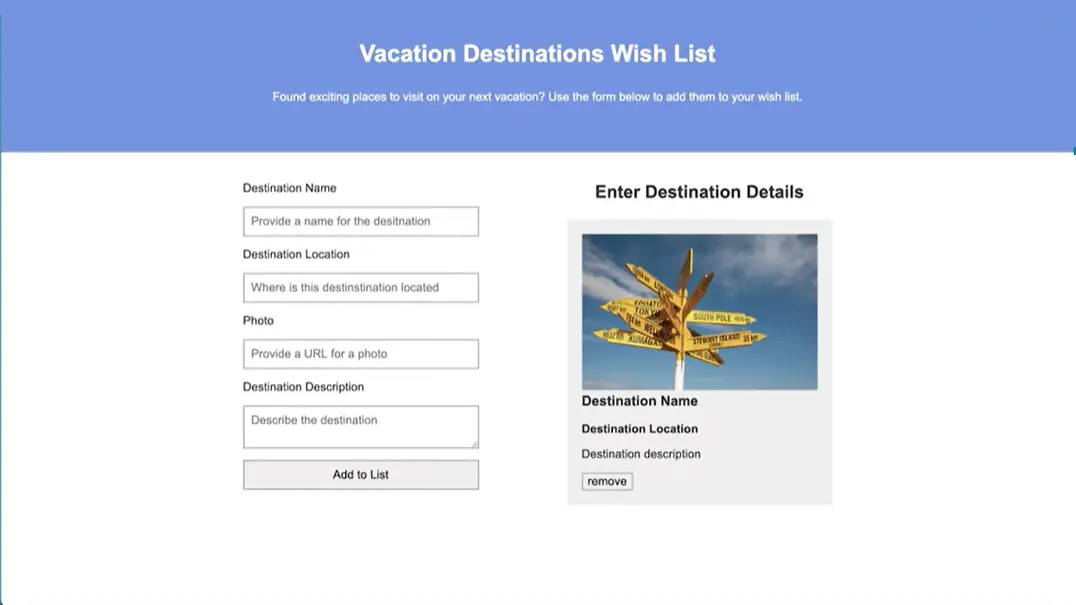
Let's take a look and see how that goes. There we go. Now we've got a card that's looking good. Ultimately, these are going to be put in through JavaScript.
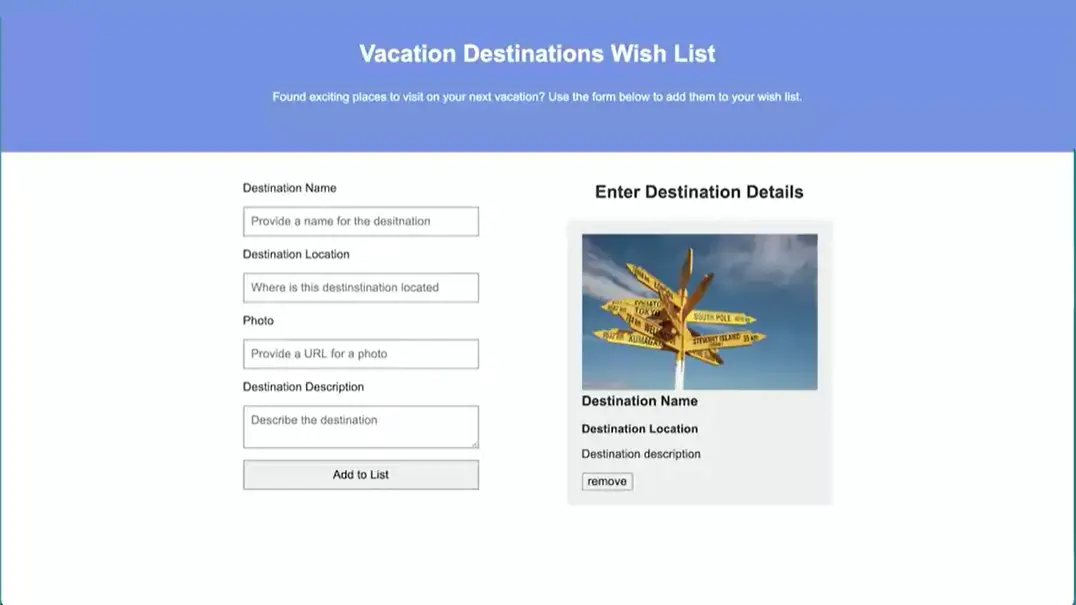
The HTML and CSS is in place now. And now that we've got that in place, we can start thinking about how this little application is going to work.
Essentially, user's going to type in a name and a location, and provide a URL for a photo and a little bit of a description here. And then that will get added, that card will get added to the list over here.
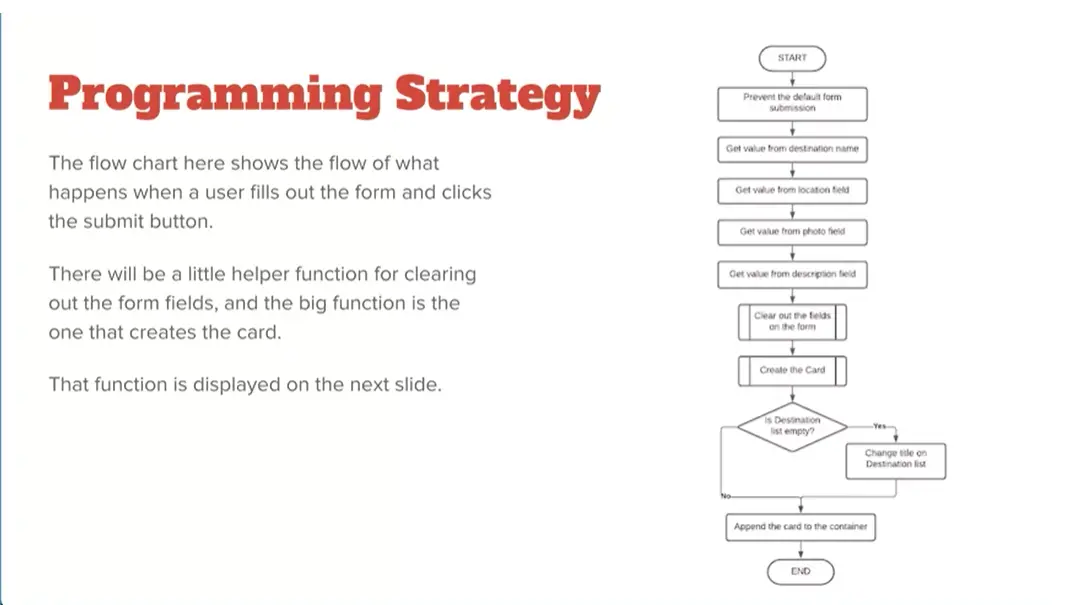
Let's take a look at a little bit of a flow chart to sort of see how this is going to work and how we're going to kind of make that all work out here. Over here on the right side of this page, you see we have a little program here that when it starts, we're going to, when somebody fills out that form, we're going to prevent the default form submission. We're going to get the value from that destination name, the location field, the photo field, the description field. And then we're going to clear out the fields in the form, create a card, create that HTML, and check to see, is the destination list empty? If it is, then we're going to change the title on the destination list up at the top. If it isn't, then we'll just upend the card to the container. In either case, we'll upend the card to the container, and we'll be able to move on from there, okay? So that's going to be the basic strategy for how we add stuff to the page.
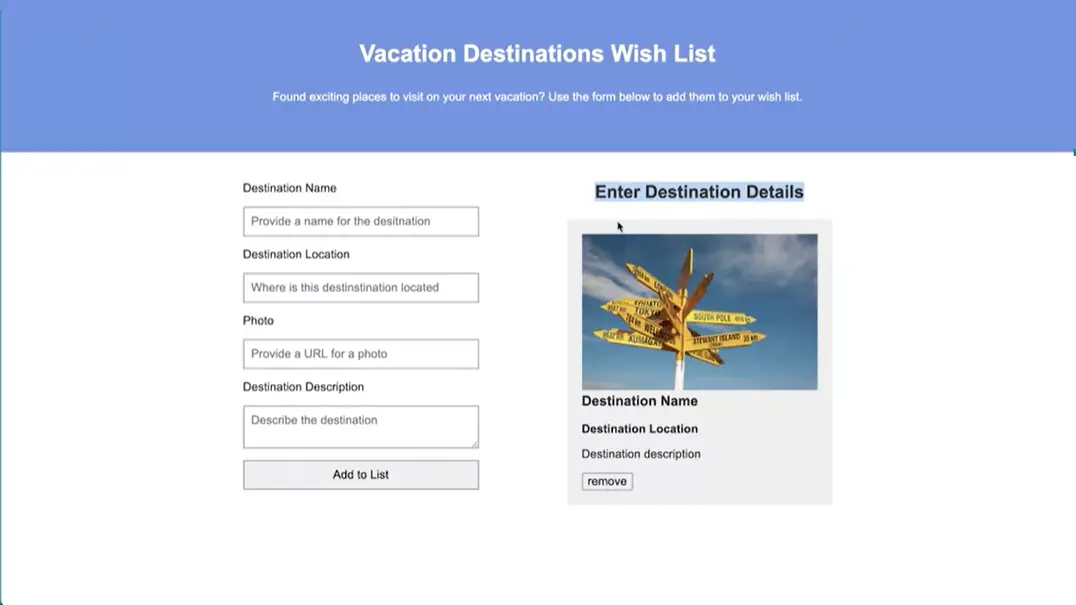
So the first time we add something to the page, this title is going to get changed, but otherwise it's not. That's the only thing that's going on there. These are going to be your little helper functions, clear out the fields, and then we're going to have a helper function that's going to create the actual card. Those are the next functions we need to look at here.
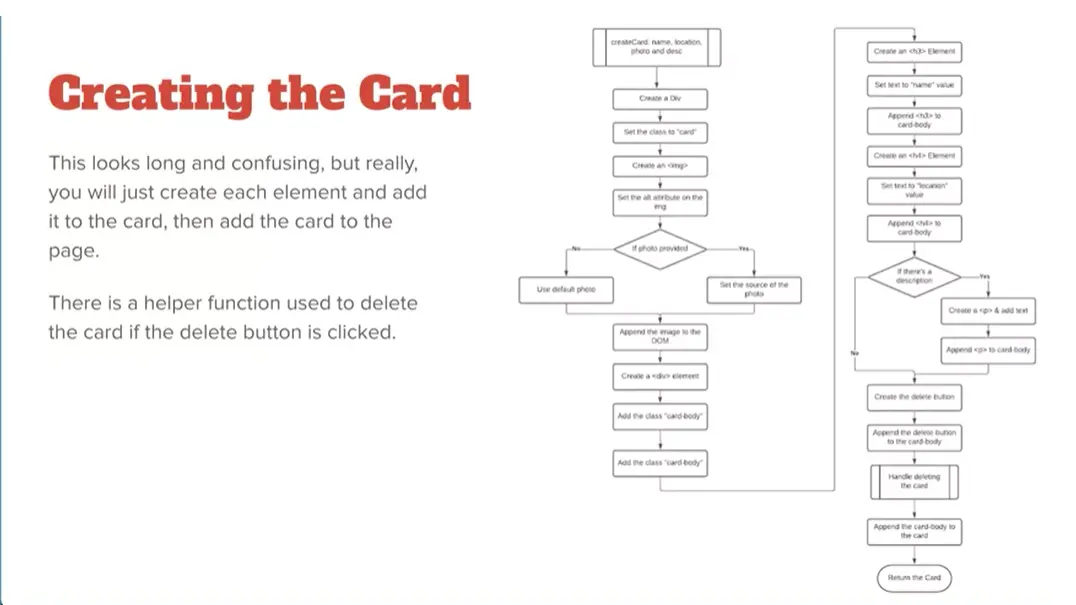
The creating the card looks like a really long function, but it's very sequential. And basically we're going to create a div and set the class to card, create an image tag, set the alt attribute on the image tag. And then if the photo's provided, we're going to set that source to whatever the URL is. If it isn't, well, we'll use the default photo and then assign that to the image element on the DOM that we just created. And then we'll create a div element. So basically, we're creating the elements manually or having JavaScript create them, to create these elements here.
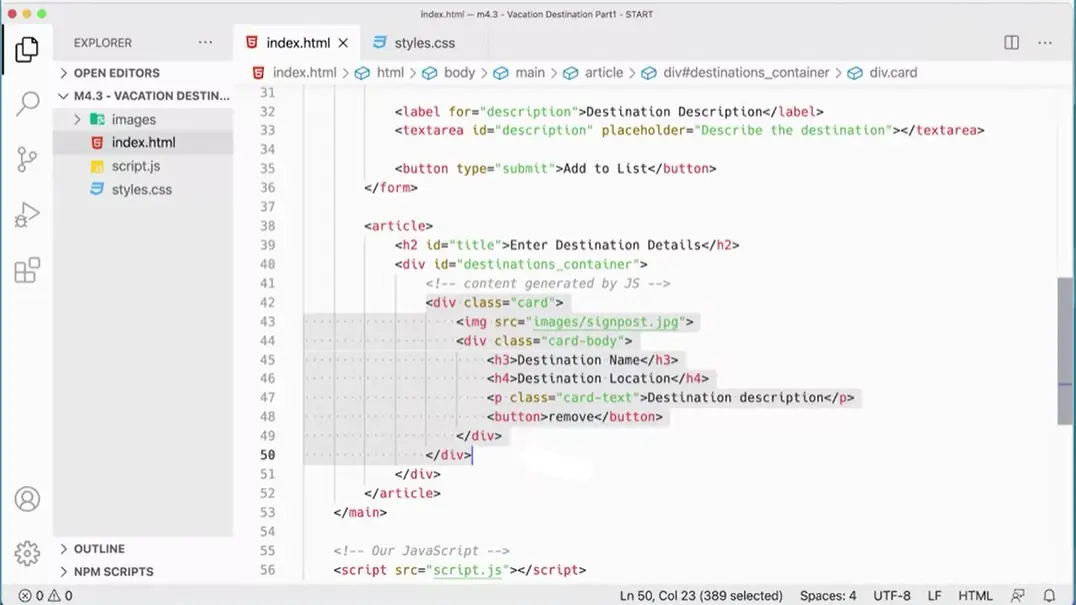
We're creating all of this HTML here.
For each card, we're going to create that information, and then we're going to stick it on the card, and that's what's going on here. And you'll notice down here we've got another helper function here for deleting the card. So if somebody clicks that remove button, then we need to be able to handle that as well. So let's take a look at that really quickly.
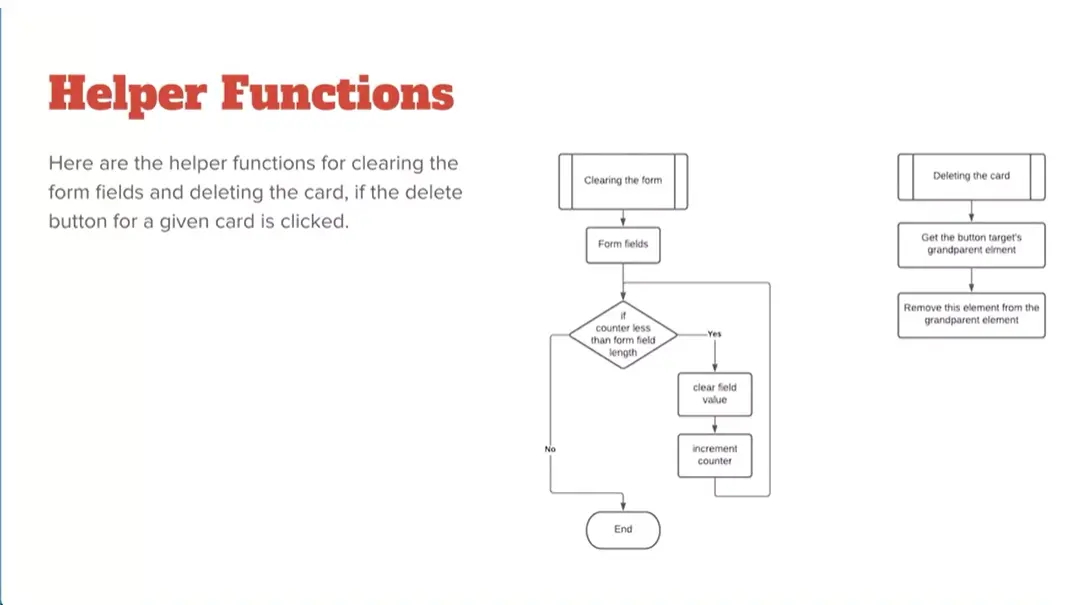
We've got a function here for going through the form fields and emptying out the form fields. And then we've got a little function here for deleting the card if we want to delete the card. We've got a number of pieces here to write in our JavaScript to create this little application for this destination list. And that's it for part one. We've created the interface that we're going to be using. And you may be wondering why we spent all this time in HTML and CSS. But it's really important to understand how the HTML and the CSS interact with the JavaScript, because all three come together to make the full interface and to make all the functionality work. I think it's worth taking the time to build the HTML and the CSS for this project. This way you understand what's going on and how JavaScript is going to manipulate that HTML and CSS in the end to make the final product.
Vacation Destination List, part two.
This part (2) we will add the JavaScript and I'm picking up exactly where I left off after part one.
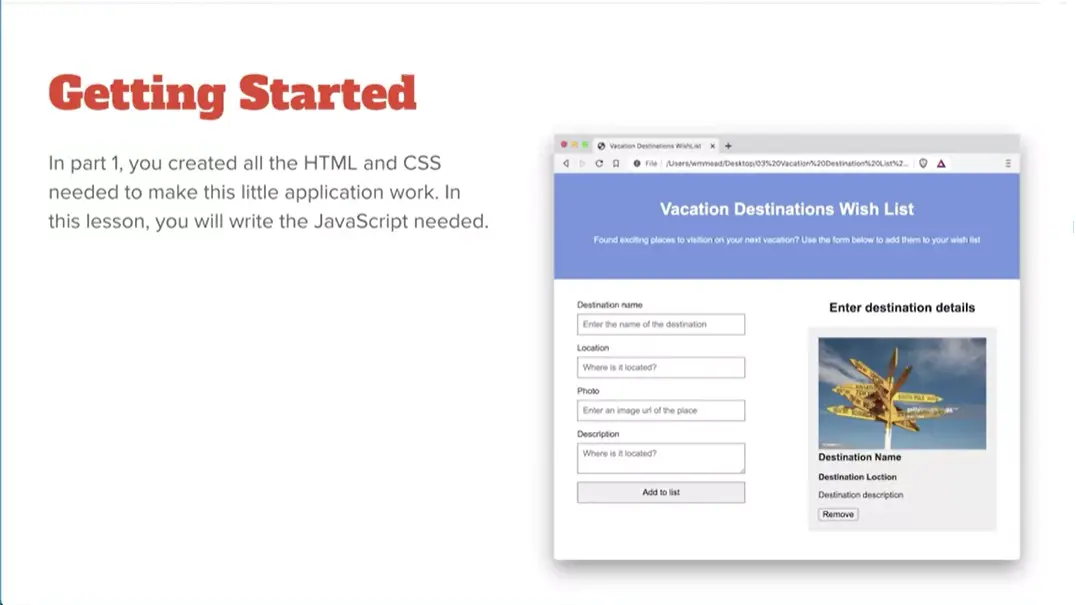
In part one, you created the HTML and the CSS, and you should have a page that looks like this. If you don't, please go back and make sure you go through everything to make sure that you get a page that looks like this before you start and you've got all the elements in there correctly, everything spelled right.
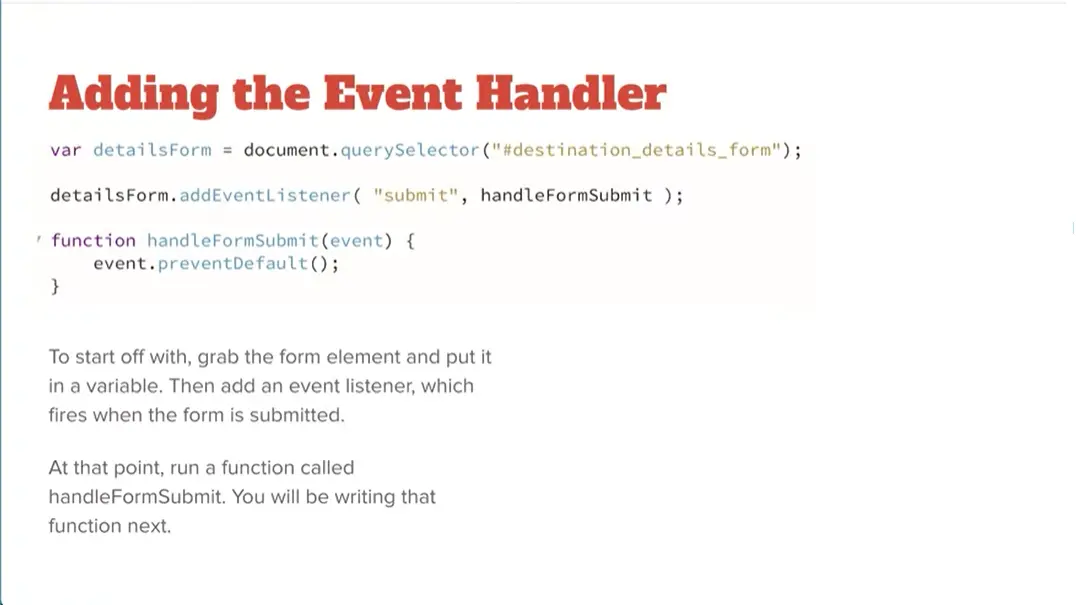
Okay, now we'll write the JavaScript we need to make this little application work. To start with, let's grab the actual destination details form and put that into a variable called detailsForm and then we'll have a event listener for when that form is submitted and instead of running an anonymous function we're actually going to run a name function called handleFormSubmit and then we'll start writing the beginning of that function.
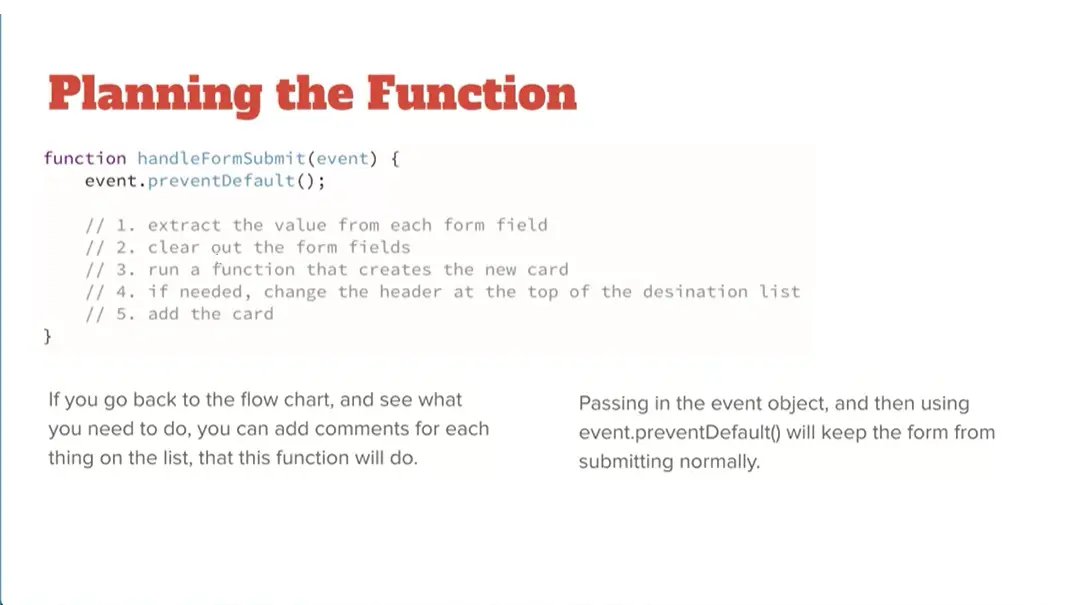
Let's get started with this right off the bat. Over here, I'm going to open up my script file and add a variable var detailsForm = document.querySelector ('#destination_details_form'); Get this form here, destination. Note that I'm using a pound sign here because I'm using querySelector. You could also use getElementByID but that'll get that form and put it in here. Now we can do detailsForm.addEventListener("submit", handleFormSubmit) and we're going to look for submit event.
And then instead of just doing function like we've done in the past, I'm actually going to have a named function here called, handleFormSubmit. That's going to be a function that runs when this form is submitted. Now, I need to define that function handleFormSubmit. And this function we're going pass in the event object and do event.preventDefault, there we go. That'll prevent the default submission of the form. You might wonder why at this point I've opted to create a named function here as opposed to just the inline function.
And it could be an inline function, there's no reason why it couldn't but this function is actually going to do quite a number of things. You could use an anonymous function here and not have a named handleFormSubmit function for this particular project. That's what I like because what we're going to do here is going to extract out the value from each form field. We're going to clear out all the form fields. When you've filled in the form and submitted it, you need to clear out these form fields so that you're ready to make another card and then we're going to run a function that creates the new card.
And then if needed, meaning there's not already a card over on the right-hand side of the interface we need to change the header at the top of that destination list and then actually add the card. And you can go back to the flowchart from the previous version of this from part one and actually see how that's going to all come together in the flowchart there. Yeah, we start with event.preventDefault to keep the normal submission of the form from happening but then we're going to do all of these things.
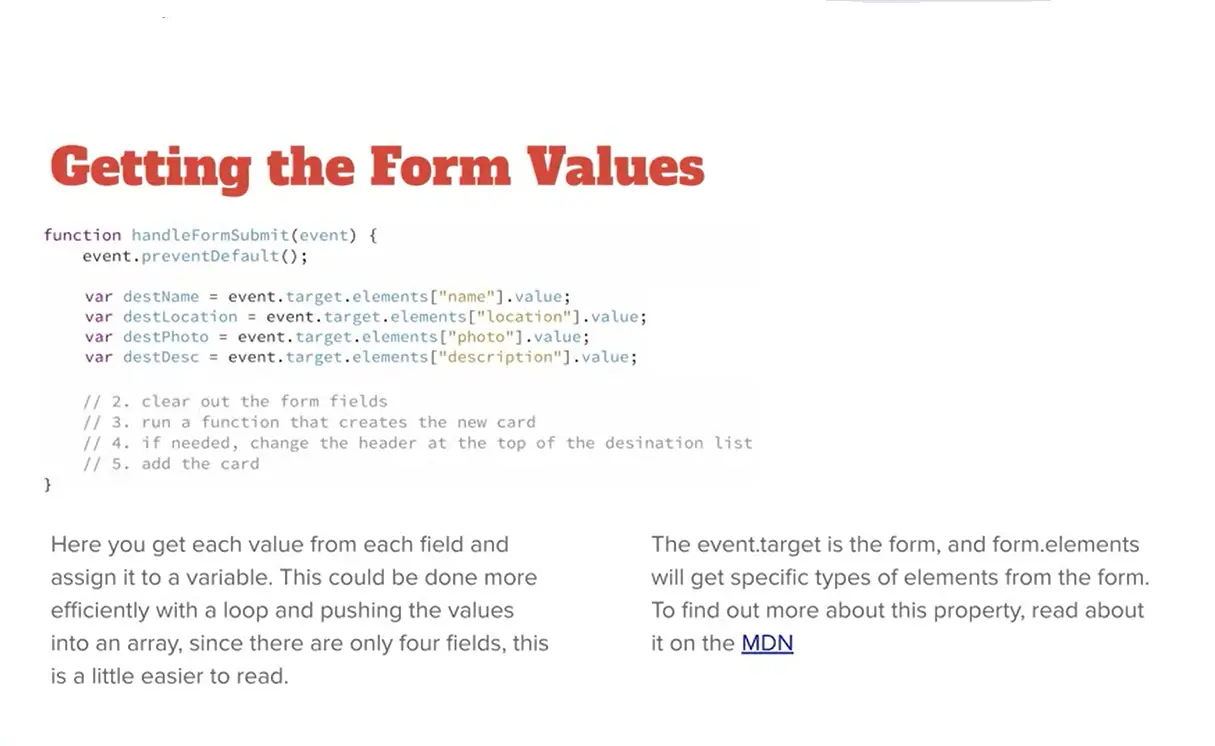
The first thing on our list of tasks to do, is to get the values out of the fields from the form. And, to do that, we can create a variable for each of the four form fields. The name, the location, the photo and the description. And then go and get the value out of those from the actual form.
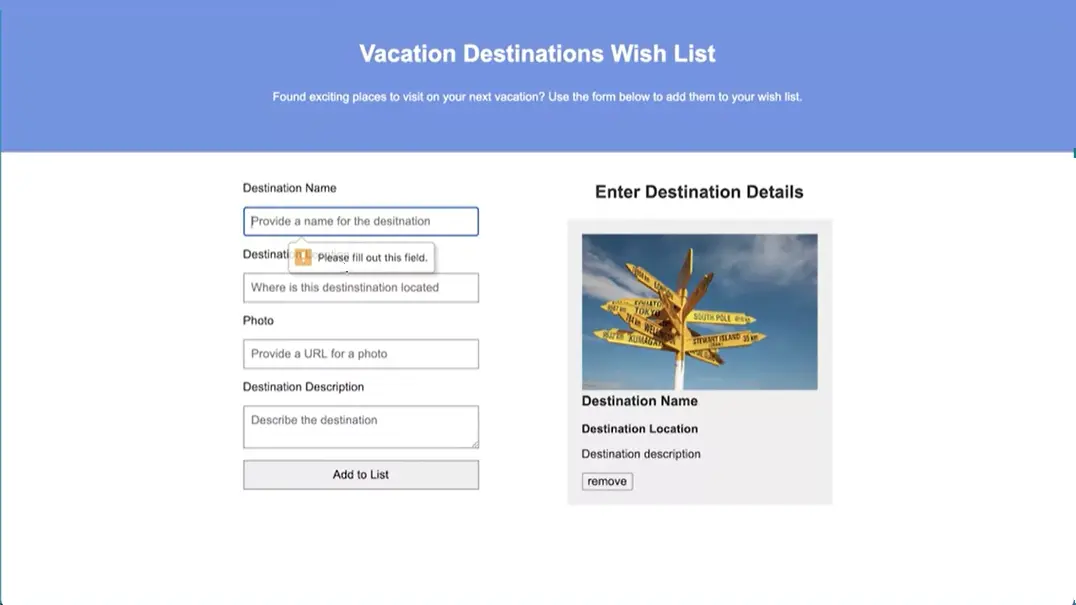
And you'll remember over here when we created this form, in the HTML, we made it such that these fields were required. So if you try to click add list without filling in anything, it's not going to do anything because of that required thing. At least if you're using chrome or modern browser. And we can get more into form validation and making sure you get good data into forms in the second course in the specialization.
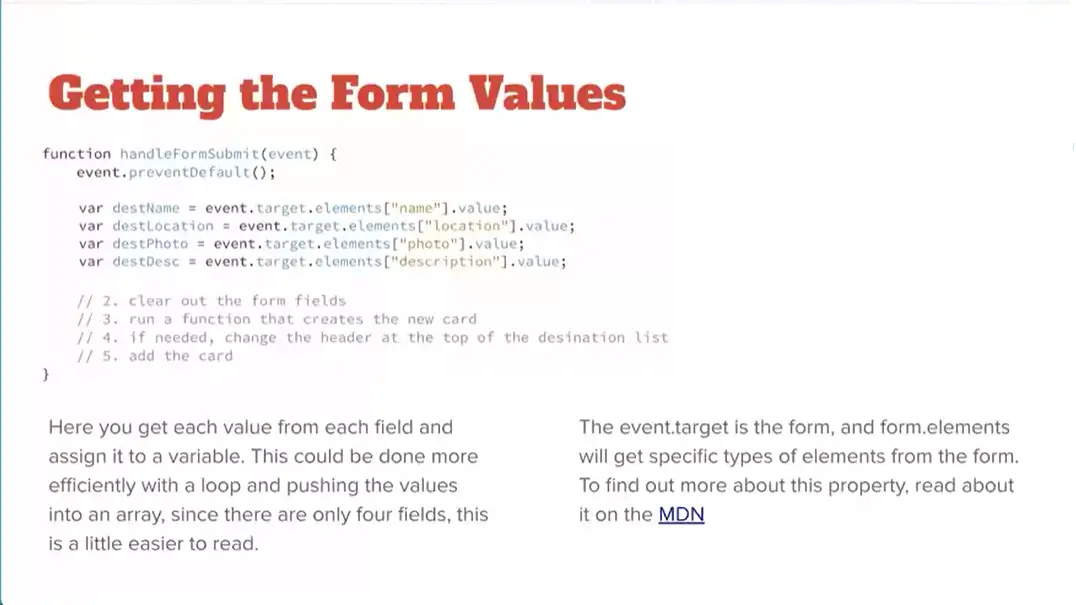
But, for right now, we just want to do something quick and simple, and we've got enough there to sort of keep it from it least being empty, even though we're not doing very much for that. And what we're going to use here is we're going to use event. The event target will be the form submission, right. Because that's the event target for the form itself. And then we can get the elements property, and pull out each one of these elements out of the form and its value and put them into a variable here.
The dot elements refers specifically to form elements, and you could come over to the MDN and look at HTML form elements dot elements, and find out more about what this is. But it will get you a specific set of elements specifically from forms. And so, it's kind of a helpful little, property here, that we can use to get specific elements out of out of a form and get that data.
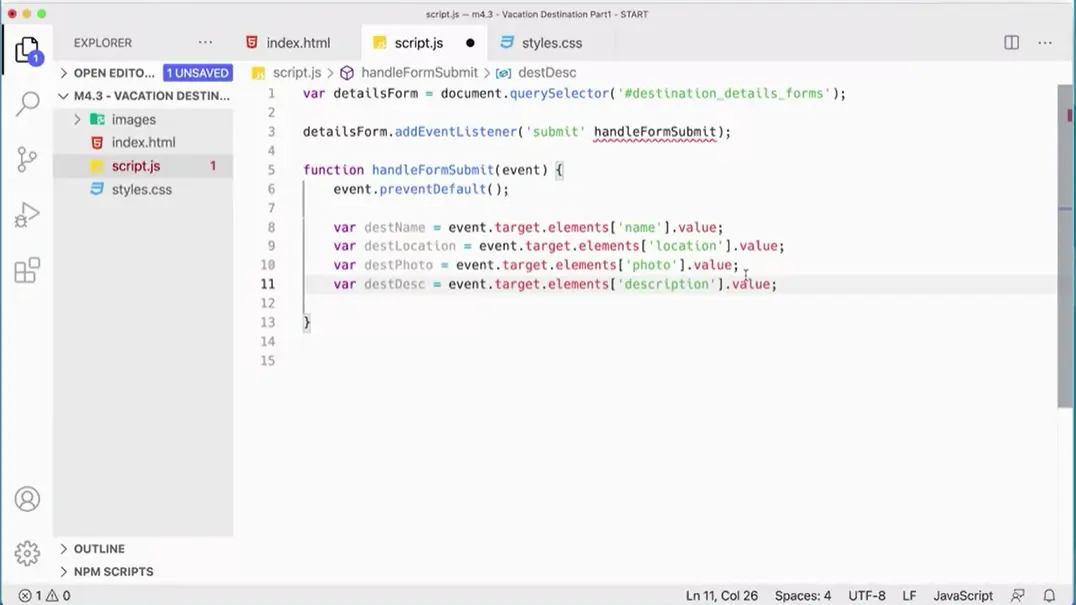
Let's put that onto our script. Over here, I'm going to do for destName equals events.target.elements['name'].value; That's going to get the name. That'll get me the first one. And the rest; destLocation, destPhoto, and destDesc.
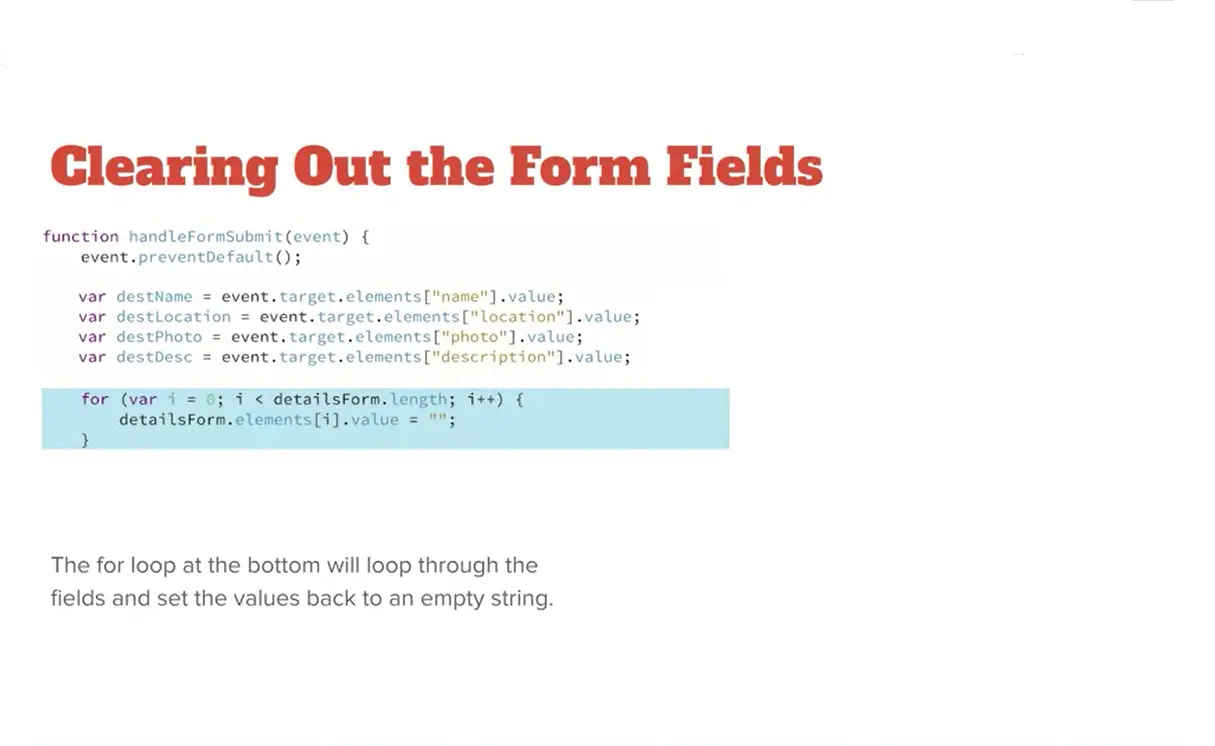
The next thing we need to do once we've captured the values from the form is to remove them until the form is ready for a new thing.
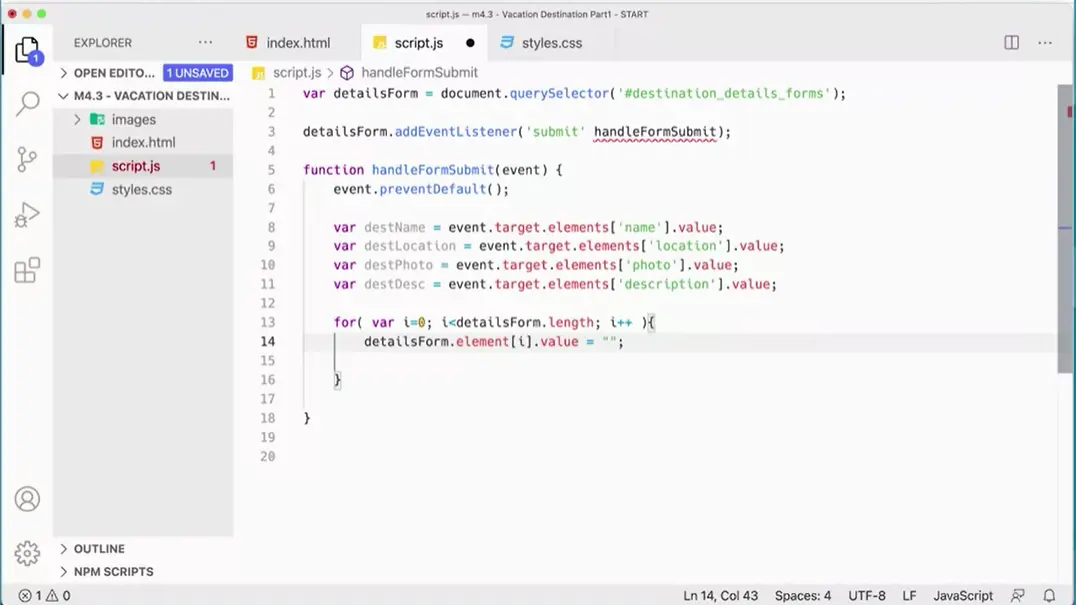
I'm just going to use a for loop here to loop through the elements of the form, and set the value back to empty. For, here's my for loop. For, and I'm going to have just a counter variable, var i equals zero, while i is less than detailsForm.length; i++, there we go. That loop is going to go through detailsForm.
Remember, detailsForm is going to get everything inside of detailsForm there. Then what I can do in here is I can very easily say, detailsForm.elements[i].value = ""; We're going to go through the detailsForm. I starts at zero, and the first time through the form, it's going to say, "Get Element 0 from that form and set its value to empty." Then we're going to increment i from zero to one, and if there's more than one element in the form, then we're going to go through and do that again for Element 1, setting its value to zero. We're going to do that for each element in the form until the form is completely cleared out. It's just a very simple for loop that's going to loop through and clear out each of the elements in that form. We've taken care of the first two items on our list.
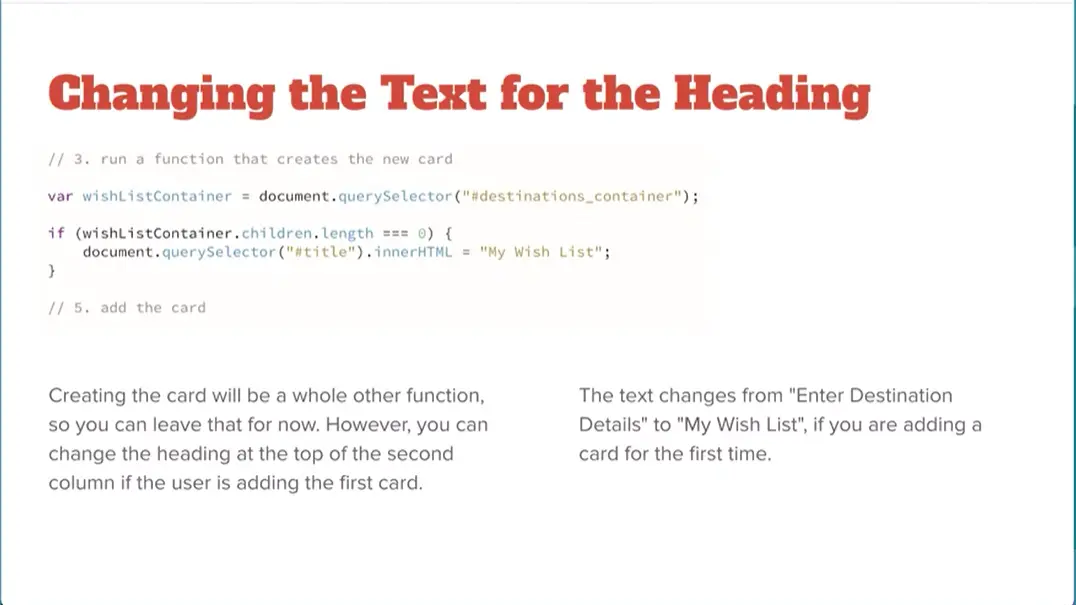
We gathered the information from the form and cleared the format. The third thing to do is to run a function that creates a new card. We're going to hold off on that because we need to write that function.
But we can take care of the fourth thing, which is to check to see if we already have a card in the other side, and if we do one thing and if we don't, we won't, we'll do a different thing. We can take care of that in terms of the header over there, and in showing, in determining what this header says here. Either it's going to say enter destination details, where we're going to change it so that it has something like "My Wish List" in there, because that makes a little bit more sense once there's something in that column over there.
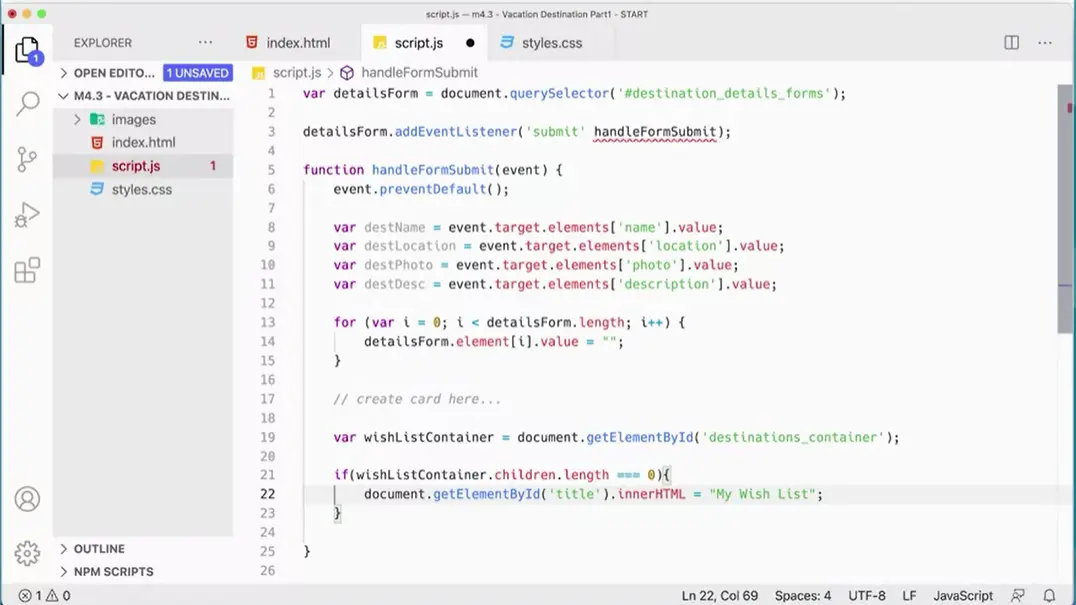
We're going to make a variable. We'll just put in create card here, so we remember we need to come back and do that. But I'm going to have var wishListContainer equals document.getElementById, and you'll remember we had an Id called title specifically so that we could do this. Over here in the HTML you'll remember we have 10-year title on that Id, so getElementById title. Then we just need a little if statement here. I realized I did the wrong thing here. I don't want the title here. I want to get this Id down here, this destination container.
That's the thing I want to check for. Destination container, because I want to see if we'll do the title in a minute. If wishListContainer.children.length is exactly the same as zero, so if there's nothing in this container. Over here we've added a card in here temporarily, we're going to get rid of that. But if this container is empty, then we're going to do something. If it's empty, then we're going to say, document.getElementById. Now we want the title. Its innerHTML is going to be, what did I put in there? ''My Wish List''. There we go. That will take care of the fourth thing, which is, if we haven't added a card in there before, it'll change the title over on the right-hand side there.
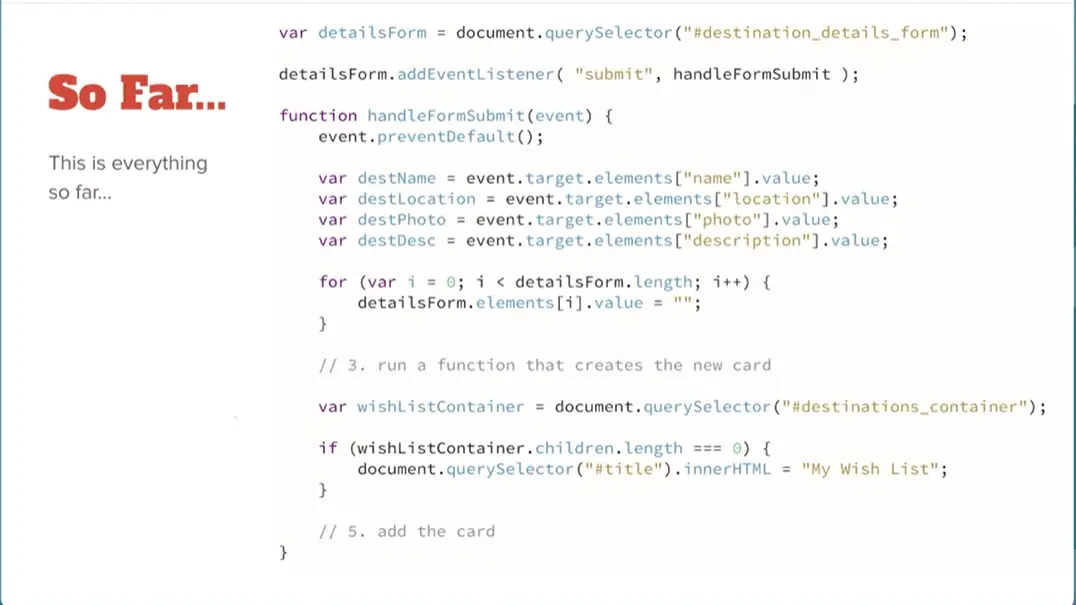
So far, it gets the data from the form fields, and then clears them out.
We have a placeholder for a place where the function that creates new card is going to go and we're going to write that next. Then we check and see if the header on the right-hand side of the page, if there's already a card in there or not. If there isn't, we're going to change the text inside that header over there. Then finally the last thing that we'll do is actually add the card. Let's move on here.
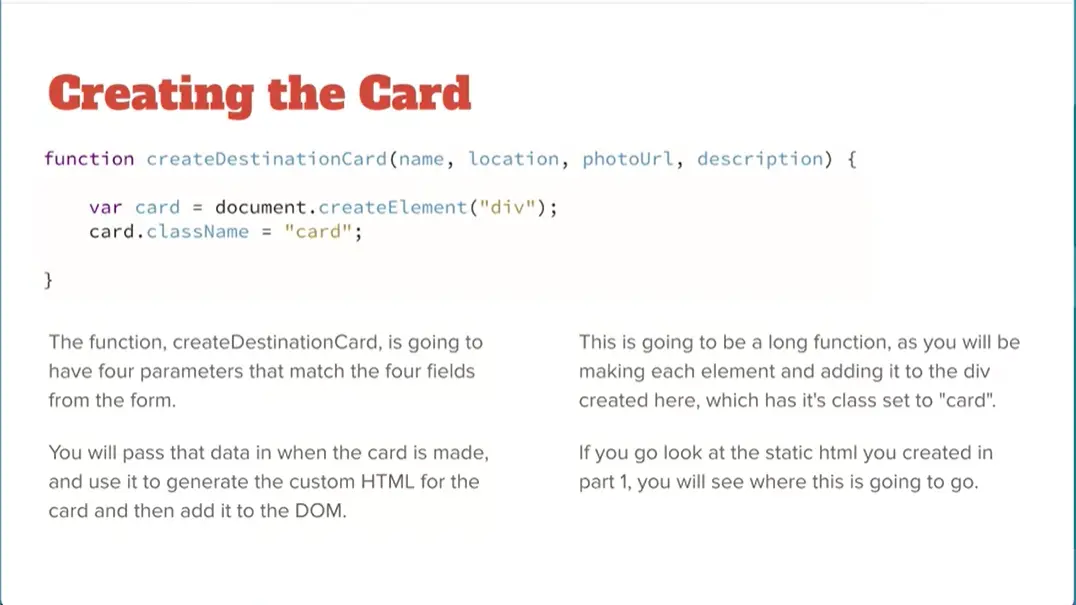
We're going to create a new function called createDestinationCard. It's going to take four parameters, and these parameters are the data that come in from the form that somebody filled out.
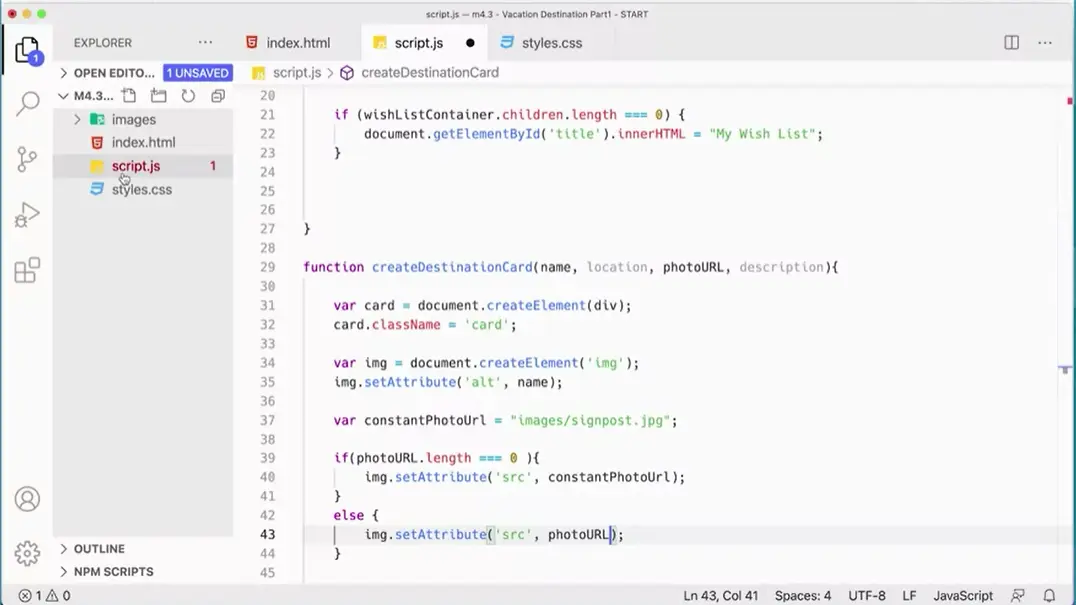
Let's go ahead and do that first. Down here I'm going to create a new function. function createDestinationCard, and it's going to take name, location, photo, I think I just did desc for description. It's going to take those as parameters, although they don't get quotes on them. Name, location, photo, and description. That's right. We're going to pass those variables in. Actually, I'm going to change this a little bit. I'm going to actually make this photoURL, and I'm going to type out description over here. Then I need to make var card, and this is going to be assigned document.createElement. We're going to create a div, and then we're going take that card, and we're going to set the className equal to card.
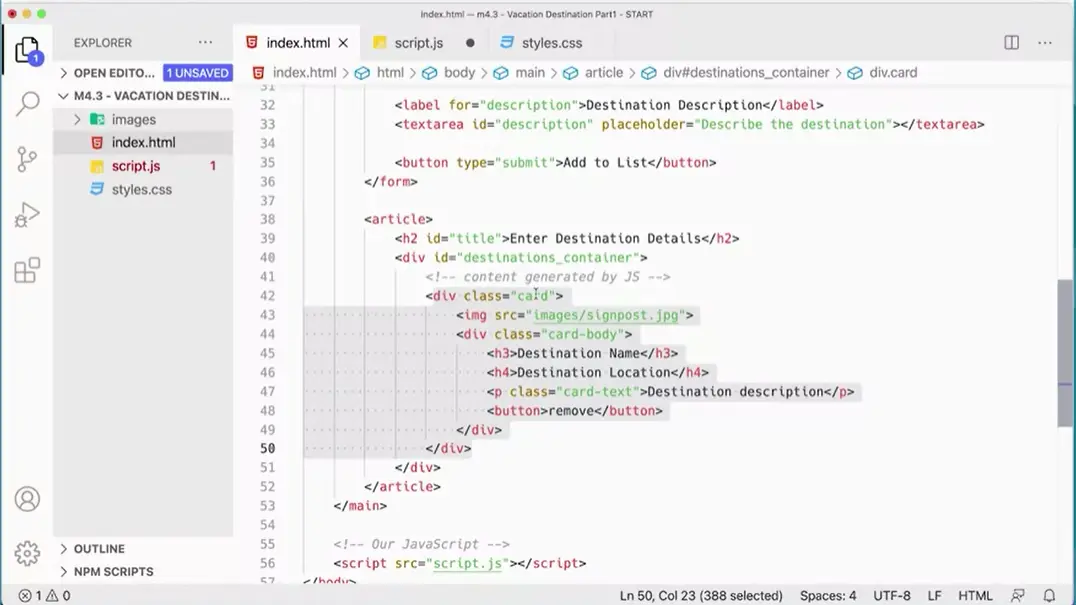
If you wonder where we're going here, you can go over to the index file here because we're basically going to use JavaScript to create these elements and put them in the card. Now, we've just created this div here and given it the class of card. This is going to be a long function because you have to create each one of these elements individually and put the content in them and then add them to the card. Next, we're going to add the image.
First thing we need to do is make a var called image, I'm just going to call it img. Then from there I'm going to do equals document.createElement, and we're going to create an img in our element. Then images really should have an alt attribute, so I'm going to say img.setAttribute alt. I'm just going to set it to name. Whatever gets passed in as the name of this location is going to get set as the attribute for the alt tag. If somebody's using a screen reader, they will still be able to know what it's a picture of even if they can't see the picture if they've got a visual disability of some sort or another. Great. We're setting that attribute. We need to set the source based on what comes in through this photoURL here. We want to be able to set that photo source, but the photo source is not required.
The first thing we need to do is determine whether or not a photo has been brought in. Before that, we want to just make a variable var, and I think I called this constantphotoUrl. I'm going to make that equal to images/signpost.jpg, because that's the image that's in this folder over in here. Then I just need to see if photoURL, that variable there that gets passed in, did somebody actually add a URL in there? We know that it has to be URL in there because over here in our form, we set this to type URL, so it'll only take a URL. Otherwise you'll get Chrome barking at you and telling you that you didn't put in a URL. We put URL in there and if we want to actually got put in because it's optional. If photoURL.length is greater than zero, I think that's what I'm doing. No, actually I want to check and see if it's exactly the same as zero. If it's exactly the same as zero, then what I want to do is I want to set the img.src equal to this constant photo here. I want to set it to that. I want to set the image source to that. That should work. On my slide I use setAttribute again, so maybe I'll do that just to make sure. But really this should actually work just fine. But let me just put this in just so it matches what I'm doing on my slide there. SetAttribute src is going to be this constant photo here, constant PhotoUrl. If that length isn't exactly zero, the else will be okay, we're going to do image setAttribute to not constant.
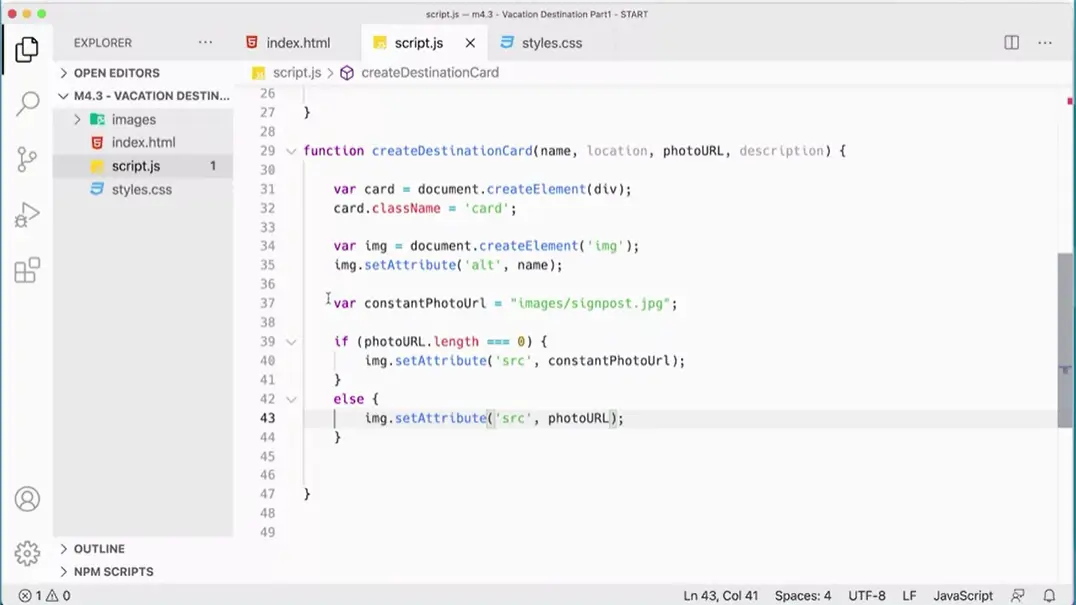
For this source table, we're going to say its a photoURL. If somebody put in a URL for a photo, it will get set to that. Otherwise, we'll use the default one that's in there.
This function is getting long, and it's going to get longer because we're creating all of these elements here.
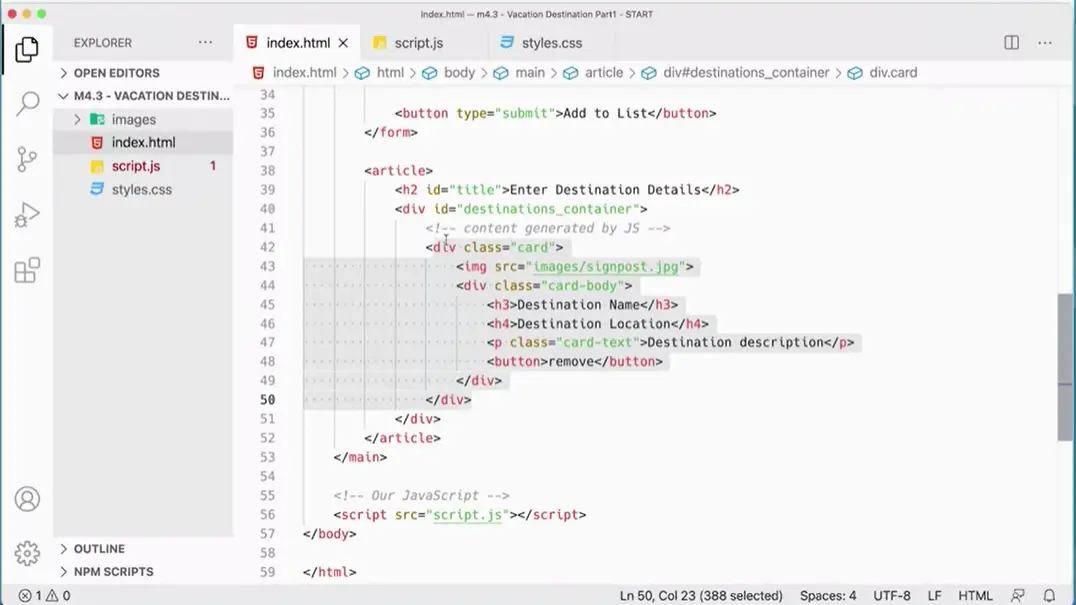
If you look over here on the index file, what we've created so far of our card is we've created this div, and we've created the image. Next we need to create this div for the card body and then add into that the h3, the h4, and then the description text. The description text is actually optional.
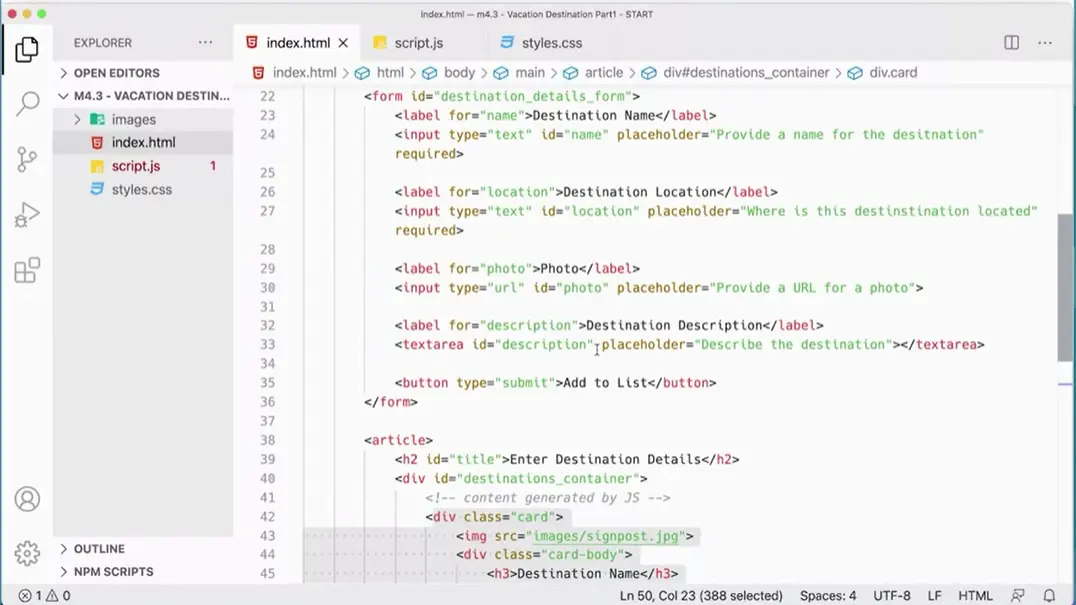
If you come up here, you'll notice there's no required on the text area there. We're going to have to deal with what happens if that's empty as well, and then we'll have to add the remove button as well but let's go ahead and continue forward with this.
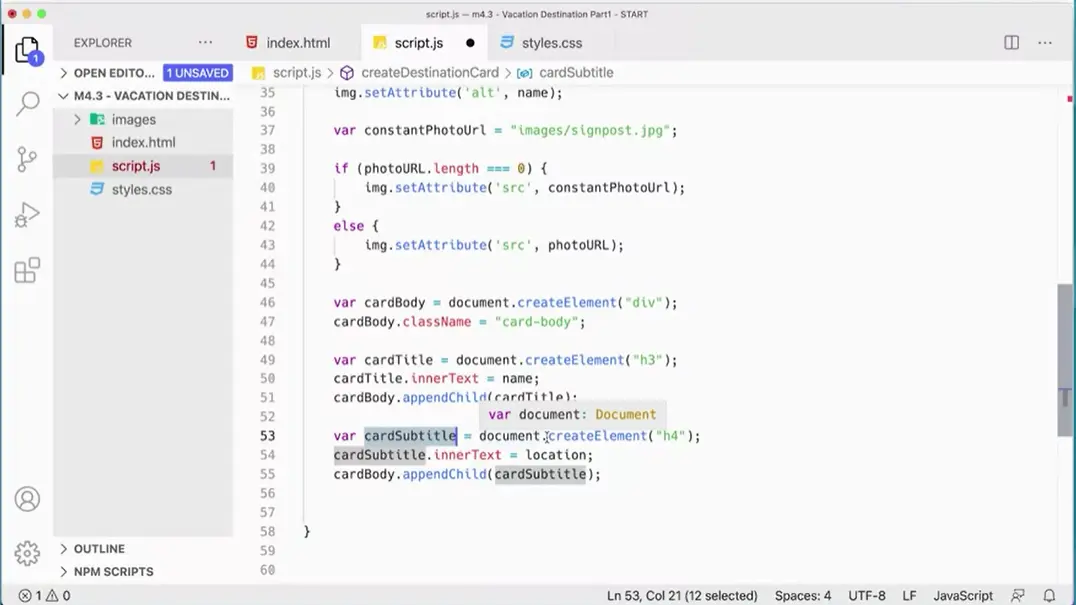
Over here the next thing we need to add after the image is a variable for the card body. We're going to make a variable card body and create element div and then set the class name to card body for that, and that will create that card body element here and then next we need to do the same with the h3 and the h4. Here's the h3 and I'm just going to paste it in. You'll have to type it, but I made var card title, document create element h3. I've created an h3, and then I'm setting the inner text to the name. Again, this is the name that came through from the form. That's what's going to get put in there, so that's going to be the name. I'm going to append child card title. I'm putting the actual card title into the card body here, and then we'll do the same thing with the subtitle.
Now I can add in the subtitle, and again I'm going to paste this in, so you don't have to watch me type it because it's getting painful for everybody. But I'm going to make a variable card subtitle and create element h4, and then I'm going to set the inner text to the location. That's this location that's getting passed in here. That's the location that somebody typed in on the form and so that's going to get set for the inner text there. I'm taking card body, and I'm appending the child card subtitle. That's going to add this to the card. I'm appending that in there. I've got a card body, and I've appended in the h3 and the h4.
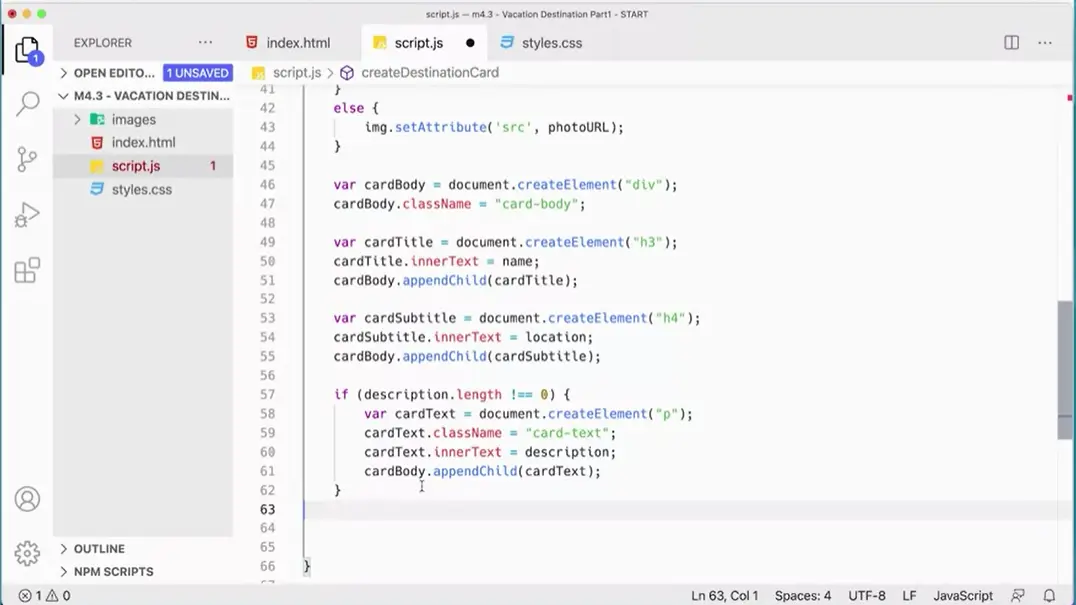
Next step is to check and see if somebody typed something into the description because it could be empty potentially, and we'll put that in next. Again, I'm going to paste this in so that I know that it's right. But here we go. If description dot length is not zero meaning it's longer than nothing then we're going to make a variable card text and create a paragraph, and then we're going to take the class name and set it to card texts because again over here, remember we did that. We have p class card text. I'm setting that class name in there to card text.
We could start with specifically if we wanted to and then setting the inner HTML to description and then appending that card text to the card body again. We get that appended in.
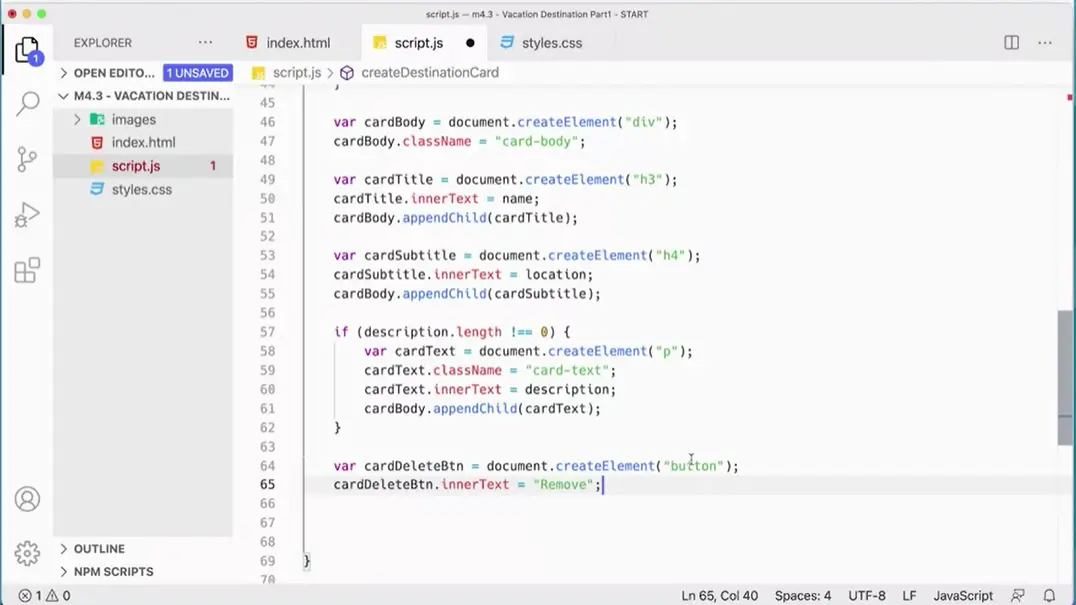
The next thing we need to add is the remove button. I'll put that in here. Here I've got a variable called card delete button, and I'm creating a button, and I'm setting the inner text to remove and that will create that button and set the for it to remove. But then I need to add an event listener. I'm going to add an event listener, so that button is going to create an event listener, and I'm going to add an event listener called removed destination. We'll write another little function that will actually remove this destination. But I'm putting an event listener on this button right now as soon as I add it, and it's going to have its own event listener that's going to run a function, and then I take that button and I append it.
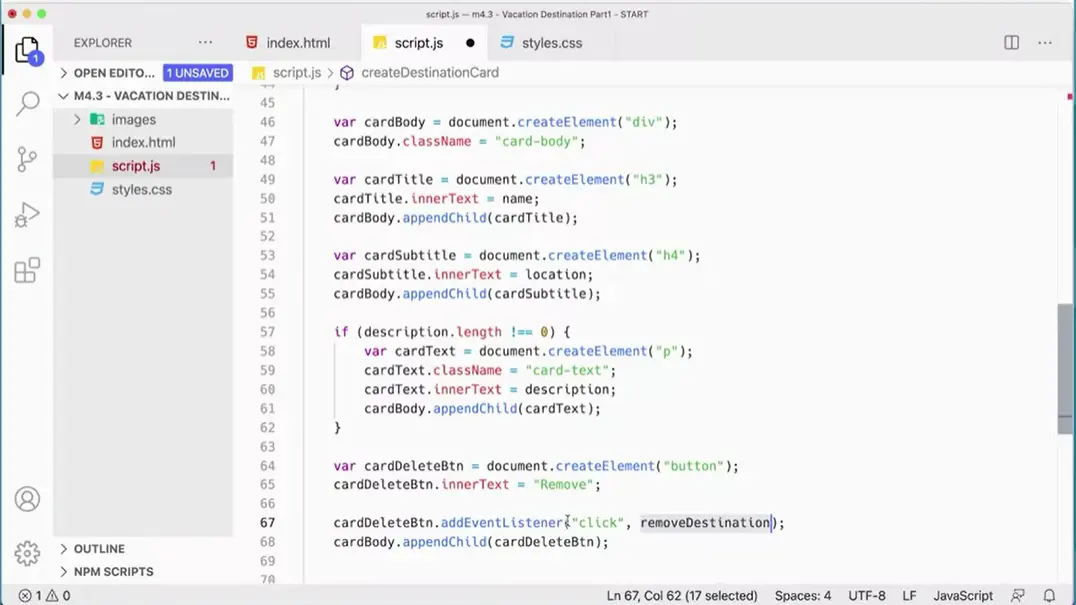
Append the card delete button to the card body.
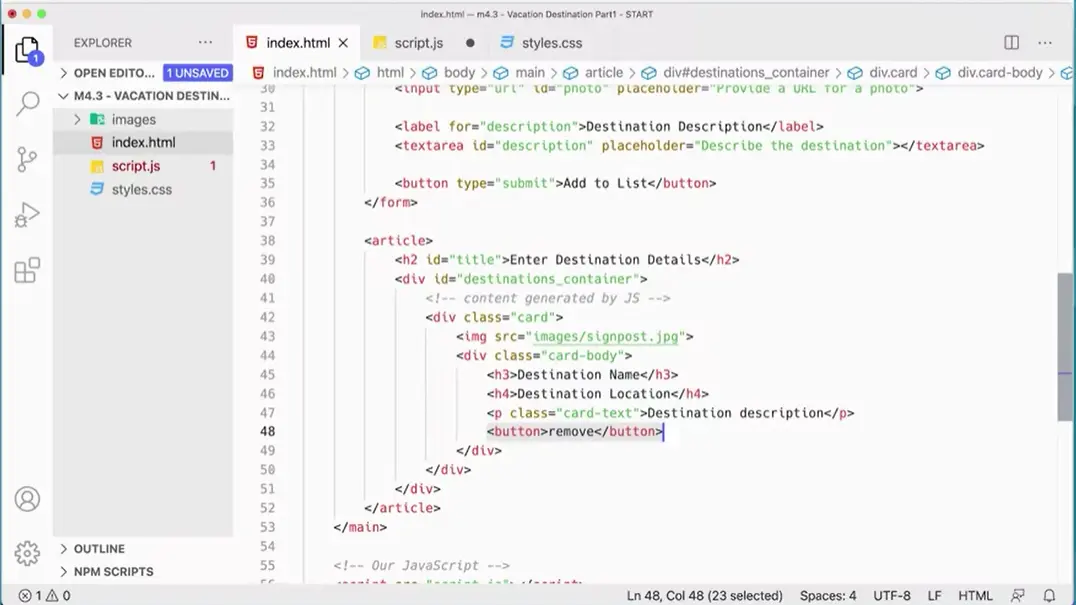
Again, if we come over here and look at the HTML here, you can see that this button called remove has been added to this card body. The card body includes four items the h3, the h4, the paragraph and the button. It only includes the paragraph if somebody types something in that field, but it includes the button and the button has an event listener on it. That will run a function that we haven't written yet, but it's there. That's going to put all of those things on there.
Now the next thing we need to do is take this card. We've been building up this card body, so we need to take this whole card body and add it to the card because we added the image to the card. We created the image, and we set its attribute, and we set its photo. Maybe we didn't add that to the card.
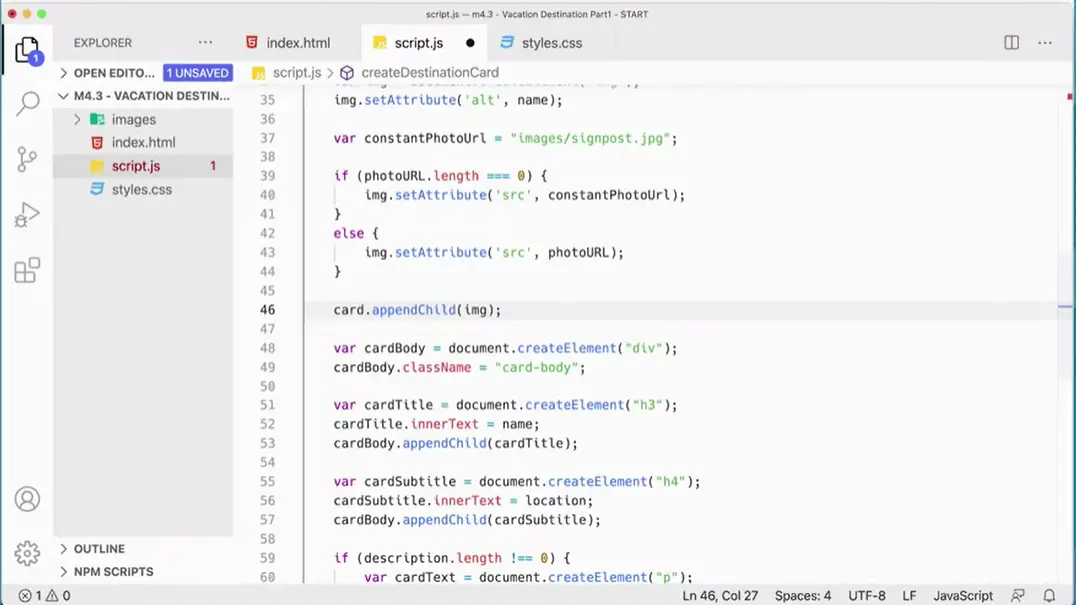
We need to do that too, and then we created the card. We need to add the image to the card as well, but we need to add the card body to the card too. Since I forgot to add the image let's do that first. Here we've got the image in place. In here we need to add card, append child image so that we'll put the image on the card.
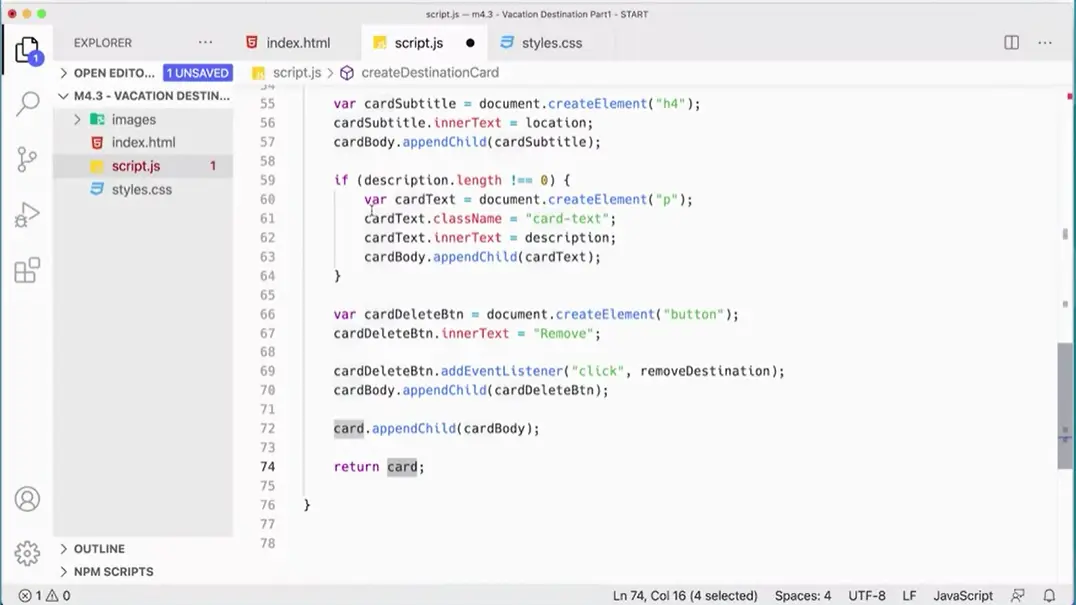
Down at the bottom here, we need to add append child card body, and then we just need to return card. That's going to take this card object or this piece of HTML that we've created that has all this stuff in it and return it. This is a long function that makes all of these elements and returns that card which should be a big piece of HTML.
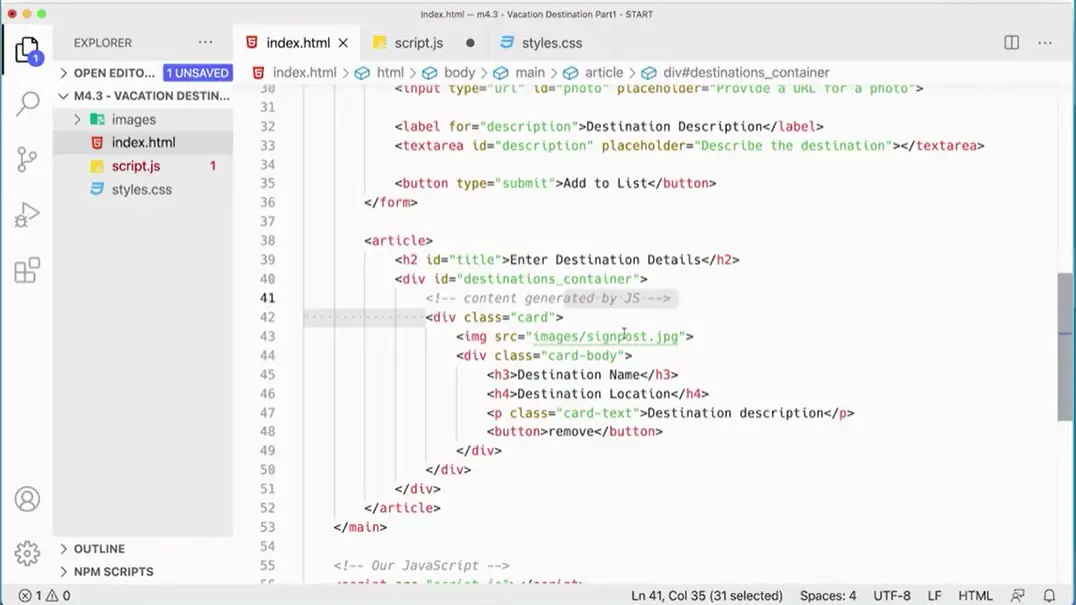
Well not a very big piece of HTML, but a piece of HTML that's this card here, div class card and in it will have the image, either the signpost image or one that somebody entered a div called card body and an h3 and h4 possibly a paragraph if somebody typed one in and a button and then that gets added on there, and then it gets returned.
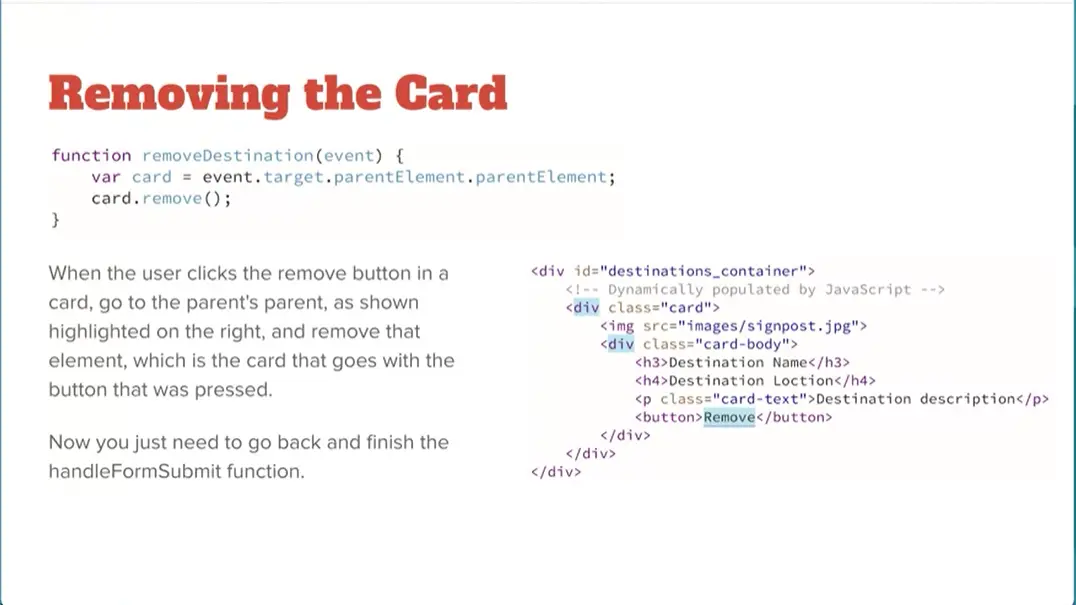
The next step in this process is to actually write the function that removes the card. And that's what this is going to look like here. We're going to make a function called removeDestination. We're going to pass in the event object so that when you click on that button, the remove button that event gets passed through, the event object gets passed through. I'm going to say variable card event.target.parentElement.parentElement; When you click this button, I need to go up to this parent and then to this parent and say card.remove. I have to get up to that parent to actually remove that card. I'm going up one parent to another parent to remove the card.
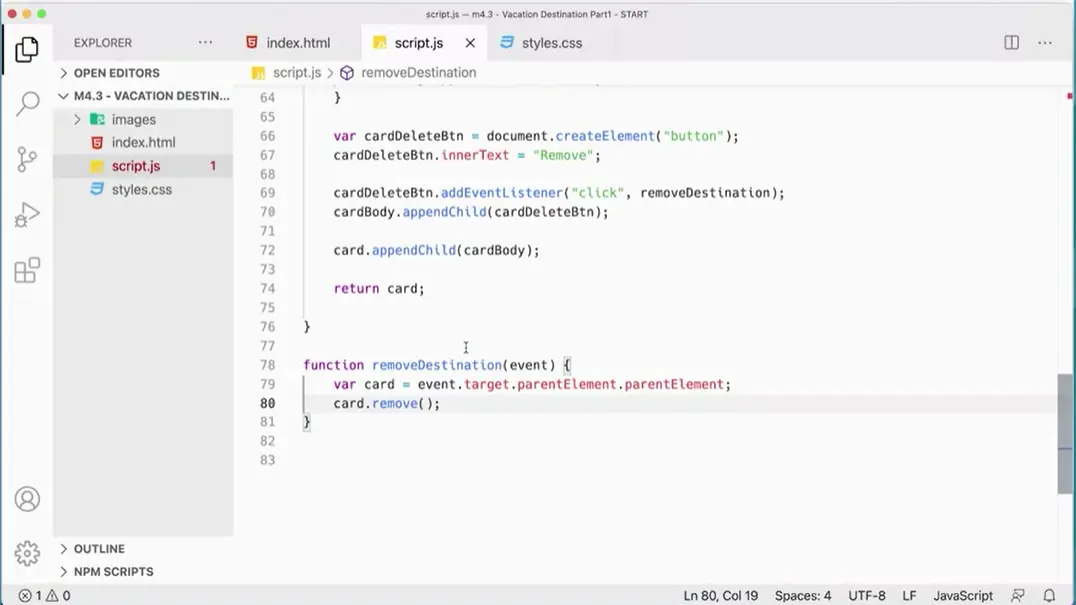
Let's add this function over here. Down here I've got function removeDestination, and it's going to take an event object. And I'm going to say var card = event. No, yeah, you then, what did I say here? Yeah, that's right. event.target.parentElement.parentElement; That's going to be card. Once I get all of all the way up there, I could do card.remove(). And that removes that card from the body, we hope. We've got our removeDestination function that's going to take in that event and then go up and actually remove that one, and that will get called here if you click on the cardDeleteBtn.
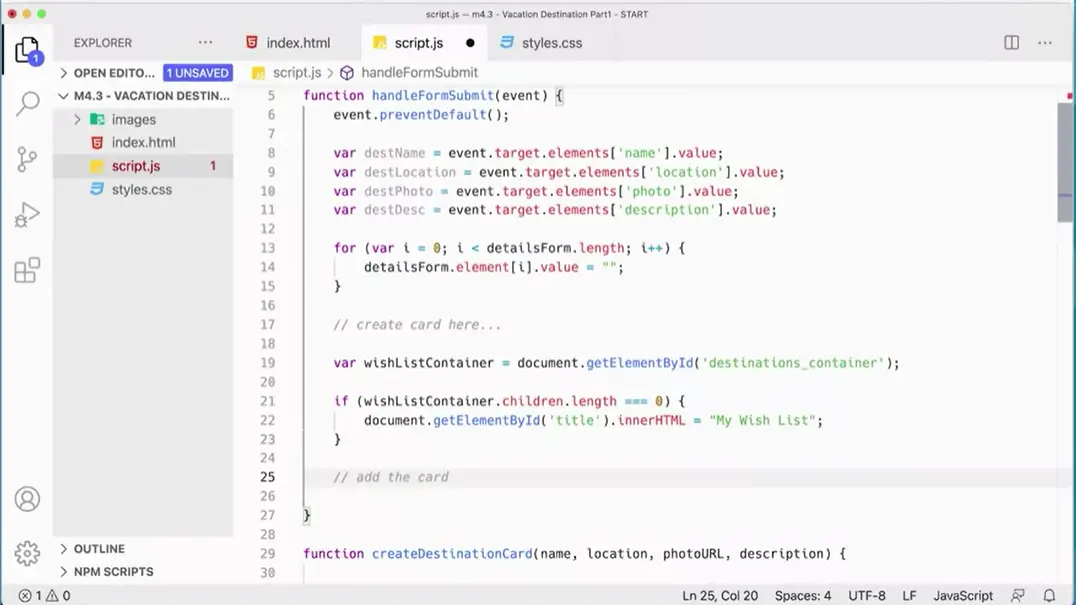
The last thing we need to do is kind of put it together. Up here you'll remember we had to things that we needed to do. We needed to create the card, and then down here, we needed to actually add the card. So, let's do these two things and then we'll be able to finish off this script here.
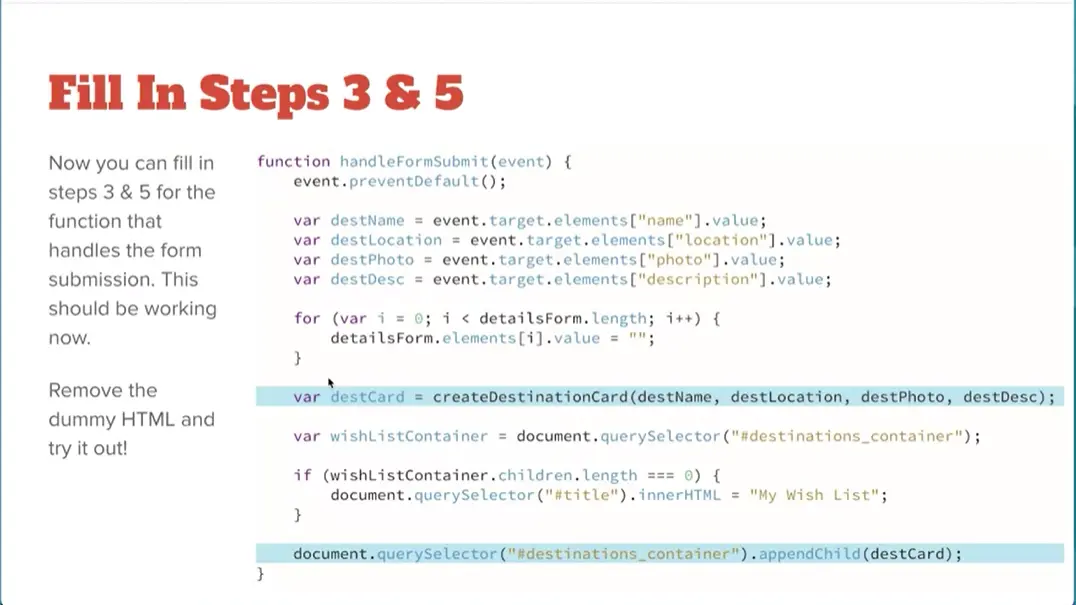
To create the card, what we're going to need is make it variable destination card, and that's going to run. This is going to be using a function expression here.
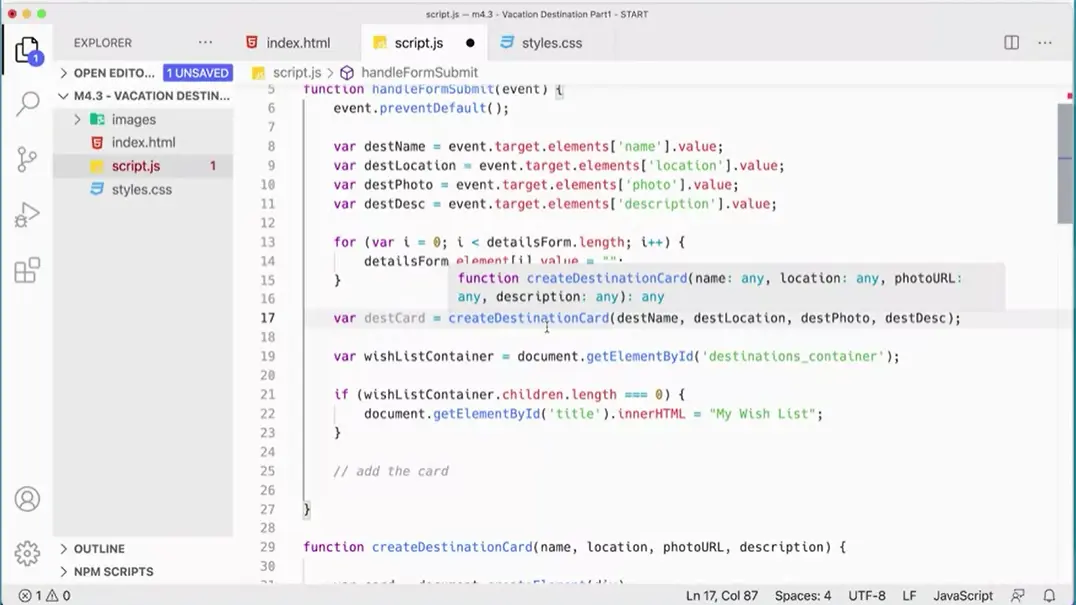
So we're going to use a function expression to create the destination card passing in these variables, so let's do that. destCard = and then what I'm actually doing is this thing here, createDestinationCard. So I'm going to put that in here, createDestinationCard. But what I'm passing in is the destination name, and I'm passing in the destination location. I'm passing in the destination photo to the photoURL, oops. And I'm passing in the destination description. And then that should var, that's going to create, it's going to go in and create that and then down here now I just need to add destination card. So that's going to say, okay, destination card's going to actually hold that card. And remember, this function returns HTML, so that HTML for the card is now in destCard.
Because remember that's what this function does, create destination card down here at the end, it returns the card, which is the HTML for all the stuff in the card. So now all of that stuff, all that HTML we created is now in this little variable right here, it's in this bucket. Okay, so the last thing we need to do is go in and find our container and upend the child, right? So let's go ahead and do that, document.querySelector. And what are we looking for, we're actually looking for this id here. ' Go get that id .appendChild. And what are we adding? We're adding destCard. Now we've gotten all five pieces of our script together, and in the next video, we'll do some error checking and fixing of stuff and see if it all works.
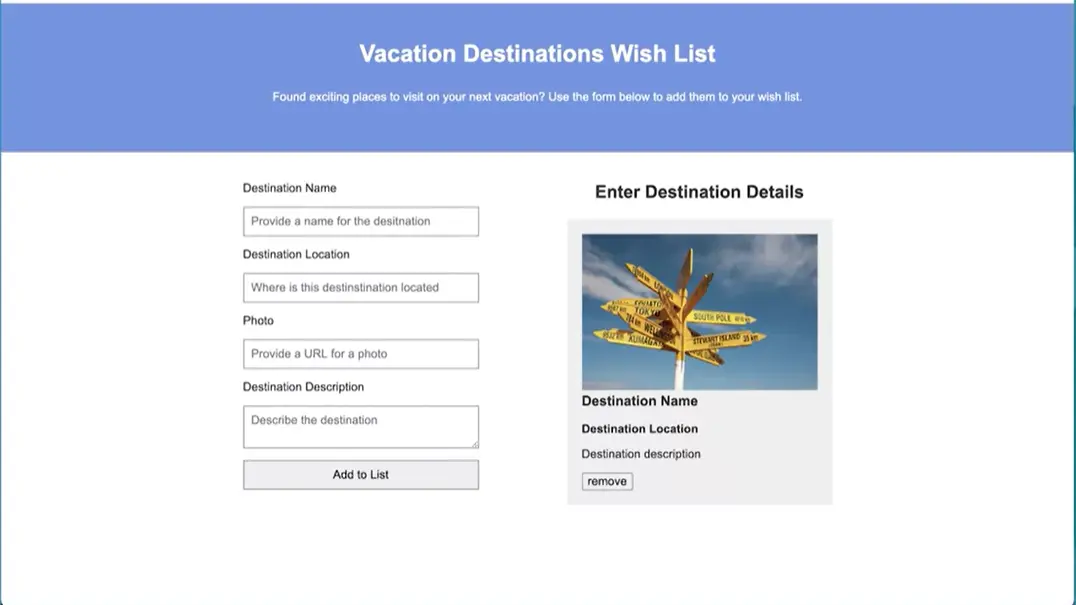
We can now add cards, and remove them from the list.
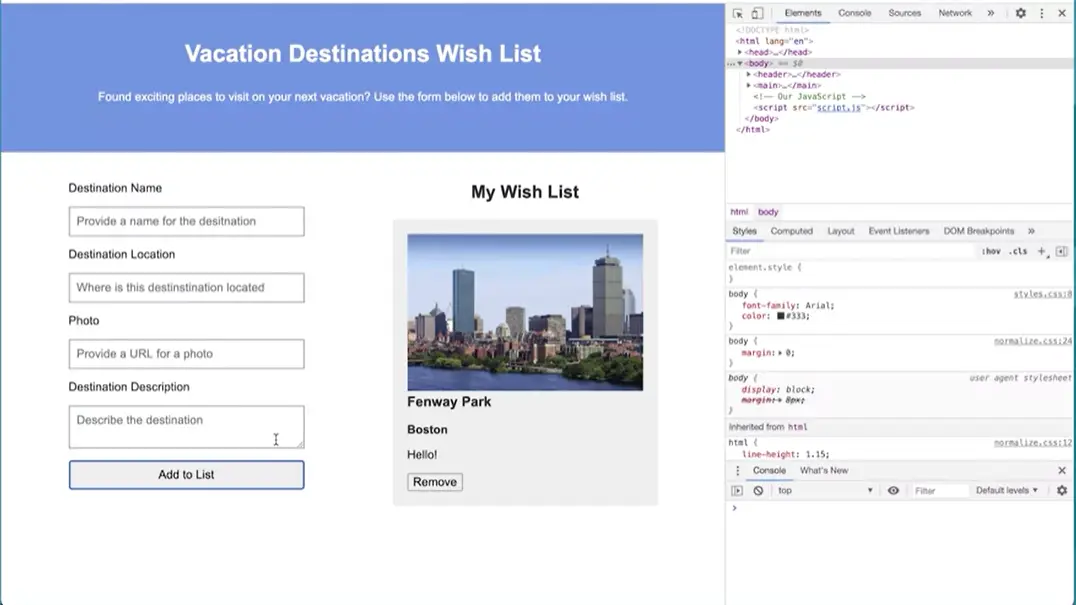
Let's try it again here. We'll do Fenway Park again. We'll do Boston. Put in the photo that I have in my form already.
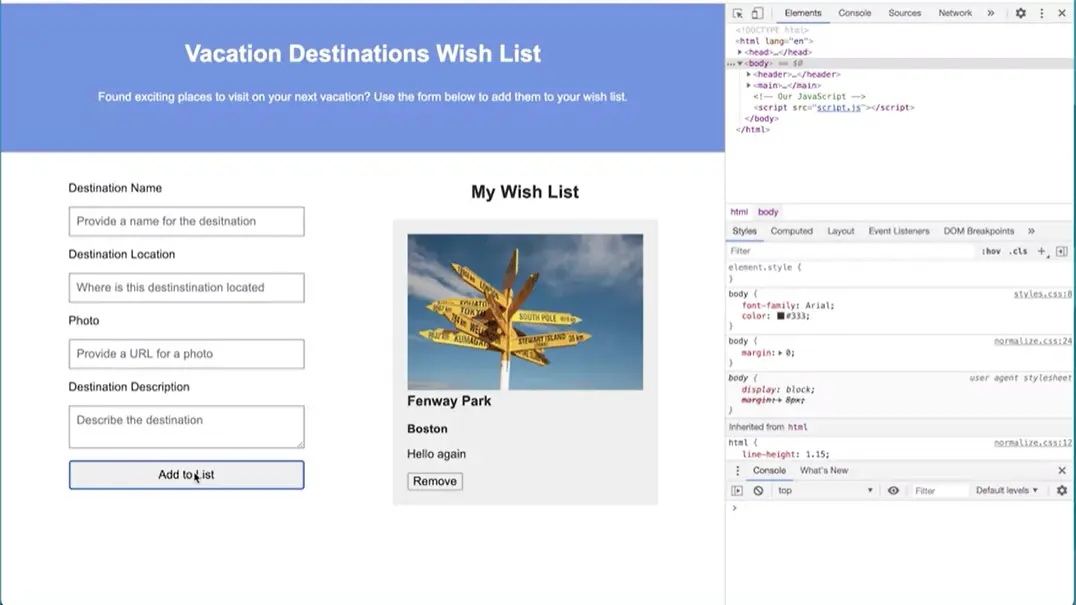
Then what happens if we leave the photo app? Let's do that. No photo in there. See if the regular photo shows up. It does. So that's the default photo, and that's working. Let's add another one. Over here, I did a quick search for New York. I found this photo, right-click it, and open that photo up into a new tab. Here's a photo that I can use. I'm just going to copy that URL, and come back here. Let's say destination name, Empire State Building in New York. I'm going to paste that URL in for that JPEG, and then add a description, is visiting New York. Here we go, Add to List.
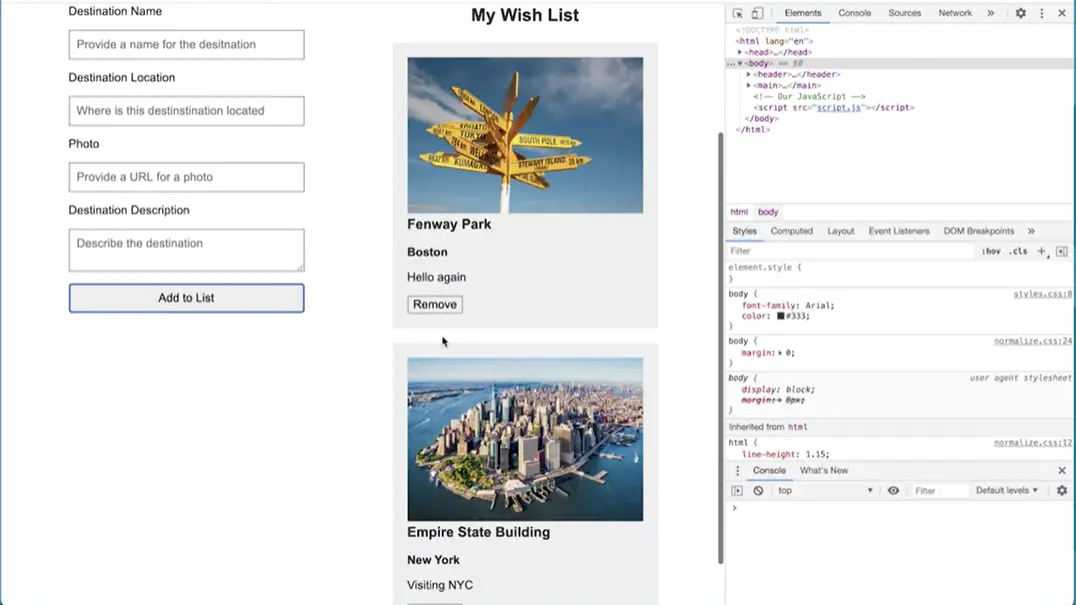
You can see that it's appended that card, it's added it to the list. So now I've got two here, and they're both working. I can remove either one. If I remove this one, and that one will go away, and the New York one will stay. Notice, that the header here changed as it was supposed to change. Everything else is working.
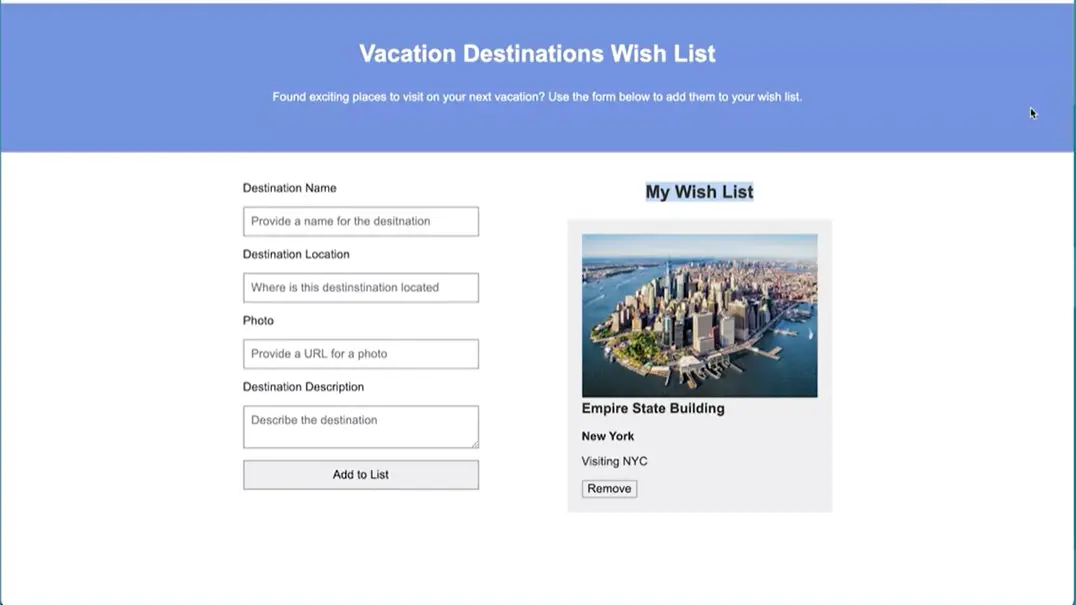
Here, in this little application we've created here, and it's not very sophisticated. It's only got a few features, but we can add elements, and remove elements on the page pretty easily with a little bit of scripting effort there. This is a really great capstone project for the end of the course here. Now, our last final pieces here, are to refactor the script down a little bit, and use our best practices, and we'll do that in the next video.
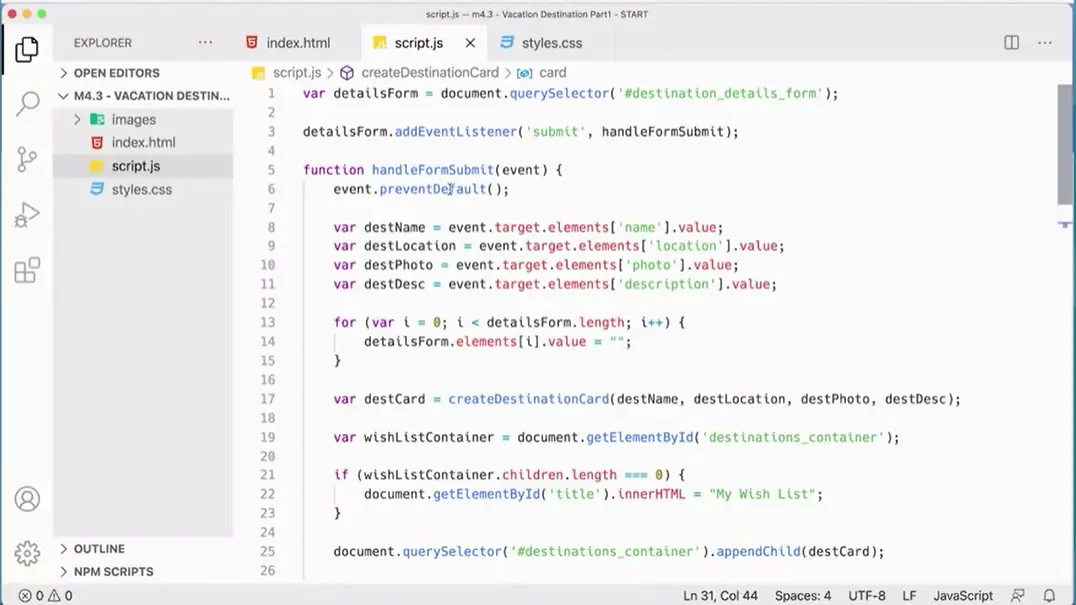
Now that we have a working project which is great, and we had some errors and that's normal and I'm glad they appeared here for me because they'll certainly appear for you. It's very easy to end up with little mistakes whether you spelled something wrong or use the wrong ID. There's a lot of moving parts with little web application, even one small like this. You have your HTML with IDs things you're hooking into. You have the styles where there's different elements that are affecting the way the page looks, and then in the script, you're manipulating many times both of those things on the fly.

Just for a quick summary of the script here, when you submit that form, what we're doing is we're running this handle form submit function which is getting the values out of the form, clearing out those values from the form when it's done.
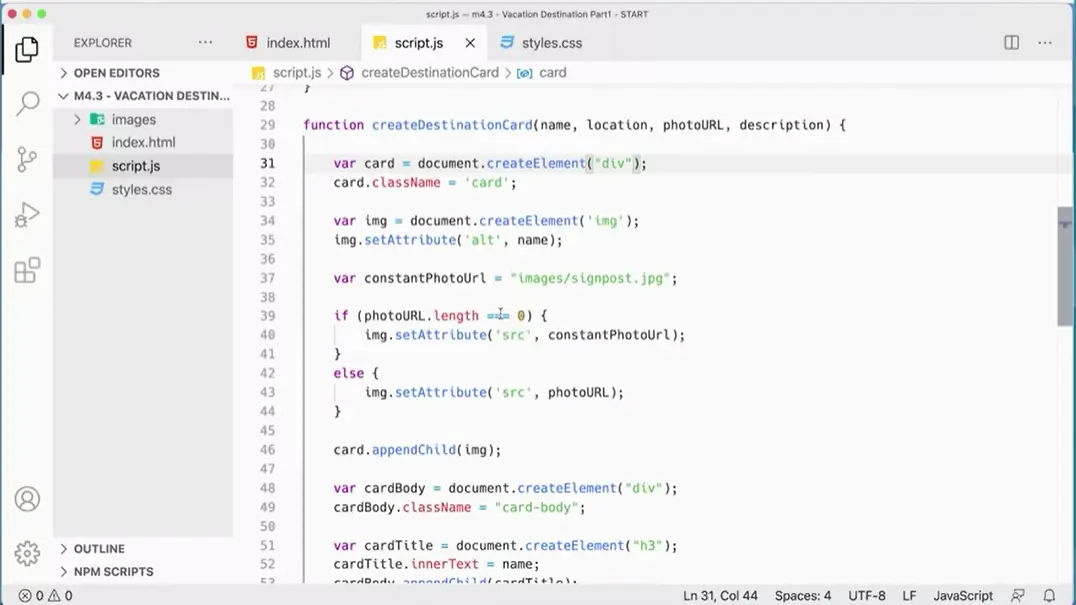
Then going through and actually creating the actual card, after that going in and fixing the header at the top of that container, at this part of the page up here.
Over here you're fixing the header if we need to, after that, we actually put the card on the page.
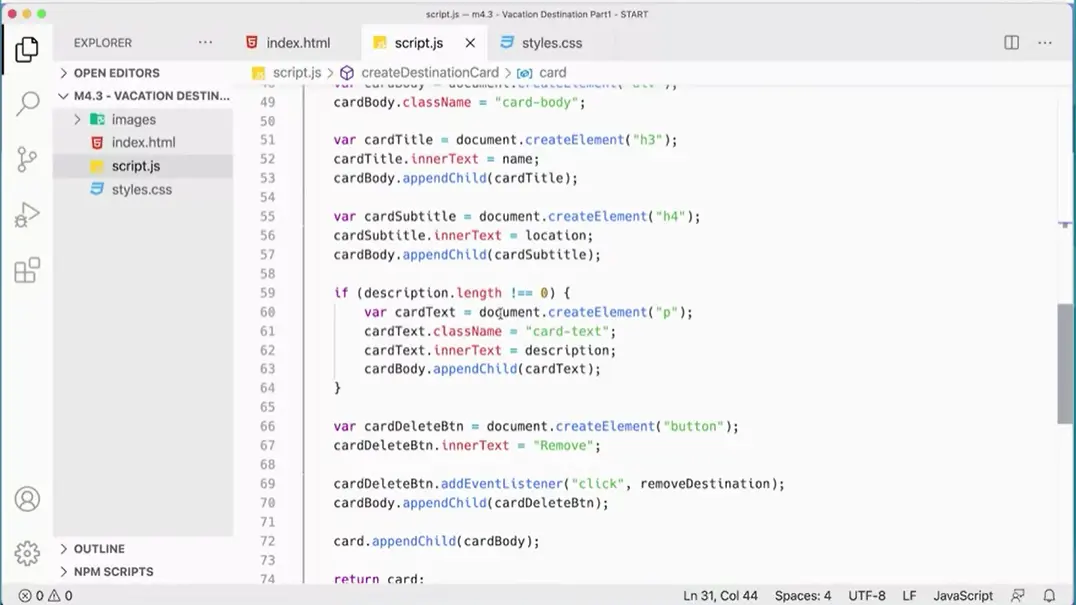
The create destination card is a long function because we're creating each one of these HTML elements manually or individually here having JavaScript create those elements and put the contents inside of them, and then add them actually to the DOM as they're needed. Plus we have an extra function that allows you to remove a card so that's one more extra piece of functionality that we have in this little application.
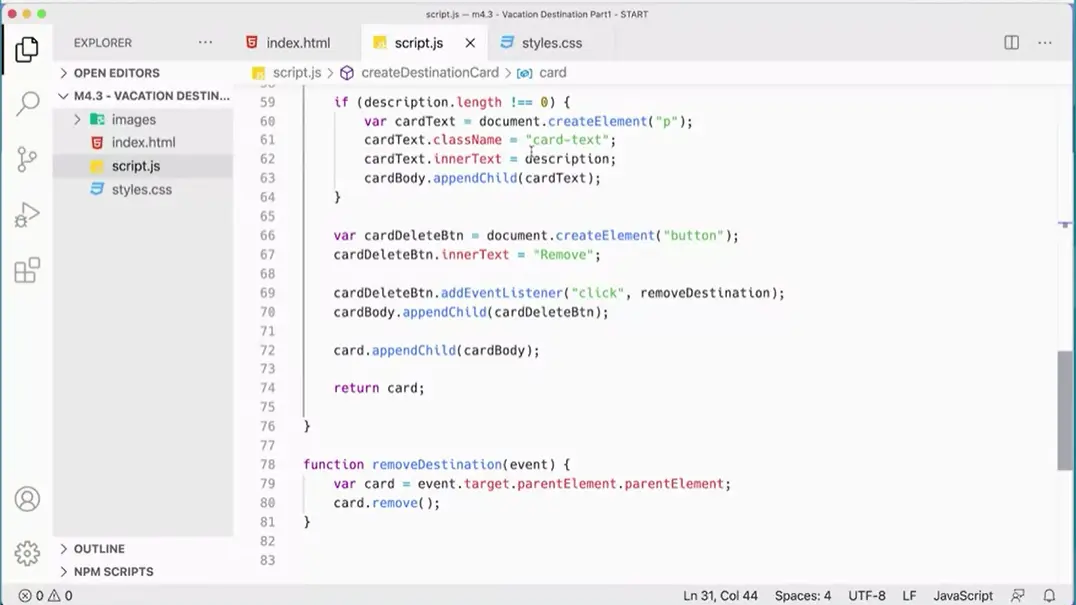
The last thing to do is to clean it up by adding a function up at the top here to enclose the whole thing and then changing out the variables.
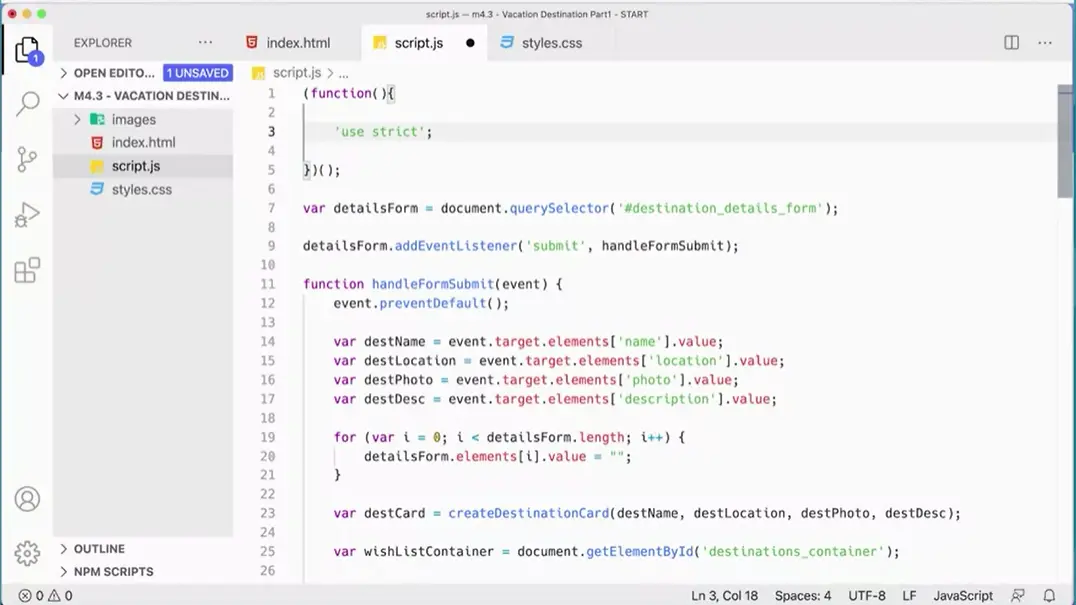
Again, we would just do open parenthesis and run an anonymous function with its parentheses in its curly braces, and then one more set of parentheses to make it run. This will run when the page loads. I can move this down and I can stick in here, use strict. That will make sure that I'm not introducing any variables by accident in the global scope.
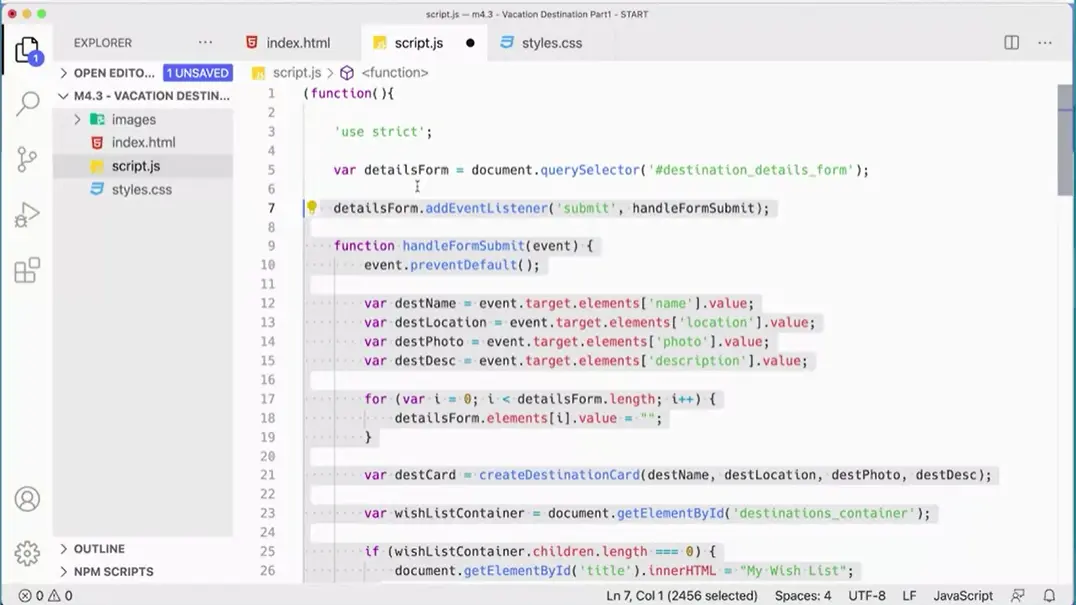
Then I could take everything that's in here, and stick it inside this function here.
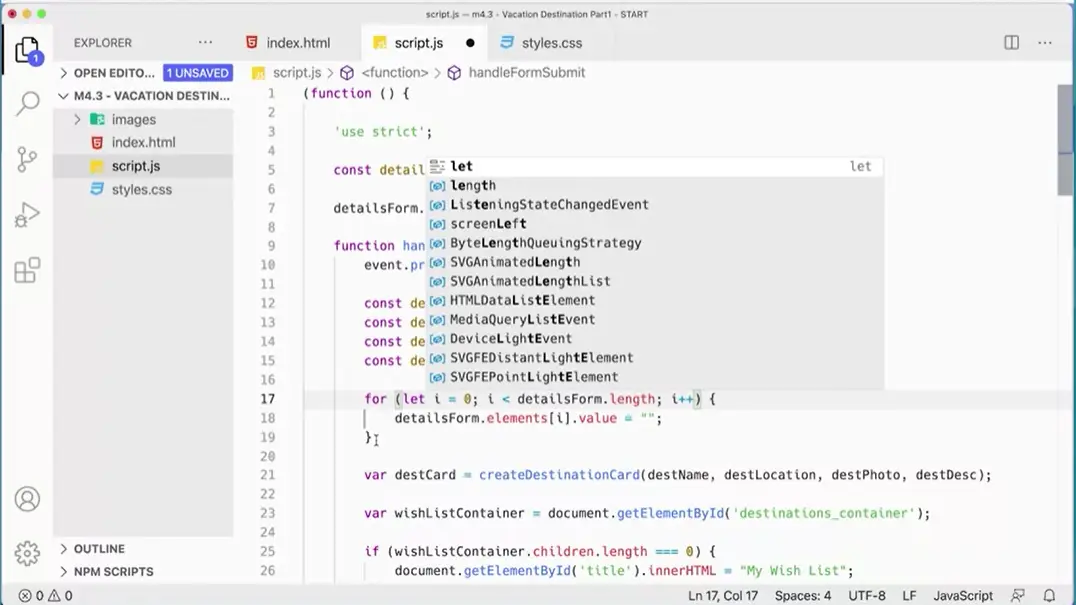
The last thing you could do is go through and replace all the vars we've got with const. They should be constant as much as possible. So we can just click const there, come down through here, that's going to be const, that's going to be const. All of these can be const. Now this one needs to be let because that's actually in a loop. That's going to need to be let, and then down here this can be const. That's containers, that's going to be const. That's going to be const, that's going to be const, that's going to be const, this one, and this one. If you're comfortable with this now you can just start using const, to begin with rather than coming through and doing this at the end, and that's certainly fine as well.
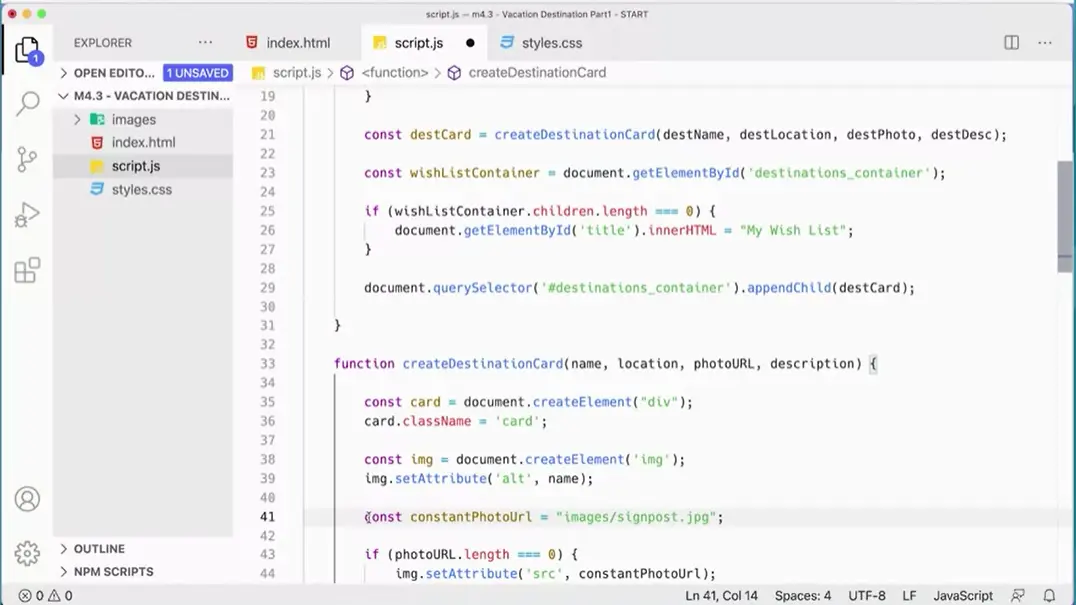
When you're new at this I think it's helpful to start with var and then come in and add const as you need to or let. Again, let is for if the value is going to change. Now use other values you're going to change when the script runs. Just the one inside the loop. I think that's the only one. I could be wrong.
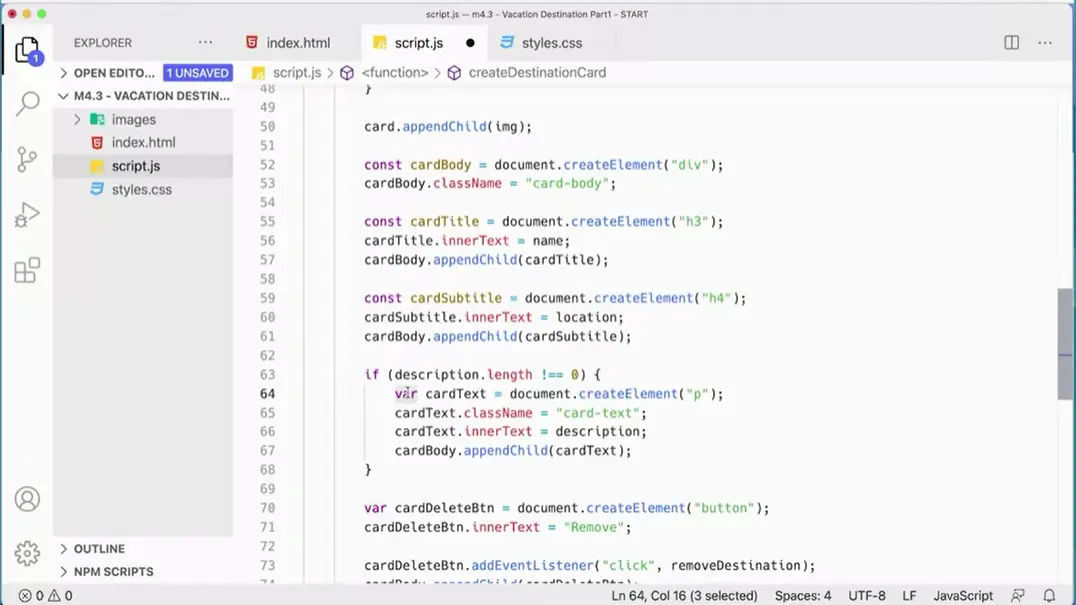
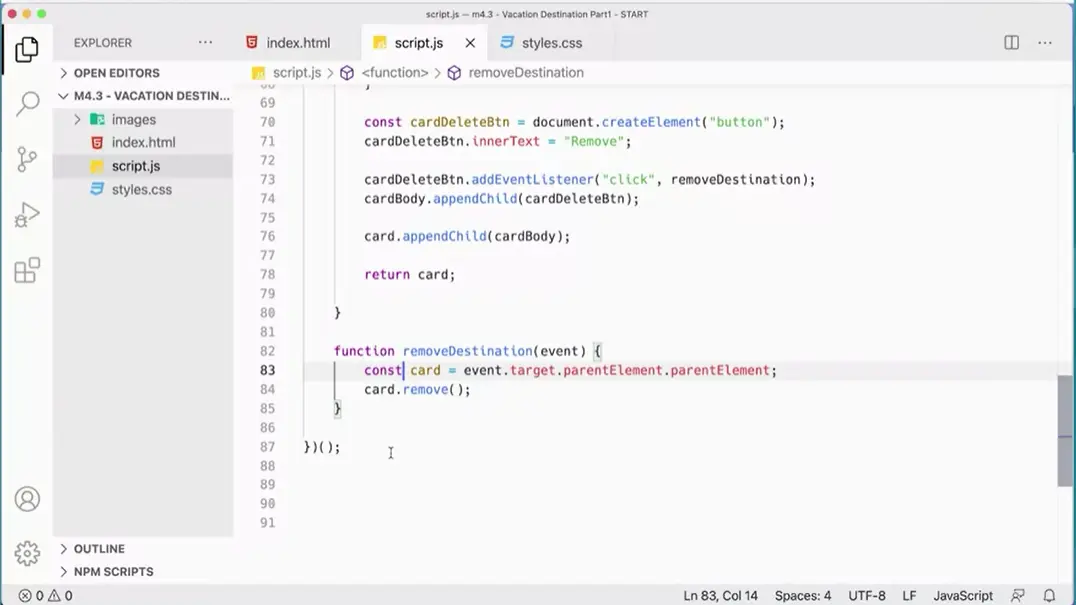
Let's just check and see if I'm wrong. If you are wrong, you'll get an error and you can fix it. Just refresh this, type in Fenway Park one more time, Boston, and the URL. Look at that it works great. Click renewals and it removes it. Everything's working the way it should. This is really great capstone project that brings together everything we've done in this first course of this specialization, and I look forward to seeing you in the second course of this specialization where we'll get into jQuery and creating all cool interactive elements on my pages.
Congratulations, you've made it to the end of our first course on JavaScript, I hope you've had a lot of fun with it. And I hope you had fun doing it with me while I stand outside here in California on this beautiful day, not that many miles away from where JavaScript was invented over 25 years ago. But JavaScript is a lot of fun, and you've learned a lot, so you should give yourself a pat on the back, and I hope you're excited about the projects we've done so far. Also, I hope you realize that there's a lot more to learn about JavaScript and that you'll join us in the next course in the specialization where we get into jQuery. And we look at some of the cool things that we can do with the jQuery library and some of the cool interactions that we can make. So thank you for coming along this far and I hope to see you in the next course.
.the end. 2.24.24 11:42pm
.the end, again. 3.06.24 5:24pm
.the end, again. 5.26.24 7:31pm
.the end, again. 5.31.24 12:21pm
.the end, again. 6.08.24 9:41am
.the end, again. 6.09.24 11:48pm
.the end, again. 6.14.24 9:20am
.the end, again. 7.26.24 9:44am
.the end, again. 9.9.24 11:12am
.the end, again. 9.26.24 2:26pm
.the end, again. 9.28.24 8:29pm
.the end, again. 10.01.24 10:23pm
.the end, again. 10.15.24 10:19pm
.the end, again. 11.17.24 7:19pm
.the end, again. 4.28.25 8:32pm
.the end, again. 11.12.25 12:57am